DIY Corner: How to Repair Holes in Drywall
Posted in: I'm Moving, Home Improvement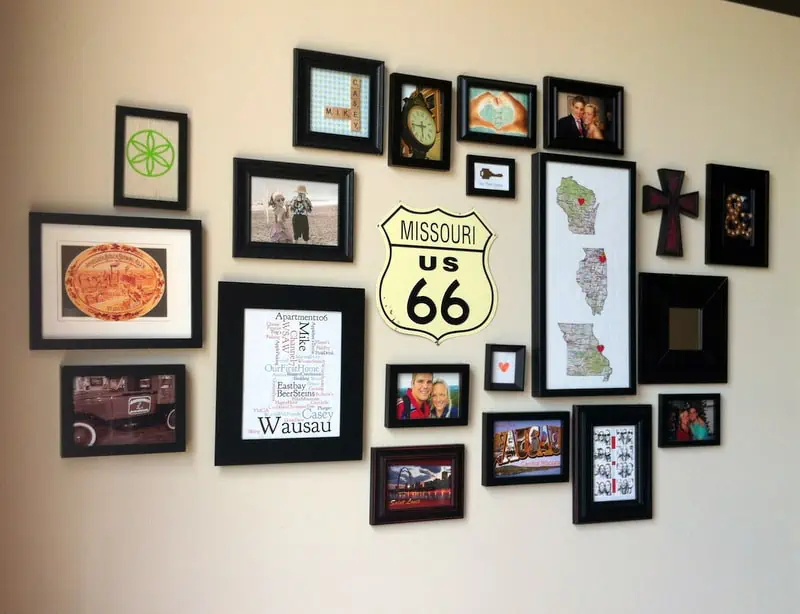
Today’s DIY Corner might actually put money in your pocket during your next move. If you’d love a real shot at getting your deposit back from your old landlord after moving out here’s a cheap and easy 3 step guide on how to repair holes in drywall. Have yourself a merry DIY Thursday!
See that gallery wall full of frames and hanging décor? Hidden behind all of that “art” are holes galore. Ouch. Back when we moved in, I wasn’t about to hinder my creativity when decorating our apartment. I wanted it to be homey and cozy. So, out came the hammer and nails, and up went the frames.
Before I knew it, we were moving out, and in order to get my security deposit back, I needed to patch those bad boys up… and fast! Here’s what I did to get that wall looking fresh and smooth.
I’m sure you’ve heard of tricks like using toothpaste, soap, or crushed up aspirin (say what?!) to fill small holes. Do not use any of the above. I repeat, do not use any of the above! Spackle is not that expensive, and it will do the job right! Spend a couple bucks and buy some real spackling tools that you will likely use again.
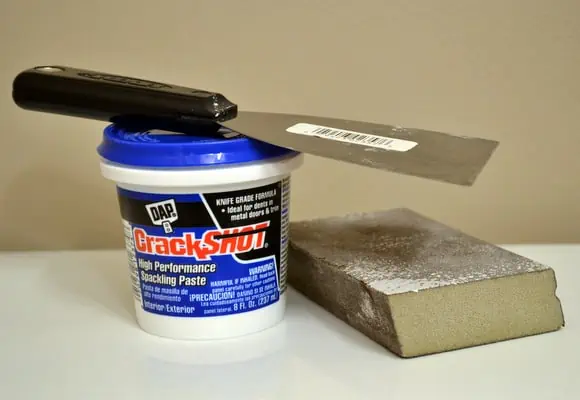
If you’re filling small holes from screws and nails (less than 1/8 inch), then all you need is a hammer, some spackle, fine grit sandpaper or a sanding block, and a putty knife.
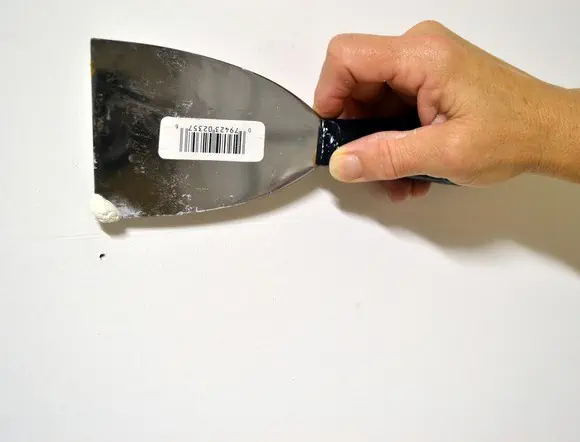
Step 1
Prep the area. Use the putty knife to gently scrap away any loose paint or fragments near the hole. You want the area to be free of debris, but be careful not to make the hole bigger. Then, hammer the empty hole. This will smooth down the perimeter of the hole and get it ready for the spackle.
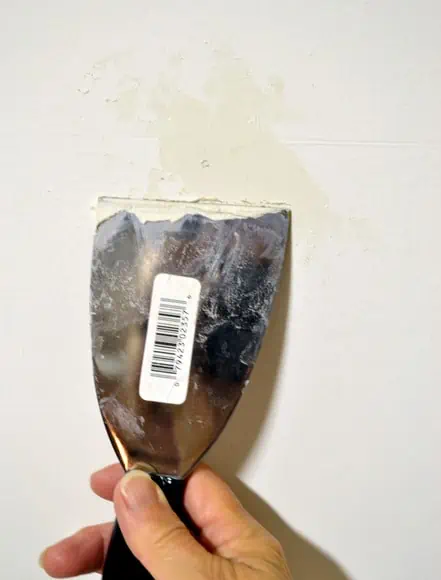
Step 2
Open the container of spackling compound and scoop up a small amount on your putty knife. Then spread a small (keyword: small) amount of compound over the hole in a smooth, feathering motion. Look at you, it’s like you’re a real handyman! Now don’t be overeager and fill the hole with too much spackle. A nice thin coat will do. Let the entire area dry completely. (Insider Tip: Close the spackle container tight because it can dry up easily. I don’t want you ruining your new purchase and then reaching for the tube of toothpaste.)
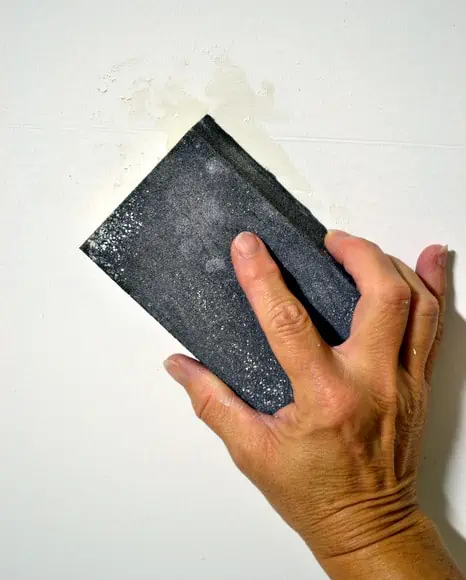
Step 3
Once the area is dry, you may notice that the spackle has shrunk in below the surface of the wall. If so, repeat step 2. When the hole is even with the wall surface, take your fine-grit sandpaper and lightly sand the area. Get it as smooth as possible and wipe away the dust with a damp rag.
Boom, 3 steps and you’re done.
Most landlords or management companies will then come in and paint before new tenants move in. So you’ll be leaving them with a clean, smooth “canvas” for that fresh paint. Looks like someone is getting their deposit back…