Avoid These 4 Design Mistakes in Your New Home

Author:

Publish Date:

Last Modified Date:

Category: Home Decorating

Tags: Tags: , , , , , , , , , , , , , , , , ,

So you just bought the prettiest home on the block and you’re moving in and getting settled? Congrats! Now it’s time for the best part … the decorating!

It’s the furniture and home decor that really brings a space to life and tells the story of the people who live there.

4 Design No-Nos We See All The Time

But there are some big design no-nos that we see a lot of people make in their new homes. Even if you just bought the most beautiful house, you can instantly bring it down a notch if you commit any of the following 4 design mistakes.

Don’t worry, all of these have easy fixes (and we even included pretty pictures of the right way to do it!), giving you have a clear visual for avoiding these commonly made mistakes.

1. The “Too-Small-Rug”

Bigger is always better when it comes to rugs!

This design mistake just might be the most common one we ever see: the “too-small-rug”. If you’ve purchased a 5-by-8 or 6-by-9 rug in your lifetime, chances are it was not the correct size for your room.

And we get it, large rugs can be expensive. But using an 8-by-10 or 9-by-12 rug in your room is going to make your space look much, much more high-end.

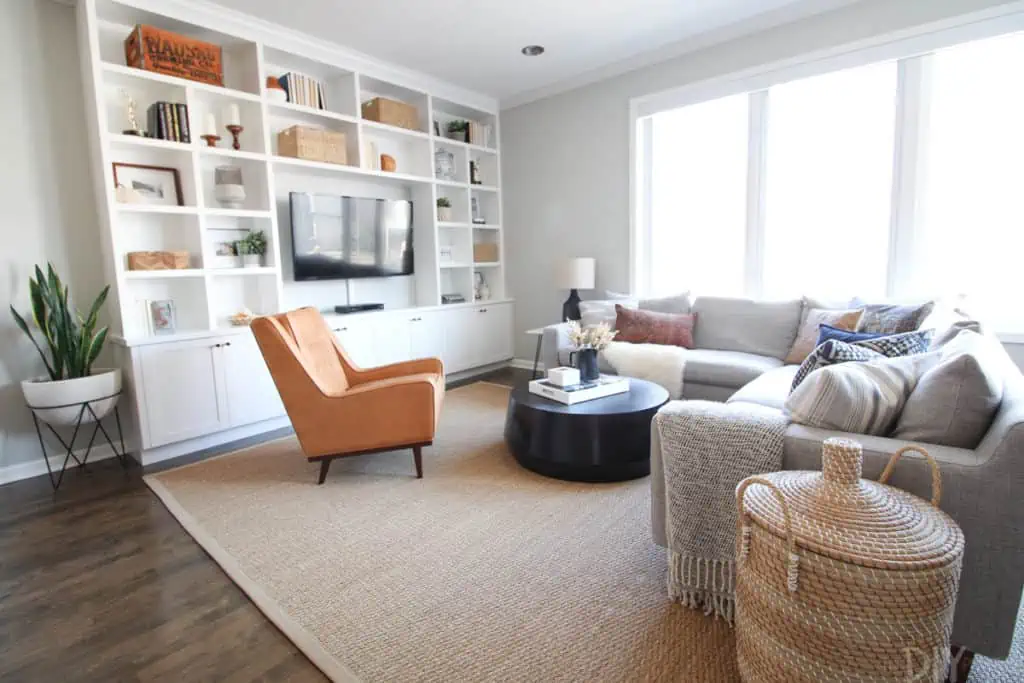
To make your rug shopping a bit easier, here are the design rules you can follow to ensure you buy the correct size.

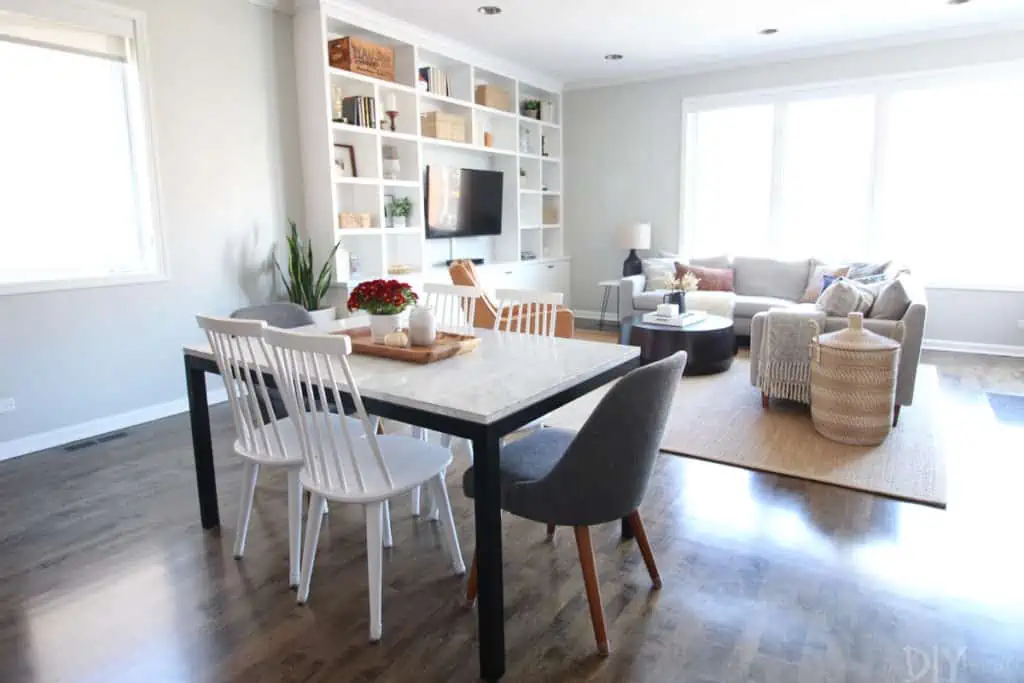
  • In a family room, find a rug that is large enough for the front legs of all the furniture to sit on the rug. Even better if all pieces of furniture can rest on top of the rug!
  • Avoid the “floating” rug look when a rug is just sitting in front of a sofa.
  • In dining rooms, rugs should be large enough to fit all chairs (even when they are pulled out) on the rug. This means at least 24-36 inches out from the table.
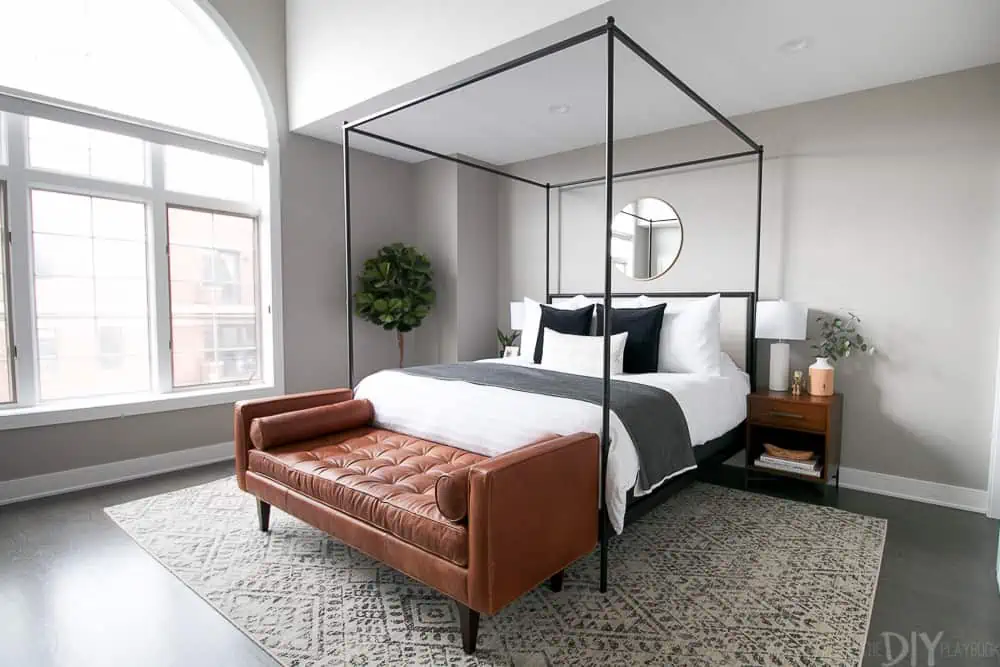
  • In the bedroom, your rug should extend 18-24 inches on each side of your bed. If you have a queen size bed, an 8×10 should work. If you have a king size bed, try a 9-by-12 rug.

For more tips buying the perfect rug, check out this blog post.

2. The Matching Bedroom Set

So you just moved into a new home and you need furniture, stat! Why not head over to the discount furniture and buy an entire bedroom set for a low low price?

Eek … please don’t do that. Yes, it may sound like a good deal, but we promise you can create a good looking bedroom (on a budget!) without going the matchy-matchy route.

And don’t get us wrong, having some matching furniture is not a bad thing. But you probably don’t want your loveseat, couch, coffee table, and side table to all match. Some of them can match to keep a cohesive look, but if everything is the exact same, you’re going to end up with a cookie-cutter look that lacks personality.

Completely matching rooms you buy as a package are very out of vogue.

Take this bedroom above, for example. It has an upholstered headboard, a leather bench, white nightstands, and a wood dresser. This creates an interesting and layered look!

If you do have matching furniture all over your house, we’re certainly not telling you to get rid of everything. Instead, think about moving things around. Bring a dresser from one room into another or swap your night stands.

You just might love all of your gorgeous furniture a bit more when it doesn’t get lost in a sea of it all being too samey.

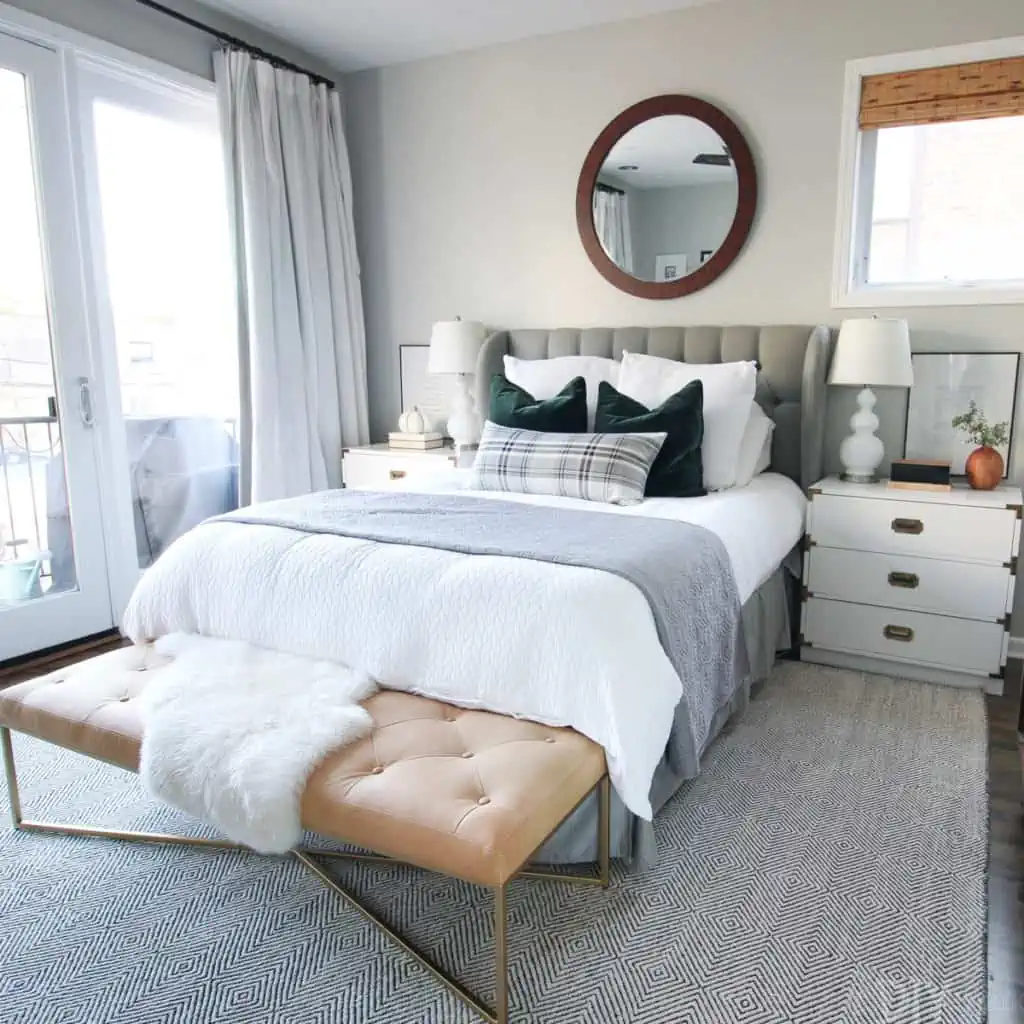
3. The Flooded Curtains

Hanging window treatments is an intimidating task. Of course, their main objective is to be functional, but you also want them to look good. And let us tell you, most people are hanging their curtains all wrong!

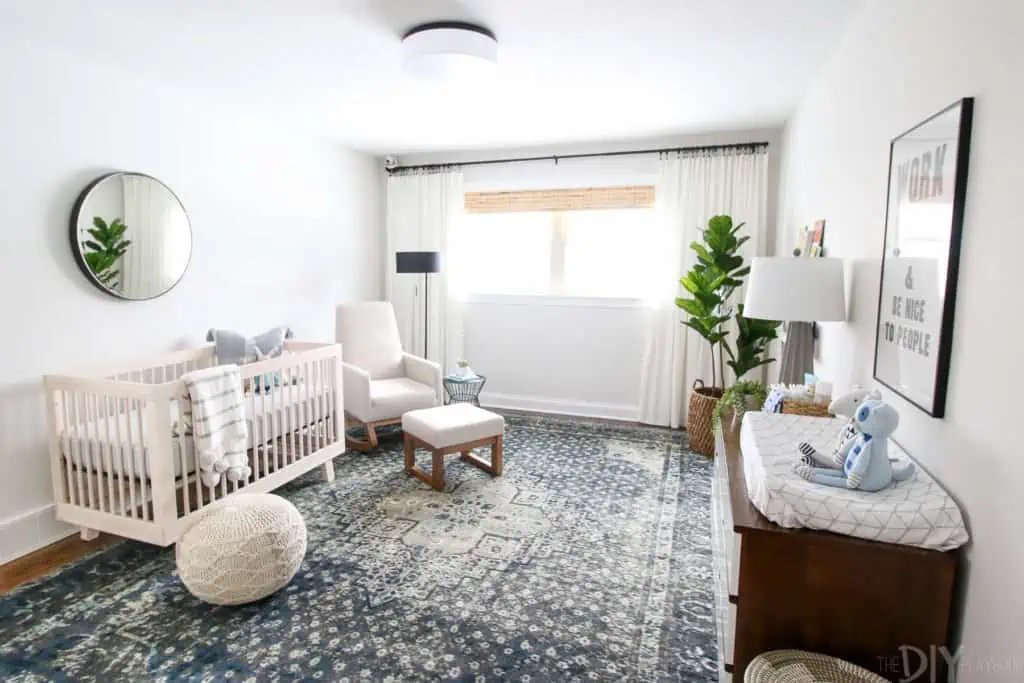
High and wide. Repeat after us: high and wide. (Check out the image above.)

That’s generally how you need to hang your curtains. Many people opt to install their curtain rod directly above the window and a couple of inches outside of it, which isn’t doing your home any favors. Why? Curtains are the key to making your ceilings appear much taller and the room bigger.

Here are things to consider when hanging.

  • Mount the rod up to a foot on the outside of the window. This allows the curtains to drape down without interfering with the light when they’re open.
  • Hang your rod almost to the ceiling. Go about 4-6 inches below the ceiling and that’s how high they should be.
  • Once you have your curtain rod hung, you can figure out how tall your curtains should be. You will probably have to purchase XL curtains. They’re harder to find, but they’re out there (IKEA sells them on a budget!).
  • Your curtains should “kiss” the floor or you can have them puddle (about 1-2 inches longer than the floor). Make sure your curtains are not too short! For no-sew hemming tips, check out this blog post.

4. The “Too-High-Art”

When you’ve just moved in, you probably have a lot to hang on your walls to really make it feel like home. But please read these tips first. Most people hang art way too high! The last thing you want is for your guests to have to crane their necks to see your gorgeous pieces. 

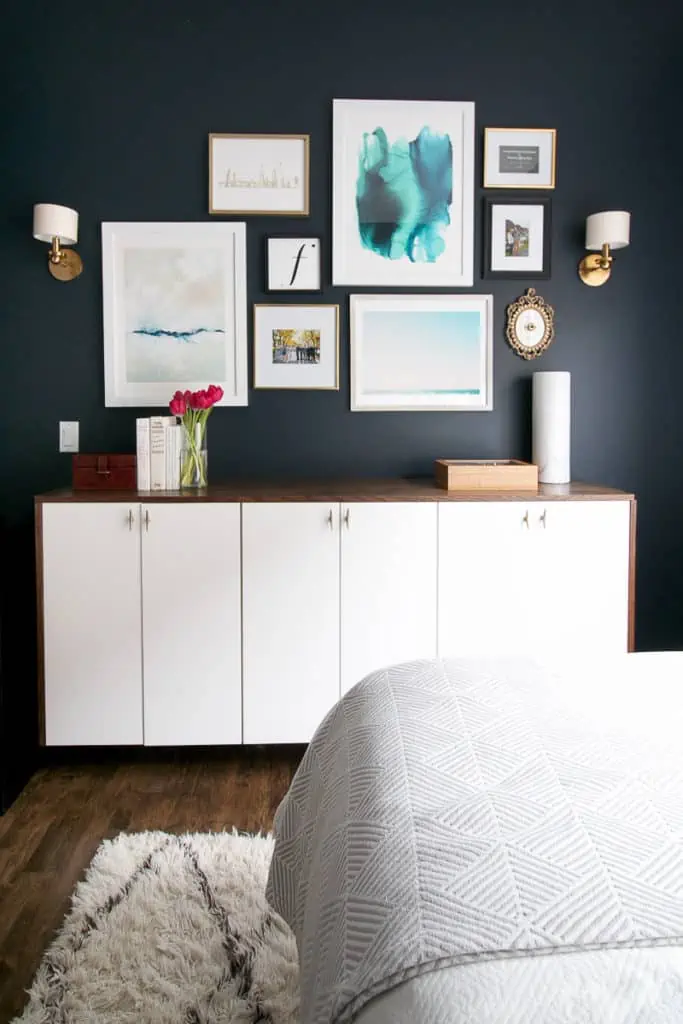
Follow these tips for perfect hanging every time.

  • Don’t go with eye level (if you’re tall, that will make things way too high!). Instead, the center of your piece should be 57-60 inches off the ground.
  • When hanging a gallery wall, think of the entire collection as one piece of art. Therefore, the very top and bottom shouldn’t be hung too high or too low.
  • When hanging above a couch or dresser, go 4-8 inches above the piece of furniture. If you go higher than that, it will look disjointed.
  • For gallery walls, 2-3 inches in between pieces is plenty! No more than that. If you’re nervous about hanging a gallery wall, check out this foolproof way to do it!

Believe in us and avoid these design mistakes whenever possible. With the right furniture, art placement, curtains and rugs, you are well on your way to a great looking new home!

Prioritize These Things for Your Rental, They’ll Be Following You to Your Future Home

Author:

Publish Date:

Last Modified Date:

Category: Apartment Life, Home Decorating

Tags: Tags: , , , , , , , , , , , , , , , , , , , , , , , , , , ,

We often get questions from readers who are renters and they’re ready to upgrade their hand-me-down furniture pieces for “grown-up” ones. They’re usually hesitant to spend too much money out of fear that it won’t fit or go with the look of their next home.

While we don’t suggest that everyone go out and buy a ginormous sectional, there really are pieces you can buy now! Here are home decor items that you can (and should) invest in now, because they’ll most likely be able to find a place in your next pad. (more…)

Packing an Oil Painting: Slick Tips

Author:

Publish Date:

Last Modified Date:

Category: Pro Packing Guides

Tags: Tags: , , , , , , , ,

[Synopsis: Packing higher-end art calls for special materials and top-notch techniques.]

We come across large picture frames and mirrors often enough to know how to pack them. Wrap them in newsprint – or better yet, large sheets of kraft paper or that brown paper the big guys always have on hand. Grab a mirror carton or custom-size a box and pack the corners with packing paper and tape it up well.

Nothing to it, right?

But the day may come (if it hasn’t already) when we come face to face with an oil painting. We may use the same brown paper process and come away unscathed, but there are a few tips and tricks we can employ to keep that piece of art in prime shape, maybe even impressing our customer in the process.

Our Weapons of Choice

For the specialized packing we are about to attack upon we’ll need a few things we might not normally have on hand:

  • Bubble wrap
  • A mini roll of plastic wrap (on a handy-dandy dispenser)
  • A locking tape measure
  • Some large sheets of foam board
  • A knife to cut them to size

For that ultimate professional touch, we’ll arm ourselves with a couple of new weapons, namely artist tape and a type of water-resistant, grease-resistant paper called Glassine. And, as the guys in the following two videos prove, the ability to wield a tape gun can really come in handy.

Food For Thought: Video #1

In this first videoour host tackles his oil painting pack job by using foam board and a mini roll of shrink wrap to make what he calls a painting sandwich. Pretty slick, ay? (Start at the 2:35 mark. It goes to about 3:50.)

Note: Our painting sandwich maker uses peanuts for protection – and makes a decent mess of things. We suggest sticking with packing paper.

Mega-Supplies: Video #2

The host of our second video is a real stickler for protection. But so are his customers. First, he breaks out his Glassine at about the 1:23 mark. To keep it in place he uses artist tape rather than packing tape or even masking tape. Watch from the 1:43 mark to hear the (probably obvious) reasons why.

Done with the Glassine, he turns to his massive stash of bubble wrap, keeping the flat side against the surface of the painting. And he uses PLENTY of the stuff, in two different bubble sizes! We may not need to go nearly as crazy – unless our customers want us to. Ask them ahead of time.

For glass frameworks of art, our hero puts strips of artist tape right on the glass, to prevent damage to the art should the glass crack or break in transit.

Finally, at about 14:50 he talks about putting cardboard corners on before the bubble wrap. He also ensures the safety of the piece by placing a piece of cardboard over the front/glass side.

Note: He does admit that not all of us will have mountains of the stuff on hand, and suggests at the 6:25 mark using sheets of Styrofoam. Again, this is an option – but so is our packing paper.

Wrapping Up

We may or may not encounter a customer with fine artwork. But they do exist, and what if those people are looking for someone who knows how to handle their oil paintings or other expensive paintings? If you have that skill on your list of offered services, you may just get the call over someone else.

×

I'm Moving

Moving? Thinking about moving? Whether your move is off in the distance or you already have one foot out the door, you'll learn about everything you should expect through our useful how-to's, cool articles and much more. It's all specially curated for you in our "I'm Moving" section.
Explore
×

I'm a Mover

For rookies or veterans alike, our "I'm a Mover" section is filled with extensive industry news, crucial protips and in-depth guides written by industry professionals. Sharing our decade of moving knowledge is just one way we help keep our professional movers at the top of their game.
Explore