The Best Way to Unpack After Moving

Author:

Publish Date:

Last Modified Date:

Category: Loading & Unloading Guides, Organization

Tags: Tags: , , , , , , , , , , , , , , , , , , , , , , , , , , ,

Unpacking should be the best part of the entire moving process. No, really!

You’ve already coordinated all of the logistics of renting a truck and hiring Helpers, you’ve packed everything up, moved, and unloaded your rental truck. Now all that’s left to do is go through all of your boxes and get everything in its place so you can enjoy your new home!

So why do some people still dread unpacking? Well, imagine sitting amongst a mountain of boxes with no clue what’s inside any of them or where everything is going to go. Okay … yeah, that does sound pretty dreadful. But it doesn’t have to be that way! By planning your unpack, you can save time, money and headaches.

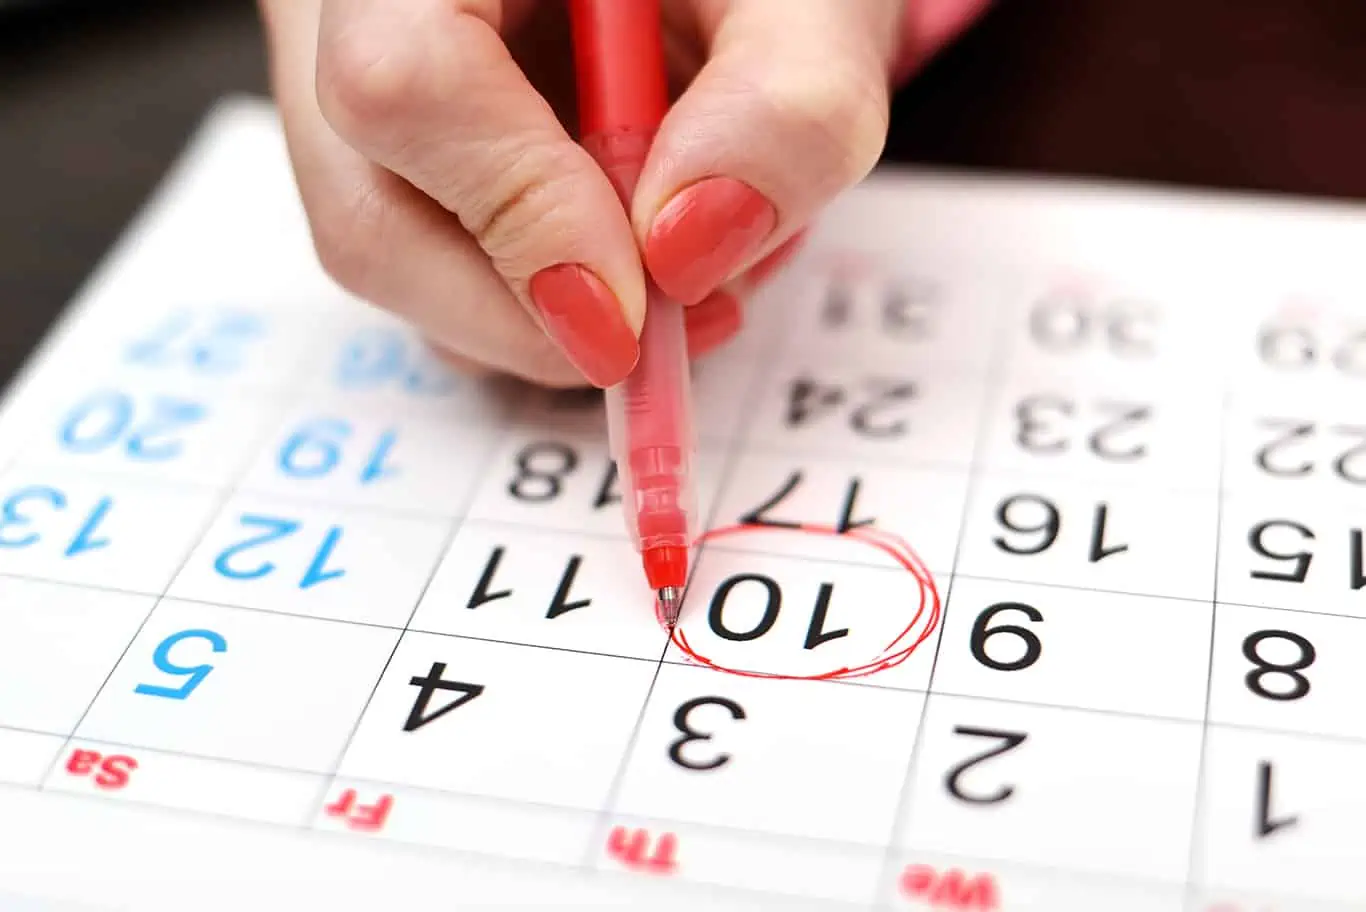
How to Make Unpacking Easier Before Moving Day Happens

We all know the quote, “If you fail to plan, you plan to fail.” The most important step to a smooth unpacking experience is proper planning before your move. 

Of course, you’ll have some planning to do if you’re booking movers and renting a truck … but you still need to spend some time packing. And no, we’re not talking about randomly throwing items into boxes and calling it a day.

Here are some things you should do before moving day to make unpacking easier.

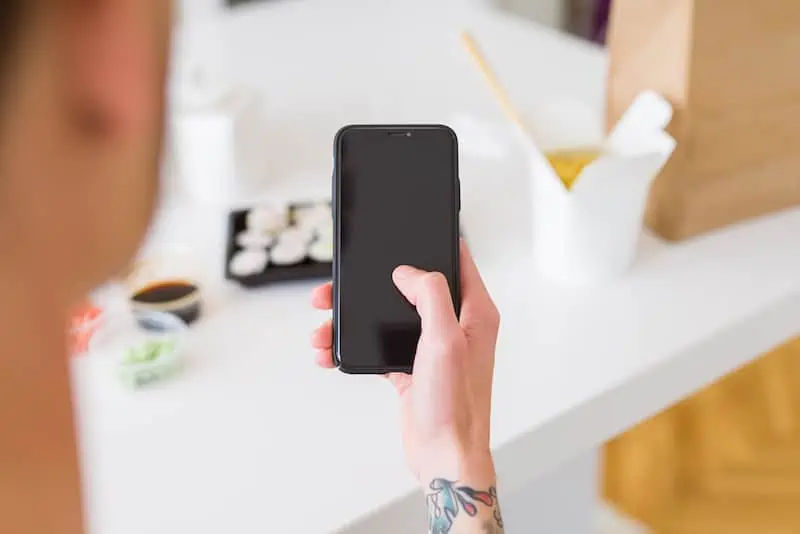
Take Photos Before You Start Packing

Before you touch anything, we want you to take out your phone and have a little home photo shoot. 

Here are things you especially need photos of:
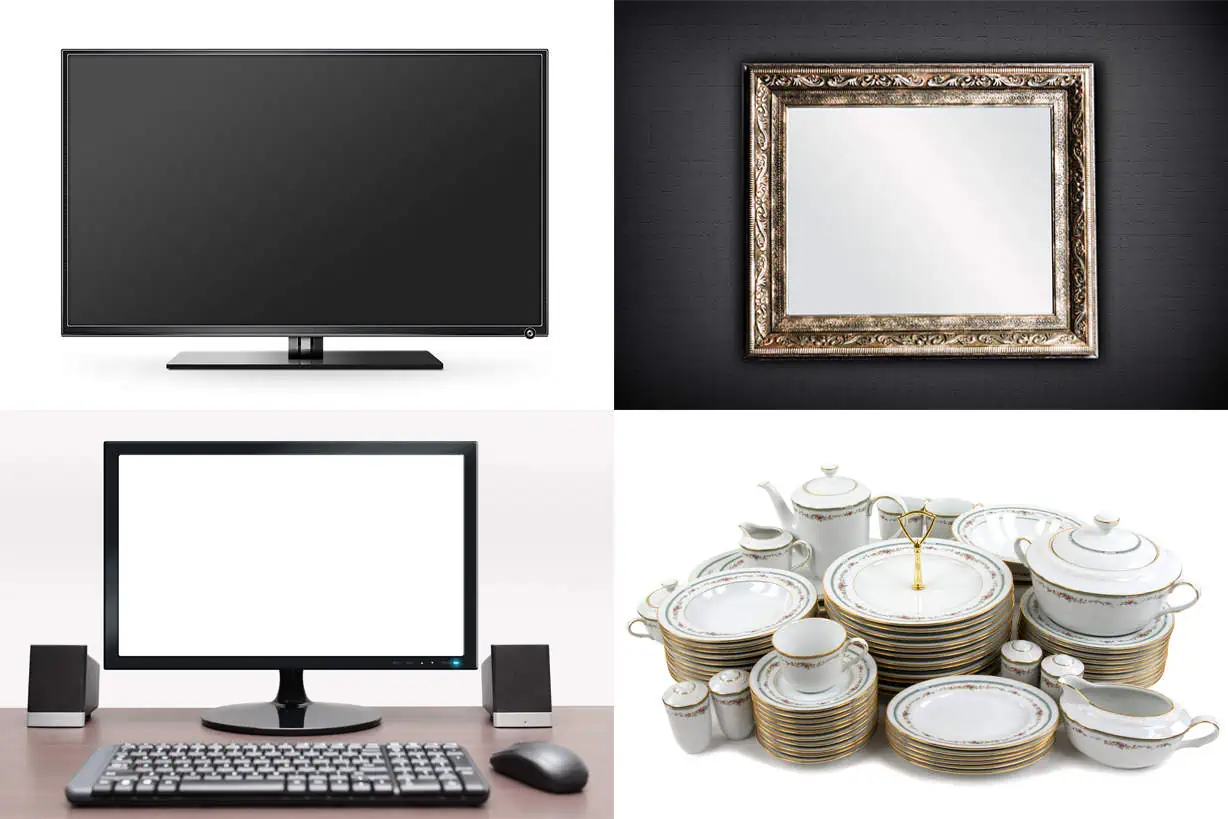
  • Bookshelves
  • The back of your TV
  • Kitchen drawers
  • Desk area
  • Tool shed

We urge you to snap pics of the areas in your home that you love! We know all too well how long it can take to get a shelfie looking just the way you want it. By snapping some reference pics now, you’ll be able to replicate that new look in your home in no time.

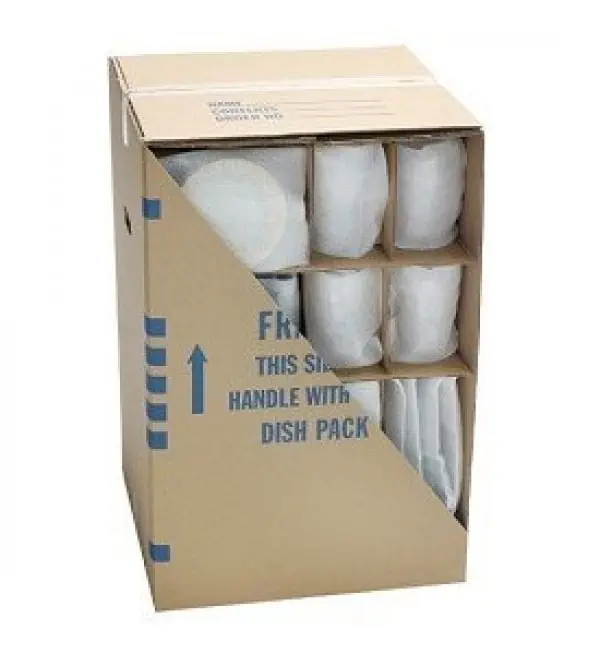
Create a Number and Color-Coded System For Your Boxes

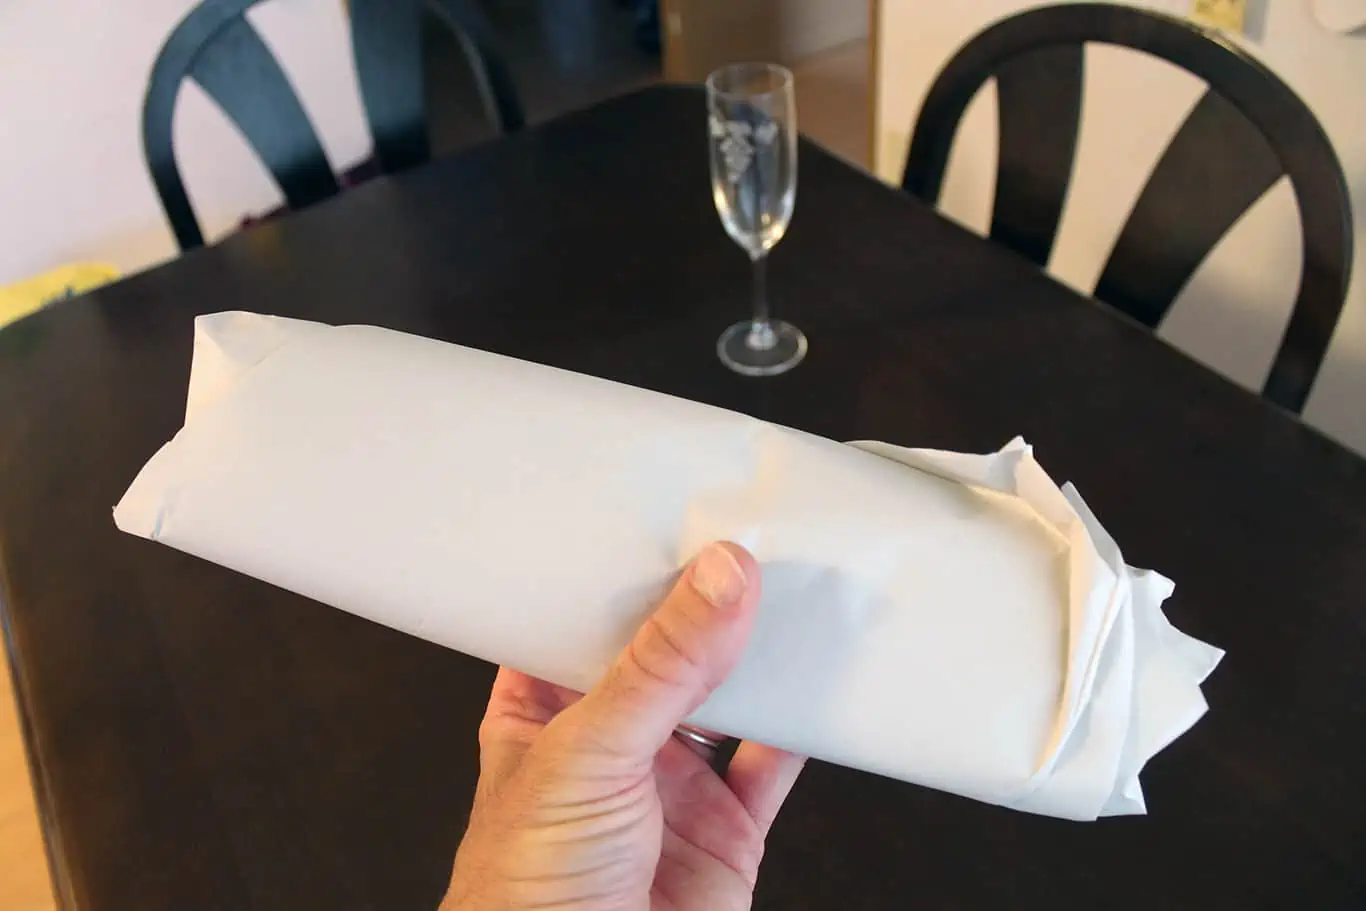
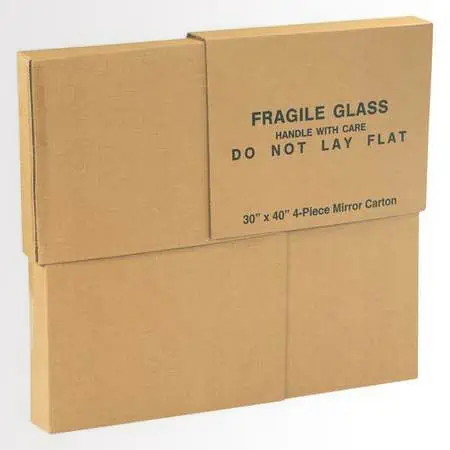
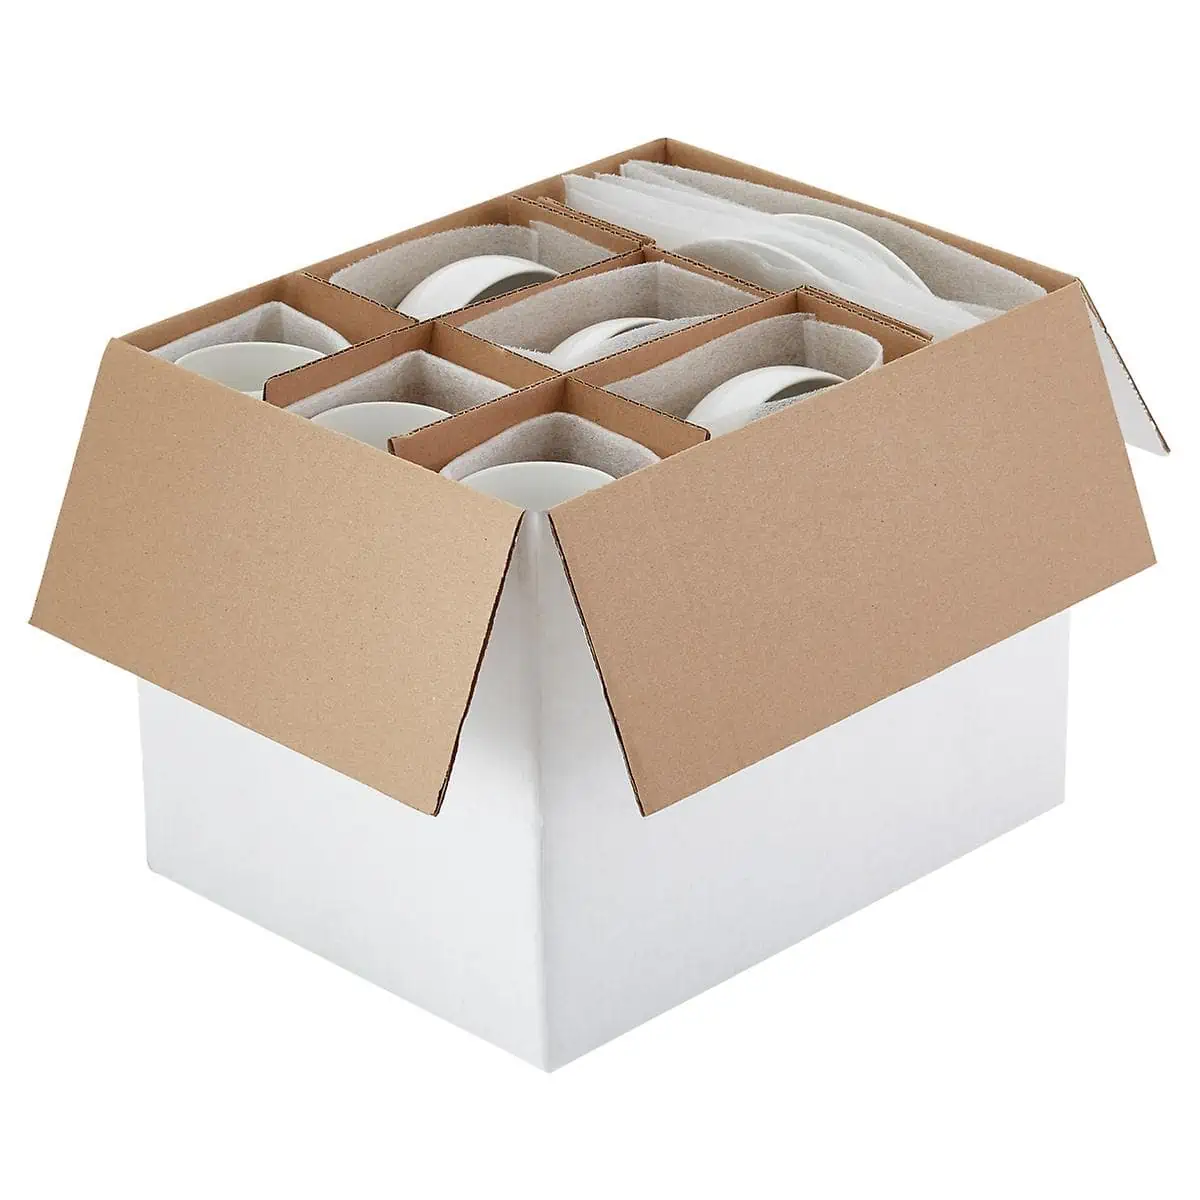
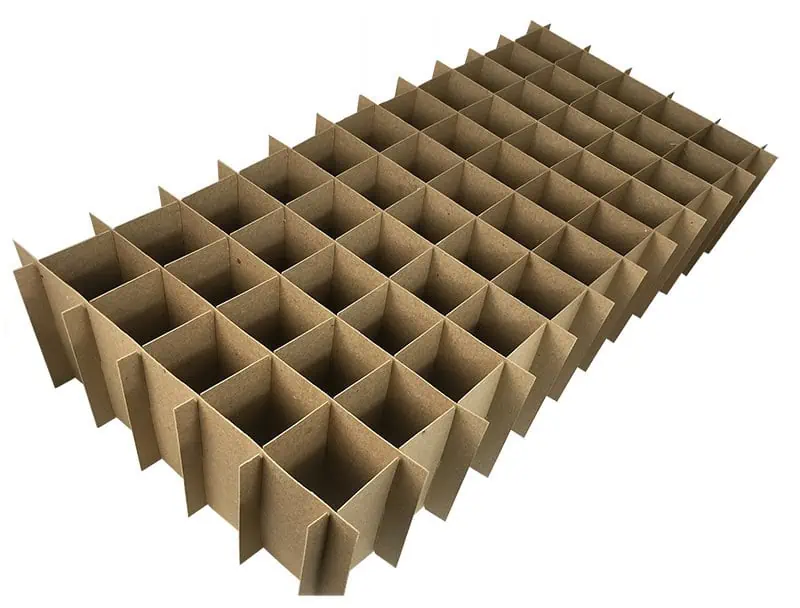
After the photo shoot, gather all of your packing supplies (boxes, paper, tape, scissors, markers … the works!) and start packing boxes like a pro.

Try to only pack up items from one to two rooms inside every box. This will make your life much easier when it’s time to unpack later.

Got a bunch of stuff on shelves? Create a numbered system to remember where everything goes. That way it’s easier to get them unpacked and into their new permanent spots.

And we can’t forget our favorite tip of all … our color-coded box systemWith this technique, you get to use our most beloved crafting tool—washi tape! Get the full instructions from this post, but the short version is that you need to separate your boxes by the room, marked with bright washi tape so your movers know exactly where to deliver them. Genius and oh so colorful!

Make it Much Easier to Unpack Essentials

There are 7 items you’ll want to have on hand for moving day, but we also think you should create a box of moving day essentials. Because imagine the night of moving day when you’re tearing open boxes trying to find pajamas, your toothbrush, and your medication for the night. Sounds like a disaster to us.

This is what should go in your “Moving Day Box” so you don’t have to tear through your moving truck:

  • A change of clothes
  • Utensils
  • Toiletries
  • Prescriptions
  • Phone charger

Be sure to label this box and keep it near you!

Get Help Unloading Your Rental Truck

See prices for movers by the hour—instantly.

Read real customer reviews.

Easily book your help online.


Clean The 5 Most Important Things

We know you have approximately 10,000 things to do to get your rental deposit back. But trust us, now is the time to give your new place a thorough cleaning because it’s empty. You simply put items in place rather than cleaning and unpacking at the same time. Want to know the five most essential things to clean?

  • Kitchen cabinets
  • The Refrigerator (and refrigerator fan)
  • Bathtub and any tub jets
  • Outside (and Inside) the stove
  • Washing machine

Unpacking Tips

You’ve done the prep work (even the cleaning, you rockstar, you!), and now moving day is here! Even if you hired help for your unload (great call), there are still things you can do to make unpacking time a little easier. 

Place Your Boxes in Rooms by Color

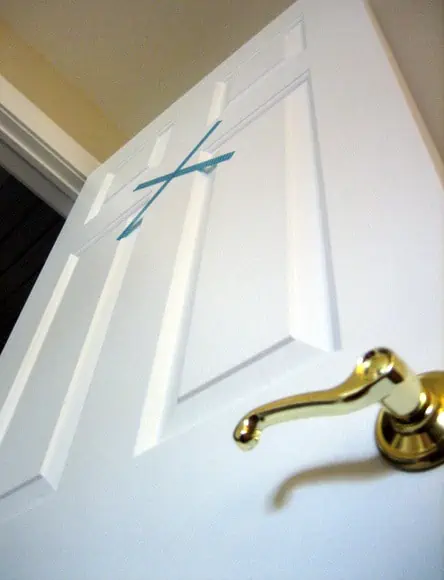
It may sound easier to just have your Helpers pile up all of the boxes in one spot of your new place, but unpacking will be a lot easier if you follow your color-coded box system to get each box in the correct room. If you followed our washi tape tips, you should have each door in your new place marked so the Helpers can easily drop the box in the right spot!

Protip: Get your “Moving Day Essentials Box” opened right away so you have everything you need to make it through the next day or two.

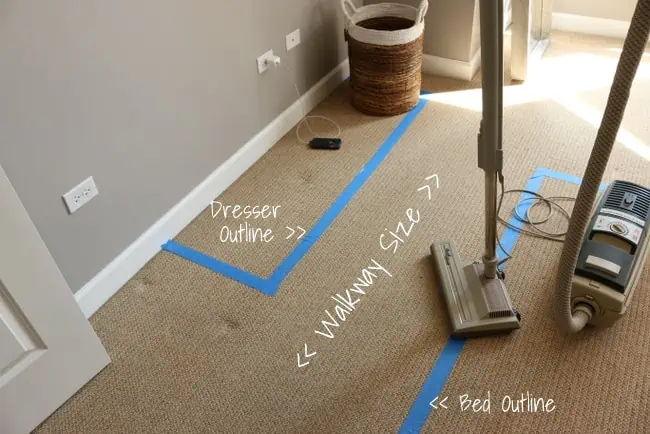
Use Washi Tape to Figure out Your Furniture Layout

As long as your movers are there, have them get your furniture in the spot where you want it! We love the idea of using painter’s tape to mark out the layout of furniture right on the floor.

Before you move (or even while your movers are bringing things in and out),  go around your place and put tape on the ground to outline your furniture. That way the movers will know exactly which wall to put your bed on and where that long dresser goes. You can always move things later on, but getting items in the correct space will make your life a lot easier in the coming days.

Unpack the Bathrooms and Bedrooms First

Moving day will be exhausting, so if you’re going to unpack anything immediately, make sure it’s your bed and bedding. Once your movers get the mattress into place, find the sheets, comforter and pillow and make your bed. If you have kids, do theirs too. Having a comfy spot to sleep at the end of the long day will feel amazing!

Unpack your bathroom boxes too. That way you’ll have all of the toiletries and medications on hand for the night and morning. A fresh shower after a long day of moving will be heavenly, trust us!

Save the Kitchen for Tomorrow

The kitchen is the most time intensive room to unpack, due to the amount of tiny and heavy items, so don’t unpack it on moving day. Your brain will be tired by the end of moving day, and you’ll want to be refreshed and recharged before you tackle this space. Save the kitchen until morning when you can make a fresh pot of coffee.

How to Stay Organized After Moving Day

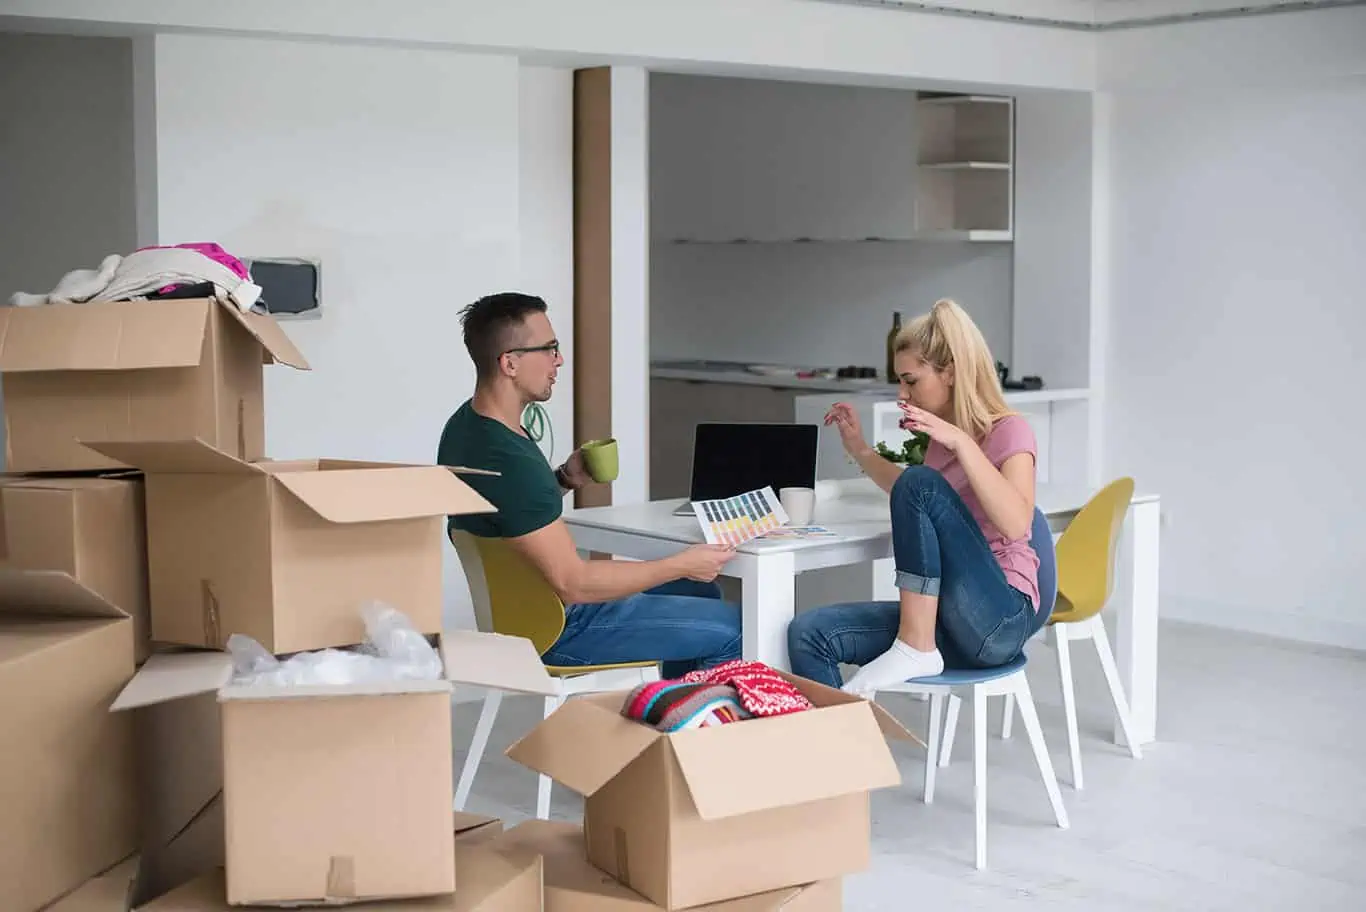
You’re into your new home and you’re surrounded by all of your possessions. First, take a deep breath. You’ve made it this far! Now it’s time for the actual fun part … making your house a home.

Avoid Distractions, Don’t Unpack Games or TV

We might suggest making a playlist of music to entertain you, but we don’t think you should get your TV setup and turned on right away. You may find yourself sitting on the couch instead of unpacking if you have a TV show or movie on. So much temptation…

Another distraction? Little ones. You’ll additionally want to make a plan for your pets when you’re moving and unpacking, so they don’t get in the way. The same goes for kids. Have a plan to keep them occupied or if you can, drop them off at grandma’s house so you have uninterrupted time to unpack. It’s all about keeping the distractions to a minimum so you can devote enough hours to get your house in tip-top shape!

Unpack Only One Room at a Time

Instead of hopping from space to space, we suggest making a list of your rooms in order of importance. Then, don’t move onto another space until the one you’re on is done.

The kitchen, bedrooms and kids’ rooms should be up high on the priority list, while the guest room and garage may not need TLC right away. Also, make sure you have furniture and appliances setup before you get too carried away going through boxes. Did you clean your counters first? You’ll want to have spots to put all of the items as you whip them out of the boxes, so having dressers and cabinets ready to go is a must!

Break Down Boxes as You Go, in Real Time

As you unpack boxes, it may be easy to just throw empty ones in a big corner. But trust us, that pile will quickly get out of control and soon you won’t be able to walk around your house without an empty box tumbling down on you. Take one box and make it the designated paper box. As you unpack boxes, crumple up the paper and shove it into that box. Then, be sure to break down boxes as you unpack. You’ll want to have a utility knife on hand so you can do this quickly.

(And Don’t Unpack Everything)

There may be some boxes that don’t actually need to be unpacked. We’re looking at you, Christmas decorations. Make a large pile of items that may be heading to storage or the garage. Then be sure to get those items to that space in the coming days.

What to Do After You’re Unpacked

You’ve made it! You survived moving day and every box in your place is unpacked. You should be feeling pretty darn good about yourself right about now, but the fun isn’t over just yet. There are still a few things you can do to really get your unloading and packing done.

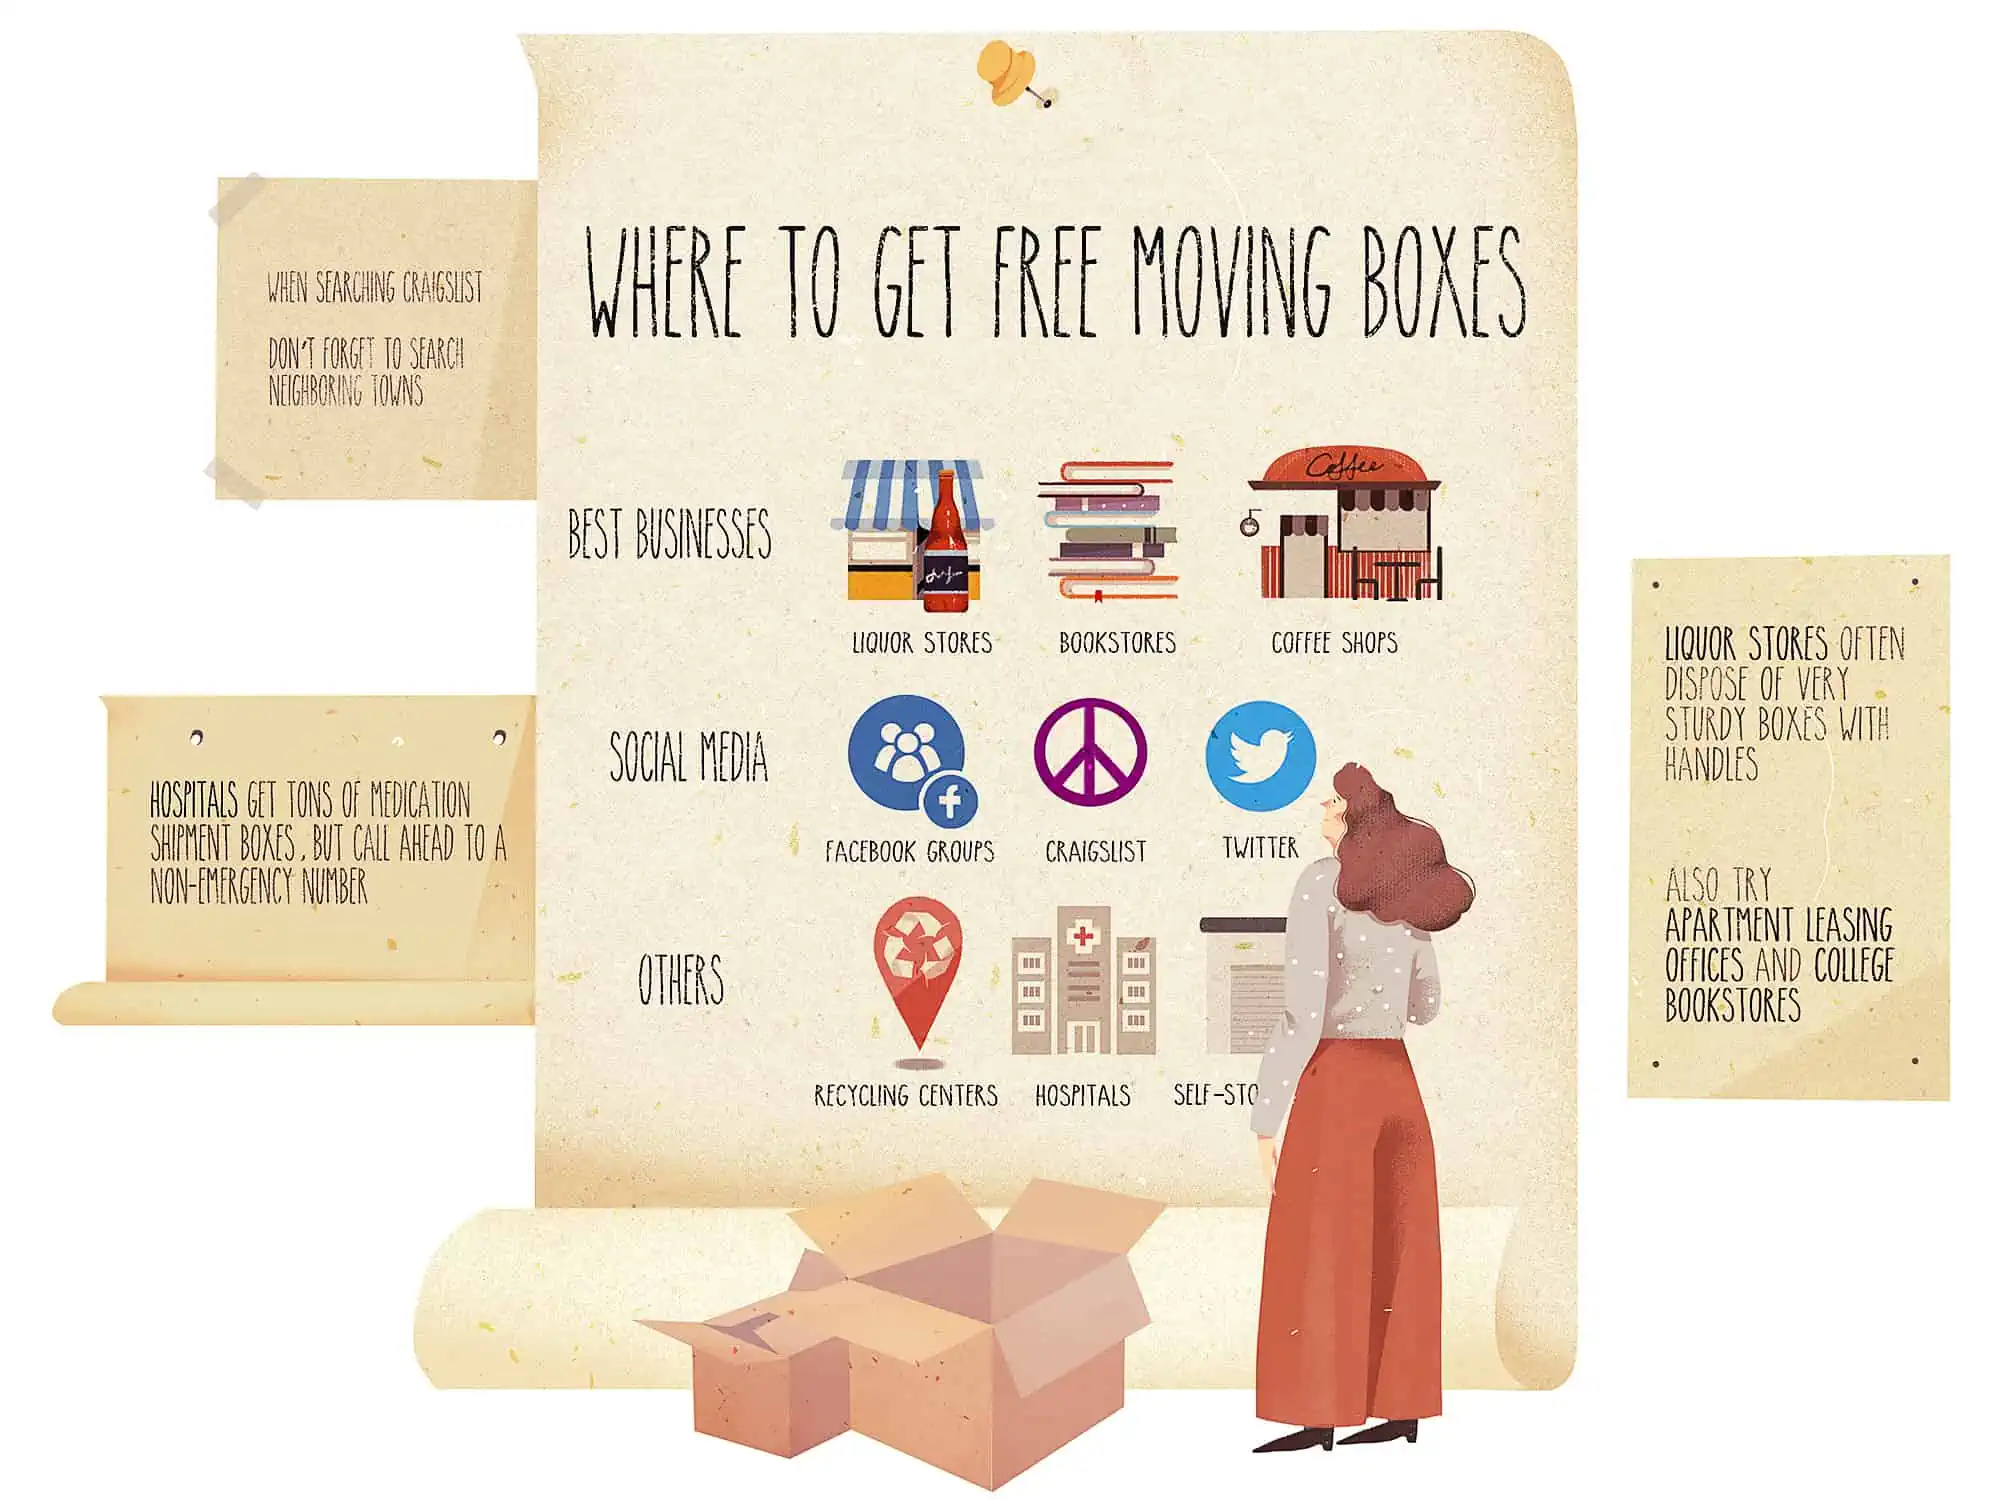
Make Use of Those Moving Boxes

If you will be moving again soon, then you may want to hang onto some of the boxes that are still in good condition. Organize your boxes and find a spot to neatly tuck them away. Are you thinking, “What the heck do I do with all of that cardboard?!” Don’t fret! Instead, try out some of the cardboard hacks.

If getting creative with cardboard isn’t your speed, you can recycle your moving boxes. Check out this searchable database that’ll let you know the closest place to recycle anything (including moving boxes!). Just be sure to set a deadline for yourself to get those moving boxes out of your new place, so they don’t stay piled in the garage forever.

Use These Organization Protips

We’re all guilty of just shoving random items into a cabinet or closet and calling it a day. But to really feel settled in your new home,  be intentional with what goes where. Check out this post on how to organize house keys:

Whenever we’re on an organization spree, we go room by room with a notepad and write down areas that need our attention. Then we’ll spend 30 minutes each night giving those spots some TLC. Those short increments of time seem much more doable than an entire day spent organizing an entire home.

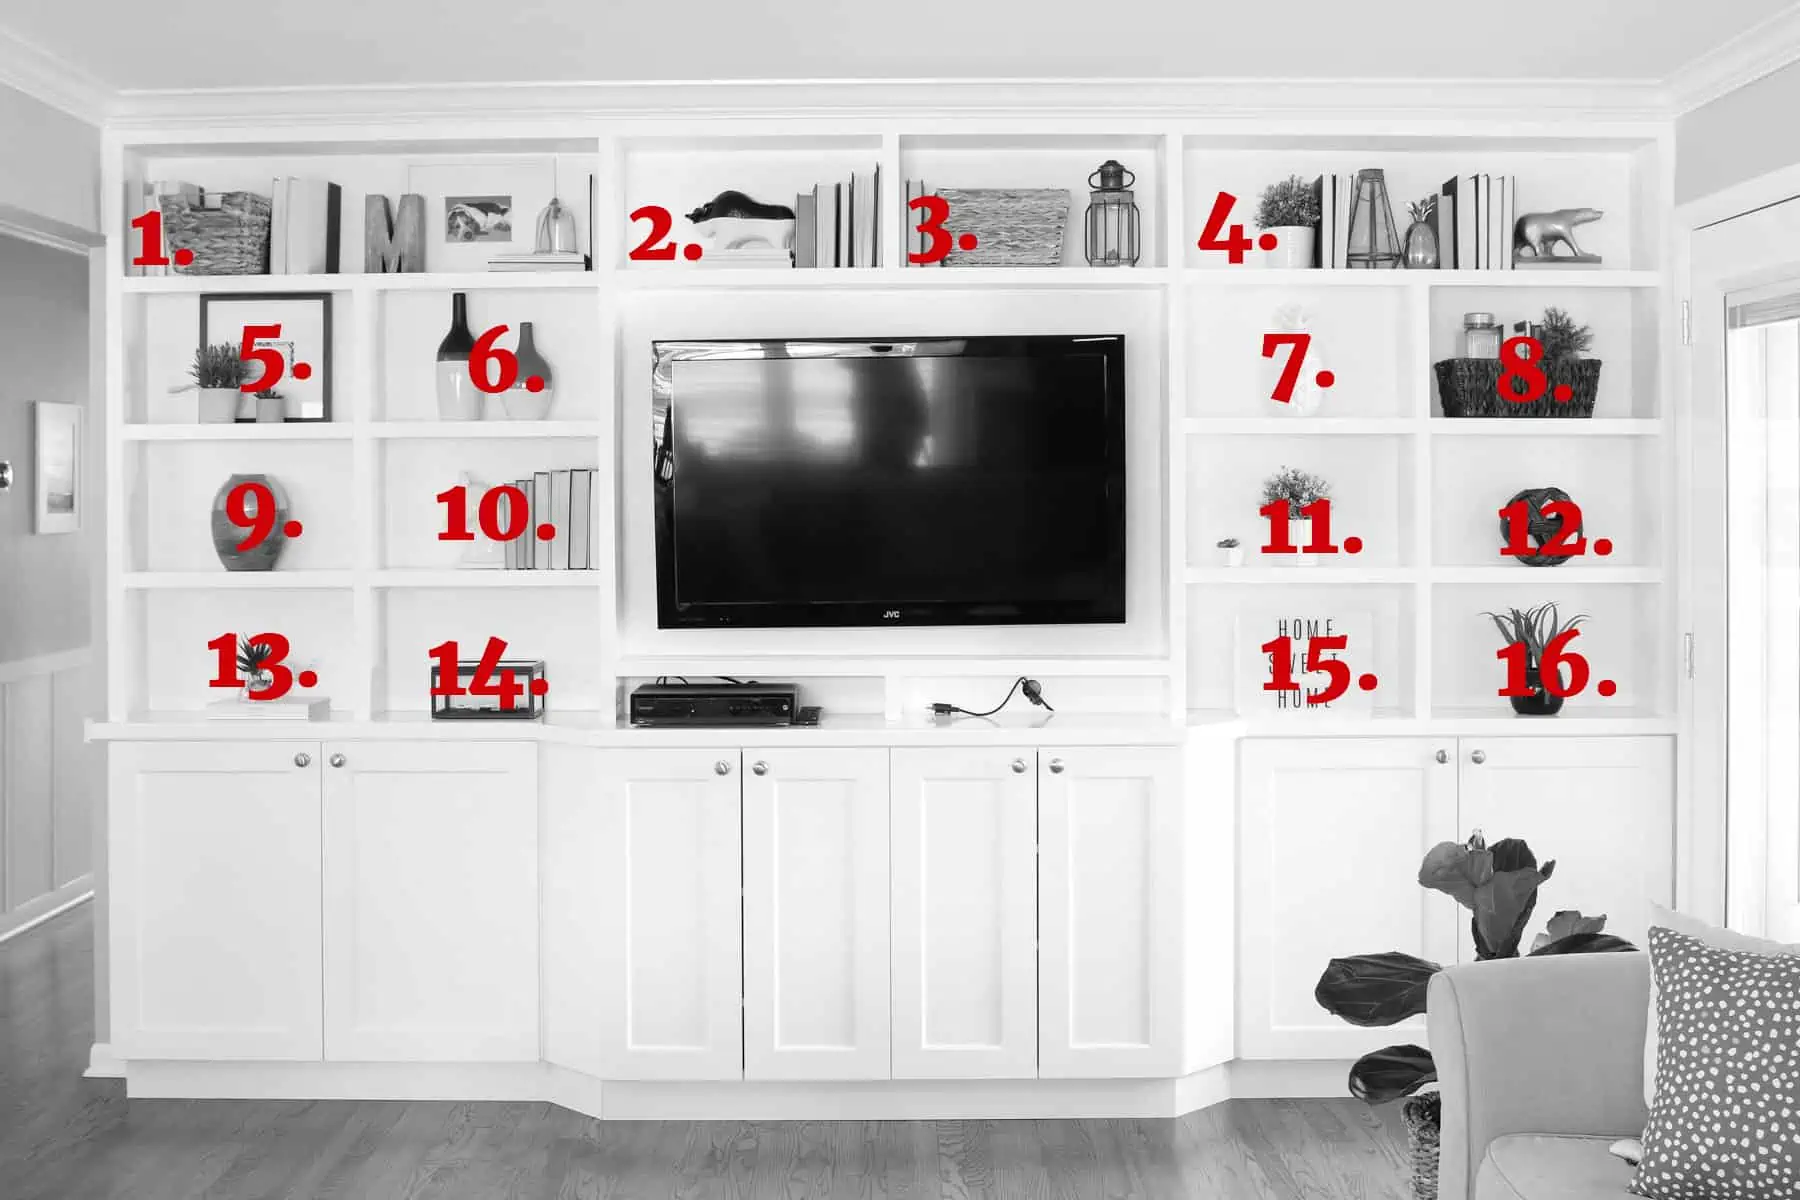
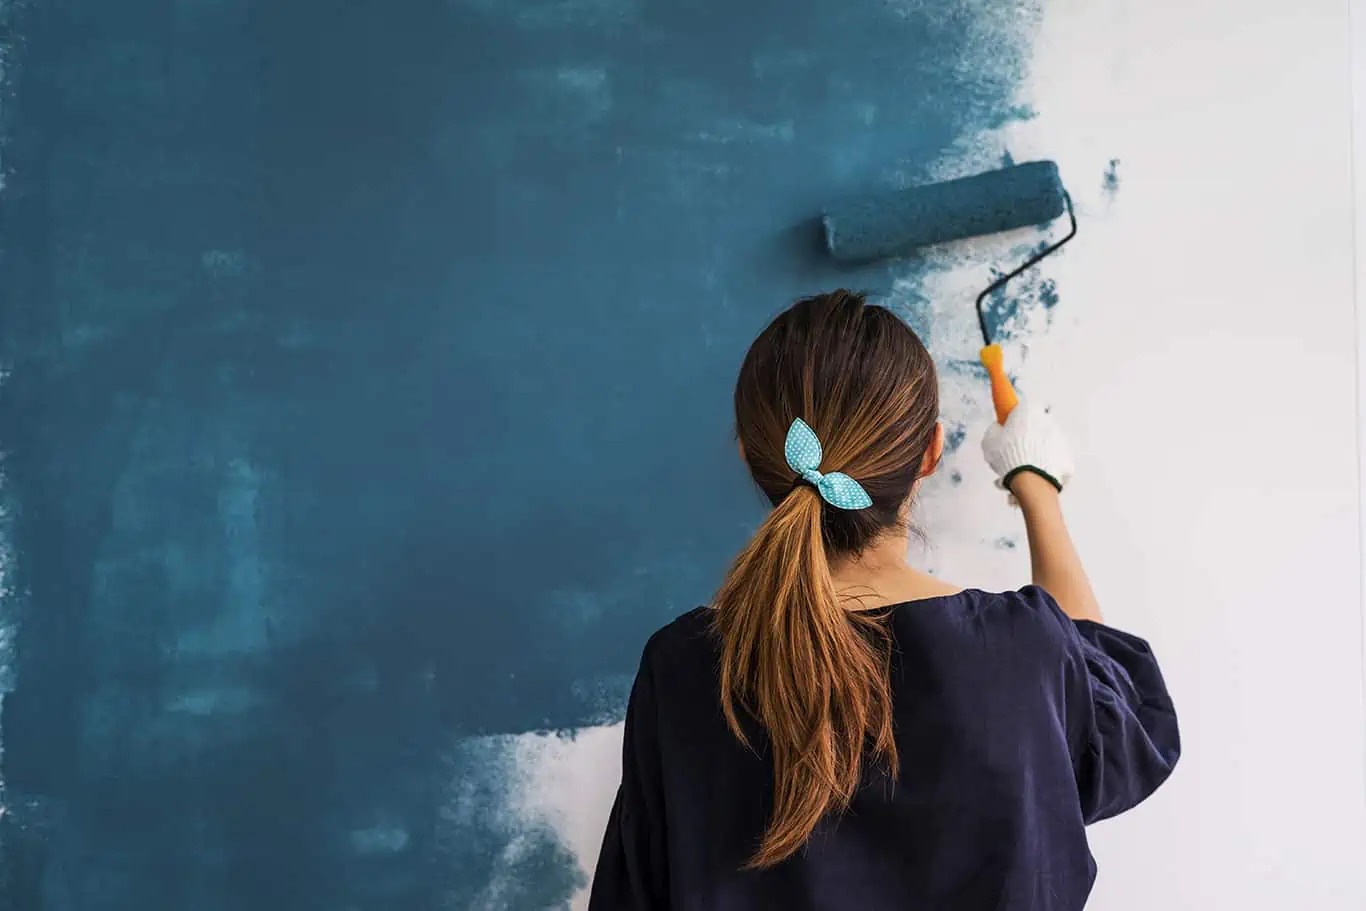
Let the Decorating Begin! (In a Month)

We always say that you need to live in your home for a while in order to decorate it well. So many people quickly buy furniture and accessories for their place without ever giving each room a test run, and they end up with design regret. Yep, don’t paint the walls until you’ve spent a little time in your new place!

We promise that you’ll make much smarter decor decisions after 2-3 months.

Here’s how to get started when it’s time to begin: 

It may not seem like it, but unpacking can be the best part of the moving experience! We promise that these tips will make your unpacking experience easier and more efficient.

The sooner you unpack, the sooner you can enjoy your new life!

Where Can I Find Free Moving Boxes? (Bonus: Free Printable Checklist)

Author:

Publish Date:

Last Modified Date:

Category: Moving Boxes & Supplies

Tags: Tags: , , ,

I recently had to move. What this actually means is I recently had to figure out where the best places are to pick up free moving boxes.

If you’ve ever moved, you know this pain. It’s not like anyone keeps all their old boxes from last time. But what I ended up keeping was a heck of a lot of knowledge about where to get moving boxes without having to pay for them.

Here are some of the best sources our me and our readers have come across. (To save time with all of these examples, always make sure to call ahead, if possible!)

First, Post on Your Feed

free moving boxes

If you have one, the very first thing you should do is post on your most used social media feed: Facebook, Twitter, etc. Chances are that someone in your life just moved and would be happy to have you pick up their boxes.

This is the easiest and often most effective free moving box trick.

Outside of people you know personally, remember that people will sometimes give away boxes on Craigslist. Don’t forget to check in neighboring cities as well!

Best Businesses for Free Moving Boxes

Liquor Stores Often Have Sturdy, Free Moving Boxes

free moving boxes

Liquor stores are maybe the best businesses to check for free moving boxes because they receive boxes in bulk, and they’re incredibly sturdy, so the glass bottles don’t break. As with most of these locations, most employees would be happy to give the boxes away rather than taking the time to break them all down!

(College) Book Stores

free moving boxes

This was not an idea that came to mind right away but it makes perfect sense. Have you ever had to move boxes of books?  It only takes one time to learn that A) books should be packed in small boxes and B) those boxes better be darn sturdy. So, like liquor stores, book stores are definitely a good place to find sturdy boxes.

Near a university book store? Those places are used to students asking for boxes, so try your luck there first.

Free, Coffee-Scented Moving Boxes

free moving boxes

Coffee shops are another good place to check out, as they are constantly receiving shipments of syrup bottles and other merchandise. Call your local coffee shop (or, sure, Starbucks) and see when a good time would be to come in.


Other Places to Check for Free Moving Boxes

Your Local Grocery Store

free moving boxes

Grocery stores may seem like the number one, most logical place to find boxes, but they’re often very busy and can be hit or miss if that goldmine at any given hour will be yours. But if you are near a supercenter such as Walmart, Target, or a local grocery chain, make a list of those nearest you and give them a call before driving over. You may not have to look any farther!

Apartment Leasing Offices (AKA Free Moving Boxes Galore)

free moving boxes

If you live in a fairly large city, there are likely people moving around all the time. Apartment complexes would naturally have new people coming in and therefore needing to get rid of their used boxes. Call or stop by a nearby apartment leasing office (or maybe ask your own!) and see if there are any there you can have.

Self-Storage places

free moving boxes

Think about it. People are taking things in and out of storage all day long. Many people are discarding large amounts of free boxes into their dumpsters or recycling containers. A lot of storage places are happy to get rid of their excess waste to people who are about to move.

Hospitals

free moving boxes

Protip: don’t stroll up to the emergency room and ask for free boxes.

However, hospitals go through tons of discarded cardboard boxes and are unlikely to have people claim them because people don’t think check a hospital. If you strike out elsewhere, look up your local hospital’s help center number and see if someone can’t help you out on your search.

Recycling Center

free moving boxes

Finally, if you happen to have a recycling center nearby, it’s possible it will be the only stop you’ll need to make! Just Google “recycling center near me” and see if this is an option for you.


I hope this makes the process a little bit easier on those of you facing a big move. It’s a lot of work, but having the inside scoop can lighten the load!

We also put together this free printable checklist sheet for you as you search local spots for your free boxes!

Also, if you happen to be an expert mover, please feel free to share some of your secrets to finding free boxes in the comments below!

 Free Printable Download

HireAHelper Free Boxes Checklist

Illustration by Dola Sun
Victoria is currently a grad student studying in Nebraska and working-part time for HireAHelper. She loves music, road trips, and reading.

Bubble Wrap 101: Protips, What It Doesn’t Work With, and Solid Alternatives

Author:

Publish Date:

Last Modified Date:

Category: How To Pack

Tags: Tags: , , , , , , , , , , , , , , , , , , , , , , , , ,

For keeping your most valuable, most expensive stuff protected when you move, it may seem like there’s nothing better than bubble wrap. But we’ll let you in on a little secret. 

Movers very rarely – if ever – use the stuff.

Not because it doesn’t work. It does. But the pros know, all those little bubbles add up to some bulky and relatively expensive bit of cushioning. Packing paper, used correctly, will serve most any packing purpose and save you both space and money.

Still, you may be more comfortable enveloping your flat screen TV, your electronics, your stemware and your china in bubble wrap. That’s totally understandable. So if you decide to go this route, here are a few things to keep in mind.

Using Bubble Wrap: 5 Quick Tips

  1. Put a layer of packing paper between your TV and that bubble wrap. Plastic can leave marks on your screen, particularly in extreme temperatures. This goes for anything you wrap in bubbles. For items with sharp edges or corners, some extra paper can help keep those sharp areas from poking right through the plastic.
  2. Wrap your items with the bubbles facing inward for better protection against exterior pressure and accidental impact. The flat side is easier to write on (in case you want to be able to identify each item quickly) and will hold the tape in place much more effectively.
  3. Don’t bank on one layer of bubble wrap. Two layers of small bubble sheeting might be enough for a piece of stemware, though this would be in addition to packing them with plenty of packing paper and, for extra peace of mind, individual cells inside your cardboard box. If you are using the stuff with the bigger bubbles for heavier items like a large framed mirror or your CPU, one layer may suffice – but again, only in addition to some crumpled packing paper for extra cushioning on all sides.
  4. Keep that bubble wrap firmly in place by taping not just along the edges, but all the way around the item. You splurged on that bubble wrap, don’t start skimping on the tape!
  5. Have a pair of scissors on hand when you are unpacking. It would be a real bummer to break something – or drop and break something – while trying to tear that bubble wrap off using only your hands. 

You might love our:

Moving Cost Calculator

If the quote from your movers felt expensive …
Make sure it lines up with the costs reported by other Americans.

What to Pack in Bubble Wrap

bubble wrap

Valuable items. Fragile items. Heavy and hard-to-replace items. If you’re staring at something and you can’t decide whether to bubble wrap it, err on the side of caution and wrap it.

Specifically, you’ll want to consider bubble wrap for:

  • Large picture frames and mirrors
  • Flat screen TVs
  • Glass tabletops and shelving
  • Electronics and computers
  • Stemware and fine china
  • Fragile decorative items

Remember, bubble wrap alone will not do the trick. Even surrounded by two or three layers of air pockets, the things on this list will still need to be packed firmly in cardboard cartons with enough crumpled packing paper on all sides to keep them from shifting and bouncing in transit while keeping them safe from exterior impact.

After the bubble wrapping is done, use the right kind of box.

There’s no point in being safe if you use the wrong box for your stuff. Finish the job right by packing each bubble-wrapped item properly, surrounded by plenty of crumpled packing paper. Moving boxes come in specific shapes and sizes for your items, use accordingly.

bubble wrap

Mirror Cartons

Picture frames, mirrors, glass shelves and flat-screen TVs go in mirror cartons – sets of two, if not four pieces that you can use to form a custom-sized box.

Double-Walled Dish Pack Cartons

bubble wrap
containerstore.com

Electronics and computer components are best protected when packed in double-walled dish pack cartons, the same boxes we use for dishes, plates and glasses. And yes! This includes your china and stemware. Fragile decorative items like statuettes and ceramics can still be packed in medium (3 cubic foot) boxes, provided they are cushioned well and the boxes are clearly marked to minimize the chances of someone putting a box of books on top.

Cardboard Cells

A note about stemware: Nothing gets broken more often than this stuff. Wrapping each piece well is crucial, but so is packing it all correctly into your dish pack as the items on the bottom will have to support the weight of everything else in there.

bubble wrap
cactuscontainers.com

The best thing to do is get your hands on some of those cardboard cells, which not only keep your wine glasses from knocking against each other but offer an appreciable amount of vertical support, keeping all the weight of those glasses off the ones at the bottom of the box.

If you can’t find any cardboard cells, don’t despair! A thick layer of crumpled packing paper on the bottom of your dish pack and another layer of crumpled paper on top of each successive tier of firmly-packed stemware is what the pros use to keep everything safe. If you aren’t comfortable with that, line your entire dish pack with bubble wrap and put a couple of sheets in between your tiers of glasses. This isn’t the most cost-efficient way to pack your stemware, but it beats a box full of expensive shards of glass.

Alternatives

If not bubble wrap, then what? As stated earlier, packing paper is the standard. However, towels, crumpled newspaper, or virtually anything form-fitting, sturdy and that’s plenty soft can often do the trick for cheaper. Sound too simple? It really is. As long as you pad your items in a balanced way, it doesn’t need to be as expensive as bubble wrap. Just as long as “this one, extra towel” isn’t the only thing keeping your priceless vase safe. Check the moving supplies section at your local hardware store for bubble wrap alternatives.

A Note on Packing Peanuts

bubble wrap
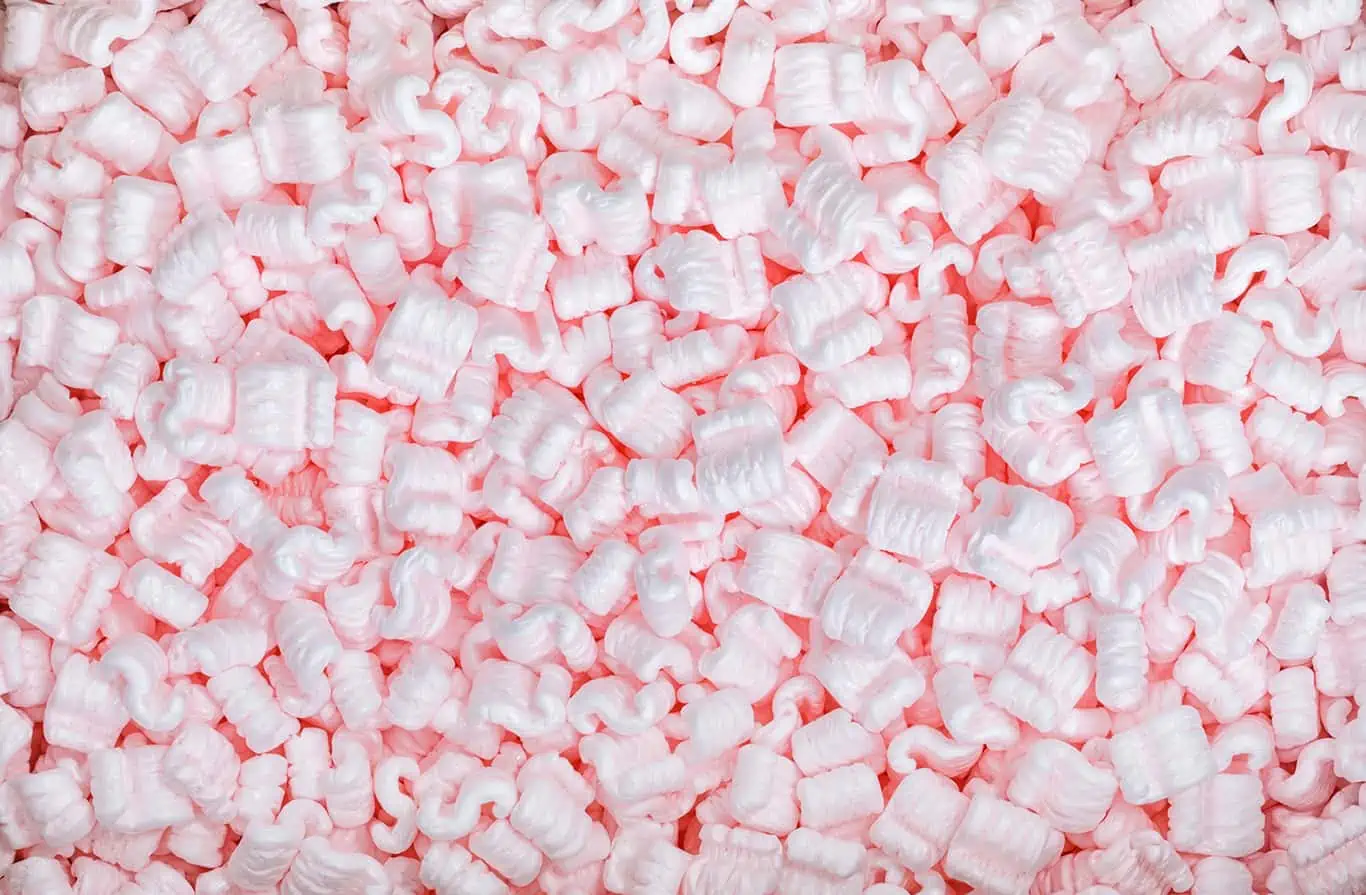
You may like the idea of those Styrofoam nuggets, but in general, they are bulky, costly, and non-biodegradable. The eco-friendly alternative cornstarch peanuts are even more expensive and don’t make for a very satisfying snack, no matter how hungry you are at the end of your move. Plus, they end up getting scattered all over the floor and clinging to your clothes. In short, use (and eat) them if you like, but I don’t recommend them.


Admit it. It’s hard to resist popping those plastic bubbles once you’re done with that bubble wrap. But think for a moment how easy it is to pop them – and how much all the boxes you are packing must weigh.

Keep this in mind when you are packing up all those valuable, expensive, fragile items. On its own, a sheet of bubble wrap can’t adequately protect your stuff. You’re going to need plenty of packing paper (or towels or clothes) in a pinch. Pack those items firmly in the center of your box, protected on all sides.

And really, save yourself a headache (and maybe the stomachache) and stay away from those peanuts!

How to Pack Stemware Safely, With or Without Dividers

Author:

Publish Date:

Last Modified Date:

Category: Pro Packing Guides

Tags: Tags: , , , , , , , , , , , , ,

I remember the first time I had to pack a china cabinet full of stemware. Wine glasses. Champagne flutes. Crystal crafted and etched so delicately it might as well have come straight out of a fairytale castle.

My hands shook as I wrapped each piece. My stomach churned as I watched my buddy load that dish pack onto the truck, underneath a stack of other boxes.

20 years later I still have nightmares about it.

I’ve dealt with plenty of stemware since then, and while I wonder now and again whether anything I’ve packed has gotten damaged in transit, I’ve learned enough from people who have been around longer than me to know how to minimize the chances. Below is a summary of what those people taught me.

Packing With Dividers

While dividers can add stability to the carton and protection to the contents, the fundamentals of packing still apply.

Make it tight. Density still matters, even inside those cells.

Create cushions of packing paper between layers.

Be generous when padding the bottom and the top of your dish pack.

In addition, there are things that require extra attention.

Image by: Done Right Moving

No matter what you are putting at the bottom of your dish pack, lining the bottom of the carton with nothing but crumpled paper isn’t the best way to go. Have you ever watched a child jump into one of those massive tubs full of plastic balls? That child doesn’t land on top, they sink down, pushing all those plastic balls to the sides. All that stuff you pack in your dish pack will do the same thing unless you cover that (thick, tight) layer of crumpled up paper with several sheets of crumpled-then-uncrumpled paper. (Imagine laying a tarp across the top of that tub full of plastic balls.) 

This goes a long way in keeping those crumpled up paper balls in place under the weight of all that kitchenware. This will also prevent your dividers from sinking and potentially exposing the stemware those dividers are supposed to be protecting.

Be aware that dividers aren’t always the perfect height for the stemware you are packing. If your wine glasses are a bit short, add extra paper beneath and on top to fill out the space in each cell. Are those champagne flutes too tall? Don’t leave them sticking out of the top! Make a double layer of dividers, pad those glasses above and below, and, to use that extra space wisely, fill the remaining space in each cell with smaller glasses (that are also well-protected).

No one in the history of packing has ever had the exact amount of stemware needed to perfectly fill the number of cells in the dividers they are using. Since the customer has requested you use those dividers for all, not most, of their stemware, don’t skimp or cheat at the end and pack those last few crystal wine glasses loose among the coffee mugs and tea cups. Fill that last divider level with those remaining pieces of stemware plus whatever other items will fit in those cells. And if you find you have more dividers than you need? Use the leftover pieces to create a sort of cardboard roof over your top divider level so you can pack and fill the remaining space in your dish pack with confidence.

Packing Without Dividers 

This was the case that first time I had to pack stemware. And while it is absolutely possible to pack a bunch of fine, fragile wine glasses safely without dividers, it takes a lot of care – and plenty of paper!

The biggest concern in wrapping stemware is that most fragile part: the stem. The thing is, all the paper in the world won’t guarantee the survival of that stem if the pressure is too great. Still, that’s the first part we want to protect.

The longer the stem, the more critical it becomes to wrap that stem in paper. We do this mainly to create a more cylindrical item we can then wrap completely. Cylindrical bundles allow for a tighter, denser pack. The more empty space there is around the stems of those wrapped glasses, the greater the chance those glasses will shift and generate uneven pressure inside the carton.

I see and hear all the time how important it is to stuff the inside of your wine glasses with paper. To be honest, I don’t get it. If there’s enough lateral (sideways) pressure being exerted on the outside of a glass to break it, crumpled paper cannot offer nearly enough strength to counter that pressure. What the paper CAN do is add a degree of protection against vertical pressure. As with packing glass lampshades, stuffing each glass with enough paper so that paper extends beyond the rim of the glasses means extra cushioning between layers. 

Speaking of layers, as we mentioned earlier, a stable layer of paper at the bottom of the carton is critical for the overall protection of the contents. When packing stemware without dividers, we want to make sure the cushioning on top of and below each layer of wrapped stemware is thick and stable. Lay some wrinkled paper across your layer, add a layer of crumpled paper balls, then cover with more flattened paper before packing your next layer of glasses. Without the strength of those vertical dividers we need to make sure our dish pack is jammed with paper not just between layers but between and around all those glasses – which we should be packing upside down, by the way! And of course, a dense, thick layer of paper on top is a must.

One final point about packing stemware: the use (or not) of bubble wrap. As with stuffing paper inside your wine glasses, I’ve seen plenty of tips involving wrapping stemware with bubble wrap. Personally I’ve never used it on any type of glassware. Ever. Nor have I ever done an unpack and seen it used. Does this mean you can’t use it? Of course not. It just might not be your most practical option. If you do use it, be aware that some people will strongly advise against wrapping a glass in plastic without wrapping it in paper first. One reason is the possibility of the plastic leaving marks that are hard to get rid of. Another is the tendency of plastic to stick to glass, increasing the likelihood of pressure and thus damage.

In simple terms, use it at your own risk.

To sum up, if you use dividers when packing stemware, make sure they are level in the carton and that the cells are filled tightly. And make sure those stems aren’t going to end up sticking out the top. If you aren’t using dividers, use common sense. That is, use plenty of paper! Make your carton super cushioned and super stable.

And pack those stemware items upside down.

Movehacks: How to Unpack and Organize Before, During and After You Open a Box

Author:

Publish Date:

Last Modified Date:

Category: Organization

Tags: Tags: , , , , , , , , , , , , ,

Some people tell us unpacking is the most enjoyable part of their move. (“It’s like Christmas!” they say.) Others dread unpacking like nothing else in the world. (“It’s worse than a triple root canal!” they cry.)

Either way, unpacking can quickly turn your new home into an ocean of cardboard and newsprint. To make the process more manageable – dare we say more enjoyable? – here are some industry tips for getting your unpack off to a raging start.

What to Do Before the Unpack

Yeah, you gotta clean before you unpack 

You might not want to hear this right off the bat, but be prepared to clean before you begin to unpack. Even if it’s just wiping the shelves and countertops and giving the floors a quick sweep, unpacking in a clean home is infinitely more pleasant than unpacking in a dusty one. These items definitely take priority when it comes to cleaning:

  • Kitchen cabinets
  • Refridgerator
  • Bathtub and bathtub jets
  • Stove
  • Inside the washing machine

For more a more in-depth look at the how and why for house prep, check out this post.

Don’t unpack from down on the ground, clear some counter space

In the kitchen or dining room, do whatever you need to do so you can get your boxes up high. Why? Because you’ll need that counter space to place boxes on before you carry your things around your new place.

Why on a shelf? Because if you unpack from the place you dropped down that heavy box, you’re going to feel it in your lower back the next day. And week. Trust me, unpack up high. Always.

Unpack to shower and sleep first

No one in the history of unpacking has ever unpacked in one day. Unless you think you can be the first, don’t wait to unpack your bedding, set up your bed, hang your shower curtain and dig out what you need to feel clean and refreshed after a long day (or week? or month?) of moving.

Protip: Yes, this involves a little foresight when packing. Mark the boxes that contain the things you want to access first. (This may also include real plates, glasses and utensils to make you feel more at home when you sit down for dinner that first evening.)

What to Do During the Unpack

Unpack the “easy” boxes first to make room 

It takes almost no time to unpack your books and stick them on the shelves of your bookcase. In a matter of minutes, you can transfer your t-shirts and jeans from boxes to dresser drawers. And for goodness sake, get those massive and bulky wardrobe boxes unpacked and out of the house!

Go about halfway with the pictures 

Unpacking large pictures, mirrors and paintings is also quick, and you can then get rid of those bulky mirror cartons. Some folks, however, suggest hanging your pictures up early on to give your new place that homey feel. I say lean them up in a corner somewhere until you get all your furniture in place. Later on, you can do the “a little to the right…a little more…no back left…no not that much…okay there, no, a shade higher…yeah, that’s perfect” thing.

Make a quota of boxes unpacked per day and stick to it

If you are the motivated type, feel free to skip this tip. If you are easily distracted and tend to put things off, you might find it helpful to …. Hey, are you listening? …  set goals for yourself. Commit to unpacking one room per day, six boxes per hour, whatever. And reward yourself for sticking to your plan by going out afterward. Just remember how satisfying it will be when you’re all finished. 

Repack what you don’t actually need for storage

As you empty your boxes, set aside those items you decide you won’t need right away – or for a long time. Keep a few of those now-empty boxes handy and consolidate those items you put aside for quick transfer to the basement, the attic or the back of your closet.

Protip: Just as you did when you first packed, write the contents of each box with a marker as you go through your consolidation.

Don’t unpack the TV

The ultimate distractor. Do unpack the tunes, though. 

Purge. Again

We suggest purging while unpacking. On move after move, it’s common to see people wait for weeks (or months) for the family’s stuff to arrive. Living without most of their stuff, they often realize that so many things were unnecessary. And while packing stuff in a box allows you to forget about it, having to unpack it and find a place for it helps you decide whether you really need it. As with the stuff you’ll be storing in the attic or the basement, set up a box or two for these things you’ve decided to part with.

What to Do After the Unpack

Hide your paper trail

Keep a couple of medium-sized boxes on hand, and use them to stash all the packing paper that would otherwise turn the floors of your new home into a churning sea of crumpled newsprint. Flattening and folding all that paper will save a lot of space – if you have the time and patience – but doing so also helps you find smaller items that can go unnoticed and disappear forever. I can’t count how many times a customer dropped their used moving boxes off at our warehouse with items still buried in the packing paper inside.

Protip: Packing a large box with flattened paper can make it surprisingly heavy. Medium boxes are more manageable in this respect.

Now, about getting rid of all those boxes…

First, get them out of your way. The garage – if you have one and there’s room – is the obvious choice. (Think twice before stashing them in the basement “temporarily”.) If the weather is good and it feels appropriate, start breaking down your empty boxes and putting them out by the curb. Unless your new home is on a cul-de-sac it may not be long before you see passer-by stop and take those boxes off your hands. If this doesn’t work, here are three ideas that don’t require a box-hungry passerby.

  • If you have the time, the storage space and the mental fortitude try passing on your boxes to someone else who is getting ready to move. Facebook groups and Craigslist are two widely-used resources for advertising moving boxes for sale or for free.
  • Some moving companies will be happy to take your boxes and your packing paper off your hands. If none of the smaller local movers will take them, check for national van line agencies in your area (like United, North American, Atlas and Allied). The agencies I worked for never bought used boxes from people, but we were always happy to take them if they were in decent shape. 
  • Recycle if you can’t find someone who will reuse them.

Unpacking can prove a more formidable task than expected. Whether you think it’ll be like Christmas or a root canal, putting these tips into practice will help you feel at home faster.

Then you can sit back and watch the TV.

How-To Guide for Getting the Best Rental Truck For You

Author:

Publish Date:

Last Modified Date:

Category: Moving Trucks

Tags: Tags: , , , , , , , , , , , , , , , , , , , , , , , , ,

You’ve spent weeks packing up. You’ve spent days cleaning your bathroom and your floors. You’ve spent hours tying up loose ends and your last few spare minutes posting about how crazy your move is making you. Now all you have to do is rent a truck.

A truck! Crap, I forgot!

If you planned well ahead and reserved your truck, you’re part of an admirable, enviable minority. If you’re moving tomorrow and haven’t started comparing rental trucks for moving? May the gods of the move be with you. (But seriously, we”re here to help.) Deciding what size truck to get to searching for a decent deal, renting a truck blindly can be as bumpy as driving one, so here are some key areas to focus on for smoothing things out.

Properly Measure How Much You Need to Move by Trying This

For most people, it’s hard to believe how much stuff they really have. It’s even harder trying to figure out how big a truck they’ll need. If you’ve rented a truck before, your experience will be invaluable, but if this is your first time, don’t underestimate how bulky your world has become!

Not a blind endorsement for Penske, but it’s a valuable tool

General packing guidelines, based off a typical move

Penske’s online “Truck Wizard can help determine what size truck you’ll need. Inputting items like furniture and appliances is easy. But estimating how many boxes of varying sizes you’ll have is tough if you haven’t already packed up. As an experiment, I tried it out using my own place. At first, I couldn’t believe I’d need that big a truck. But the next size down ended up being too small. 

Finding out halfway through your move that your stuff won’t fit in your truck is a nightmare you don’t want to live through. So when estimating how much stuff you have, be over the top thorough. And don’t forget all that stuff in the closets and the garage!

Pick Your Move Day Wisely to Get a Good Deal

Do you have any flexibility at all in scheduling your move day? If so, take advantage. When trying to rent a truck, moving on a weekday in the middle of the month versus moving on the last or first day of the month is the difference between heaven or hell.

If your flexibility is limited and you find yourself running into roadblocks trying to nail down that rental, try a few of these tricks:

  • Rent round trip if possible. Dealers need to keep their inventory of trucks in places that are busiest. Otherwise, they have to move the trucks around themselves. Got a car? Leave it behind, make your move, then return your rental and drive your car to your new home. (Or have a friend follow you in your car.) They can help you unload and drive the rental back. (Check with your rental company’s policy on this.)
  • Try a dealer somewhere out of town. The smaller dealers out in the boonies might have trucks hanging around while their colleagues in the city are scrambling.
  • If your move is local, consider making two trips in a smaller truck.
  • If you’re moving long distance, try drop-off points that may not be in your new town. For example, if you’re moving to Eugene, OR, look for a deal that involves dropping your truck off in Portland. Again, inventory logistics can drive a rental company’s truck availability, not to mention the price. You might even ask where they need trucks and try to figure out a deal. Even with the extra day or the cost of getting back to Eugene, you may still come out ahead.
  • As implied in that previous point, it pays off to physically call all the rental companies. Speak to people. Ask about possibilities that don’t show up online. Be friendly. Be inquisitive. Be persistent.

Dealing with Price Differences

The quotes you get from the various truck rental companies out there can vary significantly. Put as simply as possible, there are three main reasons for this:

  • The quality of trucks available that day
  • The quality of customer service
  • Hidden charges

Ultimately, because prices depend so much on where you personally live and who else is moving that specific day, it’s impossible to flat-out say which company has the best deal every single time. However, you can find all sorts of information on truck rental companies online. 

Moving101 is an exhaustive resource with as much information about every moving truck company under the sun, including dimensions, tons of real, up-to-the-day reviews, and a ton more.

moving101.hireahelper.com/

In addition, here’s one fairly comprehensive forum thread that may be of interest that discusses a few tips and warnings that may also be useful. Keep all of these resources in mind, as your personal (and figurative) mileage is subject to local quirks.

Some (Not So Obvious) Protips

  • If you’re worried about insurance on your rental truck… good! It’s not likely that your credit card or your personal car insurance will cover you in the case of an accident. Thus, you’ll want to know exactly what you’d be facing in case of a mishap and what kind of insurance is available to avoid a financial disaster. Rental companies will offer various types of insurance, and sometimes at different levels. Here’s a good rundown by ValuePenguin on the wonderful world of rental truck insurance terms.
  • If you’re worried that the truck you reserved won’t be there waiting for you, you’re not crazy. It happens (maybe with some companies more than others). Trucks break down, people return them late and some trucks just seem to vanish. To increase your chances of getting the truck you reserved, one idea is to get to the rental place early. Another idea: if for whatever reason you are super-concerned you won’t get the best one, arrange to pick up your truck in the evening after people have already (presumably) begun dropping them all off.
  • If you are booking your rental online, HireAHelper does offer discounts on Penske and Budget
  • If you are in a real pinch and you don’t have all that much stuff, think about renting a trailer from Uhaul instead of a truck (from anyone). Even if you have to pay to have a trailer hitch installed on your vehicle, the money you save renting a trailer instead of a truck will in all likelihood more than cover the cost. Plus trailers don’t break down nearly as often as trucks. Just make sure there’s a spare tire!

Price, quality and customer service. Insurance, truck size and availability. It’s a difficult road to navigate – we know – but with knowledge, persistence and a few tricks up your sleeve, you’ll be well-equipped to handle this last, important piece of your moving puzzle.

How To Properly Take Care of Your Back While You Pack

Author:

Publish Date:

Last Modified Date:

Category: Pro Packing Guides

Tags: Tags: , , , , , , , , , , ,

This month’s packing tip has nothing to do with protecting our customer’s belongings. Instead, we’re going to talk about protecting ourselves.

As movers, we know well the importance of lifting and carrying stuff the right way so we don’t kill our backs. Packing rarely involves heavy lifting, but spending a few hours in someone’s kitchen can still end up being a pain in the lower back (yes and the neck but that’s different). Here are three steps for avoiding that physical strain.

First, clear a space on a table or a counter where you can set and wrap your customer’s dishes, bowls, glasses and everything else waiting in those cupboards and cabinets. You want to be standing upright, not hunched over a coffee table or kneeling on the floor. (If you are packing and moving your customer on the same day, make sure your team leaves that kitchen table until the end, or at least until you’re done packing in there.)

Second, place the box on top of something, so you don’t have to bend over so far as you fill it with bundle after bundle of wrapped dishes and coffee mugs. Wrapping and packing an entire kitchen can involve a hundred or two hundred separate items. Setting your dish pack on a chair or a low (and adequately wide) stool, or even a couple of (extremely well-packed) book boxes, can save you from a lot of unnecessary back-bending.

As a bonus, your box will be easier to lift once it’s all packed.

Third, simply apply these simple tips to every other box in every other room you pack. Even when you’re packing light stuff – clothes, bedding, shoes and small picture frames – the less you have to bend over the better and stronger you’ll be throughout the day.

It may seem like not a huge step to pack boxes in this elevated way, but trust me – the energy saved absolutely adds up throughout the day, let alone throughout a career.

The Pros Pack Entire Homes With Just 5 Things

Author:

Publish Date:

Last Modified Date:

Category: How To Pack, Moving Boxes & Supplies

Tags: Tags: , , , , , , , , , , , , , , , , , , , , , , , , ,

We are sorry to report – in case you didn’t already know – that packing your entire home into moving boxes is no small task. You’ll be happy to hear, however, that the list of packing supplies you need is short.

But while the list is short, there’s a catch; You’ll need a lot more of each thing than you think.

(more…)

A Jumbo Guide to Moving Really Big Stuff

Author:

Publish Date:

Last Modified Date:

Category: Pro Packing Guides

Tags: Tags: , , , , , , , , , , , , , , ,

Do any of you guys have scars that remind you of something? Something crazy you did? Some incredible, life-affirming moment you experienced?

I do. Sort of. I have a scar on my chin that reminds me of a refrigerator, a hand truck and a set of stairs.

When it comes to moving heavy appliances, some things are not so obvious – until of course you get hit in the chin. This month we go over a few things to know before you start wrangling with that big shiny fridge.

(more…)

×

I'm Moving

Moving? Thinking about moving? Whether your move is off in the distance or you already have one foot out the door, you'll learn about everything you should expect through our useful how-to's, cool articles and much more. It's all specially curated for you in our "I'm Moving" section.
Explore
×

I'm a Mover

For rookies or veterans alike, our "I'm a Mover" section is filled with extensive industry news, crucial protips and in-depth guides written by industry professionals. Sharing our decade of moving knowledge is just one way we help keep our professional movers at the top of their game.
Explore