We Try out the App That Digitally Arranges Your Furniture With Just a Picture

Author:

Publish Date:

Last Modified Date:

Category: Home Decorating

Tags: Tags: , , , , , , , , , , , , , , , , , ,

As DIY’ers and decorators, there’s nothing we love more than an empty room just begging to be styled and filled with beautiful pieces. But some rooms can be a little tricky. Do you put the couch over here? Or maybe you need a small table over there? It can be hard to visualize how pieces will work in a space, especially when you’re starting with a blank canvas. Plus, if you’re buying a few new pieces of furniture, it can be difficult to tell if they’ll really fit and work well in the space. No one wants to purchase a dresser only to find out that it’s actually way too big or small.

An Online Tool to Help You Arrange Furniture

Luckily, there’s a new tool out there that takes all of the guesswork out of the arranging furniture process. It’s called Modsy, and this growing service is changing the game for decorators… but also for new homeowners trying to decide on new furniture or anyone else who has a room that needs some TLC.

Techcrunch.com

Essentially, you can “try on” certain layouts in your specific space in order to visualize how it will work in that room before you move things around, or before you buy anything new. The service costs about $70 (which isn’t exactly free), but in the long run, it may help you avoid design regret (like when you buy a piece that simply doesn’t work for the room), leaving you with a space that is much more functional for your home.

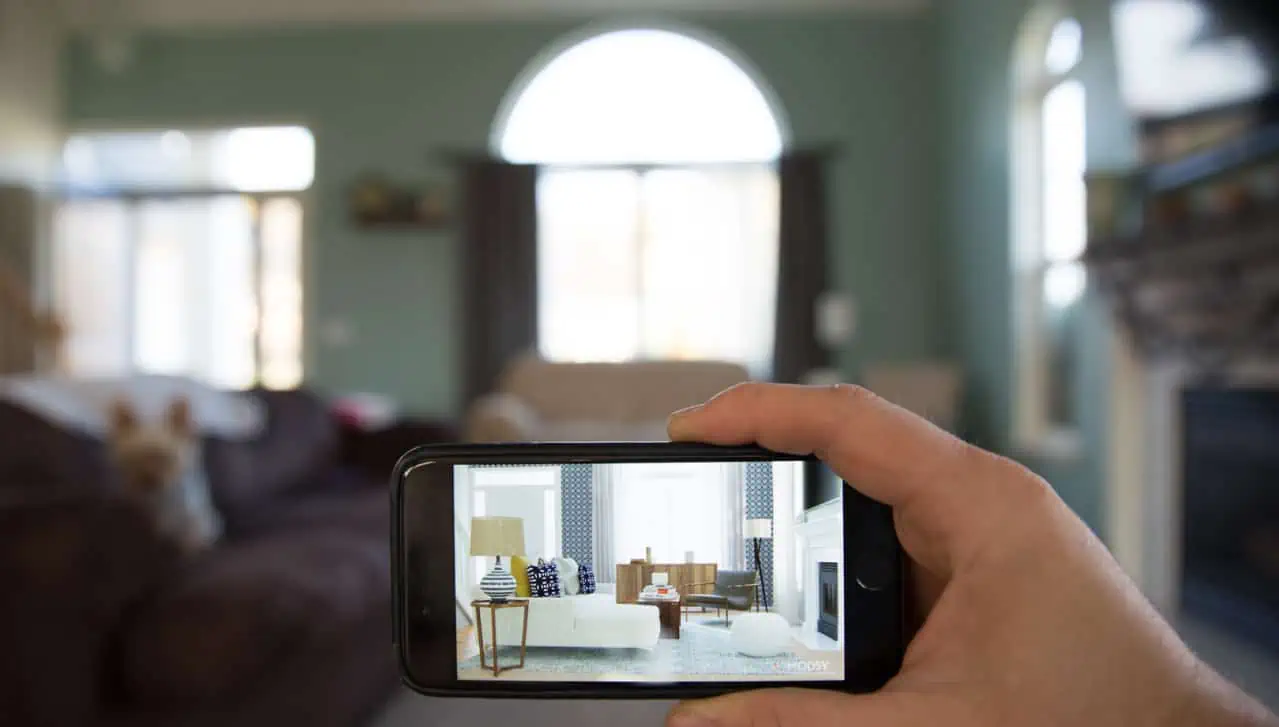
Here’s how it works: You send over photos of your space, some measurements and details on both your vision and style. They then send over a professional 3D rendering with a 360-degree visualization tool.

Real Life Spaces Using Modsy

When we first heard of Modsy, we weren’t quite sold. How could it actually work? But then we saw that a few of our friends in the blogosphere used this service when working on room makeovers. We could hardly believe these photos…

Photo by Bower Power Blog; 3D Rendering of Bedroom via Modsy

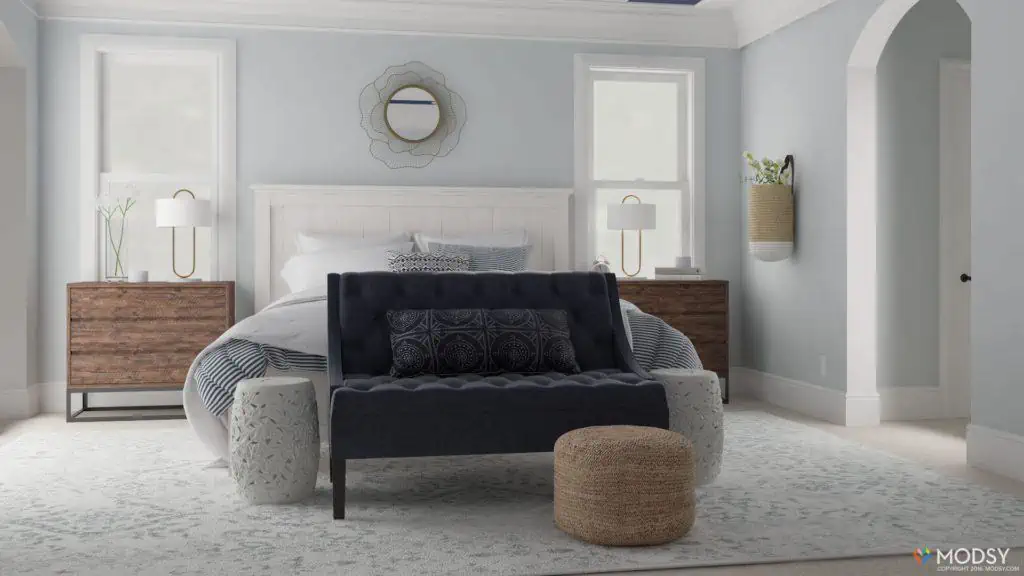
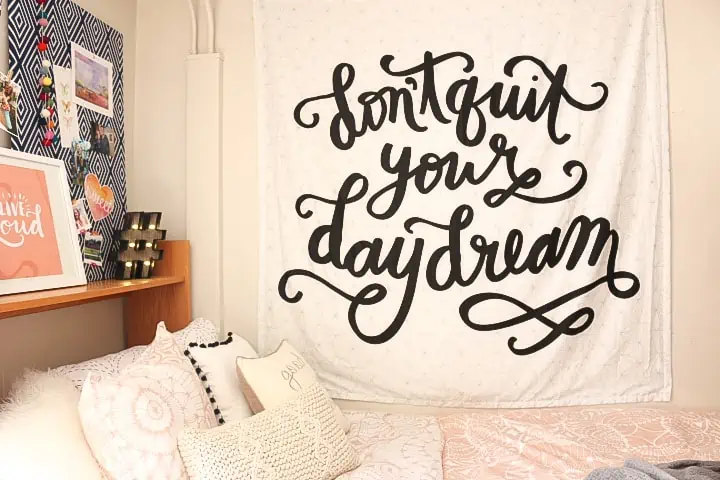
Above is the 3D rendering of our friend Katie Bower’s bedroom. She used Modsy to visualize the furniture setup in her bedroom before buying all of the pieces.

Here’s what that space now looks like in real life…

Photo by Bower Power Blog

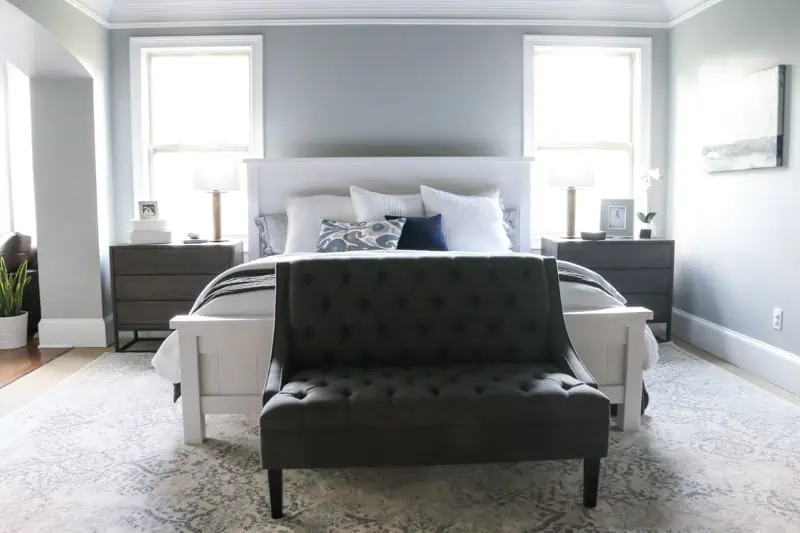
Pretty crazy, right?! Here’s another one.

Photo by Chris Loves Julia; 3D Rendering of Room via Modsy

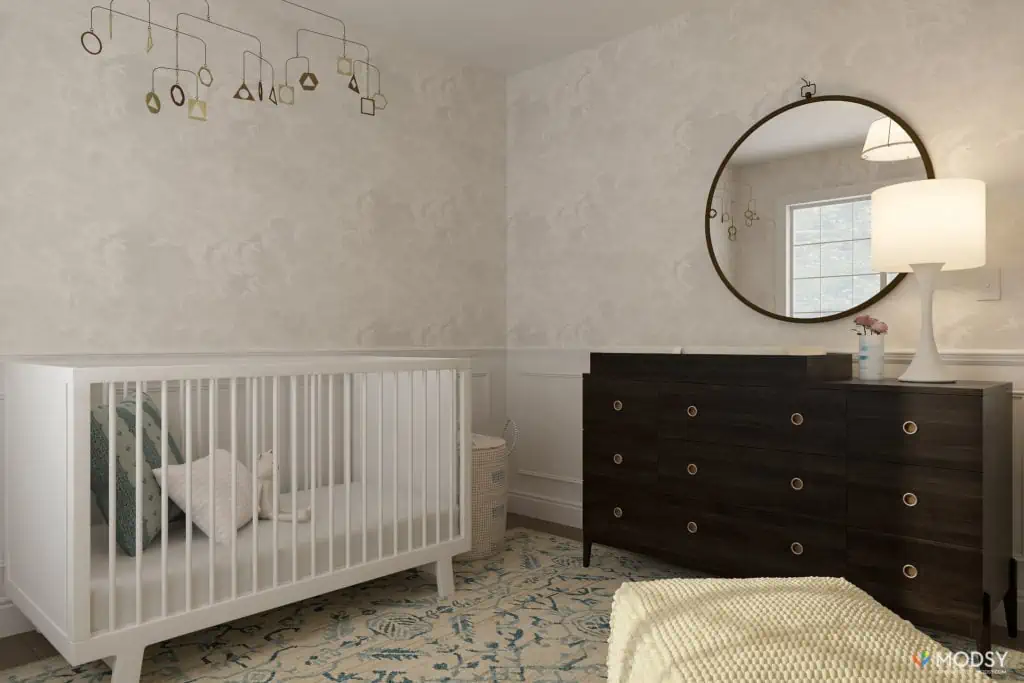
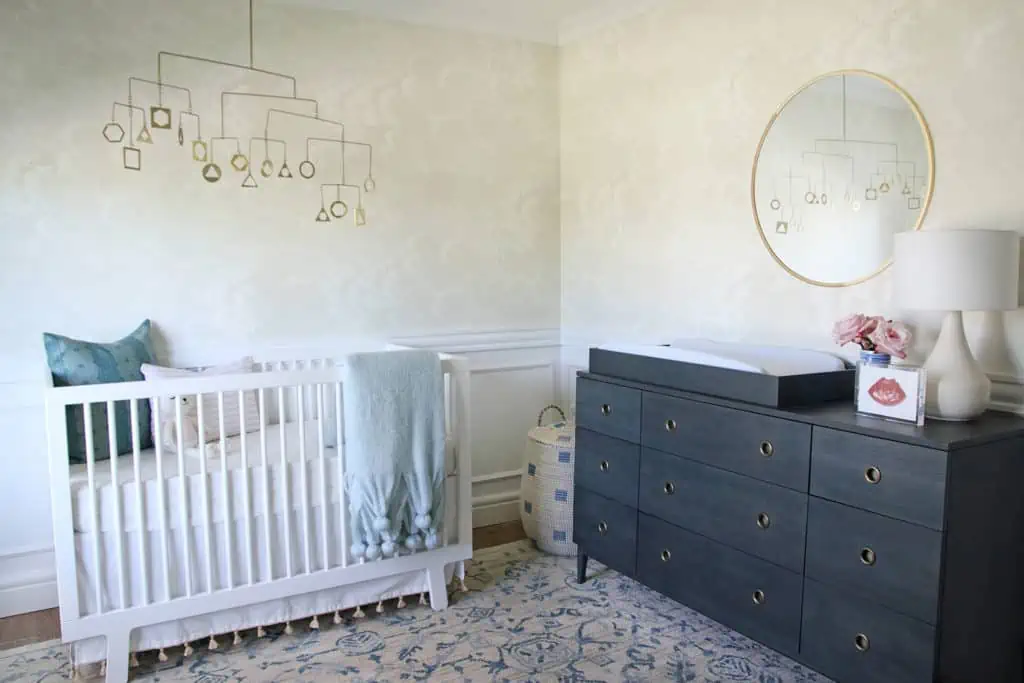
Above is the 3D rendering from Chris Loves Julia’s nursery. Below is how the actual room turned out.

Photo by Chris Loves Julia

Let’s Give It a Try

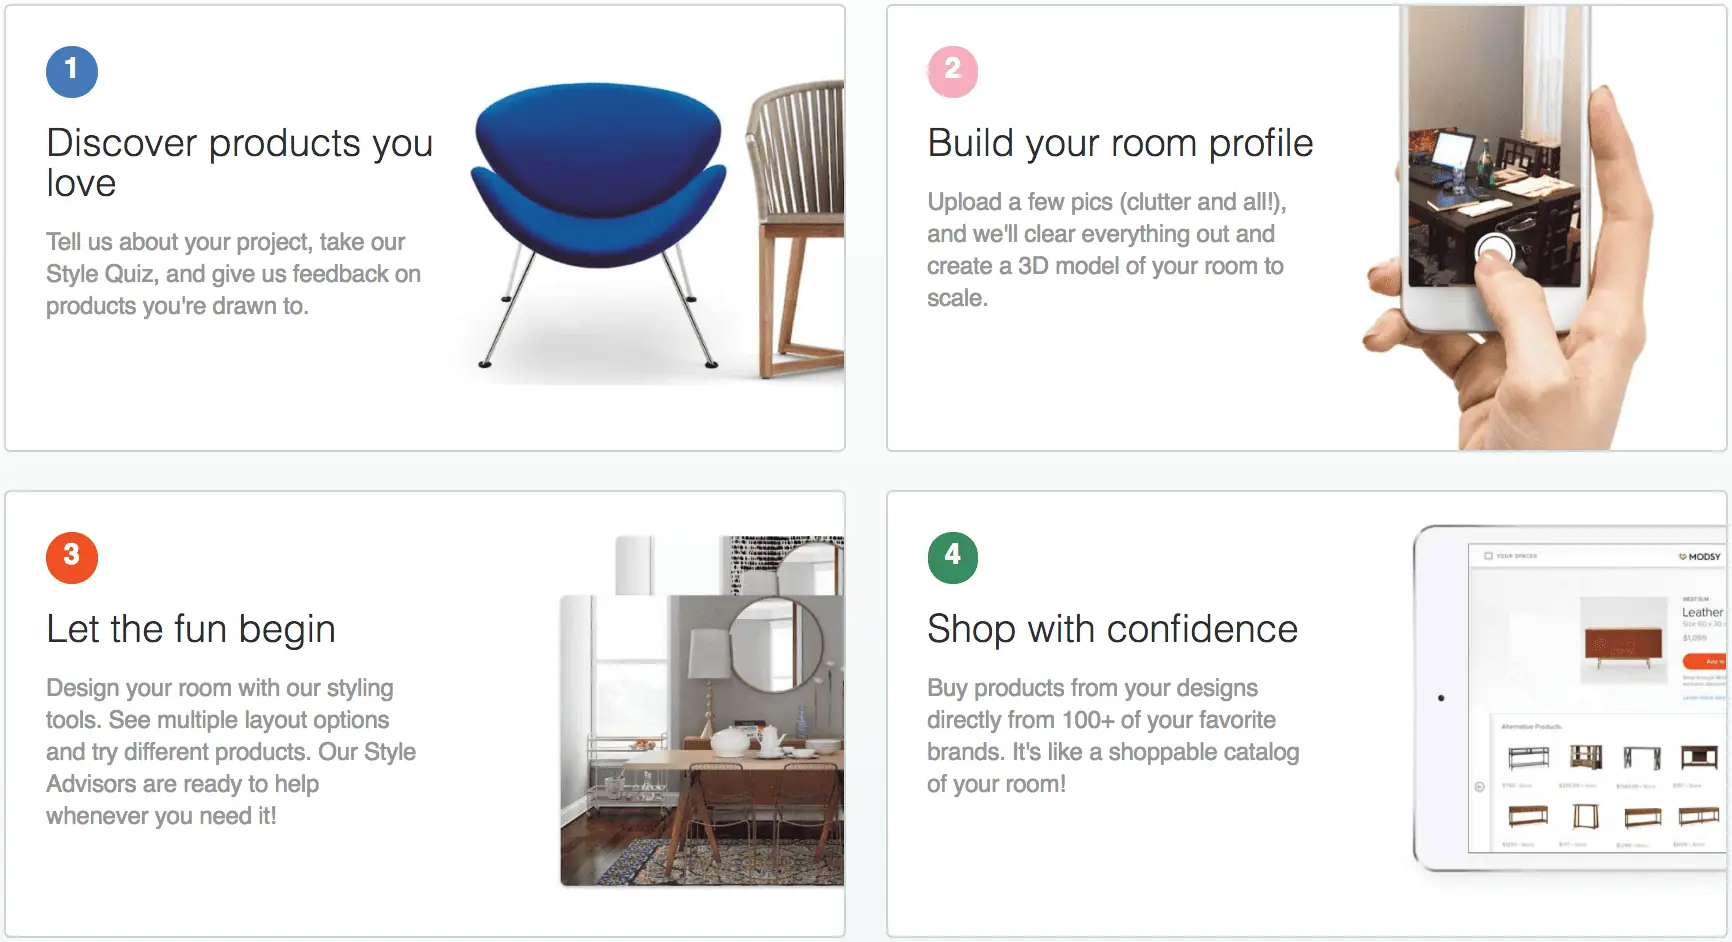
We’re currently working on a living room makeover for a friend, and their tricky living room layout had us questioning where exactly we should place all of the furniture in the space. So we figured this was the perfect time to give Modsy a try and find the most functional livingroom layout. Here is how the website lays out their service:

After setting up an account on our phones, we sent in photos and measurements and they then gave us a blank room to review. 

Because we weren’t totally sure on the style we wanted for the space, we had them give us two design options. One was a bit more glam and feminine, the other a bit more contemporary. This was their interpretations:

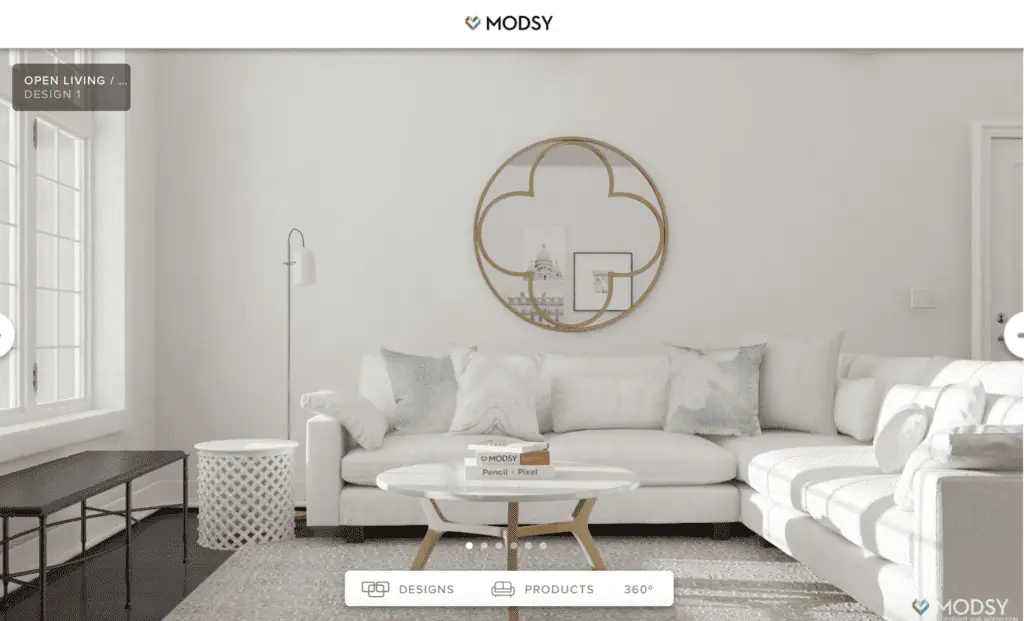
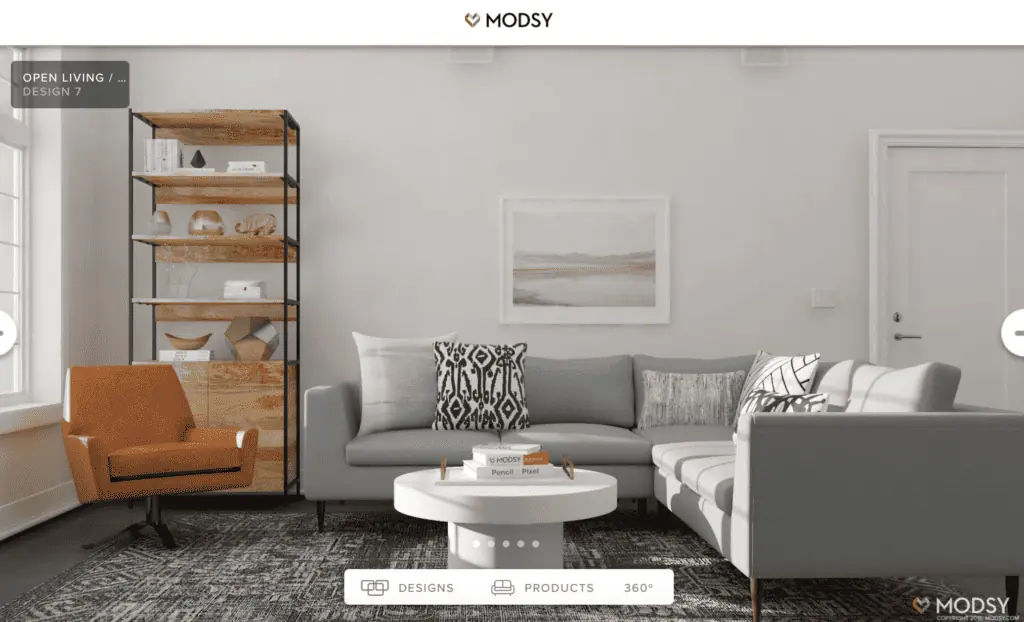
We ended up loving the second design, and realized how easily a sectional could fit in the space! We also didn’t realize we would have enough room to add a bookshelf next to the couch, and this helped us view the space in a whole new light. 

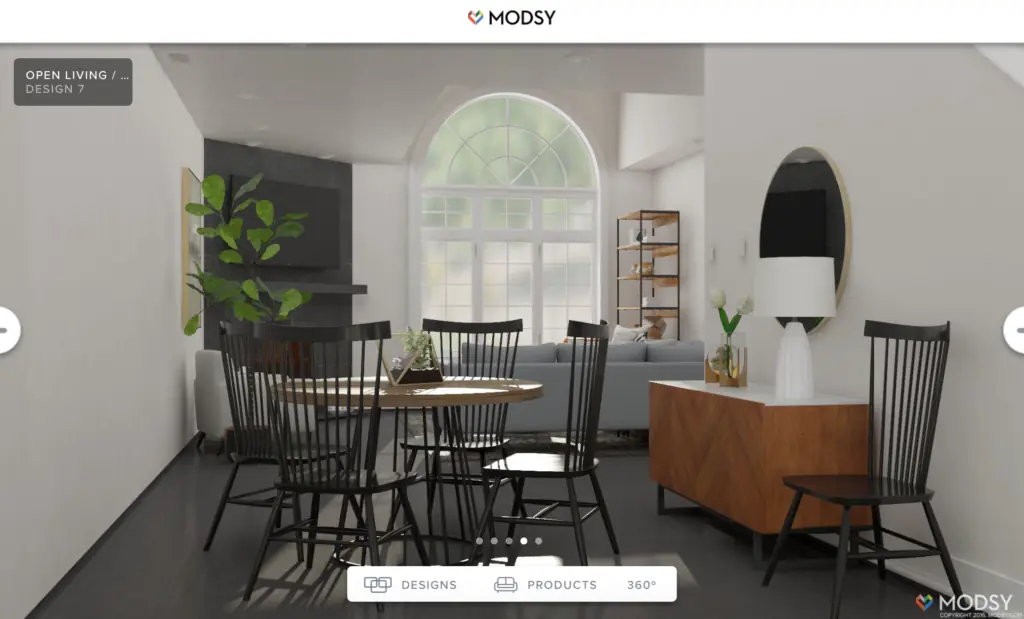
This was another rendering from a different angle. We were able to plug-in a few pieces that the homeowners already own to make sure they could continue to work in the room. 

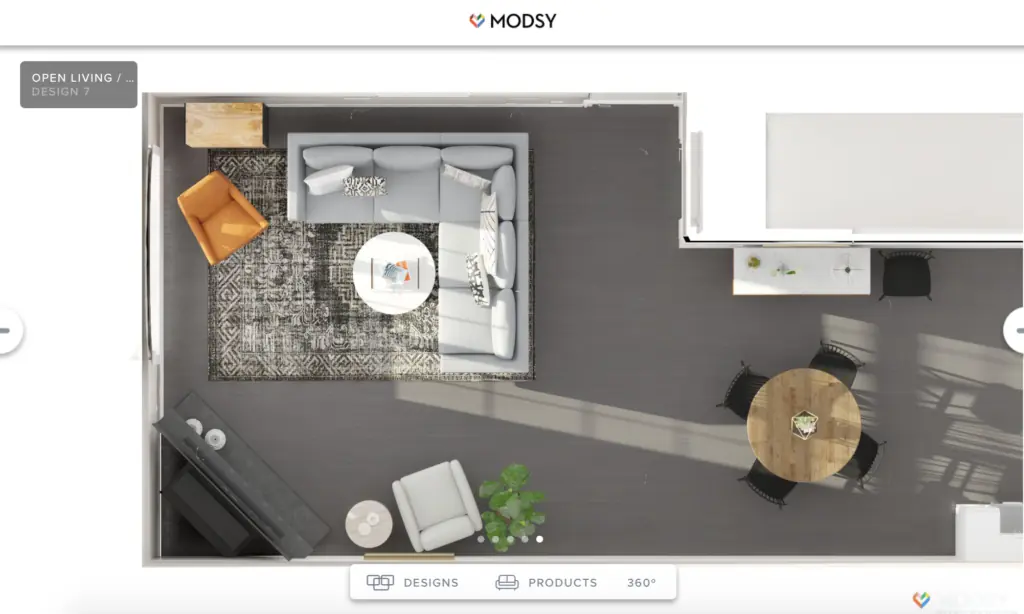
In the end, we were left with a functional layout that we’re confident will work as we help to design this room. It actually worked! While we still have a-ways to go with their space, we are both so excited to get to work and bring this vision board to life.

You Too Can Master the Art of Arranging Furniture

As two gals who can’t seem to get enough of home design and decor, we were incredibly impressed with this visualization tool. Here are our takeaways:

Pros:

  • Surprisingly easy to use
  • Slick, modern app design
  • 3D renderings are professionally done and easy to grasp (and amazing to look at!)

Cons:

  • It ain’t cheap. $70 per rendering (and $199 to include an adviser!)
  • It takes a little over a week to get renders and operates within business hours, so plan ahead
  • Recommended furniture through Modsy store can be great, but also a bit sales-y

If you’re struggling to decorate your new home, we hope you’ll give this tool a try. Hopefully, it will help you determine the best layout for the rooms throughout your home while providing you with design inspiration that is specific to your taste. Plus, you may even gain some confidence when it comes time to buy new pieces of furniture in your space, because you can try before you buy! Happy decorating!

How 3 Major Moving Companies Got to Where They Are Today

Author:

Publish Date:

Last Modified Date:

Category: Mover Spotlight

Tags: Tags: , , , , , , , , , , , , , ,

When you think about success, what comes to mind? “Money,” a lot of us might say. But there are other definitions: “Working for myself.” “Being my own boss.” “Freedom to make my own decisions.”

However any of us defines it, it’s something we can agree we all want.

So how do you get there? Let’s take a look at three individuals in the moving field who each found success traveling different roads. They all had different backgrounds, different circumstances and different outcomes. But in all of them, there’s some wisdom to consider. You might have heard their names. You’ve definitely heard of their companies. They were business owners just like many of you. Now, we get to hear their stories.

Ryder – From Rags to Riches (and Back to Rags)

Ever been in a position where you’re doing most of the work and the guy above you is doing less, but making more? That’s how a guy named James Ryder felt way back in 1935.

Ryder was making a quarter an hour loading blocks of concrete onto trucks in the Miami, FL heat. The guys driving those trucks, however, were making 40% more – a whopping 35 cents per hour! – and they weren’t working nearly as hard.

This motivated young James something fierce, inspiring him to borrow a hundred dollars to add to the thirty bucks he’d saved up and buy a used Model A truck. Simply owning a truck, however, was not the end game, and in 1937 he started a truck leasing business called Ryder System Inc.

Inside of ten years, Ryder the company was taking in $1.5 million a year. Ryder the man, however, was still taking home less than a dollar an hour. His fortunes would improve drastically with time, and by 1960, his personal stake in his company had risen to $11 million (that’s over $50 million in today’s terms).

How did he do it?

Besides plowing ahead for years despite teetering on the edge of financial ruin, his energy level played a huge part in his success. Even after all the wild business growth, Ryder would travel around the country visiting his company’s service locations and, according to one person’s account, “would kiss every secretary and jump into the pit under trucks that were in for repairs wearing a $500 suit and shake hands with the mechanics, saying ‘Hi, I’m Jim. What’s your name?’”

Mr. Ryder seems like the kind of guy who can get along with anyone. Yet, that turned out not to be the case.

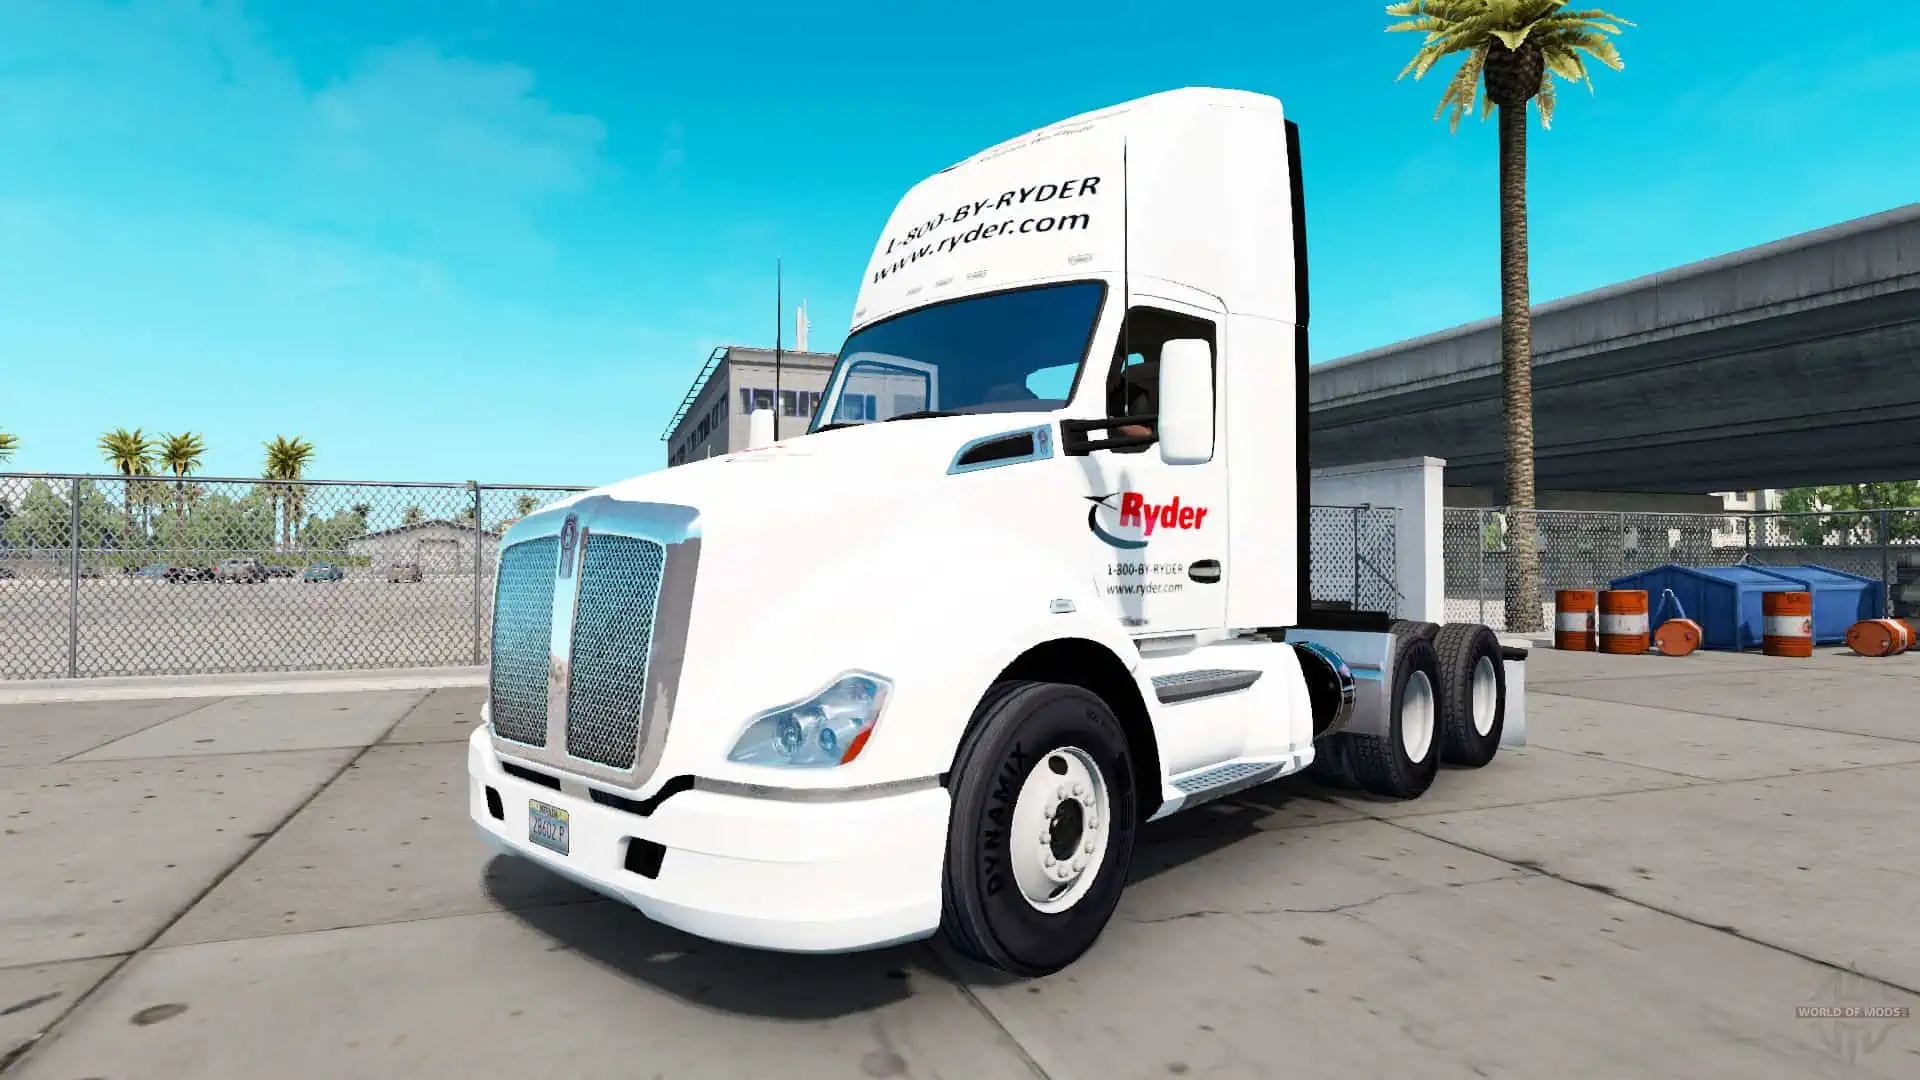
In 1978, upset by how his new company president operated the business, James Ryder quit his own multi-million-dollar baby and dove into a new transportation venture called Jartran. This would be the first in a series of failed business endeavors, and Ryder would eventually find himself back where he started: broke.

James Ryder passed away in 1997. The following year, Budget acquired Ryder, and in 2002 began retiring the Ryder name.

We might say that Mr. Ryder’s initial success was due in part to his personable approach to running his business. Rubbing shoulders with his mechanics. Giving bear hugs to the staff in every Ryder office he walked into.

We might also say this may not necessarily be the best approach.

If the normally-invisible boss of a multi-million-dollar company walks into a local branch office and starts shaking hands and passing around hugs, those “regular” employees, who may have ever thought they’d meet the man behind the name on their trucks and signs and buildings, would likely feel honored. Special. Appreciated.

But as an operations manager for a national van line agency, I learned (a little too slowly) that being buddy-buddy with everyone in the office can backfire. There is a balance, and it mandates that you be your employees’ boss first before you are also friends. Establish a relationship based on respect. Having roles and expectations in place helps keep the machine well oiled.

That is, unless you’ve got a really firm handshake.

U-Haul – Taking a Chance and Painting it Orange

In 1945 and fresh out of the U.S. Navy, Leonard “Sam” Shoen decided to move with his wife from Los Angeles to Portland. To their disbelief and dismay, they couldn’t find anyone who would rent them a trailer for the one-way trip.

Sam Shoen saw that he wasn’t the only one in the predicament, and recognized the potential in creating a company that would allow people to relocate on their own, without paying the price of what full-service movers were charging around that time.

Before the year was out, Shoen established a trailer rental business called U-Haul. He painted his trailers black. He rented them out to his customers for the grand sum of two bucks a day.

Shoen rolled the dice with his business early on – though maybe in his mind it wasn’t such a gamble. Essentially, he told his customers that when they were done with the trailer, they should just find a nearby service station and drop off the trailer – which had an information packet inside for the service station owner. In this way, he was inviting complete strangers to become a dealer for U-Haul.

Shoen very well could have lost his trailers to a bunch of unscrupulous strangers. Instead, his gamble worked, and by 1954 he had over one thousand dealers spread out across the country.

And what about painting those trailers black? What happened with that?

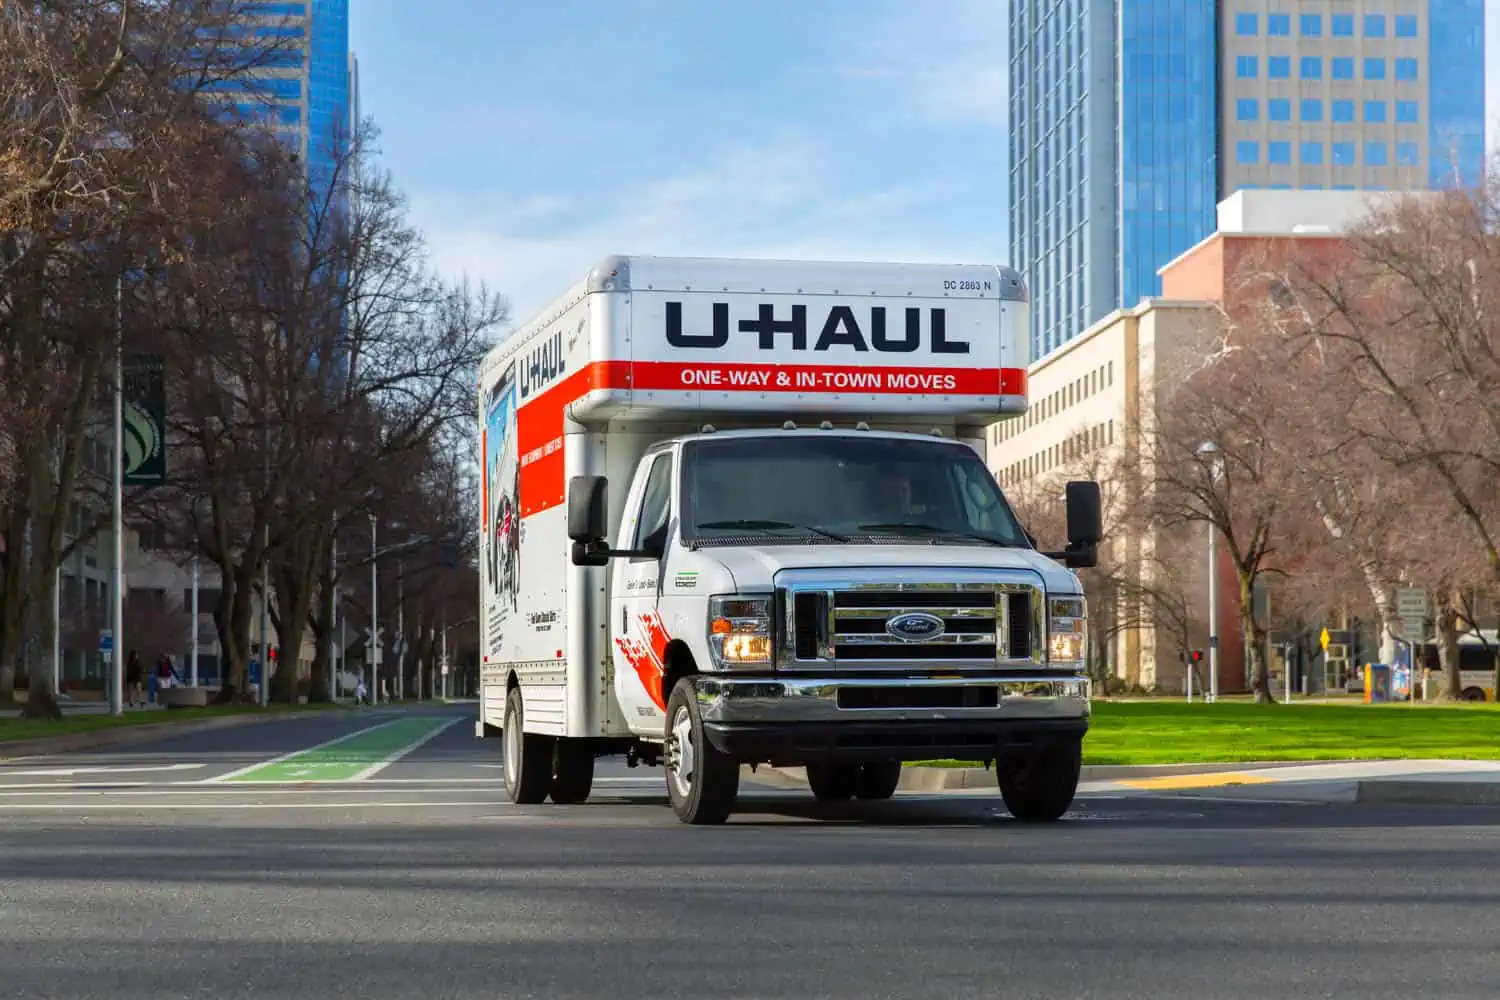
You might guess that Shoen switched to orange to make his trailers more noticeable. And you would be correct. But this was not a marketing or advertising ploy. Early on, Shoen was turning through an intersection when he was hit by an oncoming vehicle. The driver claimed he couldn’t see the black trailer because it was… well, black. Whether this was true or not, Shoen decided to paint his trailers orange and white – similar to highway barricades – to make them more visible for safety’s sake. The added marketing benefit was likely just coincidental.

It’s interesting to note that back in the beginning, by entrusting his trailers to strangers, most of them in a completely different part of the country, Shoen was doing what customers normally do: that is, he was placing his possessions in the hands of people he didn’t even know.

If Shoen hadn’t taken that chance, U-Haul may have never gotten off the ground.

Of course, simply by starting a business, we’re all taking a chance. But business growth and success virtually require some amount of risk! What moves have you made, what chances have you taken, in the interests of building your own business? Have you ever passed on something that seemed too risky? Let us know. You’re probably in good company.

Penske – Love Breeds Success, Breeds More Success

Roger Penske was a success on wheels long before he founded the Penske Truck Leasing Company. As a teenager, he bought, repaired and resold used cars. In his 20s, he won four consecutive Sports Car Club of America championships, took home three President’s Cups, and in 1962 was Sports Illustrated’s Driver of the Year. After retiring from racing at the ripe old age of 28, Penske developed his own race team and started winning so many races in so many fields it hardly seemed fair.

Then in December of 1969, Penske bought a car and light truck rental and leasing business comprised of eastern Pennsylvania locations. 12 years down the road, Penske’s venture had grown to encompass 33 facilities generating yearly sales in excess of $40 million.

Penske Truck Leasing now manages a quarter of a million vehicles through a network of approximately 3,000 service and rental locations, giving Roger Penske a net worth of around $1.5 billion.

AP News

Not bad for a guy who started as a teenager fixing up and selling cars.

If it isn’t obvious, the common thread throughout Penske’s life has been his love of cars. Which gives further credence to the old saying “Do what you love to do.”

We’re going to go out on a limb here and say we’re pretty sure no one carries furniture up and down stairs because of the sheer love of it. But we are quite confident that there is something about running a moving company – and a moving labor company – that everyone in the HireAHelper community loves. There have got to be all sorts of reasons you men and women do what you do. There may be as many reasons as there are you.

How do we know there’s something each of us loves about this business? Our customers – your customers – tell us every day. Will any of us ever make Forbes’s list of billionaires? Wouldn’t that be nice! We will, however, settle for a few millionaires.

But seriously, while money is one way to measure success, it isn’t the only determinant. Satisfied customers. Awesome employees. Pride in the progress we make.

However you measure it – and however you find it – there’s nothing better than waking up one day, after years of firm handshakes, risks and love, and saying to yourself “Yeah, I made it.”

DIY Tricks to Make Sure You Have the Best Dorm Room

Author:

Publish Date:

Last Modified Date:

Category: College Moves

Tags: Tags: , , , , , , , , , , , , , , , , , , , , , ,

We recently shared a list of the essentials (and not so essential items) to bring with you to college. Today, we’re taking things up a notch with dorm room ideas that really personalize your room and make it one-of-a-kind.  When every dorm room looks almost identical, it may seem impossible to really put your personal touch on this space. But these DIY room decor ideas will make your dorm the best one in your hall!

Make a Bulletin Board Out of an Old Shutter

Dorm Room Ideas: DIY Room Decor - Shutter Bulletin Board

Why buy a generic magnet or bulletin board from a big box store when you can create a unique piece instead? We found an old shutter from Habitat for Humanity Restore and spray painted half of it white, then the other half teal. Then we bought some clothes pins to tack up cute photographs and notes.

Hang this on your dorm room wall or simply lean it on top of a dresser for a one-of-a-kind picture board that is bound to stand out to anyone who walks by your door.

Cover the Ugly Beige Walls With a Tapestry
Dorm Room Ideas: DIY Room Decor - Cover those Dorm Walls

So many dorm room walls are a yucky beigey-yellow color. Not the most flattering color in the world, and it’s certainly not something you can change (no painting allowed!). We suggest covering those lackluster walls with a giant wall tapestry. You can find some great ones online (we love this one!) and you can use command hooks to hang it from the ceiling. The best part is a large chunk of your wall will be covered and you won’t have to stare at anything boring all year-long.

Use Washi Tape to Jazz up Your Door

Dorm Room Ideas: DIY Room Decor - Door Designs
crabandfish.blogspot.com

Washi Tape is the stuff of legend. The fact that it leaves minimal residue means it’s perfect for designs, lettering or anything else creative you can put your mind to. Geometric shapes like the one pictured are always attention grabbers, but sideways lettering or origami shapes look great too. For best results, grab a few different colors from the store.

You might have to ask your RA first before you start, or if you’re like us, ask for forgiveness instead – door designs are so cool and memorable once you see them that it’s hard to say no!

Marker Up a Personal Doormat for the HallwayDorm Room Ideas: DIY Room Decor - DIY Personalized Doormat

This is a project we love for homes, apartments and yes.. .even dorm rooms! Take a plain doormat and carefully add a personalized message using a sharpie marker. Here are some ideas to get your creative juices flowing: Write “Dorm Sweet Dorm”, write your room number or even write the initials for you and your roomie. Get creative with this simple DIY project and you’ll be proud to put this doormat in the hallway for all of your guests to marvel over!
Here’s the full tutorial for this one.

Play Scrabble on Your Mini FridgeDorm Room Ideas: DIY Room Decor - Scrabble on the Mini Fridge

This DIY room decor project is one of our favorite dorm room ideas because it’s so budget-friendly. Simply take some small ceramic tiles (you can find them at a Habitat for Humanity Restore or your local home improvement store) and turn them into Scrabble tiles. Use a ceramic paint pen to write the letters and numbers directly onto the tile, and then glue a magnet on the back. Create a bunch of these for your mini fridge and you’ll have fun all semester playing large games of Scrabble right in your dorm room. Here’s the full tutorial for this easy DIY project.

Fake It Til You Make It with a Succulent PlanterDorm Room Ideas: DIY Room Decor - Succulent Planter

We truly believe every room looks better with a little greenery in it. But we get it… there’s probably no way you can keep any real plants alive and thriving in your tiny dorm room. Instead, use the ultimate “plant-hack”: faux succulent planter! Pick up some fake succulents (which look pretty real these days), a clear vase and some pebbles so you can create this succulent planter in minutes! Check out the full, simple tutorial for this one.
Dorm Room Ideas: DIY Room Decor
It’s the personal touches that make a space extra special. Stand out at college this year with some of these DIY projects and crafty dorm room ideas!

How to Install a Smart Thermostat in 8 Easy Steps

Author:

Publish Date:

Last Modified Date:

Category: Home Improvement

Tags: Tags: , , , , , , , , , , , , , , , , , , , , , , , , , , , , ,

Adding smart technology into your home is not only a great way to add convenience and value, but it’s also a great way to stay energy-efficient. Take the awesome smart thermostat for example… this gadget can be a high expense up front, but it will end up saving you big money in the long run. Some energy companies are even offering their customers $100+ in refunds if they show proof that they installed a smart thermostat!

Because this technology is a win-win-win in our playbook, we decided to show you how easy it is to make your home smarter with the smart thermostat. And when we say easy, we really mean it!  This entire project can be broken down into eight steps that shouldn’t take you longer than 30 minutes.

We installed the Nest for this tutorial, but there are a lot of awesome smart thermostats on the market. Do your research and find one that works best for you and your home.

What You Need

  • The Nest (or most any smart thermostat device – the product itself provides almost everything you need, including a screwdriver, screws, and a level)
  • Drill (optional)
  • Anchors (optional)
  • Touch-up paint, brush, painter’s tape (optional)

1. Turn off the Power

No matter how experienced you are with DIY projects, we highly recommend turning off the power to this system before moving on to the next steps. This is the safest way to install the smart technology and the only way we advise you to complete this installation. You will also want to make sure you have enough daylight left so you can see the project without the lights on.

2. Open up the Old Thermostat

After the electricity is off, we are ready to get to the fun part! Pop off the face of your current unit, which may require unscrewing a screw, depending on your unit. Ours popped right off, no screwdriver necessary. Above is what most thermostats look like without the cover, though yours may vary slightly. What matters most are the wires.

3. Label the Wires

Before you start removing the labels from your old thermostat, we need to label them so that we are fully prepared for the last few steps of this project. The Nest comes with these convenient stickers (right in the manual!) so you can keep your labels organized. If you don’t have stickers, just use whatever you can to label all of the wires. We only had four wires, but you may have more, so make sure you label everything! You’ll thank yourself later… we promise!

4. Take the Old Thermostat off the Wall

After the wires are clearly labeled, it’s time to unscrew the old thermostat and carefully pluck it off the wall. Use your screwdriver and it should come off fairly easily. Make sure that you’re not taking the wires (or stickers!) with you because you’ll need both of them soon.

5. Hang the New Thermostat

The Nest provides a level within the product (genius!), which makes this process extremely easy.  The level makes it simple to identify when the device is evenly placed on the wall, and that’s when you can make a mark so you later know where to drill. If your smart device has no internal level, don’t worry! It’s a pretty simple process to use an external level to make sure you’re screwing it on the wall correctly.

After you mark the wall, add your trim plate (if necessary – it’s the plastic encasing that goes around a lot of these smart devices) and hang the Nest using the markings you made to guide you. You may need to use an anchor for extra reinforcement into your wall during this step, which does not always come with the kit.

6. Attach the Wires to the New Thermostat

This is when those stickers come in handy. Not only is the technology itself smart, the team that created this kit may be even smarter because these stickers are genius! Simply match each wire’s label to the label on the Nest (or the labels you made yourself), then pop them firmly into place. Make sure the little box the wire goes into pushes down snugly, because that is how you will know it is tight, secure and connected.

7. Turn Electricity Back on 

If the Nest lights up a few moments after you turn the power back on, you have successfully completed the installation. If not, turn the electricity off and recheck the colored wires to make sure they’re both in the right spots and pushed down correctly.

Your little gadget will immediately start prompting you through a series of steps that will guide you to align this new technology with your home.

8. Control Your Heat and A/C from Your Cell Phone

This part is where the “smart” technology really comes in! Once you connect the Nest with your home’s wifi, you can monitor it from anywhere you have a wifi connection. That means you can click on the heat from work, turn on the air before you get back from vacation, or even change the temperature in the house while still laying in bed (that last one is probably our favorite!). If that’s not smart technology, we just don’t know what is.

So do you think you can tackle this project and make your home a little smarter, all while saving money and energy along the way? We’re confident that installing a smart thermostat is so simple that you now have all the steps you need to check this project off of your to-do list… maybe as soon as this weekend.

A Trash Bag Is by Far the Most Useful Movehack Item. Here’s Why

Author:

Publish Date:

Last Modified Date:

Category: How To Pack

Tags: Tags: , , , , , , , , , , , , , , , , , , , ,

When you’re in the midst of a move, you may find yourself running to the store every other day to pick up supplies. It may seem like you can never have enough boxes, tape and packing paper, but there is another item you should add to your essentials list… trash bags!

This versatile item can be used in so many ways to help you move. Let’s review all of these trash bag hacks.

They’re Essential for Hanging Clothes

Instead of purchasing wardrobe boxes for your move, we suggest keeping your clothes on their hangers and protecting them with trash bags. All you have to do is take a stack of clothes off the rack and bring a trash bag from the bottom of the clothing up towards the hanger. Then, use the drawstring on your trash bag and tie it tight around the hanger. This will ensure that the bag doesn’t come off during transport. It’s the perfect garment bag hack! Bonus…buy those scented trash bags so your clothes smell fresh when you get to your new home!

Make a Simple Donation Section

Trash bags make it super easy to corral and easily identify all of the items you’re planning to donate. This is especially helpful when it comes time to clean out that stuffed wardrobe of yours! We suggest that you keep a trash bag in your closet in the months leading up to your move.  As you try on items that you no longer love, toss them into the this conveniently located trash bag. Little by little, the bags in your closets will start to fill up with donation items, and you won’t have to spend an entire weekend purging out your closets! Trust us, you won’t want to move any other way.

Trust us, you won’t want to move any other way.

Transport Your Plants Without the Mess

Plants are a tricky one to move because no one wants dirt all over their vehicle – so grab that handy dandy trash bag of yours and place the bottom of the plant inside. This ensures that the dirt doesn’t get all over and you can easily move your greenery to your new space. If you can though, keep the top of your plant out so it still gets lots of fresh air!

Wrap Unusual Objects Easily

When packing, you’re bound to run into items that will make you scratch your head and say, “How the heck do I pack that up?!” (Lamp shades are one of them.) How can you make sure your shade doesn’t get dirty and gross on its ride to your new pad? Well, use a trash bag to cover those unusual objects and keep them safe!

If It’s Anything Other Than Sunny, You’ll Need a Ton of Them

If you’re worried about special items getting wet during your move, we suggest using a trash bag inside your cardboard box. Simply put your precious items in a trash bag (books, papers, throw pillows, etc) and then put that bag inside the box! That way it’s got double protection from the elements.

And You Can Throw Your Away Trash (Duh!)

Okay, of course, you’ll need trash bags for trash. And you’ll probably have a lot more than usual when you’re packing up your home to move. Stock up on a lot of garbage bags and you’ll be set for this, and everything else on this list for the duration of your move.

It’s official: you need to head to your nearest Costco before your move and find the largest roll of trash bags you can find. Trust us!

The Fundamentals of Buying and Selling on Craigslist

Author:

Publish Date:

Last Modified Date:

Category: Money Saving

Tags: Tags: , , , , , , , , , , , , , , , , , , , , , , ,

Craigslist. We used to hear that word and automatically think of seedy transactions and random items. But we’ve since come around and now use it on a regular basis to sell stuff we no longer want, as well as to find items that are one-of-a-kind for our homes!

(more…)

Inventory Sheets Legally Keep You From Losing Your Stuff on a Move. Here’s How to Use Them

Author:

Publish Date:

Last Modified Date:

Category: Moving Checklists & Planning

Tags: Tags: , , , , , , , , , , , , , , , , , ,

Among the many pieces of paperwork that a full-service mover will ask you to sign is a piece of paper called a “Household Goods Descriptive Inventory”. It’s more commonly known as an Inventory Sheet, and it’s basically an itemized list of everything the movers are transporting for you, from your furniture to your boxes to every last golf club, garden tool and garbage can in the shed.

We know, you hardly have time to search for a coffee filter, let alone make a list of every single thing you own. But why is writing all that stuff down so important before the movers haul it away?

You Probably Want Your Stuff Back

On move day, before the rest of the crew starts carrying your stuff out the door, the lead person or someone else who knows the drill will be going around putting numbered stickers on everything and writing a description of each item on the corresponding numbered line on the “IS”. So if you make one, you’ll get a copy of that inventory sheet – or more likely several inventory sheets – and when your stuff is delivered you’ll check off each numbered item as it comes off the truck. Armed with your inventory sheets, you can make sure everything is there.

Here’s what happens on a move with completed paperwork.

Example #1: Your movers have emptied the truck, everything is moved in and accounted for according to the inventories. You and the mover both sign each IS as documentation that all items have been received.

Example #2: Once the movers have emptied the truck, you find that one item on your inventory sheets has not been checked off. You and your movers search high and low for the item (because you both want to find it!), but it is nowhere to be found. Near the bottom of the IS you will write very clearly which item is missing, then you and the mover both sign off on the paperwork. (Make sure to keep a copy!) This is your documentation for filing a claim for your missing item.

Inventory Sheets Also Keep Track of the Condition of Your Stuff

Nobody wants to end up with a scratched and dinged up dining room table. Likewise, your movers don’t want to be held responsible for any scratches and dings that were already in that table. A special column on the inventory sheet, where your movers can record any existing damage, serves as a safeguard for both of you.

Example #1: If your dining room table is all scratched up upon delivery, but those scratches are documented on the inventory sheet as already existing when the movers came to move you, you cannot hold your mover falsely accountable.

Example #2: If there is any discrepancy between the condition of your dining room table as recorded on the IS with the condition of that table when it gets delivered, you’ll have the legal evidence and documentation you need to get reimbursed for the damage. Describe clearly the new damage in the “Remarks/Exceptions” box, then take pictures of the damage as further proof. (These pictures can also help your moving company determine whether to repair or replace the item.)

It’s Important to Prepare Ahead of Your Move

It’s hardly practical to follow your mover around to witness every notation they make on every inventory sheet and to check every box, every piece of furniture and every loose item in your garage. Go ahead and try if you like, but I bet you’ll drive both yourself and your mover crazy.

Instead, be proactive before the move. On the day of your relocation, check your furniture, your appliances, your bookcases and your bicycle. The actual paper itself is pretty straight forward: Just plainly denote any significant scratches, gouges and dings. Then point them out to your inventory taker. Seeing how you are paying attention, they’ll be inclined to do more of the same.

On packing: If you’re doing your own packing, keep track of how many boxes you have. Number them as you label them with what is inside. Make a rough list of your boxes if you like, noting what size or kind each box is. Such a list may not amount to a legal document but you can use it to make sure your mover has the same number of boxes listed on their official inventory sheets.

Finally, familiarize yourself with a typical IS, including the most common abbreviations movers use when taking inventory:

  • PBO – a box that was packed by the owner, i.e., you
  • CP – a box that was packed by the mover, i.e., the carrier
  • MCU – Mechanical Condition Unknown, to prevent false claims by the customer that something “was working before I moved.”

For a good example, take a good look at this standard Household Goods Descriptive Inventory form:

The inventory sheet is your best (and perhaps only) friend if something gets lost or damaged. Make sure you are well-acquainted – both before and after your mover fills it out – before it’s finally time to sign off at the bottom.

7 Things I Learned When Downsizing From a House in California to a Shoebox in NYC

Author:

Publish Date:

Last Modified Date:

Category: Organization

Tags: Tags: , , , , , , , , , , , , ,

Full disclosure: I’m a child of the suburbs. I grew up in sprawling northern California, where trips to used bookstores and the mall are practically pastimes. There wasn’t much spatial constraint when it came to accumulating things. If I picked up a tchotchke, there would definitely be a place for it somewhere in my home.

(more…)

The 5 (Surprising) Things I Learned About Fireplace Doors After Installing Them for a Living

Author:

Publish Date:

Last Modified Date:

Category: Home Improvement

Tags: Tags: , , , , , , , , , , ,

Your fireplace is the focal point of your room. As Director of Sales and Marketing for BrickAnew, I tell people this all the time. Stockings are hung from the mantle and graduation pictures are taken in front of it. But it’s also the dirtiest place in your house. One of the easiest ways to hide that mess is by adding glass doors to your fireplace.

(more…)

×

I'm Moving

Moving? Thinking about moving? Whether your move is off in the distance or you already have one foot out the door, you'll learn about everything you should expect through our useful how-to's, cool articles and much more. It's all specially curated for you in our "I'm Moving" section.
Explore
×

I'm a Mover

For rookies or veterans alike, our "I'm a Mover" section is filled with extensive industry news, crucial protips and in-depth guides written by industry professionals. Sharing our decade of moving knowledge is just one way we help keep our professional movers at the top of their game.
Explore