Your Kitchen Remodel: Cost Factors, Layout Ideas and How to Renovate

Author:

Publish Date:

Last Modified Date:

Category: Home Improvement

Tags: Tags: , , , , , , , , , , , , , ,

Going into a kitchen remodel is a very intimidating task, especially if you are not very familiar with the process. In spite of this, there are a lot of people blindly diving into this large-scale project every year … including me!

How many? According to the National Kitchen and Bath Association, over ten million Americans had their kitchens remodeled in 2015. And the numbers have only risen in the years since.

If you are one of those more than 10 million people tackling a kitchen remodel this year, this post is for you.

Everything To Expect When Remodeling A Kitchen

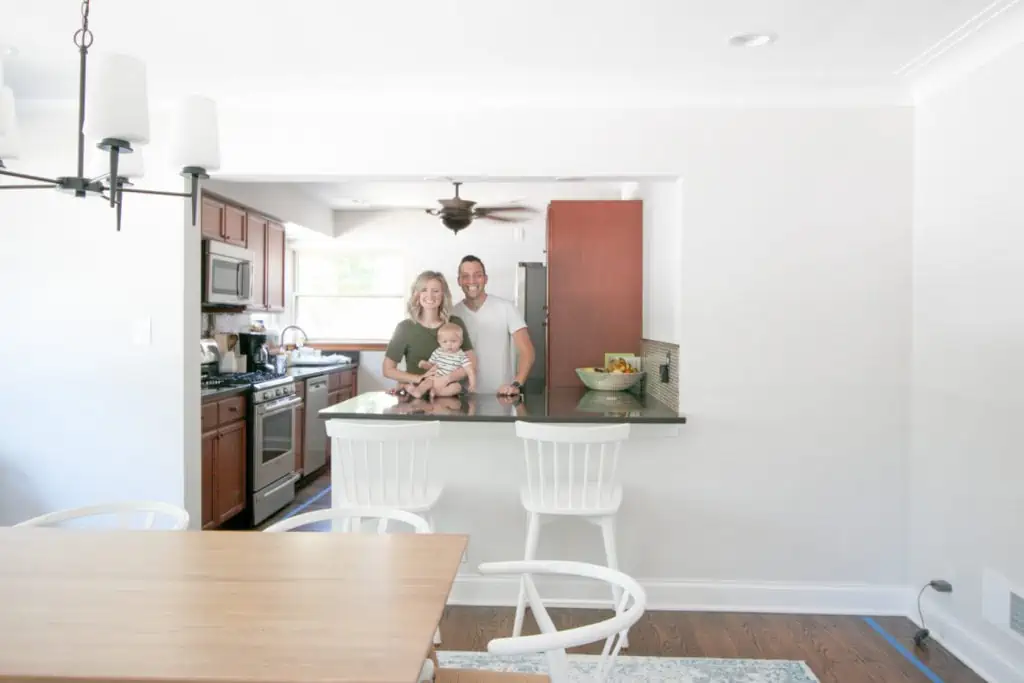
Kitchen Remodel

When I set out to get my kitchen remodeled, I honestly had no clue where to start. I had such a hard time finding info online that could map out the process for a rookie like me.

I vowed right then and there I would offer the internet everything I learned after I lived through that experience!

Take it from me, seeing the whole picture from the start is extremely helpful.

Most of the hard work (for anyone not physically putting together their kitchen infrastructure themselves) is at the front end of the process. Renovation is a lot like cooking: there’s a lot of prep.

Read over the complete process someone goes through before any work actually happens on a kitchen space:

  • Establish a budget
  • Find a designer to confirm new layout and provide accurate blueprints
  • Find and hire a contractor you trust and can afford
  • Identify where you want to buy cabinets and countertops
  • Research colors, textures, trends, materials, etc.
  • Order your cabinet and countertop and triple check to confirm your kitchen’s specs
  • Order anything else you may need (appliances, backsplash, light fixtures, faucets, sink, range hood, etc.)
  • Work with your contractor to establish a timeline
  • Keep track of all of all materials as they arrive
  • Clean out all of your old kitchen cabinets
  • Set up a temporary kitchen somewhere else in the house
  • Allow the contractors to do the heavy lifting, but be prepared to live in total chaos

Seems like a lot, huh? Don’t worry, here’s the step-by-step process.

Get Help Loading Your Container

See prices for movers by the hour – instantly.

Read real customer reviews.

Easily book your help online.


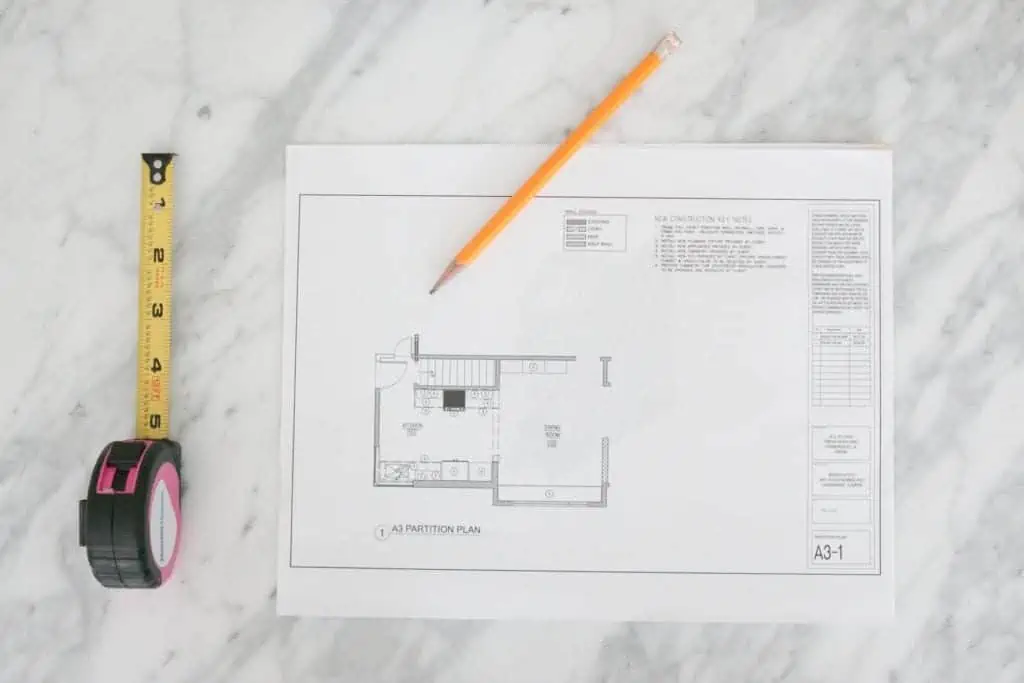
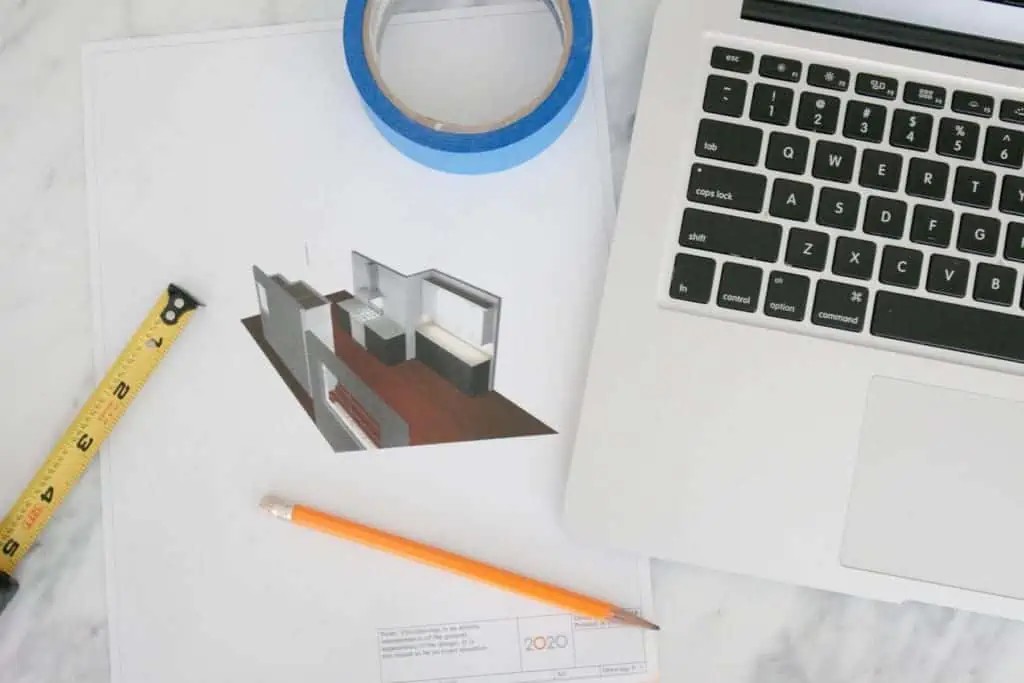
The first step is to create a layout, with or without a designer

Kitchen Remodel

If you plan on changing the layout your kitchen, the first thing you should do is hire a designer to work with you in identifying the best layout. Believe it or not, there’s a website for that. Head to ASID (the American Society of Interior Designers) to find one for hire near you!

From there, the designer will provide scaled blueprints that you will need to move onto the next steps. This step is technically optional, but it turned out to be the best thing I did during my remodel process!

Collect bids from contractorsKitchen Remodel

The next step in the process is collecting bids from contractors you are interested in hiring to complete your project.

Usually, bids come at no cost, so I encourage you to get several bids so you have a more accurate idea of what the project will cost you in the end. Before you decide on the contractor you wish to work with, be sure to check out this contract hiring guide and make sure you outline all of the details before you commit (and pay!).

What Specific Decisions Will I Have To Make?

To be perfectly honest, the amount of decisions you need to make as you prep for a kitchen renovation is overwhelming. But preparing for them in advance makes each task a lot more manageable.

Outside of the obvious questions regarding color and style, there are a lot of other things you will need to consider and purchase. Here is a list to keep handy:

  • Cabinet hardware
  • Cabinet door design
  • The material of the cabinet (which impacts cost)
  • The material of the countertop (which, again, impacts cost)
  • Box cabinets or special order cabinetry
  • Backsplash style, size, material
  • Appliances (style, brand, cost, color, “extras”)
  • Open shelving or closed cabinetry
  • Flooring materials and costs
  • Window treatments
  • Light fixtures
  • Extra organization (there are options built-into your cabinetry)
  • Installation of the cabinetry
  • Size of the cabinets (depth, width, and height)
  • Drawers vs. cabinets
  • Timeline
  • Can lights or fan
  • Material of sink
  • Plumping changes
  • Electrical changes

Be smart when shopping for materials

Kitchen Remodel

Once you hire the contractor, they will be a great resource for pointing you in the right directions for your materials, specifically for cabinets and countertops.

Sometimes contractors can get these products at a discounted rate if you shop at the retailers they recommend. Talk to them about this option before you decide on where you want to purchase your big-ticket items.

And if they don’t have any recommendations, you can always shop at big box hardware stores.

Protip: You will need to bring your exact measurements from your designer (or contractor) when you go out to physically shop, as well as have an idea of what design you want the kitchen to have. Of course, the salesperson can also help you make these decisions, but this is your kitchen, after all!

Finished buying? Your timeline begins now

Kitchen Remodel

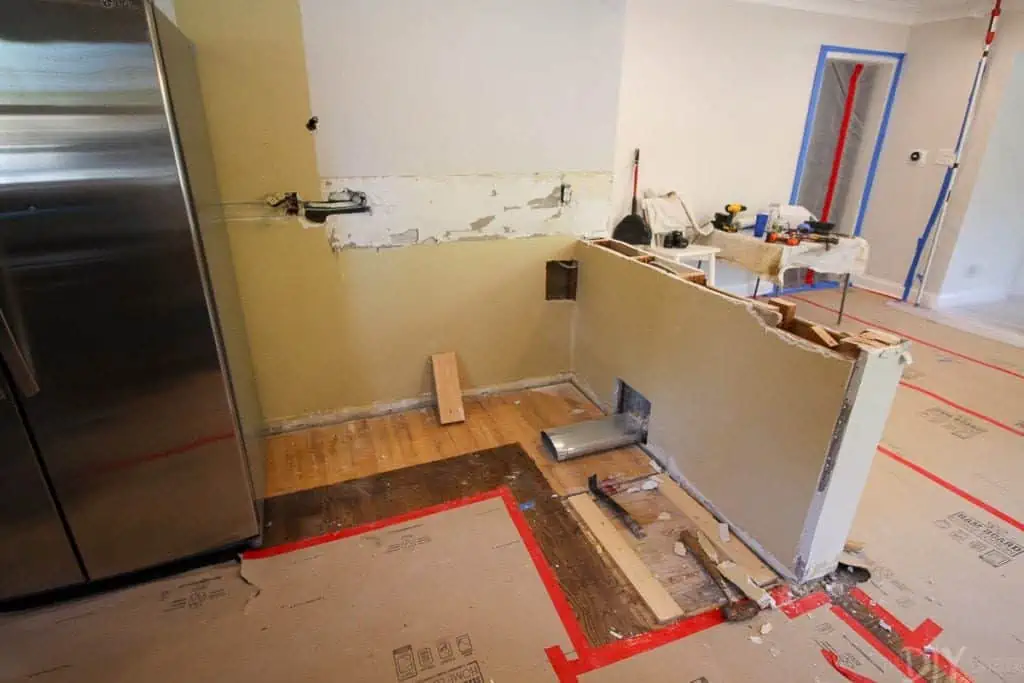
After you make the cabinet and countertop order, your contractor will work with you to create a timeline of the projects that need to be done before the cabinets arrive, which will include:

  • Demolition
  • Electrical work
  • Plumbing work

Remember, cabinets can take up to eight weeks to arrive, and possibly longer if they are custom. Getting to work before the cabinets arrive will ensure they are ready to install quickly after they get to your front door.

Your contractor (or you) will get to work

Kitchen Remodel

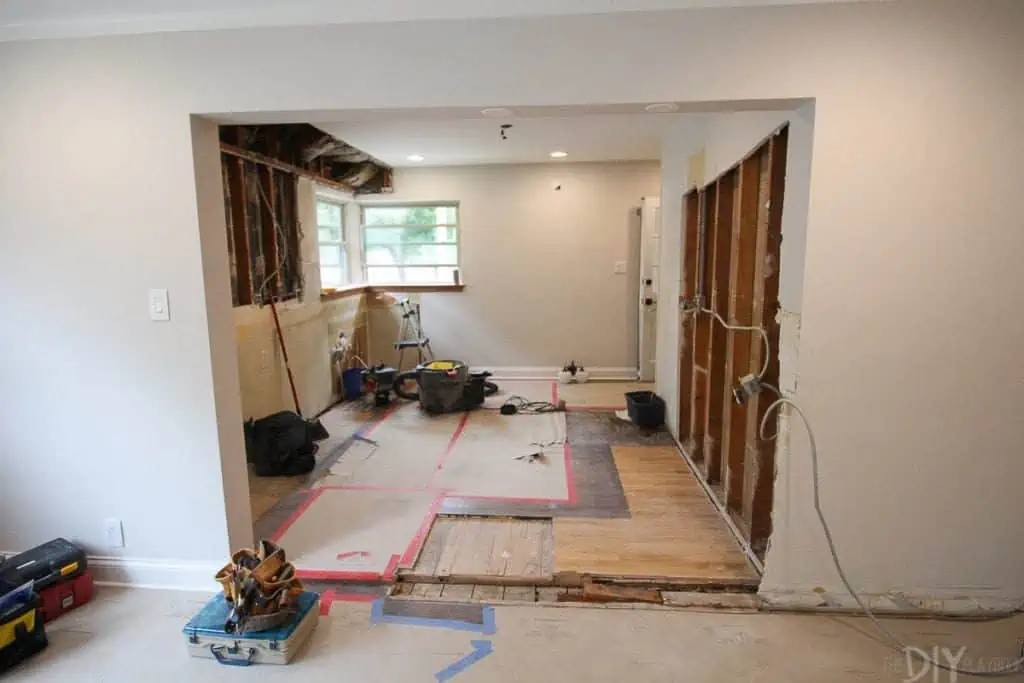
It’s time to get to work! If you have contractors, they will work to demo your current kitchen, then work even harder to put the new and improved one back together. If you did get a contractor, this is the easy part for you because, at this point, the work is out of your hands. Most all of your hard work should have already occurred during the front end of this project.

Hope you don’t mind living without a proper kitchen for a while. Be patient and your new kitchen will be ready soon enough for you to enjoy!

How long will a kitchen renovation take?

Kitchen Remodel

Every kitchen renovation will vary in terms of timing, depending on the scope of work and the size of the space. But traditionally, a kitchen renovation can run on average 4-8 weeks. Living without a kitchen for that long can be a large inconvenience, but I am here to reassure you that if we can manage it, so can you!

Kitchen Remodel

My best advice to handle this chaos is to set up a temporary kitchen prior to demoing your current kitchen. We have our fridge, microwave, and crockpot working overtime! Plus, we meal prep at our parent’s house to make healthy food for the week (so you don’t have months and months of takeout).

Is It All Really Worth It?

Kitchen Remodel

Now being on the other side of it, it was absolutely worth it!

According to HGTV, a kitchen remodel is projected to give you a 70% return on your investment, while statistics from Today’s Homeowner reports that this number could be as high as 91% of a return on this investment! So as much as this intimidating task may seem overwhelming at first and chaotic to live through, coming out the other side will be worth it in the long run. You are adding significant value to your home by making these updates now and getting a gorgeous kitchen to enjoy at the same time.

Of course, there is a lot more information you can devour as you prepare for your upcoming kitchen remodel, but I hope this beginner’s guide gave you an overview of what to expect. Seeing the bigger picture from the start will provide you peace of mind to tackle each step with confidence, and maybe even a little bit of excitement!

A DIY’ers Guide to Essential Power Tools

Author:

Publish Date:

Last Modified Date:

Category: DIY Projects

Tags: Tags: , , , , , , , , , , , , , , , , , ,

As DIY’ers, we always get a little giddy when it comes time to chat about tools. (Yes, we’re nerds like that.) So, it should come as no surprise that we’ve covered tools here on the HireAHelper blog before. We’ve even shown you our tips to keep all of your tools organized and accounted for.

Now it’s time to move up a level … to power tools! Just that word “power” may sound a little scary and overwhelming to the DIY newbies out there. But we promise there is nothing to be scared of because if even we can handle these tools, then pretty much anyone can.

The Power Tools To Own

If you’re looking to spruce up your home, add to your tool collection, and just be an all-around rock star homeowner, then these are the first five power tools we suggest adding to your collection. We’ve also included the general range of prices you can expect to pay for each.

Cordless Drill

This tool was already covered in our list of seven essential tools to own, but it’s a power tool too! And it’s quite possibly the most important tool to have, overall.

In fact, we believe every household needs a power drill (even if you’re a renter) because it can be used for pretty much anything.

How do we know? So many people in our lives have asked to borrow our drills (and we always oblige), but we quickly emphasize how they really should invest in their own. It’s a necessity! Trust us, it’ll make putting together Ikea furniture a heck of a lot easier.

Price: $30-50

Shopping Tip: Power is measured by battery voltage and ranges from 6-18V. Higher voltage models come with extra power but are quite a bit heavier. We suggest going with a nice, middle-of-the-road 12V cordless drill.

Also be sure to also pick up a variety of drill bits when you buy your cordless drill.

DIY Projects:

  • Hanging curtains
  • Building shelves
  • Drilling holes
  • Anchoring
  • Pretty much anything

Miter Saw

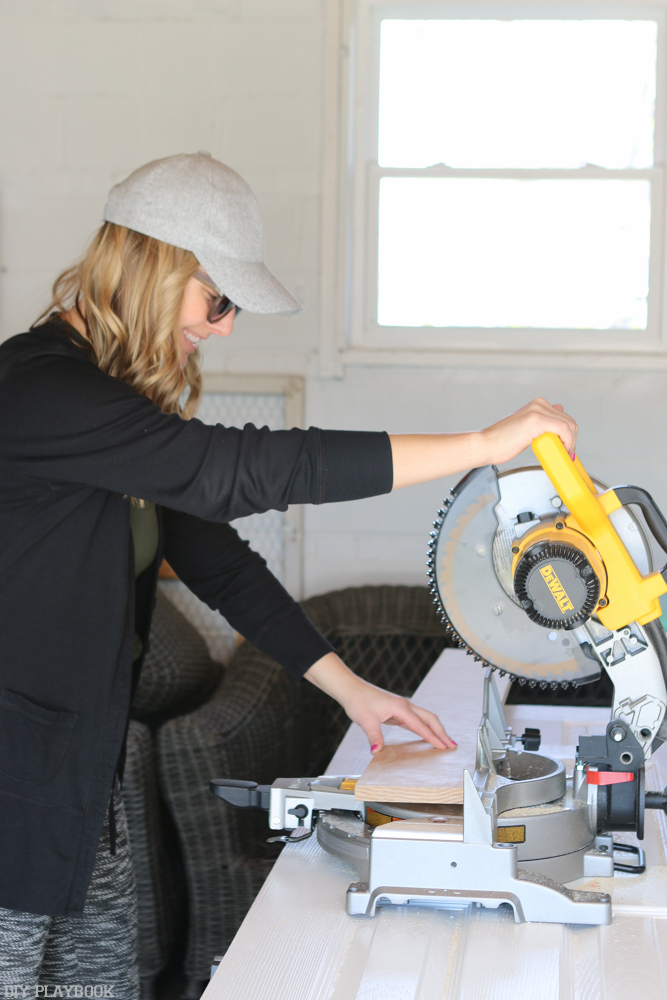
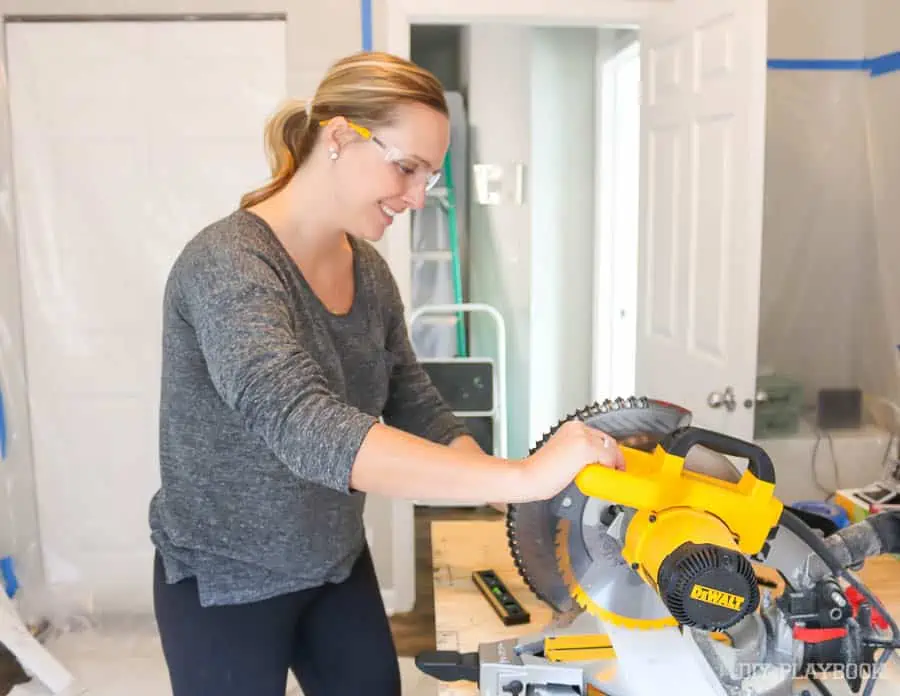
This was the first “real” power tool we ever bought and we’ve used it so many times since. Are you ever going to be touching wood? Don’t think you won’t use this because you absolutely will. It makes straight cuts, sure, but it’s also able to make incredibly accurate cuts at an angle.

Price: Average 8-10 inch saws range $140-250

Average 12+ inch saws range $250-500+

Shopping Tip: Consider the blade size when buying a miter saw (8, 10, or 12 inches).

Yep, larger blades allow for longer cuts. We have a 10-inch compound Miter Saw. Oh, and be sure to pick up safety glasses and an extension cord when you invest. That way you stay safe, and your saw can reach any outlet when working away!
DIY Projects:

  • Board and batten siding
  • Wood planter
  • Shiplap wall
  • Smoothing

Nail Gun

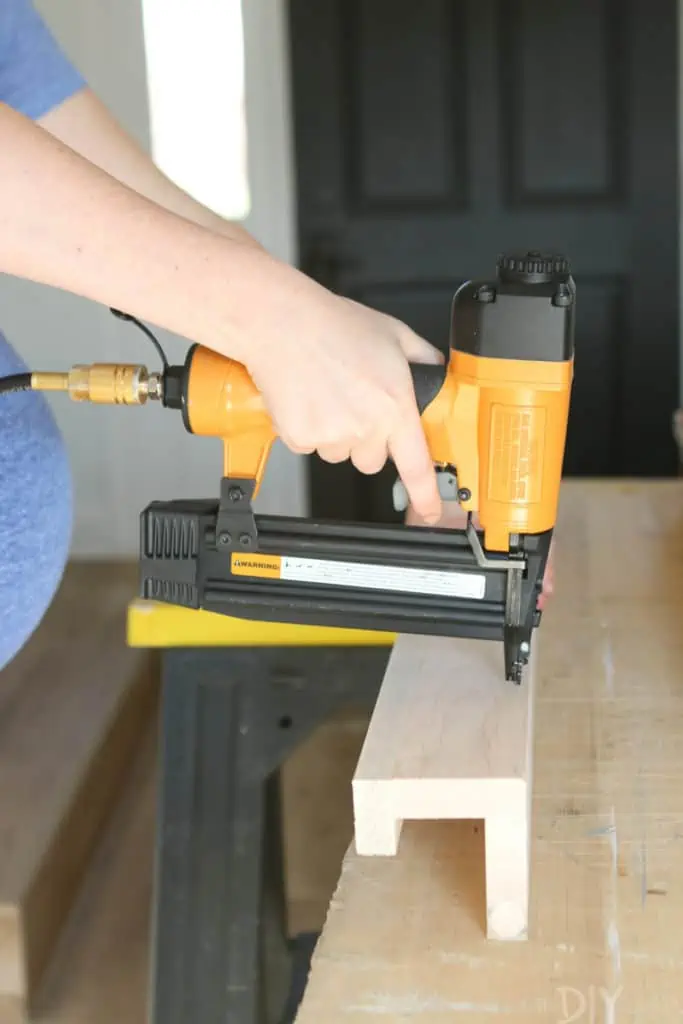
Instead of using a hammer and nails for a project, you can use a nail gun and get the job done 100 times faster. There’s a wide variety of nail guns out there, but we suggest going with a finish nailer. These come in handy when securing wood together or to a wall, and you can easily putty over the holes for a seamless look.

Price: $30-100

Shopping Tip: Nail guns can be gas-powered or air-powered, but we suggest going with an air-powered one. (Here’s the one we own.) When it’s plugged into an outlet, compressed air is used to drive the nails.

Make sure you also pick up extra brad nails for your project and that they’re compatible with the brand/size of your particular nail gun.

DIY Projects:

  • Installing baseboard
  • Creating decorative wall
  • Adding trims
  • Hanging anything

Sander

You’ve probably used sandpaper or a sanding wedge for a project before. And if you have, you know that your arm can get pretty tired when going back and forth over and over again.

It’s time. Get a sander. You add sanding pads to the sander and when you turn it on the pads move in a circle, sanding the surface as you go. We’ve also ended up using sanders when refinishing old pieces of furniture.

Price: $25-80

Shopping Tip: There are various types of sanders (palm, detail, belt, etc), but we use an orbital sander.

Orbitals are lightweight and because they’re not too heavy-handed, it’s very difficult to damage the piece you’re working on. Be sure to buy extra sanding pads for your sander, so you always have a fresh one for your project.

Oh, and a dust mask may come in handy too!

DIY Projects:

  • Refinishing furniture
  • Smoothing DIY picture ledges
  • Sanding down excess paint on a wall

Jigsaw

What’s compact and relatively inexpensive?

abeautifulmess.com

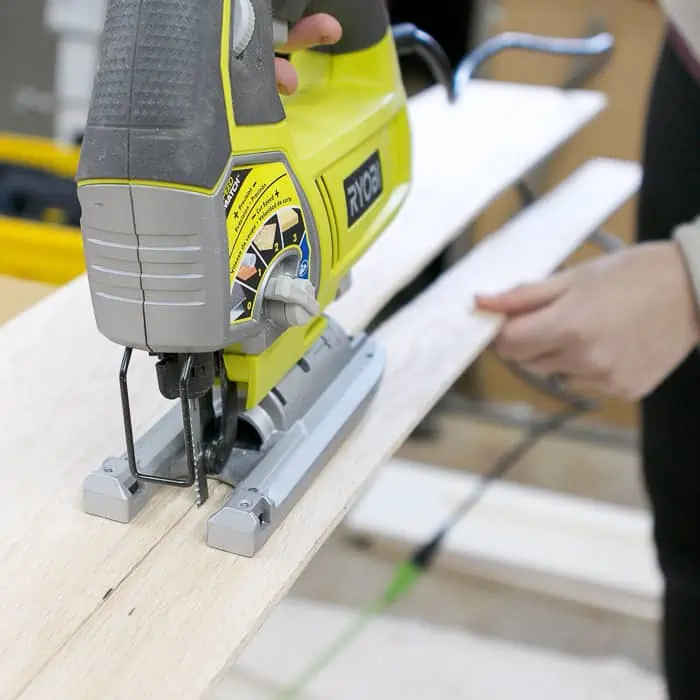
A jigsaw can be used to make both curved and straight cuts in a variety of materials (metal, plastic, wood, particle board, etc.). Whenever we are tackling a woodworking project, we almost always get out the jigsaw because there are bound to be some “wonky” cuts that don’t need to be straight or angled.

For example, if you’re adding shiplap to a wall and need to make room for an outlet … the jigsaw is the tool to get the job done!

Price: $25-90+

Shopping Tip: If you’re planning to use your jigsaw on tough materials, then you may want to buy a jigsaw with a cord. Here is the one we use.

By far the most important thing to remember is that you need to buy the right blade based on the material you’ll be cutting!

DIY Projects:

  • Curved headboard
  • Holes for outlets
  • Shaped signs
  • Personalized crafts

A jigsaw is isnt just useful and easy to learn, it’s pretty fun!


We hope this list gets you excited to start creating and building things around your home! Getting power tools means you can ditch the builder-basic look and customize a home that looks all your own.

The Unexpected Perks of Local Moves

Author:

Publish Date:

Last Modified Date:

Category: Local Moving

Tags: Tags: , , , , , , , , , , , , , ,

Often when people move, it’s across the country or at least across the state. But for my recent move, it was just about seven blocks away! Yes, I just completed a local move. And I’m a little surprised about all the unexpected perks.

Here’s the story: My husband and I are expecting our first child and have had our eyes peeled in our “dream neighborhood” for over a year. This neighborhood came with a much better school district, a house big enough to accommodate our growing family, and a close-knit community that we were eager to join.

So although it seems silly to think we put in so much effort for a move just seven blocks away, we think it was well worth the investment and are so happy with the decision.

What We Learned

We didn’t have to be as organized.

A lot of my friends have moved across the country and in doing so, have had to really focus on their moving gameplan because it came with some serious logistics. How many days and miles do you need the moving truck for? Who will drive the moving truck and who will drive the family’s cars? What do you gotta bring on the moving truck to survive the few days en route?

Figuring out this information wasn’t exactly impossible for them, but I found out (the easy way) that common logistic problems definitely didn’t sneak up on me because our move was local.

Scheduling and driving a rental truck was easy-peasy.

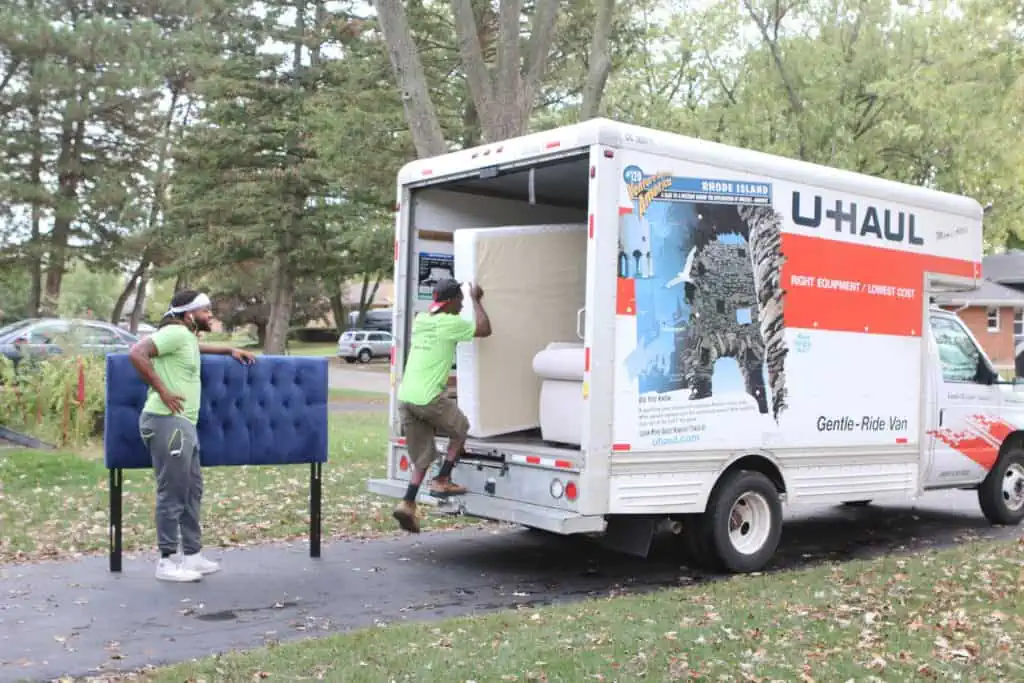
To save money, I opted for a Hybrid Move. Translation: I hired Helpers for the heavy lifting, but rented and drove the moving truck myself. Because my move was local, when I was choosing the truck I needed, my priorities were strictly around the size. Nothing else.

Here’s another thing: Often times during long-distance moves, new homeowners need to research a truck that has extra seating, valuable leg room, USB or GPS capabilities, etc. Guess what? That extra information didn’t matter so much to me as I was zipping back and forth. Plus, the rental process was a breeze because there were so many trucks available in our area that fit our minimal requirements.

4 Cases Where You Really Should Move to Save Money

If you like to burn money, don’t read this post.

Even details like where or when I needed to drop the truck off were far less complicated because I was going to pick-up and drop-off at the same location, which meant I was dealing with one salesperson the entire day. And yes, he quickly got to know me when I picked it up and was very flexible on when I brought it back. Repition is nice.

Plus, I’m not necessarily “used to” driving a 15-foot moving truck, but I can do anything for 7 blocks, right?! I would have been a bit more hesitant to drive a solo mission across the country, but zipping around a neighborhood I was already familiar with was definitely a perk that came along with this local move.

My neighbors were a huge resource.

When we moved into our new house, we needed an extension ladder to get up on the roof right away. The homeowner before us left several decorative ornamental pieces on the siding around our home and I couldn’t stand to look at these eyesores another day! You’re probably laughing at me, but seriously, a missing extension ladder was the only thing holding me back.

Google Map image of my new home.


Sure, we could have purchased one, but they’re expensive (like almost $200!) and it would’ve taken up quite a bit of non-existent room in our limited garage space.

But – yet again – because we still lived so close to our old house, we were able to borrow the ladder from our old neighbor! We drove it the seven blocks to our new house, used it, did a happy dance on our lawn once the job was done, then drove it right back to our old digs. I had no idea that the network we made in our old neighborhood would pay off so quickly, but staying local does have its perks … especially when you find yourself in a bind!

Potential financial overlaps pay off … big time!

Paying two mortgages at the same time is not fun, but ironically for the few days that we had possession of both our old house and the new house was pretty amazing in terms of moving perks. If you’re moving locally and have the chance to close on your new house just a few days before the old ones, do it! I can’t begin to tell you all of the hidden perks that came along with this situation.
For one, we were able to accomplish a lot of our DIY projects in the new house without having to live through the mess. We demoed the trim, added new trim, painted the walls, and had the floors re-finished all before we had to move into our new place. This was an epic success because we were not only able to dodge the mess and dust, but these jobs were so much easier (and quicker) to accomplish without the nuisance of all of our delicate, new furniture.

And speaking of all my “stuff”, after the DIY dust settled, we started bringing over the light-weight boxes to our new home. Anytime we would drive to the new house, we would fill up our cars with a few boxes and before we knew it, a lot of our stuff was already there and it wasn’t even moving day yet!

I can’t stress enough how much time, money and stress we were able to save thanks to this overlapping, local ownership.

We leisurely unpacked our wardrobes, bathroom essentials, and entire kitchen before moving day. When moving day finally arrived, we needed to hire the minimal amount of Helpers, then, the entire job was done in two hours! Plus, the unpacking process was a lot less stressful because nothing needed to be unpacked immediately since the closets, bathrooms and kitchens were already done.

With the help of the movers, moving day turned out to be relaxing (yes, that’s a thing!) … a welcome perk I definitely didn’t see coming.

The transition of utilities was seamless.

When we called about canceling some of our monthly utilities, some of the companies quoted us a cancellation fee because we would be ending our contract. But much to our surprise, a lot of these cancellation fees were waived if we had these services transferred over to our new house instead. We obviously opted for that option, which made the transition pretty seamless and much more affordable.

It also made paying our bills a whole heck of lot less time-consuming because we didn’t have to set up new automatic pay accounts through our bank for all of these new utility companies. So we could continue making payments and the utilities continued just like usual. It was definitely a win-win!

All our food stayed fresh.
How to Pack Up a Kitchen - Fridge, Pantry, and Freezer

Another unexpected perk was not as significant as the previous ones, but one I still appreciated!

In a long distance move, transferring your frozen or refrigerated food is another task that needs some pre-planning and an exact game plan. Groceries are far too expensive to let them go to waste because of poor planning. But in my local move, none of this pre-planning was necessary. No cooler (or planning) necessary! I don’t know about you guys, but I could get used to this trend of not having to pre-plan during a move!

Long story short, my seven block move came with some pretty unexpected perks that ending up saving me time, money and stress. Some of our family and friends rolled their eyes at us when we announced that we were hopping just one neighborhood over, but I’m happy to report it wasn’t that big of a deal to do, and the perks for us were huge; Even if it’s just seven blocks away from our old one!

The DIY Playbook are Bridget and Casey, two crafty bloggers writing out of Chicago about cool DIY projects, lifehacks and money saving techniques. After 15 years of blogging, they believe that if they can figure out how to DIY it, you can definitely do it too.

Moving Paperwork 101: How to Organize, What to Keep, Who to Contact

Author:

Publish Date:

Last Modified Date:

Category: Moving Checklists & Planning, Organization

Tags: Tags: , , , , , , , , , , , , , , , , , , , , , , ,

Listen, we are organized people.

At any given moment, our countertops are usually cleared of clutter, our files are neatly kept in labeled file folders, and our medicine cabinets are filled with colorful baskets of bathroom essentials. Organizing is our jam, mostly because we can’t take the stress that comes with living in a state of disorganization.

But recently when Bridget bought a new house and put her old house on the market, she became immediately bombarded with moving paperwork, emails and electronic files that quickly had someone who prides herself on her organization … feeling overwhelmed! All of the documents and information streaming into the mailbox and inbox were so important, yet it seemed like a whirlwind of information was getting lost in the shuffle. Not good.

With that in mind, today we’re diving into:

  • Who you can expect to hear from when you begin to move
  • What paperwork you need to keep tabs on, and
  • A few quick strategies that will help you keep track of your sanity (and those important docs!)

First, we go over the two different methods that helped me, then we get into the details about what you’ll be organizing (and with who!)

The Organization Must-Do’s

Create your official “Moving Binder” for the hard copies of paperwork.

No matter if you’re just moving, just selling, or possibly even both, the paperwork is bound to come streaming in right away. Heck, even when your home hits the multiple listings service (MLS) market or your name is given to a loan company, your address is often shared with businesses in the moving industry so they can start marketing to YOU. Some of these documents you receive in the mail are bogus and won’t really help you, but some coupons or information can be very helpful for your upcoming move. New furniture, carpet cleaners, deals on boxesyou name it and you’ll probably receive some type of paperwork for it. 

That’s why we think it’s important to set up a binder/folder system that will keep all of the hard copies of these important docs safe and together. You should immediately discard any information that is junk, but any paperwork that is important should be filed in this binder right away. We would also recommend adding a spiral or paper in the binder so you can take notes as you go. You can even add an envelope into the binder in order to save your receipts as you make purchases. Having this system in place before the paperwork gets out of hand is essential. Also keeping this binder out of the moving boxes and with you (even on moving day) will ensure you have access to paperwork up until, during, and even right after your move.

Start an official email folder for moving stuff.

Not only will your mailbox outside fill up quickly, so will your inbox! No one likes a cluttered inbox, yet sometimes it’s hard fielding all of these emails when they seem to never stop coming. Your lawyer, realtor and loan agency are going to bombard you with time-sensitive instructions for you to follow in order to move forward in the process. And if these emails get overlooked, you may have a serious problem!

We recommend starting a folder (at least one) in your inbox to start sorting out these important documents. You can always print the really important stuff to add to your binder, but also having the electronic copies of these items accessible and in one spot will be a lifesaver down the road!

But what exactly will you need to sort via email? Allow us to give you the heads up on which documents you’ll probably be receiving so you can have a better understanding of how you can manage your system accordingly.

Who Will be Contacting Me Before My Move?

The professionals that will be filling your inbox most frequently are your realtor, your real estate lawyer, your lender, and the insurance agent (and anyone from those respective teams of people). Although they will all eventually work on your behalf, communication with all of them is crucial for an on-time closing.

The Realtor

Right after the seller accepts your bid on a new house, you will most likely receive important documents from your realtorsuch as:

  • A copy of the home’s signed contract
  • Any correspondence about the property from the seller
  • A scanned copy of the receipt of earnest money
  • A timeline of the next steps (deadlines for the inspection, lender’s approval, home owner’s insurance, and written mortgage commitment)

Most of these documents can be saved and filed in the binder and/or electronic file folder. However, we would definitely suggest printing out the timeline for the upcoming deadlines. It’s imperative you meet the outlined deadlines so your closing isn’t delayed! Having these dates printed out and marked on your calendar will help you do this. We also want to remind you to ask your realtor about any questions you may have throughout the process because they are very familiar with this process and should act as your coach over the next 45-60 days. If your realtor is unsure of the answer, the next person on our list is the next best coach to guide you to your closing.

The Lawyers

Alongside realtor papers, you’ll probably simultaneously receive the following documents from your real estate lawyer and their team:

  • An introduction to the upcoming closing process, the timeline, and the fees associated with the attorney services
  • A request to sign and return a contract to work together throughout this deal
  • A request for you to send over additional information about the property including whether or not this is going to be your full-time home, the correct spelling of all buyers’ names as they will appear on the loan and/or title to the property, your current address, phone number, current marital status and your lender’s contact name/information.
  • Property Appraisal
  • Any negotiations that take place after the inspection with the seller
  • Any inspection problems that have been addressed by the seller (with receipts attached that identify proof of work)
  • Tax escrow information

Yep, it’s a lot! (That’s why you need to organize first!)

These steps need to be completed and returned almost immediately if you feel comfortable moving forward with this law firm. If you don’t, it is time to secure a new attorney immediately. You need this team right away, but you don’t want the time sensitivity of the process to force you to work with someone you aren’t comfortable with.

The Lender

While your lawyers are working closely with the realtor and the seller’s attorney, the lender is busy reviewing your finances in order to eventually approve your home loan. You can’t move forward with the contract on this property until your loan has been “cleared to close”, which is a process that can take up to (and even over!) a month. It’s a lot of stuff to cover, but here’s the information the lender will need over that month:

  • Permission from you to order the property’s appraisal (with fees associated, which is about $300-$500)
  • An itemized list of all of the updated documents he or she needs in order to update your loan and get that “clear to close” completed in time for your closing date. This paperwork will include (but is not limited to)
    • Copies of your 30 days most recent consecutive pay stubs
    • Copies of all of your W2 forms/1099 forms
    • Complete copies of your personal federal tax returns with all schedules/pages
    • Complete copies of your 2 months most recent consecutive bank statements for all assets
    • Copy of retirement funds
    • Copy of your most recent homeowner’s insurance renewal information, if you decide to purchase, non-contingent on the sale/close of your current home
    • Copy of Earnest Money Check
    • Proof of a homeowner’s insurance policy in the new home (needed two weeks prior to closing)
    • Copy of your Photo IDs for the Patriot Act
    • Signed and dated letter of explanation to confirm your intent to occupy the new property as your primary residence, if you are purchasing non-contingent on the sale/close of current home
    • Updated printout/activity of your bank account showing your Earnest Money Check clearing your account

Some of the paperwork you won’t be able to produce until right when the lender needs it (i.e., most recent paystubs, the Earnest Money Check, etc.), but some of this paperwork you probably already needed for the pre-approval process. We would advise you to put all of those documents into your moving binder system so they are easily accessible when your lender asks. This will save you tons of stress and will keep the process running as smoothly as possible.

The Insurance Agent

You’ll also need to provide proof of insurance on the new property around two weeks before your closing date. Therefore, you’re going to be in close contact with your homeowner’s insurance agent to secure this coverage.

You’ll need to send her the MLS information about the house. If you want to be considered for a few discounts, you may need to provide additional information (and proof) of the age of the roof or the home’s mechanicals. Make sure you ask your insurance provider about these opportunities so that you can save as much money as possible on your coverage!


Realtors, lawyers, lenders … oh my! The month before your move is a busy one that comes with a lot of paperwork, emails and new items on your to-do list. It can be overwhelming, even for an organized person like myself, so having a plan before the flood of information starts is key! Also knowing what to look for in your mailbox or inbox will help you get a better sense of how to stay organized and what you can have prepared in advance. The last thing you want is a delayed closing date because you missed a deadline. Use these tips so you avoid that at all costs.

Lifehack: How to Pack Big Shelves So You Don’t Go Crazy

Author:

Publish Date:

Last Modified Date:

Category: Pro Packing Guides

Tags: Tags: , , , , , , , , , , , , , , , ,

Usually, if you have a shelving display in your home that you absolutely love, chances are it has taken you quite a long time to arrange and re-arrange the decor to get it “just right”. Now it’s time to move, you’re taking the shelves with you, but you don’t want to lose the successful setup you have worked so hard to perfect, right?

The great news is that we have a super simple moving hack that will not only help you preserve this treasured look but will also make unpacking it in your new place a breeze. Allow us to explain.

Create a Numbering System

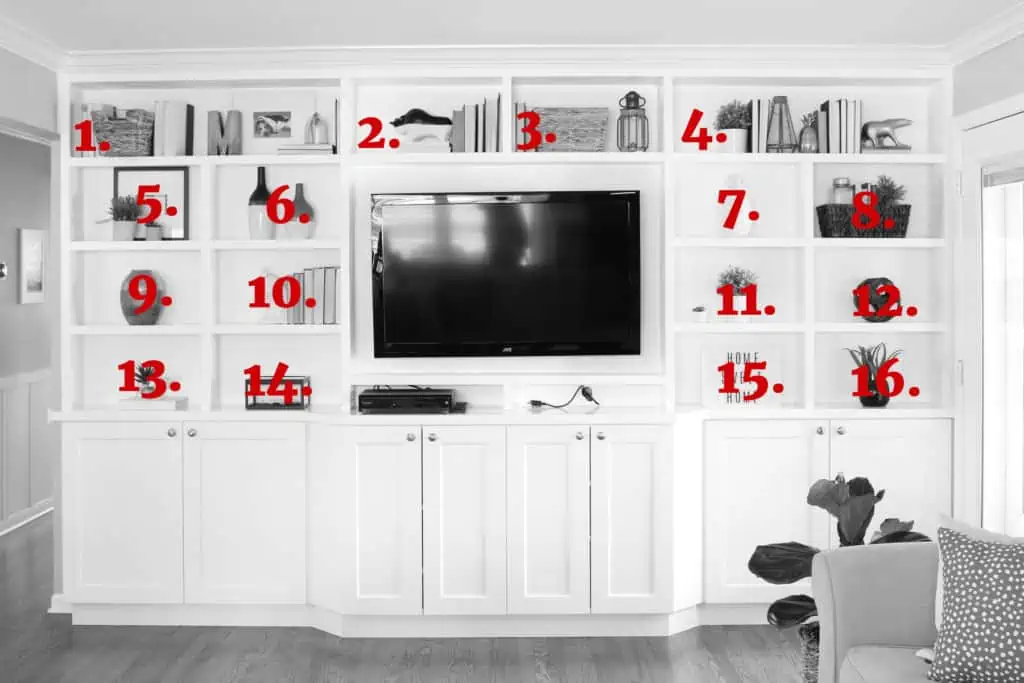
The first thing you have to do is create a numbering system for your shelving unit. You can use any method you want and don’t need to make a fancy graphic like this, you just have to make sure you remember which shelf corresponds with what number. Some may be able to easily memorize the number system, but if you’re not confident in your ability to do that, you can always put a piece of painter’s tape on each shelf with the corresponding number so you remember. This trick will take about 1 minute and won’t damage the shelving unit at all.


Start Emptying Your Shelves

The next step is to start emptying your shelves and carefully wrapping the items to eventually add to a moving box.

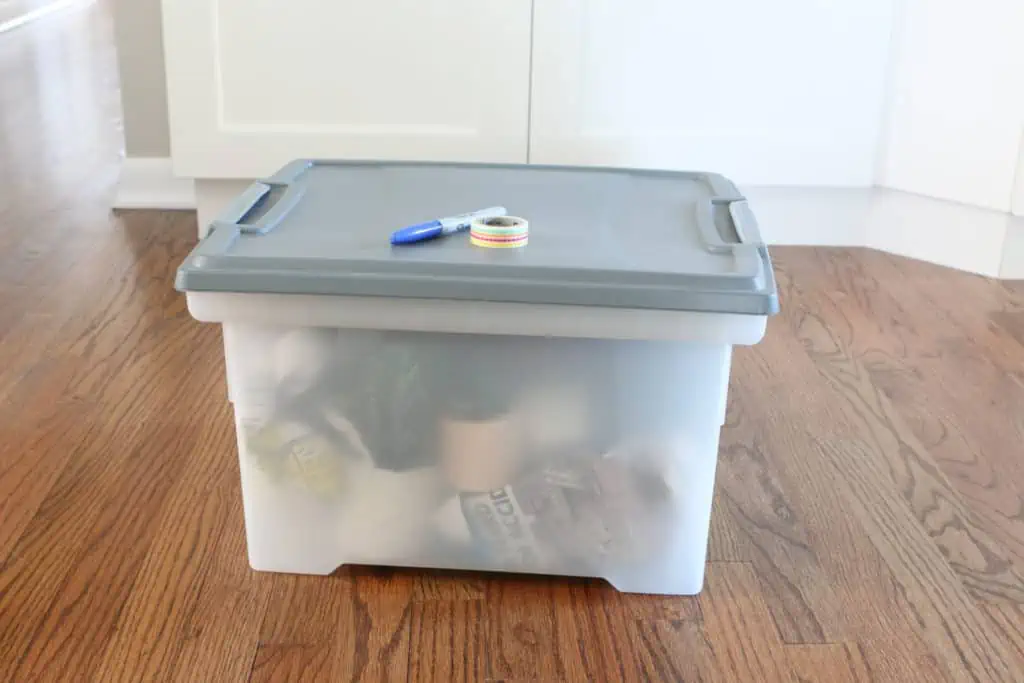
But the trick of this moving hack is to take careful note of what you are removing from each shelf as you start packing each box. Carefully wrap and box the items like you would normally do, but try to keep as many of each shelf’s contents together in one box. For example, the grouping of books, the picture frame and planter in box #4 should all make their way into the same moving box.
5 Sweet Garage Upgrades That Up Your Home’s Value

Garage additions and upgrades like the five in this list can produce an estimated 65 percent return-on-investment.

Pack and Label

Each of your moving boxes can hold far more than just one shelf’s contents. So feel free to add several of your shelves’ decor into one moving box, just be sure that each shelf’s decor stays together with its counterparts.

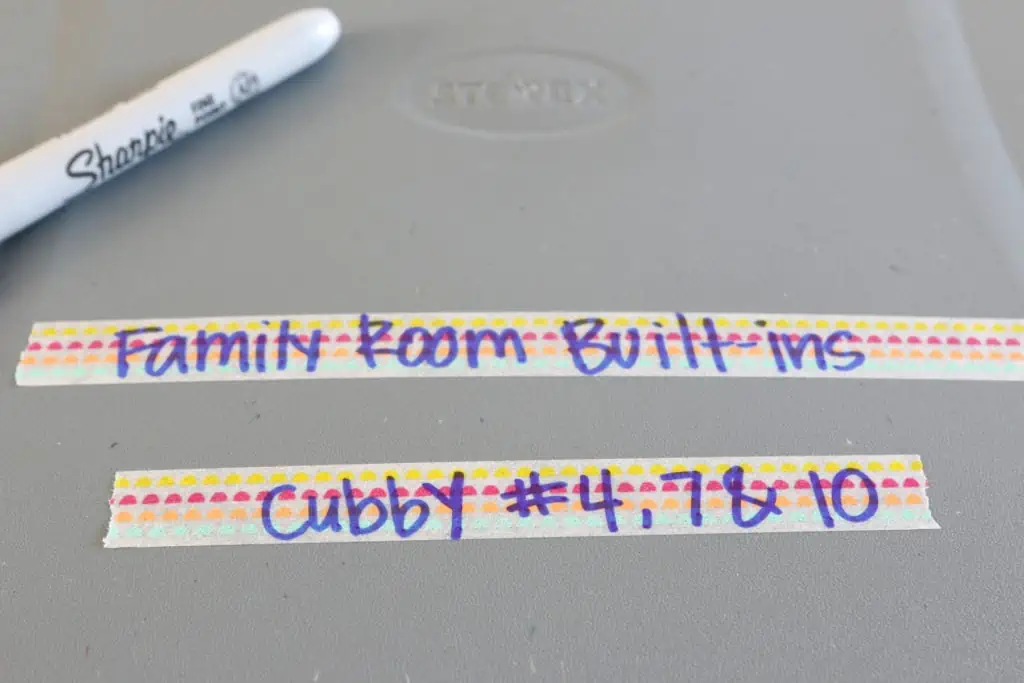
After you fill up your moving box, assess what shelf decor is inside of it. In my case, I added the decor from Shelf #4, #7 and #10 into this box so I simply noted that on the top of the moving box. This way I know that when it’s time to unpack this box and refill this shelving unit at my next house, I know exactly where to put this decor in order for it to look just like it did before! 

Repeat this packing/labeling process over and over again until your shelving unit is emptied. You should be left with a pile of moving boxes with clear labels and a precise plan on executing this look at the new house.

All you have to do in the new house is set up the shelves and simply place each item right back in the place it used to be. You don’t have to waste time trying to remember what goes where because those labels will take the guess-work right out of it, making unpacking these boxes in the new house a total breeze!

We Try out the App That Digitally Arranges Your Furniture With Just a Picture

Author:

Publish Date:

Last Modified Date:

Category: Home Decorating

Tags: Tags: , , , , , , , , , , , , , , , , , ,

As DIY’ers and decorators, there’s nothing we love more than an empty room just begging to be styled and filled with beautiful pieces. But some rooms can be a little tricky. Do you put the couch over here? Or maybe you need a small table over there? It can be hard to visualize how pieces will work in a space, especially when you’re starting with a blank canvas. Plus, if you’re buying a few new pieces of furniture, it can be difficult to tell if they’ll really fit and work well in the space. No one wants to purchase a dresser only to find out that it’s actually way too big or small.

An Online Tool to Help You Arrange Furniture

Luckily, there’s a new tool out there that takes all of the guesswork out of the arranging furniture process. It’s called Modsy, and this growing service is changing the game for decorators… but also for new homeowners trying to decide on new furniture or anyone else who has a room that needs some TLC.

Techcrunch.com

Essentially, you can “try on” certain layouts in your specific space in order to visualize how it will work in that room before you move things around, or before you buy anything new. The service costs about $70 (which isn’t exactly free), but in the long run, it may help you avoid design regret (like when you buy a piece that simply doesn’t work for the room), leaving you with a space that is much more functional for your home.

Here’s how it works: You send over photos of your space, some measurements and details on both your vision and style. They then send over a professional 3D rendering with a 360-degree visualization tool.

Real Life Spaces Using Modsy

When we first heard of Modsy, we weren’t quite sold. How could it actually work? But then we saw that a few of our friends in the blogosphere used this service when working on room makeovers. We could hardly believe these photos…

Photo by Bower Power Blog; 3D Rendering of Bedroom via Modsy

Above is the 3D rendering of our friend Katie Bower’s bedroom. She used Modsy to visualize the furniture setup in her bedroom before buying all of the pieces.

Here’s what that space now looks like in real life…

Photo by Bower Power Blog

Pretty crazy, right?! Here’s another one.

Photo by Chris Loves Julia; 3D Rendering of Room via Modsy

Above is the 3D rendering from Chris Loves Julia’s nursery. Below is how the actual room turned out.

Photo by Chris Loves Julia

Let’s Give It a Try

We’re currently working on a living room makeover for a friend, and their tricky living room layout had us questioning where exactly we should place all of the furniture in the space. So we figured this was the perfect time to give Modsy a try and find the most functional livingroom layout. Here is how the website lays out their service:

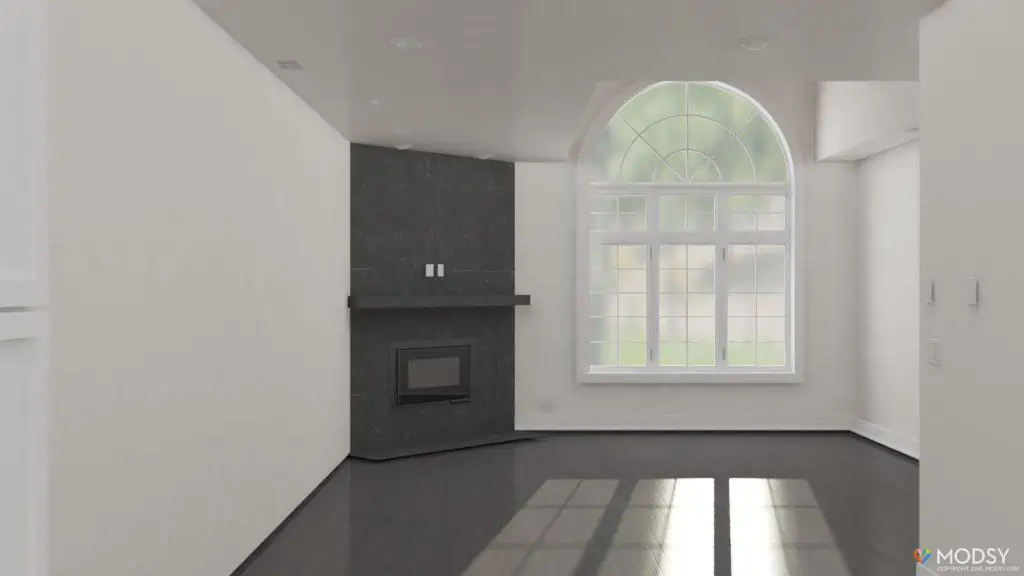
After setting up an account on our phones, we sent in photos and measurements and they then gave us a blank room to review. 

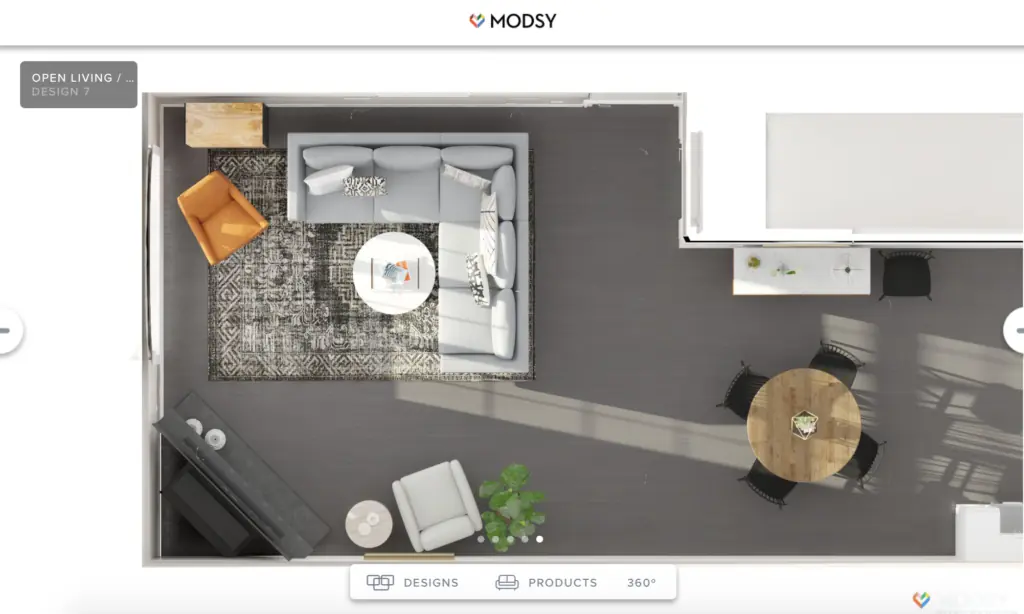
Because we weren’t totally sure on the style we wanted for the space, we had them give us two design options. One was a bit more glam and feminine, the other a bit more contemporary. This was their interpretations:

We ended up loving the second design, and realized how easily a sectional could fit in the space! We also didn’t realize we would have enough room to add a bookshelf next to the couch, and this helped us view the space in a whole new light. 

This was another rendering from a different angle. We were able to plug-in a few pieces that the homeowners already own to make sure they could continue to work in the room. 

In the end, we were left with a functional layout that we’re confident will work as we help to design this room. It actually worked! While we still have a-ways to go with their space, we are both so excited to get to work and bring this vision board to life.

You Too Can Master the Art of Arranging Furniture

As two gals who can’t seem to get enough of home design and decor, we were incredibly impressed with this visualization tool. Here are our takeaways:

Pros:

  • Surprisingly easy to use
  • Slick, modern app design
  • 3D renderings are professionally done and easy to grasp (and amazing to look at!)

Cons:

  • It ain’t cheap. $70 per rendering (and $199 to include an adviser!)
  • It takes a little over a week to get renders and operates within business hours, so plan ahead
  • Recommended furniture through Modsy store can be great, but also a bit sales-y

If you’re struggling to decorate your new home, we hope you’ll give this tool a try. Hopefully, it will help you determine the best layout for the rooms throughout your home while providing you with design inspiration that is specific to your taste. Plus, you may even gain some confidence when it comes time to buy new pieces of furniture in your space, because you can try before you buy! Happy decorating!

Showing Your Home? These Are the First Impressions That Matter

Author:

Publish Date:

Last Modified Date:

Category: Buying & Selling a Home

Tags: Tags: , , , , , , , , , , , , , , , , , , , , , , , , ,

To us, staging your home to sell is similar to going on a first date.

You set up this date in hopes to meet your future spouse. You don’t know if that’ll be the case but there’s always the hope, right? If you’re hoping to land “the one”, chances are you’re going to put some effort into prepping for this first date. We feel the same is true when it comes to staging your home to sell.

(more…)

Prioritize These Things for Your Rental, They’ll Be Following You to Your Future Home

Author:

Publish Date:

Last Modified Date:

Category: Apartment Life, Home Decorating

Tags: Tags: , , , , , , , , , , , , , , , , , , , , , , , , , , ,

We often get questions from readers who are renters and they’re ready to upgrade their hand-me-down furniture pieces for “grown-up” ones. They’re usually hesitant to spend too much money out of fear that it won’t fit or go with the look of their next home.

While we don’t suggest that everyone go out and buy a ginormous sectional, there really are pieces you can buy now! Here are home decor items that you can (and should) invest in now, because they’ll most likely be able to find a place in your next pad. (more…)

×

I'm Moving

Moving? Thinking about moving? Whether your move is off in the distance or you already have one foot out the door, you'll learn about everything you should expect through our useful how-to's, cool articles and much more. It's all specially curated for you in our "I'm Moving" section.
Explore
×

I'm a Mover

For rookies or veterans alike, our "I'm a Mover" section is filled with extensive industry news, crucial protips and in-depth guides written by industry professionals. Sharing our decade of moving knowledge is just one way we help keep our professional movers at the top of their game.
Explore