How To Furnish a Vacation Home

Author:

Publish Date:

Last Modified Date:

Category: Home Decorating, Moving Advice

Tags: Tags: , , , , , , , , , , , , , , , , , , ,

Owning a rental property can be a great way to earn passive income and grow your wealth. But before you start interviewing potential tenants, you have to transform it from a cold, empty space into a welcoming, relaxing oasis that a person would actually want to rent. That means furnishing it

You have to consider the cost of filling a second home with sofas, beds, end tables, coffee makers, and any other items that make a home nice to live in. And then there’s the major task of getting all that furniture moved inside and arranged just right.

But don’t fret too much! With some proper planning, you can turn your empty vacation home into a comfortable destination that gets rented out consistently — and at the price point you want

How Much Money Does It Cost To Furnish A Vacation Home? 

a woman looks at the price of an olive green couch

The level of furnishing you do will depend on your budget. Awning.com estimates that the cost of furnishing a rental property can range from as low as $1,000-$2,000 for a smaller property to $50,000 or more for a luxurious vacation rental

Sticking to the low end of that budget would require relying on secondhand and refurbished items. It also assumes that you don’t need to do any renovations. In this situation, you could opt for a few key pieces, such as beds, sofas, and a dining room set, which would be easier on your wallet. However, you want to ensure that your tenants are comfortable and have everything they need, which will encourage them to stay longer and come back again. And that’s going to require a larger investment. 


“Steer clear of delicate fabrics like linen and silk. Vacation rentals often see a higher turnover of occupants than traditional homes. Hence, furniture should be durable and able to withstand wear and tear.”


A mid-tier budget would be around $20,000-$30,000, which ensures you are able to get everything you need for your renters to feel comfortable and cozy. You don’t need to make a media room that’s a miniature replica of a movie theater, but paying for paintings and decorations, pillows, chairs for a backyard/porch, and cooking implements goes a long way toward your renter’s enjoyment of their time spent at your vacation home. 

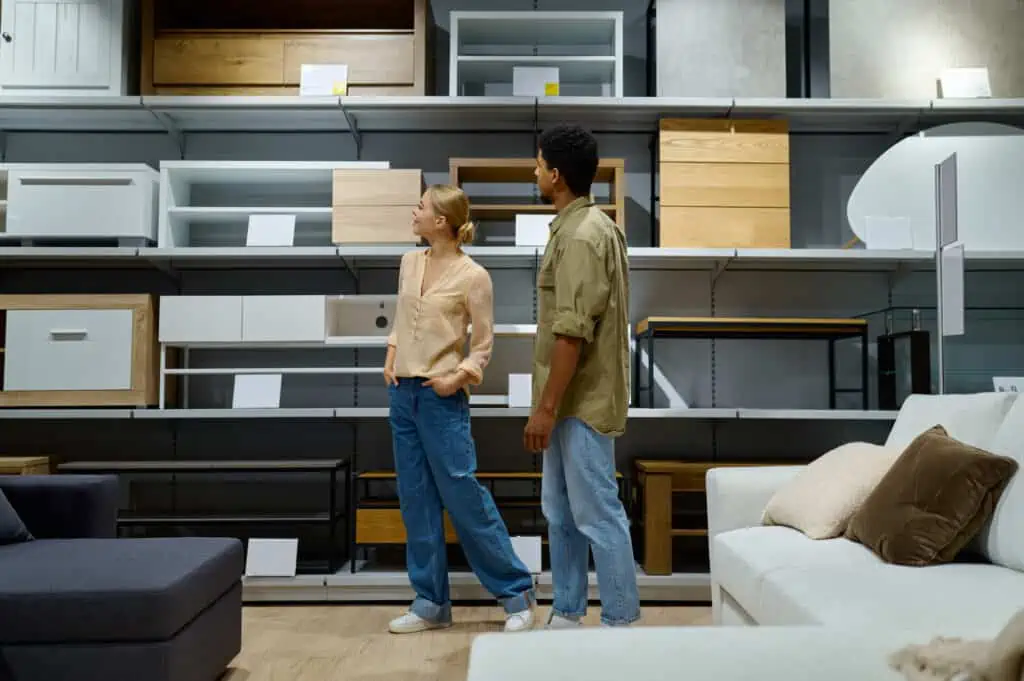
How To Pick What Types of Furniture To Use

a man adjusts a comfortable dark green chair set at a dining table

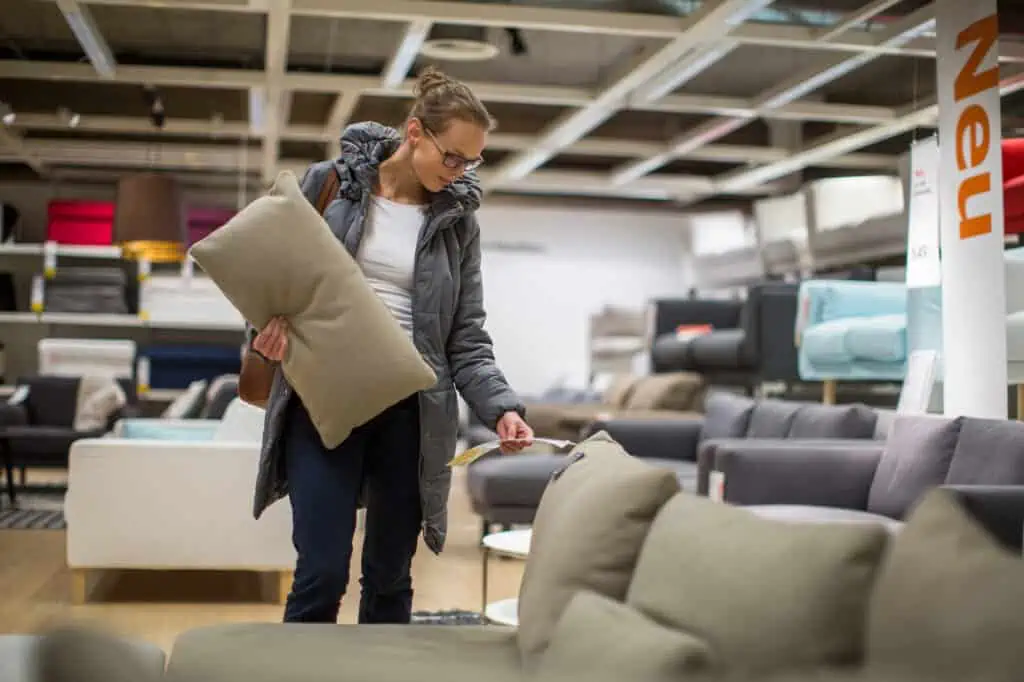
Choosing furnishings for a vacation rental involves careful planning to ensure that the space is appealing, functional, and comfortable for your guests.

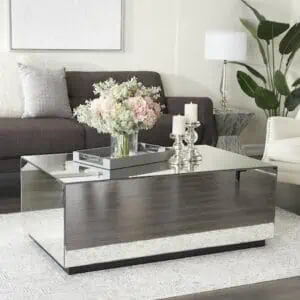
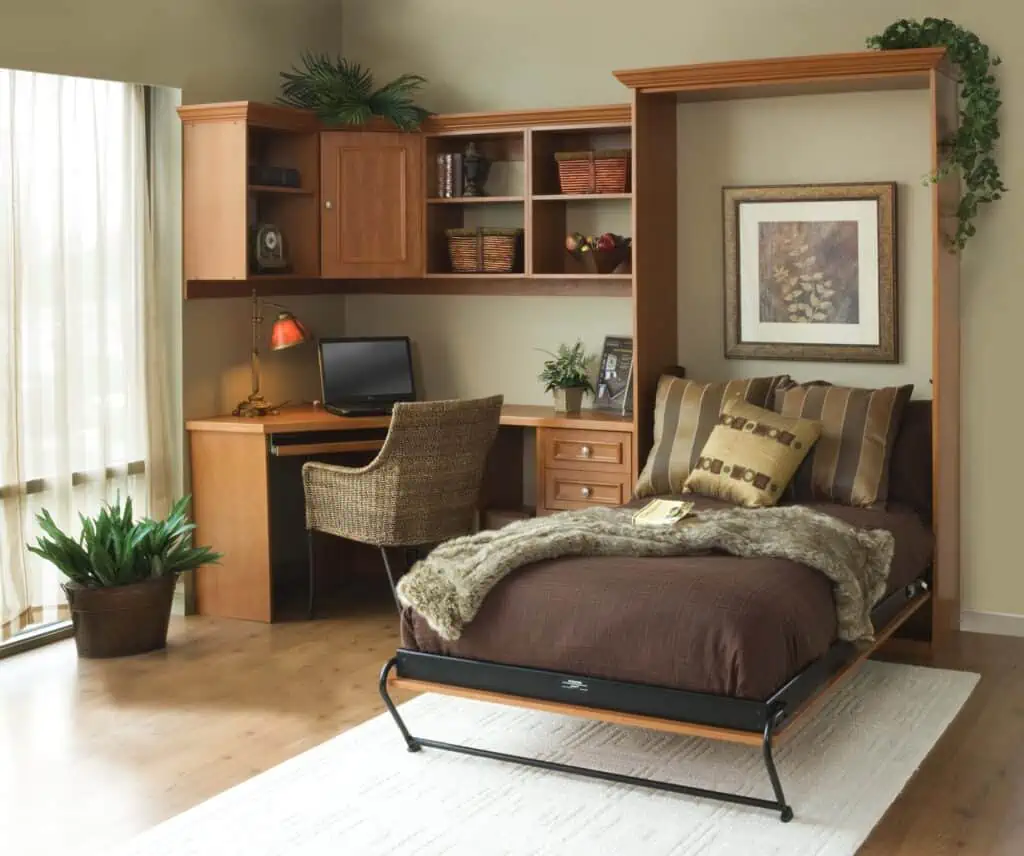
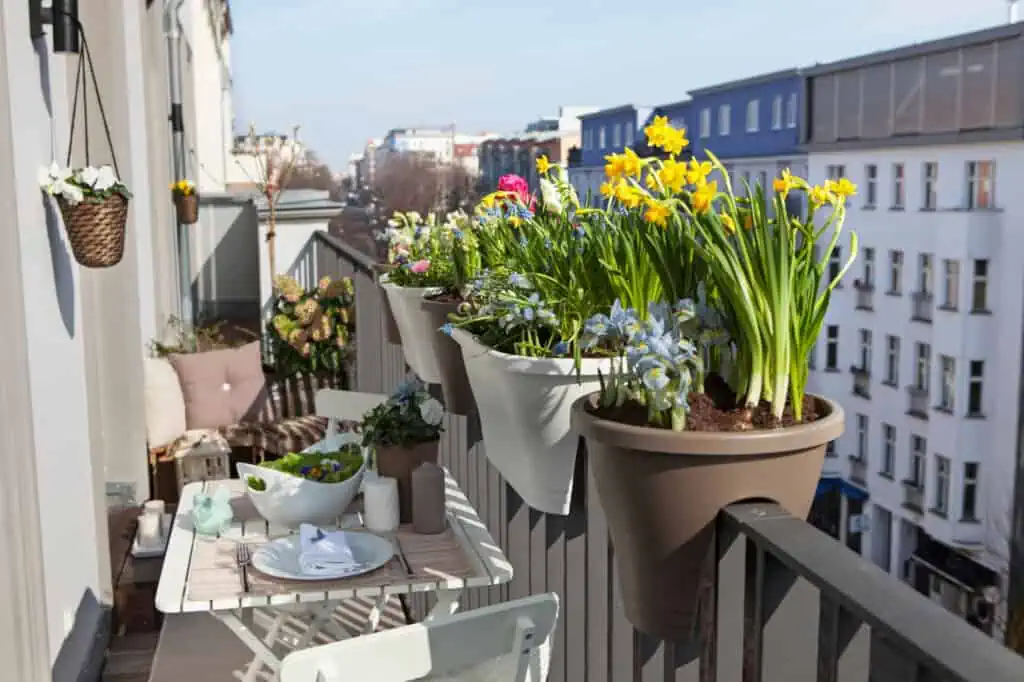
You should first inventory everything you need. Necessary items include pieces like a comfortable bed with quality bedding, a couch, a dining table and chairs, a coffee table, and nightstands. But also consider extras for comfort and convenience, like a desk for a working space, outdoor furniture for a patio or balcony, or a cozy reading chair.

But just what kind of bed should you get? Here’s how to pick the best types of furniture for a vacation rental, which may differ from how you’d choose to furnish your personal home:

  • Define your target audience: Start by determining who will be renting your vacation property. Will it be families with children, young adults, or perhaps older couples? Knowing your target audience will help guide your decisions on the type and style of furniture you need to purchase. 
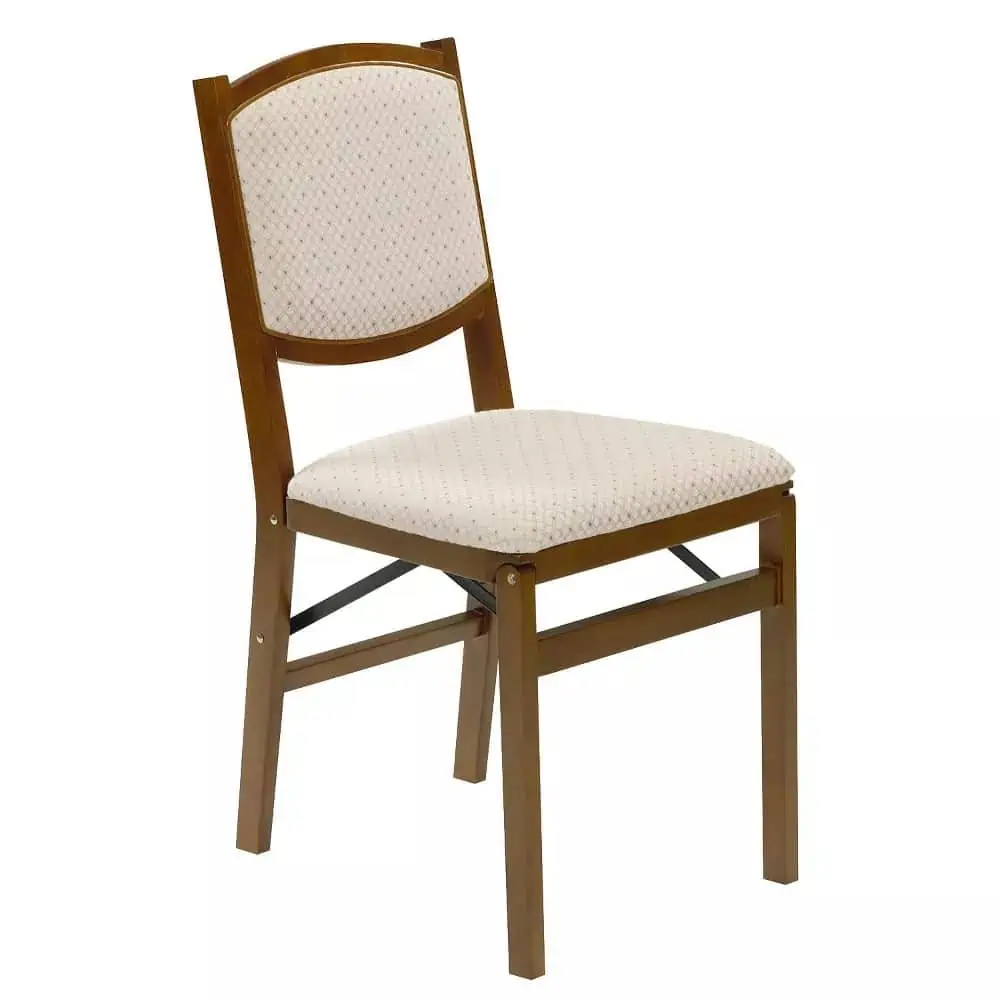
  • Choose durable furniture: Steer clear of delicate fabrics like linen and silk. Vacation rentals often see a higher turnover of occupants than traditional homes. Hence, furniture should be durable and able to withstand wear and tear. Look for leather or performance fabrics, as they are easy to clean and maintain.
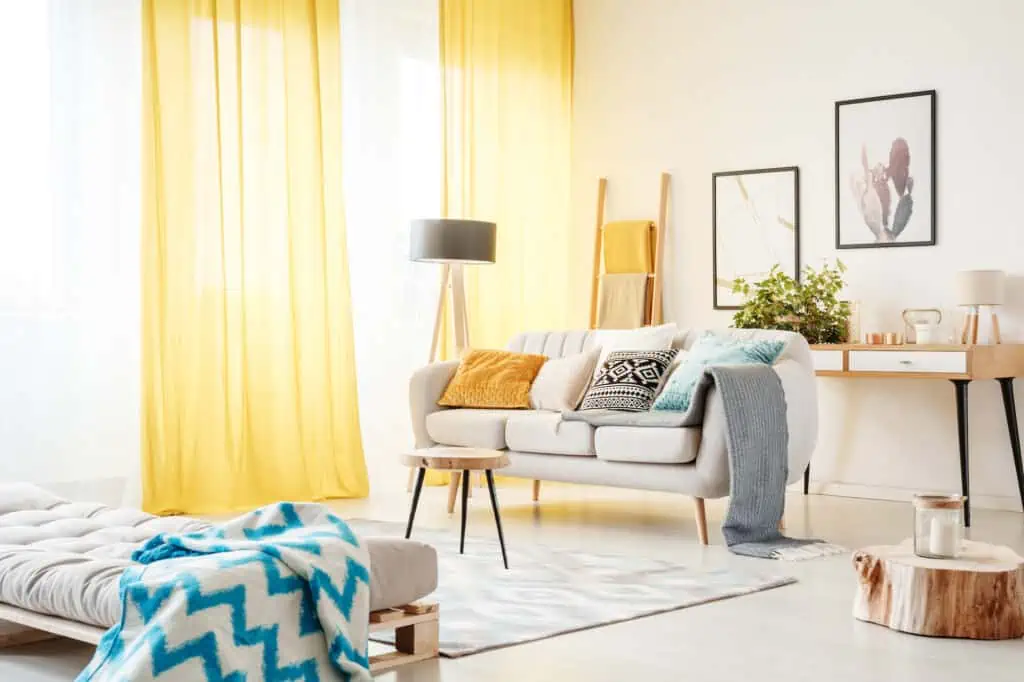
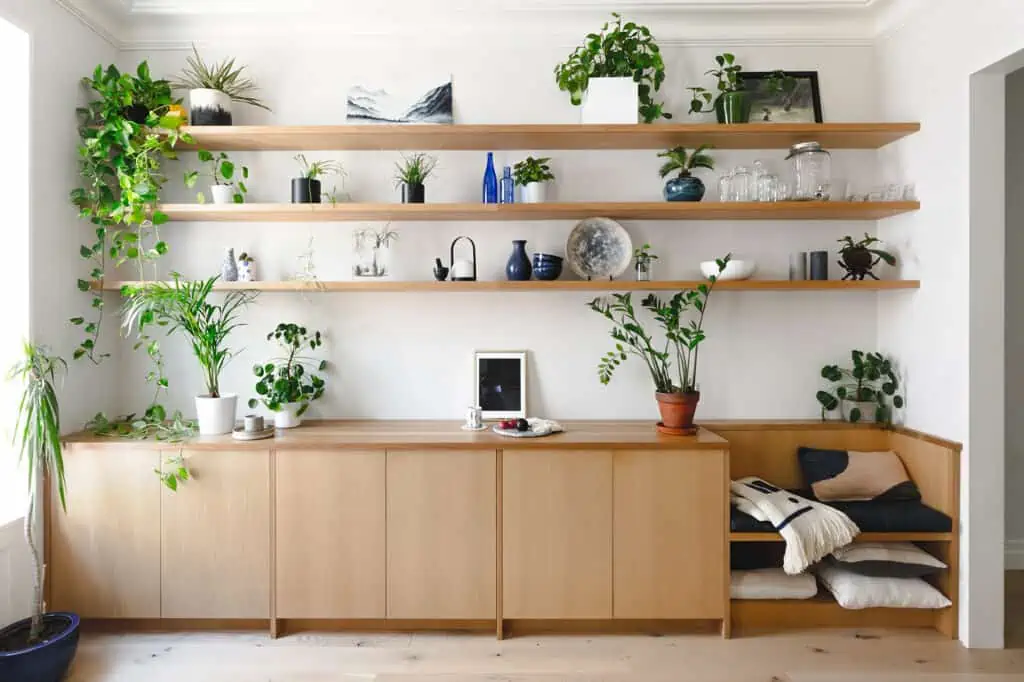
  • Use neutral tones: Neutral colors tend to appeal to a wide range of people and they can make a space look clean and welcoming. You can add pops of color with accessories like cushions, throws, and artwork.
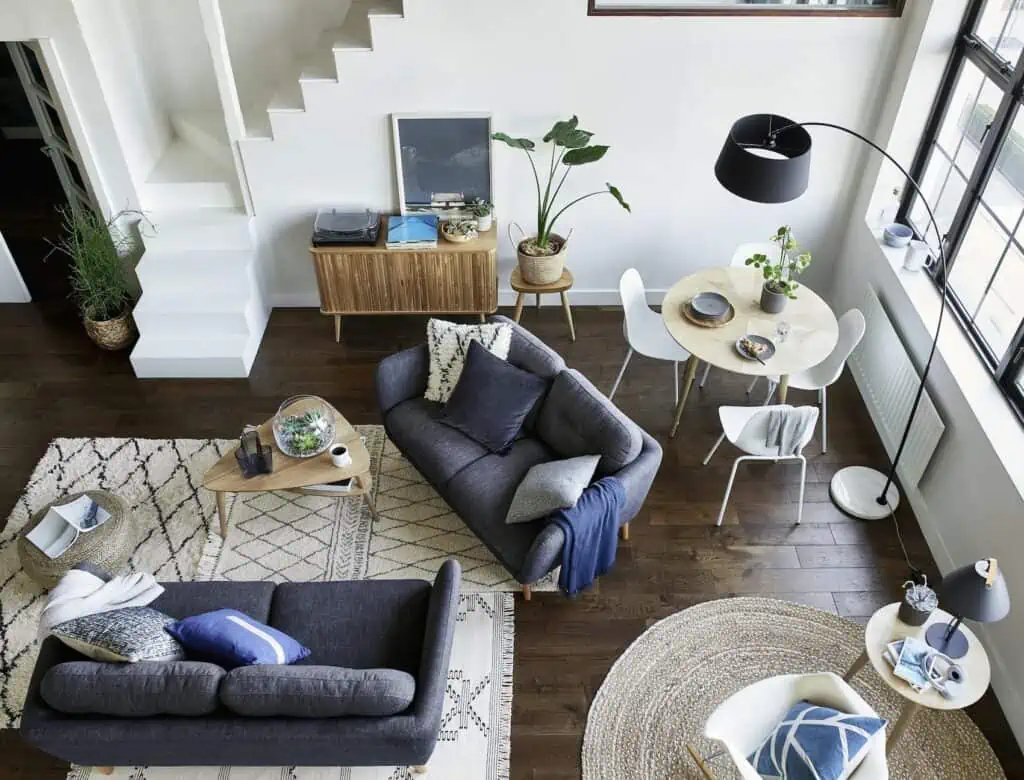
  • Aim for a functional layout: Make sure the furniture layout makes sense and allows for easy movement around the space. Also, be sure to point chairs and couches at the entertainment center or next to the fireplace. 
  • Provide storage space: Ensure there’s plenty of storage for guests to unpack their belongings. This can be in the form of wardrobes, drawers, or hooks and shelves.
  • Pick a style: Try to choose a consistent style for your vacation rental that matches the location and architecture. Whether it’s rustic, modern, beachy, or traditional, consistency in style can make the property look thoughtfully designed and more appealing.
  • Add in some decorative Items: Art and accessories can add personality and charm to your rental property. Just remember to keep it tasteful and not overly personal. For example, as lovely as your personal collection of figurines might be, your vacation home isn’t the right place to display it. 
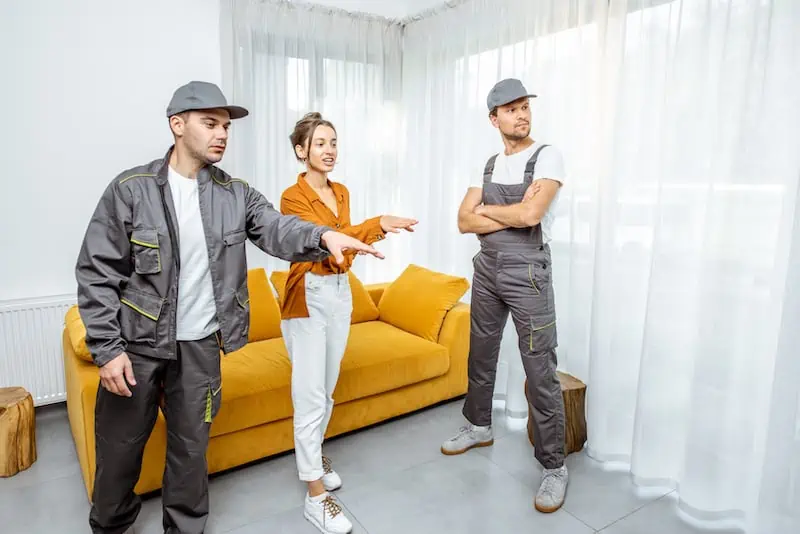
See prices for local moving labor. Read real customer reviews. Easily book your help online.

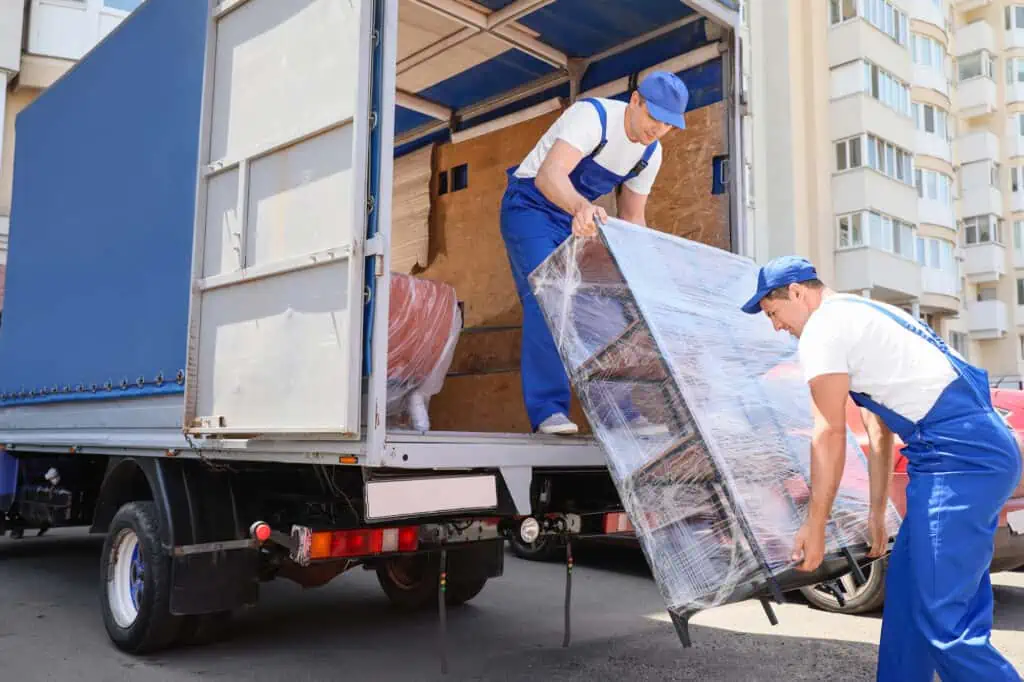
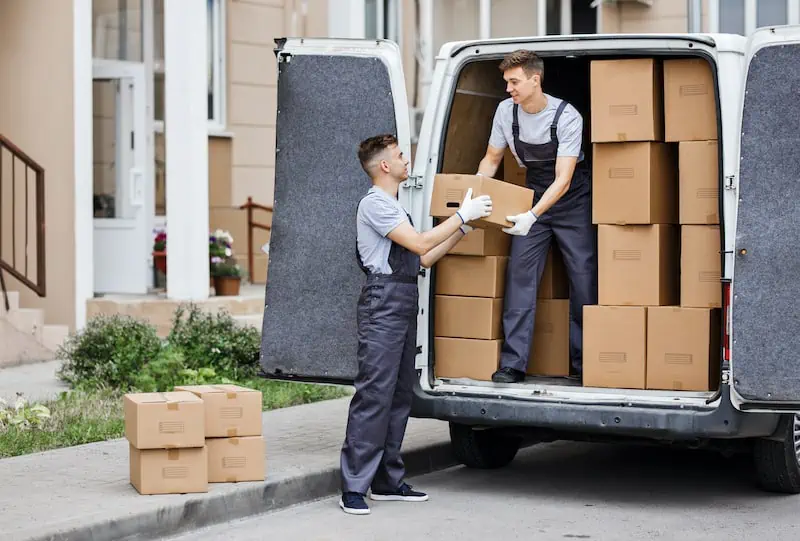
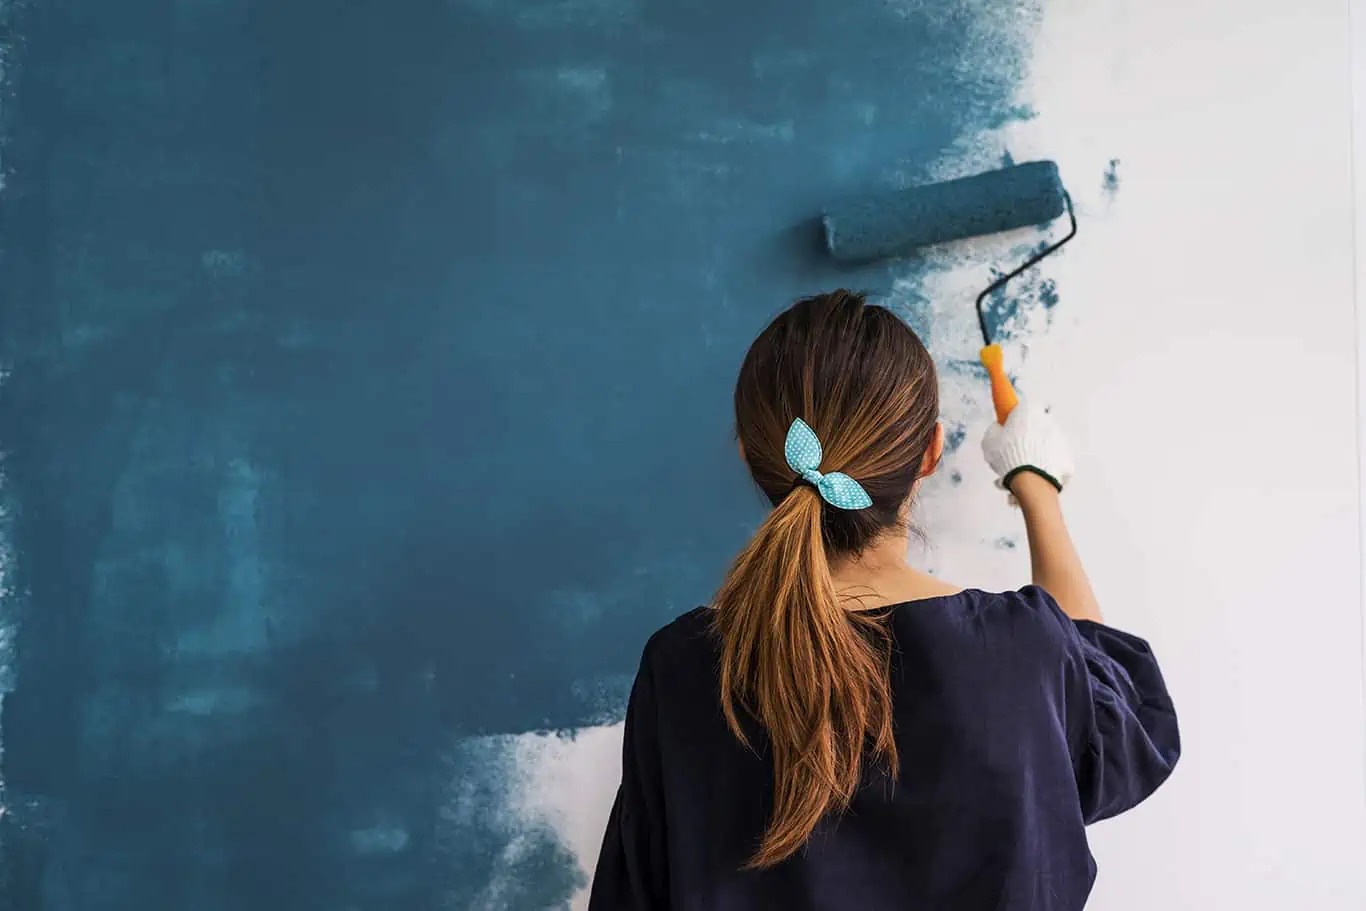
Tips on Transporting Furniture

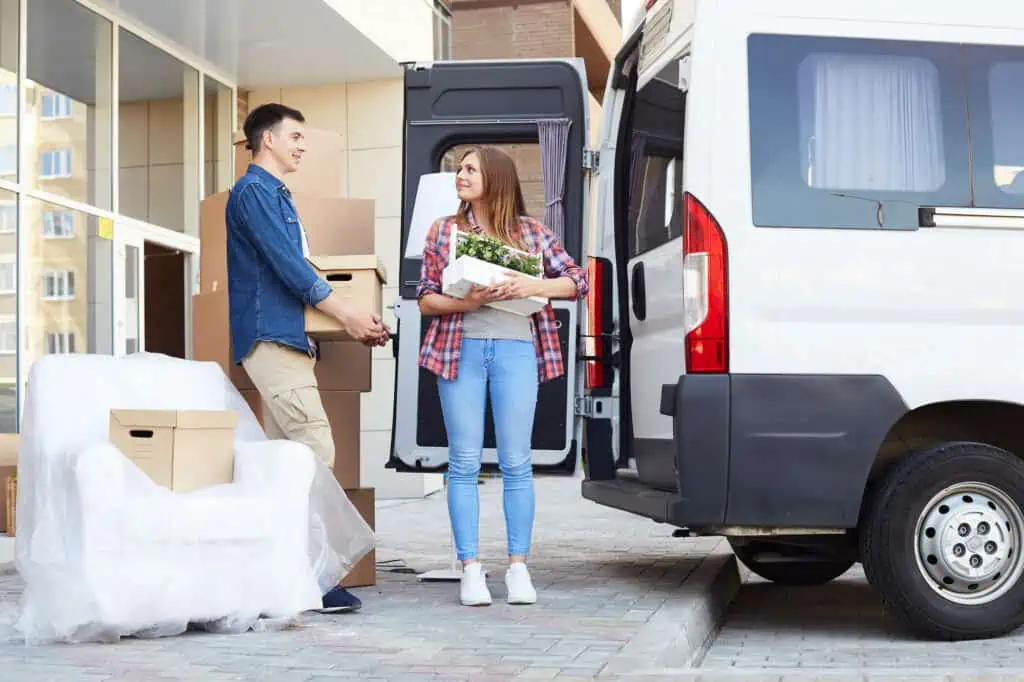
Once it comes time to get your vacation rental furnished, you’ve now got to decide how you’re going to transport all of those heavy furniture pieces. You have some options, depending on how you’ve decided to furnish the place, so here are some tips to make the process as smooth as possible. 

What if I want to use the furniture I already have?

A man and a woman loading boxes and small furniture items into a van

If you own some furniture that you’d like to move into your rental, the first step is taking an inventory of all the furniture pieces you plan to move. This will help you keep track of everything during the moving process. While you’re inventorying, take the time to clean pieces that need it (wiping dust, removing stains, etc.). That way, everything will be move-in ready.

It’s also a good idea to measure all doorways and hallways in both your current space and vacation rental to ensure that your furniture will fit through without any issues. The last thing you want is to run into fit issues in the middle of the moving process.

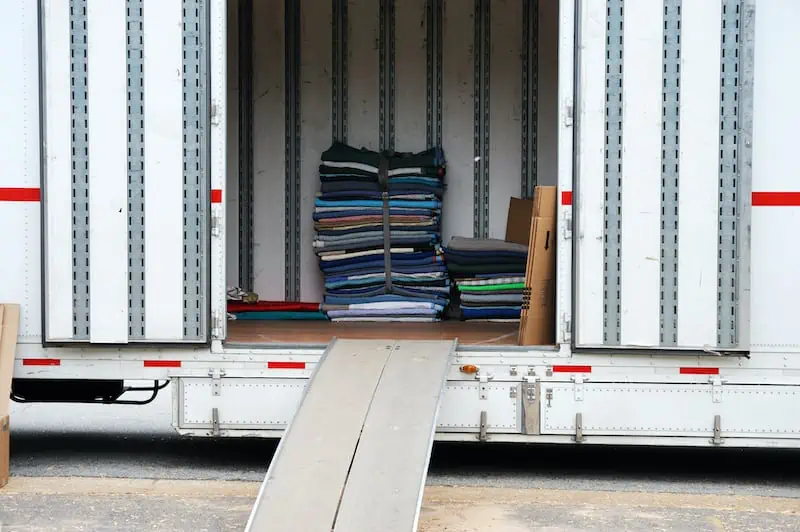
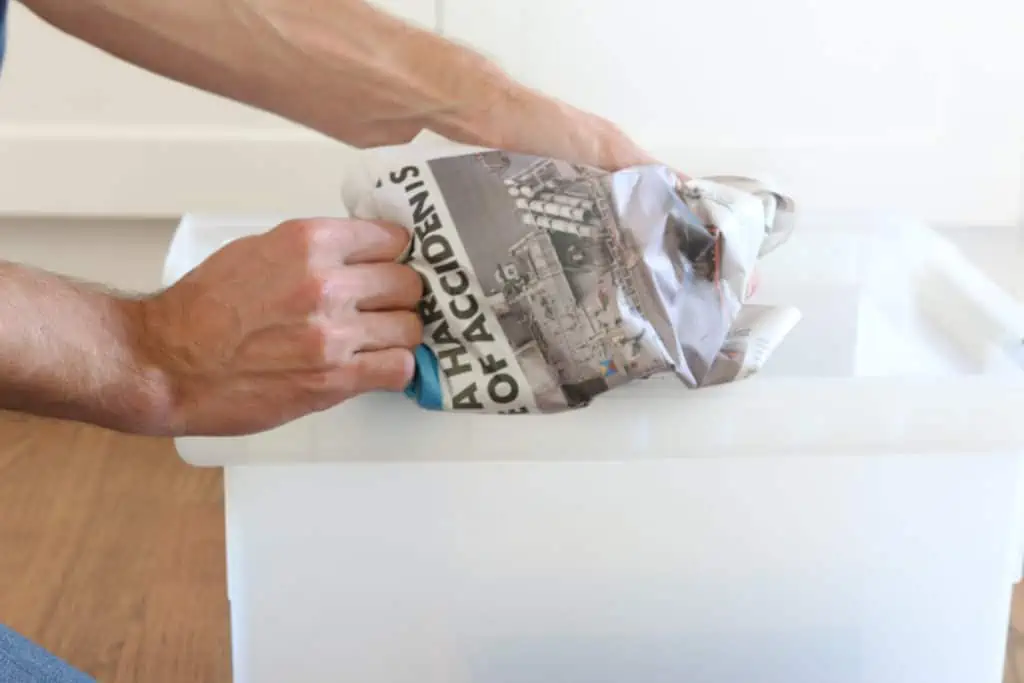
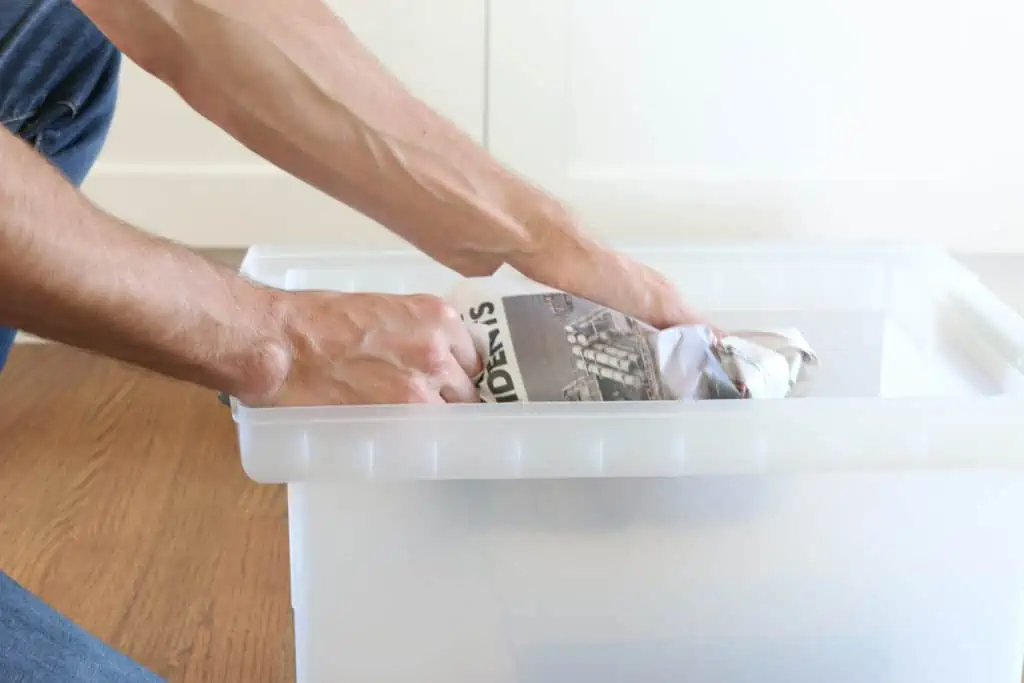
Finally, you’ll also want to protect your furniture so that it doesn’t get damaged going from Point A to Point B. For the heaviest pieces, disassembling them and wrapping them in moving blankets or moving pads is the best way to go. 

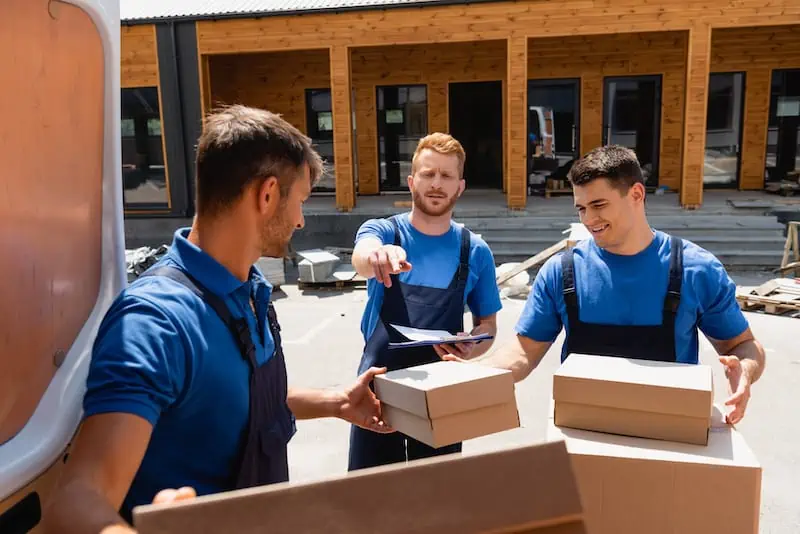
Hiring a moving company vs. DIY 

movers loading furniture into a truck

You can certainly attempt to move and pack furniture on your own! If you’re moving smaller items or the distance you’re transporting them isn’t too far, you might be able to handle the move yourself with a rented moving truck. 

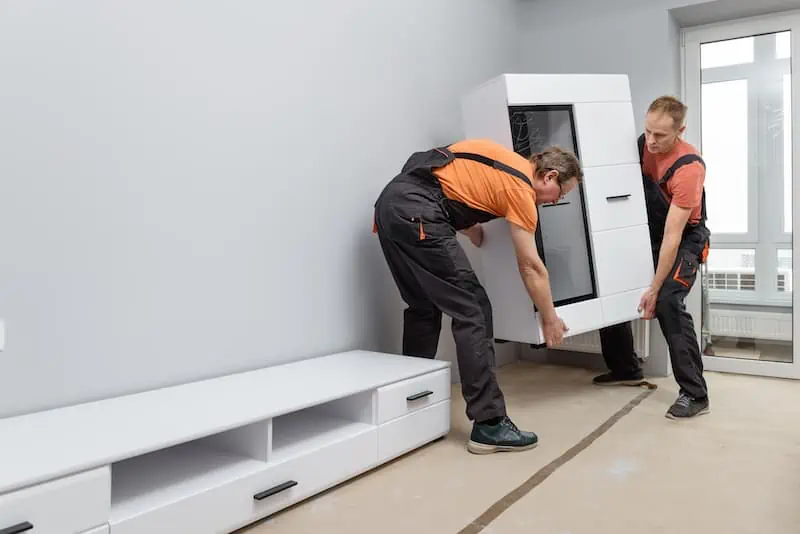
However, depending on the size and quantity of the furniture, you might want to hire professional movers. Not only do they have the experience, but also the right equipment to move heavy and bulky items safely. 


“…the cost of furnishing a rental property can range from as low as $1,000-$2,000 for a smaller property to $50,000 or more for a luxurious vacation rental.”


If you’re using a moving company, make sure your furniture is insured during the move. If you’re moving valuable items, you may need to purchase additional coverage.

In short, if you’re moving items that are bulky, fragile, or valuable, consider hiring hourly moving professionals, even if it’s simply for packing and loading/unloading only. You can still use your own transport to save some money. If you’re moving only smaller, less valuable items, then doing it yourself is likely easier on you and your wallet. 

What if I want to buy all new furniture?

If you’ve decided to buy new furniture for your vacation home, you can most likely have it delivered directly to the new address by the retailer. Some furniture stores also offer assembly services, which can be very convenient, but do come at an extra cost. You’ll need to decide if saving some of your own time and effort is worth the added expense.

How To Take Care of Your Furnished Vacation Home

a woman vacuums a rug in a furnished room

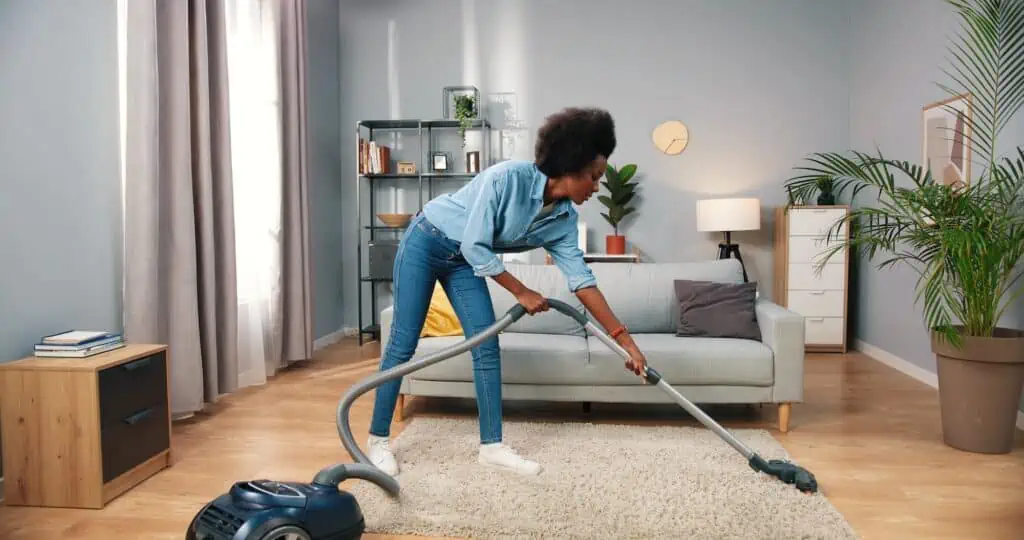
Here’s how you can ensure the furniture you invested in lasts a long time and stays looking new:

  • Regular cleaning: Schedule regular cleaning sessions for all furnishings, and make sure to upkeep all areas of the home. Vacuum upholstery and carpets, dust surfaces, and clean stains promptly. Double-check the appropriate cleaning products and methods for different materials, which will help prevent damage.
  • Use furniture covers: Consider using removable and washable covers for sofas and chairs to protect against spills and stains, especially if your property allows pets or if you have tenants with young children. 
  • Enforce tenant responsibilities: Clearly outline the tenant’s responsibilities for maintaining the furnishings in the rental agreement. This should include routine cleaning, prompt reporting of any damages or issues, and whether or not they’re allowed to move or adjust the furniture. 
  • Inspect and address issues promptly: Conduct regular inspections of the property, including the furnishings, to identify any damages, signs of wear, or pests such as bedbugs. Take care of any problems right away to prevent them from worsening.
  • Use furniture pads: Attach furniture pads to the bottom of chair and table legs to keep them from scratching the floor.
  • Avoid direct sunlight: Position furniture away from direct sunlight to prevent fading and damage.
  • Keep humidity levels in check: If necessary, use a dehumidifier to maintain optimal humidity levels, which stops mold and mildew growth.

See prices for local moving labor. Read real customer reviews. Easily book your help online.

The Bottom Line

If you’re going to invest in owning and managing a rental property, you should ensure you create the most inviting space possible. That doesn’t mean you need to blow your budget on designer furniture, but you should allocate a good chunk of cash to furnishing your rental in a way that complements the space and provides a place that people will want to rent over and over.

Getting your furnishings in the door is the toughest part, so take your time prepping furniture to be moved. Invest in the right materials, and spend some time comparing quotes from qualified movers, if necessary. Once you have your space set up the way you want it, it’s all about maintenance going forward.

Design Tips for How To Make a Small Apartment Feel Bigger

Author:

Publish Date:

Last Modified Date:

Category: Apartment Life, Home Decorating, Home Improvement, Moving Advice, Organization

Tags: Tags: , , , , , , , , , , , , , , , , , , , , , , , , , , ,

Living in a small apartment can present a few challenges. Namely, you have limited space for your stuff. That can lead to a buildup of clutter and a general sense of claustrophobia.

If you feel like you’re living in a glorified closet, you can implement some design strategies to make your place seem bigger. Maximizing the space you have available not only makes your apartment look better, but benefits your mental health. And all it takes are a few smart design choices.

Put Unnecessary Stuff Into Three Piles

a short-haired woman sorts clothing into three piles to help declutter and make space in a small apartment

The first step to opening up your space is the most obvious: getting rid of clutter. Not only is it visually distracting, but clutter can affect your anxiety levels, sleep, and ability to focus. 

You likely already know the common tips for decluttering such as sorting items into categories like  “keep,” “throw away,” “donate,” or “sell”, or the one-year rule that states, “if you haven’t used or worn an item in the past year, it’s probably time to let it go”. 


“Whether it’s statement artwork or an interesting piece of furniture, creating a focal point can help to balance the visual weight in a room, preventing it from feeling too cluttered or too sparse.”


But, you can also use technology to help reduce any paper clutter around the house by scanning important documents and storing them digitally. Cancel any print subscriptions and opt for digital versions of magazines, newspapers, and bills so the paper piles don’t accumulate again.

And if you’re struggling to declutter on your own, consider enlisting the help of a professional organizer, a supportive friend, or a family member. They can provide guidance and motivation to help keep you on track during the process, and be a more ruthless and objective third party when it comes to throwing items out.

Learn How To Siphon Natural Light

a view of a living room. Natural light is flowing in from large windows with semi-transparent yellow and white curtains. There is a white couch with multicolored throw pillows, as well as a settee and turquoise blanket in the foreground

When it comes to making a space look bigger, natural lighting is your friend. It’s a great way to make it feel more spacious, inviting, and energizing. Plus, it can also reduce your energy costs by lessening the need for artificial lighting during the day.

Light-colored walls reflect natural light better than dark colors, so opt for white, eggshell, beige, etc. A matte finish also helps light bounce around without a glare. 

Additionally, heavy curtains or window treatments can block natural light from entering your home, so opt for sheer or light-colored window treatments to allow more light to come through. If you have trees or bushes outside your windows, they may be blocking light from entering your home as well. Keep the landscaping around windows trimmed back. Dirty windows also block light, so clean your windows regularly and keep clutter out of the way.

Decorate With Mirrors

Using strategically placed mirrors can make your space look bigger and brighter by reflecting light and creating the illusion of more space. The simplest way to do this is to hang a large mirror on a wall opposite a window or corner to maximize the effect.  

a solid square mirrored coffee table in the middle of a living room. The reflection of the floor and the flowers and candles on top are visible in the table's mirrored surface
Wayfair.com

You could also create a mirror gallery; instead of hanging one large mirror, create a gallery of mirrors in different shapes and sizes on a wall. This will create a focal point and add depth to the room.

Another creative option is to use mirrored furniture such as coffee tables, side tables, and dressers. The reflective surface of the furniture will bounce light around the room, making it appear brighter and more spacious. The same goes for mirrored accessories such as vases, picture frames, and candleholders, which add an extra bit of sparkle and elegance to a room.

Just remember to be careful and not to overdo it with mirrors. While they can make a space look bigger and brighter, too many mirrors and their reflections can be overwhelming and distracting.

Make the Most Out of Your Furniture

a couple walking through a section of a furniture store, looking at shelving and couch options

When choosing furniture for a small space, it’s important to prioritize functionality and versatility. You also need to meet the challenge of keeping your space clutter-free. Look for pieces that serve multiple purposes, double as storage, and can be easily moved or stowed away when not in use. 

There are some furniture pieces that are necessary to have in a home, so here are some tips about what types to get, and how they can save you space.

Seating

a brown and white upholstered foldable chair for use in small apartments
target.com

Folding chairs are a great way to keep your space clear. And many have modern designs that make them indistinguishable from standard chairs — nothing like the cold and uncomfortable metal sort you might be thinking of.  

Ottomans are also a great, multi-purpose choice. They can serve as a coffee table, extra seating, and footrests while also providing hidden storage. They’re also lightweight and can be easily moved around a room. Look for an ottoman with a removable lid or one that has a hinged top for easy access to the storage space inside.

Similarly, sectional couches have storage in some of the pieces, often at the ends or the footrests, which are perfect for storing things like shoes, blankets, remotes, or extra video game controllers.  

Beds

a murphy bed with brown sheets and patterned pillows is built into a corner desk set up. There is plenty of storage space for a small apartment
Closet and Storage Concepts

A bed with built-in storage is also a great way to maximize space in a bedroom. Look for a platform bed with drawers underneath, or a headboard with shelves for storing books and other items. 

Murphy beds are a great option for small bedrooms or studio apartments. They can be folded up and stored in a closet or against a wall during the day, freeing up space for other activities. You also might want to consider sleeping on a Japanese-style futon. While you have to be mindful to air them out so they don’t get musty, they’re a great way to save some space since they’re made to be folded up and stored during the day. 

Tables

There are many kinds of coffee tables that have storage. You can pick between the ones that have drawers at the bottom or sides, or the kind that has a space accessible from lifting part of the tabletop itself.


“…[R]educe any paper clutter around the house by scanning important documents and storing them digitally. Cancel any print subscriptions and opt for digital versions of magazines, newspapers, and bills so the paper piles don’t accumulate again.”


There are also nesting tables, which are a set of tables that fit together like Russian dolls. They can be separated and used as individual tables, or stacked together to save space when not in use. Foldable tables are also an option, and much like foldable chairs, they come in all kinds of styles and sizes to fit your taste and needs.

Shelving and Closets

a two white clothing racks set up by a wall. One is taller and contains a set of mesh shelving for shoes and handbags. The other is shorter and has blouses hanging from it.
ikea.com

It seems like a no-brainer to say that shelving is storage, but you might not have considered that it can be converted into drawers, a table, a tv stand, or a pantry at will. Simply outfit a piece of furniture like bookshelves with storage baskets or cabinets, or turn it on its side instead of placing it against a wall. 

If you’re short on closet space, clothes racks are a great way to store bulky items like coats out of the way. They can also come with wheels, meaning it’s easy to move them out of the way entirely, or trade out a winter-clothing standing dresser for a summer-clothing one. And while it’s not exactly furniture, getting a vacuum sealer for your clothing and bedding can save a lot of room in your closet.

Rolling carts are another great option for small kitchens or dining rooms. They can be used as a serving cart, a bar cart, or as an extra pantry.

Decorate Upwards

a section of a room with three levels of floating shelves set above a countertop. Both are decorated with plants in white planters and small vases.
Shapeless Studio

To make a space look bigger, it helps to direct the eyes up. Plus, taking advantage of vertical space means you don’t have to crowd the floor of a tiny room

Tall bookcases are a great way to add storage and display space to a room while also drawing the eye up and making the ceiling appear higher. Or you can opt for floating shelves, which add storage and display space to a room without taking up floor space. 

Hanging curtains close to the ceiling creates a similar illusion of height in a room, as do tall, vertical artwork and high-mounted light fixtures.

Make Rooms Using ‘Zones’

a living room in a small apartment set up into zones. A blue couch is a divider for the dining room in the corner. One square rug sits under the living room couches while a circular rug is set under another sitting area. There are white stairs leading to upper rooms in the top left.
housebeautiful.com

Small apartments may not have a fully separate bedroom, dining room, kitchen, etc., which can make the space feel cramped. But dividing your apartment into different zones based on their functions, and choosing furniture that fits each zone’s specific needs, will make things feel less closed-in and more functional.

When setting up your zones, make sure the furniture placement allows for a clear flow of traffic between each one. Furniture such as bookcases or room dividers can also be used to create physical barriers between different zones, helping to define each space and create a sense of privacy (if that’s what you want). You can also use different patterns, colors, or sizes of furniture, like rugs, to create distinct areas within a single room.

Take Advantage of Outdoor Space

a view of a balcony with planters hanging on the railing and a small table and chairs set with food.

Having a balcony in a small apartment can be a great advantage, as it’s another way to provide additional space and make your home feel bigger. Depending on where your balcony or patio is located, you could use it as an extension of your living space. Adding an outdoor rug, seating, and a few plants can transform your outdoor space into an inviting hangout.

But keep in mind that the same rules apply outside as they do inside. In other words, you should avoid too many knick-knacks, extra large furniture, and dark colors, Instead, opt for sleek and minimalistic furniture and decor, and be sure it’s made to handle the sun and weather from being outdoors

See prices for local moving labor. Read real customer reviews. Easily book your help online.

Pick These Colors, Textures, and Materials 

To summarize, you have to be selective about what you bring into your home — and strategic about how you place it all — to make a small space appear larger, brighter, and more welcoming.

To maximize the appearance of space in your apartment, follow these tips:

  • Use light colors: Choose soft tones of white, beige, or gray, and avoid dark or heavy colors that can make the space feel cramped.
  • Create texture and depth: Incorporate different materials and finishes, such as wood, metal, glass, fabric, and plants. Mixing materials will add depth and dimension to your space.
  • Use transparent or glass furniture: Transparent or glass furniture, like coffee tables or dining tables, can help create a sense of openness by allowing light to pass through them.
  • Create a focal point: Whether it’s statement artwork or an interesting piece of furniture, creating a focal point can help to balance the visual weight in a room, preventing it from feeling too cluttered or too sparse. It can also help to distribute the attention evenly across the space, making it feel more comfortable and inviting.
  • Use lighting: Create different moods and highlight different features of your apartment with a mix of soft overhead lighting, table lamps, and floor lamps to create a warm and inviting atmosphere.
  • Keep it clean: A tidy and organized space will always appear larger. Use storage solutions to keep your belongings organized and out of sight, and avoid having too many items on display.
  • Choose the right furniture scale: Avoid oversized furniture, which can make a small space feel more cramped. Instead, opt for smaller, more streamlined pieces that won’t dominate the room.
  • Incorporate rugs: They can help to create the illusion of more space by defining separate areas within an open-plan living space or studio. Bookcases and partitions can also help define different zones.

Not everyone has the luxury of living in a big, wide-open home. But if you do live in a small apartment, it doesn’t have to feel that way. A few smart design choices can make your space seem much larger than it really is, which creates a much more pleasant atmosphere. 

My Top 10 Moving Tips for Professional Movers

Author:

Publish Date:

Last Modified Date:

Category: Customer Service, Moving Company Resources

Tags: Tags: , , , , , , , , , , , , , , , , ,

As movers, we like to move fast and efficiently. But we also like doing everything right.

But there’s truth to the old adage “Work smarter, not harder.” With that phrase in mind, take advantage of these smart moving tricks and hacks I picked up over the years to help you and your crew from working any harder than you need to … but while still doing that 5-star service you’re known for.


1. Set up as SOON as you step off the truck

What’s the first thing we do when we show up for a move? Ring the customer’s doorbell, say hello, and do a walk-through of the place.

Use this opportunity to have a crew member bring stuff you’ll need into the house. As your customer shows you around,

  • Leave a roll of shrink wrap in the living room for the O/S
  • Bring your tools inside/upstairs (along with a few plastic bags!) so you can get right to disassembling the beds
  • Bring in some markers and tape (if there’s any packing to be done) 

Note: Even if you are moving someone into their brand-new home, you’ll still want to bring in tools; they always come in handy. (At minimum, use your free hands to bring in the first few boxes while you’re saying good morning.)

2. Make practical use of the walk-through

Once you’ve seen the upstairs (or the farthest parts of the apartment), grab a box or two and carry them with you back downstairs and/or toward the door. This will keep the move flowing and snappy.

If you need to inventory the customer’s goods first, leave those boxes inside, for now. But if it’s a same-day local move, then carry the beginnings of their stuff out to the garage or driveway (or wherever you’ll be staging things), if not right out onto the truck.

Note: The very beginning is not the time to start hauling heavy furniture down the steps. Leave that sort of stuff for once you’ve got the necessary paperwork signed and the necessary furniture pads prepared.

3. Tape nuts and bolts to the furniture it comes from

Me? I love it when putting a bed frame or a dining room table together, the nuts and bolts are all right there for me, taped in place and waiting for me.

Some people prefer using a parts box, but honestly? Just tape those bits of hardware securely to the bed frame or the underside of the tabletop and you’re good to go.

DON’T tape the bolts THEMSELVES directly to the surface of any metal or wood (please, no!); put all those screws and wing-nuts and everything else in a plastic bag, tape a piece of packing paper around the bed frame or one of the table legs, wrap up that plastic bag of bolts in more paper to prevent any scratches, then tape the protected bag to the bed frame, or the underside, or one leg of the table.

Note: If you are worried about leaving scratches or sticky tape residue on the customer’s bed frame or table leg (or whatever else), or if you just prefer not to tape plastic bags to things, there’s nothing wrong with using a parts box. Go with what works for you.

4. Both you AND the customer should take pictures of everything before you move it!

pictures moving

Before unhooking electronics, it may prove supremely helpful down the road to have pictures of all the cords and wires so we – or the unloaders, or the customer – can see how to hook everything back up again.

The same goes for anything else we will be disassembling: exercise equipment, partition furniture, and even something as simple as a dresser mirror. Of course, take pictures of any pre-existing damage you find, whether it be on an item or somewhere in the customer’s home (e.g., a scratch on the floor or a nick in the wall.)

Note: I recommend using a filesharing website like Dropbox or wetransfer for photos. Both you and the customer can send their pictures to one online folder created specifically for that move.

5. It’s almost always better to empty heavy furniture before moving it

moving furniture

Sure, it might make sense to transport a dresser as is, without emptying it and packing all those clothes in boxes. But depending on how bulky and heavy that dresser is, or how treacherous a staircase might be, to first take out all the drawers and carry them downstairs (and maybe all the way out to the truck). A dresser without its drawers (and all the clothing inside) weighs a lot less than it does when full, making it easier to maneuver without any danger of a drawer sliding out and crashing into the wall or onto the floor.

6. Try shoulder straps 

shoulder straps furniture movers
photo credit: northerntool.com

Shoulder straps are for when we are faced with a heavy piece of furniture and a narrow staircase. If you have furniture straps, great, If not, you can use ratchet straps (as long as you remove the part with the ratchet). Either way, using straps can make it a lot easier to control a heavy piece as you ease it down those stairs. Slide it down if it has a sturdy, flat surface (pad it up first!). Otherwise, lift it and go down one step at a time.

7. Pad-up the furniture at the truck, not inside

Sure, if you are going to slide a piece of furniture down a set of stairs you’ll absolutely want to pad it first, and pad it very well.

But for furniture you are simply going to carry out to the truck, wait until later to pad it up. Why? No matter how securely you tape your furniture pads in place, they are bound to slip once you try to carry what they are wrapped around. Your mileage may vary, but I always found it much easier to handle furniture that was not padded, and much more importantly, much faster not to have to do the same thing twice.

8. Save your back with a “set box”

movers van set box

A set box is a box for putting other boxes on top of, and it saves everyone a lot of unnecessary bending and lifting.

Whether moving your customer in or out, it’s a great idea to have a few solid boxes left at key loading or unloading places; when you have one crewmember or two hauling boxes out of the house to the staging area and another crewmember or two hauling them onto the truck, a set box on either end will speed you up!

9. Tape cardboard OVER a furniture pad that’s covering glass

furniture pad cardboard

It’s common — and smart — to place a piece of cardboard over the front of a china hutch or a curio, or any piece of furniture with glass that can not be removed and wrapped. Usually, this is done before wrapping the piece up in furniture pads. But for an extra layer of protection — and to give everyone a clear warning that there is glass under that pad — tape another piece of cardboard over the glass ON TOP OF the furniture pad.

10. Bring towels

mover with a towel

In hot weather, we sweat. In bad weather, things get wet. In any case, it’s a great idea to have a few towels on hand.

Have CLEAN towels for your crew to wipe the sweat off their hands and arms (and faces and legs too). Have some big old towels your crew can use to wipe their feet and keep the truck ramps as well as the inside of the truck as dry and safe as possible.


And one final tip: Please, don’t run. Yes, we are movers. We love to move. But one missed step, one uneven edge, one loose rock and your extra hustle could lead to a whole lot of hurt, not to mention a slowdown for the rest of the job and maybe beyond.

“Work smarter, not harder.” To that, I’d add, “Work safely.”

The Best Way to Unpack After Moving

Author:

Publish Date:

Last Modified Date:

Category: Loading & Unloading Guides, Organization

Tags: Tags: , , , , , , , , , , , , , , , , , , , , , , , , , , ,

Unpacking should be the best part of the entire moving process. No, really!

You’ve already coordinated all of the logistics of renting a truck and hiring Helpers, you’ve packed everything up, moved, and unloaded your rental truck. Now all that’s left to do is go through all of your boxes and get everything in its place so you can enjoy your new home!

So why do some people still dread unpacking? Well, imagine sitting amongst a mountain of boxes with no clue what’s inside any of them or where everything is going to go. Okay … yeah, that does sound pretty dreadful. But it doesn’t have to be that way! By planning your unpack, you can save time, money and headaches.

How to Make Unpacking Easier Before Moving Day Happens

We all know the quote, “If you fail to plan, you plan to fail.” The most important step to a smooth unpacking experience is proper planning before your move. 

Of course, you’ll have some planning to do if you’re booking movers and renting a truck … but you still need to spend some time packing. And no, we’re not talking about randomly throwing items into boxes and calling it a day.

Here are some things you should do before moving day to make unpacking easier.

Take Photos Before You Start Packing

Before you touch anything, we want you to take out your phone and have a little home photo shoot. 

Here are things you especially need photos of:

  • Bookshelves
  • The back of your TV
  • Kitchen drawers
  • Desk area
  • Tool shed

We urge you to snap pics of the areas in your home that you love! We know all too well how long it can take to get a shelfie looking just the way you want it. By snapping some reference pics now, you’ll be able to replicate that new look in your home in no time.

Create a Number and Color-Coded System For Your Boxes

After the photo shoot, gather all of your packing supplies (boxes, paper, tape, scissors, markers … the works!) and start packing boxes like a pro.

Try to only pack up items from one to two rooms inside every box. This will make your life much easier when it’s time to unpack later.

Got a bunch of stuff on shelves? Create a numbered system to remember where everything goes. That way it’s easier to get them unpacked and into their new permanent spots.

And we can’t forget our favorite tip of all … our color-coded box systemWith this technique, you get to use our most beloved crafting tool—washi tape! Get the full instructions from this post, but the short version is that you need to separate your boxes by the room, marked with bright washi tape so your movers know exactly where to deliver them. Genius and oh so colorful!

Make it Much Easier to Unpack Essentials

There are 7 items you’ll want to have on hand for moving day, but we also think you should create a box of moving day essentials. Because imagine the night of moving day when you’re tearing open boxes trying to find pajamas, your toothbrush, and your medication for the night. Sounds like a disaster to us.

This is what should go in your “Moving Day Box” so you don’t have to tear through your moving truck:

  • A change of clothes
  • Utensils
  • Toiletries
  • Prescriptions
  • Phone charger

Be sure to label this box and keep it near you!

Get Help Unloading Your Rental Truck

See prices for movers by the hour—instantly.

Read real customer reviews.

Easily book your help online.


Clean The 5 Most Important Things

We know you have approximately 10,000 things to do to get your rental deposit back. But trust us, now is the time to give your new place a thorough cleaning because it’s empty. You simply put items in place rather than cleaning and unpacking at the same time. Want to know the five most essential things to clean?

  • Kitchen cabinets
  • The Refrigerator (and refrigerator fan)
  • Bathtub and any tub jets
  • Outside (and Inside) the stove
  • Washing machine

Unpacking Tips

You’ve done the prep work (even the cleaning, you rockstar, you!), and now moving day is here! Even if you hired help for your unload (great call), there are still things you can do to make unpacking time a little easier. 

Place Your Boxes in Rooms by Color

It may sound easier to just have your Helpers pile up all of the boxes in one spot of your new place, but unpacking will be a lot easier if you follow your color-coded box system to get each box in the correct room. If you followed our washi tape tips, you should have each door in your new place marked so the Helpers can easily drop the box in the right spot!

Protip: Get your “Moving Day Essentials Box” opened right away so you have everything you need to make it through the next day or two.

Use Washi Tape to Figure out Your Furniture Layout

As long as your movers are there, have them get your furniture in the spot where you want it! We love the idea of using painter’s tape to mark out the layout of furniture right on the floor.

Before you move (or even while your movers are bringing things in and out),  go around your place and put tape on the ground to outline your furniture. That way the movers will know exactly which wall to put your bed on and where that long dresser goes. You can always move things later on, but getting items in the correct space will make your life a lot easier in the coming days.

Unpack the Bathrooms and Bedrooms First

Moving day will be exhausting, so if you’re going to unpack anything immediately, make sure it’s your bed and bedding. Once your movers get the mattress into place, find the sheets, comforter and pillow and make your bed. If you have kids, do theirs too. Having a comfy spot to sleep at the end of the long day will feel amazing!

Unpack your bathroom boxes too. That way you’ll have all of the toiletries and medications on hand for the night and morning. A fresh shower after a long day of moving will be heavenly, trust us!

Save the Kitchen for Tomorrow

The kitchen is the most time intensive room to unpack, due to the amount of tiny and heavy items, so don’t unpack it on moving day. Your brain will be tired by the end of moving day, and you’ll want to be refreshed and recharged before you tackle this space. Save the kitchen until morning when you can make a fresh pot of coffee.

How to Stay Organized After Moving Day

You’re into your new home and you’re surrounded by all of your possessions. First, take a deep breath. You’ve made it this far! Now it’s time for the actual fun part … making your house a home.

Avoid Distractions, Don’t Unpack Games or TV

We might suggest making a playlist of music to entertain you, but we don’t think you should get your TV setup and turned on right away. You may find yourself sitting on the couch instead of unpacking if you have a TV show or movie on. So much temptation…

Another distraction? Little ones. You’ll additionally want to make a plan for your pets when you’re moving and unpacking, so they don’t get in the way. The same goes for kids. Have a plan to keep them occupied or if you can, drop them off at grandma’s house so you have uninterrupted time to unpack. It’s all about keeping the distractions to a minimum so you can devote enough hours to get your house in tip-top shape!

Unpack Only One Room at a Time

Instead of hopping from space to space, we suggest making a list of your rooms in order of importance. Then, don’t move onto another space until the one you’re on is done.

The kitchen, bedrooms and kids’ rooms should be up high on the priority list, while the guest room and garage may not need TLC right away. Also, make sure you have furniture and appliances setup before you get too carried away going through boxes. Did you clean your counters first? You’ll want to have spots to put all of the items as you whip them out of the boxes, so having dressers and cabinets ready to go is a must!

Break Down Boxes as You Go, in Real Time

As you unpack boxes, it may be easy to just throw empty ones in a big corner. But trust us, that pile will quickly get out of control and soon you won’t be able to walk around your house without an empty box tumbling down on you. Take one box and make it the designated paper box. As you unpack boxes, crumple up the paper and shove it into that box. Then, be sure to break down boxes as you unpack. You’ll want to have a utility knife on hand so you can do this quickly.

(And Don’t Unpack Everything)

There may be some boxes that don’t actually need to be unpacked. We’re looking at you, Christmas decorations. Make a large pile of items that may be heading to storage or the garage. Then be sure to get those items to that space in the coming days.

What to Do After You’re Unpacked

You’ve made it! You survived moving day and every box in your place is unpacked. You should be feeling pretty darn good about yourself right about now, but the fun isn’t over just yet. There are still a few things you can do to really get your unloading and packing done.

Make Use of Those Moving Boxes

If you will be moving again soon, then you may want to hang onto some of the boxes that are still in good condition. Organize your boxes and find a spot to neatly tuck them away. Are you thinking, “What the heck do I do with all of that cardboard?!” Don’t fret! Instead, try out some of the cardboard hacks.

If getting creative with cardboard isn’t your speed, you can recycle your moving boxes. Check out this searchable database that’ll let you know the closest place to recycle anything (including moving boxes!). Just be sure to set a deadline for yourself to get those moving boxes out of your new place, so they don’t stay piled in the garage forever.

Use These Organization Protips

We’re all guilty of just shoving random items into a cabinet or closet and calling it a day. But to really feel settled in your new home,  be intentional with what goes where. Check out this post on how to organize house keys:

Whenever we’re on an organization spree, we go room by room with a notepad and write down areas that need our attention. Then we’ll spend 30 minutes each night giving those spots some TLC. Those short increments of time seem much more doable than an entire day spent organizing an entire home.

Let the Decorating Begin! (In a Month)

We always say that you need to live in your home for a while in order to decorate it well. So many people quickly buy furniture and accessories for their place without ever giving each room a test run, and they end up with design regret. Yep, don’t paint the walls until you’ve spent a little time in your new place!

We promise that you’ll make much smarter decor decisions after 2-3 months.

Here’s how to get started when it’s time to begin: 

It may not seem like it, but unpacking can be the best part of the moving experience! We promise that these tips will make your unpacking experience easier and more efficient.

The sooner you unpack, the sooner you can enjoy your new life!

Can Movers Help You With Other Stuff Besides Moving?

Author:

Publish Date:

Last Modified Date:

Category: Movehacks

Tags: Tags: , , , , , , , , , , , , , , , , , , , , , , , , , ,

If you thought moving companies do nothing but put all your stuff on a big truck, you’d be right—if you were living sometime in the distant past.

Today’s moving companies are constantly expanding their range of services and offering them all à la carte. That half-job or heavy lifting you need help with? Sure, you can try begging and bribing your friends, or you can call up a few movers in your area. You might be surprised at what they can help you with.

So What Else, Exactly, Can Movers Help With?

More than you can probably imagine. Heck, you don’t even need to be moving to have them give you a hand! More and more, people are turning to moving companies for all kinds of tasks too big to tackle alone. Movers make great day laborers, for things like:

Clearing out your garage or basement

  • Having a couple of sets of hands to move stuff while you figure out whether it goes to the curb or your cousin’s house or back into the garage can save you an entire weekend (if your garage looks anything like mine)
  • This also applies to attics, sheds, or anywhere

Hauling individual furniture from Point A to Point B

  • From your house to the curb; from your bedroom to the basement; to that cousin’s house; to the municipal trash dump; to your local secondhand store or consignment shop

Moving everything out of the room you are repainting or remodeling 

  • And then moving it back when you are done

Hauling stuff to your home from the furniture store

  • Or from your second cousin’s house, or from the garage of the guy selling that big beautiful piano on craigslist

Movers can (and often will) also take care of those jobs tangential to a move:

Even if you’ve managed to tackle your entire move on your own, you may be left with a mountain of unwanted cardboard boxes and unusable packing paper that you just don’t want to deal with. Movers, however, see gold in those mountains. So try giving them a call.

Protip: Most movers tend to charge for a minimum of two hours of labor, due to scheduling their business hours. This is not by any means a hard and fast rule, but make sure you ask before you book your help.

Can I hire movers to JUST help me load and unload my U-Haul?

You betcha!

Renting a truck or a moving container and hiring moving labor for all the heavy lifting is a huge trend—and for good reason. You save a ton of money by renting your own truck, and you save your back by hiring movers.

À la carte movers often:

  • Bring all the equipment
  • Have all the knowledge necessary to do the job right
  • Pack stuff you need packed, wrap stuff you need to be wrapped
  • Load it all up safely and securely

You drive your U-Haul (or Penske or Budget), or have your portable container delivered, and a fresh crew of movers unloads everything at your new home. This is what we call a Hybrid Move. As far as moving goes, it’s the best of both worlds. And it’s what HireAHelper movers do best.

Get an instant quote for local TV mounting services.

Protip: If you are moving locally, your movers may be able to rent you moving blankets for a small fee. But if you are moving out of the area, you might be able to rent them from your rental truck company. You may, however, have to buy them. Just please don’t move without them!

Can my movers do my entire move?

Yes, of course. Your traditional Full Service moving company will handle the whole moving enchilada if that is what you want, including packing up your entire home, right down to your last box of biscuits. This is the easiest way to move. It is also by far the most expensive.

Movers Know Best

Of course, we can’t tell you what’s best for you. But we can say with total confidence that movers know how to best handle your stuff. Whether it’s a single item job or a few pieces of heavy furniture; whether you’re moving one room or one door down or one hundred miles away; whether you need loading help, unloading help, or both, hiring moving labor is the best and most economical way to make sure your belongings are taken care of.

If you’re not sure what to do, that’s cool. Calling a mover and asking a few questions costs nothing. And it could end up saving you a lot.


Illustrations by Rob Wadleigh

A Pro’s Guide to Moving Heavy Furniture Without Hurting Yourself

Author:

Publish Date:

Last Modified Date:

Category: Loading & Unloading Guides

Tags: Tags: , , , , , , , , , , , , , , , , , , , ,

Chances are, there are near by movers who can help you move that fridge, bed, or whatever else makes your back ache by the mere thought of picking it up. But if you can’t find the right help, or if you and your back feel up to the task, then keep reading—we’ve got you covered!

The First Step to Moving Heavy Furniture

Abraham Lincoln once said, “Give me six hours to chop down a tree and I will spend the first four sharpening the axe.” Okay, that’s a little weird, but moving heavy furniture is the same idea. You gotta really, really prepare.

Before you roll up your sleeves and start picking stuff up, you’ll want to do a few things:

  • Clear as wide of a pathway as you can
  • Measure that your furniture isn’t too big to go through that path
  • Mark a clear, physical end point where you will drop the item

The last one will probably be near your moving truck or storage container or, if you’re particularly strategic, a staging area (meaning your driveway, sidewalk, or the garage during sketchy weather) in order to better “Tetris” your stuff.

Disassembling Furniture

The great news is that many movers across the country will offer to disassemble any furniture that might need it in order to be moved. All you have to do is ask if your local mover offers the service.

If you’re disassembling furniture all yourself, there are plenty of basics to know when taking off table legs, moving desks, or detaching a flat screen tv.

The Most Important Basics When it Comes to Disassembly

  • When removing table legs, immediately reattach whatever nuts and bolts were holding the leg in place after the leg is off. This keeps screws from disappearing 
  • Always use a screwdriver with a magnetic head when unscrewing flat-screen tv mounts, as losing important screws is extremely easy to do
  • Dresser mirrors always get removed and properly packed up. Any undetachable dresser mirrors require tons of special attention to move
  • Dining room chairs aren’t often designed to be taken apart easily, if at all. But if you have chairs with exposed bolts or screws, you may be able to disassemble them

The above just scratches the surface of what professional movers with experience know about moving furniture and disassembling furniture. You’ll learn plenty, just like I did, by trying to do it yourself.

Get Help Unloading Your Rental Truck

See prices for movers by the hour—instantly.

Read real customer reviews.

Easily book your help online.


“The IKEA-Exception”

The furniture in your home didn’t just grow there, right? It had to have been carried in.

But the one exception to the “furniture doesn’t grow there” concept is IKEA-like furniture, or in other words, most anything you had to assemble yourself.

Full-Service moving companies will generally refuse to move customer-assembled furniture made of pressboard. This is because such furniture was designed to be assembled, put in place, and never ever moved again. Any customer requesting their pressboard bookcase (or pressboard anything) be professionally moved usually has to sign a waiver stating they understand it will very likely get destroyed and the movers will assume zero responsibility for the destruction.

If you have any pressboard furniture or any furniture that – be honest with yourself – is generally cheap and flimsy, consider selling it or giving it away. Moving it costs time and money and will more than likely turn it into an unusable piece (or pieces) of trash.

Wrapping Furniture

how to move heavy furniture

At some point during the move-out process, you’ll need to wrap your furniture so it doesn’t get scratched, gouged and cracked into oblivion.

Cloth furniture pads (also known as “moving blankets”) are what movers use, and we highly recommend them. Wrapping your furniture before you carry it through your home and out the door can help protect it against incidental dings in the doorway and, quite possibly, holes in your walls.

No true professional mover will ever dream of transporting heavy furniture without furniture pads.

Protip: Moving pads can make it hard to keep a firm grip on your furniture. I always preferred to wrap everything in the staging area, or right there on the truck.

The Most Important Basics When it Comes to Wrapping Furniture

Wrapping a refrigerator or a bookcase is pretty straightforward. Wrapping a non-rectangular item like a sofa or a chair can be a challenge.

  • The key is to secure your furniture pads neatly and tightly, covering every surface except, in general, the bottom side
  • You mostly need to just make sure the pads don’t come off. Some movers use shipping tape to keep their pads in place, while others use shrink wrap. Both are effective but costly (not to mention a little wasteful). That’s why other movers use big rubber bands called “mover’s bands”. They are versatile and reusable for applications far beyond moving furniture (like, say, wrapping an office chair)
  • To secure those pads, whether you use tape, shrink wrap or those big rubber bands, just remember: avoid putting tape or shrink wrap directly on your furniture’s surfaces

How Many Furniture Pads Do I Need?

For reference, furniture pads the pros use measure 72” x 80”, give or take.

End tables, small bookcases, and dining room chairs usually only need one (1) pad; most furniture needs two (2), while things like sofas, really large dressers, even some big headboards need three (3) apiece.

How many furniture pads do you need, then? Your best bet is to go from room to room, check how many things you have that need to be wrapped, note how many pads each item will require to cover their surface, then tally it all up. (To be safe, you might want to tack on a half dozen more!)

How Do Pros Move Furniture Through Doorways?

how to move heavy furniture

Angling

If your sofa is too wide to fit through a doorway in your home, there are a few things you can do.

The simplest is to tilt it 45 degrees (more or less) so the front edge of the seat cushions and the top of the back of the couch are aligned vertically. This will make the bottom rear edge of the couch look like it is sticking further out, but all you geometry lovers out there will appreciate how this actually makes the couch narrower.

Curling

If your couch is still too wide, try standing it on end and curling it through.

Laying down a blanket first will help you smoothly and safely slide your couch through the doorway. Ease the top back edge through first, then curl the sofa around the side of the doorway closer to the seat cushions as you slip the rest of the couch through. (You can also push it through seat cushion edge first.) This same strategy can be used when trying to get oversized easy chairs through a seemingly too-narrow door.

Detaching

If you find you need a few extra inches of clearance before your sofa will pop through that doorway, try removing the legs or feet.

Even though they are sometimes nothing but short squares of wood, I’ve found on many occasions that taking them off is the difference between success and a damaged door jamb. On occasion, I’ve had to actually remove a door from its hinges in order to get a couch out the door. While not difficult, you will need a flat head screwdriver and a hammer to coax those hinge pins out, and a couple of extra sets of hands to keep the door in place until those pins pop free.

Moving Furniture Up and Down Stairs

how to move heavy furniture

Hauling large pieces of furniture – more importantly, heavy pieces of furniture – down a flight of stairs is a dangerous proposition if you don’t take it slow (and smart).

  • Make sure you have a strong friend (if not two) on the lower end as you go down (or up) the stairs. Take those steps one at a time. Rest as often as need be, simply by laying that dresser or bookcase down, right on the stairs. Just make sure it doesn’t start sliding!
  • Watch for walls, banisters, and hanging light fixtures
  • It’s easy when you’re watching your feet to forget about everything else. And that, I can tell you, includes your knuckles!
  • When sliding items around corners on landings, use a blanket underneath
    • When doing so, put a blanket down to make the sliding process easier and to avoid damaging that dresser and/or the floor. If the floor is carpeted, the item is really heavy, or if the surface it is resting on is uneven, try walking that thing forward – using small, slow, easy steps

Using Wheels to Move Your Furniture

how to move heavy furniture

If you aren’t The Hulk, a little extra help in the form of wheels can make a huge difference. Here are what the pros use:

  1. 4-wheeler: A 4-wheeler is great for moving large, heavy items over long flat distances. Two main things to watch for: your piece of furniture is resting firm and balanced, and that the wheels, usually black rubber, aren’t marking or scuffing your floors.
  2. Hand truck: A hand truck has two wheels and a metal plate on which to rest your furniture, and a long upright surface with handles. Their soft-ish wheels let you move heavy items up and down stairs and across uneven surfaces all by yourself. However, we highly recommend having a second set of hands at the lower (bottom) end of that piece of furniture any time you are negotiating stairs.
  3. Appliance dolly: An appliance dolly is basically a heavy-duty hand truck with a strap to secure in place the refrigerator, washing machine, dryer or whatever. Despite its name, an appliance dolly can absolutely be used to haul furniture.

This All Seems Hard. Are There Furniture Movers Near Me, Just In Case?

Most likely, yes!

See prices for local moving labor. Read real customer reviews. Easily book your help online.

Start by searching HireAHelper’s massive network of local movers to find movers near you to tackle the big stuff. You don’t necessarily need to hire an entire moving crew if you just need to move your heaviest items.

Normal moving rates will apply, usually starting at a couple hundred bucks for two experienced professionals for two hours. They will usually bring all the necessary equipment, too!

If you just aren’t sure you want to move heavy furniture yourself, relax. Professionals know how to do everything in this article. If you’re doing a long distance move, our sister company Moving Place can provide you with movers, transportation and everything you might expect from a full service move at a fraction of the price.


Illustrations by Marlowe Dobbe

5 Expenses I Didn’t Expect After Graduating

Author:

Publish Date:

Last Modified Date:

Category: College Moves

Tags: Tags: , , , , , , , , , , , , , , , , ,

Graduating is even harder than it looks.

I am one of the lucky ones who found my first job right out of school. But that secretly meant my living expenses suddenly skyrocketed after I had to buy a used car, move away from home and find and furnish an apartment.

Don’t get me wrong, I knew those purchases would be way more expensive than the usual trip to the grocery store. But there were so many details I didn’t even realize existed. It was a crash course.

Now I want to make sure that doesn’t happen to you. Here are the random expenses that hit me after graduation, plus how I survived a rocky first few months so that I remained intact before my first adult paychecks could make an impact.

1. Moving Costs More Than You’d Think (But There’s a Hack for That)

Moving101 Container Price Comparison

When I graduated I lived on campus, but I still somehow had a lot to move into my first apartment. The first thing I did was figure out if anyone could help me move. In return for snacks, my friends and family were happy to offer some manual labor. I got lucky!

But when I got a job, it ended up being located out of state. So to save money, I figured out I could rent a truck and tow my car behind it, and only hire movers to do the lifting. Getting your own vehicle and hiring labor separately for either end of your move (Hybrid Moving) costs less than Full Service moving and varies dramatically in price, but the average cost is around $660. It’s an added cost, but plenty of critical time saved, which I needed.

HireAHelper lets you compare the price of movers and customize everything, from how many people help you move to what arrival time window you’ll need. The more options you can compare for a moving process the better, as every move is going to be a little bit different.

See prices for movers by the hour – instantly.

Read real customer reviews.

Easily book your help online.


How can someone so young take on that expense? Well, I barely had enough to cover the move, but here’s another thing I learned — many employers offer reimbursement for moving expenses! Make a note to talk with your new employer and ask if they make a similar offer. It was a lifesaver when my company helped me out so that I could put my money toward the next round of expenses!

2. Crossing State Lines Can Mean More Fees

When you move to a new state, you’re going to have to get a new state license and plate for your car. The steps will be different depending on your move, but you can check out the process for your specific state online to know what prices you’re in for.

I had to fill out paperwork and pay fees for the process of:

  • Getting an updated title for my car
  • Printing a new plate
  • Creating a new license

All of it cost about $200! Plus, there was the time it took to go to the DMV, get my new emissions test and talk with my car insurance company about my new address and license information.

Call the DMV where you’ll be moving to ahead of time for clarification because it really is a lot to deal with when you’ve never done it before. It definitely was for me.

3. Even My Used Car Had a Major Price Tag

An approximation of how getting your first used car looks.

When I was in school, I used my parents’ old car to get around to my part-time jobs and the grocery store. But after college, I knew I had to get my own ride. I’d been saving up for a while and figured I could negotiate the price of the car down to what I had in my savings account, but it turns out there’s so much more to it than that.

The only thing I knew about buying a car before I walked into the first dealership was that you have to negotiate your final price, but fees and taxes can’t be worked down. The dealer had to explain things like document fees and dealer fees, plus the sales tax. (Again, every state will be a bit different, though some fees are the same across the board.)

It’s smart to save up some extra cash to cover these fees since they’re non-negotiable. While you’re getting your down payment together, take steps to research what these expenses will be so you can better plan for the total cost of a car.

Lastly, make sure you can handle the monthly payment. While I saved enough for a hefty down payment, I did have to take out a small loan to cover the rest. I automated my car payments through my bank once my regular paychecks started rolling in so I would never risk jeopardizing my credit score with late payments.

4. My First Student Loan Payment Shocked Me

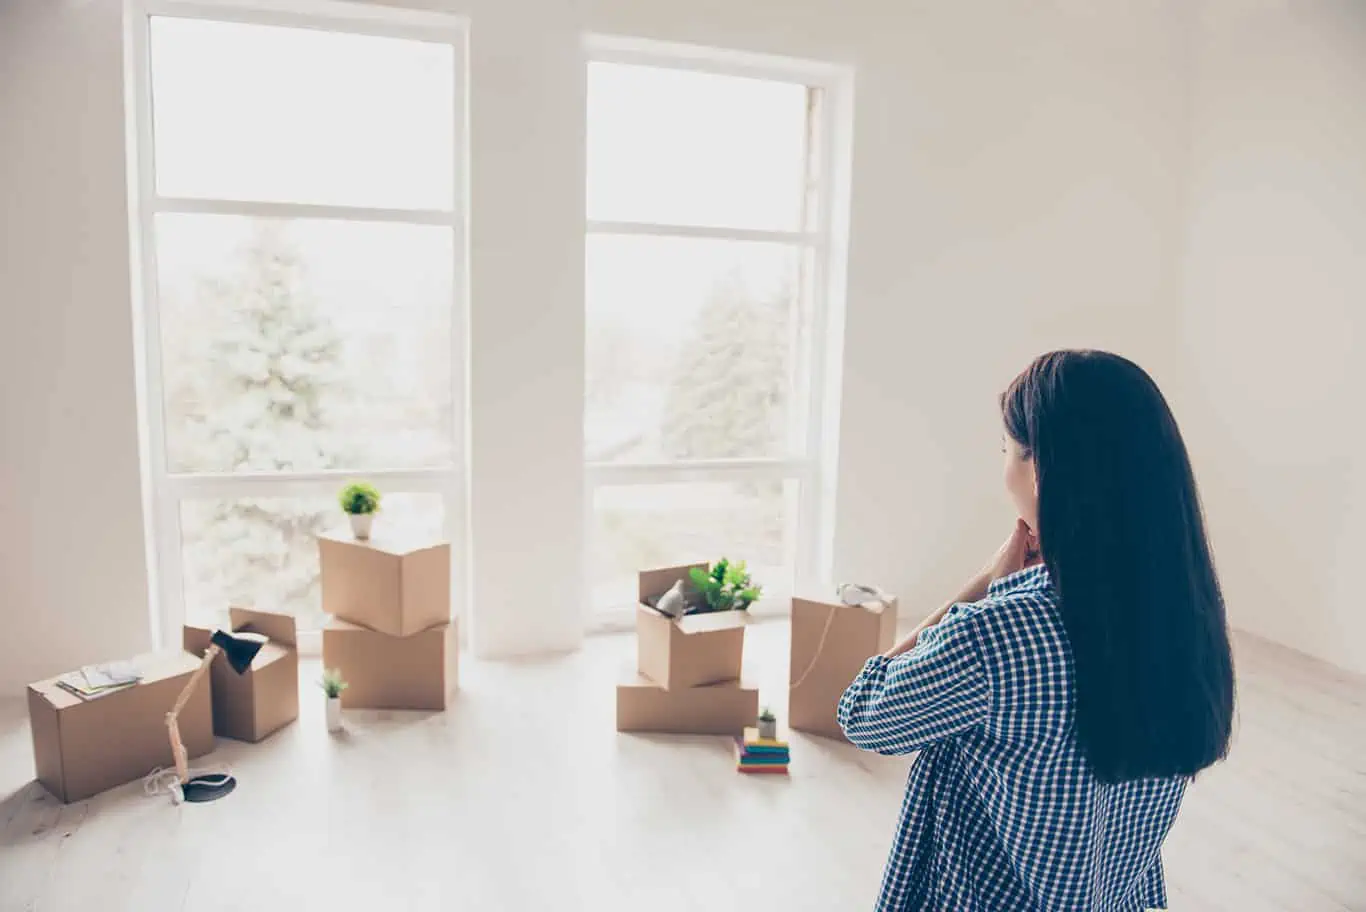
The amount I had to take out in student loans wasn’t nearly as drastic as what some of my friends had to sign for—proud state school grad here—but there are ways those loans can pull you into paying more than you originally borrowed. For starters, I had no idea what capitalizing interest was. Basically, it’s interest that’s triggered by specific events and causes your monthly payment to not even make a dent in your overall debt. The debt increases while your payments stay the same.

I also began to panic when the loan bills came in. I hadn’t even earned my first paycheck with my new job yet, so how was I supposed to pay $350 a month after already paying for moving and buying a car?

That’s when I started to research how to consolidate my loans, and it really saved me. The Department of Education can consolidate multiple federal loans with one fixed interest rate, which streamlines the process and extends your repayment period. Rather than juggling multiple payments, I just had to worry about one.

You may also consider private refinancing if you’ve landed a steady job and worked to build a credit score of at least 690. This can both consolidate your loans and lower your interest rate — but isn’t necessarily always the best choice for recent grads. Do your research! 

(So I Learned a Budgeting Trick)

Sure, I’d managed my own bills in college, but between forthcoming loan payments and the costs of moving and a higher rent, I saw my expenses skyrocket. 

So I did some research online and began militantly tracking all of my income and expenses with a Google spreadsheet. I vowed to follow the 50/30/20 budget, which stipulates that half of my earnings pay fixed expenses, 20 percent goes to debts and savings, and 30 percent is reserved for variable expenses like groceries and light spending.

50 30 20 rule of thumb

It’s tempting to have your paychecks come in and put all your extra cash toward one big thing like a savings account or credit card debt, but metering it out will help you tackle everything at once. Building my savings while decreasing my debt has helped me more in the long run than just choosing one over the other.

Now, my healthy savings account means a minor emergency like a car repair doesn’t trigger any anxiety. After upending my meager college savings to move, a steady and dependable tracking system soothed my nerves and helped me navigate this whole new world.

5. Filling Up a New Apartment Drains Your Wallet

The process of finding my apartment was easy since everything is online now. I could map out how far each apartment complex was from my work and not have to worry about it being too far away. Actually getting settled was a whole different story.

I had to buy all my own furniture, and you can bet that I didn’t have the money to do it all at once! For a little bit, my apartment décor consisted of a mattress on the floor and the most basic kitchen supplies. A good list of basic apartment supplies you’ll need will consist of:

  • Plates and bowls
  • At least two or three of each type of silverware
  • A trashcan
  • Dish soap and a sponge
  • Toilet paper
  • Basic cleaning supplies (e.g., broom, cleaning solution)

Don’t panic if your apartment doesn’t feel like home for a little while. Getting more than the basics will take time, but eventually, your new fancy budget will help you get everything on your list, and your apartment will gradually feel more like a home and less like a living space. 

Plus, if you have a roommate, that makes your quest to fill the space of essentials even easier! Me? I bought myself a couch from a killer Amazon Prime Day deal—and I’ve been treating myself with one apartment item a month since.


Some of the above surprise costs were never mentioned to me because I didn’t know to ask about them.

Give your post-college world about six to eight months to settle down. Now, I’m much more financially secure and living in a home that feels cozy and welcoming. I’m finally ready to put some money into my travel fund and I don’t sweat the occasional sushi dinner. For now, you just have to buckle in and prepare for a crazy ride after that diploma lands in your hand.


Holly Welles is a millennial-focused real estate writer and the editor behind The Estate Update. For more home tips and financial advice, subscribe to her blog for even more financial advice.

The Furniture Dolly: How To Move Heavy Furniture

Author:

Publish Date:

Last Modified Date:

Category: Loading & Unloading Guides

Tags: Tags: , , , , , , , , , , , , , , , , , , , , , , , ,

How do you move large pieces of furniture? It’s a question we hear all the time. It’s a daunting prospect, having to haul heavy, bulky items like dressers, bookcases and entertainment units from your house to your moving vehicle. 

Fortunately, there are several ways to do it safely.

The Furniture Dolly

At first glance, a furniture dolly is not very impressive. It’s just a rectangle on wheels. Barely six inches tall. No handles. No straps. Most likely made of wood and sporting a curious inability to roll straight when given a push.

But don’t let its modest appearance fool you. A furniture dolly can help you move just about anything you can put on it, making it your best back-saving friend when it comes time to move.

Is It Safe to Put Furniture on a Furniture Dolly?

You bet! A good quality furniture dolly can handle upwards of a thousand pounds – more than most people need, and certainly, more than most people can lift. (No matter how many friends they’ve gotten to come help.) Even a less-expensive dolly can handle a few hundred pounds. Just be sure to check the specs before you bring it home and put it to work.

Can a Furniture Dolly Move Tall Things Like Bookcases or Long Sofas?

The simplicity of a furniture dolly makes it versatile enough for items of just about every shape and size, and is great for hauling stacks of boxes too! Long chest of drawers? Tall china hutch? Bulky, heavy armoire? That little 4-wheeler (as many movers call it) can handle it all and then some, allowing you to move your stuff over long distances with minimal effort and strain.

How Much Is a Furniture Dolly?

Want one to own? A furniture dolly usually costs somewhere between $20-40, varying slightly depending on how many hundreds of pounds they can hold. (Usually starting around 800 pounds.)

Just need to rent one? If you’re renting a moving truck, often times rental truck companies offer furniture dollies for about $7.

Department stores like Home Depot tend to have them for around the same $7-10 mark. Or if you’re hiring movers, they usually provide tools such as furniture dollies free of charge that they themselves use to move your stuff.

Is a Furniture Dolly Easy to Use?

It’s totally safe and simple to utilize … but only if you know how to use it. Make sense? Cool! Here’s how to use a furniture dolly.

The Basics of How to Load 

Putting a piece of furniture on a furniture dolly is just that: putting it on. Carefully lift a piece of furniture up and place it to where the furniture dolly is located on the center-most flat surface of the furniture. 

But it’s more complicated than just that.

Sure, some items can sit on a dolly the same way they sit on the floor. As long as there’s a flat bottom surface that can support the weight of the item there’s no need to lower it onto its side or tip it onto its back or turn it completely on its head.

But other times, you’ll need to load the furniture a different way. Here are the most important things to know.

  • Map out your exit route to where you are loading it. This is a major mistake waiting to happen. If you aren’t going to be able to angle that long dresser into a hallway, there’s no sense in sitting it horizontally. Likewise, if your armoire just barely clears the top of the doorway, you probably won’t get it through on a dolly. 
  • Safely figure out which side of that piece of furniture you’ll put downside. This is what the pros follow: sit tall items like bookcases and armoires on their sides, and long items like dressers upside down. If it has legs or a hollow underside, it won’t rest properly sitting upright. Yes, you’ll have to turn it sideways or even upside down. And before you lay it on its back, understand that the back sides of many pieces of furniture are not fashioned to support a tremendous amount of weight, so use your best judgment.
  • Empty out armoires and bookcases before attempting to load them. A chest of drawers can be moved without being emptied, assuming there’s nothing inside except clothing. Emptying and taking out drawers will make it noticeably lighter and more manageable, so always weigh your options. (Ha.)
  • Secure any doors and drawers that might fall or slide open. This can easily be done with large mover’s rubber bands or lengths of string that tied tightly. Some people choose to wrap their furniture with pads before moving them and this will absolutely keep those doors and drawers closed, but keep in mind that while essential, furniture pads can make it more difficult to maintain a firm hold if you have to carry it up or down a flight of stairs!

How To Load Your Long Piece On End

This is probably the most precarious way to both load and transport a piece of furniture on a dolly because, well, physics.

But like I said, in narrow spaces and tight corners it sometimes is the only way. Here we’ll go through it in a two-person scenario because we don’t encourage loading a piece like this on your own.


  • Position your dolly on the floor close to (but not up against) the side of your dresser (or long piece). Tell your friend to attentively stand by.
  • Lift the side of your dresser opposite your furniture dolly until the side of your furniture facing down touches the dolly. (Make sure you clear the item from the wall and any other potential obstruction!)
  • Raise your dresser onto the dolly while your friend holds the dolly in place until it’s in a vertical position, keeping a firm hold to prevent tipping or rolling awry. Don’t be afraid to lower the dresser back down, taking its weight off the dolly to let your friend adjust the dolly’s position. You absolutely want to ensure the dresser ends up sitting balanced and square on the dolly. (You may have to try a few times.)
  • We recommend two sets of hands for rolling it across the floor and down the hall. The person in front steers and watches for obstacles while the person in the back pushes (gently). Both of you need to constantly be on guard to make sure the item doesn’t begin to tip ever so slightly.

Protip: If the top of your dresser has a lip or overhang that extends beyond the surface of the side resting on your dolly, allow that lip to hang over the edge of the dolly so that dresser sits flat and vertical.

Loading Your Tall Piece on Its Side

The basics here are the same as in loading it on end, although the geometry and the dynamics make it possible to handle this type of situation on your own. (Still, we believe four hands are always better than two.)

  • Position your dolly on the floor near the face-down side of the piece.
  • Working from the same side of the piece as your dolly, pull the top of the piece toward you. Lower it slowly, eyeing your dolly and nudging it into a place where your piece will be balanced once it is resting fully on the dolly.
  • Maintain control by keeping that dolly in place with your foot. This part gets trickier the taller your piece is, so take care to keep both your piece and yourself steady. As in the previous example, your dolly may begin to kick out as the weight of your piece comes down on it, so if at all possible, have someone lend you their hands.
  • Lay flat and push! Assuming your piece is sitting square and balanced on the dolly, pushing it across the floor should be a relative piece of cake. Just take care taking those corners since those top and bottom ends are now sticking way out in front and back of the dolly.

Protip: Your furniture has legs? When tipping heavy pieces of furniture with legs, be very aware of the weight of your object. The longer and slimmer the legs, the better chance they will snap under the weight. Whenever possible, grab a friend or two to help keep the weight off those legs as you lower the piece down onto your dolly.

Loading Your Sofa

This may be the easiest situation to handle or it may be a disaster in the making. It depends on what lies under your sofa’s skin.

  • If the backside of your couch has a solid surface beneath the upholstery, all you need to do is center your dolly behind your couch and tip your couch on its back and you are rolling!
  • If your sofa has a frame that leaves a lot of hollow area under the upholstery, you may have to work quite a bit harder to get your dolly in a place where it will support that sofa without tearing through anything.
  • Hollow? A piece of plywood or another flat source of support placed on top of your dolly can compensate for what your sofa lacks. A few flattened moving boxes may lend enough support for the job, as will a couple of two-by-fours that, when laid crossways on your dolly, will support your sofa from the top edge to the bottom.

Protip: This same strategy of using plywood, cardboard or a couple of pieces of scrap lumber to create a wide, flat surface is also useful when stacking boxes on your dolly! Or when moving odd-shaped items like exercise machines and pieces of art.

Things to Watch Out For

Once you’ve rolled that dresser or sofa safely out the door, down the driveway and up to the truck, you may think that all is well. But pushing that piece of furniture up the ramp and onto the back of the truck comes with its own hazards.

  • Keep one eye on the ceiling so you don’t destroy any overhead light fixtures or smoke alarms. Also be on the lookout for anything potentially high up on the walls, like smoke alarms or fuse boxes.
  • Unless your front door (or any door) swings 180 degrees, the edge is going to be sticking out, leaving a clearance of however wide your furniture is minus one-half inch.
  • Take care not to crush your knuckles against those door jambs! (It hurts, trust me.)
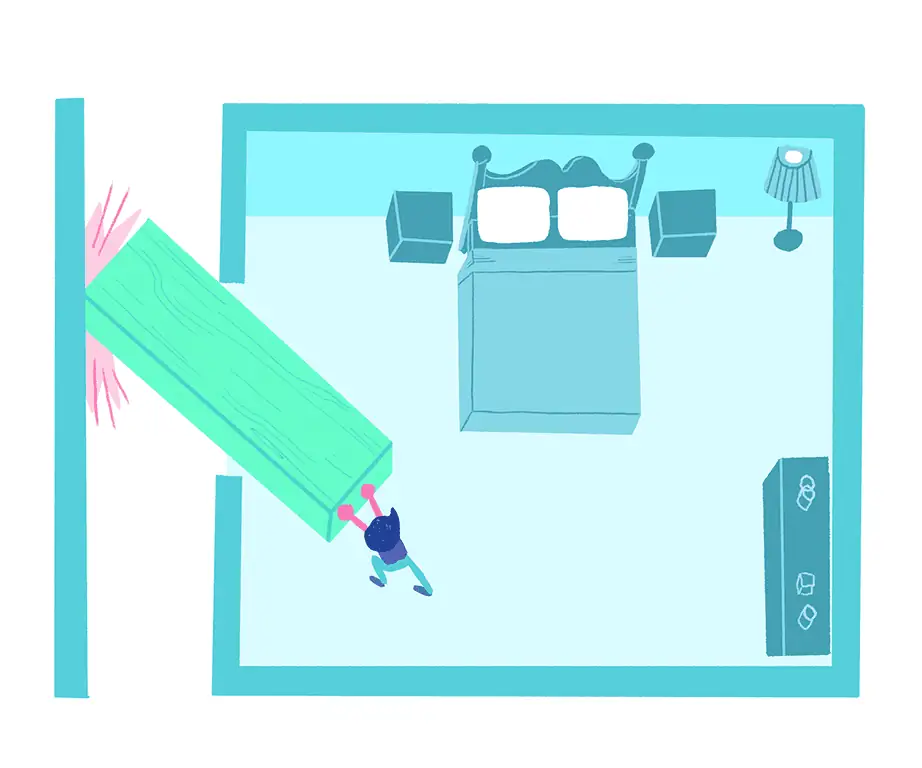
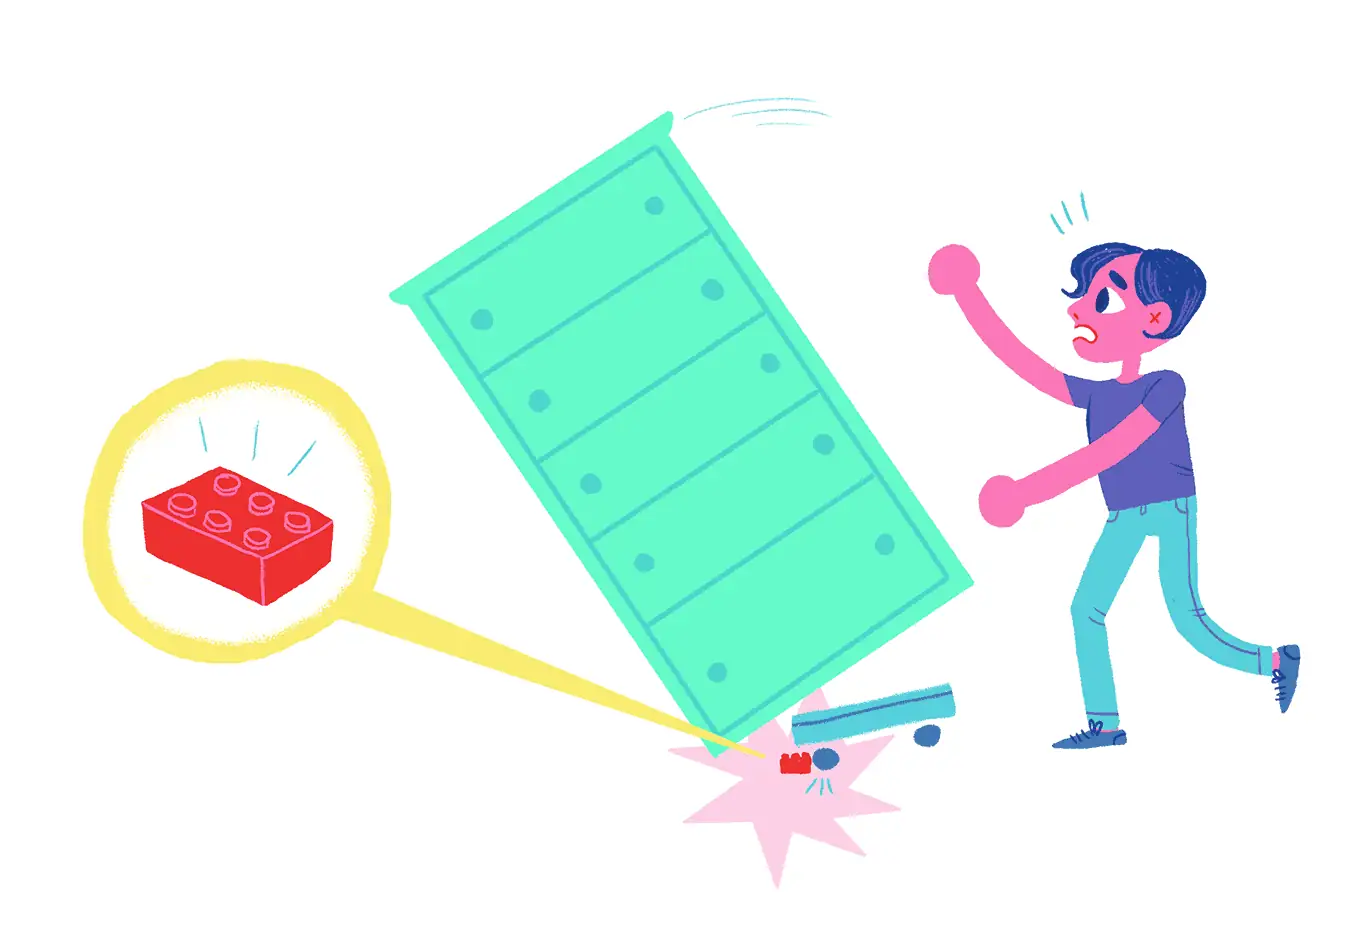
  • You also need to keep an eye on the floor. A throw rug, the uneven spaces between floor tiles, even something as small and unassuming as a Lego can stop your dolly … while whatever is sitting on top of it keeps moving forward.
  • Coaxing your furniture up a ramp is not wise or easy. Any item sitting low and long can stretch beyond what the angle between the driveway and the ramp will allow, scraping up the ramp while the wheels of the dolly are still on the ground. You might do well to turn your dolly ninety degrees so you can push that piece of furniture (carefully!) sideways up the ramp. (Make sure the side with the drawers and doors is facing upward!)


Protip: It should be obvious that furniture dollies are not at all useful anywhere there are stairs involved. It may be tempting to be creative, but believe me, 4-wheelers and staircases do not mix. Grab a friend, or a few, and carry that piece of furniture slowly and carefully.

Does This All Seem Like a Lot of Work?

I’ve been moving furniture for decades, and trust me, some people just shouldn’t be moving their own furniture. At the end of the day, it’s hard work, and professionals are professional for a reason. With that said, if you’re going to do it yourself, you need to make sure you do all the stuff above so you don’t hurt yourself (not to mention your valuables).

See prices for movers by the hour – instantly.

Read real customer reviews.

Easily book your help online.


Even if you only need to get movers to move your heaviest stuff, it may be totally worth it to just check to see who is around you and what they charge to help. It may be a lot more affordable than you think.

And don’t worry, they’ll bring the furniture dolly.


Illustrations by Marlowe Dobbe

Lifehack: How to Pack Big Shelves So You Don’t Go Crazy

Author:

Publish Date:

Last Modified Date:

Category: Pro Packing Guides

Tags: Tags: , , , , , , , , , , , , , , , ,

Usually, if you have a shelving display in your home that you absolutely love, chances are it has taken you quite a long time to arrange and re-arrange the decor to get it “just right”. Now it’s time to move, you’re taking the shelves with you, but you don’t want to lose the successful setup you have worked so hard to perfect, right?

The great news is that we have a super simple moving hack that will not only help you preserve this treasured look but will also make unpacking it in your new place a breeze. Allow us to explain.

Create a Numbering System

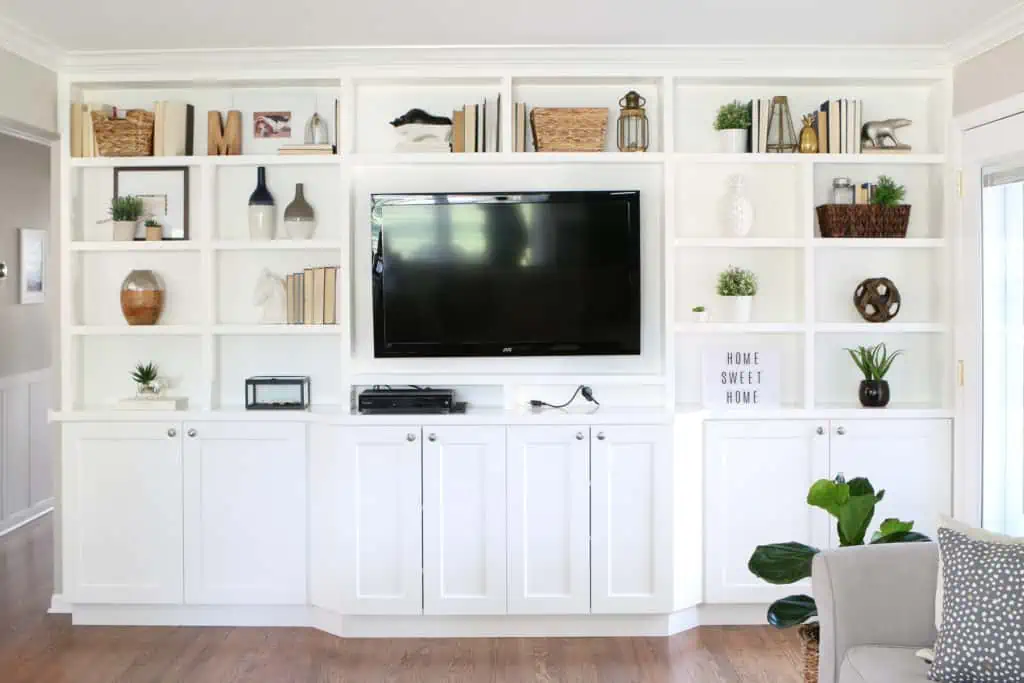
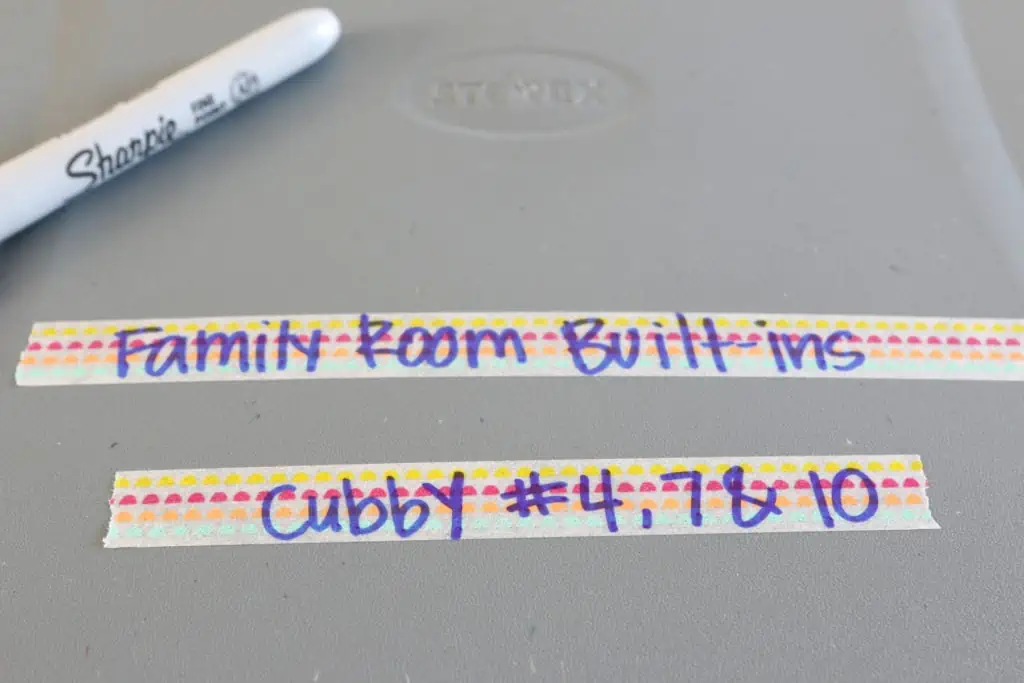
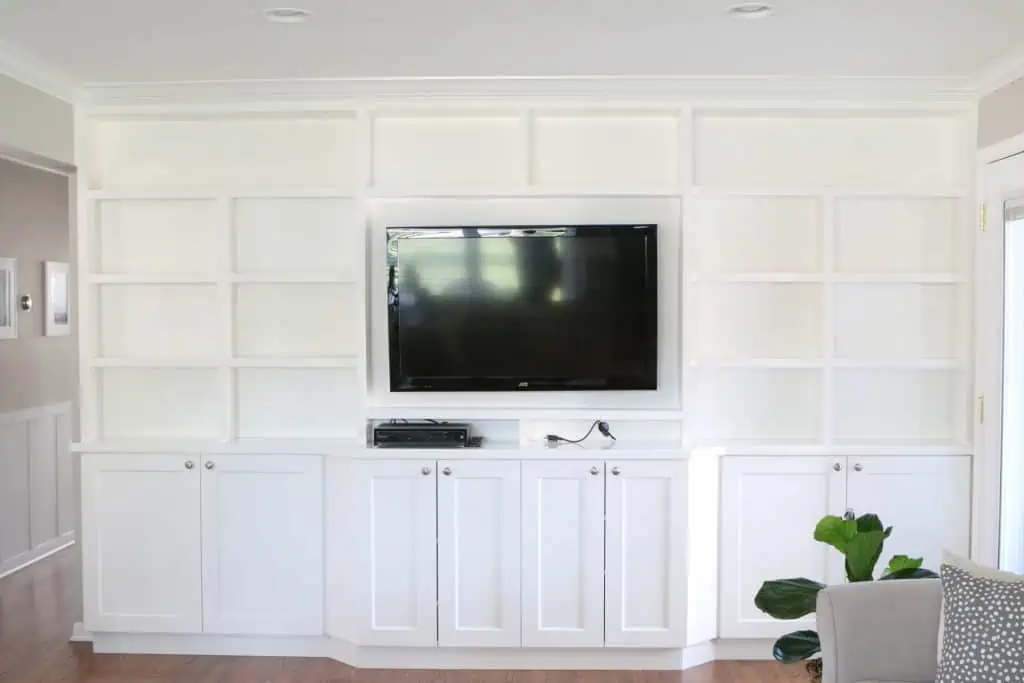
The first thing you have to do is create a numbering system for your shelving unit. You can use any method you want and don’t need to make a fancy graphic like this, you just have to make sure you remember which shelf corresponds with what number. Some may be able to easily memorize the number system, but if you’re not confident in your ability to do that, you can always put a piece of painter’s tape on each shelf with the corresponding number so you remember. This trick will take about 1 minute and won’t damage the shelving unit at all.

Start Emptying Your Shelves

The next step is to start emptying your shelves and carefully wrapping the items to eventually add to a moving box.

But the trick of this moving hack is to take careful note of what you are removing from each shelf as you start packing each box. 
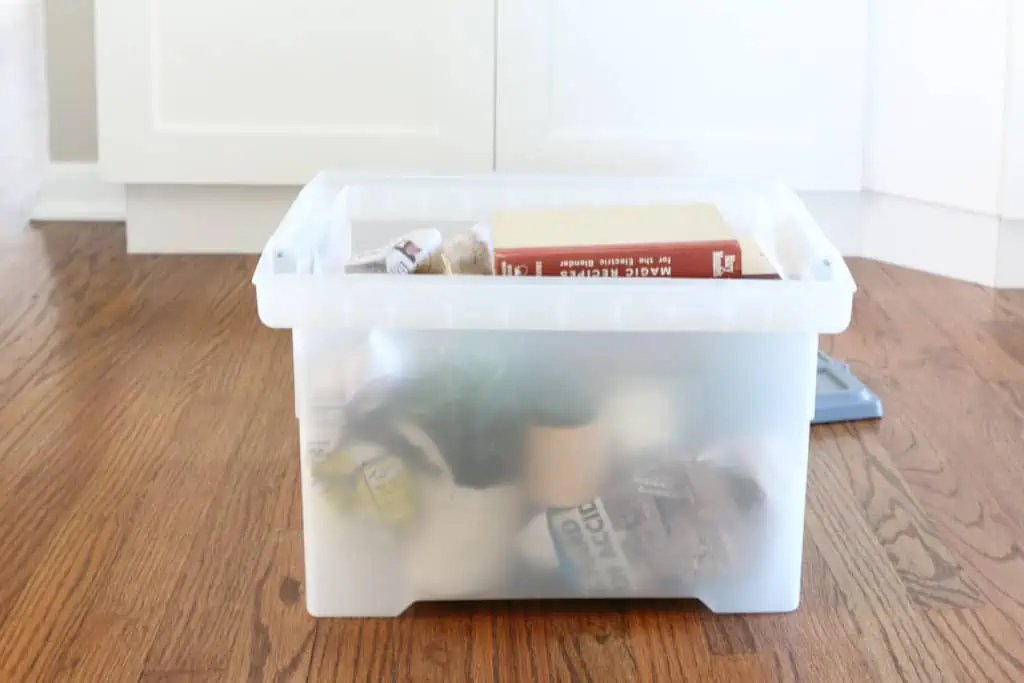
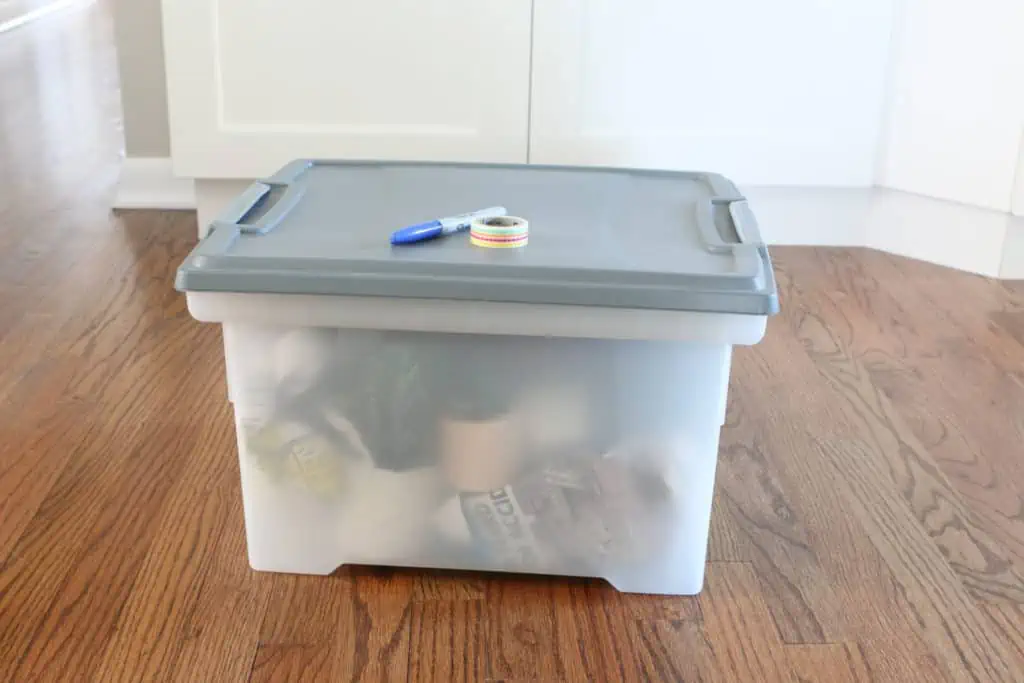
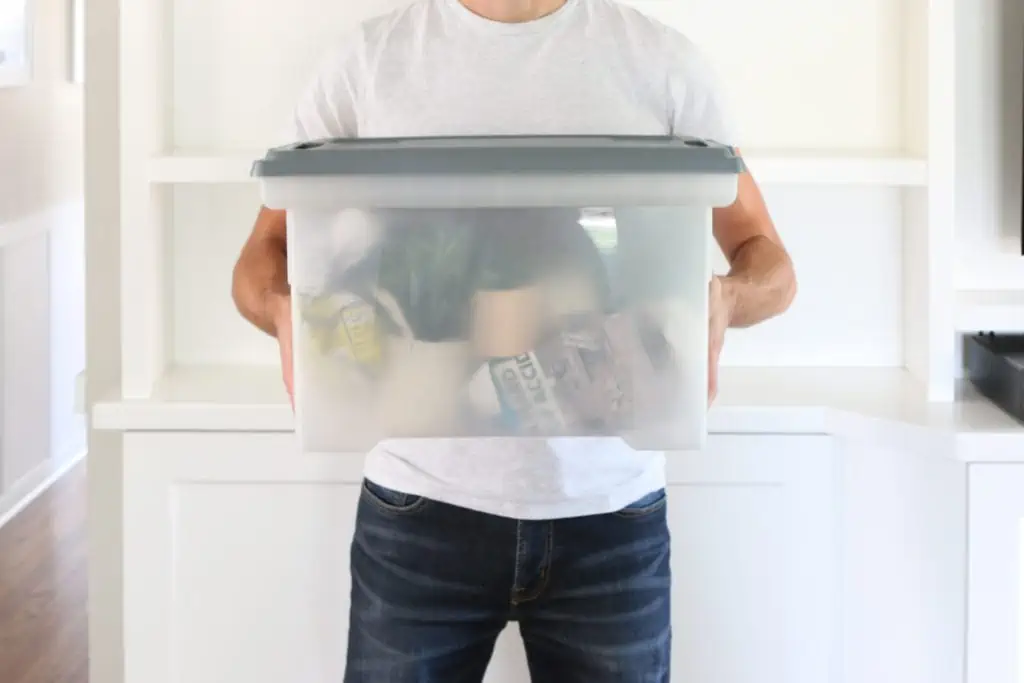
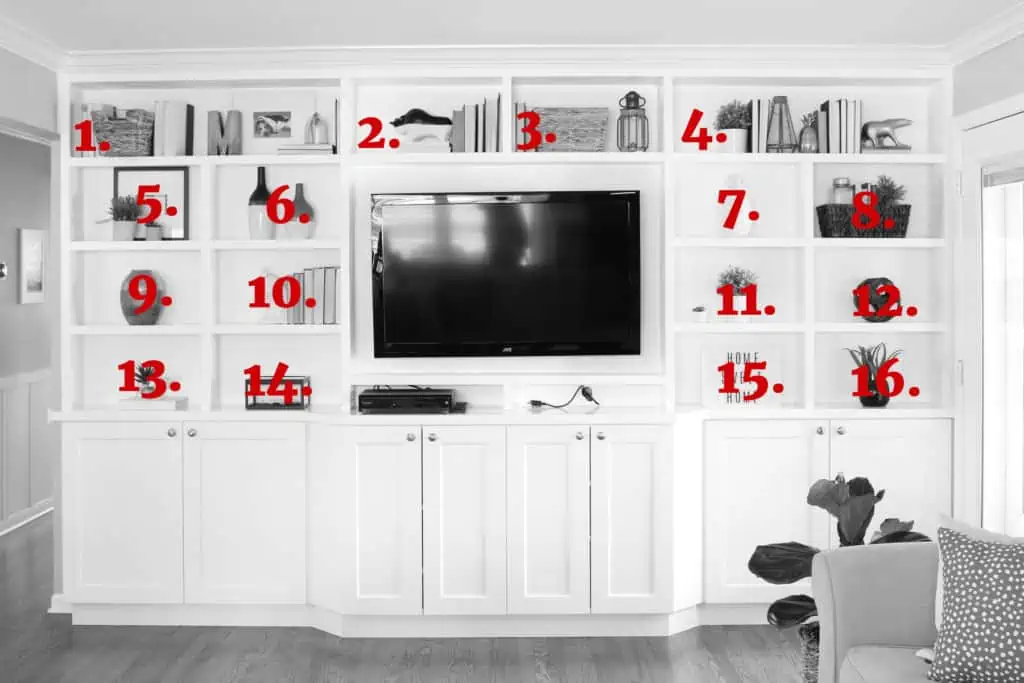
Carefully wrap and box the items like you would normally do, but try to keep as many of each shelf’s contents together in one box. For example, the grouping of books, the picture frame and planter in box #4 should all make their way into the same moving box.

5 Sweet Garage Upgrades That Up Your Home’s Value

Garage additions and upgrades like the five in this list can produce an estimated 65 percent return-on-investment.

Pack and Label

Each of your moving boxes can hold far more than just one shelf’s contents. So feel free to add several of your shelves’ decor into one moving box, just be sure that each shelf’s decor stays together with its counterparts.

After you fill up your moving box, assess what shelf decor is inside of it. In my case, I added the decor from Shelf #4, #7 and #10 into this box so I simply noted that on the top of the moving box. This way I know that when it’s time to unpack this box and refill this shelving unit at my next house, I know exactly where to put this decor in order for it to look just like it did before! 

Repeat this packing/labeling process over and over again until your shelving unit is emptied. You should be left with a pile of moving boxes with clear labels and a precise plan on executing this look at the new house.

All you have to do in the new house is set up the shelves and simply place each item right back in the place it used to be. You don’t have to waste time trying to remember what goes where because those labels will take the guess-work right out of it, making unpacking these boxes in the new house a total breeze!

×

I'm Moving

Moving? Thinking about moving? Whether your move is off in the distance or you already have one foot out the door, you'll learn about everything you should expect through our useful how-to's, cool articles and much more. It's all specially curated for you in our "I'm Moving" section.
Explore
×

I'm a Mover

For rookies or veterans alike, our "I'm a Mover" section is filled with extensive industry news, crucial protips and in-depth guides written by industry professionals. Sharing our decade of moving knowledge is just one way we help keep our professional movers at the top of their game.
Explore