How To Pack Art Supplies so Your Stuff Doesn’t Break

Author:

Publish Date:

Last Modified Date:

Category: How To Pack, Moving Boxes & Supplies

Tags: Tags: , , , , , , , , , , , , , , , , , , , ,

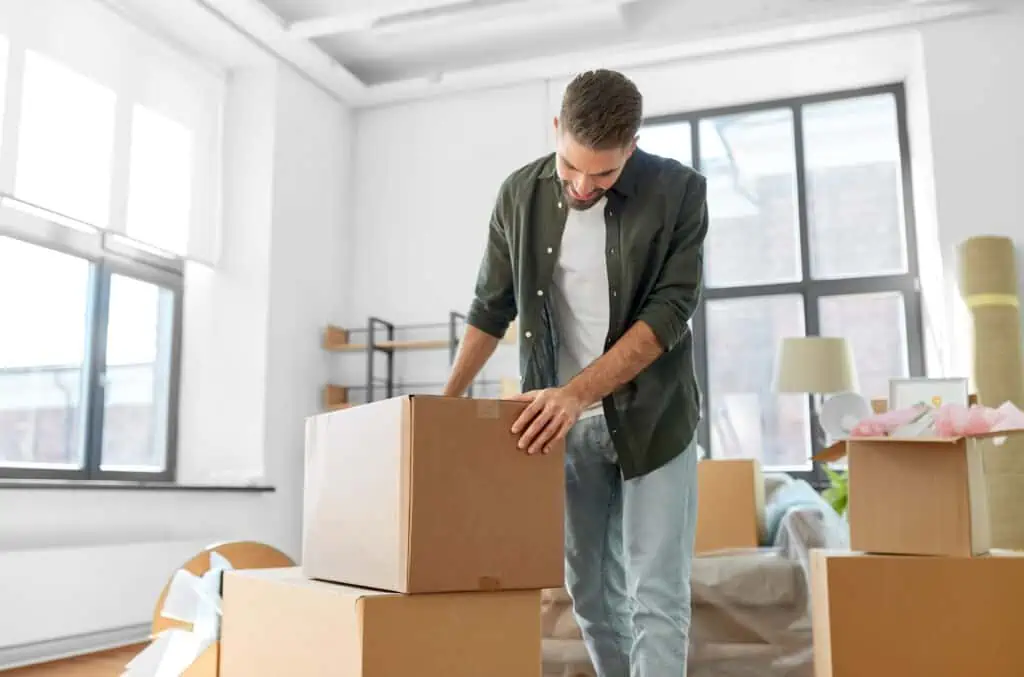
As an artist, you probably consider yourself a bit of a free spirit. That’s a great quality when it comes to being creative, but a little less helpful when it comes time to move.

If you have an art studio full of supplies and one-of-a-kind works, the Herculean task of organizing, packing, and transporting it all requires a solid game plan and organization. But don’t worry, we have you covered with plenty of artist-recommended packing tips that’ll help you move your studio with as few hiccups as possible.


101 Moving Advice for Your Art Supplies (and Everything Else)

While your art supplies likely take up a big chunk of what you have to pack (and what you’re most concerned about), there are some tried and true tips that make any kind of move easier:

  • A scheduled moving checklist is the best tool to ensure everything gets done. Give this one a try
  • Creating a moving inventory prevents you from desperately going through boxes searching for something you need
  • A move is a great time to downsize. This will speed up the packing and moving process and make it cheaper to move
  • Hiring someone to do the loading and/or unloading for you, as well as having an idea of what you need to unload first (and therefore goes on the truck last) are both good ideas

What To Buy To Keep Your Paints From Spilling (and More) 

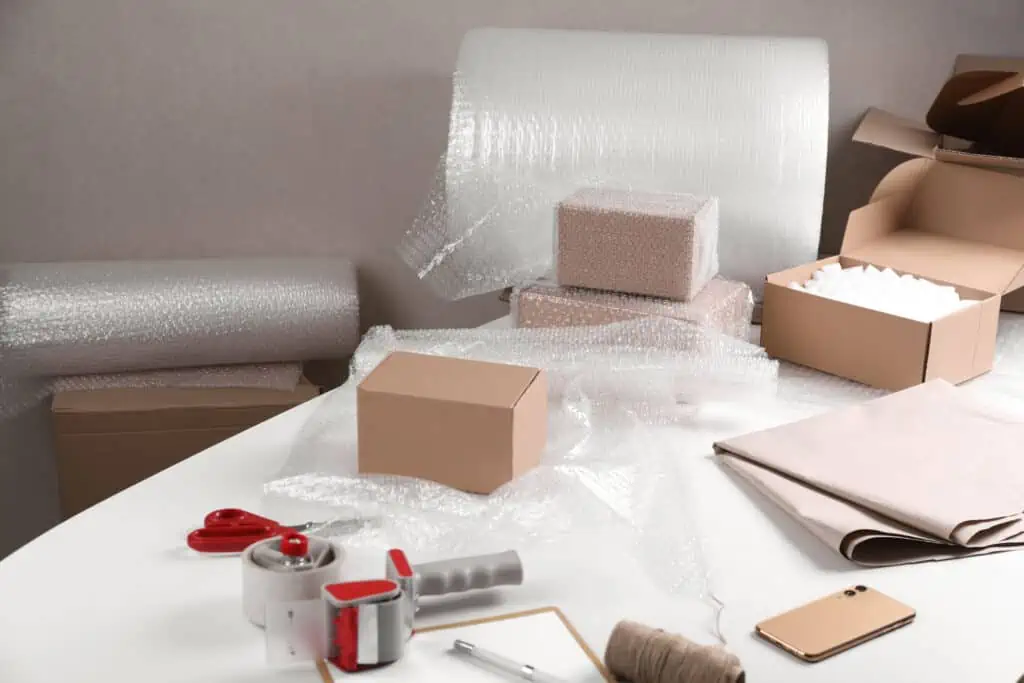
Now is not the time to skimp on quality packing supplies. Sure, free boxes work when you’re moving into your first apartment. But for expensive and/or delicate art supplies, you’ll want to invest in heavy-duty materials.

  • Sturdy cardboard boxes: We recommend buying at least a few boxes specifically designed for moving. They’re reinforced and are much sturdier than regular boxes, meaning there’s less of a chance that they’ll tear and scatter your art supplies everywhere. You can find specialty moving boxes at home improvement stores such as Home Depot and Lowe’s, as well as moving companies like ULINE and U-Haul.
  • Crates: For heavier items, use plastic crates or tote boxes instead of cardboard! Plastic crates also make for excellent storage post-move.
  • Packing peanuts: Filling space with packing peanuts means you won’t risk damaging your supplies with the constant vibration of your moving truck, especially on long-distance moves. Look for biodegradable options, which are plant-based and won’t add to landfills.
  • Bubble wrap: This will help protect ink jars and other breakables while you move. Grab a roll from your local hardware store and cushion your delicate art supplies.
  • Newspaper: Reusing newspapers is an eco-friendly way to protect your art studio supplies from potential harm. However, be sure you DO NOT use newspaper to wrap canvases, as the ink will transfer!
  • Labels: Color-coded labels will make your unpacking process much easier and will save you from trying to locate specific items in a sea of boxes afterward.
  • Plastic wrap: Choose smaller rolls of wrap for smaller items and bigger rolls for items like furniture. Plastic wrap is also great for keeping drawers closed and ensuring any small items ( like shelves and hardware) don’t get separated.
  • Cardboard tubes: Ideal for packing loose artwork. Paintings or drawings without frames risk being creased or scratched while moving, but gently rolling them and storing them in cardboard tubes greatly reduces the likelihood of damage.

How To Pack All Kinds of Different Art Supplies  

“Art” is a huge umbrella. You might be a traditional painter… or you might be into needlepoint or woodworking. But never fear, we reached out to several experts for tips on packing a huge variety of art supplies.  
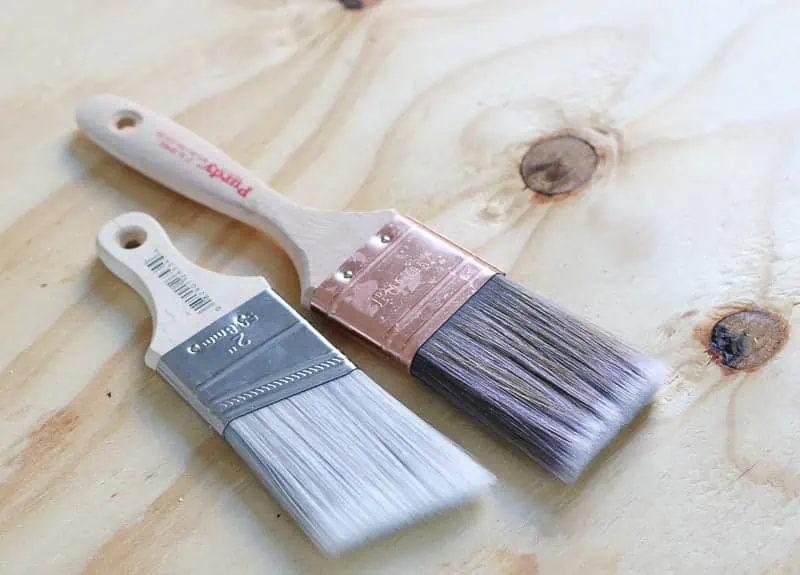
Brushes

What to watch out for: Even the cleanest brushes often have traces of paint and other materials left on them — and many of those materials are flammable. Either clean your brushes before packing them, or make sure you label any boxes that contain used brushes so you can unload them first.

pack art suppliesHow to pack: Start by bundling your brushes together and securing them with elastic bands at the top and bottom. Then, wrap them up tightly with a roll of plastic wrap. Make sure the wrapping is tight before you put them in a box.
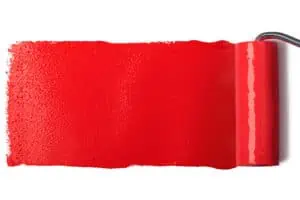
Paints

What to watch out for: Most paint is flammable, so for one, it should be packed carefully and clearly labeled. And for two, movers often won’t put buckets of paint on their moving trucks, so you might need to come up with an alternative transportation plan. If you’re unsure whether or not your paints are flammable, check the manufacturer’s labels. Take extra care to keep your paints out of direct sunlight.


“Chemicals like acetone, butane, and aerosol sprays are commonly found in art studios…most moving companies won’t move [them] due to the potential danger involved…double-check with the one you hired before loading any chemicals onto the truck.”


How to pack: Paint is notorious for leaking, even when the jars and tubes are tightly closed. Cover all of your paints individually in plastic wrap before packing them. This avoids an accidental abstract painting when you open up your moving boxes. 

Canvases and finished artwork 

What to watch out for: Certain packing materials, like newspaper and packing peanuts, can stick to your canvases or worse, transfer ink. The result is unwanted smears or imprints on the artwork you painstakingly created. 

How to pack: Always use plastic or bubble wrap to protect your canvases and finished work before using other packing materials. Once your canvases or artwork are wrapped, pack them safely into boxes with paper and packing peanuts to provide further protection.

Ceramics

pack art supplies

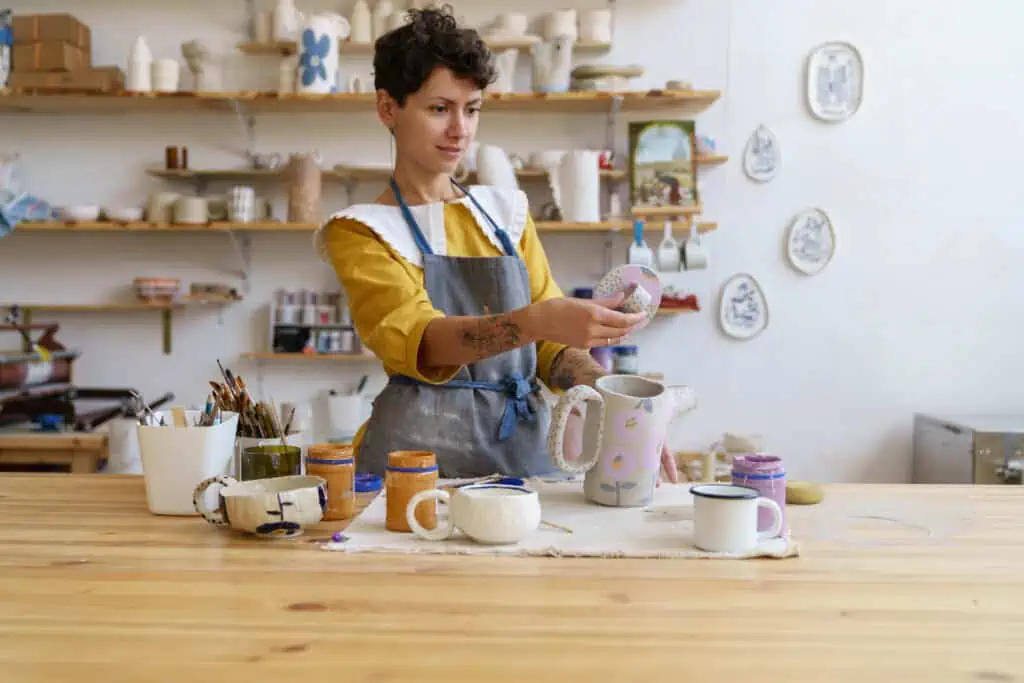
What to watch out for: Ceramics are more susceptible to breaking than other art supplies! If they aren’t adequately protected, protruding pieces like spouts and handles could break off as they move around inside your packing boxes.  

How to pack: Use newspaper and packing tape to fill the voids under handles and spouts. The goal is to wrap them so securely that you can’t see or feel any delicate protrusions on your ceramic pieces. Wrapping them this way will make each piece bulky, but the extra bulk is worth the protection. Pack your wrapped pieces snugly in boxes or crates to avoid excess movement while driving.

See prices for local moving labor. Read real customer reviews. Easily book your help online.

Pastels, charcoal, pencils, markers

What to watch out for: Drawing utensils, especially charcoal and pastels, are delicate and need extra protection to avoid breakage while you move. The vibration from moving trucks and cars can easily cause pastels and charcoal to crumble, pencils to break, and markers to lose their caps.

How to pack: Bundle your pencils and markers and secure them with rubber bands. Once they’re bundled, cover them in plastic wrap. Place charcoal and pastels in small containers with lots of padding. Use paper towels, packing peanuts, or newspaper to cover the sides of the container before you pack them in boxes. 

Cameras

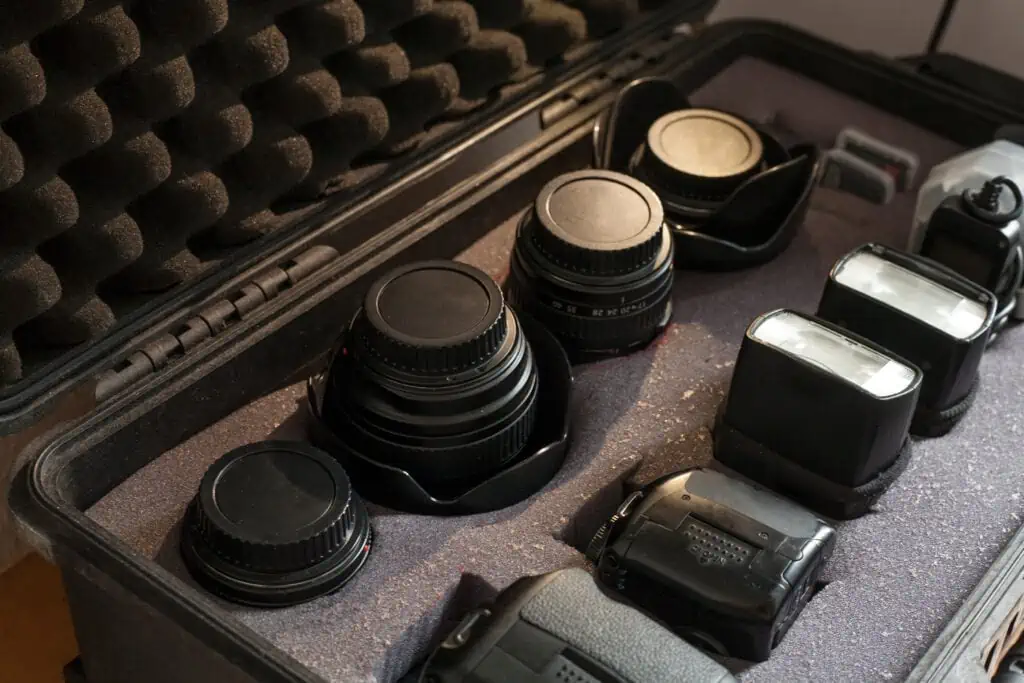
What to watch out for: Cameras and camera equipment are pricey investments you want to protect. Watch out for cracked lenses and damaged internal components in your camera body when moving art supplies.

How to pack: If you have a hard shell case with dense foam for your camera, you’re all set! If not, line a small box with a few layers of bubble wrap to reduce vibrations, then wrap your camera body and lenses with soft fabric like an old t-shirt or blanket. Pack your camera and equipment in small boxes BEFORE placing them in larger moving boxes. 

Lighting

What to watch out for: The last thing you want when you start unpacking is a box full of glass shards. Broken bulbs, as well as bent or creased shades, are the most important things to prevent when you move your art studio lighting. 


“Give yourself plenty of wiggle room when estimating when a task should be finished — you never know what could come up, how tiring packing can be, or what you might have forgotten at the start. “


How to pack: Pack your lightbulbs separately from your other art supplies. Secure them in bubble wrap or place them in a box with packing peanuts. Gently wrap all lampshades in paper, then nest them in a box with packing peanuts. Make sure to label this box with “Nothing On Top” so your shades won’t get crushed by heavier items!
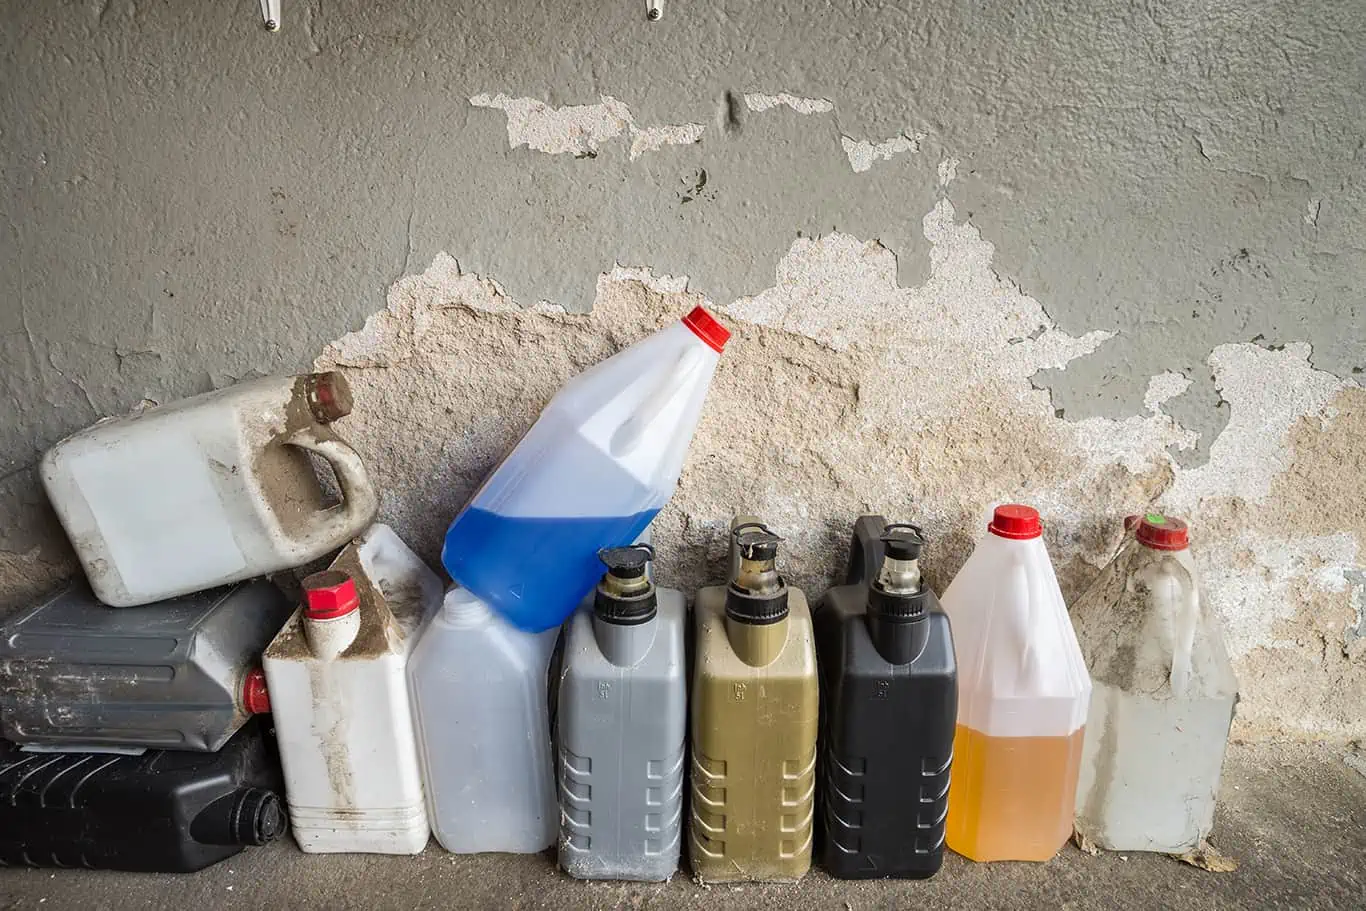
Chemicals

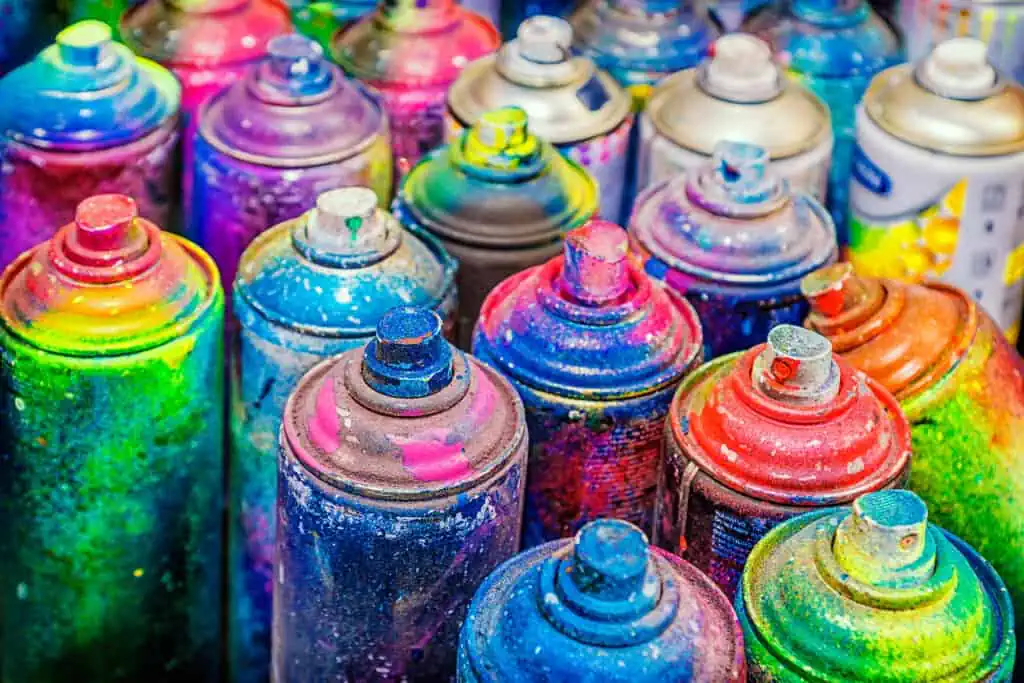
What to watch out for: Chemicals like acetone, butane, and aerosol sprays are commonly found in art studios, and they need special attention and care. In fact, most moving companies won’t move chemical substances due to the potential danger involved. Be sure to double-check with the movers you hired before loading any chemicals onto the truck. 

How to pack: Make sure these items are wrapped in plastic, then placed into sealable bags before being put upright into a box. Clearly label the boxes and take them out of your vehicle before your other items. Also, pay attention to the temperature in your vehicle; allowing these chemicals to get too hot (or cold) while you’re traveling can be a hazard. 

Easels

What to watch out for: Easels have many pointy pieces that can quickly damage other items you pack. To avoid unwanted damage, pay special attention to how and where you pack them.

How to pack: Take your easel apart and place any screws or extra parts in a plastic baggie. Wrap the pieces in bubble wrap and then tape everything together to hold them in place. Get a sturdy box and fill it with packing peanuts, then place the easel in the box and securely surround the pieces with packing peanuts. 

Pottery wheels

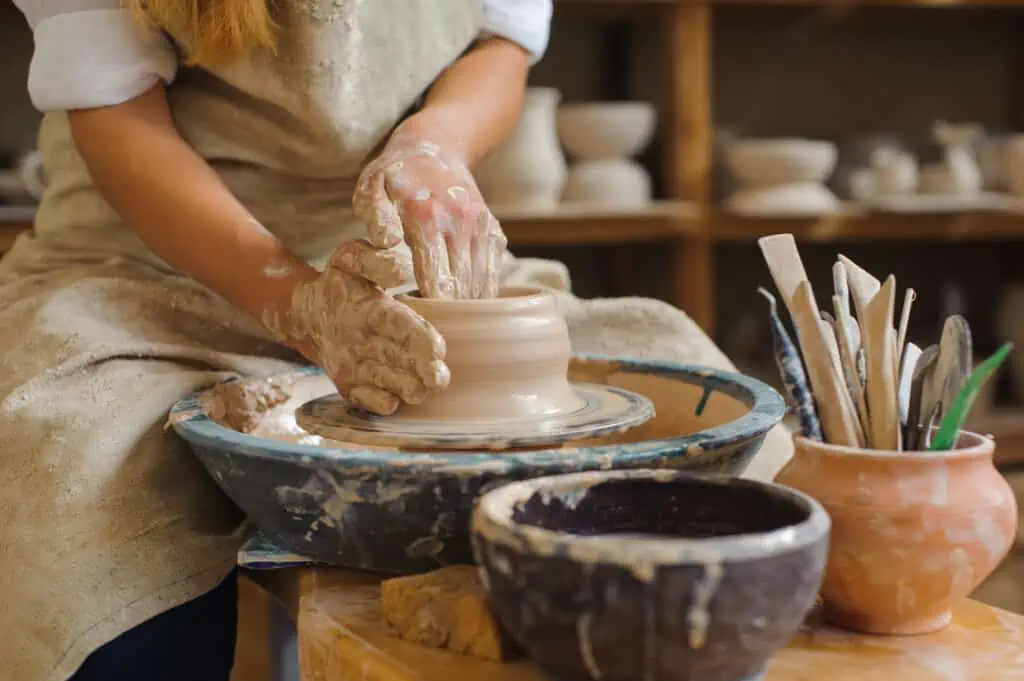
What to watch out for: Keep an eye out for damage to the internal components of your pottery wheel. These wheels are sturdy, but they’ve got a lot of parts that could suffer damage from constant vibration during transport.

How to pack: First, wrap your entire wheel in plastic wrap. This helps to protect it by reducing vibration transfer and keeps everything snugly in place. Then use packing foam to line a box – ideally, one that just fits the foam and wheel. Finally, fill the empty spots around your wheel with packing peanuts before you close it up.

Moving far away?

Do it cheaper.


MovingPlace can save up to 40% compared to traditional interstate moving companies. Click here to learn how.

Soldering irons

What to watch out for: Soldering irons are special tools, and you don’t want to harm them while you move between residences. Wrap it properly to prevent damage to the delicate parts of your soldering iron.

How to pack: Cover your soldering iron in plastic wrap or bubble wrap first, then use newspaper to create a nest that protects any protruding ends that could damage other items. Box it up with your other art studio supplies and make sure everything is securely in place. 


“DO NOT use newspaper to wrap canvases, as the ink will transfer!”


Model figurines and collectibles (e.g., cars, planes, trains, boats)

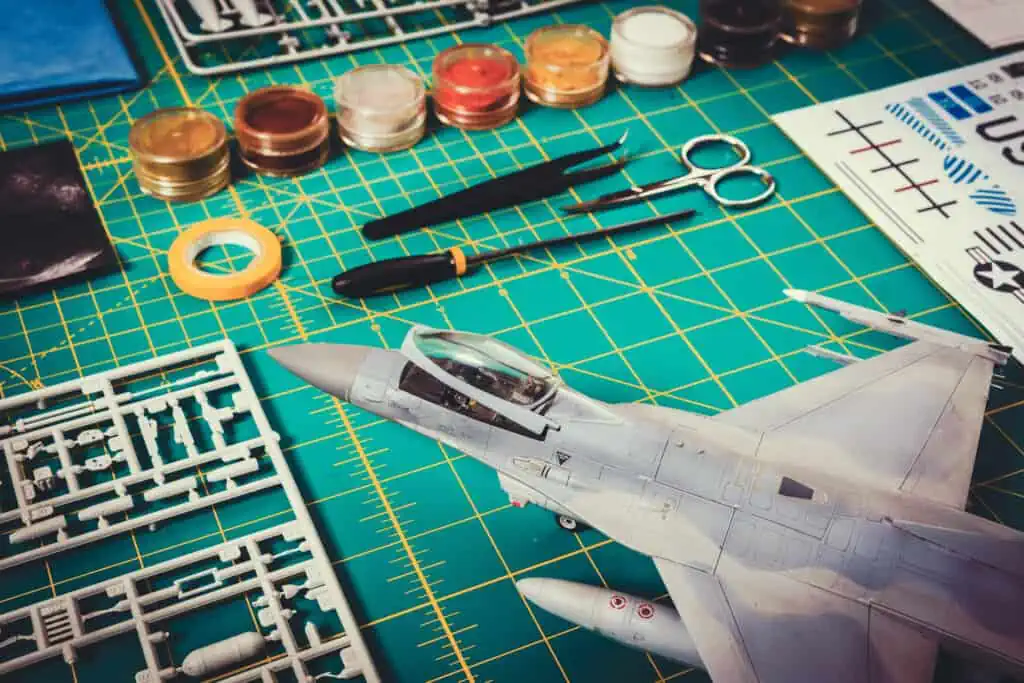
What to watch out for: You spent a lot of time building out model figurines and one-of-a-kind collectibles, so you want to do everything you can to keep them intact while you move. Often these collectibles are full of delicate pieces that could break and paint that could transfer.

How to pack: Wrap each figurine in plastic to avoid scratches or paint transfer. Packing peanuts can stick to some paints, especially in the heat, and potentially cause damage when you remove items from your packing box. Instead, wrap your collectibles in pieces of cloth to avoid any unwanted damage. 

Glass panes

What to watch out for: Glass breaks easily, of course. Sharp corners can pop through the outside of boxes if they’re not appropriately wrapped. Additionally, glass is heavy, so avoid overloading boxes or using ones that are too large to carry comfortably. 

How to pack: Roll glass panes in newspaper that’s bent at a 90-degree angle to create bumpers for each corner. Tape these securely with packing tape. Then, using packing tape again, create an ‘X’ across one side of the pane. This helps to reduce the chance that your glass will crack in transit. Finally, pack your glass panes together in a box with plenty of packing peanuts and bubble wrap for cushioning.

String and yarn

pack art supplies

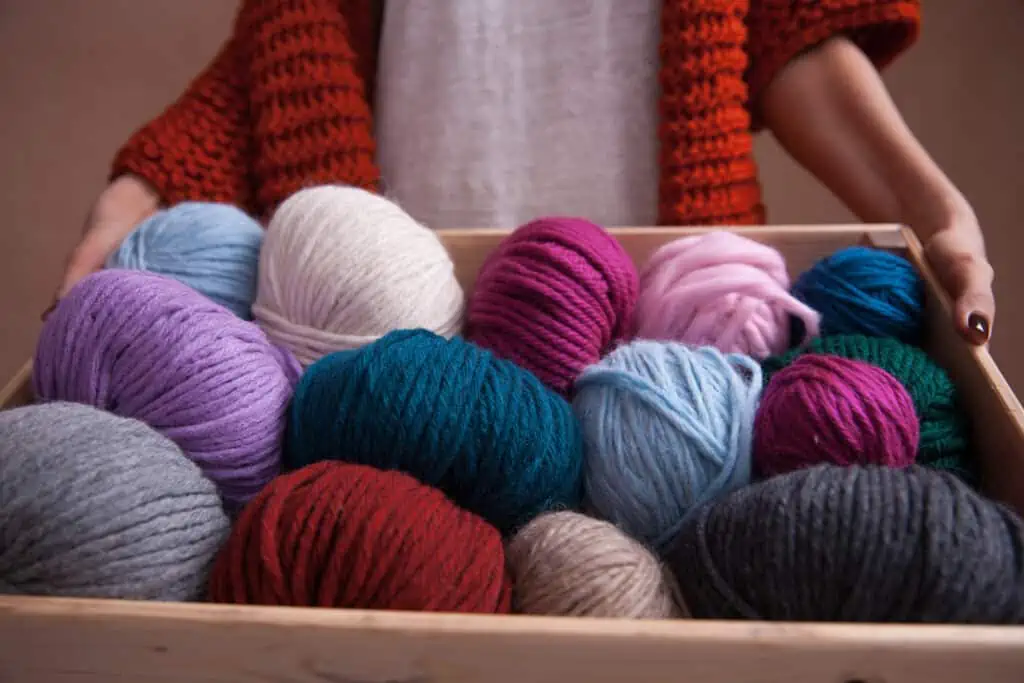
What to watch out for: Knitters and crocheters know that yarn is super important — and occasionally, super expensive. Some styles of yarn are also quite flammable, like yarns made from acrylic and acrylic blends. Sounds crazy, but keep these yarns away from items like paint, chemicals, and other combustibles.

How to pack: After securing the ends of each skein to prevent tangles, neatly place them into a box. You can pack other things in this box that are breakable and use the yarn as cushioning. Just make sure that anything you pack with your yarn can’t leak. 


There’s no doubt about it — packing your art supplies is quite the task. And without a plan, you might lose a few of your favorite tools and works of art in the process. The good news is that you can make the process a lot more organized and low-stress by following some artist-recommended tips.

Paint Chips Aren’t the Only Toxic Hazard I Found While Apartment Hunting

Author:

Publish Date:

Last Modified Date:

Category: Neighborhood Advice

Tags: Tags: , , , , , , , , , , , , , , , , , , , ,

I‘m a single mom, so you might say I’m a little overprotective of my daughterwho isn’t?

My daughter and I are a dynamic duo. When it was time for us to pack up our stuff and journey across the city, my overprotectiveness made sure our new home was safe for the one thing in my life I couldn’t possibly live withoutmy little girl.

I also happen to live in New York City. And like many families here and other metropolitan areas, we’re your average apartment dwellers. Guess what? Especially here on the east coast, apartment buildings are often old, which set off my mom alarms when I was looking for a new place.

What I already knew to do was be vigilant about paint chips. But after a scare that led me to do more research, I found out there was so much more than lead paint to worry about. I want to share what I learned so other families can be safer when they move.

Asbestos

Have you heard of asbestos? I had heard of it before but never understood what it really was until I was told that the material was actually in my new apartment.

Through my ordeal with the removal process, I learned that this toxin is the only known cause of a rare form of cancer called mesothelioma. Wow! Getting cancer from the one place meant to keep you safe?

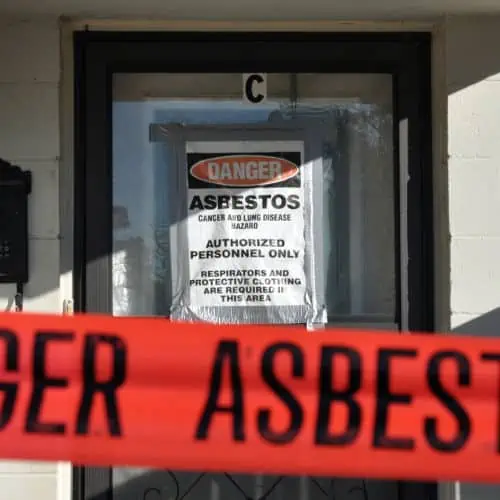
What happens with asbestos is this: when disturbed, the asbestos particles are released into the air and then unknowingly inhaled. Those particles get caught in the lining of vital organs. Consistent exposure can cause cancerwhich can form in the abdomen, lungs or even heart. Asbestos is tricky because you can’t identify it by sight with the untrained eyeyou actually need to pay someone to inspect your home. (Sometimes this can come with your home inspection, but you might need to ask for the actual test.)

Though when I say you need to, I mean just that. If your home or apartment building was built between 1930 and 1980, it may have asbestos in it. The initial cost may seem like a heavy burden now, but in the long run, will prevent an unnecessary battle with cancer. Get that stuff far, far away from your loved ones!

Radon

Radon detecting units being built underneath a house

So you’ve checked for asbestos. Now onto radon, another sneaky toxin. Radon is an invisible, odorless, and tasteless gas.

According to the Environmental Protection Agency (EPA), as many as 8 million homes throughout the county have elevated radon levels. That is problematic because the gas is the second leading cause of lung cancer. Radon leaches from the soil and into the home where it can collect. There is the highest risk of elevated radon levels in the basements or lowest levels of buildings.

The only way to know if you have elevated radon levels is to test your home. There are two different forms of testing: short and long-term detectors. Short-term detectors measure radon levels for two to 90 days. The long-term tests determine the average radon concentration for more than 90 days. Long-term detectors are more accurate, as radon levels change constantly.

Mold

Mold … now that I’ve done the research, just thinking of this word gives me the willies. Mold is quite common, and for those with allergies or asthma, the presence of mold can be really disruptive to their lives. Yep, unfortunately, I am one of those people. (All my fellow allergy suffers please blow your nose in solidarity.) 

Unfortunately, mold does not discriminate against any homes or apartments—you lucky ones with brand spanking new homes may still fall prey to mold growth. Thankfully, it’s pretty simple to remove! 

Mold growth can be removed from hard surfaces with commercial products, soap and water, or a bleach solution of no more than one cup of household laundry bleach in one gallon of water.

To prevent further mold growth, ensure that humidity levels in your space are low. An air conditioner or dehumidifier can help to dry that air out! Cleaning bathrooms with mold killing products will also ensure no little spores have time to flourish. Also, make sure to consider your vents. Keeping household vents open will allow for proper circulation to keep mold at bay.

Lead-Based Paint

Lastly, it’s still important to be on the lookout for lead-based paints. Bad paint was at the forefront of my mind with a little “ankle biter” in tow when I looked at prospective apartments.

Lead is particularly dangerous for kids because, if you weren’t aware, just about everything goes into their mouths, including paint chips. For kids, lead exposure can result in behavior and learning problems, slowed growth and lower IQ. Again, older homes and apartments have a higher incidence of lead paint—those built before 1940 have an 87 percent chance that they contain lead paint. If the lead paint is in good shape, there is little to no risk. but if the paint is chipping, peeling or cracking, it’s time to get it removed.

It’s important to have your homes inspected for lead-based paint. Don’t be shy about bringing it up to a landlord, even if you’re already moved in! A basic risk assessment will inform you about any lead-based paint present in the space and how to mitigate the risks.

As a young professional making my way on my own I was confident that I was smart enough to know what to look for when apartment hunting. It turns out I wasn’t smart enough without additional research. But hopefully, through the tips and tricks I’ve mentioned, you can be sure to save yourself from some headaches (and heartaches) and prevent you and your little bundles of joy from exposure to toxins.


Tonya is a single mother and blogger raising her daughter in NYC. She has a newfound passion for health after journeying into motherhood and hopes to share her knowledge with those around her. In addition to writing, she enjoys going to the park with her daughter and cozying up with a good book.

How to Future-Proof Your Nursery So It Grows up With Your Baby

Author:

Publish Date:

Last Modified Date:

Category: Home Decorating

Tags: Tags: , , , , , , , , , , , , , , , , , , , , , , ,

Decorating a nursery for your baby is a special time. As a soon-to-be new mom, every single piece of clothing, blanket, stuffed animal and tiny accessory I see seems way too cute to be real. I still can’t believe I’ll eventually have a little one that will fit into these tiny clothes and use these adorable toys!

But when it comes to decorating our nursery, I’m trying to restrain myself from buying all these cute things. That’s because I’m trying to decorate this space with intention so that the nursery will grow with my baby as he becomes a toddler … and even a little boy.

I don’t want to invest more money in different furniture, rugs, or new paint in a few short years all because I wasn’t planning ahead and creating a space that will transition with him.

How To Create A Nursery That Will Grow With Your Baby

Can you relate?

Are you excited to decorate your nursery but don’t want to be re-decorating the nursery in a few short years? A room that will be oh-so-adorable (and functional!) now, but will also be age-appropriate without a ton of time and money? Here’s how I made my nursery future-proof.

Reconsider Your Paint Color

From the top, this is the most obvious, yet the most ignored piece of advice.

It’s natural to hear “It’s a boy!” and immediately starting planning a traditional light blue nursery. But thinking outside of that box is a great first step in making sure your nursery will grow with your child.

Paint can be expensive, not to mention a definite time investment, so choosing a color that doesn’t exclusively reflect a baby’s first year will help this space transition without having to repaint your light blue or pastel pink room in just a couple years. (And just say no to wallpaper!)

These Paint Colors Have the Best Resale Value

Zillow examined 50,000 home sales and found these colors help sellers make as much as $5,000 more!

So to all the excitable parents-to-be out there, we suggest a neutral wall color. You can always accessorize with those bold, bright, or traditional nursery colors in a less permanent way. Future-you will thank you.

Protip: Wall decals, or “wall stickers” are increasingly becoming the “temporary tattoos” of the home-deco world. Most of them are easy to apply and easy to remove, so consider going this route if you absolutely have to plaster something across your wall. Amazon is just one place with plenty of options.

Just Skip The Theme

This is probably our biggest piece of advice because it will have a large impact in creating a nursery that will grow with your baby.

I know this can be difficult, especially since so many baby stores align a lot of their products in large themes. In fact, when my husband and I went to register, one of the first questions that the sales associate asked was, “What’s the theme of your nursery?”

Yep, she looked at us like we were straight crazy when we declared that there was no theme.

But skipping this theme will help the space transition later on because themes often make a nursery feel very “baby”. Themes can’t transition.

Not to say that you can’t incorporate some aspects of these cute collections, but steer clear of buying an entire set of bedding, decor, textiles, etc. That is, unless you want to start completely over as soon as you’re sick of it.

Invest in This Flexible Furniture

Buying the right furniture will also be another way you can save money in the long run. Investing in pieces don’t look like they are only for babies will prevent you from needing to replace these pieces in a few short years.

A lot of cribs these days are considered to be convertable cribs, or 3-in-1, which means they will transition from a crib, to a toddler bed, and then eventually to a twin bed headboard. Wayfair has a nice spread of potential crib options.

toysrus.com

Also, skip the traditional changing table and opt to buy a regular dresser that you can add a changing pad on top of.

That way, you won’t have to ditch the changing table for something less specific in a few short years. You just switch out the changing pad and use the same dresser in a big kid room!

Transformable and “big-kid” furniture for a newborn will save you lots of money in the long run, and you might find a lot of companies are finally starting to realize this when you check out baby furniture options out there.

Be Mindful of Textiles

The biggest thing that comes to mind when choosing textiles is the rug you add to this space. Rugs can be very expensive, so don’t buy a childish one only to replace it a year later. (Veteran moms, you know what we’re talking about.)

If you have hard floors, we recommend a rug to give your room a softer area to eventually crawl around. And if you choose a pattern, texture and color that isn’t strictly for a nursery, it can live in that space for years and years.

We went with this dark oriental-inspired rug because it will not only hide stains, but it can transition as the baby gets older. It is also super versatile so it can adapt to match all kinds of decor, pillows, art, etc.

This large rug was definitely an investment, but we don’t plan on moving it for a long time, which really helps to make you feel comfortable spending money on something expensive now.

Organization Systems Never Become Outdated

Creating a bedroom space that works for your everyday needs is important regardless of how old you are. From newborns all the way up to adulthood, you want your room to be organized and functional to meet your everyday routine.

But a newborn’s needs/routine will look very different from a small child’s, right? That doesn’t mean you can’t establish organization systems early on that will grow with your baby.

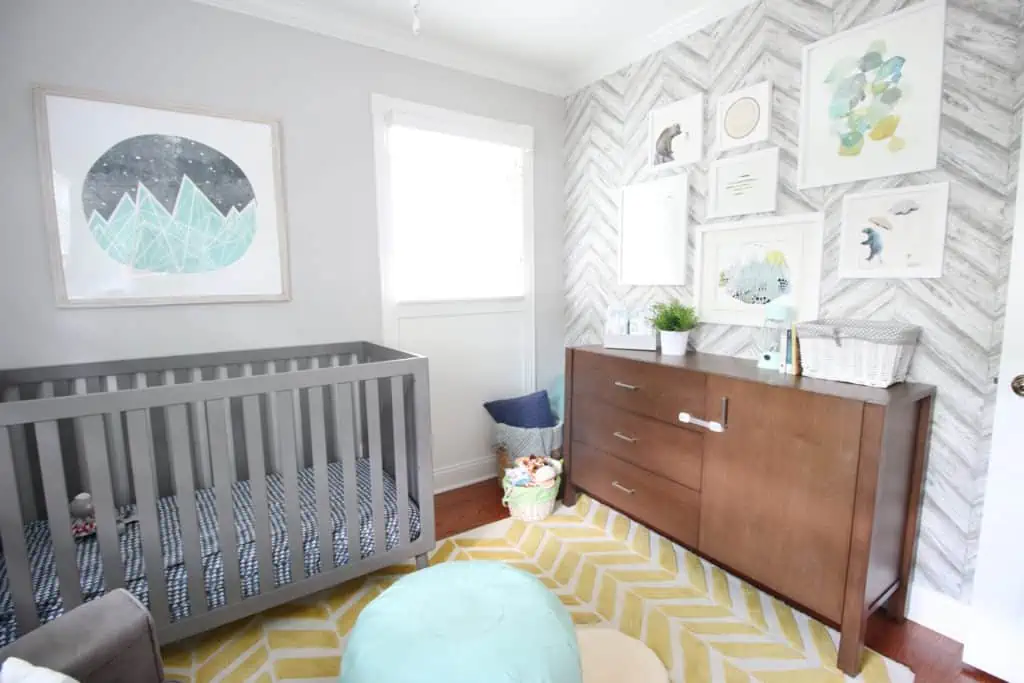
The first thing we did was add hooks to the walls. Today, they work for a baby’s towel, but later on that same hook will be a perfect spot for your little one’s book bag.

A closet organization system that works for your little one’s diapers will one day be useful for them to pick out clothes. And yes, the more organized you are now, the more you will appreciate and maintain these methods throughout the future.

Keep Most of the Fun to Accessories

Last but certainly not least, it’s time for the fun part: accessorizing!

Here’s where we give you full permission to inject those baby vibes into the nursery. Accessories are the best and most inexpensive way to add personality and color into your nursery. Mirrors, toys, pictures and more can easily be swapped out as your baby transitions. (As long as they aren’t part of a 25-piece themed set, of course.)

So if you can’t help but splurge on that adorable stuffed animal or that super cozy baby blanket, do it! The necessities in the room will be there for the long-haul.

As the years go on, now all you have to do is swap out a few accessories, which is far less intimidating than new paint, furniture, new rugs and a whole new theme!

If You Have Kids, Test Your Home for These Things Right Now

Author:

Publish Date:

Last Modified Date:

Category: Home Improvement, Kids & Pets

Tags: Tags: , , , , , , , , , , , , , , , , , ,

I recently moved while pregnant and let me tell you, the struggle is real! Although there were some unexpected perks (it helps to have a literal built-in excuse not to have to do the heavy lifting), there were also a slew of concerns and precautionary steps I took to keep me and Baby Mac safe throughout the process. (In case you’re wondering, he’s due in February!)

I’m definitely not here to scare any future moms. We all know there’s plenty of material available that can do that. But I also didn’t want to go into my move blind to the potential hazards that a new house can pose to you or your baby’s health.

So as an expecting mom and a special education teacher who sees the effects of these household dangers far too often, I’m here to share important research so we can be diligent in taking the necessary steps to keep our babies safe.

You Need to Get Your New Home Tested for Lead

According to the Centers for Disease Control and Preventions (CDC), 1 in every 38 kids is impacted by lead poisoning. Exposure to lead at a young age can come from many things, but usually include these lead-based sources:

  • Lead paint
  • Lead in a tainted water supply
  • Lead fumes during construction

When a child is exposed to this dangerous toxin, they are at high risk of developing a learning disability, a lower IQ and/or damaged organs. In some extreme cases, it can even cause death.

We can all agree that we would never want to expose our babies or young children to lead, but the scary part is that sometimes we do so without even realizing it. That’s why with just a little research and the right tools, you can arm yourself with the resources you need to test for lead products. And often times, all you really need is yourself!

How to Test for Lead

Large companies, such as 3M, sell DIY lead checking products (some for under $10!) that you can purchase and use to test the paint in your home. The directions will coach you on how to swipe the painted surface and almost instantly identify whether or not that paint is contaminated.

If you are an avid DIY-er like us, be sure to use these strips to test any furniture you may be giving a makeover for the new nursery, too. You definitely don’t want to sand down an old dresser that was previously painted with lead paint. That dust can be extremely dangerous when it becomes airborne. You also don’t want to paint over it since your little one could peel away that paint some day and ingest it. There are plenty of old dressers that need a lot of DIY love (so don’t ditch this creative idea entirely!), just be sure to choose one that doesn’t have a history with lead.

https://www.youtube.com/watch?v=BWgxU9BSBng&feature=emb_title

According to the Environmental Protection Agency, 10-20 percent of our exposure to lead comes from water. This is especially dangerous because we may not even realize we are mixing lead-infused water in our baby’s formula and potentially causing serious damage in the process. To test the water in your new home, simply contact your water supplier and ask for it to be tested. If this is not a service they provide, the EPA has contact information for approved testing labs you can reference right here. Just click on your state and search your state government’s resources!

What to Do If Your Child Has Already Been Exposed to Lead

If you have little ones and are concerned that they may have already been exposed to lead (sometimes it can be inhaled through contaminated dust without you even realizing it), don’t freak out – you can often get their lead levels tested at your local pediatrician, just make the appointment today.

Take the precautionary steps to avoid this contamination, and you are your little one will be safe. Just be sure you use the resources available to confirm that your new home is clear of any risk before it’s too late. The bottom line is that lead poisoning is extremely dangerous and fetuses and small children are unfortunately at the highest risk of the side effects.

Get Your Home Tested for Radon

Who knew some old houses could have a dangerous build-up of radon lurking within? I had no idea until right before I moved into my new house and did some investigating. I’m definitely not a pro on the topic, but here’s all the info I found out through my moving experience.

Radon is a dangerous gas that radiates out of the soil over time and is more prominent in some areas of the country versus others. Those areas’ homes catch these gases, trapping them inside and increasing the levels of radon to a point that can be dangerous to live in over long periods of time. According to the American Lung Association, radon is the second leading cause of lung cancer … right behind smoking! I don’t want my baby exposed to second-hand smoke and I don’t want him exposed to high radon levels either.

How Do I Get a Radon Test? How Much Does it Cost?

Getty Images

The great news is that high levels of radon in your home don’t need to be a deal breaker because there are solutions to lower the levels of gases. Each state’s EPA shares resources on which companies you can call to test your home for radon right here. This test costs a couple hundred bucks (depending on location, house size, etc.) and it takes a few days to complete. To test for it, a tracker is placed in your new home, usually in the basement. Note that the longer the tracker can stay in the home, the more accurate the read will be.

For reference, the average level of radon in households across America is 1.3 picocuries per liter and according to the EPA, you need to take action on reducing radon on or above 4.0 pCi/L. Talking to the company who tested your home will be the best resource to start identifying what specific steps you can take to decrease these radon levels now and eliminate them from rising in the future.

Other Harmful Chemicals to Consider

Okay, the two biggest chemicals that may lurk in your home prior to moving in are out-of-the-way, but we don’t want you to forget about the ones that may pop up throughout the moving or nesting process. Here’s a list of other common products that could be useful as you get settled in, but ones you need to take precaution so you are not exposed to:

  • Rodent/Insect pesticides
  • Landscaping pesticides or fertilizers
  • Paints with VOC
  • Polyurethane finishes for floors
  • Paint removing liquids
  • Spray paints (it’s better to roll/brush no-VOC paints if possible!)
  • Arsenic (which is a substance that a lot of outdoor decks or wood is treated with)

Especially if you’re pregnant like me and someone in your home needs to use these listed products, be sure to use proper ventilation, steer clear, or even see if you could stay at a friend’s place until the fumes are gone. It’s always better to be safe rather than sorry, right?

Overall, I went into my move feeling a lot more at ease about these potential dangers because I invested a little time and money into having my house tested for both lead paint and radon levels. Also diving into these topics a little deeper helped me identify how I can take steps later in my pregnancy (or in future pregnancies) to stay safe, which I’m very grateful for. If you’re looking to move while pregnant, I hope you too can find peace of mind by getting your home tested (and cleared!)

These Paint Colors Have the Best Resale Value

Author:

Publish Date:

Last Modified Date:

Category: Home Decorating, Home Improvement

Tags: Tags: , , , , , , , , , , , , , , , , , , , ,

As DIY bloggers, we frequently get questions from our readers about things they see in our homes. But by far the most asked question is, “What is that paint color in your house?”  (more…)

×

I'm Moving

Moving? Thinking about moving? Whether your move is off in the distance or you already have one foot out the door, you'll learn about everything you should expect through our useful how-to's, cool articles and much more. It's all specially curated for you in our "I'm Moving" section.
Explore
×

I'm a Mover

For rookies or veterans alike, our "I'm a Mover" section is filled with extensive industry news, crucial protips and in-depth guides written by industry professionals. Sharing our decade of moving knowledge is just one way we help keep our professional movers at the top of their game.
Explore