How To Safely (and Quickly) Move a Photo Studio

Author:

Publish Date:

Last Modified Date:

Category: How To Pack, Pro Packing Guides

Tags: Tags: , , , , , , , , , , , , , , , , , ,

We often write about how to move things like houseplants, your pantry, and even your dog. But what happens when you’re moving not just things, but also your livelihood? 

This is often the scenario for photographers who are moving. This places a huge burden on their moves to be speedy, but also needing it to be extra safe. Not a great combo.

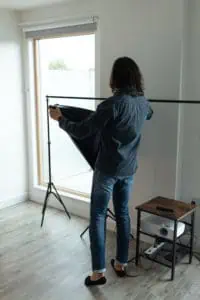
To help iron out this problem, we spoke with Seattle-area professional photographer Brianna Bray to walk you through the most important things about moving your photo studio.

Why is moving photography equipment a big deal?

A $11.5 billion industry, photography is an essential profession in small and big cities alike. Capturing important and intimate moments of life knows no borders.

Given that photography is needed everywhere, this means photographers are often on the move. And when they relocate, the average professional photographer is likely moving at least $10,000 worth of photo equipment to a new area — not something you want to leave up to a random stranger to pack. (Yes, professional studio movers ARE a thing, you sometimes just have to ask.)

How Professional Photographers Prepare To Move Photography Equipment

Brianna Bray

Whether you’re planning to move your photo studio somewhere permanent or temporary, the pros advise creating a detailed moving plan any time your equipment is transported anywhere, no matter how you do it.

Give your photo equipment its own packing day

When you decide to move, give yourself plenty of time to pack your equipment carefully.  “It’s always better to be safe than sorry. Take your time packing your equipment and triple-check your gear,” says Brianna Bray. Thus, she recommends relegating your photo packing to its own day.

Write down important measurements

If you have any large photo equipment in your studio (or just a lot of it), it’s a good idea to write down the height and width measurements of your largest equipment AND the dimensions of your new location. If you can’t physically measure the new area, ask your realtor to help you get the dimensions of whatever space is intended to become your new photo studio. If this isn’t possible, research storage units in the area so you have a backup plan in case something doesn’t fit.

Here’s a helpful guide for determining how much space you need for a photography studio.

(Additionally, estimating the size of your current setup will help you determine what size moving truck you may need if you intend to rent a truck or hire professional movers for the job.)

Inventory and photograph your equipment

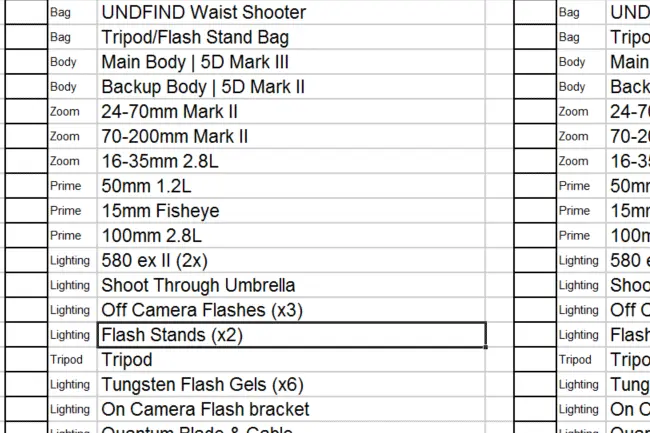
Regardless of whether you’re an amateur or professional photographer, you likely have equipment. It’s a great habit to create an inventory list for every single item you own.

Your photo equipment inventory list should include:

  • Cameras
  • Tripods
  • Computer equipment
  • Lighting apparatus
  • Photo gear cases
  • Camera bags
  • Lenses
  • Digital accessories
  • Reflectors
  • Etc.

Make a separate column to record the condition of all of your items. (You get bonus points for taking photos and digitizing receipts, in case you need to pursue reimbursement.)

You can use a pre-written equipment list like this one to help jog your memory.

Example equipment list – slrlounge.com

Get camera moving insurance (or don’t)

moving photo studioIf you haven’t already consulted your insurance provider about a policy to cover your photography gear, doing so before you move is exactly the time to do it.

Cameras are typically covered by most home or renter’s insurance policies, but they usually only cover things like theft, vandalism, and fire. But for more likely problems like loss and damage (especially in between homes), generic policies probably won’t cut it. Call your insurer to explain your specific situation and ask them what you’d need. Consider specific electronics insurance if you feel your collection is important enough.

As a bonus, because you just made an inventory (you did, right?), you can easily share it with your insurer! Include how much you paid for each piece of equipment. Update your inventory as you get rid of gear or add new pieces over time.

Is insurance really necessary?

Even if you only have a single lens, no one is so amateur they deserve to lose hundreds of dollars due to a broken camera. 

Still, insurance isn’t always the best option. Consider a cost-benefit analysis: how much extra would it cost to hand-carry your equipment instead of insuring it for a move inside a moving truck? If you haven’t invested much in your studio, it may not make sense to spend extra. However, far fewer photographers insure their equipment than likely should (especially if you’re moving long distances!).

Get Help Unloading Your Rental Truck

See prices for movers by the hour—instantly.

Read real customer reviews.

Easily book your help online.


Camera Cases

When it comes to transporting your camera and lenses, it may be tempting to bubble wrap everything and put it in a box. However, bubble wrap is not usually the best option for moving expensive equipment.

For this part of your gear, there really is no replacement for a proper camera bag or hard case. Brianna suggests investing in a high-end case to avoid both damage and stress on your equipment during a move. “A hard case with shock-absorbent padding inside is always going to be the best option,” suggested Brianna.

Photographerscooperative.com

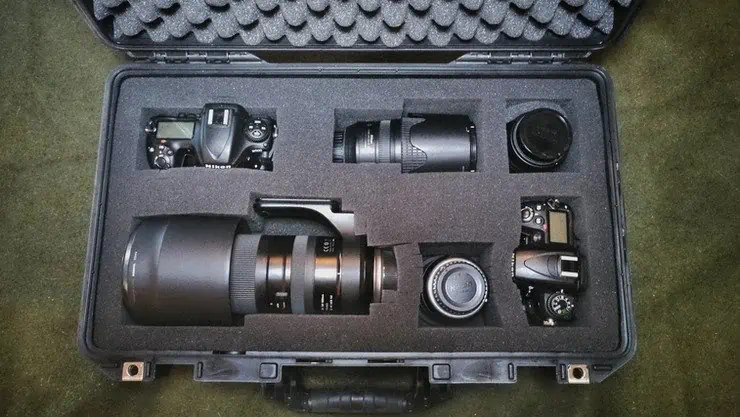
Yes, these cases can be pricey in themselves, typically running you about $200 to upper $300s on Adorama and Amazon, especially for higher-end brands like Pelican. So if you’re already committed to spending this much, another option is to order a custom case to make sure your equipment fits like a glove, which will typically run you between $300 and $400.

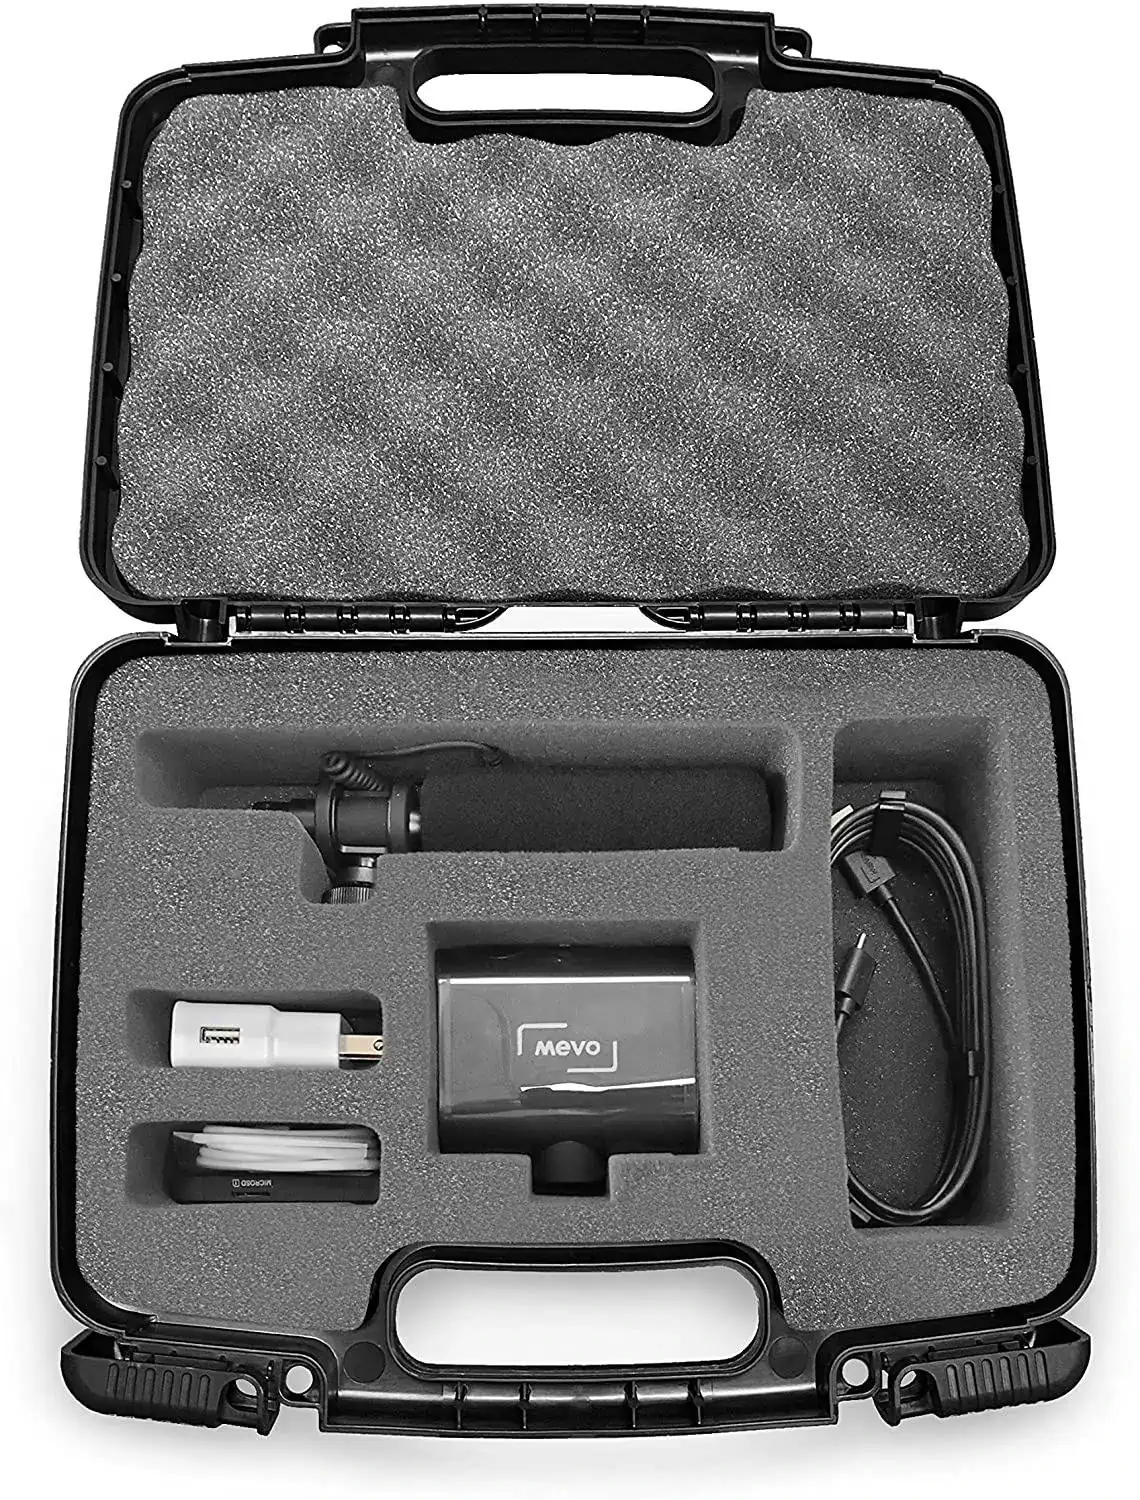
Budget Option: Casematix Hard Shell Camera Case – $28.99

If you’re moving on a budget, Casematix makes a solid basic camera hardshell case. While you won’t get the same durability and weather resistance as a more deluxe option, the egg-crate foam interior and hard plastic exterior still makes this a superior choice for moving day. 

Casematix.com

Higher-End Option: Pelican 1510 – $209.95

Pelican.com

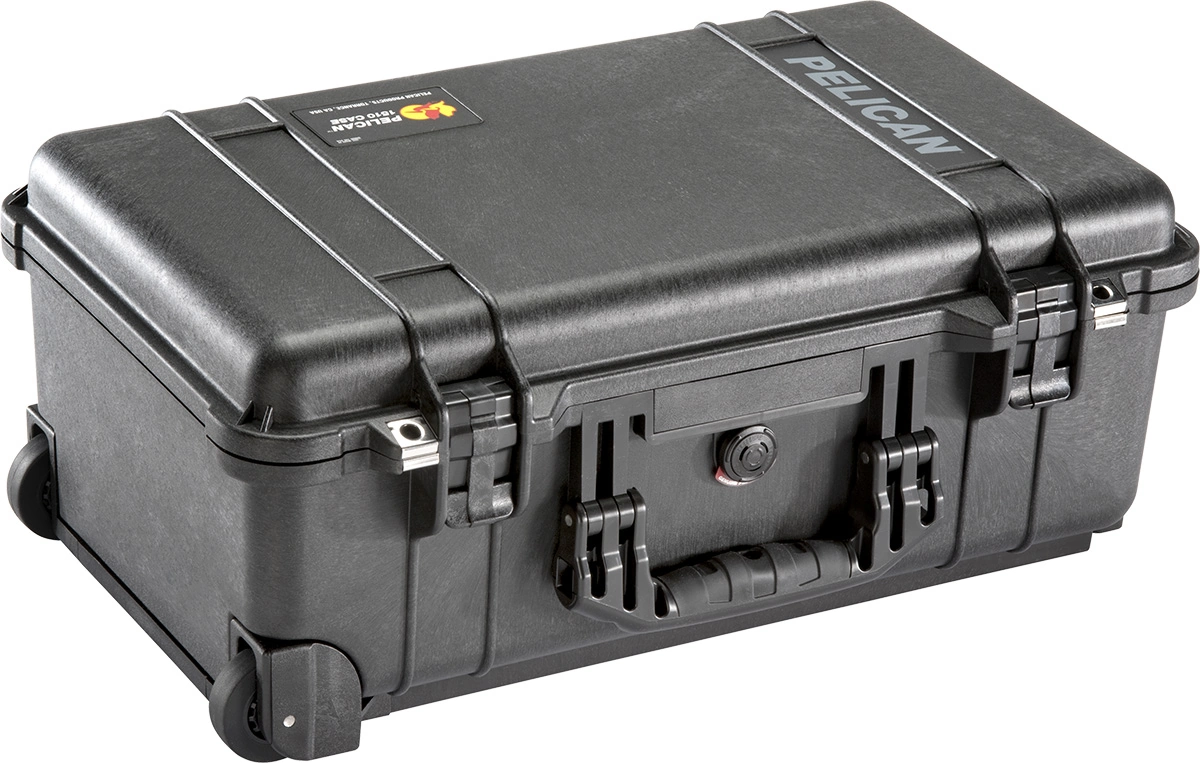
It’s no secret in the photography world that Pelican makes great cases. For photographers who can spend a little more on a case, Pelican 1510 is a carry-on sized option that is great for both short and long-distance relocations with both roller wheels and a pull handle. Watertight and crushproof, the 1510 is pretty durable and will keep your gear safe in all kinds of weather and temperatures.

Custom Option: My Case Builder, Nanuk 945 – $360.09

For those looking for a custom hardshell, My Case Builder offers a variety of options. The Nanuk 945 is fully customizable through a customized builder app, which lets you look up your existing camera equipment for foam perfectly matched to your gear. The Nanuk 945 is also dustproof, waterproof, and fully TSA-compliant.

Mycasebuilder.com

Protip: If you earn income from your photography and pay taxes, you should be able to include these expenditures as business expenses when you file your taxes (be sure to double-check with your accountant for specific tax information).

For the rest: bubble wrap, stretch wrap, and foam

For less expensive and fragile equipment like lights, backdrops, props, and hard goods, boxes and bubble wrap can be a good solution. Just make sure that you buy enough so you don’t have to skimp on moving day.
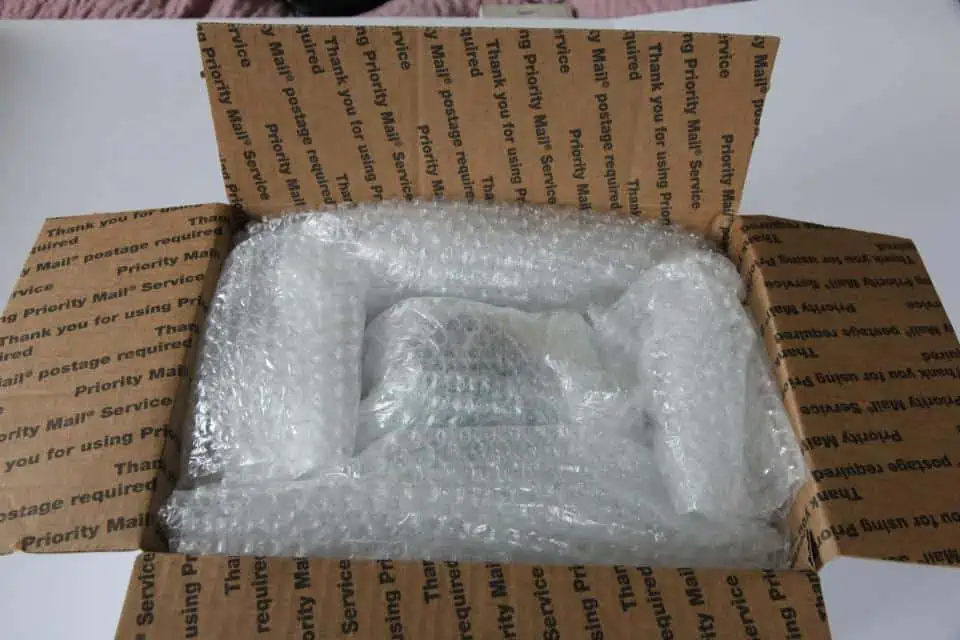
Bubble Wrap

Bubble wrap camera gear – Uhaul.com

We recommend getting a large, 100-foot roll of bubble wrap from a department or office supply store. Bubble wrap all hard items that you don’t want getting scratched or bumped, like monitors, external hard drives, battery grips, and props.


Stretch Wrap

Stretch wrap tripods – Uhaul.com

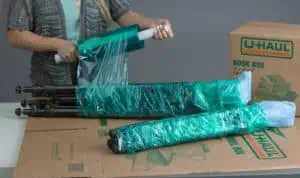
Invest in stretch wrap to secure the legs of tripods and umbrellas, light stands, and stacks of hard goods.


Packing Foam/Dish Foam

Dish foam fragile items – Uhaul.com

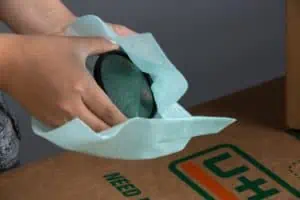
Packing foam can be used as a soft extra layer of protection for smaller components that you’ll be boxing up and want to avoid getting scratched like filters and lights.


How to pack camera equipment if you DON’T have a special case

You want to avoid using plain old cardboard boxes with no padding for your camera stuff. That said, if your only option is cardboard, get boxes that are big enough to properly fit your other equipment, but that don’t stretch the sides of the box. You’ll also want to have enough boxes to avoid overloading a box and blowing the bottom out.

If you have a lot of fragile items that cardboard can’t properly protect, consider using a wood-moving crate instead of boxes. While they are a little more expensive, this is a better way to ensure that your livelihood isn’t damaged during a move.


“Even if you only have a single lens, no one is so amateur they deserve to lose hundreds of dollars due to a broken camera.”


But no matter what you use, it’s crucial that you avoid empty space inside of where you are packing them. Empty spaces are an opportunity for items to move and crash into each other in transit, which can easily lead to damage. That bubble wrap you got is a great way to take up space, but you can even use crumpled-up newspaper, dish towels, or balled-up plastic bags if you have extras laying around.

Properly packed box – Bhphotovideo.com

Transporting Your Studio

Packed? Now you have to choose the best transportation option for you. Photo studios come in many different shapes and sizes, which means you have a surprising amount of options. Here are the best ones.

You should always hand-carry your photography equipment, if possible

If you’re moving your studio across the country, Brianna suggests bringing your cameras with you, whether you’re driving or flying. If you’re flying, she highly recommends that you prioritize your most expensive camera by making it your carry-on. 

If things are out of your hands (literally), you really need to try and keep your studio gear separate from other items. Label your boxes as fragile, of course. You might also want to give them an additional label, so you know that it’s your photo gear.

Camera carrying cases are great for hand-carrying, NOT for packing, shipping or storage – Photographerscooperative.com

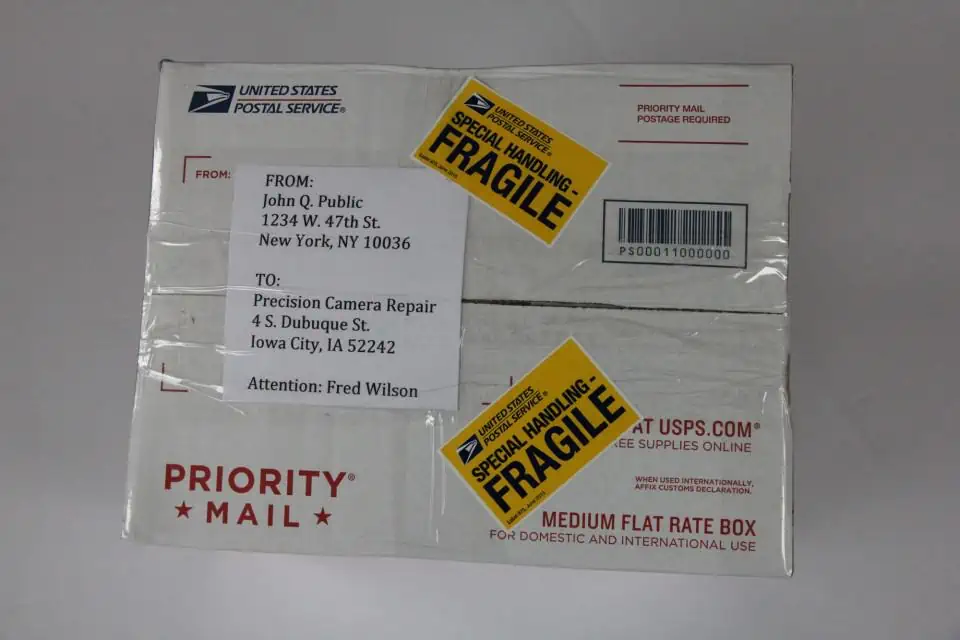
Mailing your camera equipment is a realistic option

You actually have the option to use a postal provider like FedEx to ship your gear to you. If you do this though, be sure to plan enough time to ship if you choose this, and cover your purchase with insurance when possible. As Brianna explained, “If you have to ship your gear, I would heavily research the carrier company prior to using their services. See what company has the least issues, best insurance options, ideal shipping speed, etc.” She added, “Make sure everything is labeled as ‘fragile’ as well.”

Also, don’t advertise that the boxes contain photography gear. A simple “PS” (for photo studio) will alert you that the materials belong in your studio without advertising to potential thieves that the packaging contains expensive goods. 

An example of a ready-to-ship camera package – Bhphotovideo.com

Properly secure them in your rental truck or vehicle

If you’re carrying your items or transporting them in your own vehicle or rental truck or container, you’ll have to consider just a few more logistics. Will all the items fit into your vehicle, or do you actually need to rent a moving truck? (Also, do you have experience driving a moving truck large enough to fit your studio plus anything else?)

When packing your vehicle or a moving truck, you’ll need to ensure that your cases and boxes are secure. This means doing these things:

  • Renting or buying moving blankets
  • Securing boxes in place with straps and bungee cords to secure boxes in place
  • Creating a security strategy to avoid theft during transit

And it sounds obvious, but Brianna cannot stress enough, “Never leave your equipment unattended. I always have my gear properly packed and then stored in the trunk of my vehicle. You never know when your car could be broken into so best to not leave anything in sight.”

Get moved by professional studio movers for a few hundred bucks

Because your photography studio constitutes a significant investment and, possibly even represents your livelihood, you may just want to hire a professional moving company to relocate your studio, along with your other things. In fact, some moving companies are actually professional studio movers, meaning they have specific experience moving your exact equipment. 

Take time to get to know moving companies in your area if you’re moving locally, as you may be able to hire labor-only professionals for only a couple hundred bucks. And if you’re moving long-distance, reputable moving companies should be able to uniquely assess your studio and move it for you. Either way, just make sure to check out online reviews to ensure the company you pick has a good safety record.


Brianna Bray is the Owner & Photographer at Farside Photography, you can find her work on Instagram: @farsidephoto.

Avoid These 4 Design Mistakes in Your New Home

Author:

Publish Date:

Last Modified Date:

Category: Home Decorating

Tags: Tags: , , , , , , , , , , , , , , , , ,

So you just bought the prettiest home on the block and you’re moving in and getting settled? Congrats! Now it’s time for the best part … the decorating!

It’s the furniture and home decor that really brings a space to life and tells the story of the people who live there.

4 Design No-Nos We See All The Time

But there are some big design no-nos that we see a lot of people make in their new homes. Even if you just bought the most beautiful house, you can instantly bring it down a notch if you commit any of the following 4 design mistakes.

Don’t worry, all of these have easy fixes (and we even included pretty pictures of the right way to do it!), giving you have a clear visual for avoiding these commonly made mistakes.

1. The “Too-Small-Rug”

Bigger is always better when it comes to rugs!

This design mistake just might be the most common one we ever see: the “too-small-rug”. If you’ve purchased a 5-by-8 or 6-by-9 rug in your lifetime, chances are it was not the correct size for your room.

And we get it, large rugs can be expensive. But using an 8-by-10 or 9-by-12 rug in your room is going to make your space look much, much more high-end.

To make your rug shopping a bit easier, here are the design rules you can follow to ensure you buy the correct size.

  • In a family room, find a rug that is large enough for the front legs of all the furniture to sit on the rug. Even better if all pieces of furniture can rest on top of the rug!
  • Avoid the “floating” rug look when a rug is just sitting in front of a sofa.
  • In dining rooms, rugs should be large enough to fit all chairs (even when they are pulled out) on the rug. This means at least 24-36 inches out from the table.
  • In the bedroom, your rug should extend 18-24 inches on each side of your bed. If you have a queen size bed, an 8×10 should work. If you have a king size bed, try a 9-by-12 rug.

For more tips buying the perfect rug, check out this blog post.

2. The Matching Bedroom Set

So you just moved into a new home and you need furniture, stat! Why not head over to the discount furniture and buy an entire bedroom set for a low low price?

Eek … please don’t do that. Yes, it may sound like a good deal, but we promise you can create a good looking bedroom (on a budget!) without going the matchy-matchy route.

And don’t get us wrong, having some matching furniture is not a bad thing. But you probably don’t want your loveseat, couch, coffee table, and side table to all match. Some of them can match to keep a cohesive look, but if everything is the exact same, you’re going to end up with a cookie-cutter look that lacks personality.

Completely matching rooms you buy as a package are very out of vogue.

Take this bedroom above, for example. It has an upholstered headboard, a leather bench, white nightstands, and a wood dresser. This creates an interesting and layered look!

If you do have matching furniture all over your house, we’re certainly not telling you to get rid of everything. Instead, think about moving things around. Bring a dresser from one room into another or swap your night stands.

You just might love all of your gorgeous furniture a bit more when it doesn’t get lost in a sea of it all being too samey.

3. The Flooded Curtains

Hanging window treatments is an intimidating task. Of course, their main objective is to be functional, but you also want them to look good. And let us tell you, most people are hanging their curtains all wrong!

High and wide. Repeat after us: high and wide. (Check out the image above.)

That’s generally how you need to hang your curtains. Many people opt to install their curtain rod directly above the window and a couple of inches outside of it, which isn’t doing your home any favors. Why? Curtains are the key to making your ceilings appear much taller and the room bigger.

Here are things to consider when hanging.

  • Mount the rod up to a foot on the outside of the window. This allows the curtains to drape down without interfering with the light when they’re open.
  • Hang your rod almost to the ceiling. Go about 4-6 inches below the ceiling and that’s how high they should be.
  • Once you have your curtain rod hung, you can figure out how tall your curtains should be. You will probably have to purchase XL curtains. They’re harder to find, but they’re out there (IKEA sells them on a budget!).
  • Your curtains should “kiss” the floor or you can have them puddle (about 1-2 inches longer than the floor). Make sure your curtains are not too short! For no-sew hemming tips, check out this blog post.

4. The “Too-High-Art”

When you’ve just moved in, you probably have a lot to hang on your walls to really make it feel like home. But please read these tips first. Most people hang art way too high! The last thing you want is for your guests to have to crane their necks to see your gorgeous pieces. 

Follow these tips for perfect hanging every time.

  • Don’t go with eye level (if you’re tall, that will make things way too high!). Instead, the center of your piece should be 57-60 inches off the ground.
  • When hanging a gallery wall, think of the entire collection as one piece of art. Therefore, the very top and bottom shouldn’t be hung too high or too low.
  • When hanging above a couch or dresser, go 4-8 inches above the piece of furniture. If you go higher than that, it will look disjointed.
  • For gallery walls, 2-3 inches in between pieces is plenty! No more than that. If you’re nervous about hanging a gallery wall, check out this foolproof way to do it!

Believe in us and avoid these design mistakes whenever possible. With the right furniture, art placement, curtains and rugs, you are well on your way to a great looking new home!

The Do’s and Don’ts For Shooting Your Own Real Estate Photos

Author:

Publish Date:

Last Modified Date:

Category: Buying & Selling a Home

Tags: Tags: , , , , , , , , , , , , , , , , , , , , ,

When it comes to selling your home, it’s all about making that good online impression. The only way to get serious buyers to physically see your home in person is to hook them online. And honestly, the quickest way to do that is with some amazing real estate photography!

But let’s be real – hiring a professional photographer isn’t always in the budget. If you’re looking to save money by snapping your own pics, then we’ve got some great tips for you to keep in mind when you’re roaming your place, camera in hand.

(more…)

Keeping Print Photographs Protected

Author:

Publish Date:

Last Modified Date:

Category: Pro Packing Guides

Tags: Tags: , , ,

When was the last time you bought a roll of camera film? When was the last time you even saw a roll of camera film? About the same time you last used a pay phone maybe? But do you also have – in an old album if not in a shoebox in the back of a closet somewhere – a bunch of old print photographs that you just can’t get rid of? So do some of our customers. Today we go over a few tips on taking care of those irreplaceable, ancient keepsakes.

Photos Already in Albums

…are the easiest to pack – usually. But there are a couple of things to watch out for.

Like books and papers, photo albums fare best when they are placed flat in the carton. Unlike books and papers, photo albums contain materials – like the photos and their plastic sleeves – that can become hopelessly stuck together under certain conditions: pressure from having an apartment’s worth of furniture and books on top of them along with extreme temperatures and humidity.

To keep the pressure off them, pack photo albums in something other than a book box. In between sweaters and t-shirts in a 3-cube isn’t a bad idea – as long as you mark the carton properly. Guarding against the elements can be a tougher proposition. Mention to your customer that environmental factors can affect their photos, and if they are concerned about the weather or the time their photos will be in storage suggest climate control for their storage unit and a general awareness while they are in transit. If conditions outside – and thus inside the back of the truck – begin to get extreme, taking those packed up photos to a milder environment couldn’t hurt.

A Few More General Tips

Packing Photos in a Shoebox for a Move

Avoid stacking unprotected pictures – in those aforementioned harsher conditions, even if they aren’t all that harsh, those unprotected photos can easily stick together and be ruined. Suggest to the customer (even if they’ve had those photos in a shoebox since the last time they saw a pay phone) that separating their photos with packing paper is a great way to help keep them protected from the elements – though doing this with even just one shoebox of photos can take a load of time. Tell them you’d be happy to do it, of course, but also remind them that they are paying you by the hour.

Avoid wrapping photos (or photo albums) in plastic – the possibility of trapping moisture resulting in mold is too great.

If you have a habit of using foam peanuts when packing certain items, avoid using them for packing photos and photo albums. The peanuts and particularly the crumbs can get static clingy and are a pain in the neck to have to pick off all the photos and their plastic housings.

For those special photos your customer wants to take particularly good care of, consider placing them in between the pages of a hardcover book – between pieces of packing paper as older books’ ink might rub off and the glossy pages of newer books, not to mention those big coffee table picture books, can wreak havoc on a photo, especially in hot and humid conditions.

* Note: Most types of packing paper are acid-free and lignin-free…which is good news for those photos.

Packing Photos in Frames

Yes, we do it all the time, with rarely a nick or scratch. Be aware, though, that the glass of the frame actually makes a photo more vulnerable to damage, not less, and if the frame seems delicate or the glass thin and fragile it is always an option to take that extra-large family portrait from 2002 out of the frame and pack it separately.

Preserving Those Most Precious Photos

If no digital copy of the last photo ever taken of your customer’s dearly beloved Grandma exists, suggest scanning it and creating a digital file, along with any other treasured photos that have no digital counterpart. When packing such photos, if they are not in frames or otherwise fully protected, it shows extra care if you wear gloves to keep the oil on your hands from damaging the photographs.

Packing Digital Photos

Okay, we don’t exactly pack digital photos. But we do pack the devices they are stored on. Packed correctly, these devices and thus the pictures stored in them should arrive safe and uncorrupted. But occasionally things happen. Even people who are not in the middle of moving have seen their external hard drive crash.

Two ways to help prevent the loss of all those gigs of images: Suggest a backup on another external hard drive (nothing groundbreaking here) or (maybe more helpful) uploading their archives to a cloud storage site. Using a cloud service (like Dropbox, Windows SkyDrive, Apple’s iCloud) will incur a monthly charge for anything more than a couple of gigs. Online photo storage website Flickr offers 1,000 gigs of free photo storage. Shutterfly offers unlimited photo storage for the same low price.

Your customer may be fine with a shoebox full of stacked and unprotected photos. But for everyone else, a few preventative measures can help preserve a lifetime of memories.

×

I'm Moving

Moving? Thinking about moving? Whether your move is off in the distance or you already have one foot out the door, you'll learn about everything you should expect through our useful how-to's, cool articles and much more. It's all specially curated for you in our "I'm Moving" section.
Explore
×

I'm a Mover

For rookies or veterans alike, our "I'm a Mover" section is filled with extensive industry news, crucial protips and in-depth guides written by industry professionals. Sharing our decade of moving knowledge is just one way we help keep our professional movers at the top of their game.
Explore