When Your DIY Projects Will Fail

Author:

Publish Date:

Last Modified Date:

Category: DIY Projects

Tags: Tags: , , , , , , , , , , , , ,

We love a good do-it-yourself project. There’s just something about improving your home all by yourself without the assistance of a professional that feels so darn good! (Heck, our blog is called The DIY Playbook, so obviously we are obsessed with all things DIY.)

But it may shock you that we firmly believe that there are many instances when you should not do a project yourself. (Ever heard of “nailed it”?)

Yep, we’ve outlined all the times when you need to call in a pro to get the job done below.

Time Will Inevitably Be More Valuable Than Money

Many people assume that just because a project is easy, they should do it themselves. However, even simple tasks take time.

Here’s a real situation we were both in recently. Painting a room only takes 1-2 days. The problem is that it takes an entire 1-2 days of your time, and we were moving.

If you have 1,000 things on your moving to-do list, then it may make sense to call in a pro to get it done quickly and efficiently. (Hiring help to move is another bright idea when that to-do list is bursting with items!)

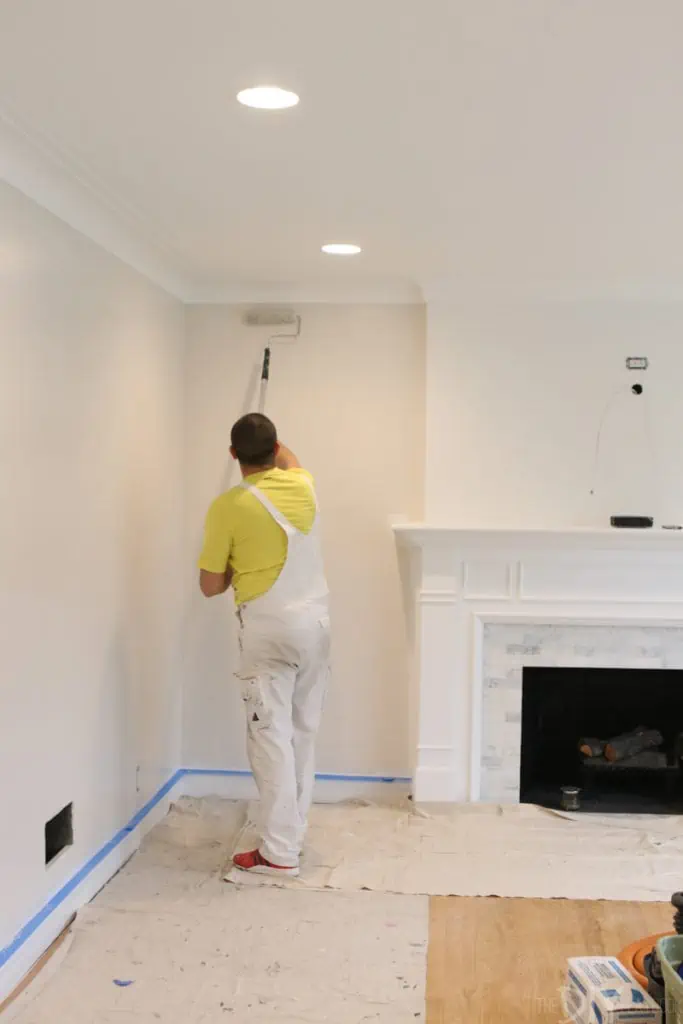
It cost us each about $1,000 to hire this DIY out, but we weighed that against packing up one house to move to another, closing on a home, and finishing things up at your old pad. So yeah, painting a room will only take about 1-2 days and costs roughly $100 in supplies, but sometimes you don’t have an open schedule.

In our particular case, an additional $900 was a resource well spent, because hiring it out ensured that we could subtract our labor, plus have a crisp white trim and fresh paint on the walls as we moved our new items in.

Don’t worry DIY fans; as we’ve designed each room in our homes later on, we’ve re-painted a few spaces with new colors ourselves. From experience, what sounds like a great DIY project is only realistic after you have the time.

Some DIY Projects Have Sneaky Costs

People turn to DIY to save money. And it’s true, often times labor is the most expensive part of a large project. However, there are some sneaky costs that you need to keep in mind before you decide to handle a project by yourself. Here are the two biggest ones we’ve figured out are the worst.

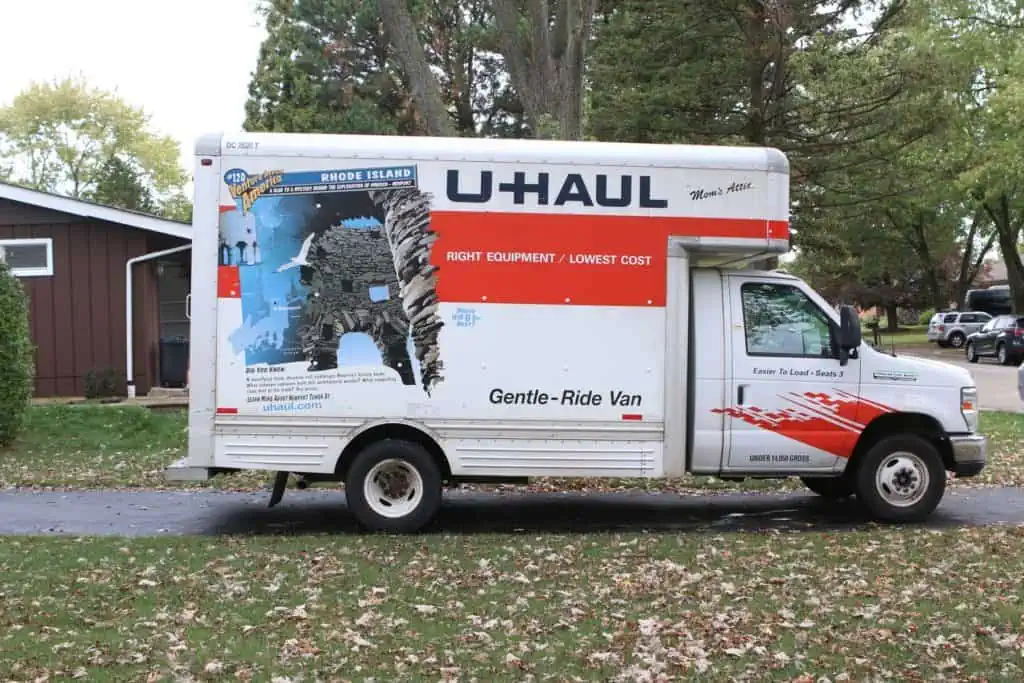
Transportation: This line item is way too often overlooked when it comes to large-scale projects. If you need a lot of large materials for a project, figure out how the heck you’re going to get those supplies home before you consider it worthwhile.

DIY Playbook has lived it. We decided to add a large decorative wall treatment to a guest bedroom, not realizing that we would need 12-foot wooden boards from the home improvement store. We had to rent a truck on the fly (which cost about $75). It made us question the savings.

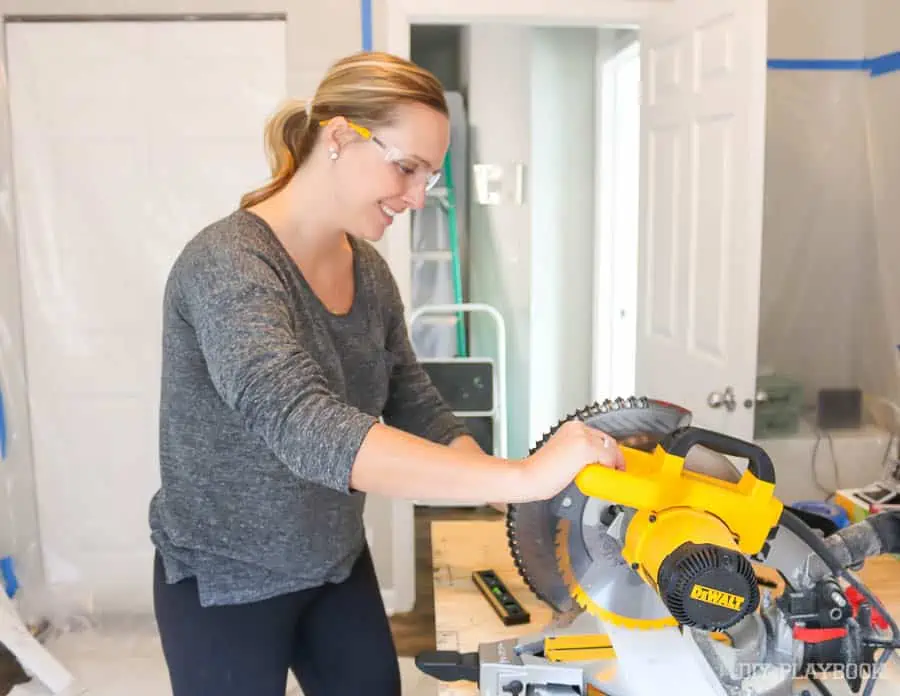
Tools and Supplies: The more you DIY, the more tools and general DIY supplies you’ll acquire, making this a thing of the past. But the first time you tackle a project, you’ll probably have to buy all.the.things.

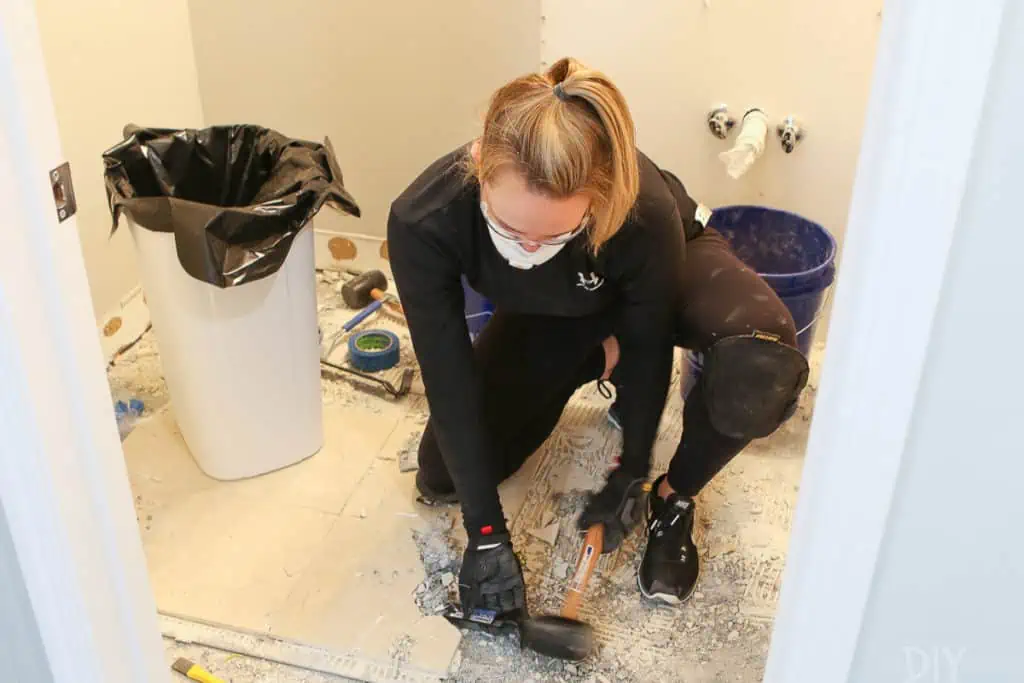
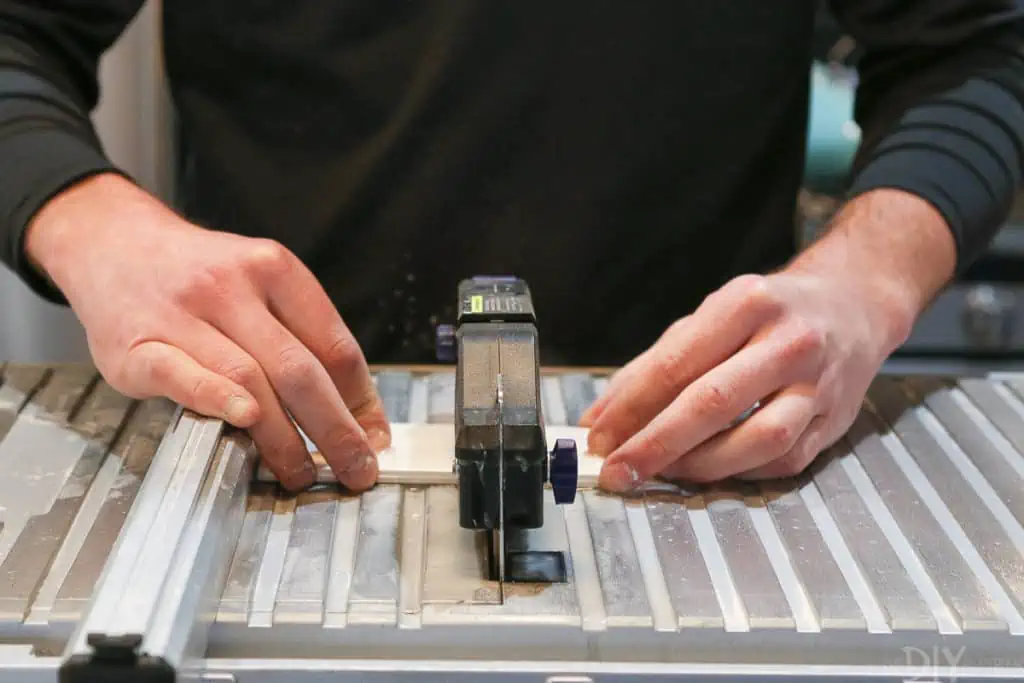
We recently completed a large tiling project for the first time and that meant we had to buy trowels, sponges, and a wet saw for the job. That added up to a couple hundred dollars pretty quickly! Of course, the next time we do a tiling project we will be prepared (and won’t have to spend quite as much), but buying all new supplies is something you’ll want to consider.

However, by making that investment in purchasing and learning how to till ourselves, we saved about $2,500 in labor. (Granted it took us two months to get the bathroom done, but heck … that’s still some big saving!)

Think through a project carefully, jot down some numbers, and add everything up before you start a project on your own.

Be Honest When You Don’t Know How

As DIY’ers ourselves, we always encourage people to expand their skill. However, if you’re an average homeowner, there are projects that will be far too advanced for you.

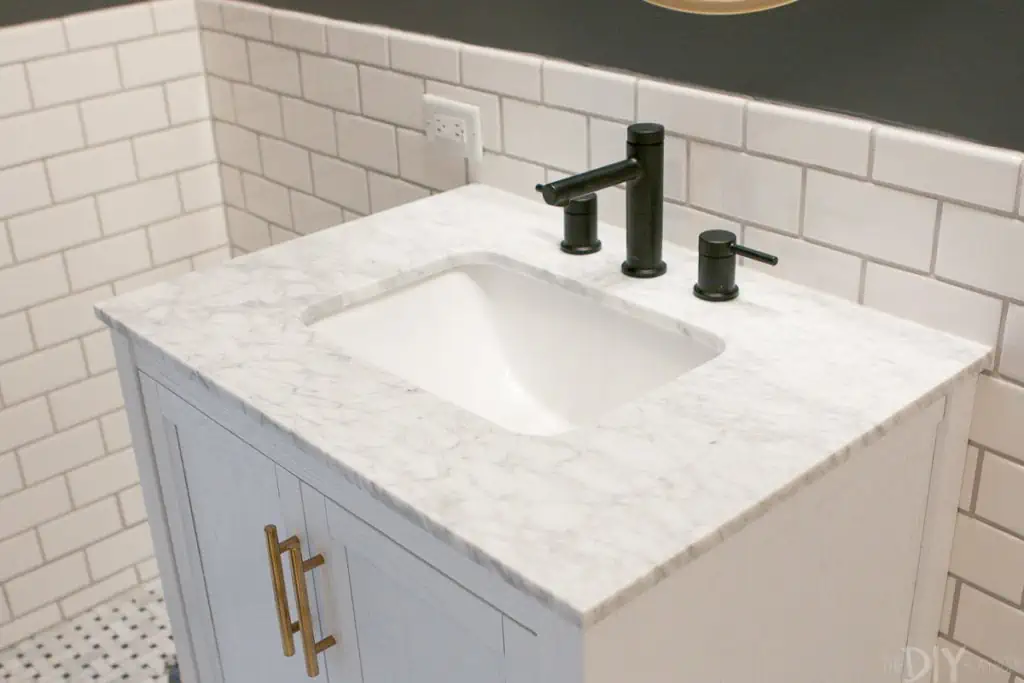
For instance, while we think most people can easily learn how to install a faucet online, we’d advise hiring a plumber to move plumbing lines in a bathroom. Sometimes it isn’t just safety to you and your materials, but not knowing regulation and keeping things to code also matters. The project don’t necessarily have to be too advanced for you to need an expert opinion.

And of course, some projects are incredibly dangerous if you handle them yourself! Gas repairs or extensive electrical work are not DIY projects. Know your limits and hire out when necessary.

Don’t DIY “ASAP Projects”

As a homeowner, you’re bound to run into emergency issues that need to be fixed ASAP. Whether it’s a flooded bathroom or a busted hot water heater, you’ll want to have a professional on call immediately.

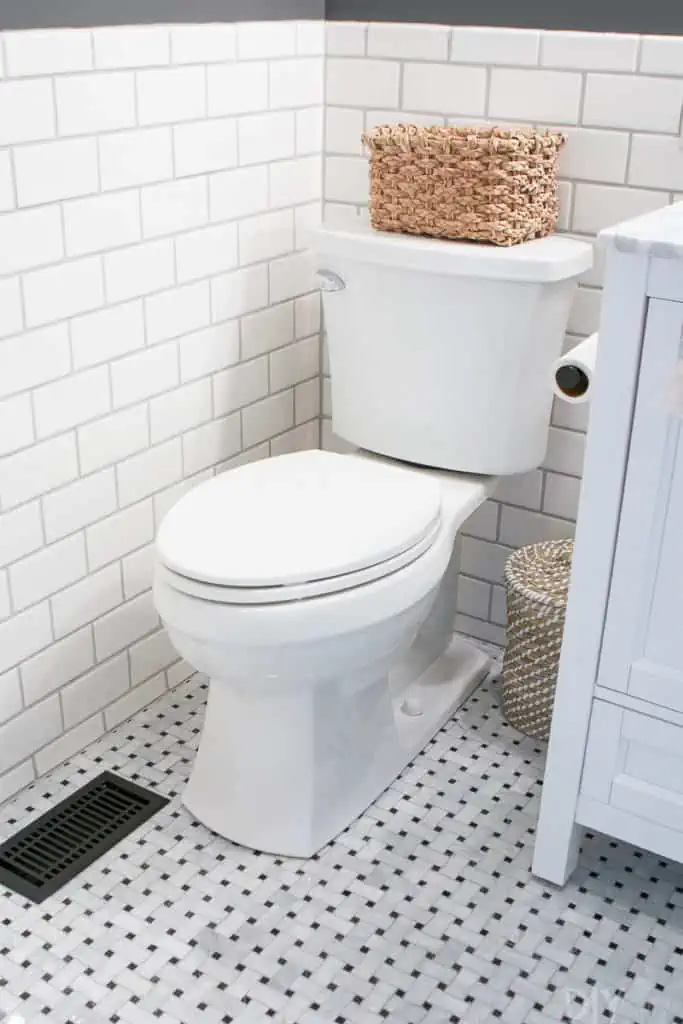
When we were renovating our bathroom, we accidentally bumped the toilet valve and it immediately started leaking. Not wanting to flood our new bathroom, we called in a plumber to swap the old valve with a new one. This set us back about $275, but the job was done correctly and in about an hour. Plus, we felt much more at ease knowing our new bathroom wasn’t going to flood from that pipe!

These urgent issues should be handled by a professional. When you don’t have the time to research and buy the correct supplies, you can make a mistake trying to do an extensive repair yourself. If it’s a home emergency, call it in.

Don’t Experiment If You’re Gonna Stare at It Every Day

If there are any perfectionists tuning in, this category is for you. You may be stuck looking at the results of your DIY for years, so if you are someone who may constantly critique minor (or major) mistakes, then DIY-ing a large project may not be worth the money saved.

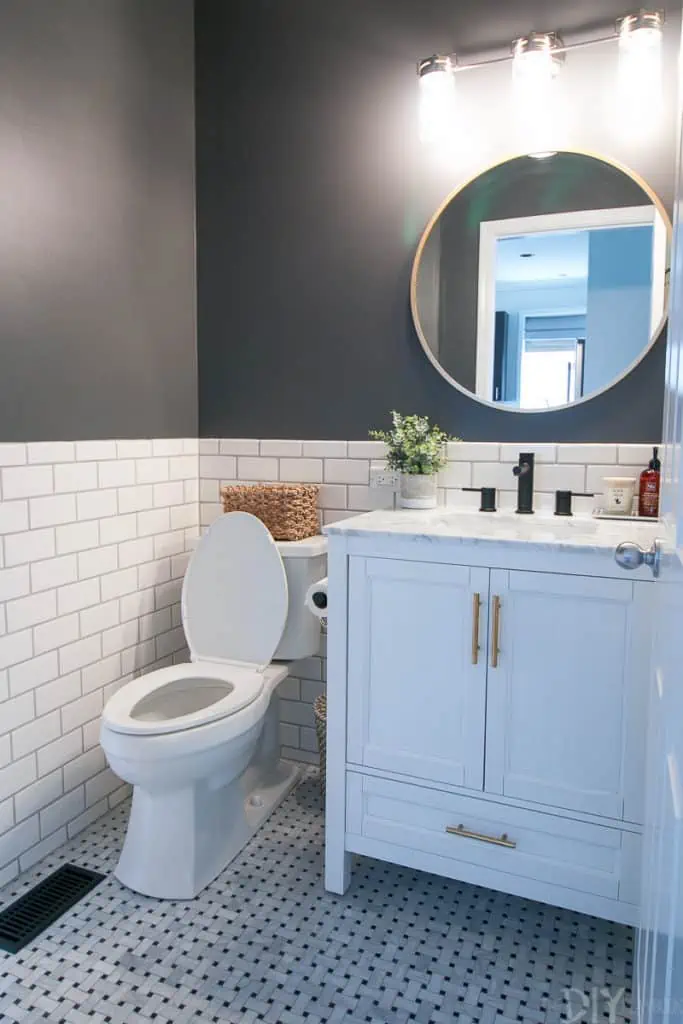
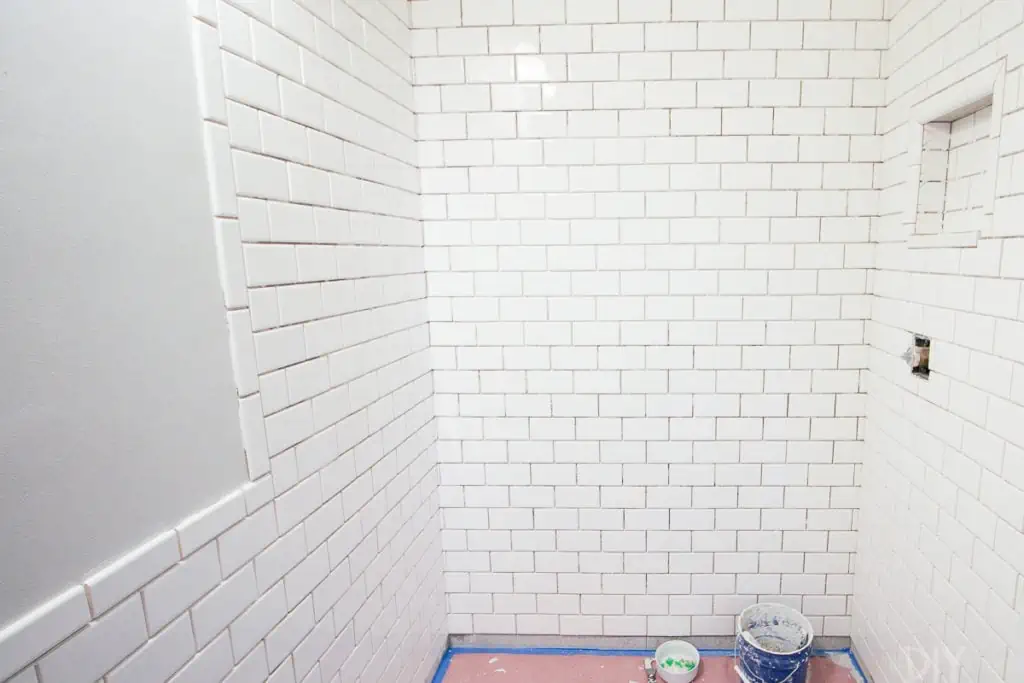
We recently renovated our guest bathroom (more on that here!) and I stare at all of the tiles in there when I shower. I’ll always focus in on the corners where I know a tile is 1/8 of an inch off from our handiwork. It’s minor, but it really bugs me!

We know this question sounds like a silly one to ask yourself, but DIY-ing is never worth it if you’re not going to love the end result, or even worse, hate it more than when you started.

The DIY Projects We Recommend

There are lots of DIY projects that you can (and should!) tackle on your own. Here are some ideas to get your creative juices flowing…

  • Changing Doorknobs
  • Painting your Front Door
  • Changing a Faucet
  • Installing a Ceiling Fan
  • Swapping out Light Fixtures
  • Changing an Outlet
  • Adding Cosmetic Woodworking to Walls
  • Installing a Smart Thermostat
  • Fixing a Screen Door
  • Painting a Room
  • Changing out your Baseboard

To DIY or not to DIY? Sometimes the answer is crystal clear. But when you’re unsure, we hope you consult this list so you make the right decision for you (and your home!).

How Often Should You Clean These 20 Household Items?

Author:

Publish Date:

Last Modified Date:

Category: Home Improvement, Organization

Tags: Tags: , , , , , , , , , , , , , , ,

Cleaning the house is one of those things that most people just don’t like to do. Getting out the rubber gloves, smelling all of the chemicals and spot cleaning with a toothbrush isn’t exactly the most appealing activity.

However, different areas in your house can be a breeding ground for bacteria, mold and fungus. Places you didn’t know were hazardous like your kitchen and bathroom sinks can become some of the most disgusting places.

So how often, exactly, should you clean each area of the home? We’ve got your answers!


[SEE FULL INFOGRAPHIC]


How Often Should You Clean Your Living Room

Living Rooms

Your living rooms are naturally some of the cleanest parts of the home. However, we can track dirt in or kids and pets can make spills, so it’s best to keep up with this area fairly often. Here’s how often you should clean things in your living room.

Carpet

Once a week: Your carpet is a place where dust, dirt and allergens tend to hide. Giving your floors a weekly clean with a good-quality vacuum cleaner is super important. In places with constant foot traffic, you may want to vacuum more than once a week.

Protip: If you need to spot clean a stain, you can mix a teaspoon of liquid dish detergent with a quart of warm water and ¼ teaspoon of white vinegar. Apply this mixture on the spot and then rinse and blot dry!

Couch

Once every two weeks: Most people don’t realize how much dirt, dust, fur and oils your furniture absorbs. It can host allergens and other nasty things if left unattended. Regular cleaning can help extend the life of your furniture, which means a surface cleaning every couple of weeks using the upholstery attachment on your vacuum.

Protip: You should also plan to have a professional clean the upholstery about once a year, depending on how much you use the piece of furniture. If you develop a stain in between cleanings, put your iron on the “steam” setting and wave it back and forth over the problem spot.

Windows and Blinds

Once a month: The windows and blinds in your house can accumulate dust and dirt. To keep the mess at bay, you should try to wipe down your windows and blinds at least once a month.

Protip: When cleaning your blinds, you can use an old sock dipped in a 50/50 solution of vinegar and water. Stick your hand inside the sock and swipe it over each blind for a quick and easy clean.

Ceiling Fans

Once a month: Have you ever had dust accumulate on the blades of your ceiling fan? Since it’s so high up, many people forget that it’s up there until the dust bunnies have already taken over. To prevent the dust buildup, dust the top of your blinds once a week.

Protip: You can prevent the dust from falling everywhere if you use a pillowcase to dust your fan blades. Simply slide each fan blade into the pillowcase and enclose the case around it, then slide it off. The dust will stay inside the pillowcase and you can easily throw it in the wash when you’re done!

Baseboards

Once a month: Your baseboards can collect dust and dirt, but most homeowners don’t see cleaning the baseboards as a priority. If you keep up with cleaning them once a month the task won’t be too time-consuming.

Protip: Use the brush attachment on your vacuum to swipe the top edge where the dust settles. If there are scuffs or spills, wipe them away with an erasing sponge.

How Often Should You Clean Your Bedrooms

Bedrooms

Your bedroom may accumulate more germs than you realize. Since you spend a good amount of time here (approximately one-third of your life), it tends to accumulate germs. How often exactly should you clean your sleeping quarters? We explain here.

Bed Linens

Once a week: Bed sheets can accumulate a serious collection of sweat, body oils, dirt from outside and more. When they get too dirty they can become a breeding ground for bacteria and fungi. Those are not things you want sharing a bed with you! While most people wash their sheets only every four weeks, experts recommend washing them once a week.

Protip: If you have white sheets, toss a squeeze of lemon juice in the washer. It’s a natural brightener without the chemicals in bleach products.

Duvet Cover

Once a month: If you use a top sheet you can get away with washing your duvet cover once a month. If you don’t, you may want to wash it every two weeks just to be safe. Like pillows and bed linens, duvet covers can be a breeding ground for bacteria, fungus and dust mites.

Protip: Changing a duvet cover is on most people’s list of top annoying things, but did you know there is a simple hack to make the job easier? Use the burrito method for an easy switcharoo. Turn your duvet cover inside out and place comforter on top. Roll it up, tuck it in, and unroll it—it’s magically on!

Bed Pillows

Every three months: While you should be washing your sheets (and pillowcases) once a week, you should be washing the pillows themselves once every three months. Pillows can play host to critters and debris like dirt, oil, skin cells and even dust mites.

Protip: Most down-alternative pillows can go in the washing machine, while feather pillows need to be dry cleaned. Buy down-alternative to ensure cleaning is easy and frequent.

Mattress

Every three months: Your mattress is another thing that can accumulate sweat, dust, dust mites and allergens quite easily. To keep the bacteria and fungi at bay, clean your mattress with the seasons. You can use the upholstery attachment to vacuum the mattress, and clean its cover (if it has one).

Protip: Spot clean oil stains or food spills with a mix of baking soda, salt and water. Cover the stain, let it sit for 30 minutes then wipe it away with a damp cloth.

Closets

Twice a year: It’s usually a best practice to do a full-closet cleaning and purge twice a year. While it can seem like a daunting task, having a clean closet full of clothes you actually wear can be a game changer for your morning routine.

Protip: When purging, keep basic, classic items and toss anything trendy you haven’t worn in over a year. You can also ditch duplicate items or things you don’t feel comfortable in. Your closet should be full of only things that make you happy!

How Often Should You Clean Your Bathroom

Bathrooms

We all know the bathrooms can get pretty gross, but most people probably still don’t clean them as often as they should. Things like bath towels and bath mats can accumulate mold, while your toilet and sink can be a bacteria breeding ground. Here’s how often you should clean the things in your bathroom.

Toilet

Every day: Toilets have a reputation for being the dirtiest place in the house, but the average toilet is cleaner than you think. To make sure your toilet stays sanitary, it’s best to give it a light clean every day, then give it a deep clean once a week.

Protip: Want to keep toilet stains at bay? Pour vinegar in the top of your toilet and let that sit while you spray vinegar around the seat and clean.

Bathroom Sinks

Every day: Did you know that your bathroom sink is even dirtier than your toilet seat? The bacteria travel from your hands onto the sink every time you wash your hands, so it’s incredibly important to disinfect your bathroom sinks every day.

Protip: You can use disposable disinfecting wipes daily to make sure the area stays sanitized. It’s easy, and you can throw the whole mess away afterward!

Bath Towels

Every three or four uses: Towels are tricky, because the more you use them, the more often you will need to change them. If you take more than one shower a day, or if you have multiple family members using a towel, it may need to be cleaned once every couple of days.

Protip: On the other hand, if you’re the only one using it and you shower at the gym three times a week, you may be able to get away with washing it weekly. Be sure to wash your towels in water that is at least 140 degrees Fahrenheit (60 degrees Celsius) so that you kill all of the bacteria that’s inevitably breeding them.

Shower Grout

Once a week: Your grout can be one of the most annoying things to clean in your bathroom. However, it can also make the most impact on how clean your bathroom looks. Nobody likes a shower with dirty grout, so keep up with cleaning it weekly.

Protip: To clean, dip a toothbrush in bleach and scrub any discolored areas. Every once in a while you will need to seal your grout so that water and mold can’t seep in.

Bath Mats

Once a month: Bath mats that have rubber backing can wear out faster if they are washed more than once a month. However, mats that don’t have a rubber backing, or that are in a frequently used or extra-dirty space like the kids’ bathroom can be washed more often.

Protip: If a rug doesn’t have time to dry out it can harbor all kinds of mold and fungi. To kill all signs of life, wash the rug on high heat. Rugs with rubber backing should be air-dried.

How Often Should You Clean Your Kitchen

Kitchens

Believe it or not, your kitchen is the dirtiest place in your house. This is pretty unsettling considering we cook our food here. But, that’s precisely why it’s so dirty! Germs like e.coli can stick on cutting boards, hide in your fridge and set up camp in your sink. Here’s how often you’ll need to clean to maintain a safe and sanitary cooking environment.

Kitchen Counters/Sink

Every day: The kitchen sink and counters can be another place that germs accumulate. Since you’re often cutting meat and dealing with food products, the kitchen sink can actually end up being one of the dirtiest places in the whole house.

Protip: To keep your eating area sanitary, use one tablespoon bleach in one quart of water and spray down the sink daily. You can also use disposable disinfecting wipes here.

Sponges

Every week: Unfortunately, the trend is to keep your kitchen sponges until they smell and fall apart. Letting them get this bad means that they’re teeming with bacteria, funguses and things that can potentially make you sick. You should be cleaning your sponge weekly, and replacing them every two to three weeks.

Protip: For their weekly cleanings, mix ¾ cups bleach in one gallon of water and let your sponges soak for several minutes. Then just rinse and you’re done!

Oven

Once a month: Many people think that cleaning their oven is something to save for a special occasion, but the longer you wait to clean it, the harder it will be. Keeping up with monthly cleanings is the best way to make sure your oven stays in good working order.

Protip: A trick to making the process easier is to put a bowl of water in the oven and turn it up to high for 20 minutes. This will help loosen some of the dried dirt and grease. Then, wait for the oven to cool before wiping it clean!

Dishwasher

Once a month: Most people don’t realize that their dishwasher can accumulate all sorts of gunk and grime. It cleans the dishes you eat off of so you will want to make sure you give it a routine cleaning once a month (and a deep cleaning once or twice a year).

Protip: Place a cup of vinegar inside the dishwasher and run it on a hot water cycle. This is a great way to routinely clean your dishwasher and keep it in tip-top shape.

Refrigerator

Four times a year: A clean fridge is a safe fridge, yet nobody likes to deep clean it. While it’s best to give it a wipe down daily, you should only need to give it a deep clean about four times a year.

Protip: When you’re getting ready to clean the fridge, purge it of any ingredients that are past their “use by” date. Remove and soak the drawers in warm water while you wipe down the rest of the fridge. It’s best to work in sections so that all of your food doesn’t get too warm!

How Often Should You Clean These Household Items

What You Should Know Before Renovating your Bathroom

Author:

Publish Date:

Last Modified Date:

Category: Home Improvement

Tags: Tags: , , , , , , , , , , , ,

Renovating a bathroom is no small task. But upgrading your outdated bathroom is often a worthy investment, especially if you’re looking to increase the value of your home.

According to U.S. News, investing in a bathroom remodel results in a 62% return on average.

My husband and I recently tackled our own bathroom renovation all by ourselves. (Well, mostly by ourselves … we did hire out a few advanced tasks.) While it was a difficult and time-consuming job, we lived to tell the tale and we now have a gorgeous new space that undoubtedly increased the value of our Chicago condo.

Our new bathroom! But how did we get here?

We learned a lot along the way. A lot of preparation goes into planning a bathroom renovation. So before you whip out that sledgehammer, here’s what you should do to start your bathroom renovation off on the right foot.

Write Out a Detailed Wish List For Your Bathroom Renovation

When you buy a home, you often go in with a “wish list” of items (3 bedrooms, 2 bathrooms, a large backyard, etc.). There are some items on the list that are non-negotiable, and others that “would be nice to have…”

You need to make this exact same type of list for your bathroom renovation.

Spend an hour inside the space you’re renovating writing down “wants” and “needs”. It’s pretty important that you and your roomie/spouse/partner are on the same page from the start on what you want for the space, so make sure you do this step together if applicable!

For our bathroom renovation, we decided that removing our outdated tub and replacing it with a standing shower was our number one objective. Ideally, we also wanted to build a shower niche to hold all of our shower accessories, but that item was on the “would be nice to have” list.

Learn What to DIY vs. What to Hire Out

Renovating a bathroom yourself can definitely save you money because professional labor is often the most expensive part of any renovation. However, if you don’t have the time (or skills) to DIY, this will not be the best option for you. My advice? Make a list of every single task that you think needs to be done in the space … all the way from the demolition to installing the final light fixture.

An image from our DIY journey

Some of the small tasks can definitely be done by yourself, even with little to no DIY skills. We had never tackled a bathroom renovation before but figured out each step along the way. (We  watched plenty of YouTube tutorials, which we highly recommend!).

The number one task we’d recommend doing yourself is the demolition of the space.

As long as you wear the proper safety gear, you can gut your bathroom in a weekend (here’s how we demoed our space!). We ripped everything out down to the studs, and this ended up saving us at least a few hundred dollars in labor.

Other (more advanced) tasks are often best left to the professionals. These things include:

  • Waterproofing the shower
  • Moving plumbing fixtures
  • Moving lighting fixtures

This stuff ended up being too advanced for us. We both knew that we would need to find a pro to get those important tasks done correctly.

Consider Hiring a Designer to Finalize the Floor Plan Before You Touch Anything

If you plan to move plumbing and electrical fixtures, you may want to consider hiring a designer to help plan the layout of the space. Yes, this comes at a cost, but it may save you headaches and expensive mistakes down the line.

I used Angi to find a designer to help with the layout of our bathroom. For $400, she:

  • Measured our space
  • Made suggestions on placement of items
  • Provided a detailed rendering of the final plan for renovation

For our budget and what we got out of it, it was worth every penny. A designer can also help you source items and figure out the style and look of the space they’re tasked on. We were happy to handle that stuff ourselves, so we didn’t need to pay for additional services. Also, our designer also provided us with a few recommendations for contractors. Which brings us to…

Find and Hire a Contractor

Finding the right contractor is no easy feat. You want someone who is reliable, trustworthy, and will do a good job. We received recommendations from our designer, but you can ask neighbors, friends or check out a review site like Angi. I recommend meeting with at least two to three potential contractors to get in-person estimates.

Here are some questions we learned to ask when interviewing for a contractor:

  • What will this project entail?
  • How long will it take?
  • Do I need to be home?
  • Can you break down the cost of labor and materials?
  • Are the materials included?
  • When can you start? Is that date firm?
  • Do I need a building permit?
  • How will payment work?
  • How will you protect my home?
  • What are the next steps?

It’s important to over-communicate with your contractor and make sure you’re on the same page from the start. If you’re DIY-ing some tasks of the renovation, you’ll want to discuss this with them ahead of time to make sure they recommend that. We outlined exactly what we needed our contractor to do and what we would be handling ourselves, so ours was “in the know” from the start!

Set the Budget and Order Your Bathroom Renovation Stuff Now

Once you find a contractor that’s the right fit, you’ll get an estimate from them for the project. Understand what they will be providing for the renovation and what you will need to buy yourself.

Which means if you are DIY’ing portions of the project, now is the time to gather your tools and supplies to get the job done. Look up each task and make a list of the tools you will need. You may need to rent a few power tools (like a wet saw for tiling), so keep those rental costs in mind. Or see if you can borrow some of these larger tools from friends or neighbors. When it comes to DIY supplies, local home improvement stores are your best bet. Our advice? Go in with a detailed list and try to visit on a weeknight when the store will be less crowded and you can get one-on-one attention from an employee.

As for the new bathroom products, now is the time to place your order. While you can certainly hit up the big box home improvement stores, we’ve found a lot of success with online retailers.

Here are some of the spots we recommend for the major bathroom products:

If you take away one piece of advice from this entire article, I hope it’s this next part: Order all of your products now and do not start your renovation until everything has arrived.

Sometimes you can place an order for a vanity or shower hardware, only to find that it’s back ordered for six weeks! You don’t want your entire renovation on hold because of that, so order everything and get it delivered before the project physically starts!

Make a Timeline

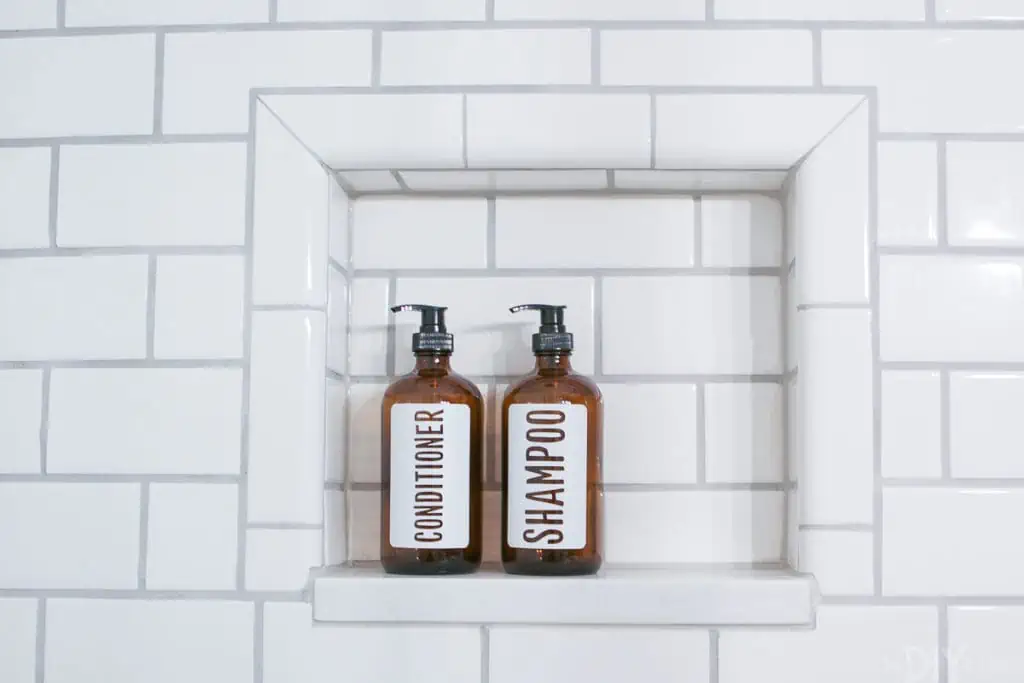
Now that all of your product is ordered (and arriving soon!), you can create a bathroom renovation timeline. Communicate this timeline with everyone involved in the project … your contractor, designer, spouse, family members, etc.

Because we were DIY-ing a good portion of our bathroom, I reserved every weekend for a month on my calendar (as well as my husband’s). That way we didn’t book anything during that time, and we could focus on getting the job done. But even though you have a timeline, know that it will probably change. I anticipated that we could get our renovation done in 4 weeks, but it ended up taking about 7 weeks. Go in with a plan, but be flexible because you’re always going to run into problems!

Have a Physical Place to Survive During Renovations

Chances are you’ll be living in your home throughout your bathroom renovation, so it’s important to have a plan on how you’re going to continue to live amongst the dust and chaos. We live in a small condo and once our demolition started, our entire place was a disaster zone. Right then and there, we decided that we wouldn’t let any of the mess trickle into our master bathroom or master bedroom. Instead, those were our “sanctuaries” away from the chaos of the renovation.

Create these safe zones ahead of time and vow to keep those areas clean and free from any of your bathroom mess. Trust me, you’ll need those retreats when you’re living through a renovation.

I know you may be eager to start smashing away your outdated bathroom to get it looking fresh, clean, and modern. But it’s important to do work upfront before you get started. That way you have a clear idea of the amount of money and time you’ll need to create the bathroom of your dreams!

×

I'm Moving

Moving? Thinking about moving? Whether your move is off in the distance or you already have one foot out the door, you'll learn about everything you should expect through our useful how-to's, cool articles and much more. It's all specially curated for you in our "I'm Moving" section.
Explore
×

I'm a Mover

For rookies or veterans alike, our "I'm a Mover" section is filled with extensive industry news, crucial protips and in-depth guides written by industry professionals. Sharing our decade of moving knowledge is just one way we help keep our professional movers at the top of their game.
Explore