This article should probably be called, “How Regular People Should Pack a Bicycle for Moving”. Most people don’t even bother wiping the mud splatters off their bike before they have their movers roll it onto the truck.
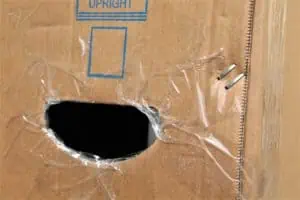
But if your bicycle is not in a box, it will either end up lying flat on top of your stuff, or wedged in the middle somewhere. Yet in transit, not only can your bike get damaged, but it can also cause some serious damage.
The pros know this. But lucky for us regular people, it’s not only possible but not too difficult to pack a bicycle in the garage or out in the yard. You just need a short list of simple supplies.
What You Need to Disassemble a Bike

- A couple of hand wrenches (most pedals require a 15mm wrench)
- Hex wrenches (i.e., Allen wrench set)
- Padding, such as bubble wrap, foam tube covers, sheets of foam, or whatever you’ve got
- Tape, including box tape and some skinnier stuff
- Scissors (or a pocket knife)
- A small cardboard box for bike parts
- Sixty minutes, give or take
And for the absolute best results, you need a good sturdy bike box! Call or visit your local bike shop, as they’ll likely be more than happy to have you take one off their hands. If they don’t have a box on hand, ask when they’ll be getting new bikes delivered and ask them to set an empty box aside for you.
Bonus: Ask them to leave the packing materials in there for you. You’ll see why in a minute.
Other helpful bits:
- Zip ties
- Ziploc or other plastic bags
- Extra cardboard
Packing Your Bicycle, Step By Step
1. Shift the gears to the lowest gear on your bike, so the chain is on the largest (innermost) rear chainring
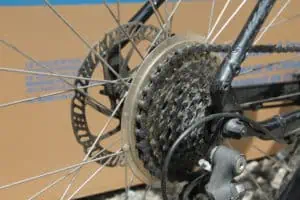
How do you pack a bike? You have to start on the lowest gear. This pulls the rear derailleur, aka the most expensive and delicate component on your bike, closer to the rear wheel. It also adds an extra ounce of protection against potential impact damage.
Remember: to shift, you need to be pedaling!
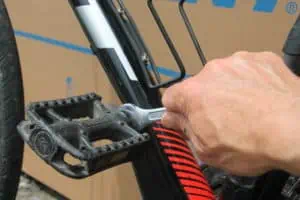
2. Remove the pedals
Now it’s time to use that 15mm wrench. (This might seem scary, but it really isn’t.)
Get a tight grip on the end of the pedal and twist. Note that you’ll have to turn the pedals in opposite directions, left pedal clockwise, and right pedal counter-clockwise. Please take note that removing some pedals requires an Allen (hex) wrench, with the hole on the inner end of the pedal closest to the bicycle.
Put the pedals in your small cardboard “parts box”.
You’ll notice each pedal should be marked with an “L” or an “R”, which tells you which side of the bike each one goes on when you put your bike back together (since the threads on one pedal run opposite to the other).
Note: Over time, some pedals can become kind of stuck. Some WD-40 type lube might do the trick. If it doesn’t, my working solution is to sit on the bike with the wrench on the pedal, free-end toward the rear of the bike. Squeeze the brakes and push down on the wrench with your foot. But please, be careful not to bang, scrape, or lacerate your leg on your bike once that pedal comes loose!
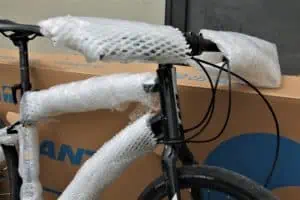
3. Start adding crucial padding
Use bubblewrap (or whatever you’ve got) to wrap the most sensitive (and dangerous) parts of your bike frame:
- Handlebars
- Pedal cranks
- Rear derailleur
It’s a good idea to tape or zip-tie one of the pedal cranks to the bike frame to keep the chain drive from moving and shifting. Do this before wrapping the derailleur!
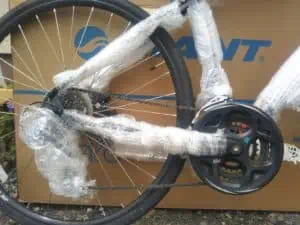
Pro tip: If you are superhuman and can rip a piece of tape off the roll with one hand while holding your bubble wrap in place with the other, awesome. For us regular people, it is super helpful to stick a couple of pieces of tape on your forearm or the leg of your jeans before you start wrestling that bubble wrap into place.
In the end, your bike might look as covered as this:
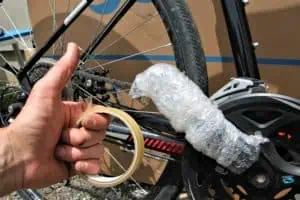
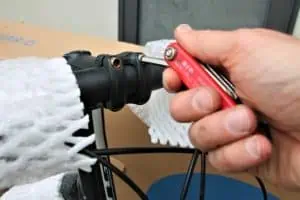
4. Remove and secure the handlebars
With the Allen (hex) wrench, remove the four bolts holding the faceplate in place.
Be careful not to let the handlebars go freefalling when the bolts come out, as this can do bad things to the brake and shifting cable mechanisms—and possibly your knees. Immediately screw the bolts back in to put the faceplate back on when the bars are off.
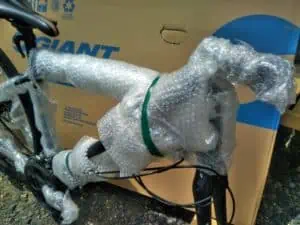
Since they are attached to the ends of your handle bars, be careful not to yank, strain or otherwise abuse the brake and shift cables while you’re doing this! If possible, tape or zip-tie the handlebars to the right side of the bike frame, like this:
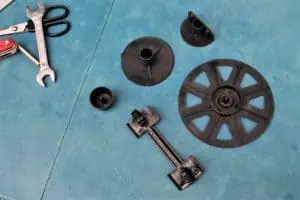
5. Remove the front wheel
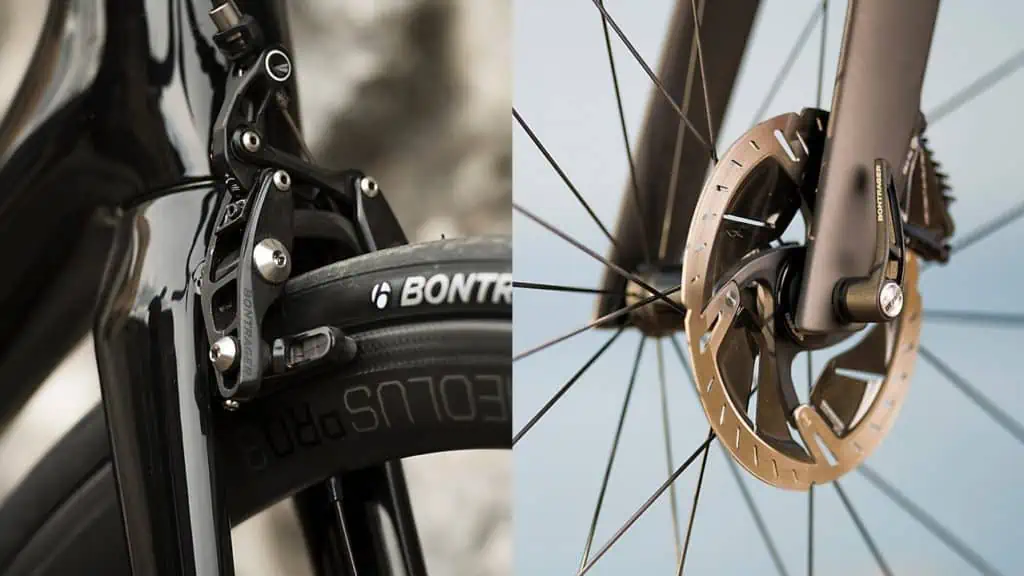
If you have rim brakes, you’ll need to loosen them first to allow the wheel to come off. Disc brakes need no attention for now.
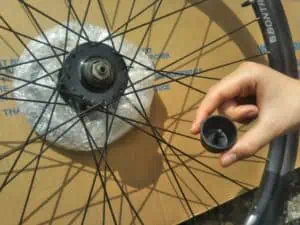
To get the wheel off, you need to flip the little lever on the left side of the wheel hub and loosen the axle until the wheel comes free. Keep unscrewing the axle until the part on the right side comes off.
Careful: there are two conical springs on the axle, which look exactly how they sound like. Don’t lose them! Simply slide the axle out of the wheel, put the spring and the end piece back on the axel, and put the whole thing into the cardboard parts box with your pedals (and other small parts).
![]()
See prices for movers by the hour – instantly.
Read real customer reviews.
Easily book your help online.
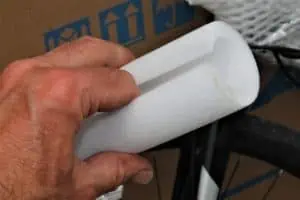
6. Wrap the front fork
When you are taking the front wheel off, it’s a good idea to have a piece of cardboard ready so you don’t set the ends of your front fork on the ground where it will get scratched. A foam pipe cover cut to size works well as fork padding, but bubble wrap works too.
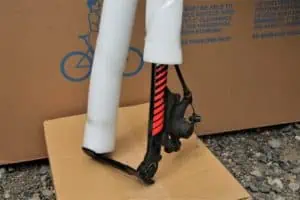
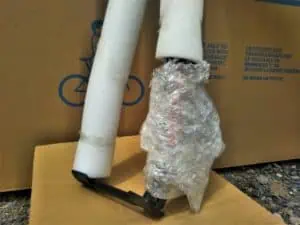
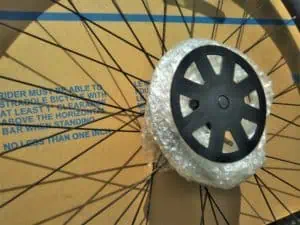
7. For added protection, pad the disc brake (if your bike has disc brakes)
If your bike has disc brakes, you’ll have to pad the brake mechanism on the left fork. (Pad the ends of the forks well!) Padding wheel hubs and the elements of your chain drive can be challenging… to say the least. But if you really care about your bike, this is what a professional would do to protect it fully.
Also, taping pieces of extra cardboard to the inside of the bike box where these parts sit lends an extra layer of protection. Go even further by putting extra bubble wrap or foam underneath these extra pieces of cardboard.
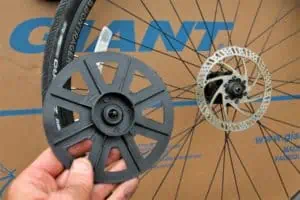
If the good folks at the bike shop gave you the packing materials along with the bike box, look for something that looks like the head of a hammerhead shark. This is a specialized piece that will not only protect the ends of your forks, but will hold them in place to prevent them from getting bent or otherwise damaged from pressure or impact. Other pieces may attach to the wheel hubs, not only protecting them but also providing an extra surface area to keep the box from getting crushed against your bicycle.
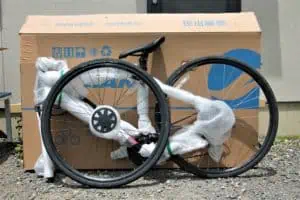
8. Put your bike in the box
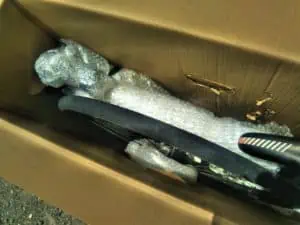
Make sure to turn the front fork 180 degrees so the neck (the part that holds the handlebars) is facing backwards. Slide the front wheel in on the left side of the bike. Keep the front tire on the left side! This is so it doesn’t get chewed up by the chainrings on the right!
Lower your seat so you can put some padding and/or extra cardboard on it and still properly close the box. Left in place, the seat can help keep the box from getting crushed on top.
Note: Some people prefer to remove the seat, wrap it up, and tape/zip-tie it to the bike frame or pack it separately. You do you.
9. Tape up the box
Before you do, you may choose to stick some extra items in there for even more padding and protection. Old blankets work well, as does camping gear like tents or sleeping bags. However, be aware of any sharp points or edges on your bicycle that could tear a hole in the fabric, especially if the bike is going a long distance. Don’t use anything you particularly care about.
Tape the box on all corners and along the top and bottom edges. Tape the carry holes on the sides of the box to reinforce them, like so.
Pro tip: If the box is big enough, putting these extra blankets, tents, or whatever in plastic bags helps keeps dirt and chain grease away.
The Final Pro Tip
If you find your bike won’t quite fit in the box, well, remove the rear wheel too! This will require the removal of the rear derailleur from the frame, which should only typically involve removing one additional bolt or screw. But don’t just leave it hanging! Wrap it well and secure it to the inside of the bike frame where it won’t get smacked around.
Take the axle out of the rear wheel just as you did the front, and just like before, take extra care to protect all those chainrings.
And now the fun part: you’ll have to zip-tie one or both wheels to the bike frame so that all those exposed chain drive components are not resting on the bottom of the box. (And avoid having to do all of this by simply getting a big enough box!)
Packing a bike isn’t as complicated as it seems, it just takes a little getting used to. And if you’re finding yourself too frightened to do all of the above, ask your movers if they can help (they probably have done this before). But if you’re doing this alone and/or for the first time, don’t freak out! Once you get the hang of it, you’ll never forget. It’s kind of like riding a…