The Best Way to Unpack After Moving

Author:

Publish Date:

Last Modified Date:

Category: Loading & Unloading Guides, Organization

Tags: Tags: , , , , , , , , , , , , , , , , , , , , , , , , , , ,

Unpacking should be the best part of the entire moving process. No, really!

You’ve already coordinated all of the logistics of renting a truck and hiring Helpers, you’ve packed everything up, moved, and unloaded your rental truck. Now all that’s left to do is go through all of your boxes and get everything in its place so you can enjoy your new home!

So why do some people still dread unpacking? Well, imagine sitting amongst a mountain of boxes with no clue what’s inside any of them or where everything is going to go. Okay … yeah, that does sound pretty dreadful. But it doesn’t have to be that way! By planning your unpack, you can save time, money and headaches.

How to Make Unpacking Easier Before Moving Day Happens

We all know the quote, “If you fail to plan, you plan to fail.” The most important step to a smooth unpacking experience is proper planning before your move. 

Of course, you’ll have some planning to do if you’re booking movers and renting a truck … but you still need to spend some time packing. And no, we’re not talking about randomly throwing items into boxes and calling it a day.

Here are some things you should do before moving day to make unpacking easier.

Take Photos Before You Start Packing

Before you touch anything, we want you to take out your phone and have a little home photo shoot. 

Here are things you especially need photos of:

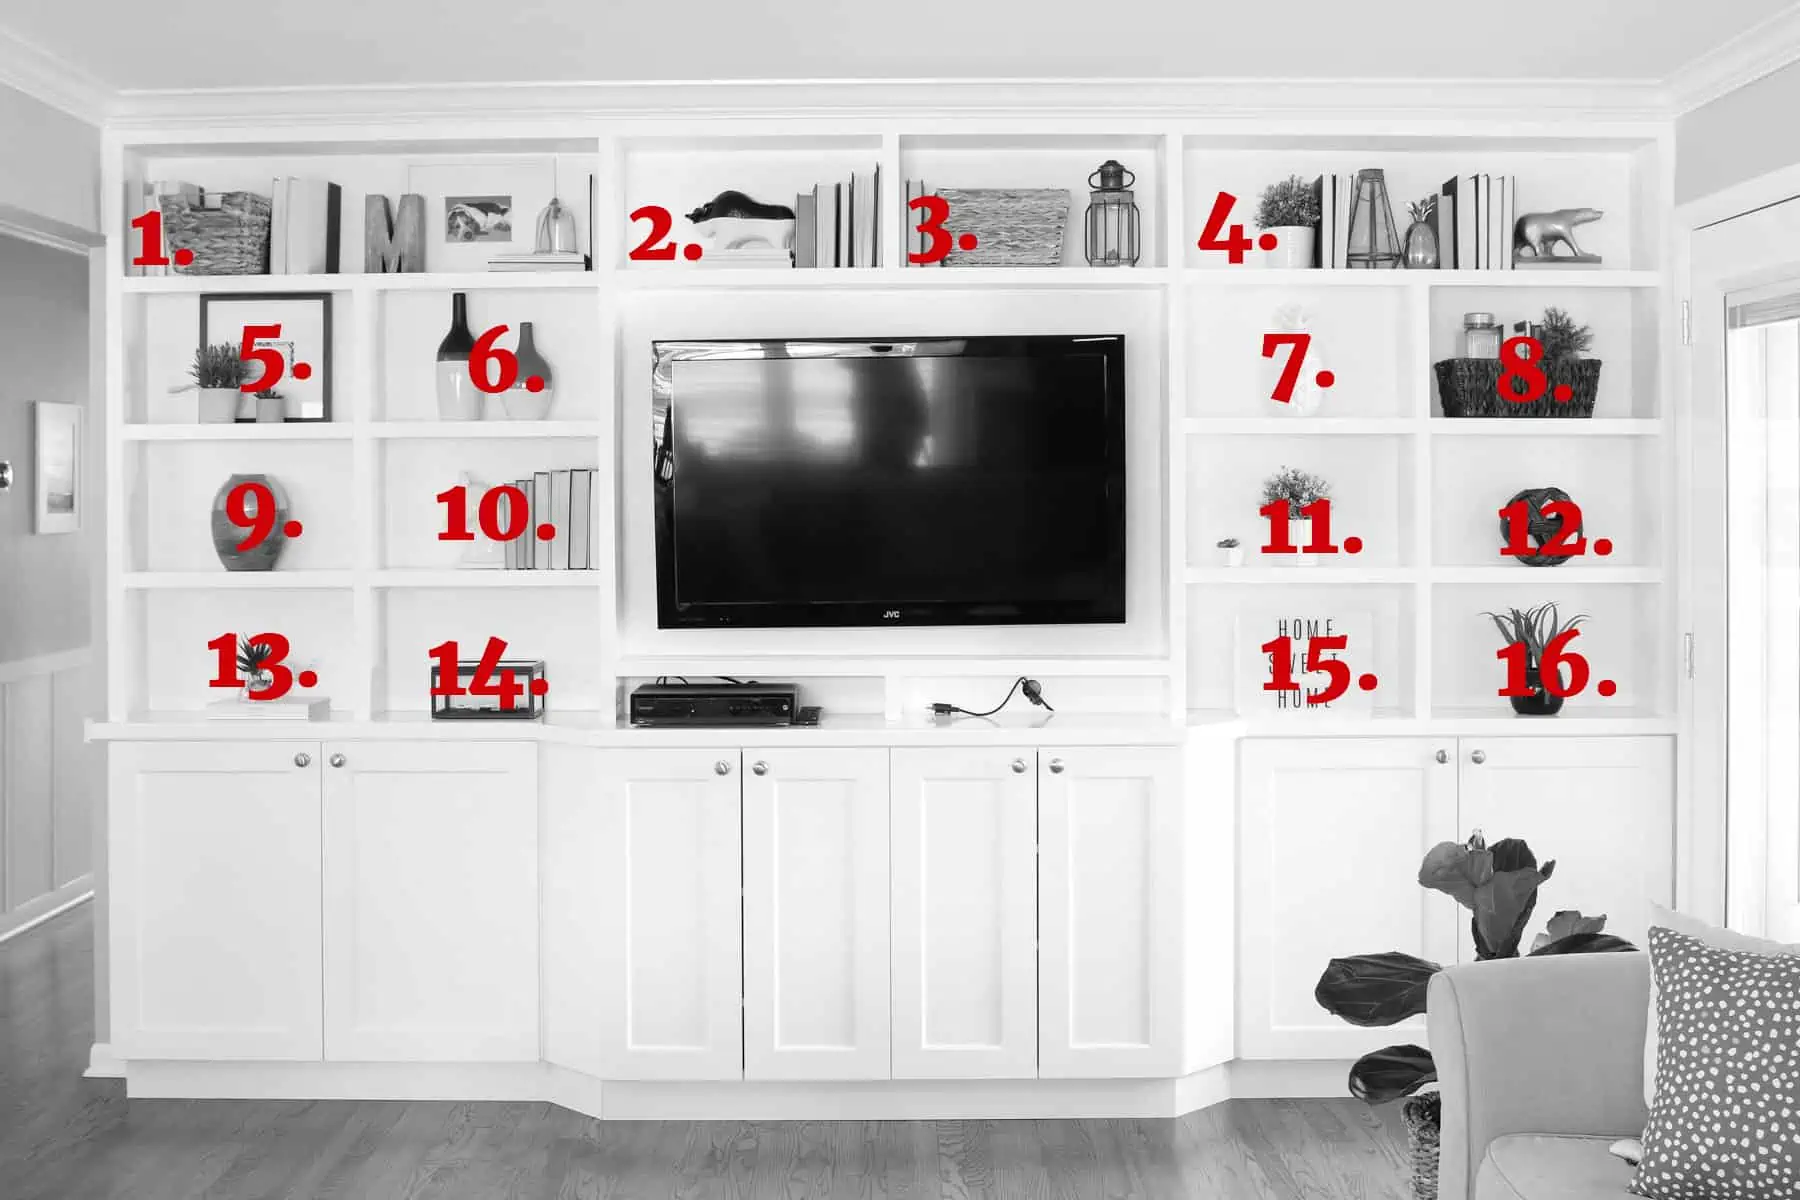
  • Bookshelves
  • The back of your TV
  • Kitchen drawers
  • Desk area
  • Tool shed

We urge you to snap pics of the areas in your home that you love! We know all too well how long it can take to get a shelfie looking just the way you want it. By snapping some reference pics now, you’ll be able to replicate that new look in your home in no time.

Create a Number and Color-Coded System For Your Boxes
After the photo shoot, gather all of your packing supplies (boxes, paper, tape, scissors, markers … the works!) and start packing boxes like a pro.

Try to only pack up items from one to two rooms inside every box. This will make your life much easier when it’s time to unpack later.

Got a bunch of stuff on shelves? Create a numbered system to remember where everything goes. That way it’s easier to get them unpacked and into their new permanent spots.

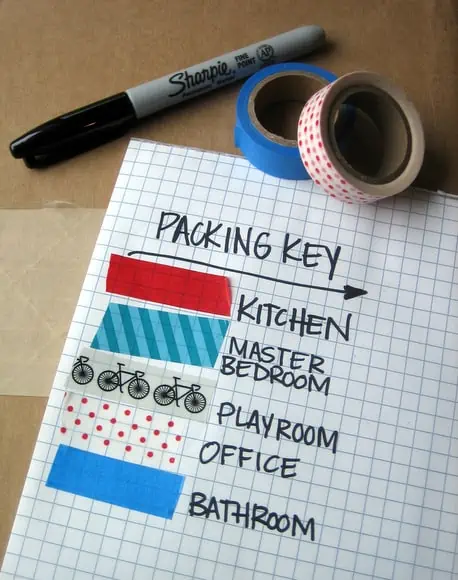
And we can’t forget our favorite tip of all … our color-coded box systemWith this technique, you get to use our most beloved crafting tool—washi tape! Get the full instructions from this post, but the short version is that you need to separate your boxes by the room, marked with bright washi tape so your movers know exactly where to deliver them. Genius and oh so colorful!

Make it Much Easier to Unpack Essentials

There are 7 items you’ll want to have on hand for moving day, but we also think you should create a box of moving day essentials. Because imagine the night of moving day when you’re tearing open boxes trying to find pajamas, your toothbrush, and your medication for the night. Sounds like a disaster to us.

This is what should go in your “Moving Day Box” so you don’t have to tear through your moving truck:

  • A change of clothes
  • Utensils
  • Toiletries
  • Prescriptions
  • Phone charger

Be sure to label this box and keep it near you!

Get Help Unloading Your Rental Truck

See prices for movers by the hour—instantly.

Read real customer reviews.

Easily book your help online.


Clean The 5 Most Important Things

We know you have approximately 10,000 things to do to get your rental deposit back. But trust us, now is the time to give your new place a thorough cleaning because it’s empty. You simply put items in place rather than cleaning and unpacking at the same time. Want to know the five most essential things to clean?

  • Kitchen cabinets
  • The Refrigerator (and refrigerator fan)
  • Bathtub and any tub jets
  • Outside (and Inside) the stove
  • Washing machine

Unpacking Tips

You’ve done the prep work (even the cleaning, you rockstar, you!), and now moving day is here! Even if you hired help for your unload (great call), there are still things you can do to make unpacking time a little easier. 

Place Your Boxes in Rooms by Color
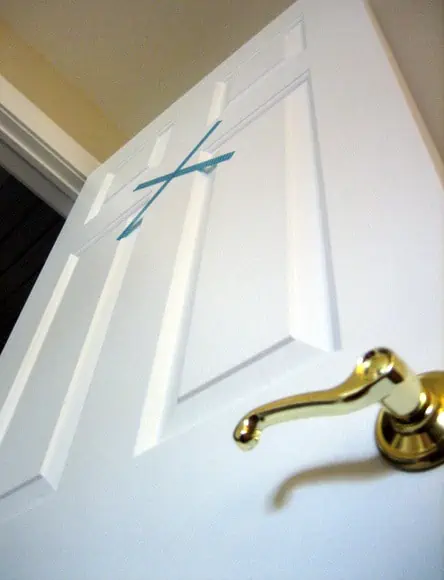
It may sound easier to just have your Helpers pile up all of the boxes in one spot of your new place, but unpacking will be a lot easier if you follow your color-coded box system to get each box in the correct room. If you followed our washi tape tips, you should have each door in your new place marked so the Helpers can easily drop the box in the right spot!

Protip: Get your “Moving Day Essentials Box” opened right away so you have everything you need to make it through the next day or two.

Use Washi Tape to Figure out Your Furniture Layout

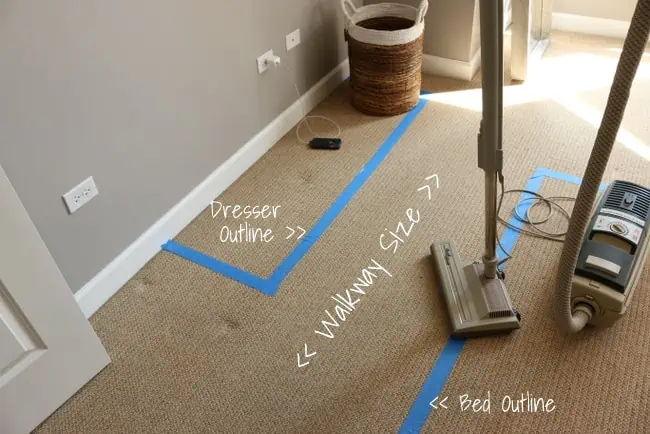
As long as your movers are there, have them get your furniture in the spot where you want it! We love the idea of using painter’s tape to mark out the layout of furniture right on the floor.

Before you move (or even while your movers are bringing things in and out),  go around your place and put tape on the ground to outline your furniture. That way the movers will know exactly which wall to put your bed on and where that long dresser goes. You can always move things later on, but getting items in the correct space will make your life a lot easier in the coming days.

Unpack the Bathrooms and Bedrooms First

Moving day will be exhausting, so if you’re going to unpack anything immediately, make sure it’s your bed and bedding. Once your movers get the mattress into place, find the sheets, comforter and pillow and make your bed. If you have kids, do theirs too. Having a comfy spot to sleep at the end of the long day will feel amazing!

Unpack your bathroom boxes too. That way you’ll have all of the toiletries and medications on hand for the night and morning. A fresh shower after a long day of moving will be heavenly, trust us!

Save the Kitchen for Tomorrow

The kitchen is the most time intensive room to unpack, due to the amount of tiny and heavy items, so don’t unpack it on moving day. Your brain will be tired by the end of moving day, and you’ll want to be refreshed and recharged before you tackle this space. Save the kitchen until morning when you can make a fresh pot of coffee.

How to Stay Organized After Moving Day

You’re into your new home and you’re surrounded by all of your possessions. First, take a deep breath. You’ve made it this far! Now it’s time for the actual fun part … making your house a home.

Avoid Distractions, Don’t Unpack Games or TV

We might suggest making a playlist of music to entertain you, but we don’t think you should get your TV setup and turned on right away. You may find yourself sitting on the couch instead of unpacking if you have a TV show or movie on. So much temptation…

Another distraction? Little ones. You’ll additionally want to make a plan for your pets when you’re moving and unpacking, so they don’t get in the way. The same goes for kids. Have a plan to keep them occupied or if you can, drop them off at grandma’s house so you have uninterrupted time to unpack. It’s all about keeping the distractions to a minimum so you can devote enough hours to get your house in tip-top shape!

Unpack Only One Room at a Time

Instead of hopping from space to space, we suggest making a list of your rooms in order of importance. Then, don’t move onto another space until the one you’re on is done.

The kitchen, bedrooms and kids’ rooms should be up high on the priority list, while the guest room and garage may not need TLC right away. Also, make sure you have furniture and appliances setup before you get too carried away going through boxes. Did you clean your counters first? You’ll want to have spots to put all of the items as you whip them out of the boxes, so having dressers and cabinets ready to go is a must!

Break Down Boxes as You Go, in Real Time

As you unpack boxes, it may be easy to just throw empty ones in a big corner. But trust us, that pile will quickly get out of control and soon you won’t be able to walk around your house without an empty box tumbling down on you. Take one box and make it the designated paper box. As you unpack boxes, crumple up the paper and shove it into that box. Then, be sure to break down boxes as you unpack. You’ll want to have a utility knife on hand so you can do this quickly.

(And Don’t Unpack Everything)

There may be some boxes that don’t actually need to be unpacked. We’re looking at you, Christmas decorations. Make a large pile of items that may be heading to storage or the garage. Then be sure to get those items to that space in the coming days.

What to Do After You’re Unpacked

You’ve made it! You survived moving day and every box in your place is unpacked. You should be feeling pretty darn good about yourself right about now, but the fun isn’t over just yet. There are still a few things you can do to really get your unloading and packing done.

Make Use of Those Moving Boxes

If you will be moving again soon, then you may want to hang onto some of the boxes that are still in good condition. Organize your boxes and find a spot to neatly tuck them away. Are you thinking, “What the heck do I do with all of that cardboard?!” Don’t fret! Instead, try out some of the cardboard hacks.

If getting creative with cardboard isn’t your speed, you can recycle your moving boxes. Check out this searchable database that’ll let you know the closest place to recycle anything (including moving boxes!). Just be sure to set a deadline for yourself to get those moving boxes out of your new place, so they don’t stay piled in the garage forever.

Use These Organization Protips

We’re all guilty of just shoving random items into a cabinet or closet and calling it a day. But to really feel settled in your new home,  be intentional with what goes where. Check out this post on how to organize house keys:

Whenever we’re on an organization spree, we go room by room with a notepad and write down areas that need our attention. Then we’ll spend 30 minutes each night giving those spots some TLC. Those short increments of time seem much more doable than an entire day spent organizing an entire home.

Let the Decorating Begin! (In a Month)

We always say that you need to live in your home for a while in order to decorate it well. So many people quickly buy furniture and accessories for their place without ever giving each room a test run, and they end up with design regret. Yep, don’t paint the walls until you’ve spent a little time in your new place!

We promise that you’ll make much smarter decor decisions after 2-3 months.

Here’s how to get started when it’s time to begin: 

It may not seem like it, but unpacking can be the best part of the moving experience! We promise that these tips will make your unpacking experience easier and more efficient.

The sooner you unpack, the sooner you can enjoy your new life!

How To Move Your Garden Without Killing Your Plants

Author:

Publish Date:

Last Modified Date:

Category: How To Pack

Tags: Tags: , , , , , , , , , , , , , , ,

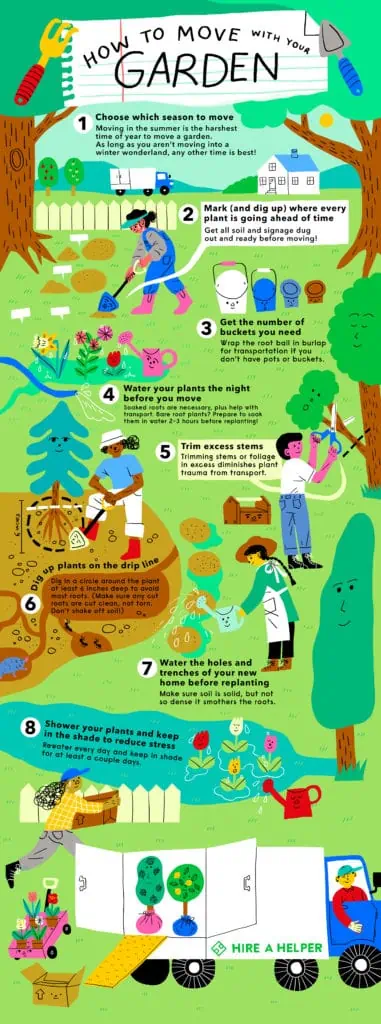
Check out the How to Move Your Garden infographic below!

For moving plants long distances, check out this guide.


It’s true, just because you’re moving doesn’t mean you have to say farewell to your garden.

There is actually a myriad of reasons you might want to move your garden. Maybe you purchased a new greenhouse and want to transfer your tomatoes and other vegetables inside before fall sets in. Perhaps you just bought a new home and want to relocate your favorite perennials to the current landscape. Or maybe you simply want to place potted plants into the ground instead.

Whatever the reason, you find the need to move your garden from its present location, which is not something you should do without reading about it first. There are a lot of steps to successfully moving a garden, so get your hoes, your wheel barrels and your expandable hoses ready, folks. Let’s move!

If you are able, choose the season you move

The worst time to move a garden is in the heat of the summer. Not only is the dryness damaging to the roots, but the sun is especially hot at that time of year and direct light can cause a great deal of damage. More on this from thespruce.com:

Never leave the roots exposed to sun, heat or wind. It’s tempting to remove all plants from their pots and place them where you want them to go in the garden, but roots will desiccate quickly. Remove each plant just prior to planting.

Provided you aren’t moving into a winter wonderland, any other time is better. Of course, if you have no choice but to move your garden in the heat of summer, there are tips we will include along the way to ensure your garden’s safety.

Mark where everything is going to go first

Wherever the new location for your garden, be sure to have the spots in which you are going to plant them ready to go ahead of digging out and transplanting. In other words, visually indicate what’s going into them so things don’t get confusing. If you are planting them in bigger pots, make sure the soil is ready to go at the bottom so the transfer will be ready to go. Conversely, if you are planting directly into the ground, make sure your spots are already dug out and big enough before anything is pulled out.

If you are moving in the heat of summer, we suggest dousing these spots with water before transferring the plants. The roots will need moisture after the shock of being uprooted. 

If you aren’t sure exactly where you want to plant, dig trenches and create a temporary nursery for your plants!

Here’s $25 Off Movers

$25 Off Coupon

Pot, bucket, or burlap: get the transportation ready

If you are moving your garden from one pot to another or if you are moving your potted plants into the ground, skip this step. But if you are moving your garden from one home to another, then you’ll need receptacles that can be also be moved. If basic pots or buckets aren’t available, wrap the root ball in burlap for transporting. The shock of moving is enough to kill a good deal of plants, so it’s important to make sure the transport goes as smoothly as possible.

Use a special watering schedule for soon-to-be in-transit plants

It’s important during transportation that you water your plants correctly. Not to mention that watered plants are also easier to remove with the root intact.

First, you should water your garden the night before you plan on moving it so that the plants are well-hydrated for the move. This helps them sustain what’s called “the jolt of transit”. 

Secondly, don’t go easy on the roots; Soak them well! If by chance you have plants with bare roots (or “naked roots”), the bottoms of these plants need to be submerged in water for two to three hours before being replanted. Here are just a few common bare-root plants to look out for:

  • Shrubs
  • Hosta
  • Daylilies
  • Roses
  • Fruit trees
  • Prarie Onion

Trim excess stems

It’s suggested you cut off any stems or foliage that are dying or in excess. Doing this will diminish the trauma your plant might experience. However, this isn’t universally necessary for all plants, so use your best judgment!

Dig up using the drip line

Now it’s time to dig up those plants. But you won’t want to dig into the base of the plant. Doing so risks chopping up a healthy root! Instead, take a hand shovel and dig a ring around the main stem of your plant, carefully paying attention to where the roots are positioned. This is the drip line, otherwise known as the area your plant drips onto the ground, and it’s a great method for digging up plants.

For larger plants, the ring you dig around the plant should be at least 6 inches deep. When you start digging around any size plant you will find that you will likely cut some roots on the way. This is okay, but make sure they are clean cuts, not torn.

Once the ring is dug, use a larger shovel (or several, for larger plants) to pop them out of place. Don’t shake or remove any soil from the root ball, since this will serve as protection. Put your plants into their transportation vehicles to get them ready for their final destinations!

Moving far away?

Do it cheaper.


MovingPlace can save up to 40% compared to traditional interstate moving companies. Click here to learn how.

Re-plant (the right way)

You want to plant your garden in its new location as soon as possible. We would suggest doing it right after you are done uprooting them. If that isn’t possible, then quickly get them into their temporary, transitional home. Just remember, the longer the plant is out, the harder it will be to set.
Before placing your newly removed plants in their new home, you should water the holes and trenches you’ve created. Once you placed water again, gently top the roots off with some soil. Protip: Make sure the soil is solid, but not so dense it smothers the plant.

Reduce stress on the plants

Once you have your plant in its place, give it a little shower to cool off the leaves. Provide some shade for plants planted in direct sunlight for at least a couple days. You might need to water these plants every day until they grow strong again. If you can do this gentle process in the cooler parts of the day, your plants will thank you for it. Also, if you see anything drooping, water it right away!


Check out our infographic for how to move your garden without killing your plants!


Infographic by Subin Yang

Tim Moore is the lead editor of Backyard Boss and is a lifelong backyard enthusiast. He grew up immersed in the outdoors, camping every weekend and tending to the backyard with his family. Follow Tim and Backyard Boss on Facebook, Pinterest and Twitter for everyday inspiration for your backyard.

The Toxin I Uncovered During My Basement Remodel

Author:

Publish Date:

Last Modified Date:

Category: Buying & Selling a Home

Tags: Tags: , , , , , , , , , , , , , , ,

I grew up with the handiest dad in the entire neighborhood. When I was a kid, it felt like every six months there was a different room getting a facelift, ranging from completely renovating the kitchen to turning a small attic into our playroom.

This mentality rubbed off on me. Today, I’ve not only made improvements to my own home, but I’ve even taken on a few house flips in my spare time. However, the time and labor that goes into these projects shouldn’t be underestimated. My dad made it look easy, but there are always curve balls.

My Initial Purchase

For my past two house flips, I purchased bank-owned foreclosures. I found this process much easier than most people think, and it also typically leaves a nice cushion in your budget to invest in the renovation.

However, after renovating these homes, I was left with less of a profit than I initially calculated. This time around, I took a risk and bid on a home through a foreclosure auction. (The main difference between auction and bank-owned is that the homes at auction often are bid on sight unseen!) However, living in a rural part of New York, I have become familiar with the homes in the area and had a general sense of what I would be dealing with.

First Impressions

After finalizing the deal, I drove to the location with my husband and two children to get an initial look at our new property. As soon as we arrived, I began to see the potential that this home had to offer. A beautiful paint-chipped, white ranch that was constructed in the early 1950s. Set back on about an acre of land, all I could think was how perfect this home would be for a family to live and grow, with plenty of space for children to roam freely and enough privacy while having a central location near to highways, plazas, and our neighborhood.

We opened the front door to the main entrance with our fingers crossed, praying that the inside would be salvageable. Other than the extremely worn hardwood floors, everything was generally intact. Four bedrooms and two bathrooms, seemingly unscathed by the many cold winters that occurred over the years. Slight cracks ran the walls and almost everything was outdated, however, these changes would be minor, as I still wanted to ensure the home would maintain its timely character.

On the surface, our initial evaluation of the purchase was going well, briefly discussing our plans as we moved room to room. However, our luck was about to change as we descended the rickety steps into the basement.

The Monster in the Basement

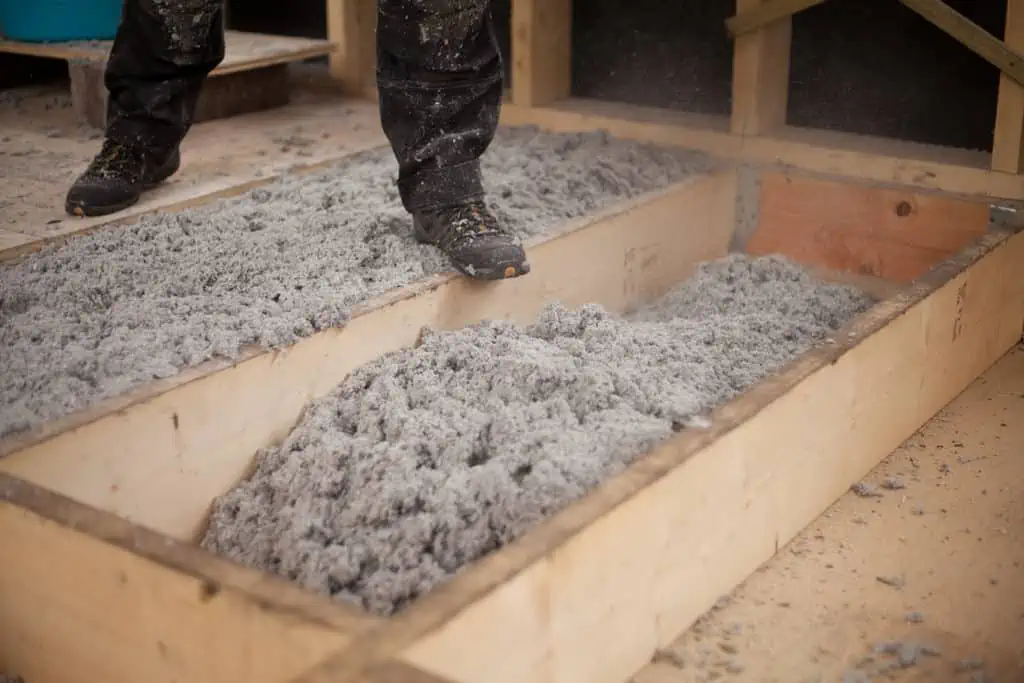
As we entered the unfinished basement, nothing seemed out of the ordinary. It was a small space but could be used as an extra bedroom or guest room if it was finished. The drywall was cracked in multiple spots, exposing the insulation underneath. This initially concerned me, as given the age of the home I knew that the insulation could very well contain asbestos, a deadly carcinogen when exposed to humans. The basement was also very damp, which upon further inspection, it appeared that there was an abundance of mold along the ceiling.

The basement needed much more than a cosmetic lift.

Before we began any repairs, we had to have the home professionally inspected and tested, as we knew that the possibility of health risks was too high for us to begin renovating the basement.

Unfortunately, it seemed that our fears became a reality. Not only was there asbestos-containing insulation in the basement, but it was in other areas of the house as well! Flipping houses I’ve learned that asbestos was once a common additive in a variety of building materials, due to its unsurpassed resistance to heat. But asbestos was also found in our basement floor and ceiling tiles, somewhere I never expected a toxin to be present. While the mold was a quick fix for the abatement team, the insulation was the true task and a much larger undertaking.

A Delay in the Process

It took weeks for the insulation to be properly tested and eventually remediated. The time we could have spent renovating the home was used to break open a large percentage of the walls in the house by the remediation team and rid them of the dangerous material. Some spaces were left untouched, such as the attic, but this area was far too small for anyone to access.

The whole time our insulation was being replaced, the only thoughts I had were, what if they missed an area? What if there were asbestos fibers floating around without my knowledge? It was scary to think that we bit off more than we could chew with this flip. However, tests came back and our home was cleared for the projects we had planned.

Better to Be Safe Than Sorry

This home taught me the biggest lesson of all, no matter how big or small your home improvement project may be, it’s important to get your home checked out before you begin.

I’ve started doing this no matter what the quality of the house is.

With the bank-owned foreclosures, I was able to get an inspection done before the purchase. But with this most recent flip, I’m glad I had this done prior to breaking down any walls. The risks I could have put myself and my family in put a pit in my stomach, and it’s unfortunate that many of those who do these projects on their own unknowingly expose themselves to dangerous toxins. If you do decide to renovate your home by yourself, have it tested for all toxins.

And if you can’t complete the project on your own, consult a professional who can assist. Trust me.


Gina Wheeler is a content creator and freelance writer from New York. Beyond her obsession with interior design and home updating, Gina has a passion for the mind, body, and health excellence. Gina enjoys learning about the intricacies of the body including exercise, nutrition, and preventative care.


How to Decorate Your Home for the Holidays on a Budget

Author:

Publish Date:

Last Modified Date:

Category: Money Saving

Tags: Tags: , , , , , , , , , , , , , , , , , ,

As home decor enthusiasts, the holidays are an opportunity to swap out our everyday decor for pieces that add some magic of the season to our homes. You could even say that decorating for the holidays is kinda like our Super Bowl!

New to holiday decorating? Go to the store and it might seem intimidating and kind of expensive to transform your space from top to bottom. But we are here to reassure you that you don’t have to go out and buy tons of new decorations to give your space that extra sparkle. Instead, there are plenty of budget-friendly (and free!) ways to deck the halls.

First, Choose a Color Scheme

If you want to make a big impact without buying tons of new items, we recommend starting with a color scheme. It can be gold and red, blue and silver, or honestly any color palette that you personally like. Choosing a few key colors/metallics will make decorating a lot easier.

Stick with your color scheme and we promise you’ll end up buying fewer items to decorate your home for the holidays. You can leave a lot of your everyday decor up in your space, but add these key colors for a pop of holiday glam that will really make your space look different from the everyday.

Wrap Faux Gifts

This tip may seem a little silly, but it’s actually a great one! If you’re an Amazon Prime enthusiast like us, then you probably get packages on the reg. Save a few of these shipping boxes, then use them as holiday decor.
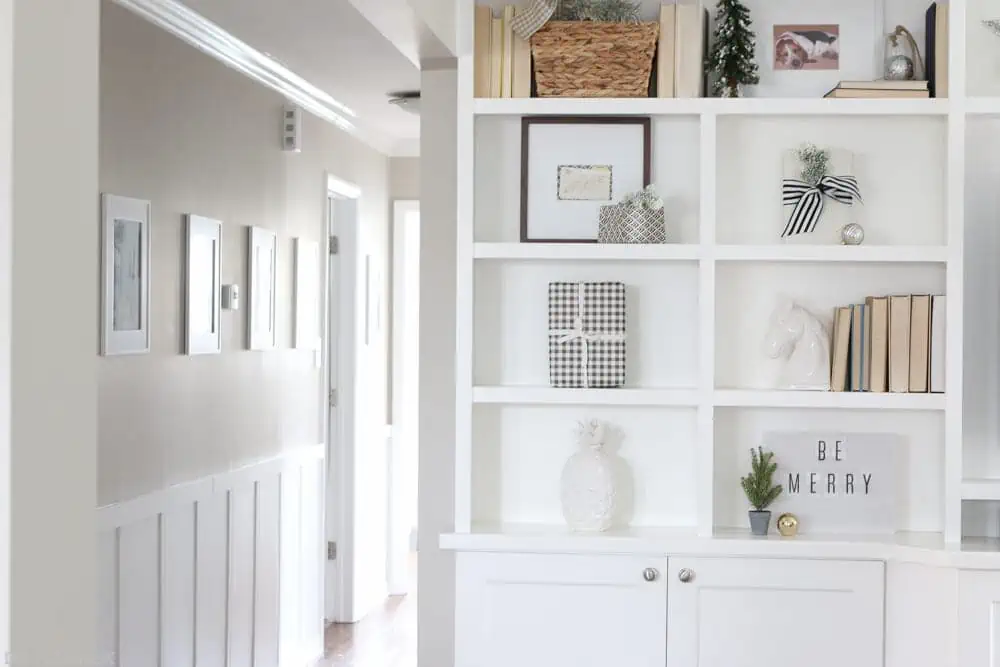
It’s as simple as it sounds. Wrap the empty boxes with pretty wrapping paper and ribbon – in your color scheme, don’t forget – and use them throughout your home.

We both use these “gifts” as bookends on our built-ins, and place them strategically throughout our homes for a budget-friendly holiday touch! It doesn’t get much cheaper than that!

Use Grocery Store Finds (Food!)

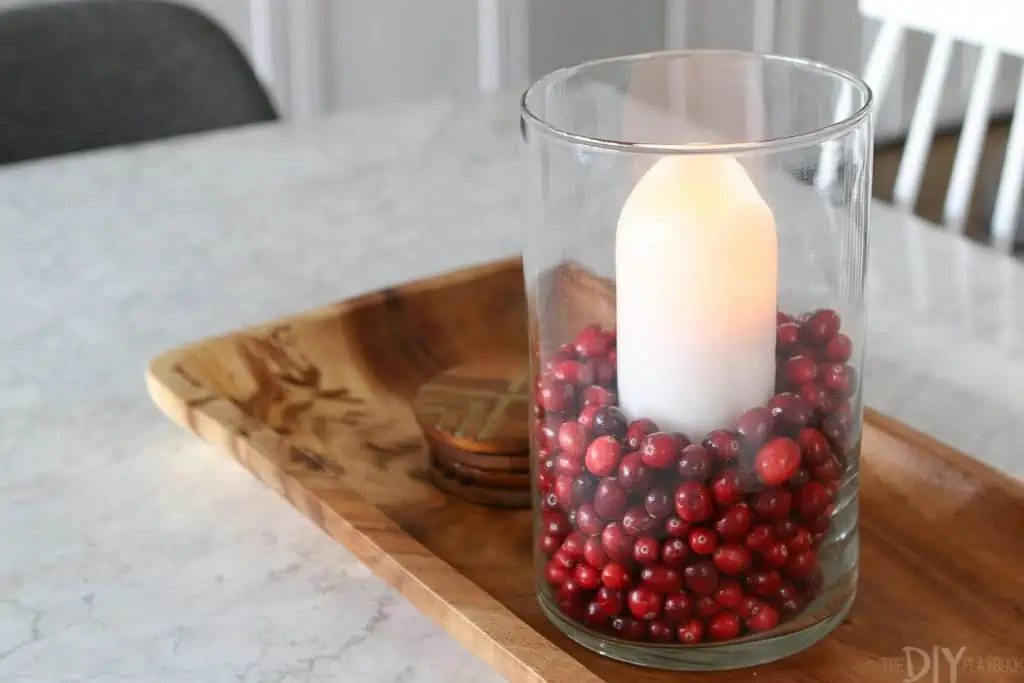
One of our favorite holiday crafts is using fresh cranberries in glass hurricanes with candles throughout your home.

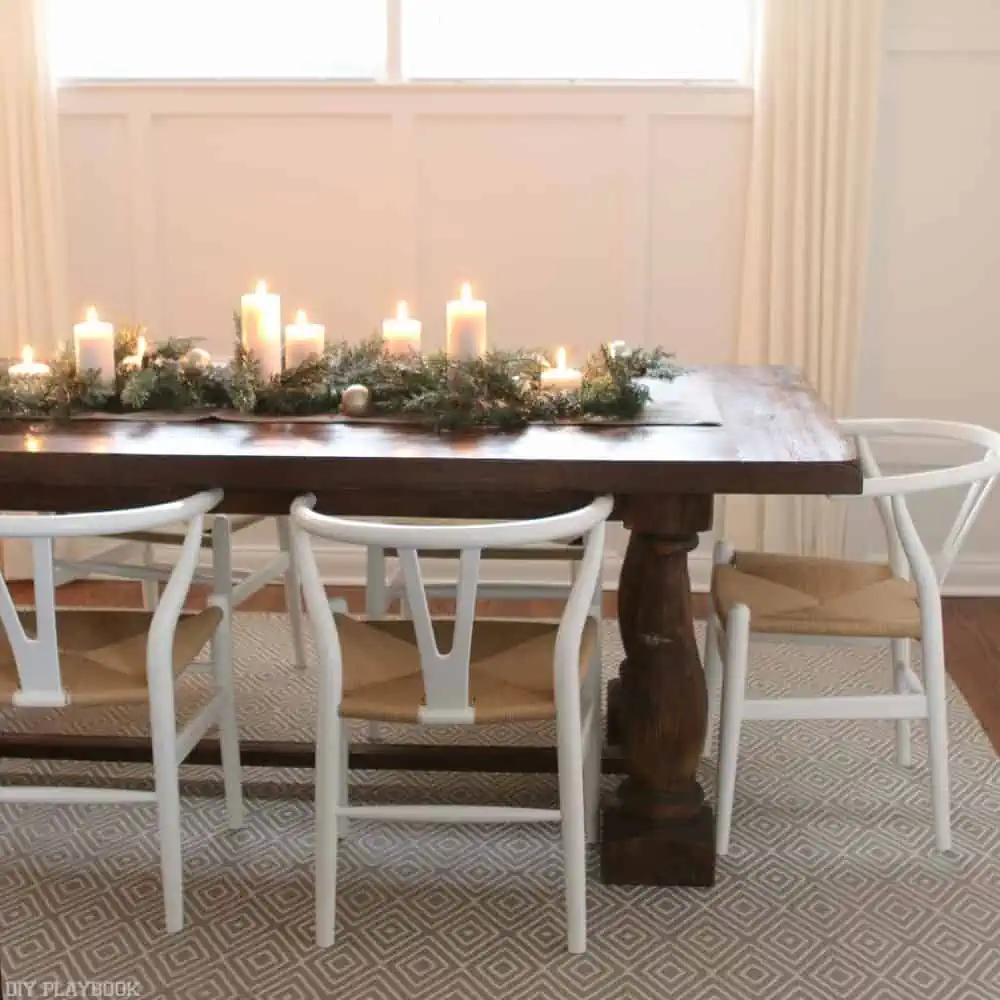
Cranberries are inexpensive and they add a colorful touch to your space. We especially love this idea, where you use water, faux greenery, cranberries, and floating candles to make a gorgeous centerpiece for your dining room table.

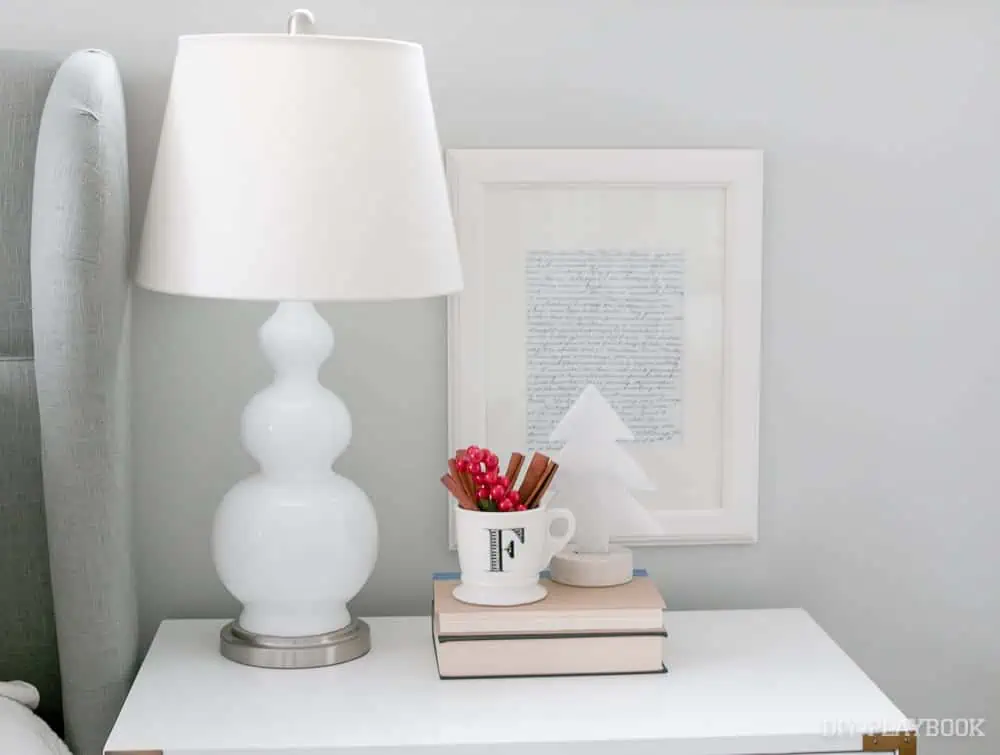
While you’re at the store, grab some cinnamon sticks too. You can group a few of these together in a mug and display on a shelf for a decoration that looks and smells good! You can also pick up some branches from the grocery store (or even better, your backyard!) to place in a tall vase in your home. This brings a winter touch to your home’s decor.

Get Cheap Faux Greenery From the Craft Store

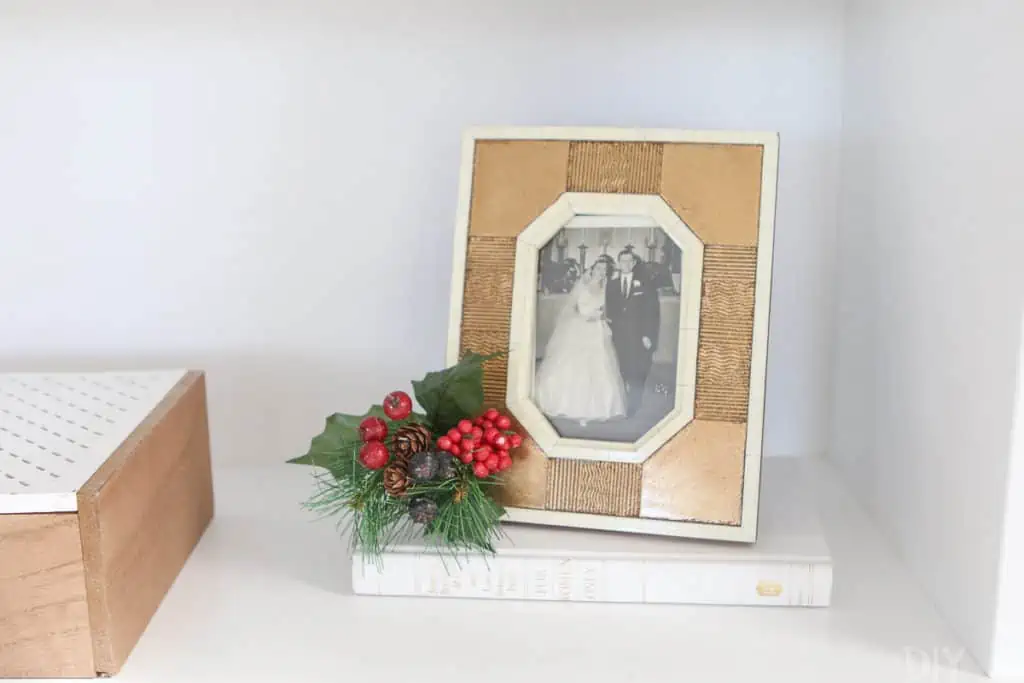
During the holiday season, we’re at the craft store just about every weekend. (Seriously.)  And the one thing we recommend everyone picks up is some faux greenery. You can buy a bunch of small pieces for a steal and this greenery can be used all over your home.
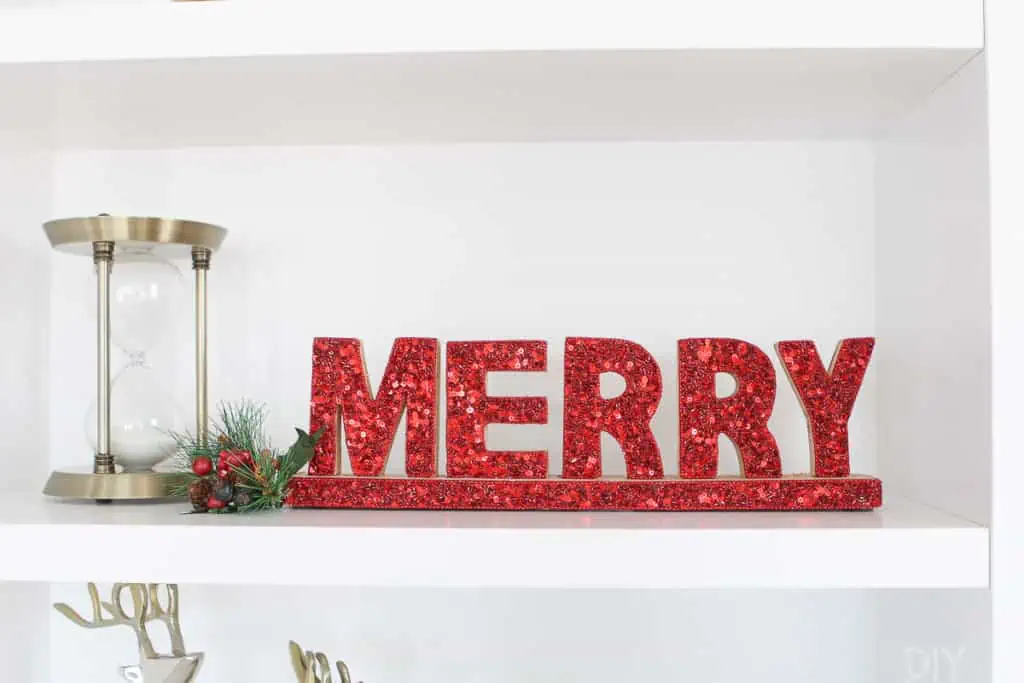
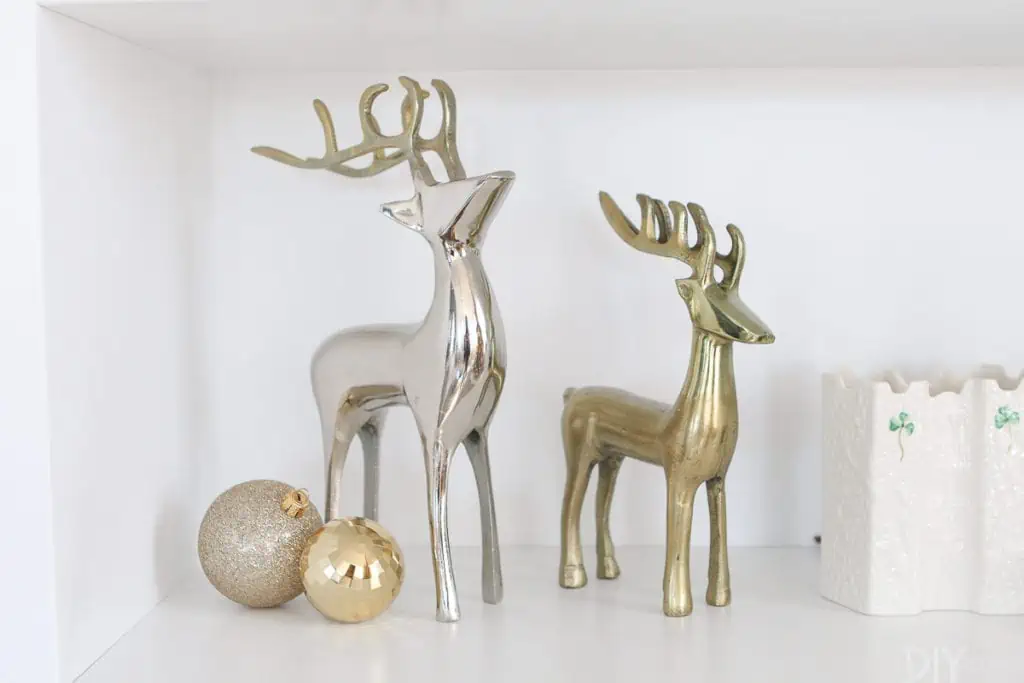
Drape it on your mantle, put it on your dining room table, and add small pieces to your bookshelves. While you’re at it, pick up a few scented evergreen sticks. We love sticking these in the faux greenery to add a fresh winter scent to our spaces. Nothing says the holidays like the smell of fresh evergreen!

Gather Up and Display Your Holiday Cards

One of our favorite parts of the holiday season is all of the snail mail we receive. Instead of just throwing your holiday cards in a pile on your kitchen counter, get creative!
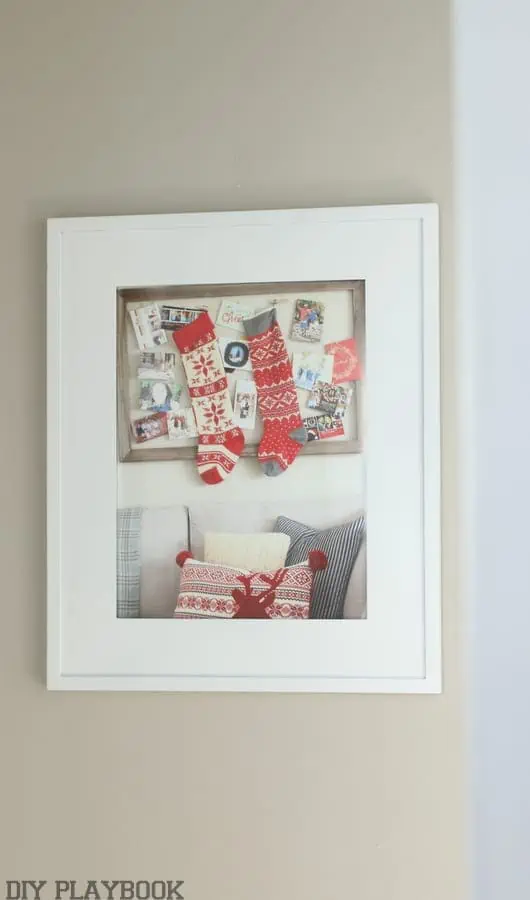
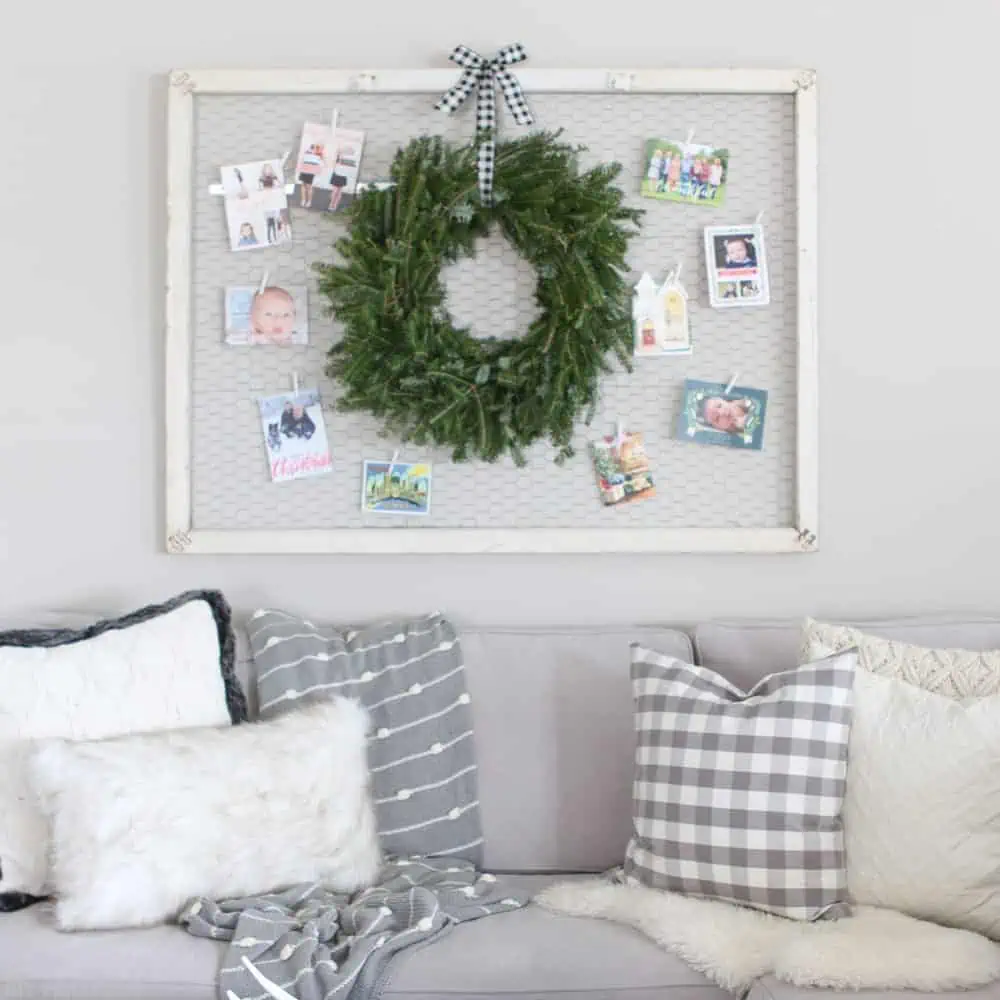
In the past, we’ve used a big chicken wire frame to display all of the cards we receive and we hang them up with clothespins. This acts as wall art and it’s fun for guests to see all of the cards from loved ones everywhere.

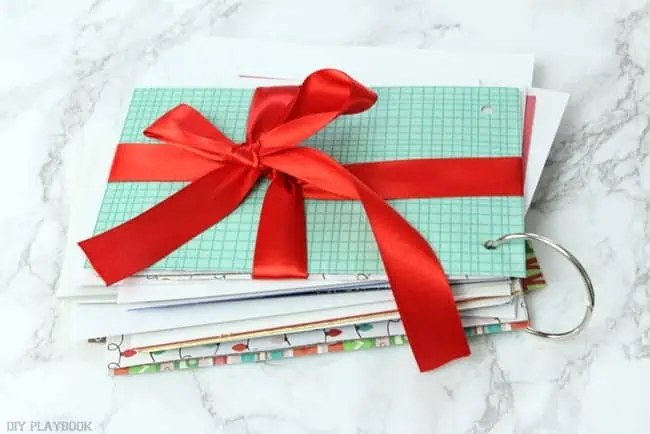
Another cool thing we do is save our holiday cards every year to make a little booklet of the many cards we receive. We display these booklets on our coffee tables so guests can flip through them when they visit. Plus, it’s a fun way to look back and see how families have changed over the years as this booklet gets bigger and bigger!

Go Crazy With Glass Ornaments

Glass ornaments are a major protip. You can buy a giant pack of ornaments for a few bucks. These always come in handy when we decorate our homes because they’re so versatile. Add some to a festive bowl, place some in a clear vase, and place a few next to holiday items on your shelves to add a sparkly touch!

Frame Special Holiday Moments

Don’t forget to change up your picture frames for the holidays!

We love the idea of framing special holiday moments and places that matter to you during the season. Want to save the most money? We channel our inner photographer and head around town to snap photos of favorite winter spots. The local ice skating rink, the big Christmas tree in town, a snowy tree … there are so many photo ops you can use to fill those frames! Or to make it easier, start a tradition now to take a special photo every year that you can use to display when you get out all of your holiday decorations.

We hope you feel inspired after reading this list to get in the spirit of the season. We promise you don’t have to spend big bucks to make your space feel special during the holidays. Turn on some holiday music, heat up some hot cocoa, and enjoy yourself as you deck your halls!

Your Kitchen Remodel: Cost Factors, Layout Ideas and How to Renovate

Author:

Publish Date:

Last Modified Date:

Category: Home Improvement

Tags: Tags: , , , , , , , , , , , , , ,

Going into a kitchen remodel is a very intimidating task, especially if you are not very familiar with the process. In spite of this, there are a lot of people blindly diving into this large-scale project every year … including me!

How many? According to the National Kitchen and Bath Association, over ten million Americans had their kitchens remodeled in 2015. And the numbers have only risen in the years since.

If you are one of those more than 10 million people tackling a kitchen remodel this year, this post is for you.

Everything To Expect When Remodeling A Kitchen

Kitchen Remodel

When I set out to get my kitchen remodeled, I honestly had no clue where to start. I had such a hard time finding info online that could map out the process for a rookie like me.

I vowed right then and there I would offer the internet everything I learned after I lived through that experience!

Take it from me, seeing the whole picture from the start is extremely helpful.

Most of the hard work (for anyone not physically putting together their kitchen infrastructure themselves) is at the front end of the process. Renovation is a lot like cooking: there’s a lot of prep.

Read over the complete process someone goes through before any work actually happens on a kitchen space:

  • Establish a budget
  • Find a designer to confirm new layout and provide accurate blueprints
  • Find and hire a contractor you trust and can afford
  • Identify where you want to buy cabinets and countertops
  • Research colors, textures, trends, materials, etc.
  • Order your cabinet and countertop and triple check to confirm your kitchen’s specs
  • Order anything else you may need (appliances, backsplash, light fixtures, faucets, sink, range hood, etc.)
  • Work with your contractor to establish a timeline
  • Keep track of all of all materials as they arrive
  • Clean out all of your old kitchen cabinets
  • Set up a temporary kitchen somewhere else in the house
  • Allow the contractors to do the heavy lifting, but be prepared to live in total chaos

Seems like a lot, huh? Don’t worry, here’s the step-by-step process.

Get Help Loading Your Container

See prices for movers by the hour – instantly.

Read real customer reviews.

Easily book your help online.


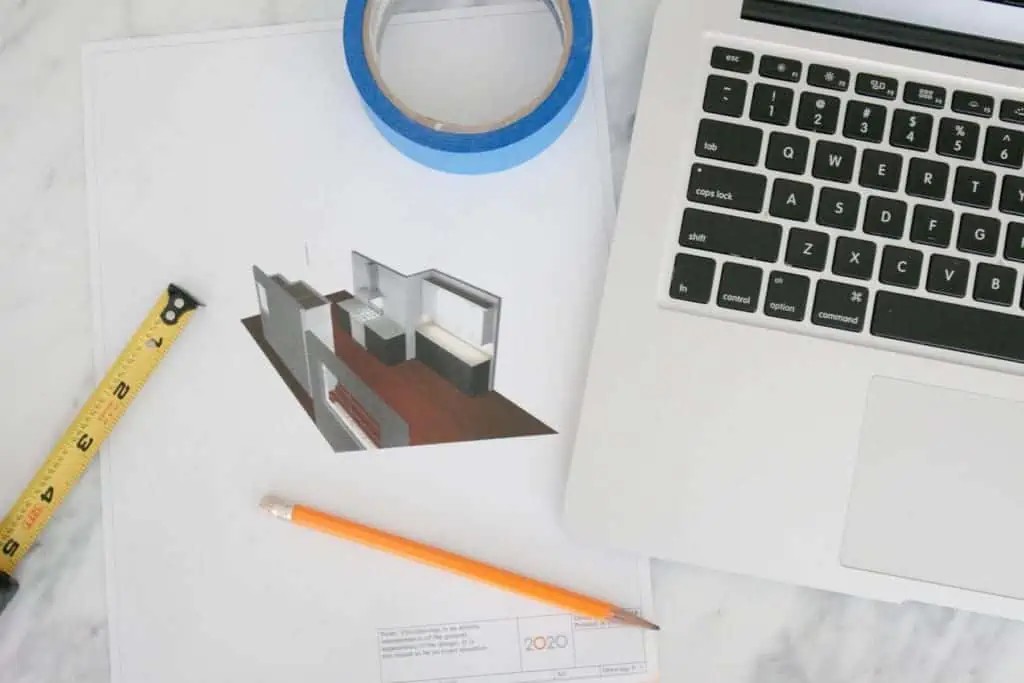
The first step is to create a layout, with or without a designer

Kitchen Remodel

If you plan on changing the layout your kitchen, the first thing you should do is hire a designer to work with you in identifying the best layout. Believe it or not, there’s a website for that. Head to ASID (the American Society of Interior Designers) to find one for hire near you!

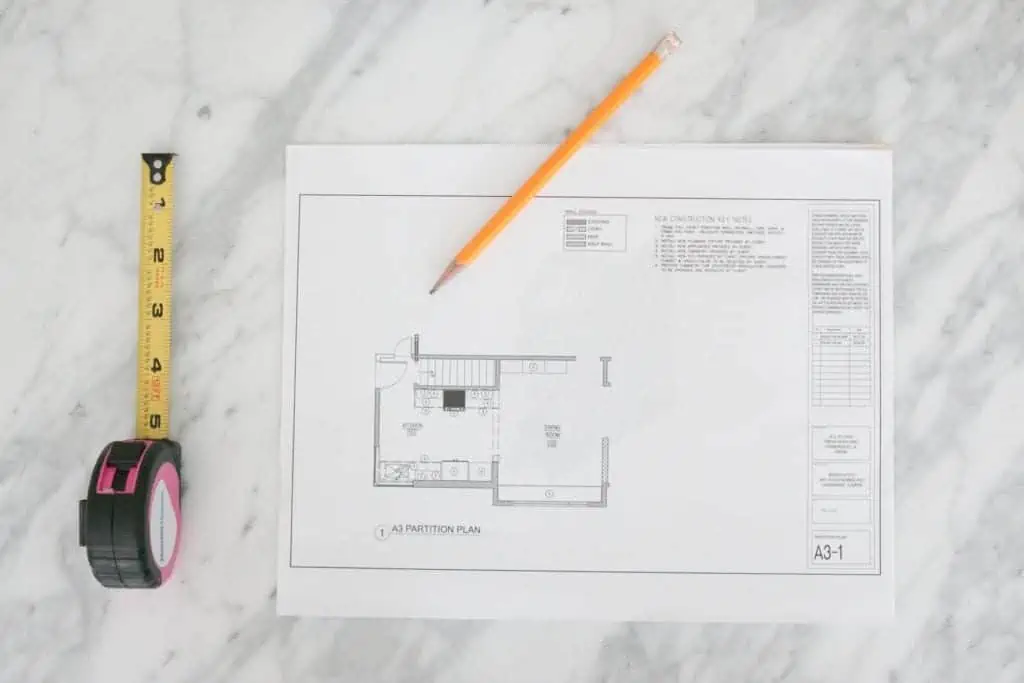
From there, the designer will provide scaled blueprints that you will need to move onto the next steps. This step is technically optional, but it turned out to be the best thing I did during my remodel process!

Collect bids from contractorsKitchen Remodel

The next step in the process is collecting bids from contractors you are interested in hiring to complete your project.

Usually, bids come at no cost, so I encourage you to get several bids so you have a more accurate idea of what the project will cost you in the end. Before you decide on the contractor you wish to work with, be sure to check out this contract hiring guide and make sure you outline all of the details before you commit (and pay!).

What Specific Decisions Will I Have To Make?

To be perfectly honest, the amount of decisions you need to make as you prep for a kitchen renovation is overwhelming. But preparing for them in advance makes each task a lot more manageable.

Outside of the obvious questions regarding color and style, there are a lot of other things you will need to consider and purchase. Here is a list to keep handy:

  • Cabinet hardware
  • Cabinet door design
  • The material of the cabinet (which impacts cost)
  • The material of the countertop (which, again, impacts cost)
  • Box cabinets or special order cabinetry
  • Backsplash style, size, material
  • Appliances (style, brand, cost, color, “extras”)
  • Open shelving or closed cabinetry
  • Flooring materials and costs
  • Window treatments
  • Light fixtures
  • Extra organization (there are options built-into your cabinetry)
  • Installation of the cabinetry
  • Size of the cabinets (depth, width, and height)
  • Drawers vs. cabinets
  • Timeline
  • Can lights or fan
  • Material of sink
  • Plumping changes
  • Electrical changes

Be smart when shopping for materials

Kitchen Remodel

Once you hire the contractor, they will be a great resource for pointing you in the right directions for your materials, specifically for cabinets and countertops.

Sometimes contractors can get these products at a discounted rate if you shop at the retailers they recommend. Talk to them about this option before you decide on where you want to purchase your big-ticket items.

And if they don’t have any recommendations, you can always shop at big box hardware stores.

Protip: You will need to bring your exact measurements from your designer (or contractor) when you go out to physically shop, as well as have an idea of what design you want the kitchen to have. Of course, the salesperson can also help you make these decisions, but this is your kitchen, after all!

Finished buying? Your timeline begins now

Kitchen Remodel

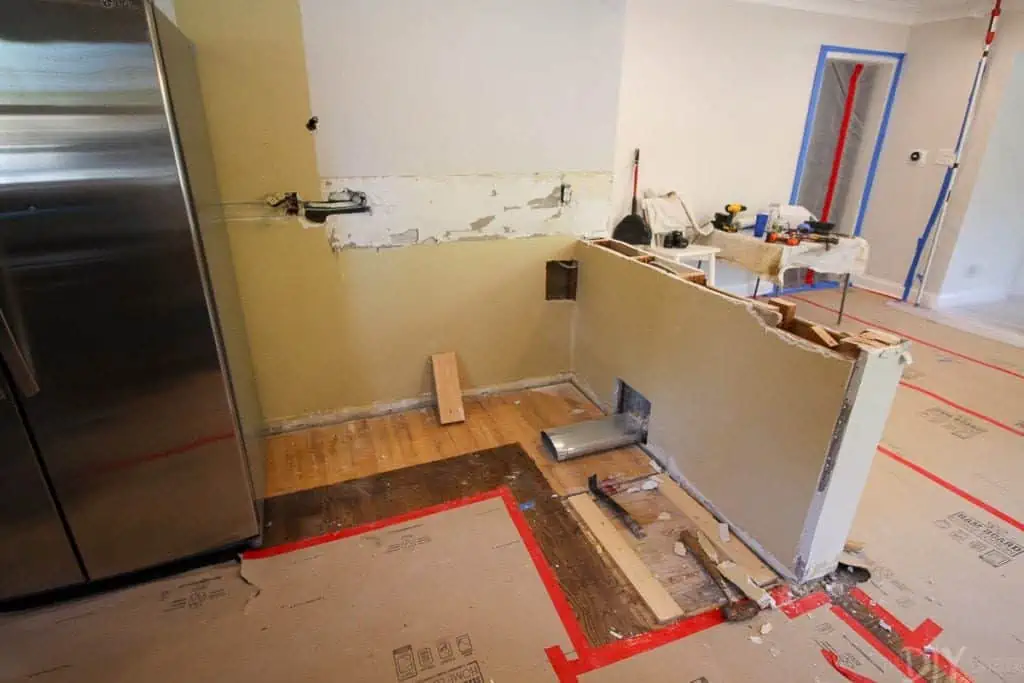
After you make the cabinet and countertop order, your contractor will work with you to create a timeline of the projects that need to be done before the cabinets arrive, which will include:

  • Demolition
  • Electrical work
  • Plumbing work

Remember, cabinets can take up to eight weeks to arrive, and possibly longer if they are custom. Getting to work before the cabinets arrive will ensure they are ready to install quickly after they get to your front door.

Your contractor (or you) will get to work

Kitchen Remodel

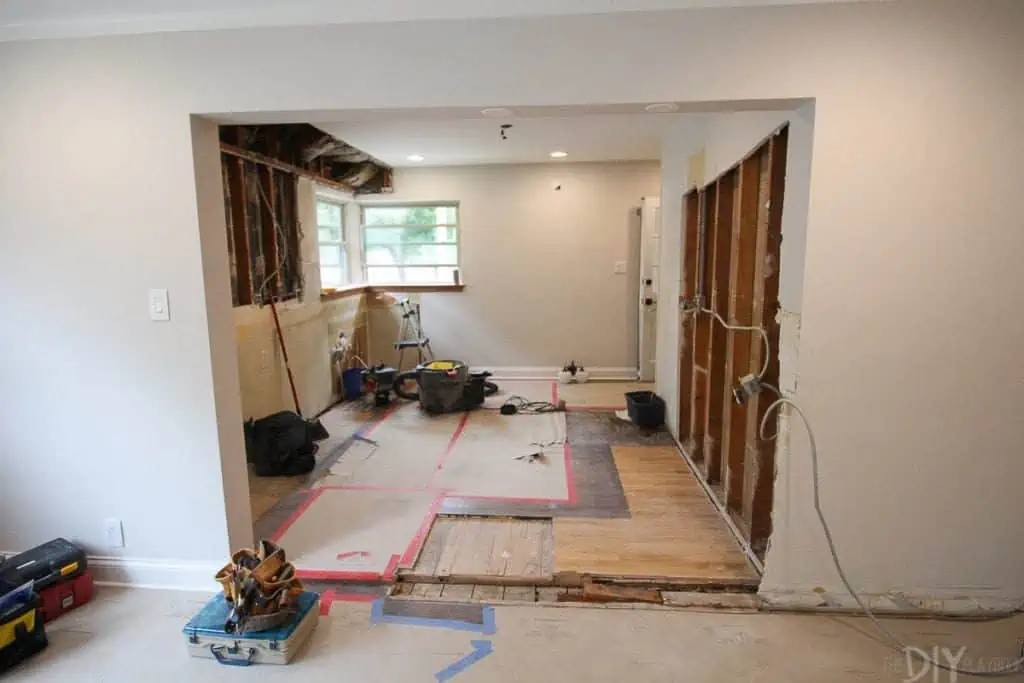
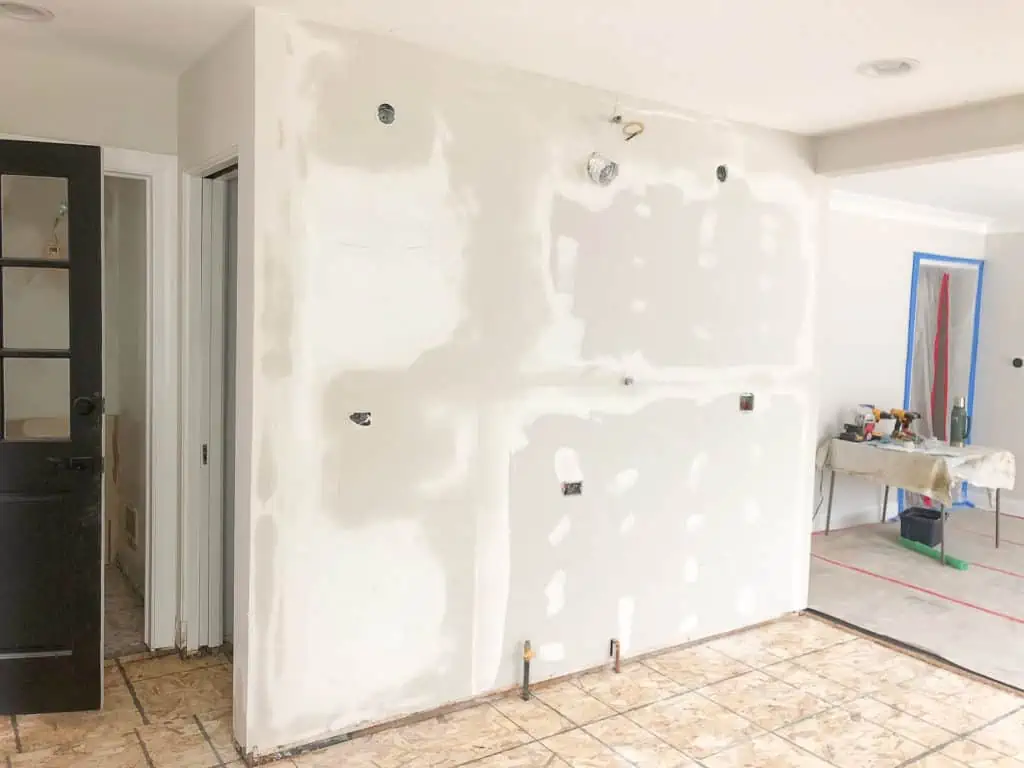
It’s time to get to work! If you have contractors, they will work to demo your current kitchen, then work even harder to put the new and improved one back together. If you did get a contractor, this is the easy part for you because, at this point, the work is out of your hands. Most all of your hard work should have already occurred during the front end of this project.

Hope you don’t mind living without a proper kitchen for a while. Be patient and your new kitchen will be ready soon enough for you to enjoy!

How long will a kitchen renovation take?

Kitchen Remodel

Every kitchen renovation will vary in terms of timing, depending on the scope of work and the size of the space. But traditionally, a kitchen renovation can run on average 4-8 weeks. Living without a kitchen for that long can be a large inconvenience, but I am here to reassure you that if we can manage it, so can you!

Kitchen Remodel

My best advice to handle this chaos is to set up a temporary kitchen prior to demoing your current kitchen. We have our fridge, microwave, and crockpot working overtime! Plus, we meal prep at our parent’s house to make healthy food for the week (so you don’t have months and months of takeout).

Is It All Really Worth It?

Kitchen Remodel

Now being on the other side of it, it was absolutely worth it!

According to HGTV, a kitchen remodel is projected to give you a 70% return on your investment, while statistics from Today’s Homeowner reports that this number could be as high as 91% of a return on this investment! So as much as this intimidating task may seem overwhelming at first and chaotic to live through, coming out the other side will be worth it in the long run. You are adding significant value to your home by making these updates now and getting a gorgeous kitchen to enjoy at the same time.

Of course, there is a lot more information you can devour as you prepare for your upcoming kitchen remodel, but I hope this beginner’s guide gave you an overview of what to expect. Seeing the bigger picture from the start will provide you peace of mind to tackle each step with confidence, and maybe even a little bit of excitement!

Avoid These 4 Design Mistakes in Your New Home

Author:

Publish Date:

Last Modified Date:

Category: Home Decorating

Tags: Tags: , , , , , , , , , , , , , , , , ,

So you just bought the prettiest home on the block and you’re moving in and getting settled? Congrats! Now it’s time for the best part … the decorating!

It’s the furniture and home decor that really brings a space to life and tells the story of the people who live there.

4 Design No-Nos We See All The Time

But there are some big design no-nos that we see a lot of people make in their new homes. Even if you just bought the most beautiful house, you can instantly bring it down a notch if you commit any of the following 4 design mistakes.

Don’t worry, all of these have easy fixes (and we even included pretty pictures of the right way to do it!), giving you have a clear visual for avoiding these commonly made mistakes.

1. The “Too-Small-Rug”

Bigger is always better when it comes to rugs!

This design mistake just might be the most common one we ever see: the “too-small-rug”. If you’ve purchased a 5-by-8 or 6-by-9 rug in your lifetime, chances are it was not the correct size for your room.

And we get it, large rugs can be expensive. But using an 8-by-10 or 9-by-12 rug in your room is going to make your space look much, much more high-end.

To make your rug shopping a bit easier, here are the design rules you can follow to ensure you buy the correct size.

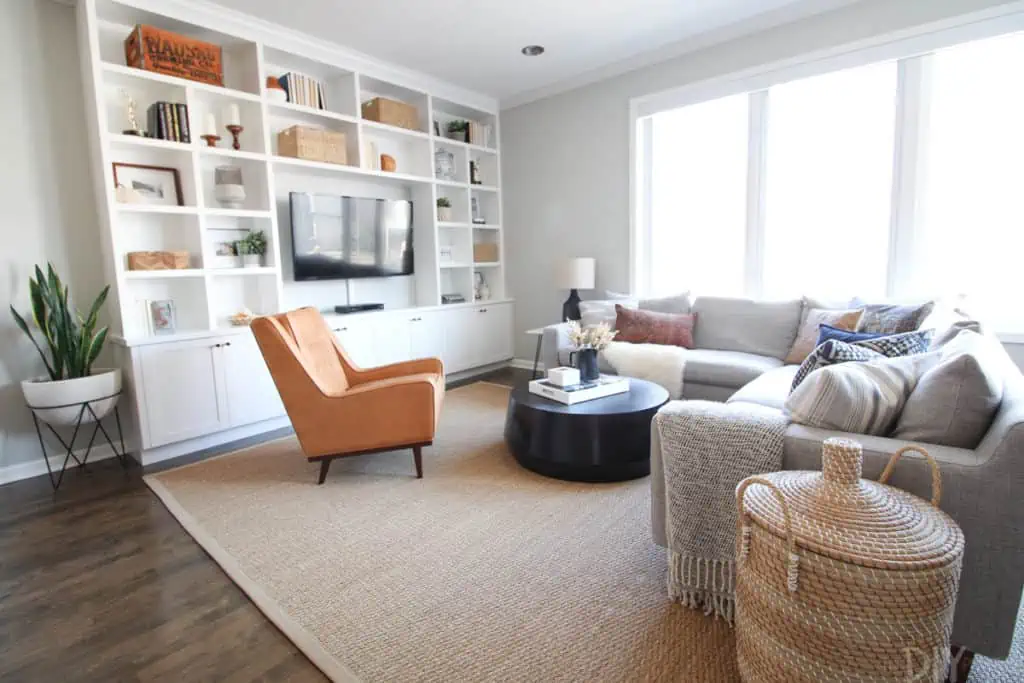
  • In a family room, find a rug that is large enough for the front legs of all the furniture to sit on the rug. Even better if all pieces of furniture can rest on top of the rug!
  • Avoid the “floating” rug look when a rug is just sitting in front of a sofa.
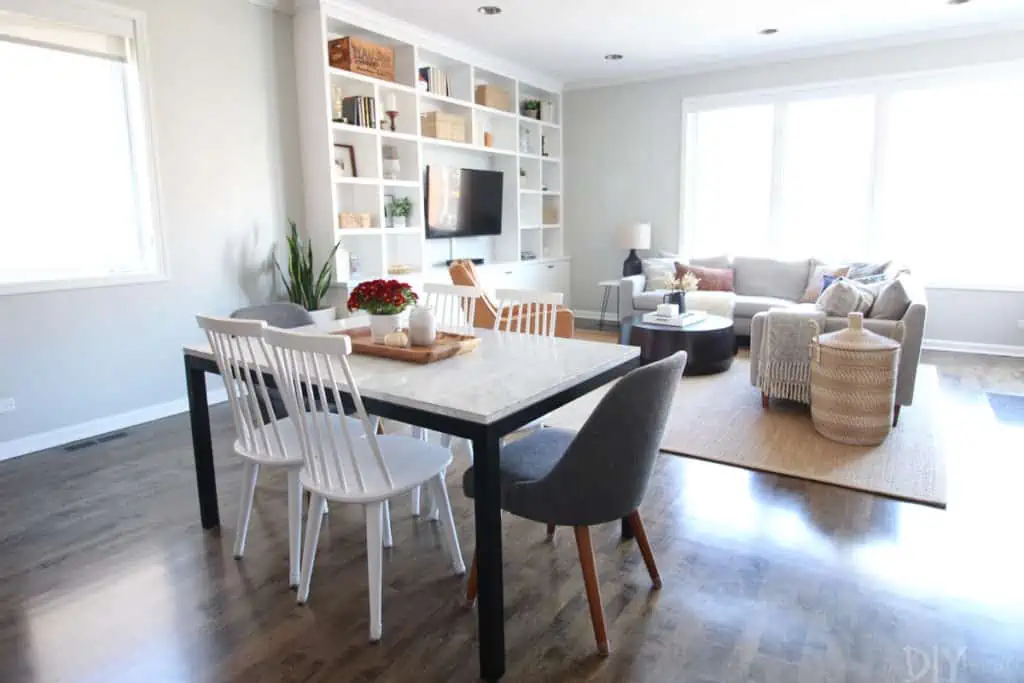
  • In dining rooms, rugs should be large enough to fit all chairs (even when they are pulled out) on the rug. This means at least 24-36 inches out from the table.
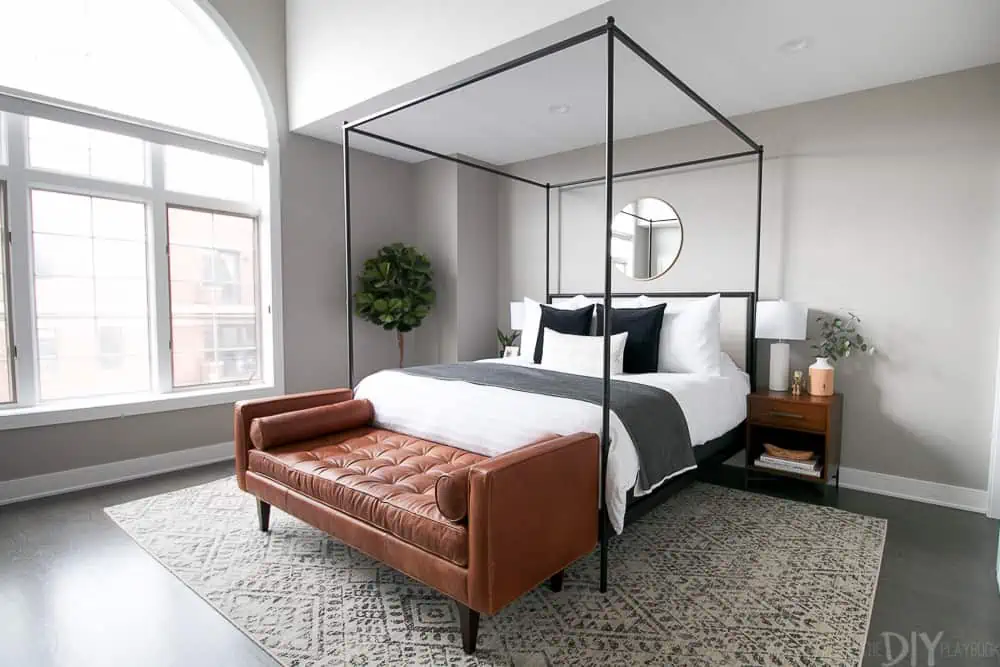
  • In the bedroom, your rug should extend 18-24 inches on each side of your bed. If you have a queen size bed, an 8×10 should work. If you have a king size bed, try a 9-by-12 rug.

For more tips buying the perfect rug, check out this blog post.

2. The Matching Bedroom Set

So you just moved into a new home and you need furniture, stat! Why not head over to the discount furniture and buy an entire bedroom set for a low low price?

Eek … please don’t do that. Yes, it may sound like a good deal, but we promise you can create a good looking bedroom (on a budget!) without going the matchy-matchy route.

And don’t get us wrong, having some matching furniture is not a bad thing. But you probably don’t want your loveseat, couch, coffee table, and side table to all match. Some of them can match to keep a cohesive look, but if everything is the exact same, you’re going to end up with a cookie-cutter look that lacks personality.

Completely matching rooms you buy as a package are very out of vogue.

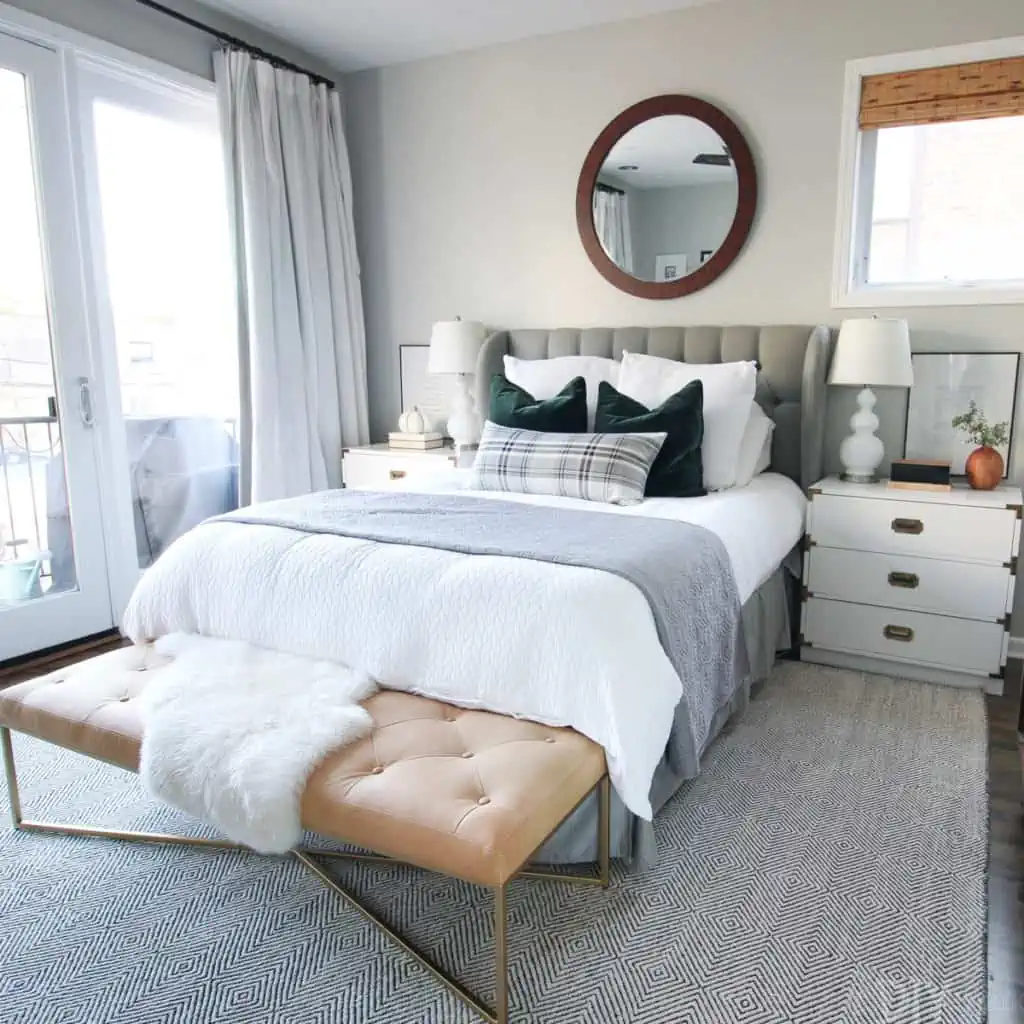
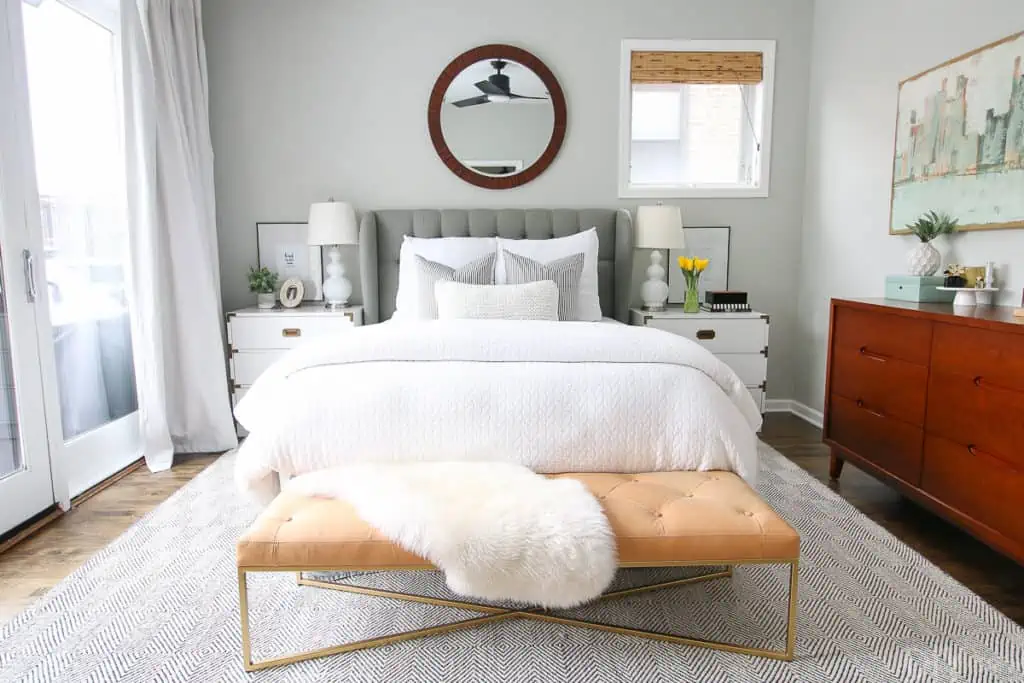
Take this bedroom above, for example. It has an upholstered headboard, a leather bench, white nightstands, and a wood dresser. This creates an interesting and layered look!

If you do have matching furniture all over your house, we’re certainly not telling you to get rid of everything. Instead, think about moving things around. Bring a dresser from one room into another or swap your night stands.

You just might love all of your gorgeous furniture a bit more when it doesn’t get lost in a sea of it all being too samey.

3. The Flooded Curtains

Hanging window treatments is an intimidating task. Of course, their main objective is to be functional, but you also want them to look good. And let us tell you, most people are hanging their curtains all wrong!

High and wide. Repeat after us: high and wide. (Check out the image above.)

That’s generally how you need to hang your curtains. Many people opt to install their curtain rod directly above the window and a couple of inches outside of it, which isn’t doing your home any favors. Why? Curtains are the key to making your ceilings appear much taller and the room bigger.

Here are things to consider when hanging.

  • Mount the rod up to a foot on the outside of the window. This allows the curtains to drape down without interfering with the light when they’re open.
  • Hang your rod almost to the ceiling. Go about 4-6 inches below the ceiling and that’s how high they should be.
  • Once you have your curtain rod hung, you can figure out how tall your curtains should be. You will probably have to purchase XL curtains. They’re harder to find, but they’re out there (IKEA sells them on a budget!).
  • Your curtains should “kiss” the floor or you can have them puddle (about 1-2 inches longer than the floor). Make sure your curtains are not too short! For no-sew hemming tips, check out this blog post.

4. The “Too-High-Art”

When you’ve just moved in, you probably have a lot to hang on your walls to really make it feel like home. But please read these tips first. Most people hang art way too high! The last thing you want is for your guests to have to crane their necks to see your gorgeous pieces. 

Follow these tips for perfect hanging every time.

  • Don’t go with eye level (if you’re tall, that will make things way too high!). Instead, the center of your piece should be 57-60 inches off the ground.
  • When hanging a gallery wall, think of the entire collection as one piece of art. Therefore, the very top and bottom shouldn’t be hung too high or too low.
  • When hanging above a couch or dresser, go 4-8 inches above the piece of furniture. If you go higher than that, it will look disjointed.
  • For gallery walls, 2-3 inches in between pieces is plenty! No more than that. If you’re nervous about hanging a gallery wall, check out this foolproof way to do it!

Believe in us and avoid these design mistakes whenever possible. With the right furniture, art placement, curtains and rugs, you are well on your way to a great looking new home!

What You Should Know Before Renovating your Bathroom

Author:

Publish Date:

Last Modified Date:

Category: Home Improvement

Tags: Tags: , , , , , , , , , , , ,

Renovating a bathroom is no small task. But upgrading your outdated bathroom is often a worthy investment, especially if you’re looking to increase the value of your home.

According to U.S. News, investing in a bathroom remodel results in a 62% return on average.

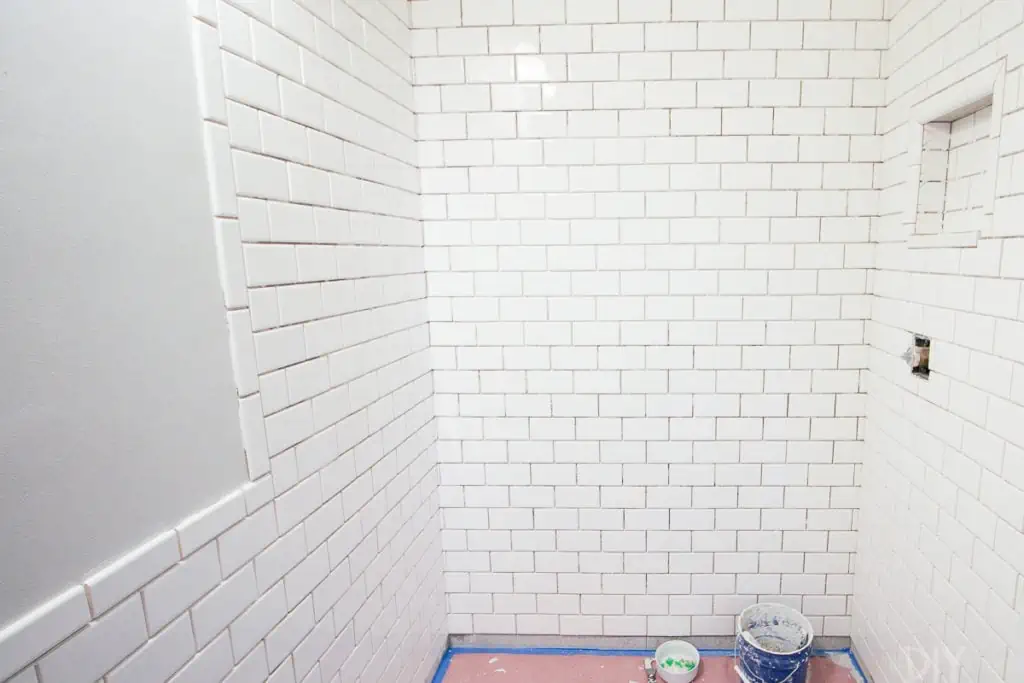
My husband and I recently tackled our own bathroom renovation all by ourselves. (Well, mostly by ourselves … we did hire out a few advanced tasks.) While it was a difficult and time-consuming job, we lived to tell the tale and we now have a gorgeous new space that undoubtedly increased the value of our Chicago condo.

Our new bathroom! But how did we get here?

We learned a lot along the way. A lot of preparation goes into planning a bathroom renovation. So before you whip out that sledgehammer, here’s what you should do to start your bathroom renovation off on the right foot.

Write Out a Detailed Wish List For Your Bathroom Renovation

When you buy a home, you often go in with a “wish list” of items (3 bedrooms, 2 bathrooms, a large backyard, etc.). There are some items on the list that are non-negotiable, and others that “would be nice to have…”

You need to make this exact same type of list for your bathroom renovation.

Spend an hour inside the space you’re renovating writing down “wants” and “needs”. It’s pretty important that you and your roomie/spouse/partner are on the same page from the start on what you want for the space, so make sure you do this step together if applicable!

For our bathroom renovation, we decided that removing our outdated tub and replacing it with a standing shower was our number one objective. Ideally, we also wanted to build a shower niche to hold all of our shower accessories, but that item was on the “would be nice to have” list.

Learn What to DIY vs. What to Hire Out

Renovating a bathroom yourself can definitely save you money because professional labor is often the most expensive part of any renovation. However, if you don’t have the time (or skills) to DIY, this will not be the best option for you. My advice? Make a list of every single task that you think needs to be done in the space … all the way from the demolition to installing the final light fixture.

An image from our DIY journey

Some of the small tasks can definitely be done by yourself, even with little to no DIY skills. We had never tackled a bathroom renovation before but figured out each step along the way. (We  watched plenty of YouTube tutorials, which we highly recommend!).

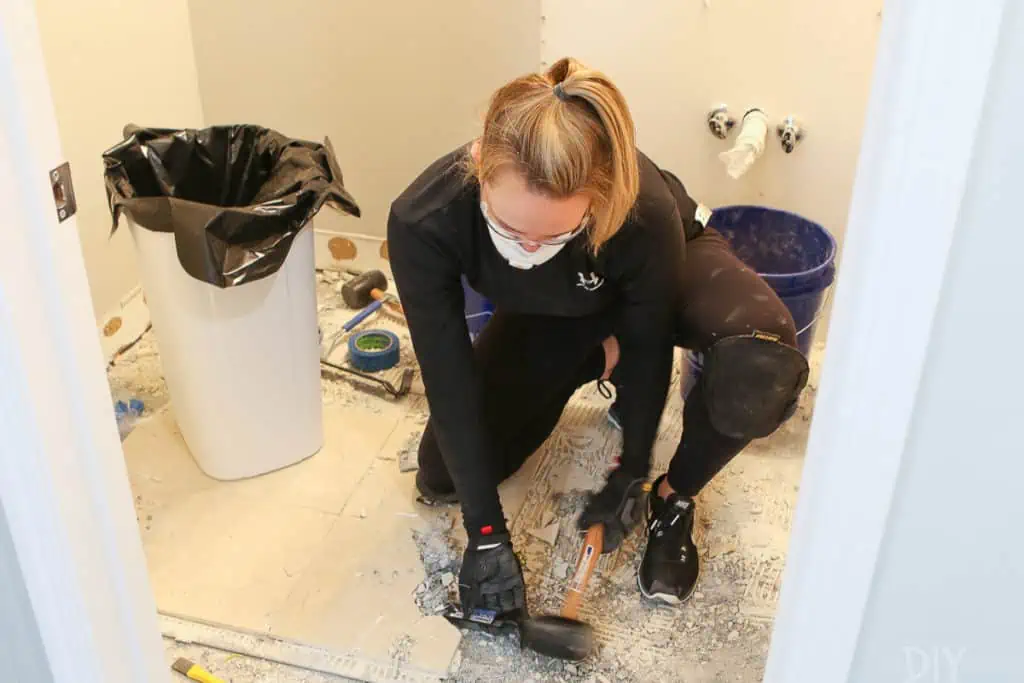
The number one task we’d recommend doing yourself is the demolition of the space.

As long as you wear the proper safety gear, you can gut your bathroom in a weekend (here’s how we demoed our space!). We ripped everything out down to the studs, and this ended up saving us at least a few hundred dollars in labor.

Other (more advanced) tasks are often best left to the professionals. These things include:

  • Waterproofing the shower
  • Moving plumbing fixtures
  • Moving lighting fixtures

This stuff ended up being too advanced for us. We both knew that we would need to find a pro to get those important tasks done correctly.

Consider Hiring a Designer to Finalize the Floor Plan Before You Touch Anything

If you plan to move plumbing and electrical fixtures, you may want to consider hiring a designer to help plan the layout of the space. Yes, this comes at a cost, but it may save you headaches and expensive mistakes down the line.

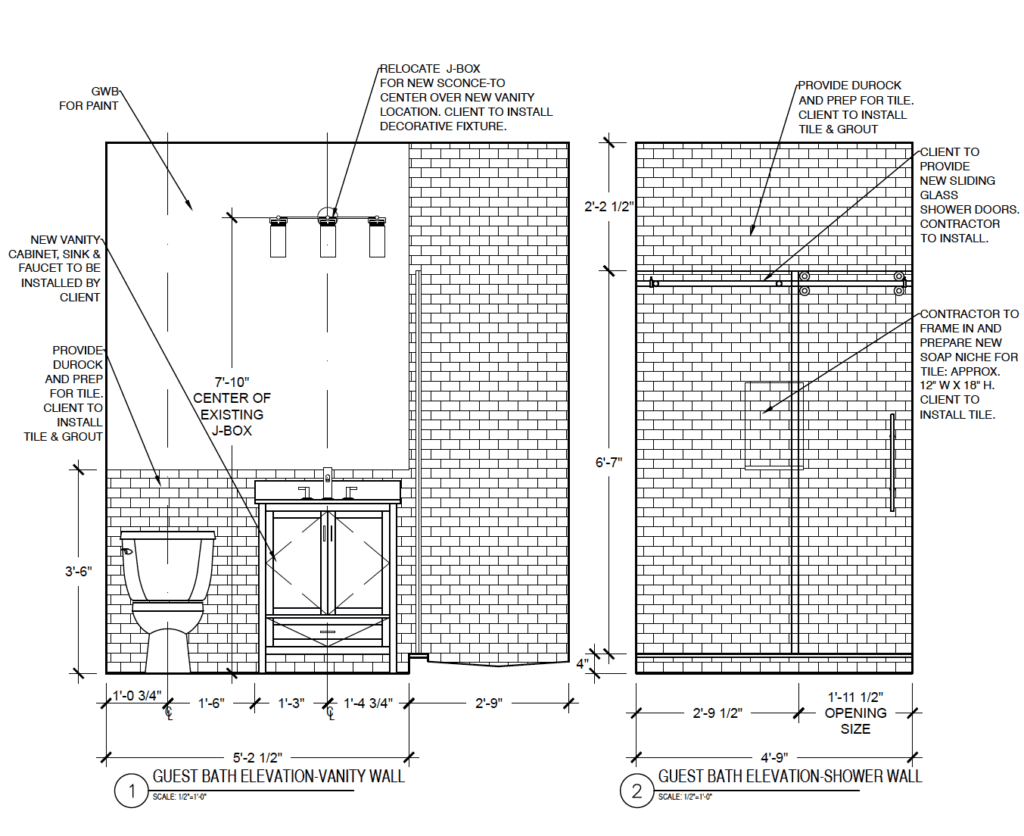
I used Angi to find a designer to help with the layout of our bathroom. For $400, she:

  • Measured our space
  • Made suggestions on placement of items
  • Provided a detailed rendering of the final plan for renovation

For our budget and what we got out of it, it was worth every penny. A designer can also help you source items and figure out the style and look of the space they’re tasked on. We were happy to handle that stuff ourselves, so we didn’t need to pay for additional services. Also, our designer also provided us with a few recommendations for contractors. Which brings us to…

Find and Hire a Contractor

Finding the right contractor is no easy feat. You want someone who is reliable, trustworthy, and will do a good job. We received recommendations from our designer, but you can ask neighbors, friends or check out a review site like Angi. I recommend meeting with at least two to three potential contractors to get in-person estimates.

Here are some questions we learned to ask when interviewing for a contractor:

  • What will this project entail?
  • How long will it take?
  • Do I need to be home?
  • Can you break down the cost of labor and materials?
  • Are the materials included?
  • When can you start? Is that date firm?
  • Do I need a building permit?
  • How will payment work?
  • How will you protect my home?
  • What are the next steps?

It’s important to over-communicate with your contractor and make sure you’re on the same page from the start. If you’re DIY-ing some tasks of the renovation, you’ll want to discuss this with them ahead of time to make sure they recommend that. We outlined exactly what we needed our contractor to do and what we would be handling ourselves, so ours was “in the know” from the start!

Set the Budget and Order Your Bathroom Renovation Stuff Now

Once you find a contractor that’s the right fit, you’ll get an estimate from them for the project. Understand what they will be providing for the renovation and what you will need to buy yourself.

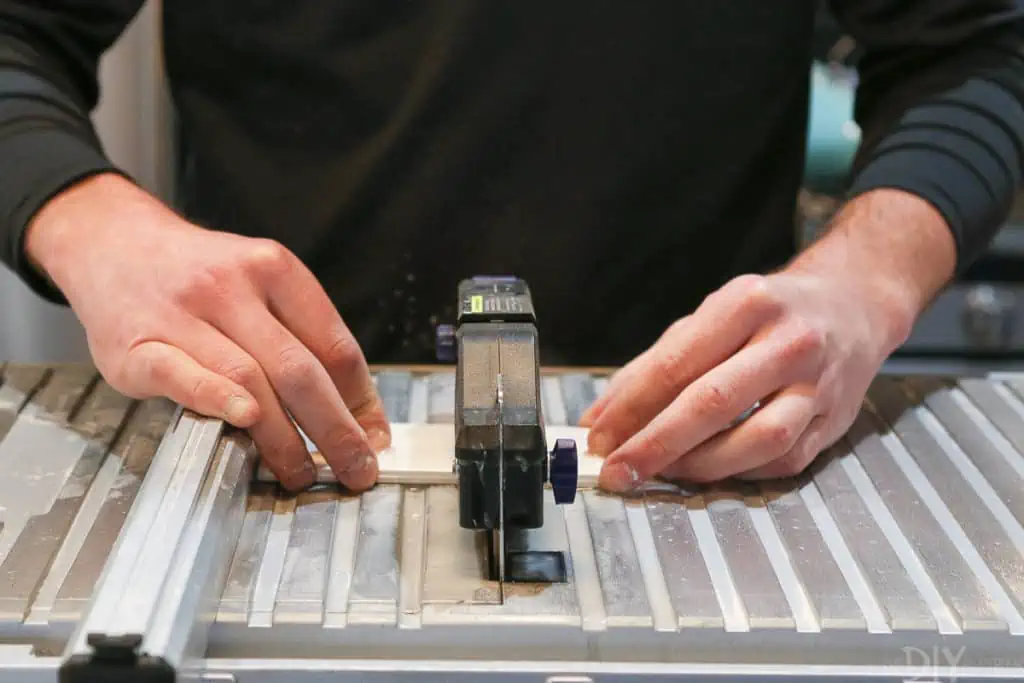
Which means if you are DIY’ing portions of the project, now is the time to gather your tools and supplies to get the job done. Look up each task and make a list of the tools you will need. You may need to rent a few power tools (like a wet saw for tiling), so keep those rental costs in mind. Or see if you can borrow some of these larger tools from friends or neighbors. When it comes to DIY supplies, local home improvement stores are your best bet. Our advice? Go in with a detailed list and try to visit on a weeknight when the store will be less crowded and you can get one-on-one attention from an employee.

As for the new bathroom products, now is the time to place your order. While you can certainly hit up the big box home improvement stores, we’ve found a lot of success with online retailers.

Here are some of the spots we recommend for the major bathroom products:

If you take away one piece of advice from this entire article, I hope it’s this next part: Order all of your products now and do not start your renovation until everything has arrived.
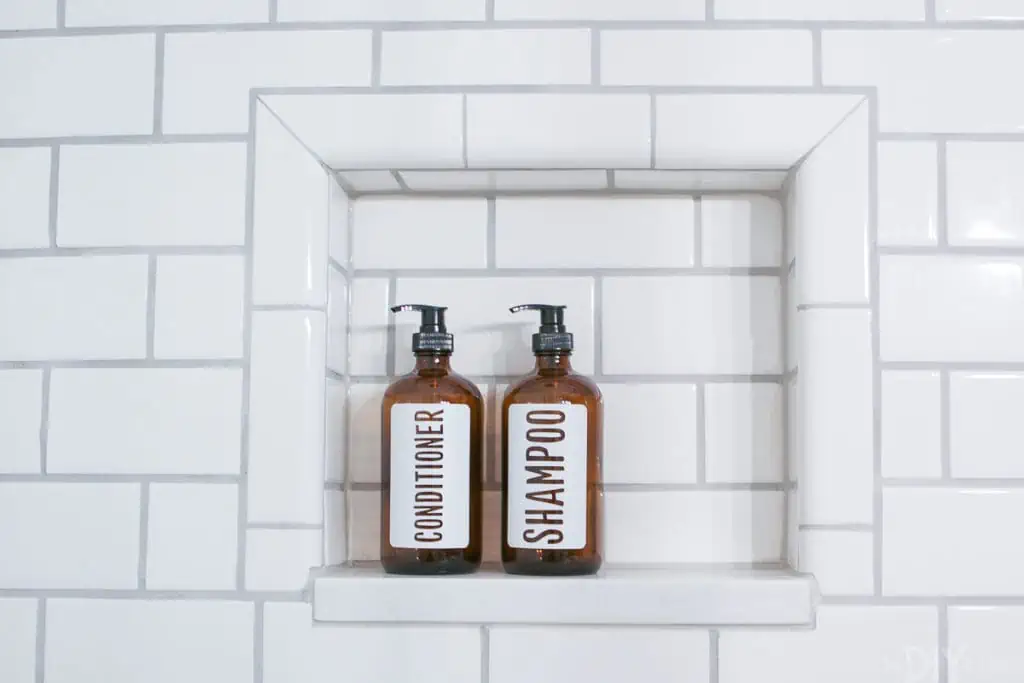
Sometimes you can place an order for a vanity or shower hardware, only to find that it’s back ordered for six weeks! You don’t want your entire renovation on hold because of that, so order everything and get it delivered before the project physically starts!

Make a Timeline

Now that all of your product is ordered (and arriving soon!), you can create a bathroom renovation timeline. Communicate this timeline with everyone involved in the project … your contractor, designer, spouse, family members, etc.

Because we were DIY-ing a good portion of our bathroom, I reserved every weekend for a month on my calendar (as well as my husband’s). That way we didn’t book anything during that time, and we could focus on getting the job done. But even though you have a timeline, know that it will probably change. I anticipated that we could get our renovation done in 4 weeks, but it ended up taking about 7 weeks. Go in with a plan, but be flexible because you’re always going to run into problems!

Have a Physical Place to Survive During Renovations

Chances are you’ll be living in your home throughout your bathroom renovation, so it’s important to have a plan on how you’re going to continue to live amongst the dust and chaos. We live in a small condo and once our demolition started, our entire place was a disaster zone. Right then and there, we decided that we wouldn’t let any of the mess trickle into our master bathroom or master bedroom. Instead, those were our “sanctuaries” away from the chaos of the renovation.

Create these safe zones ahead of time and vow to keep those areas clean and free from any of your bathroom mess. Trust me, you’ll need those retreats when you’re living through a renovation.

I know you may be eager to start smashing away your outdated bathroom to get it looking fresh, clean, and modern. But it’s important to do work upfront before you get started. That way you have a clear idea of the amount of money and time you’ll need to create the bathroom of your dreams!

A DIY’ers Guide to Essential Power Tools

Author:

Publish Date:

Last Modified Date:

Category: DIY Projects

Tags: Tags: , , , , , , , , , , , , , , , , , ,

As DIY’ers, we always get a little giddy when it comes time to chat about tools. (Yes, we’re nerds like that.) So, it should come as no surprise that we’ve covered tools here on the HireAHelper blog before. We’ve even shown you our tips to keep all of your tools organized and accounted for.

Now it’s time to move up a level … to power tools! Just that word “power” may sound a little scary and overwhelming to the DIY newbies out there. But we promise there is nothing to be scared of because if even we can handle these tools, then pretty much anyone can.

The Power Tools To Own

If you’re looking to spruce up your home, add to your tool collection, and just be an all-around rock star homeowner, then these are the first five power tools we suggest adding to your collection. We’ve also included the general range of prices you can expect to pay for each.

Cordless Drill

This tool was already covered in our list of seven essential tools to own, but it’s a power tool too! And it’s quite possibly the most important tool to have, overall.

In fact, we believe every household needs a power drill (even if you’re a renter) because it can be used for pretty much anything.

How do we know? So many people in our lives have asked to borrow our drills (and we always oblige), but we quickly emphasize how they really should invest in their own. It’s a necessity! Trust us, it’ll make putting together Ikea furniture a heck of a lot easier.

Price: $30-50

Shopping Tip: Power is measured by battery voltage and ranges from 6-18V. Higher voltage models come with extra power but are quite a bit heavier. We suggest going with a nice, middle-of-the-road 12V cordless drill.

Also be sure to also pick up a variety of drill bits when you buy your cordless drill.

DIY Projects:

  • Hanging curtains
  • Building shelves
  • Drilling holes
  • Anchoring
  • Pretty much anything

Miter Saw

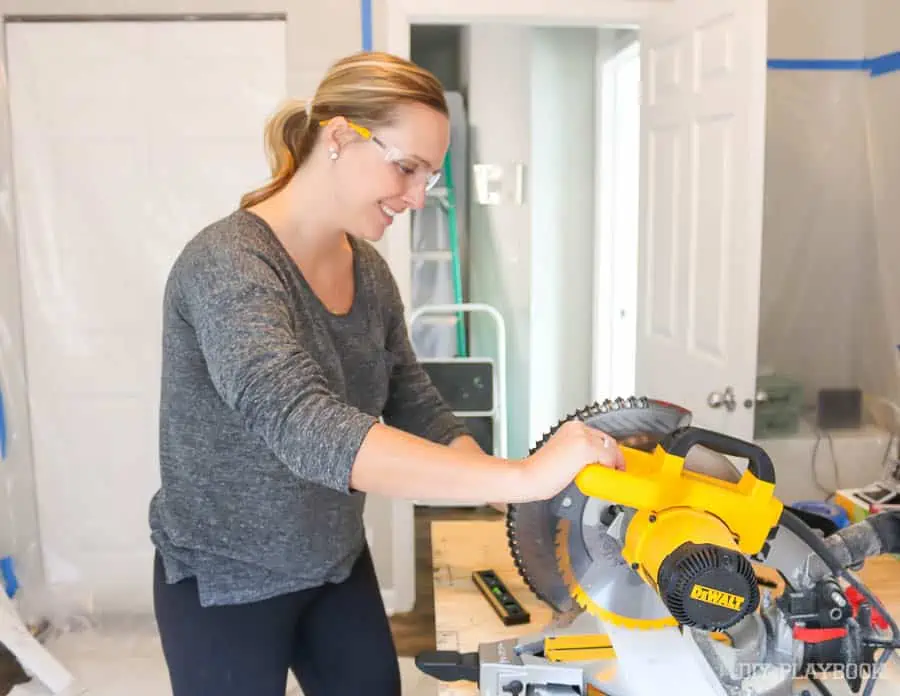
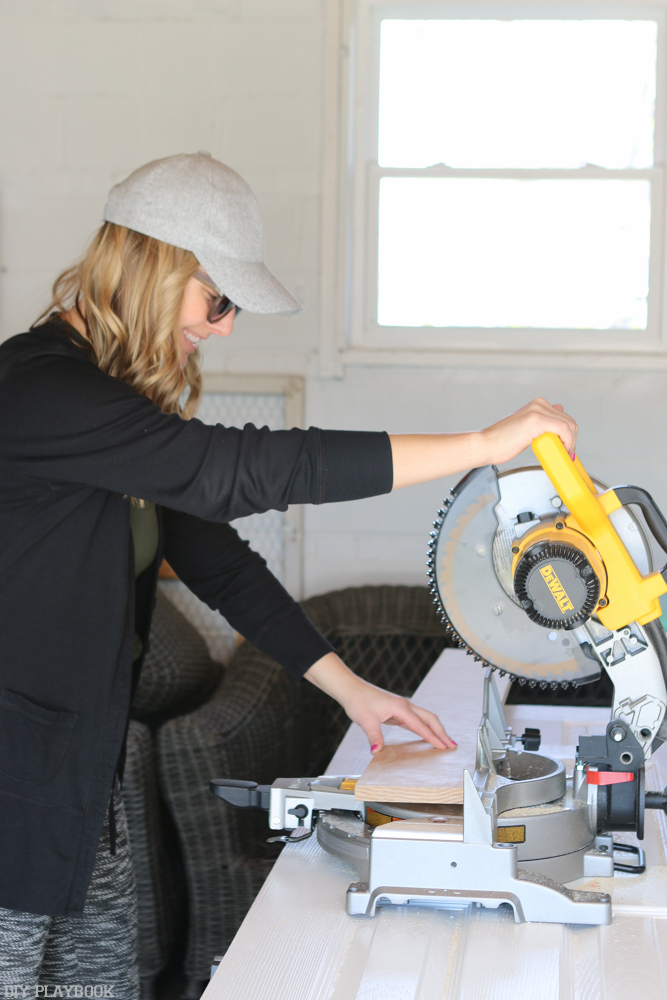
This was the first “real” power tool we ever bought and we’ve used it so many times since. Are you ever going to be touching wood? Don’t think you won’t use this because you absolutely will. It makes straight cuts, sure, but it’s also able to make incredibly accurate cuts at an angle.

Price: Average 8-10 inch saws range $140-250

Average 12+ inch saws range $250-500+

Shopping Tip: Consider the blade size when buying a miter saw (8, 10, or 12 inches).

Yep, larger blades allow for longer cuts. We have a 10-inch compound Miter Saw. Oh, and be sure to pick up safety glasses and an extension cord when you invest. That way you stay safe, and your saw can reach any outlet when working away!
DIY Projects:

  • Board and batten siding
  • Wood planter
  • Shiplap wall
  • Smoothing

Nail Gun

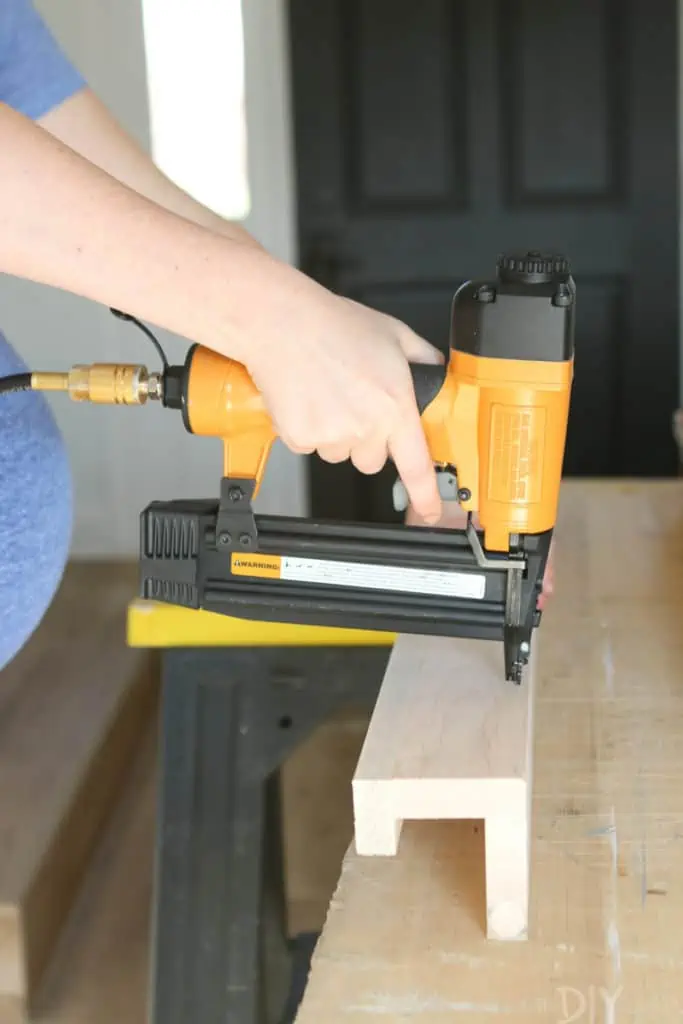
Instead of using a hammer and nails for a project, you can use a nail gun and get the job done 100 times faster. There’s a wide variety of nail guns out there, but we suggest going with a finish nailer. These come in handy when securing wood together or to a wall, and you can easily putty over the holes for a seamless look.

Price: $30-100

Shopping Tip: Nail guns can be gas-powered or air-powered, but we suggest going with an air-powered one. (Here’s the one we own.) When it’s plugged into an outlet, compressed air is used to drive the nails.
Make sure you also pick up extra brad nails for your project and that they’re compatible with the brand/size of your particular nail gun.

DIY Projects:

  • Installing baseboard
  • Creating decorative wall
  • Adding trims
  • Hanging anything

Sander

You’ve probably used sandpaper or a sanding wedge for a project before. And if you have, you know that your arm can get pretty tired when going back and forth over and over again.

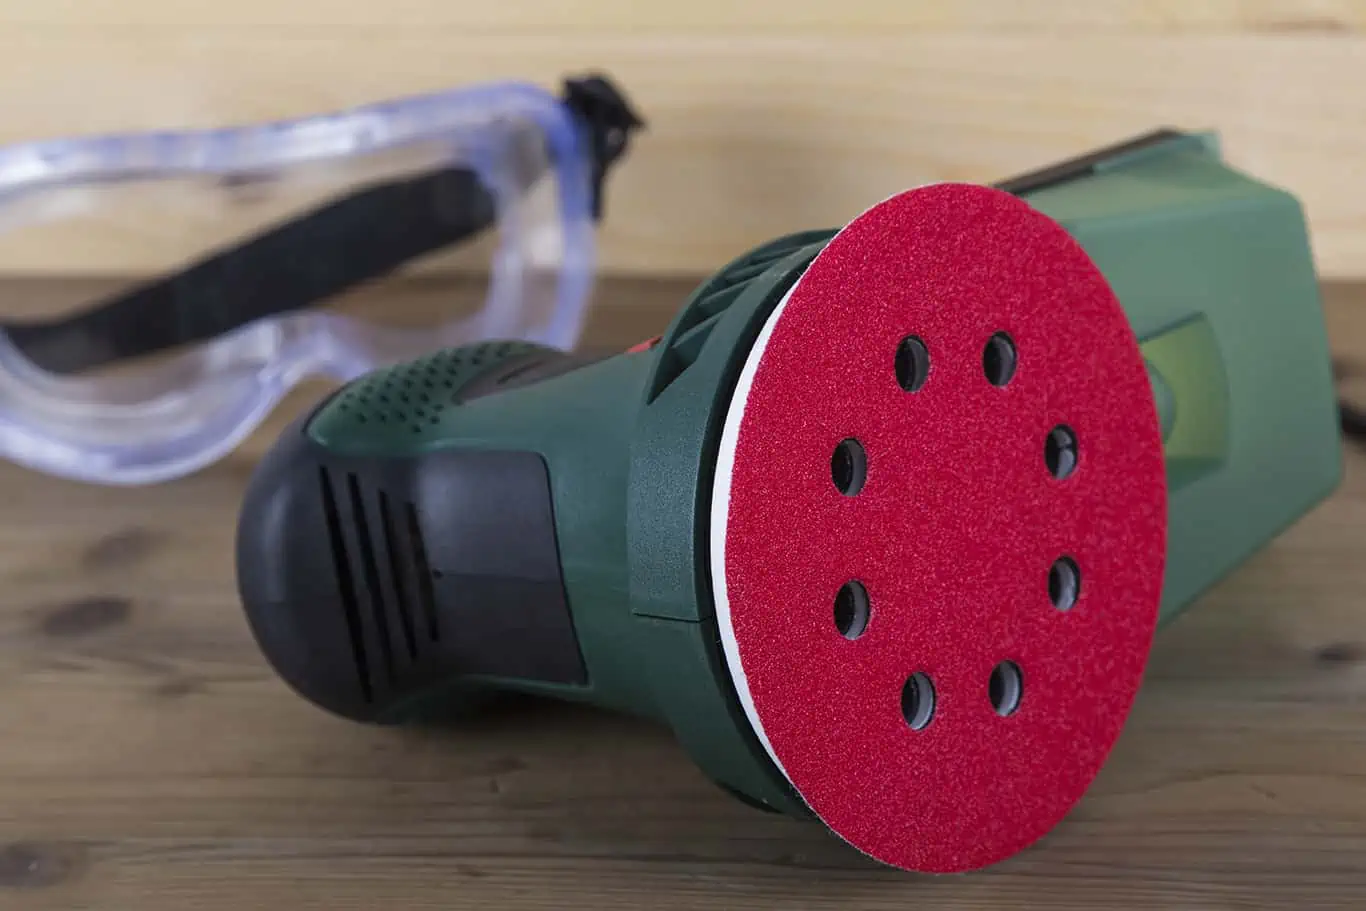
It’s time. Get a sander. You add sanding pads to the sander and when you turn it on the pads move in a circle, sanding the surface as you go. We’ve also ended up using sanders when refinishing old pieces of furniture.

Price: $25-80

Shopping Tip: There are various types of sanders (palm, detail, belt, etc), but we use an orbital sander.

Orbitals are lightweight and because they’re not too heavy-handed, it’s very difficult to damage the piece you’re working on. Be sure to buy extra sanding pads for your sander, so you always have a fresh one for your project.

Oh, and a dust mask may come in handy too!

DIY Projects:

  • Refinishing furniture
  • Smoothing DIY picture ledges
  • Sanding down excess paint on a wall

Jigsaw

What’s compact and relatively inexpensive?

abeautifulmess.com

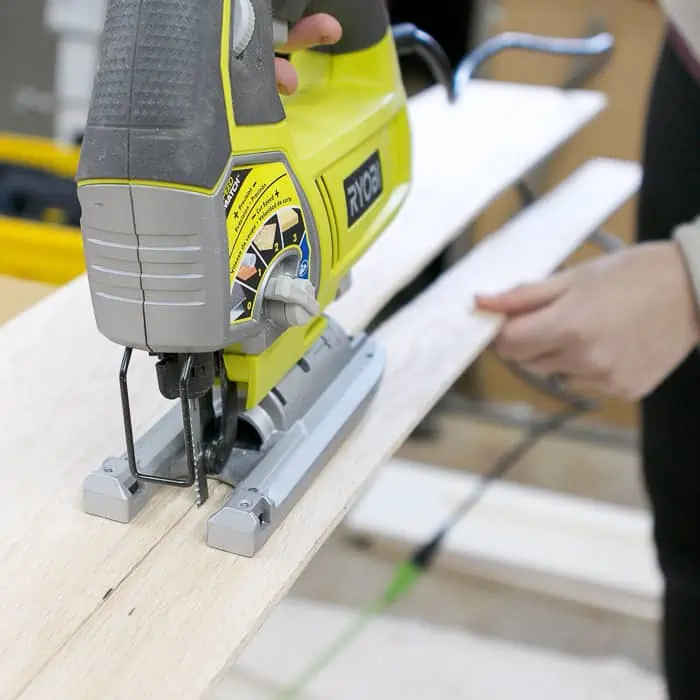
A jigsaw can be used to make both curved and straight cuts in a variety of materials (metal, plastic, wood, particle board, etc.). Whenever we are tackling a woodworking project, we almost always get out the jigsaw because there are bound to be some “wonky” cuts that don’t need to be straight or angled.

For example, if you’re adding shiplap to a wall and need to make room for an outlet … the jigsaw is the tool to get the job done!

Price: $25-90+

Shopping Tip: If you’re planning to use your jigsaw on tough materials, then you may want to buy a jigsaw with a cord. Here is the one we use.

By far the most important thing to remember is that you need to buy the right blade based on the material you’ll be cutting!

DIY Projects:

  • Curved headboard
  • Holes for outlets
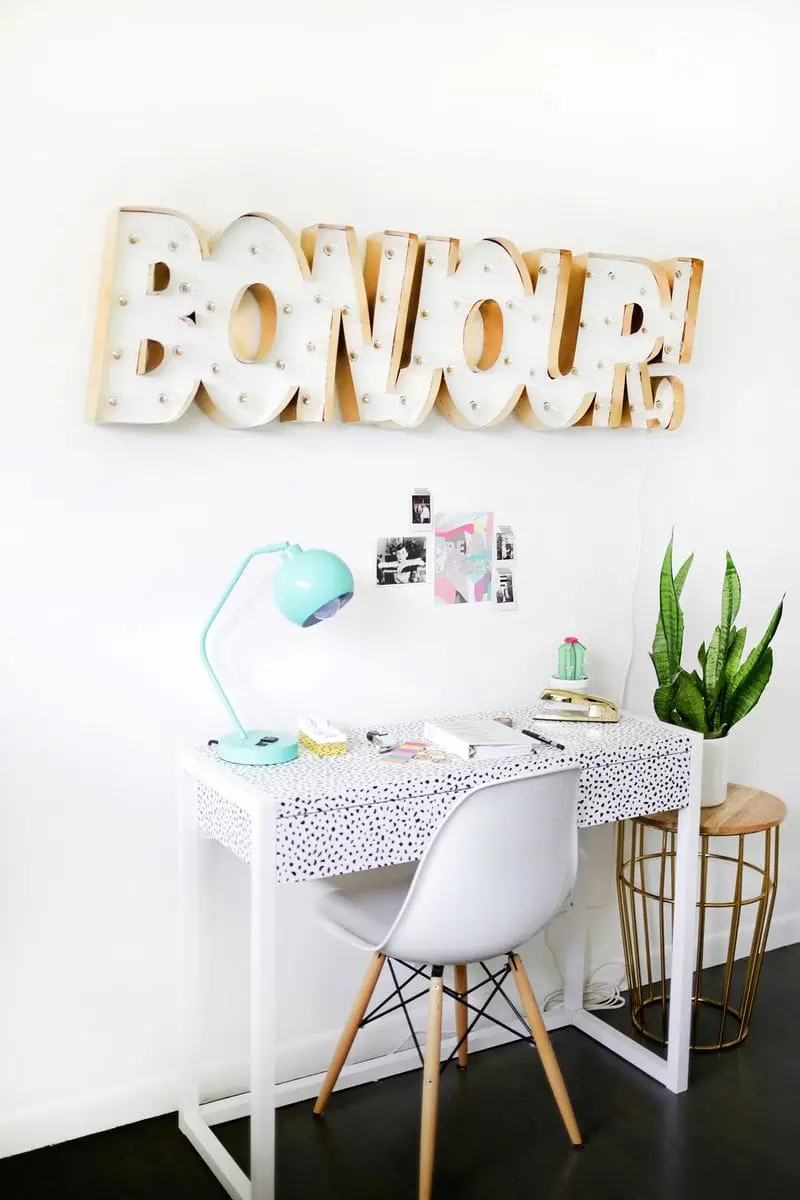
  • Shaped signs
  • Personalized crafts

A jigsaw is isnt just useful and easy to learn, it’s pretty fun!


We hope this list gets you excited to start creating and building things around your home! Getting power tools means you can ditch the builder-basic look and customize a home that looks all your own.

How to Future-Proof Your Nursery So It Grows up With Your Baby

Author:

Publish Date:

Last Modified Date:

Category: Home Decorating

Tags: Tags: , , , , , , , , , , , , , , , , , , , , , , ,

Decorating a nursery for your baby is a special time. As a soon-to-be new mom, every single piece of clothing, blanket, stuffed animal and tiny accessory I see seems way too cute to be real. I still can’t believe I’ll eventually have a little one that will fit into these tiny clothes and use these adorable toys!

But when it comes to decorating our nursery, I’m trying to restrain myself from buying all these cute things. That’s because I’m trying to decorate this space with intention so that the nursery will grow with my baby as he becomes a toddler … and even a little boy.

I don’t want to invest more money in different furniture, rugs, or new paint in a few short years all because I wasn’t planning ahead and creating a space that will transition with him.

How To Create A Nursery That Will Grow With Your Baby

Can you relate?

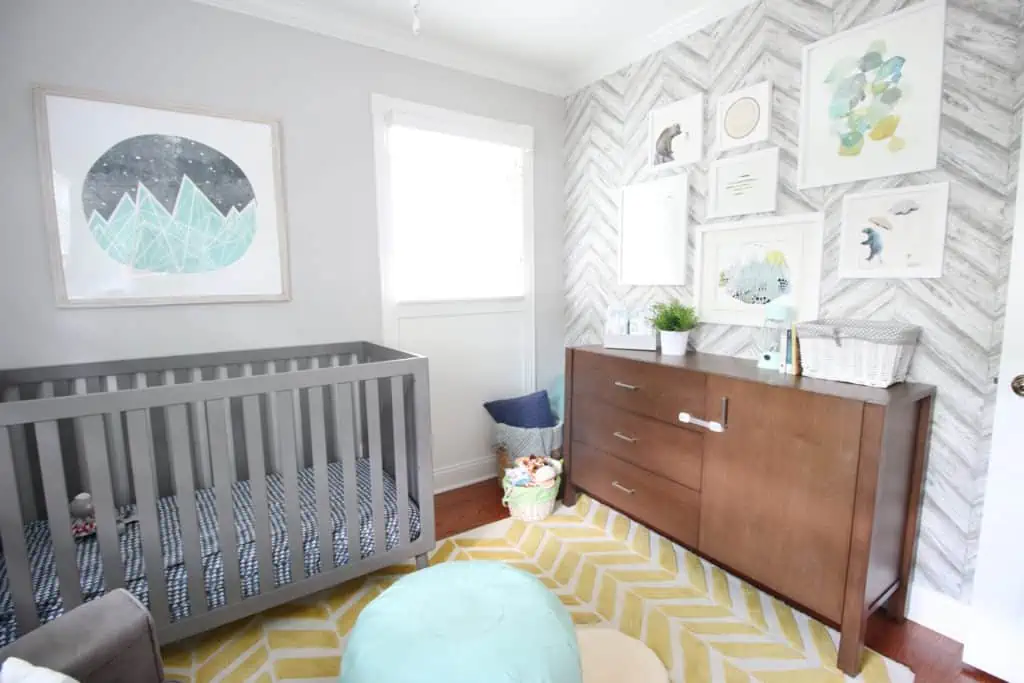
Are you excited to decorate your nursery but don’t want to be re-decorating the nursery in a few short years? A room that will be oh-so-adorable (and functional!) now, but will also be age-appropriate without a ton of time and money? Here’s how I made my nursery future-proof.

Reconsider Your Paint Color

From the top, this is the most obvious, yet the most ignored piece of advice.

It’s natural to hear “It’s a boy!” and immediately starting planning a traditional light blue nursery. But thinking outside of that box is a great first step in making sure your nursery will grow with your child.

Paint can be expensive, not to mention a definite time investment, so choosing a color that doesn’t exclusively reflect a baby’s first year will help this space transition without having to repaint your light blue or pastel pink room in just a couple years. (And just say no to wallpaper!)

These Paint Colors Have the Best Resale Value

Zillow examined 50,000 home sales and found these colors help sellers make as much as $5,000 more!

So to all the excitable parents-to-be out there, we suggest a neutral wall color. You can always accessorize with those bold, bright, or traditional nursery colors in a less permanent way. Future-you will thank you.

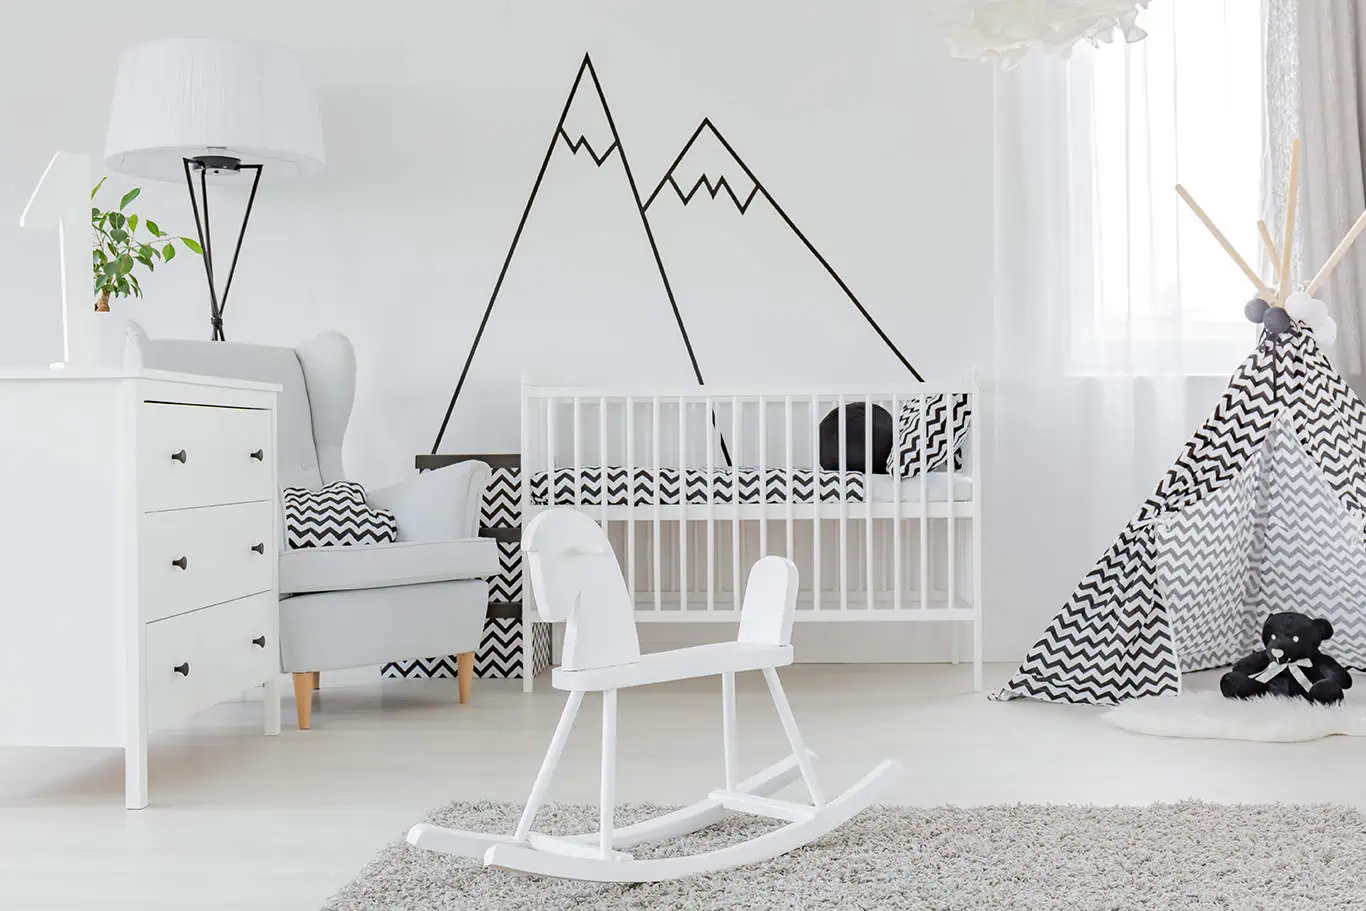
Protip: Wall decals, or “wall stickers” are increasingly becoming the “temporary tattoos” of the home-deco world. Most of them are easy to apply and easy to remove, so consider going this route if you absolutely have to plaster something across your wall. Amazon is just one place with plenty of options.

Just Skip The Theme

This is probably our biggest piece of advice because it will have a large impact in creating a nursery that will grow with your baby.

I know this can be difficult, especially since so many baby stores align a lot of their products in large themes. In fact, when my husband and I went to register, one of the first questions that the sales associate asked was, “What’s the theme of your nursery?”

Yep, she looked at us like we were straight crazy when we declared that there was no theme.

But skipping this theme will help the space transition later on because themes often make a nursery feel very “baby”. Themes can’t transition.

Not to say that you can’t incorporate some aspects of these cute collections, but steer clear of buying an entire set of bedding, decor, textiles, etc. That is, unless you want to start completely over as soon as you’re sick of it.

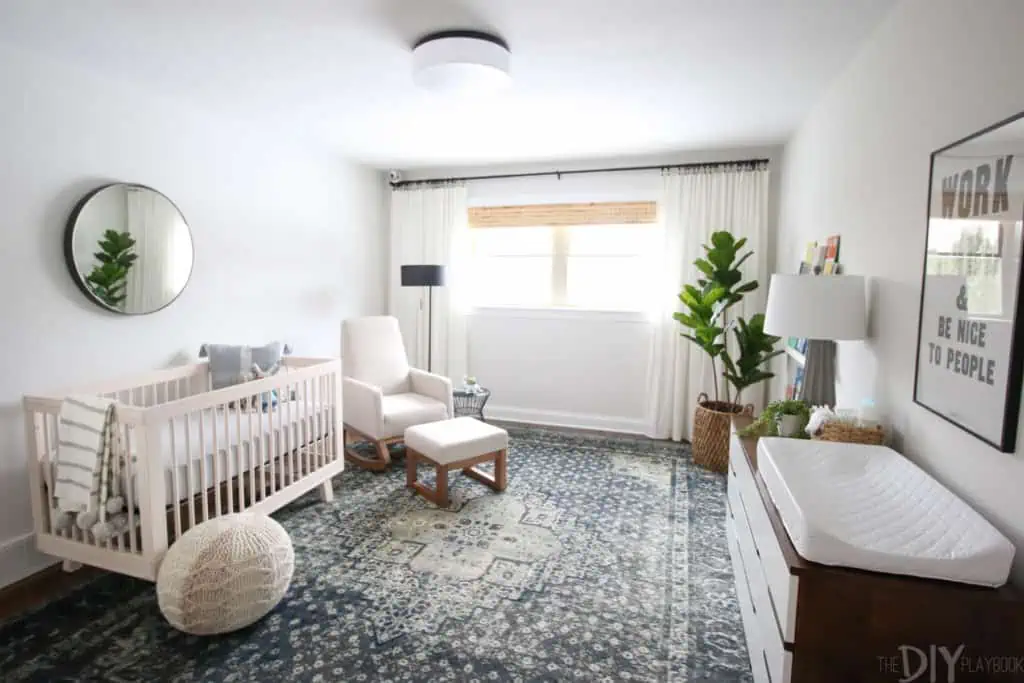
Invest in This Flexible Furniture

Buying the right furniture will also be another way you can save money in the long run. Investing in pieces don’t look like they are only for babies will prevent you from needing to replace these pieces in a few short years.

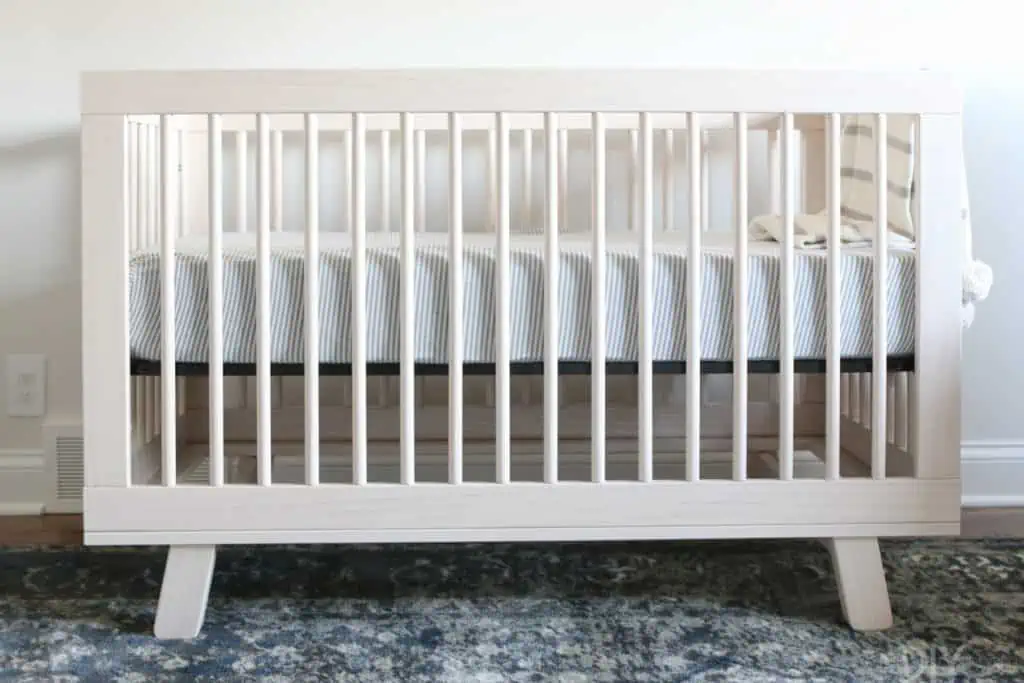
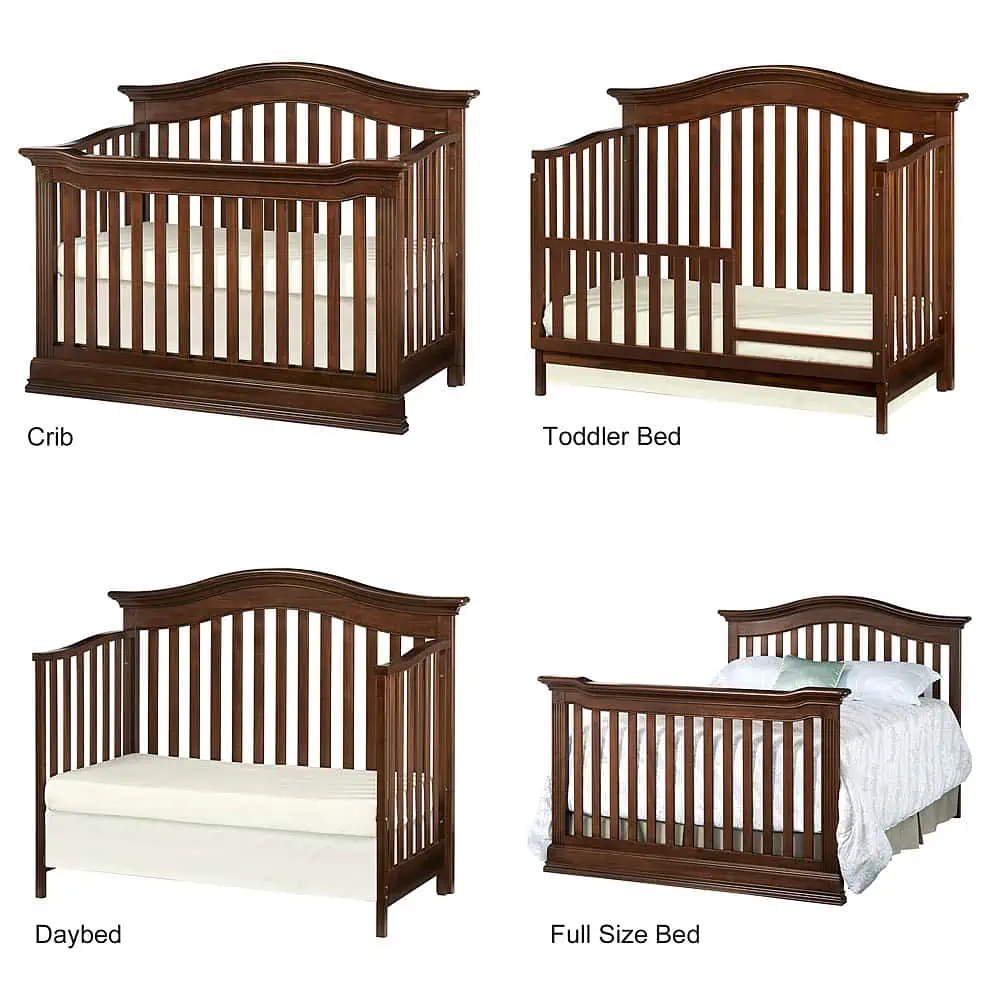
A lot of cribs these days are considered to be convertable cribs, or 3-in-1, which means they will transition from a crib, to a toddler bed, and then eventually to a twin bed headboard. Wayfair has a nice spread of potential crib options.

toysrus.com

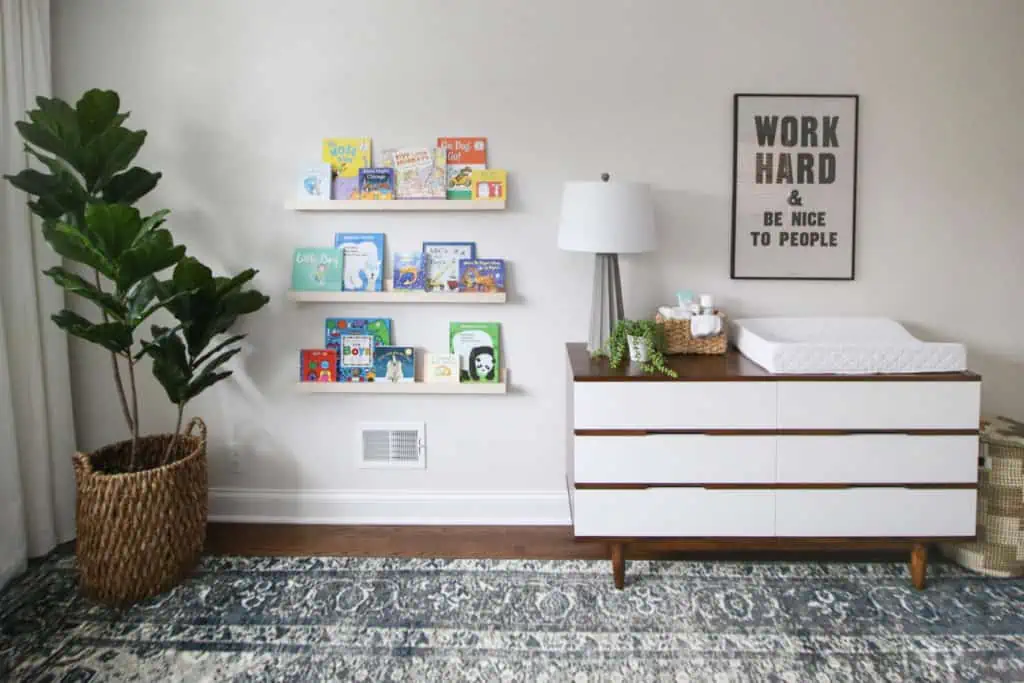
Also, skip the traditional changing table and opt to buy a regular dresser that you can add a changing pad on top of.

That way, you won’t have to ditch the changing table for something less specific in a few short years. You just switch out the changing pad and use the same dresser in a big kid room!

Transformable and “big-kid” furniture for a newborn will save you lots of money in the long run, and you might find a lot of companies are finally starting to realize this when you check out baby furniture options out there.

Be Mindful of Textiles

The biggest thing that comes to mind when choosing textiles is the rug you add to this space. Rugs can be very expensive, so don’t buy a childish one only to replace it a year later. (Veteran moms, you know what we’re talking about.)

If you have hard floors, we recommend a rug to give your room a softer area to eventually crawl around. And if you choose a pattern, texture and color that isn’t strictly for a nursery, it can live in that space for years and years.

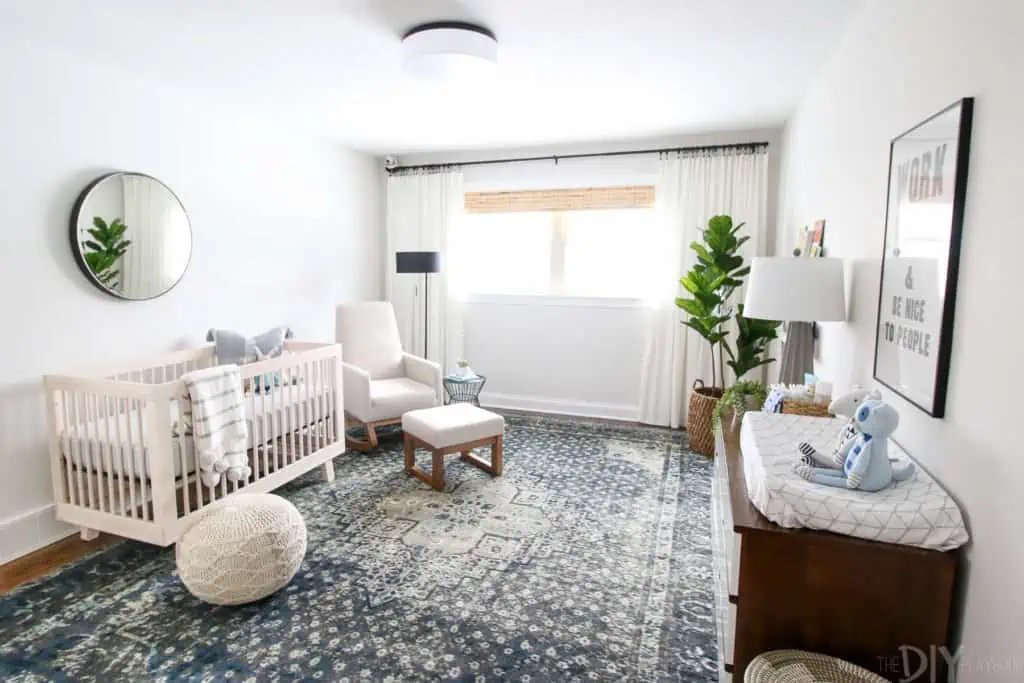
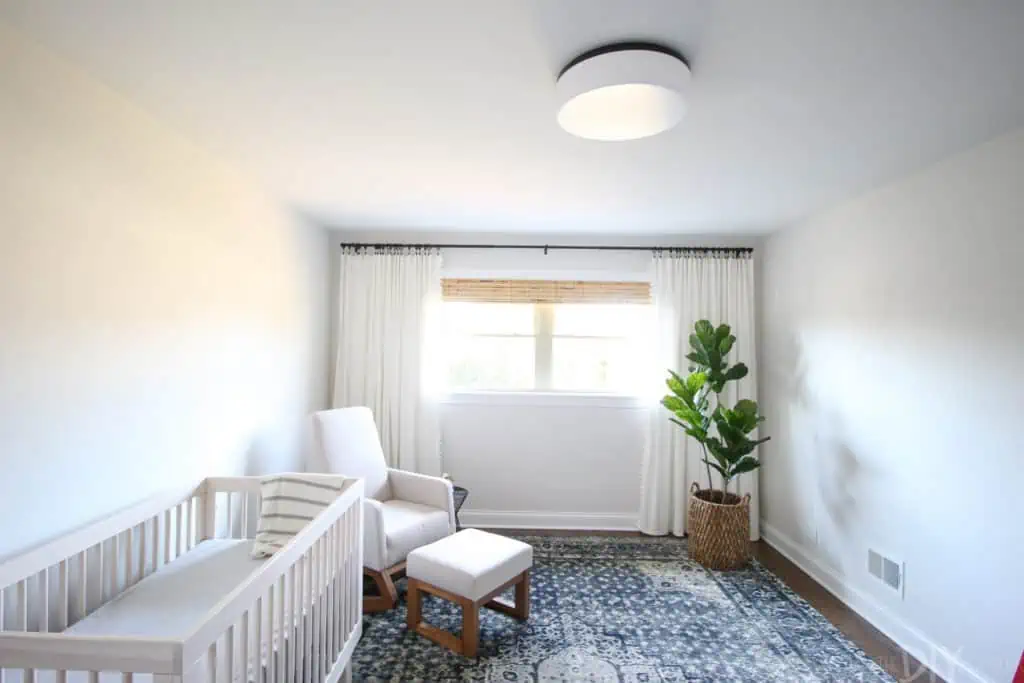
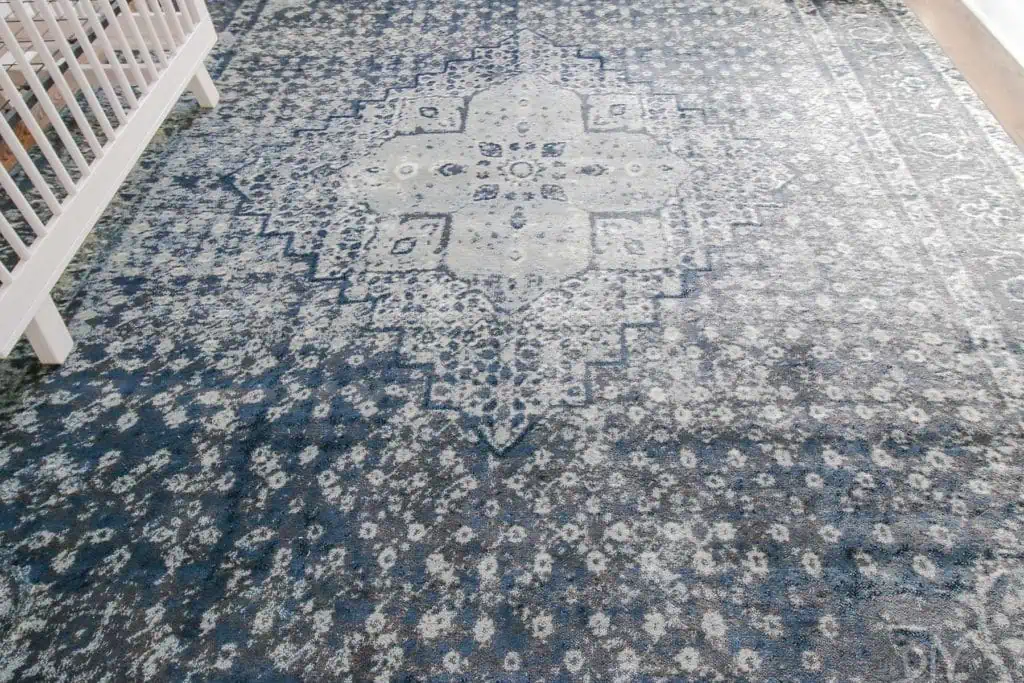
We went with this dark oriental-inspired rug because it will not only hide stains, but it can transition as the baby gets older. It is also super versatile so it can adapt to match all kinds of decor, pillows, art, etc.

This large rug was definitely an investment, but we don’t plan on moving it for a long time, which really helps to make you feel comfortable spending money on something expensive now.

Organization Systems Never Become Outdated

Creating a bedroom space that works for your everyday needs is important regardless of how old you are. From newborns all the way up to adulthood, you want your room to be organized and functional to meet your everyday routine.

But a newborn’s needs/routine will look very different from a small child’s, right? That doesn’t mean you can’t establish organization systems early on that will grow with your baby.

The first thing we did was add hooks to the walls. Today, they work for a baby’s towel, but later on that same hook will be a perfect spot for your little one’s book bag.

A closet organization system that works for your little one’s diapers will one day be useful for them to pick out clothes. And yes, the more organized you are now, the more you will appreciate and maintain these methods throughout the future.

Keep Most of the Fun to Accessories

Last but certainly not least, it’s time for the fun part: accessorizing!

Here’s where we give you full permission to inject those baby vibes into the nursery. Accessories are the best and most inexpensive way to add personality and color into your nursery. Mirrors, toys, pictures and more can easily be swapped out as your baby transitions. (As long as they aren’t part of a 25-piece themed set, of course.)

So if you can’t help but splurge on that adorable stuffed animal or that super cozy baby blanket, do it! The necessities in the room will be there for the long-haul.

As the years go on, now all you have to do is swap out a few accessories, which is far less intimidating than new paint, furniture, new rugs and a whole new theme!

×

I'm Moving

Moving? Thinking about moving? Whether your move is off in the distance or you already have one foot out the door, you'll learn about everything you should expect through our useful how-to's, cool articles and much more. It's all specially curated for you in our "I'm Moving" section.
Explore
×

I'm a Mover

For rookies or veterans alike, our "I'm a Mover" section is filled with extensive industry news, crucial protips and in-depth guides written by industry professionals. Sharing our decade of moving knowledge is just one way we help keep our professional movers at the top of their game.
Explore