So you’re moving house by yourself — how hard can it be? Then you go to your closet and see all those hanging clothes, and reality hits.
Let’s be real. Taking your favorite outfits down to fold them and stuff them into boxes is just asking for wrinkles. Unless you’re eager for the steam iron to be the first thing you use in your new home, it’s best to keep clothes on their hangers. So, how do you pull that off?
There’s good news! It can be done in five simple steps. Here’s how.
Step 1: Declutter Your Closet
 Do you know what’s better than moving 30 garments on hangers? Moving 20. Start off by going through your closet and making some hard decisions about which items are going on hangers, which can be folded up, and which ones are getting dropped off at the donation center. Grab your pen and paper and create three categories:
- Staying on the hanger. Keep the essentials — formal shirts, suit jackets, and anything you reach for regularly — right on the hanger.
- Going in a box. Haven’t worn it in a few months? You can probably get away with folding it up. Don’t worry, you’ll have plenty of time to smooth out the wrinkles on your second favorite pair of slacks and summer skirts later.
- Farewell forever. Haven’t worn something in a year or two? Just let it go. A thrift store will be thrilled to get your gently used outfits. It’s hard to decide what to let go of, but there’s a method for that too.
Step 2: Gather Supplies
Now that your clothes are sorted, you need supplies to move them, including:
- A box of 30-gallon yard bags: The thicker, the better
- Twist ties: You can never have too many
- Painter’s tape in lots of colors: You can color-categorize your things
- Scissors, extra hangers, and a felt pen or two: For labeling and other miscellaneous tasks
Step 3: Group and Sort
 Now, you’re ready to get organized. Before pulling anything from the closet, group similar items together. Move all the shirts to one section of the rack, followed by jackets, pants, and anything else you’re taking.
Don’t have more than about 10 hangers per group to prevent crowding. Once the groups are assembled, carry them out and gently place them on the bed or the clean floor. It’s time to bag them up!
Step 4: Bag and Secure
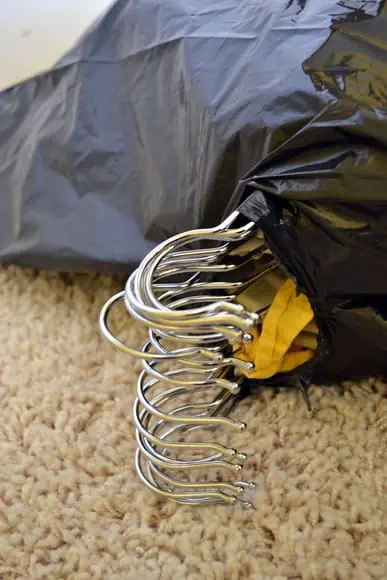 Trash bags might not scream “fancy,” but they do a fantastic job of protecting your clothes. Begin by cutting a small hole in the bottom of one of the bags. Then, gently poke the top of the hangers through the hole and pull them through as far as they’ll go. And keep it roomy; overpacking can create wrinkles, which is what we’re trying to prevent in the first place!
Slide the bag over the clothes and tighten the drawstring at the bottom. To keep everything in place, simply add a twist tie around the hangers so they won’t shift around. Slap some colored tape on the bag (or use white tape and a felt pen) and label it. This saves you time unpacking later.
Step 5: Move Your Clothes
When you’re ready to pack up and go, lay the bagged bundles flat to keep everything in shape. Give them plenty of space in your truck so they stay organized. Or you can buy specialized wardrobe boxes that have a bar for hangers built in.
Still need a truck? Take a look at some of these vital stats for renting a truck, and get the most out of your move. You’ve got this!