Retiring after a long career is an exciting time but a significant life change. All retirees need to make plenty of vital financial decisions, such as deciding if moving into a new home is the right choice and budgeting with a new level of income. For many retirees, downsizing or moving into a retirement community is a great option, while others may choose to move in with family members or friends.
Whatever decision you make, it’s important to make sure that you enjoy your retirement years to the fullest. Choosing a home that will suit your needs for years to come can help prevent stress down the line.
Finding the Best Long-Term Retirement Location Checklist
As you house hunt, ask yourself these questions to identify homes that will suit your long-term needs.
Keep in mind it’s unlikely you’ll find all of these features in a single home. Instead of trying to check all the boxes, compare the overall level of retirement-friendliness of each home in your search.
1. Renting vs. owning: “What makes the most financial sense?”
Most people approaching retirement have a good idea of what their monthly budget will look like, between retirement account withdrawals, social security, and other sources of income.
The rate of homeownership among retired married couples is a whopping 90%! But while owning may feel like the norm, you should know it leaves you susceptible to a high level of financial liability for maintenance and unexpected repairs. On the other hand, renters sidestep those costs.
“All too often, we don’t realize a hazard until it causes damage.”
Speak with your partner, financial advisor, or others in your support system to make the best decision. The American Association of Retired Persons (AARP) demonstrates that the answer here is all about your retirement cash flow and anticipated future expenses. In many cases, renting will be lower-stress and less expensive, even if it goes against how you’ve traditionally thought about retirement.
Consider Alternative Retirement Housing
For some retirees, downsizing and moving into a new home simply isn’t an option. There are other choices for those not looking for traditional renting or homeownership.
Cohousing: If you’re looking for a stronger sense of community in retirement, cohousing.org communities can be a great option. These communities are typically built around communal social spaces. Residents of all life stages live privately, but enjoy a social environment that is meant to build stronger relationships and a sense of support.

Multigenerational living: Moving in with your family can be a great option for you and give you a chance to enjoy time with family, children and grandchildren. Some modifications may need to be made to your family member’s home, depending on the house and the situation.
Be sure to review the electrical and fall hazards discussed earlier to ensure your loved one’s home is safe for you.
2. “Is the neighborhood safe and accessible?”
Your long-term home should be highly accessible for both you and visitors. When possible, avoid homes that are at the end of steep driveways or walkways and those that open into busier-than-average streets. This way, inclement weather causes less disruption to your life (and the lives of others coming to visit you).
Choose a new city or state with close and easy access to:
- Grocery stores
- Pharmacies
- Doctor’s offices
- Hospitals
Move to an area where the drive to these amenities is short, or you can safely walk to get essentials, especially if there is inclement weather.
It’s also best to choose a location that has strong neighborhood safety scores. While it isn’t always possible to live in a perfect area, safety apps and websites can help you assess what the most ideal location in your intended town may be.
“The rate of homeownership among retired married couples is a whopping 90%!”
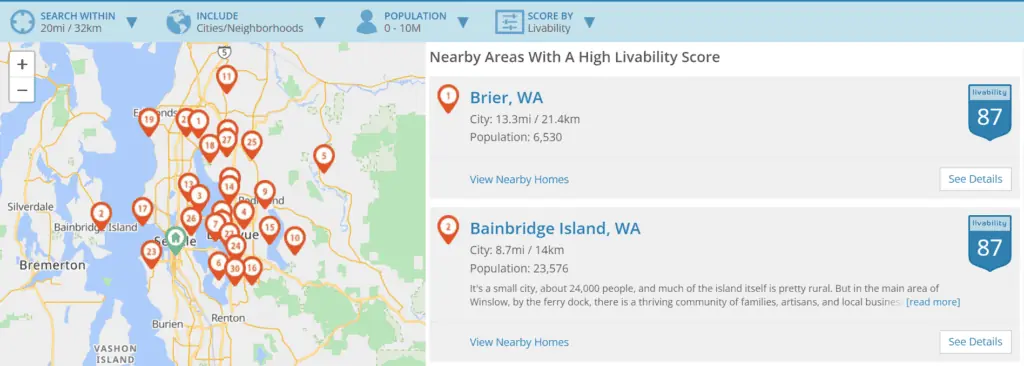
Safety apps and online resources like NextDoor and AreaVibes can give you insight into the safety of specific neighborhoods. You can also ask people questions about the area to understand better how safe it is and how neighborly people are.
A Note on Retirement Communities
If you want to be social and live near others, a retirement or independent living community is also an option that sidesteps many safety and accessibility concerns.
Independent living communities often cater to a variety of activities and interests. You may be surprised to find options that have pools, gyms, restaurants, movie theaters, and even dog parks on their premises.
3. “Is the place’s floor plan aging-friendly?”
Next on our list is an aging-friendly floorplan, meaning a thoughtful overall home design that will pose the fewest mobility challenges over the years. Pay close attention to these features in the floor plan to identify risks.
Entrances and Exits
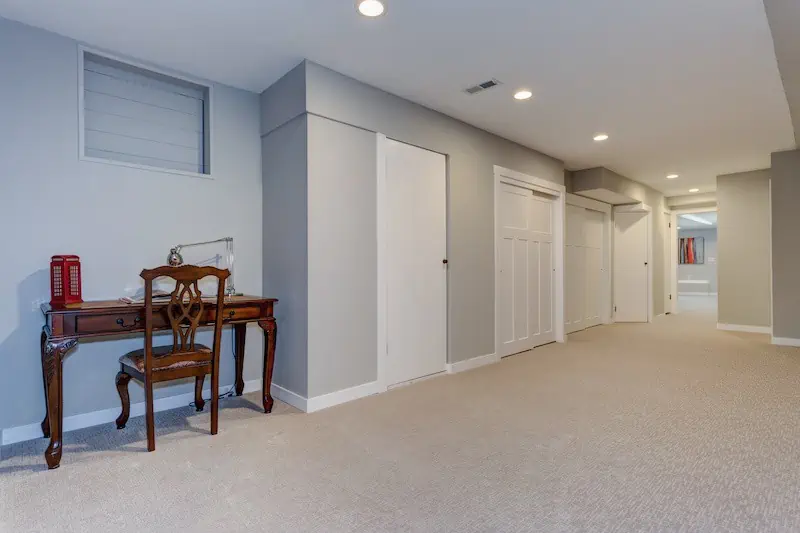
- Look for no-step or very few steps entrances and exits, if applicable. This ensures easy access if future mobility assistance is needed, and of course, reduces slip and fall risk. When possible, opt for a backyard without a patio or deck steps. Given a choice, a totally flat poured concrete patio will further reduce fall risk over wood or paving stones.
- Aim for all essential amenities on the same floor. This means at least one full bathroom, a kitchen or kitchenette, laundry, and living space that are all on one level. That way, there are as few obstacles as possible between you and everything you need.
- Look for wide doorways and halls. This will accommodate any mobility devices and equipment now or in the future if they are ever needed.
- Ensure easy access to outlets and light switches. Standard electrical outlets are 12” to 18” above the floor, but can actually be modified to be higher for less bending over. You may also choose to swap standard light switches for rocker options that require less effort to turn on.
See prices for movers by the hour – instantly.
Read real customer reviews.
Easily book your help online.
Kitchen
Americans with Disabilities Act (ADA)-compliant kitchens have features that are mobility-friendly and tend to avoid fall risks.
ADA guidelines suggest:
- Countertops that are no higher than 34” so they are accessible from multiple positions
- Dishwasher and oven doors that do not fully obstruct walkways when open
- Stovetop controls are at the front so you don’t reach across a hot burner to turn the cooktop off
- Freezer space that is accessible from multiple positions without reaching
Read the ADA guidelines for kitchens and kitchenettes.
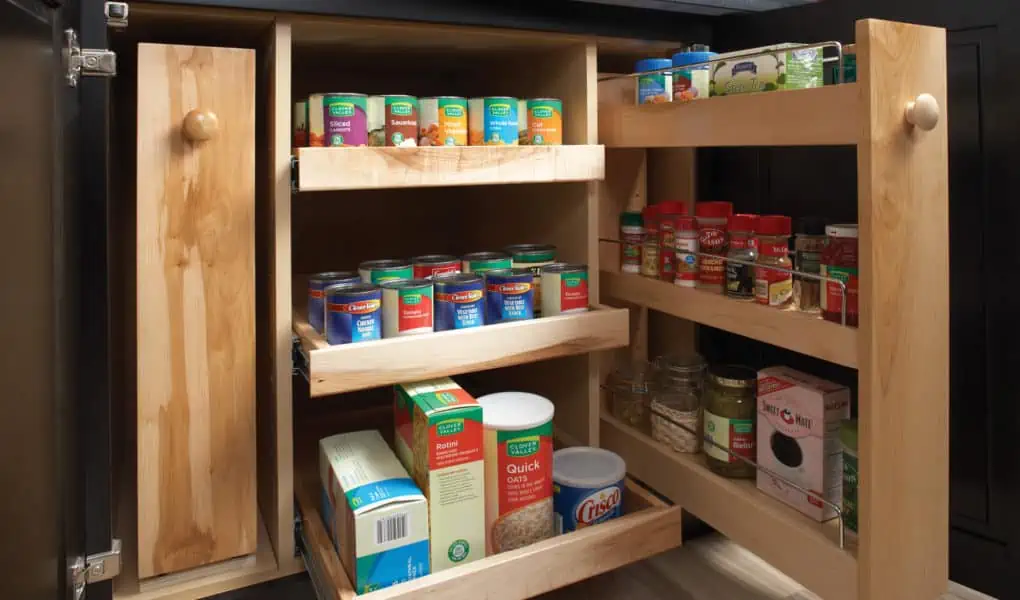
Get pull-out shelving with little or no reliance on overhead storage. This doesn’t mean you can’t have overhead cabinets! But all your cooking essentials should be within arm’s reach from a standing and seated position to avoid fall risks.
Bathroom
Get a back-friendly washer and dryer. Many people find front-loading laundry machines to be more accessible than top-loading options. Additionally, you may choose to raise a front-loading washer or dryer onto a platform to make them the ideal height for loading while standing or sitting.
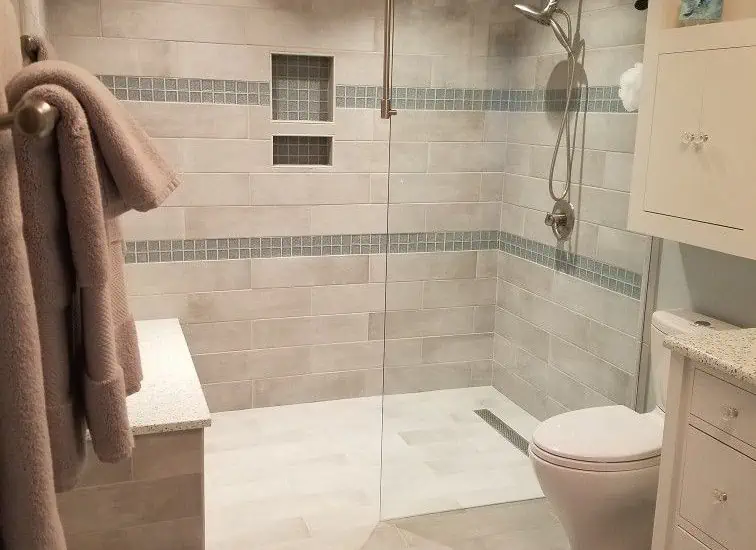
No step shower entrance. By avoiding a high step in and out of the shower, you are greatly reducing fall risks in the bathroom. Any traditional bath/shower combos should be outfitted with grab bars and bathmats for the same reason.
4. “Is the exterior maintenance manageable?”
A beautiful garden or water feature may make a home attractive, but it can become laborious, unsafe, or costly over time.
Assess the level of exterior and yard upkeep, appliance maintenance, and lot size to get an idea of how much effort will be required. This likely means that a home with a manicured yard on a large lot may not be right for you; or perhaps you may plan to renovate existing yard features into lower-maintenance features instead, like container gardens and rock gardens.

If you choose to rent or live in community housing, check if there is a Home Owner’s Association or Condo Association. If so, provided yard maintenance may be included in your fees.
Assess the external materials used in the home to see if they need a lot of maintenance. If possible, see if they can be switched to low-maintenance or longer-lasting options, including:
- Vinyl fencing
- Concrete, stone, brick, or composite stairs
- Seamless gutters with gutter guards
5. “Are there electrical and fall risks to address?”
In retirement, a quirky home can gradually become a safety risk. All too often, we don’t realize a hazard until it causes damage. These are important elements to address as soon as you move into your new home.
Electrical Hazards
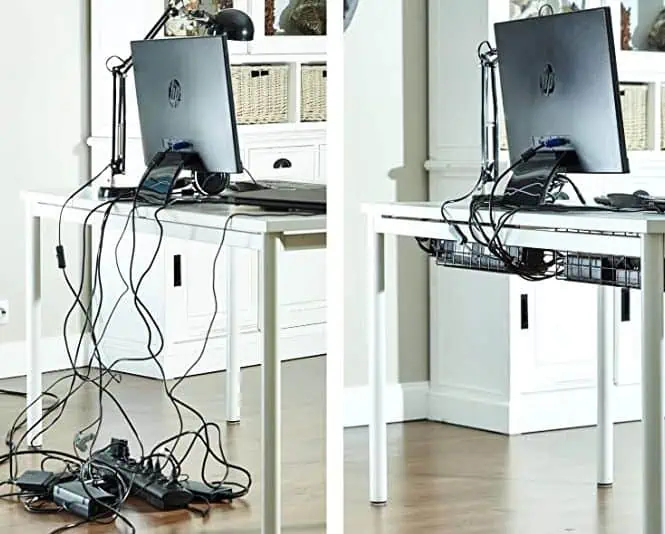
Plan the placement of your electrical equipment ahead of time to reduce cords trailing across walkways. Once installed, practice good cord maintenance to avoid trips.
Use velcro to bundle extension cords together, and lay it all flat with a cord cover, whenever possible.
Opt for appliances with retractable cords when you can. Usually seen on vacuums, retractable cords pull back into the device for easier storage and less tripping.
Swap regular light switches for rocker styles that are easier to operate, especially in the dark.
Fall Hazards

Tack the edges of all carpets and area rugs to help prevent trips and falls. You can also consider removing these floor coverings and replacing them with durable, slip-resistant, hard surface flooring to eliminate the issue altogether.
Use anti-slip flooring or nonslip rugs in bathrooms. Bathrooms are a major source of falls due to moisture and heat, as well as slick tiling that is often used in these areas.
Install grab bars anywhere you transition from sitting to standing. Most often, these are helpful around the toilet and in the shower, but can also be added anywhere you need more support.
Add railings along outside walkways, especially those you’ll be navigating in the dark.
Add motion-sensor lights to dark areas both indoors and outdoors to maximize pathway visibility at all times.
How To Have a Smooth and Low-Stress Moving Day
When you’re ready to sell your home and buy a new one, it’s important to plan ahead, which includes the move itself. Here are a few tips to help make your moving day go smoothly:
- If you’re downsizing, start the packing process well in advance, as you’ll be donating, giving away, or throwing out a lot of items. Sentimental items can be especially difficult to sort through, so give yourself extra time with special memories.
- Use an app to plan how your furniture will fit in your new place. Design apps like Sweet Home 3D and Room Planner allow you to virtually mock up your space and existing furniture to decide what will (and won’t) fit after you move.
- Pack a suitcase with your clothing, toiletries, and medications so they are available to you as soon as you arrive. Unpacking may take several days, and this way you’ll have everything you need without looking through boxes.
Finally, consider hiring professional movers to help take the physical and mental stress off of you. A moving company can help with all the packing, loading, and unloading of bulky items like furniture and appliances. Plus, it just makes the entire process easier.


