Tips for Moving Into a Floating Home

Author:

Publish Date:

Last Modified Date:

Category: Moving Advice

Tags: Tags: , , , , , , , , , , , , , ,

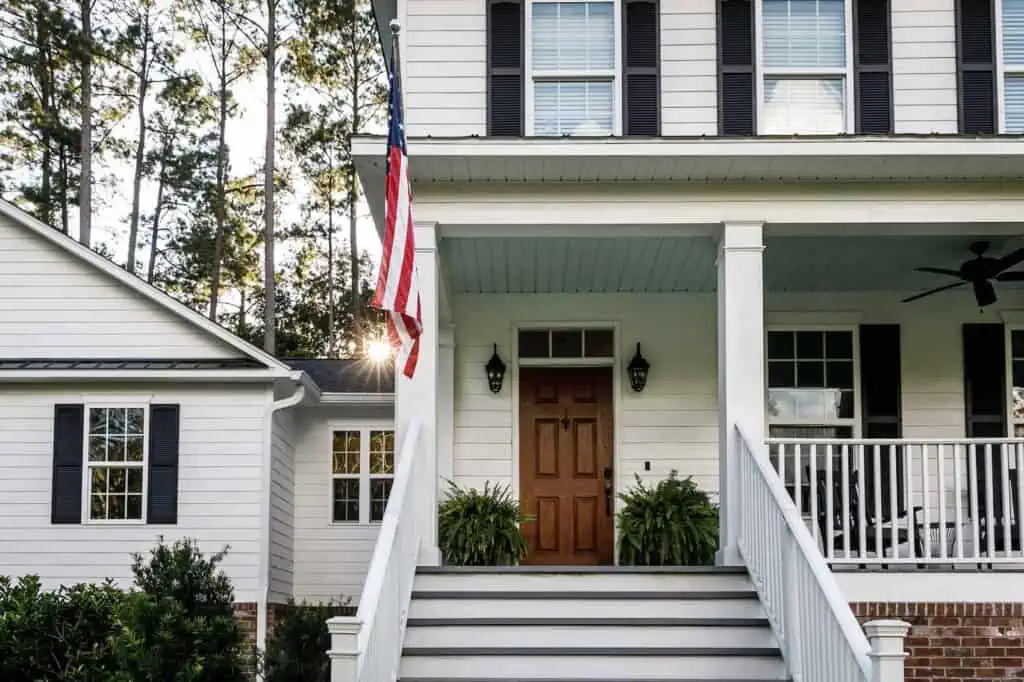
A floating home is usually positioned on calm waters, such as on a lake, bay, or river. This twist on the traditional home is a unique way to embrace the peacefulness of nature while still having the convenience and comforts of a standard house.

If you’ve ever wanted to learn more about what it takes to own a floating home, this guide gives a good foundation for what you need to know. We cover the important topics, such as whether the house can drift off in the middle of the night (spoiler: it can’t). We’ll also go over what qualifies as a floating home, the pros and cons of owning one, tips for making the purchase, maintenance, and more.


What Is a Floating Home?

A floating home is a permanently moored house built on a buoyant foundation, allowing it to rest on a lake, a river, or another calm body of water. It provides all the conveniences of a land-based home with a deck as your backyard and the water surrounding you.

Pros and Cons of a Floating Home

a boat taxi drives by a floating home neighborhood

Living in a floating home has its charms, but it’s not all sunsets and peaceful water views. Like any home, it comes with trade-offs. Here’s a quick look at the pros and cons to help you decide if it’s the right option for you.

Pros:

  • Unique lifestyle: A floating home provides a serene environment. Expect beautiful water views and a lifestyle that keeps you in touch with nature. Plus, it’s always a great icebreaker to mention you live in one.
  • Community: Many floating home communities are tight-knit with neighbors who share a love for the water.
  • Fishing access: Whether it’s morning casting from your deck or weekend excursions, living on the water makes it easy to fish as often as you like.
  • Potential for appreciation: In some areas, floating homes can increase in value. This is especially true where unique homes and lifestyles are in high demand.
  • Space efficiency: Floating homes often have efficient and innovative design solutions to maximize limited space. This can be great if you’re interested in a minimalist lifestyle.
  • Less environmental footprint: Depending on the location and setup, floating homes can have a smaller ecological footprint than land-based homes. Some floating homes are also designed with sustainability in mind, using technologies such as rainwater harvesting, solar panels, and water turbines for energy.

Cons:

  • Maintenance: Floating homes endure constant wear and tear from water and moisture. This leads to potential issues such as rust, rot, and mold. Regular maintenance is a must.
  • Financing and insurance: Getting a purchase loan and insurance for a floating home can be trickier and sometimes cost more than for a traditional home.
  • Vulnerability to natural elements: Floating homes are usually more at risk of rising water levels, storms, and flooding.
  • Utilities: Many floating homes hook up to the city’s utilities, but managing water, sewage, and electricity can be more complicated than on land. Additionally, internet and TV service may be spotty.
  • Resale potential: The market for floating homes can be niche. Depending on the region and economy, selling a floating home may take longer than a conventional home.
  • Regulations: Floating homeowners may face challenges related to zoning, maritime laws, or changing regulations. This may affect moorage rights or the ability to rent out the home.

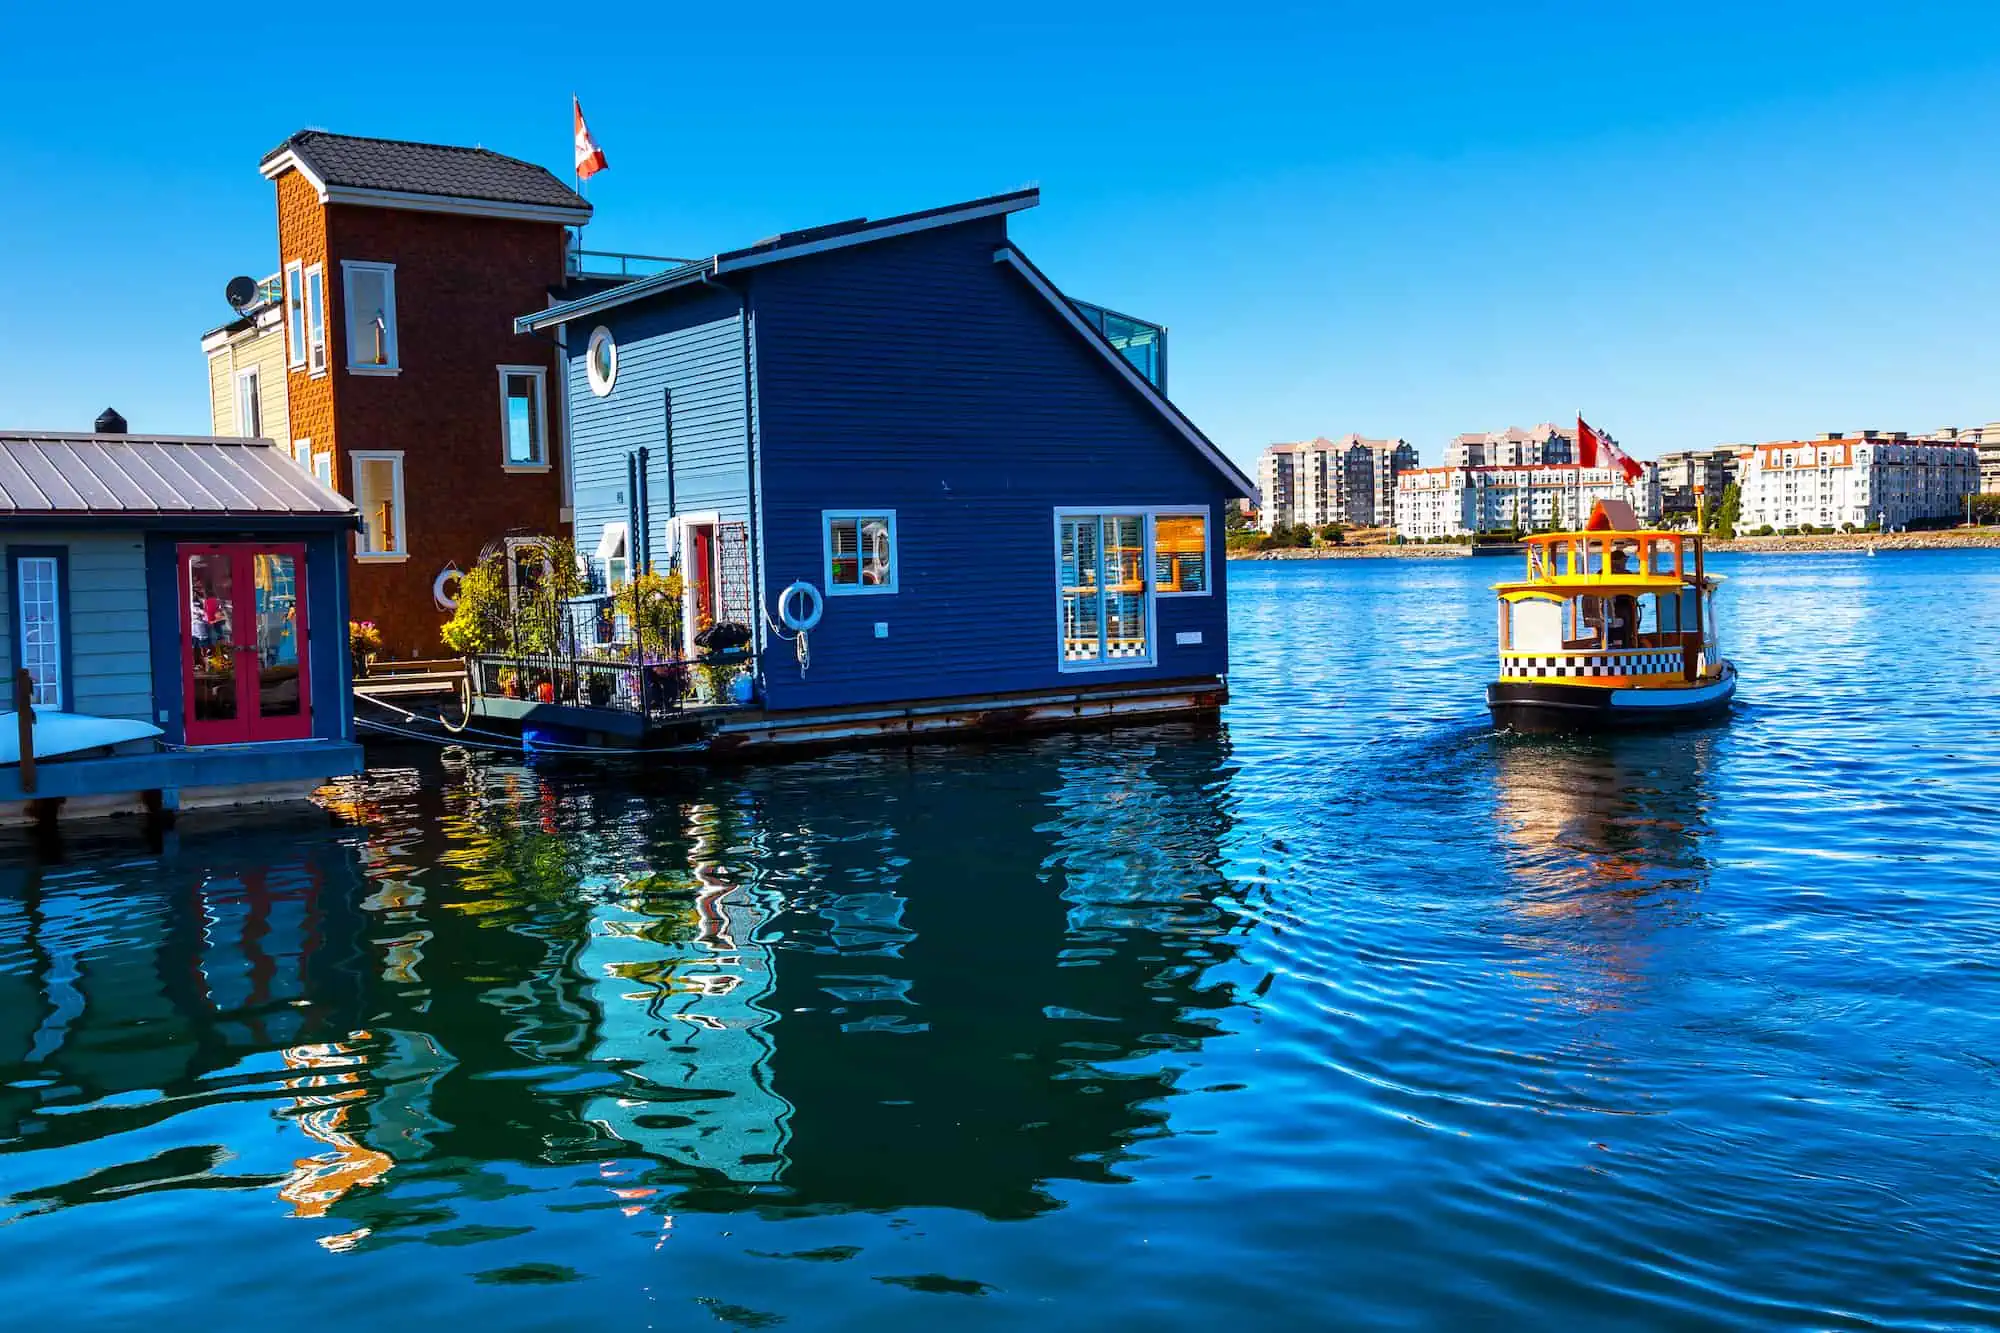
Houseboat vs. Floating Home: What’s the Difference?

houseboats on a river

Houseboats and floating homes are both dwellings that are designed to be on the water, but they have some differences.

As the name implies, a houseboat is a boat that has been designed or modified to be used primarily as a home. Because it’s a boat, it has its own means of propulsion and can travel from place to place. Houseboats are typically moored at marinas.

A floating home, on the other hand, is typically moored or anchored in a specific location and doesn’t move. Also, it’s often connected to local utilities, similar to land-based homes.


What to Know Before Buying a Floating Home

Buying a floating home can be a tedious process. As tempting as it may be to rush out and find your own piece of floating real estate, it’s important to have an idea of what you’re getting into first.

How the Homebuying Process Works

The steps involved in buying a floating home can vary depending on your situation and local laws. For example, you can skip the financing step if you’re buying your new place outright. However, knowing about the general process can help you prepare for a task that will likely take several months to complete.

Set a Budget

Consider all the financial aspects, including how much you can put down if you need a purchase loan.

And don’t forget ongoing expenses! They can vary depending on several factors, including the size and condition of the house, the cost of moorage fees, how eco-friendly the home is, and insurance prices.


“Just like in a moving truck, you have to distribute weight evenly in your floating home. Putting too much weight in one area can cause it to tip, potentially leading to damage over time.”


Also, plan to set aside 3 to 6 months of living expenses in an emergency fund. The NerdWallet Emergency Fund Calculator can help you determine how much you should ideally put aside.

Get Pre-Approved

If you need financial assistance, make sure you take the steps to get pre-approved for a loan. Contact a local lender that offers specialized loans for floating homes before you start browsing, so the process can move more quickly.

Hire a Real Estate Agent

Consider hiring a real estate agent, especially if you’re new to this type of buying process. Having professional guidance can save you a lot of time, stress, and money in the long run.

Browse Floating Homes

Do an internet search for “floating homes for sale in”, followed by your state name. Include a city name for more localized listings. Most will be For Sale By Owner (FSBO) or listed by a realtor.

Make an Offer

Move fast (but strategically) once you find a floating home you love. The supply is limited, and you don’t want to miss out.

Apply For a Dock Lease

You’ll own the home but not the area under it, which means you must apply to lease the space. The marina has to approve you to lease the slip. The exact timing of this step can vary, but it typically occurs before the closing.

Get the Necessary Inspections and Permits

Call the city to find out exactly what you need, but a flotation inspection (typically involving underwater components) and a home inspection (of the house itself) will enable you to fully understand the condition of the floating home.

Close the Deal

If everything looks good, you can review and sign the papers, pay, and officially take ownership of the floating home.

Set Up Your Utilities

Call the local utility companies and put the services in your name. Do this ASAP, preferably before moving in.

Budgeting for a Floating House

Floating homes come with a unique set of upfront and ongoing costs. Some mirror those of traditional houses, but others are specific to life on the water.

Upfront Costs

  • Purchase price: The cost of a floating home can vary widely based on factors such as location, size, condition, and features. Prices can range from a few hundred thousand to over a million.
  • Inspection fees: Make sure there are no hidden issues by getting an inspection from a pro who has experience with floating homes. Your lender may even require it. This involves a dive survey to check out the underside of the house; it usually costs between $500 and $1,000.
  • Down payment: Depending on the financing type, the down payment may be higher than what’s typically required for land homes.

Ongoing Costs

  • Moorage fees: If you don’t own the slip where your floating home is anchored, you’ll need to rent the space. This can be a significant monthly cost, which usually covers water, garbage, sewage, parking, and maintenance of common areas.
  • Homeowner association (HOA) fees: If your floating home is part of a community or marina with shared amenities, you may have to pay HOA fees in addition to the slip/moorage fee.
  • Utilities: You’ll likely be responsible for covering the cost of additional utilities such as internet, gas, and electricity.
  • Insurance: Floating homes require a specialized insurance policy that covers potential risks such as sinking, flood damage, and storm-related damage. Costs can vary significantly, especially by company, so do your research.
  • Financing costs: Floating homes don’t typically qualify for a traditional mortgage. Applying for a personal loan or a specialized floating home loan are two options to consider.
  • Maintenance: You need to factor in maintenance costs with any home, but life on the water comes with special tasks.

Maintenance and Upkeep

a person cleans off their deck with water and a brush

Floating homes can often cost less to maintain than traditional houses, but they have unique upkeep needs. Here are some areas and tasks to add to your checklist.

  • The hull: It’s at risk of water damage and marine growth, and it may also experience cracking, depending on the build material. Don’t skip regular inspections! Carefully do self-inspections every few weeks. Schedule professional inspections annually (at the very least) and after bad storms.
  • Corrosion: Metal parts or fixtures, especially ones near or below the waterline, are susceptible to this issue. Quickly treat areas that show signs of corrosion.
  • Waterproofing: Check the inside and outside of the home for potential water leaks or areas where water could get inside. That includes the roof, walls, windows, and doors. If you find any leaks, take care of them ASAP to prevent further water damage.
  • Utility connections: Utilities such as electricity, water, and sewage are typically connected via lines that run to shore or a dock. Check these connections for wear or damage, especially since the home can move around a bit.
  • Anchoring and mooring: Make sure that the home’s mooring lines, anchors, and related equipment are in good condition. Look for wear, chafing, or any signs that a failure could be on the horizon.
  • Decks: They can degrade over time since they’re exposed to the elements, so check, clean, reseal or restain, and repair decking as needed.
  • Ventilation and humidity: Floating homes can be prone to moisture and humidity problems. Good ventilation is necessary. Invest in a quality dehumidifier.
  • Pests: Water often welcomes pests, including rodents and insects. Use preventative measures to keep them away.
  • Safety equipment: Keep life rings, fire extinguishers, smoke alarms, and other safety equipment on hand at all times.
  • Winterizing: If you’re in a location with cold winters, there’s the potential for freezing. Go through a winterizing process, which includes insulating water lines and using heat tape to keep them from freezing. Floating homes in extremely cold climates may also need a bubbler system or agitator to prevent ice from forming around the flotation system.

How Insurance Works for Floating Houses

Floating houses have additional risks of damage, including the risk of sinking. This means that standard homeowners’ insurance won’t cut it. You’ll need to look into specialized coverage made specifically for floating homes.


“You’ll own the home but not the area under it, which means you must apply to lease the space. The marina has to approve you to lease the slip.”


Costs and coverage can vary by carrier. Most will offer multiple policy options, but it’s usually worth skipping the cheapest policy in favor of the most comprehensive. You can hope nothing goes wrong, but at least you’ll be prepared if it does.

Start by doing an internet search of “floating house insurance in [state].” Make sure to compare at least three quotes from different carriers to make sure you’re getting the best deal.

Accessibility

Being surrounded by water means it’s important to anticipate potential communication issues and plan for emergencies.

  • Parking: Moorage fees are what you pay to basically “park” your floating home. Parking your vehicle is another story. You may need to get a separate permit or pay an additional fee.
  • Availability of utilities: If you live in a floating home community, chances are your local utility companies already service many of your neighbors. Contact the companies before moving in to learn more about average monthly costs, what setup entails, and what they do if service goes down.
  • Cell phone service: Upgrading to the newest cell phone can be beneficial when you’re living in a floating home. Newer models usually have better connection capabilities than older ones, which helps if you’re in an area that’s not near a major metro.
  • Emergency planning: Keep emergency supplies on hand, such as life vests and first aid kits. You should also create a comprehensive emergency plan that’s based on your location. This may involve contingencies for fire, flooding, hurricanes, tornadoes, power outages, tsunamis, or earthquakes.

Tips for Moving Into a Home by the Water

a ferry and barge that can carry people and large items like cars across the water, which is helpful when moving into a floating home

So is moving into a floating home any different from moving into a house on land? Yes! You’re still going to have to box up your belongings and transport them to your new place (maybe with the help of professional movers).

But keep these extra tips in mind so you’re ready for the big day:

  • It’s wet out there: Use waterproof packing materials whenever possible, and give extra care to fragile items. Don’t forget to stay away from the edges when walking, and wear sturdy footwear with good traction.
  • Transporting your belongings: Your home may only be accessible by boat, which means taking several trips back and forth. Don’t waste that time when you could rent a barge service and move everything across the water in one shot. Some even allow you to drive the moving truck aboard.
  • Weight distribution: Just like in a moving truck, you have to distribute weight evenly in your floating home.Putting too much weight in one area can cause it to tip, potentially leading to damage over time. Make sure your belongings are evenly distributed from front to back and side to side.

Your best option is to work with a professional moving company that has experience relocating floating homes. The simplest way to find an experienced company is to look up and contact movers in areas like San Francisco or Seattle.


Living Sustainably in a Floating Home

If you’re one of the many homeowners concerned with living sustainably, coming up with a plan can help you do just that. Let’s talk about some of your options.

  • Water conservation: It’s similar to what you would do in a traditional home. For example, stick to shorter showers (about 5 minutes), upgrade your showerhead, and turn off the water while brushing your teeth.
  • Solar energy: Solar power isn’t just great for cutting down your electricity bills and doing good for the environment. It can also be helpful during a power outage, keeping some or all of your power running, depending on your setup.
  • Graywater systems: A graywater system is a setup that collects used water from certain areas such as tubs, showers, and bathroom sinks (not toilets). Instead of going to a septic system, the water is filtered and redirected for non-potable uses, such as irrigation.
  • Composting toilets: A composting toilet isn’t hooked up to a regular plumbing system and doesn’t even use water. Instead, the waste goes into a special chamber where it breaks down naturally.
  • Eco-friendly building materials and floating platforms: If you’re building your floating home, ask the builder to focus on using eco-friendly materials whenever possible. They’ll typically go over the design plans with you before construction begins.

Give Your Home an Impactful Impression: The Complete Guide to Real Estate Photography

Author:

Publish Date:

Last Modified Date:

Category: Buying & Selling a Home, Moving Advice

Tags: Tags: , , , , , , , , , , , , , , , , , , , , , , , , , , , , , , ,

What if I told you that posting photos of your home online might just be the key to catching its next owner’s eye?

According to the National Association of Realtors, 96% of all home buyers search for homes online. Nine out of ten buyers below the age of 57 said photographs were the most useful feature during their search for a new home.

These numbers are enough to make any homeowner sit up and take note. Home buyers want to walk through a home online before they take a tour in person, and high-quality photographs let them do exactly that.

Read on for a step-by-step guide on how to take real estate photos that’ll have your home off the market in no time.


What To Do Before You Start Taking Photos

Before you whip out your camera to start getting all the best shots of your property, there are a few things to consider and make decisions about.

DIY or Pro?

a woman looks at images on a professional digital camera seated at a desk with a large monitor

Let’s take a moment to consider whether you should hire a pro or go the DIY route for your property photos. There’s no right answer — whichever you choose will depend on what works for you!

Reasons to hire a professional photographer

  • A real estate photographer has the skills, experience, and equipment needed to make your home appeal to potential buyers.
  • Shooting your home yourself and getting publish-ready photos can take a fair bit of time, especially if you’re not comfortable behind the camera. Hiring a pro can be a much faster experience.
  • You’re more likely to get high-resolution, perfectly lit photos that meet industry standards.

Reasons to DIY

  • Hiring a real estate photographer can cost you several hundred dollars, depending on the size of your house and the number of photos you request. There’s a cost involved in taking your own too, but there’s no cap on how many photos you end up with.
  • You have the flexibility to shoot (and reshoot) at your convenience without coordinating with someone else’s schedule.
  • There’s less complexity in simply getting the equipment and doing it yourself. There’s no need for contracts, and you own all the photos you take.

Rules and Regulations

a landlord discusses plans with a couple of tenants

Depending on if you’re renting your home out, you have an HOA, or you want to use certain equipment for photos, there are some legal considerations you should be mindful of.

  • Check with your tenants: You can sell a home you’re currently renting. Still, you should check your rental agreement — and tenants’ rights in your state — to create a reasonable timeline for the entire sale process that will eventually include viewings and asking the tenant to vacate. And always ask permission before you come into the home to make changes.
  • Get permission from the HOA: If you live somewhere where there are amenities (like a gated community), there might be guidelines or restrictions about taking and using photographs of common areas or the exterior of the building. It’s best to check with the HOA, community guidelines, or other community oversight committees to make sure you’re in the clear.
  • Register drones for aerial shots: Unfortunately, using drones to take photos to help sell a property doesn’t fall under recreational use according to FAA guidelines. You’ll need to register your drone and get a Remote Pilot Certificate before taking and using any photos for your home sale. The FAA website has all the steps and information you need to fly and photograph with your drone legally.

Invest in the Equipment You Need

Photography equipment, including dsl camera, tripod, lenses, and lighting are all displayed on a shelf

There’s no doubt smartphone cameras can take some stunning photos today. But photographing a home for sale is more than just point and click. You’ll likely need to invest in good quality gear that will help you take the best photos possible.

Photography equipment can be expensive to buy, but the good news is that you can rent almost everything you need at a fraction of the price.


“Aim to get photographs you can work with straight out of the camera. Think of the editing stage as a way to boost good photos, not to salvage bad ones.”


If you prefer to get a feel for the equipment or hands-on advice before renting it, look for a local camera shop. The staff may also be willing to give you a quick tutorial on how to use the gear.

If you’re comfortable shopping online, Lensrentals and BorrowLenses have all the equipment you need from the best brands on the market.

Camera types

a woman looks over different types of cameras and lenses on the table in front of her

DSLR cameras are a good bet because they capture high-resolution photos and give you greater control over how the photos turn out. Full-frame cameras, on the other hand, perform better in low-light conditions and can capture more of a room in a single shot. Image stabilization is a must-have feature that helps reduce blur from minor hand movements like pressing down on the shutter.

Lenses

Wide-angle lenses in the range of 20mm to 24mm are often the go-to choices for interior photography. They’re wide enough to capture more of a room and make it appear large, but not so wide to make the room look distorted. Look for a lens that also has image stabilization.

Tripod

a camera on a tripod sitting on top of a coffee table in a living room

Shooting interiors often involves dealing with less-than-ideal light conditions. In low light, your camera’s shutter needs to stay open longer to let in enough light to properly expose the image. The longer the shutter is open, the more susceptible your photo is to camera shake — even with image stabilization in your camera and lens. A tripod helps you get around this by holding the camera steady throughout the exposure. It also helps with HDR and bracketing.

Lighting equipment

Even the best camera and lens in the world won’t save a photo in bad light. Lighting equipment can help you create the ideal light conditions to make your home look inviting. Some items to consider are an external or bounce flash to use on your camera, a softbox or umbrella for external lights, and reflectors or diffusers to bounce light into darker areas. Don’t use the flash that’s built into the camera as you can’t adjust its angle.

Drones

a drone with a camera attachment hovers in front of a house

Aerial shots are optional but worth considering because they can give home buyers a comprehensive bird’s eye view of your property, including the land and any outbuildings. You’ll need to register your drone with the Federal Aviation Administration (FAA), so you might want to consider buying your own instead of renting.

Memory cards

Having multiple high-quality memory cards ensures you’re getting the best possible storage for your photos — “multiple” being the key word. It might seem convenient to grab one massive memory card and call it a day, but memory cards can get corrupted. If that happens, you could lose every photo you’ve taken. Spread your photos across multiple cards to minimize the risk. This is an item on the list you could consider buying instead of renting, because the cost difference between renting and buying isn’t significant.


Learn About Composition and Framing Basics for the Perfect Shot

Before you hit that shutter, you need to think about how the elements in your frame come together to tell a story. This is where composition and framing come into play, with the rule of thirds and leading lines.

Rules of thirds

a living room with a fireplace and coffee table
An example of the rule of thirds. The coffee table and fireplace are set along the lines of the invisible 3 by 3 grid

This is a classic photography principle that adds balance to your photos. To understand how it works in practice, pull up your phone camera and set the grid to show on the screen. You’ll see the frame divided into nine equal parts by two equally spaced vertical lines and two equally spaced horizontal lines.

The idea is to place the most important elements — like your fireplace or kitchen island — along these lines or where they intersect for a more appealing photo.

Leading lines

a set of steps leads up to a porch and front door of a home
An example of leading lines. The banisters on the steps draw the eye to the entryway and porch.

Leading lines are lines you can find within the frame that guide the viewer’s eyes toward the main subject. Look for architectural elements like doorways, edges of furniture, or the lines created by tile flooring.

These can naturally draw someone’s attention toward a focal point in your photo. For outdoor photos, fences or garden paths can be effective leading lines to guide a viewer’s eyes toward your home.


Get Familiar with Your Camera Settings

Take some time to get used to your camera and know what each button and dial does. You’ll see some letters and numbers on the screen that may not make much sense to you right now. Let’s take a look at what these mean.

Aperture, shutter speed, and ISO

a camera set up on a tripod. Someone out of frame is adjusting the settings

These three settings determine what it takes to create a photo with the correct exposure and sharpness.

  • Aperture: This is the opening in your lens that lets light in and is known by a number called ‘f-stop’. Here’s something you absolutely must know: a lower f-stop number means a wider opening, more light, and slightly softer photos; a higher f-stop number means a smaller opening, less light, and slightly sharper photos. For real estate photos, aim for an aperture between f8 and f11. This range usually results in sharper images by getting more of the scene in focus.
  • Shutter speed: This is how long your camera’s sensor is exposed to light. A fast shutter speed (like 1/2000 of a second) freezes action, while a slow one (like 1/30 of a second) can introduce blur. Adobe suggests that for real estate photography, your shutter speed is somewhere between 1/60 and 1/2
  • ISO: This controls your camera’s sensitivity to light. Lower numbers (e.g., 100 or 200) are less sensitive and produce cleaner shots. Higher numbers (e.g., 800 or 1600) are more sensitive but can produce grainy photos. Keep it below 400, especially indoors, to minimize noise.

You can shoot in fully manual or semi-automatic modes. Fully manual means you manually set all three values. It gives you complete control, but does require a good understanding of how aperture, shutter speed, and ISO interact.

In semi-automatic modes, you can adjust either the aperture or the shutter speed, and the camera will automatically adjust the rest. This is a good middle ground if you’re not comfortable going fully manual.

See prices for local moving labor. Read real customer reviews. Easily book your help online.

RAW vs. JPEG

RAW and JPEG are the file types your photos will save in. While JPEG might seem like the easy choice because it’s more commonly used and instantly shareable, RAW ultimately wins because of the control it gives you over the final photo.

  • More editing flexibility: A RAW file retains much more data than a JPEG. This means that when you’re editing the photos, you have more room to adjust things like exposure, colors, and sharpness without sacrificing image quality.
  • Better dynamic range: RAW files capture a broader range of lights and darks, which comes in handy when you’re dealing with varying lighting conditions like a bright window in a relatively dark room.

The main downside to RAW files is that they’re larger and require specialized software for editing. But, given that you want to show off your home in the best possible light, it’s 100% worth the extra memory cards and effort.


Prepare Your Property for the Best Shots

a woman adjusts a small centerpiece on a coffee table in preparation for the room to be staged

First things first: make a list of the shots you absolutely must take. You don’t want to finish your shoot and then realize you forgot to capture something crucial.

Your list should focus not only on your favorite rooms, but also on what rooms will attract buyers. “Potential buyers focus on the kitchen, bathrooms, and living room space in that order because they imagine themselves using those spaces often,” says Peter Kim, CEO of Odigo Real Estate Club.

Here’s a quick list to get you started:

  • Kitchen and living room: At least one shot each, but preferably more. If possible, show how they connect to other parts of the house.
  • Bathrooms: One general shot should do, but if it’s a larger or uniquely designed bathroom, consider additional angles. Highlight features like double sinks, if the bathroom has them.
  • Master bedroom: Focus on the room’s size and any special features, like a walk-in closet.
  • Front exterior: Make a great first impression and highlight the house’s curb appeal.
  • Backyard: If you have one, capture it from an angle that shows how big it is. Show any outbuildings it may have, like a shed or a greenhouse.
  • Other rooms: One shot of any other appealing rooms/areas like a home office or studio, pantry, laundry room, basement, and garage.

Having a list gives you a game plan to follow so you’re not just snapping pictures aimlessly — or forgetting an important room in the process.

Decluttering and staging

a woman dusts off a table in a living room in preparation for a real estate photo

A cluttered room is a photographer’s — and home buyer’s — nightmare. When potential buyers look at your listing, you want them to focus on the spacious rooms, natural light, and other selling points, not the knick-knacks you’ve collected over the years.

Photographer and videographer James Costa suggests doing a thorough clean of the house before you begin — including vacuuming, mopping, and cleaning all counters and windows. Then, he says, remove all the clutter. 


“Don’t go wider than 24mm [lenses]! Extreme wide-angle lenses cause distortion and make the room look unnatural.”


“People need to picture themselves in the home, not the current owners,” says Costa. “You want to make certain you remove personal items such as photos. Put all clothing and shoes away, and other clutter such as keys and mail.”

And once everything’s decluttered, it’s time for staging. Costa shares some of his recommendations:

  • Kitchen: Counter space is king. Remove as much as you can but remember to make it seem livable. Keep a few small appliances such as a coffee maker out and place something colorful like a bowl of fruit.
  • Living room: Arrange books on shelves, and clean the fireplace if the room has one. Fluff all pillows to make them seem more inviting, and hide cables for the TV and other electronics.
  • Bathrooms: Put out fresh, matching towels, lower toilet stands, and consider putting out decorative soap. Remove personal items such as shampoo, and remove floor mats to show off the floors.

Enhancing curb appeal

a man on a ladder paints a windowsill

Curb appeal is essentially how your home looks from the street. And since it’s the first thing buyers see when they pull up for a visit, it sets the tone for the entire viewing.

If potential buyers are turned off before they step inside, you’re already facing an uphill battle, so it’s important to take steps to make a great first impression. 

  • Freshen up the paint: If your front door or shutters have seen better days, add a fresh coat of paint to liven them up. You don’t have to go for a dramatic color change. A simple fresh coat of the existing color can make them look more appealing.
  • Pay attention to landscaping: Trim overgrown bushes, remove dead plants, rake the yard, mow the lawn, and consider adding a few flower pots near the entrance.
  • Put away outdoor tools and toys: Garden tools, lawnmowers, or kids’ toys scattered around can be distracting in photos. Stash them in the garage or a shed to keep the focus on your home.
  • Sweep and power wash: Dirt and grime build up over the years. A quick power wash of your walkway, driveway, and facade can make your home look well-maintained. At the very least, it can remove debris and freshen up the space.

Photograph the Interiors

The beauty of digital photography is that you can review your photos as you take them. If you’re unhappy with the exposure, or you want to swap out a vase for a coffee table book, you can do this as you’re shooting.

Aim to get photographs you can work with straight out of the camera. Think of the editing stage as a way to boost good photos, not to salvage bad ones. Sure, it might take a bit more time during the shoot, but this step can save you heaps of editing time later.

Lighting the room

photography lighting equipment shines light around a yellow couch and dresser in preparation for a photo to be taken of the furniture

Here’s a photography tip for you: lighting is possibly the most important aspect of what makes a good photo. Shooting in natural light sounds hassle-free, but relying solely on the sun can be tricky. The angle of sunlight changes throughout the day, affecting color temperature and shadows in each room. You can use different techniques for more control over how the room looks.

  • Interior lighting: Turning on interior lights can make the space look warm, but they often vary in color and temperature. You’ll need to adjust the white balance during post-processing to get consistent results.
  • Exterior lighting: Use added exterior lights mounted on a softbox or umbrella to light specific areas of the room. This also allows for more control over the temperature and color of the light. If your budget doesn’t stretch to include too much lighting equipment, you can use reflectors to bounce natural light into shadowed areas.
  • Dos and donts of camera flash: You can also use a bounce flash that’s mounted on your camera, but do not point the flash directly at what you’re shooting. Direct flash can create harsh, unflattering shadows and highlights. Instead, bounce the flash off ceilings or walls to create a softer look and reduce glare on shiny surfaces. 
  • Bracketing: This is a process where you’ll take multiple photos at different exposures, which you’ll then combine into one while post-processing to create a more balanced scene. It’s to make light distribution appear more even in rooms where there’s a very bright side (like from windows) contrasted against a very dark one.  The frames must be identical for this to work properly, which is where using a tripod becomes essential.
  • Make use of overcast days: Brighter sunlight is better, right? Not necessarily! Cloudy weather acts as a natural light diffuser, reducing harsh shadows.

Picking the right light is not a ‘one and done’ situation. Each room may need different lighting depending on how big it is, which direction it faces, and how much natural light it gets. 

Convey the depth of the space

a camera with a level attachment is standing in the middle of a room
Level attachments are one way to help keep the camera in the right position

When photographing a room, you want the viewer to get a sense of its layout and size. A poorly executed shot can make a large room look cramped or a cozy room look uninviting. So how do you get it right?

  • Use a wide-angle lens: Lenses in the range of 20mm to 24mm help you capture more of the room in a single frame and make spaces appear larger. Don’t go wider than 24mm! Extreme wide-angle lenses cause distortion and make the room look unnatural.
  • Avoid tilting the camera: “Try to be on level with your main subject and tilt the camera as little as possible,” says photographer Matthias Haltenhof. “In an ideal situation, all images can be photographed at a nearly horizontal level, so you don’t need to correct a lot in post-processing.” Check if your camera has an electronic level setting or buy a hot shoe level. Both methods will show you if your camera is pointing straight into the room or tilting up or down. If you need to shoot something below or above eye level, adjust the height on the tripod instead of tilting the camera.
  • Balance the elements in the frame: Use the rule of thirds and leading lines you learned about to make the photograph look appealing. For each setup, decide what you want to catch the viewer’s eye — is it the reading nook, dinner table, or cohesiveness of the layout — and frame your shot with the composition basics in mind.

Photograph the Exteriors

Getting the right shots of your home from the outside matters just as much as the living spaces inside. Whether it’s the backyard with the swing or a well-lit driveway, the spaces outside your walls should shine in these photos.

Make a great first impression

a woman takes a photo of the exterior of a home with a black iron gate and well manicured bushes

A house that looks welcoming right off the bat can make home buyers stop scrolling and pay attention. Capture your home’s curb appeal so viewers can see what it looks like from the outside.

  • Showcase landscaping: If you have colorful flower beds, a well-manicured lawn, or a unique tree, include these in your shots to add character. If your front or back yard space is small, use angles that make the most of the space, such as photographing from a corner to give a sense of expansiveness.
  • Highlight outdoor elements: Got a pretty mailbox, charming front door, or stylish windows? These are elements that make your home stand out, so get these in the frame.
  • Shoot at the right time: The time of day can dramatically affect the mood of your exterior shots. During golden hour (the first hour after sunrise and the last hour before sunset), the angle of the sun creates a soft, warm, flattering light and is best for general photos. You can use an app to know when golden hour is at your location. Shooting at twilight lets you showcase outdoor lighting and offers a glimpse of what the house will look like in the evenings.

See prices for local moving labor. Read real customer reviews. Easily book your help online.

Show an aerial perspective

Drone photography lets you offer a new viewpoint to your property that displays its size, layout, and the surrounding area.

Before you take to the skies, check if there are any airspace restrictions in your area. You can verify this by directly contacting local authorities or using apps and websites that show no-fly zones specific to drones. The FAA website is a good place to begin to learn more about airspace restrictions.

If you’re all set to go, remember that the basic rules of photography — good light and good composition — apply to aerial shots as well. In addition, you need to be mindful of your drone’s surroundings to avoid it getting stuck in a tree or blown off by the wind.


Edit Your Photos

someone looks over photo prints that have been edited on the computer in front of them

After you’ve taken the photos, it’s time to move them off the memory card and onto your computer to edit them. The goal isn’t to make your house look unrecognizable or deceive potential buyers. You want to lightly enhance your photos and turn good photos into great ones.

Keep in mind, you can outsource this stage of the photography process if you like. There are professional photo editors who offer their services on websites like Fiverr. Check different profiles and reviews before deciding if you’d like to hire someone or edit the photos yourself.

Selecting the right editing software

There are multiple photo editing software options for you to choose from. Adobe Lightroom and Photoshop are industry standards and offer a range of features from basic adjustments like exposure and contrast, to advanced capabilities such as layering and retouching.

You can also use these programs to post-process bracketed images. They’re subscription-based and start at $9.99 per month with a free 7-day trial. Adobe’s tools are powerful options, but there is a small learning curve if you’re not familiar with the interface of Adobe products.


“It might seem convenient to grab one massive memory card and call it a day, but memory cards can get corrupted… [and] you could lose every photo you’ve taken. Spread your photos across multiple cards to minimize the risk.”


Capture One is a good alternative with similar features as the Adobe photography suite. Its plans start at $24 per month with a free 30-day trial.

GIMP (GNU Image Manipulation Program) is a free alternative if you’re looking for a free option. While it may lack some of the polished features of the paid software options, GIMP offers the tools you need for photo editing and is open-source.

Color correction and enhancement

a before and after photograph of someone hanging their legs off of a ledge that has been color corrected
an example of color correction

There are a few basic photo editing steps you should run your photos through. For all the adjustments, use a light hand to keep your photos looking as natural as possible.

  • Adjust the white balance to balance out any varying color temperatures in your photo and to make your house look natural yet warm.
  • Enhance colors and vibrancy to make greens greener and blues bluer in your outdoor photos. Don’t overdo it — oversaturated photos will have the opposite effect and turn buyers off.
  • Retouch images to remove minor imperfections like wall stains.
  • Sharpen your photos and reduce noise to make your photos crisp and reduce graininess that may occur at higher ISO settings or in lower light conditions.
  • Lens corrections automatically adjust any lens distortion and chromatic aberration or color distortion (if the software you use has the option). 

The key takeaway here is moderation. Overediting can make your photos look artificial, and it may also misrepresent the property, which will turn potential buyers off when they come to see the home in person.


Upload Your Photos to Your Home Listing

Your photos are taken and edited, and it’s time to upload them to the listing. But don’t just choose files in a random order! “A common mistake in listing photos is not placing the photos in an order which takes the buyer throughout the home in a continuous way,” says real estate broker Chuck Vander Stelt.

Jumping around from room to room can be disorienting. Instead, think about the route you want potential buyers to take through your home. By following a sensible sequence, the listing can tell a coherent story of what it’s like to move through your home.

Save your photos in JPEG format to upload (not RAW that you shot in), and check the property listing site’s requirements or file size restrictions.


With the photos doing the heavy lifting and showing off your home, you’re all set to get ready for viewings. Next step: changing that ‘For Sale’ sign to ‘Sold’. Good luck!

×

I'm Moving

Moving? Thinking about moving? Whether your move is off in the distance or you already have one foot out the door, you'll learn about everything you should expect through our useful how-to's, cool articles and much more. It's all specially curated for you in our "I'm Moving" section.
Explore
×

I'm a Mover

For rookies or veterans alike, our "I'm a Mover" section is filled with extensive industry news, crucial protips and in-depth guides written by industry professionals. Sharing our decade of moving knowledge is just one way we help keep our professional movers at the top of their game.
Explore