When I was a mover, we always made sure we had some plastic wrap on our truck. Like tape and furniture pads, plastic wrap is an essential part of the equipment list of every moving pro, even if we don’t always use it.
So, if you’re not a mover, do you still need plastic wrap for your DIY move? There are plenty of reasons why you might, and many situations where it would help. But while plastic wrap can be extremely useful, it isn’t always necessary for a successful move.
Let’s get into why and when we use plastic wrap so you can decide for yourself if it will benefit your own move.
Table of Contents
- What Is Plastic Wrap for Moving?
- Why Use Plastic Wrap When Moving?
- Step-by-Step Guide: How to Wrap Furniture with Plastic Wrap
- Our Top 5 Tips for Using Plastic Wrap
- Alternatives to Plastic Wrap for Moving
- FAQs About Plastic Wrap for Moving
What Is Plastic Wrap for Moving?
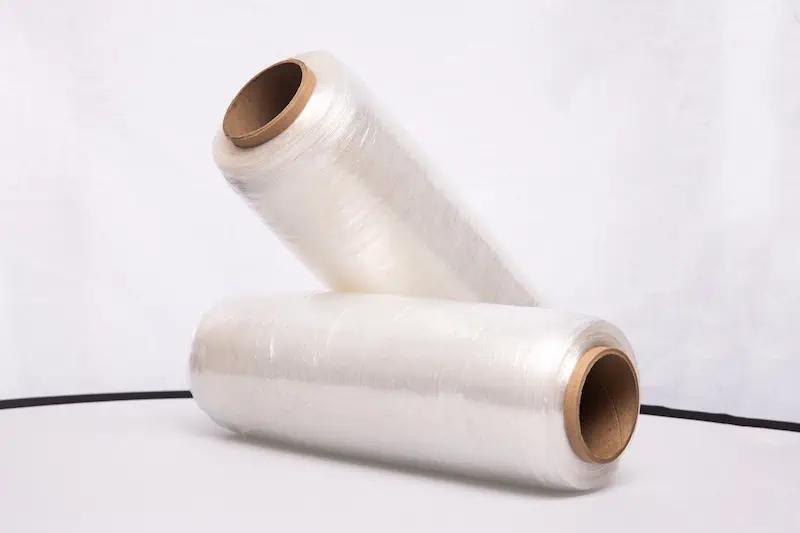
Plastic wrap, also known as stretch wrap, is a sheet of clear, durable plastic that comes in rolls hundreds of feet long. It’s formed in the same basic shape as a roll of Saran Wrap, but don’t expect to find any in your kitchen drawers. A roll of plastic wrap for moving is about eighteen inches long and is quite bulky.
Moving plastic wrap is much thicker, stronger, and stickier than anything you’d use on your leftovers. It’s most often used to wrap large pieces of furniture and major appliances. It also doesn’t come in a box like Saran Wrap, though it does typically come with handles or a dispenser attachment.
There are a few different types of plastic wrap for moving:
- Clear wrap: The most common type, used for general moving needs.
- Heavy-duty wrap: Thicker and tougher, better for large or fragile items.
- Perforated wrap: Has small pre-cut lines so you can tear sections without scissors.
You can usually buy moving plastic wrap at home improvement stores, moving supply outlets, or online. Just make sure you’re purchasing rolls labeled for moving or industrial use. Kitchen-grade wrap is too thin and tears too easily, so it’s not a good fit for moving.
How Much Plastic Wrap Do I Need?
The amount you’ll need depends on how much furniture and other items you’re wrapping. A small one-bedroom apartment may only require 1-2 rolls, while a larger home with 3-4 bedrooms might go through 4 or 5 rolls. If you have lots of upholstered furniture or bulky items, estimate one roll higher than you think you’ll need. In general, it’s always better to have too much than not enough halfway through loading your truck.
Why Use Plastic Wrap When Moving?
Most professional movers use plastic wrap for three reasons:
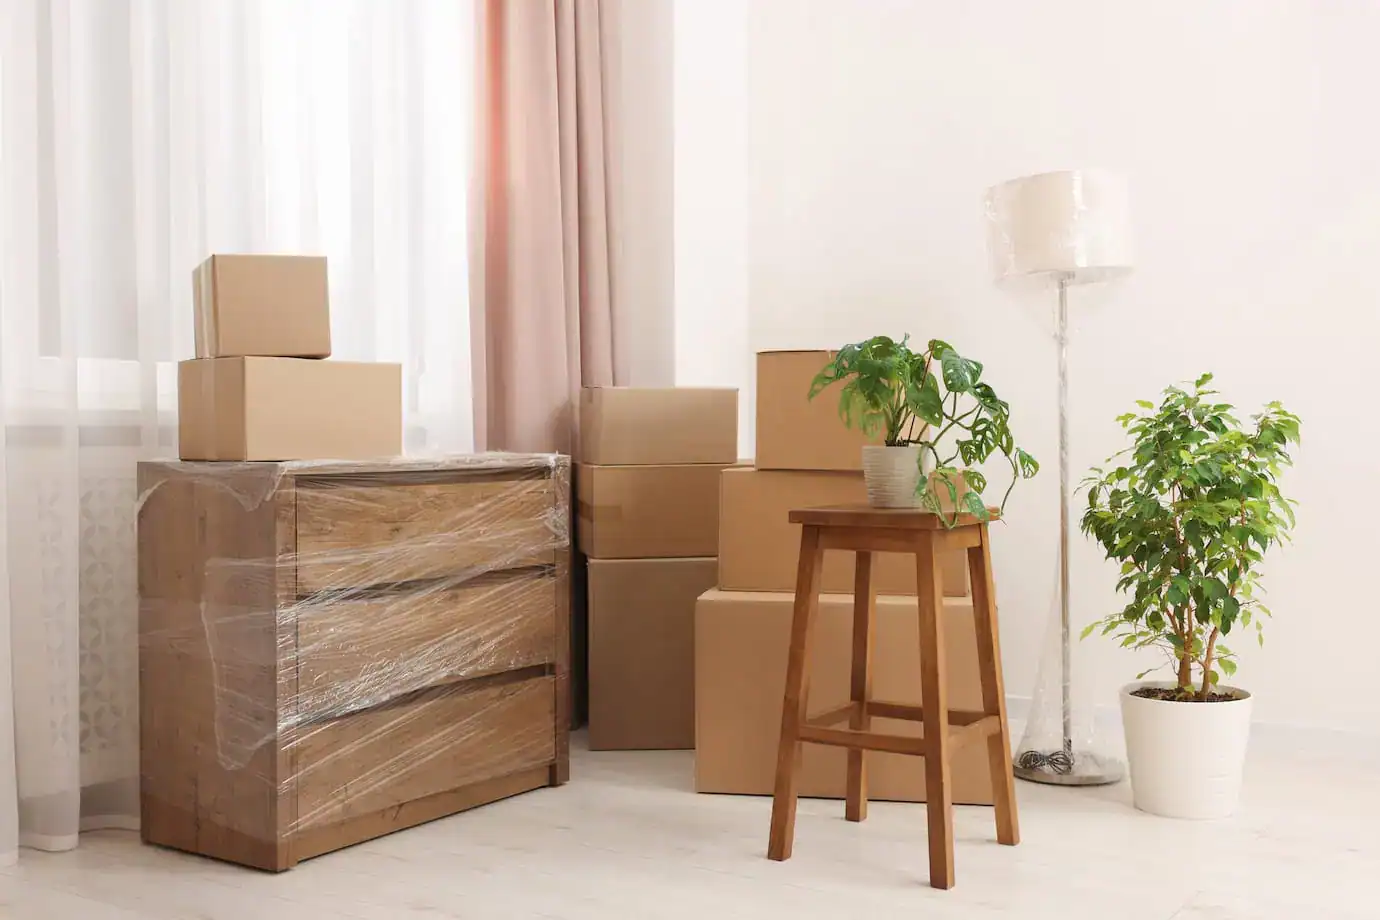
- To keep dust and dirt off of upholstered furniture (overstuffed furniture, or “OS” in mover-speak)
- To keep furniture pads in place around larger items like OS, major appliances, pianos, large TVs, and heavy tabletops
- To keep drawers from sliding out of dressers, keep sofa cushions in place, and prevent the doors on hutches or armoires from swinging open and breaking off their hinges.
Those are the main reasons, but depending on what kind of furniture you have, it can provide a lot of other benefits. Here are some more ways you can use stretch wrap:
- Stabilize office chairs: Wrap a swivel office chair to keep moving parts from shifting around and getting damaged.
- Protect glass surfaces: Place a piece of cardboard over a furniture pad covering the glass of a hutch or curio, then wrap to help prevent shattering.
- Bundle yard tools: Use plastic wrap to keep items like rakes, brooms, or shovels together in a tight bundle.
Years ago, two of my fellow crew members wrapped an entire plastic shelving unit — with everything still on the shelves. This saved about an hour of packing. I generally wouldn’t encourage the practice (since this only worked out because there was nothing heavy on those shelves), but you can see how plastic wrap can be used in some pretty unique ways.
Since plastic wrap is generally used for larger objects, when we, the movers, use it, we tend to use a lot. Unfortunately, plastic wrap is not something we can reuse, so when the move is over, all that plastic ends up in the trash. Just something to keep in mind as you plan your move.
The 10 Best Uses for Plastic Wrap for Moving
Plastic wrap is one of the most versatile packing supplies you can use on moving day. Beyond just covering furniture, it helps secure, protect, and bundle items in ways that tape or boxes can’t. Here are 10 practical ways movers rely on it:
1. Protect upholstered furniture
The barrier of the wrap keeps couches and chairs safe from dust, dirt, and stains. Make sure you leave a small opening so moisture doesn’t get trapped and cause mold during storage.
2. Secure furniture pads
Once your furniture is covered, pads are essential for protecting wood, appliances, and fragile finishes. Plastic wrap holds them in place more securely than tape, ensuring they don’t slide off during loading. Remember to always wrap from top to bottom so pads stay snug.
3. Keep drawers closed and their contents intact
Beyond pads, plastic wrap also helps with furniture that has moving parts. Instead of emptying every dresser drawer, wrap the whole piece with drawers still inside. This prevents them from sliding open and spilling lightweight items like clothes or linens. But, you shouldn’t leave fragile or excessively heavy items inside because they can break or damage the furniture, or make the piece too weighty to lift safely.
4. Hold cushions in place
Cushions are another part of furniture that often causes trouble in transit. Sofa and loveseat cushions slip off easily, but wrapping them tightly keeps everything together and prevents them from ending up on dirty truck floors. Some movers even wrap cushions separately to use as extra padding.
5. Wrap glass doors and fragile surfaces
When dealing with delicate glass, extra protection is key. For hutches, curios, or cabinets with glass panels, layer cardboard or a furniture pad first, then secure with plastic wrap. This double layer helps prevent shattering if the item shifts. However, never apply plastic wrap directly to bare glass long-term, since it can create stress points that cause cracks, or it can leave behind sticky residue that’s hard to clean.
6. Bundle loose items together
Plastic wrap isn’t just for furniture — it’s great for organizing awkward items, too. Yard tools, curtain rods, or sports gear are hard to box, but wrapping them into one tight bundle saves space and keeps them from scattering. Place cardboard at one end to prevent sharp edges from poking through.
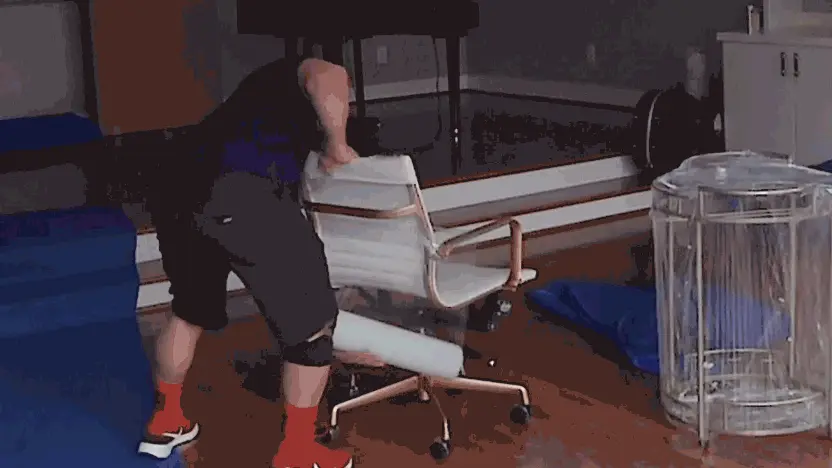
7. Stabilize office chairs and moving parts
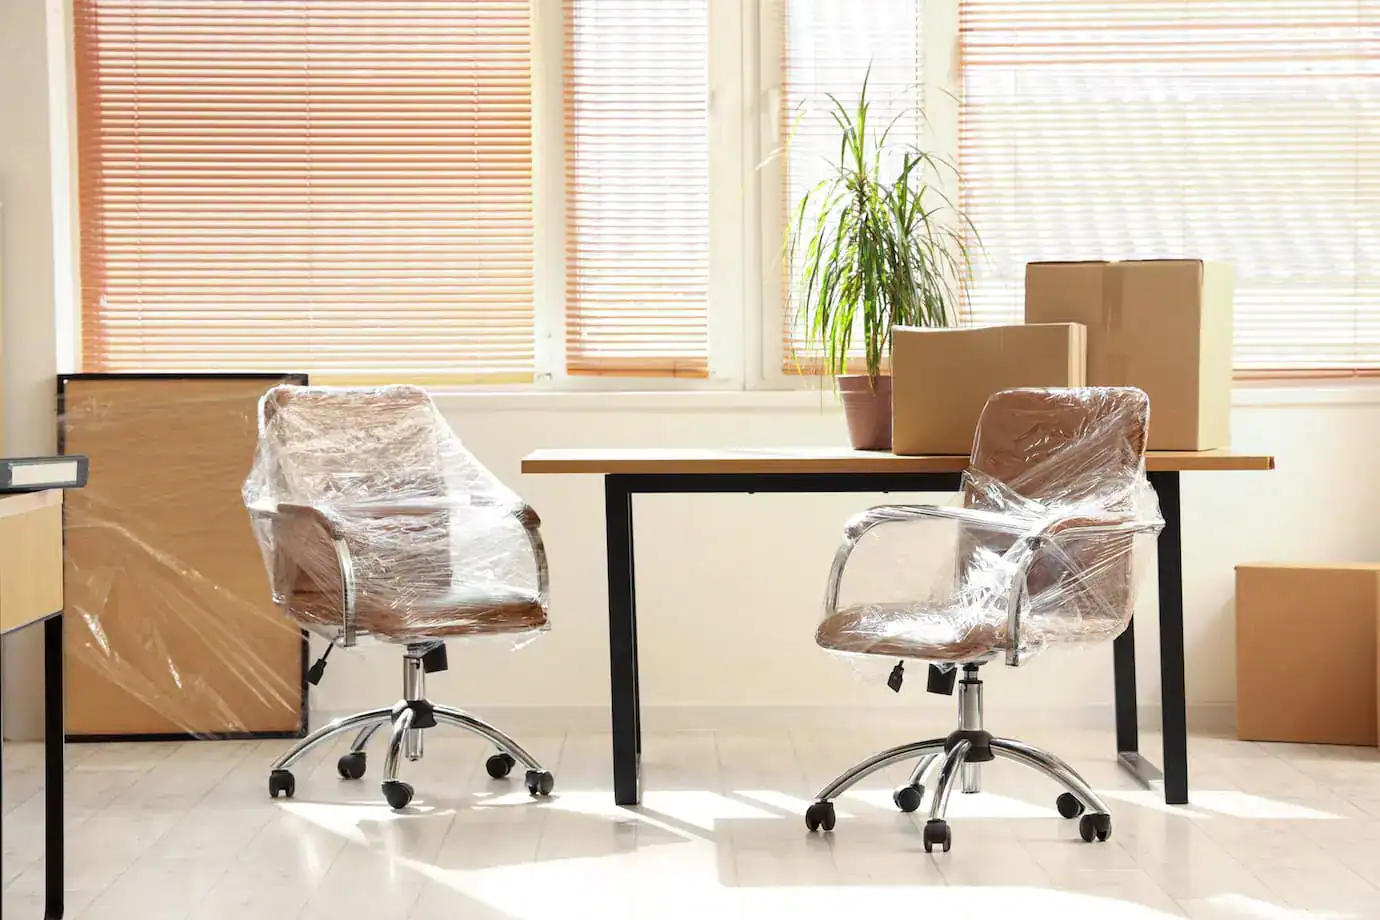
Just as it keeps bundles under control, plastic wrap also helps with furniture that moves too much. Chairs with wheels or swivels can get damaged if parts spin or twist in transit. Wrapping them keeps armrests, wheels, and backs in place. This also works for recliners, exercise equipment, and other items with moving parts.
8. Wrap mattresses and box springs
Beyond small items, plastic wrap also works on bulky pieces. It protects mattresses from dirt, dust, and spills during transport. For long-term storage, use a breathable mattress bag instead, but for moving day, plastic wrap provides quick, effective protection.
9. Protect large TVs and electronics
Electronics require extra care, and plastic wrap can help. Flat-screen TVs are fragile and expensive, so it’s a good idea to first wrap them in a moving blanket, then add plastic wrap to hold it in place. This prevents the blanket from slipping and adds light moisture resistance.
10. Secure cords, rugs, and odd-shaped items
Finally, plastic wrap makes hard-to-pack items easier to manage. Loose power cords and cables can get tangled, damaged, or lost. Instead of just tossing them into a box, you should wrap them onto their appliance or device with stretch wrap. Plastic wrap also keeps rugs rolled tight and makes irregular items like bikes or floor lamps easier to move without snagging. It can also seal the lids of cleaning supplies to prevent leaks.
When Is Plastic Wrap Unnecessary?
One main use of plastic wrap is to protect upholstered (overstuffed) furniture. If you don’t have any OS, then there’s one less reason to need plastic wrap. If you have OS but you’re only moving a short distance, it may not be worth the bother or the expense of wrapping it.
Also, even if you’re only moving a short distance, I’d recommend using pads for your furniture and any major appliances. Pads can be kept in place with tape — the same kind you use when packing stuff in cardboard boxes. Tape may not be as effective as plastic wrap, but if you only have a few items that need to be padded, buying a five-hundred-yard roll of plastic wrap may not make sense for you.
“…[you’ll] want to avoid rolling plastic wrap across the floor, your driveway, or the floor of your truck or container. Even one small rock can nick the surface, causing the plastic to pull apart in pieces the next time you try to use it.”
Likewise, some well-placed tape can keep dresser drawers and China hutch doors from opening and dumping out all your stuff or breaking. Just don’t put tape directly on the wood!
In short, tape can do much of what plastic wrap does, just not quite as well. Keeping furniture pads in place is one thing, but to keep dust and dirt off your OS, you’d be much better off with plastic wrap.
Step-by-Step Guide: How to Wrap Furniture with Plastic Wrap
Plastic wrap only sticks to itself, not to your furniture. That’s why it’s important to anchor it properly and keep steady tension as you wrap. Done right, it will protect your upholstered furniture from dust and dirt, keep drawers and doors shut, and hold furniture pads in place for the trip. To get that plastic-wrapped tight right from the start, you’ll need to do the following:
Step 1 — Gather Supplies
Before you start wrapping, get everything ready:
- Rolls of plastic wrap for moving (wide rolls work best for large furniture).
- Moving blankets or pads for cushioning delicate areas.
- Scissors or a box cutter for cutting the wrap when you’re finished.
- Work gloves to protect your hands from friction burns while handling the roll (yes, they happen).
Some rolls come with plastic handles that act like a rolling pin. In my experience, though, it’s often easier to grip the roll loosely in your fingers and let it spin. Just make sure you’re wearing gloves.
Step 2 — Prepare the Furniture
Set up each piece before you wrap it:
- Clean surfaces so you don’t trap dust or grit under the wrap.
- Remove cushions, legs, or detachable parts that could shift during transport.
- Cover delicate areas with a furniture pad or thick paper first. This prevents the plastic from sticking or causing damage in storage or extreme temperatures.
If you’re wrapping something with drawers or doors, padding it first ensures you won’t damage the surface if you need to use a little extra tension.
Step 3 — Start Wrapping
Anchor the plastic wrap to one corner of the furniture or solid leg. If there’s nowhere to tie off, have a helper hold the free end flat against the surface until you come all the way around to secure it. Doing this solo is possible, but it’s a real pain.
As you wrap, walk backward around the furniture, overlapping each layer so it clings to itself. Keep the roll just off the surface until you clear an edge or corner. Then pull it tight and hook it around the corner to lock it in place. Continue until the item is covered tightly.
This method works for everything from sofas to fridges. Just go slowly and be careful not to pull so tightly that you strain the legs on lighter pieces or collapse flat-pack furniture. If things start going sideways, don’t be afraid to back up and start again.
Step 4 — Seal and Secure
Once the item is fully wrapped, tear or cut the plastic, and then press the end firmly into the last few layers so it sticks to itself. For extra security, tuck the loose edge under one of the wrapped sections.
If someone was holding the starting edge for you, remember they’ll need to keep their fingers in place until you make your way all the way around and wrap some plastic over that loose end — and probably your friend’s fingers. It’s one of those moments when a little teamwork saves a lot of frustration.
Our Top 5 Tips for Using Plastic Wrap
Even though plastic wrap is simple to use, a few tricks can make it safer, easier, and more effective on moving day. From protecting your hands to preventing damage to your furniture, these quick tips will help you avoid common mistakes and get the most out of every roll.
#1. Always wear work gloves.
Some plastic wrap comes with handles on the ends, making it look like a big rolling pin. But I personally find that these handles just get in the way, especially when you try to wrap the bottom edge of your upholstered sofa or heavy dresser.
It’s much easier to hold your roll of plastic wrap loosely, letting it unroll around your fingers as you go. But be careful! Don’t find out the hard way that the friction of the spinning roll can cause painful rope-burn-like blisters. Trust me, find some decent gloves.
#2. Plastic wrap can damage certain materials.
Wrapping OS and mattresses with plastic wrap generally does not cause problems because the plastic won’t adhere to the fabric. On the other hand, plastic wrap can stick to wood, vinyl, and some metals.
“A small one-bedroom apartment may only require 1-2 rolls, while a larger home with 3-4 bedrooms might go through 4 or 5 rolls. If you have lots of upholstered furniture or bulky items, estimate one roll higher than you think you’ll need.”
Over time and in extreme temperatures, it can adhere to your wooden dining room chairs, your leather couch, and even the sides of your fridge. And it may never completely come off. This is especially crucial to remember if you are moving long-distance or putting your stuff into storage.
The solution is to cover these items in furniture pads or thick brown paper sheets before wrapping them tightly in plastic. “Tightly” is the key word here, because if it’s loose, it won’t hold those furniture pads or sheets of paper in place, and your fridge will slip right out of your hands.
#3. Plastic wrap can lead to mold.
While plastic wrap’s primary purpose is to keep dust and dirt away, completely sealing your sofa in the stuff can backfire. If moisture gets trapped inside and has no way of escaping, you can end up with mold and mildew all over your living room set.
Here too, extended time and extreme temperatures can exacerbate the situation. Be sure to leave a few openings when you wrap your OS (and everything else) in plastic.
#4. Don’t strangle your stuff.
Yes, it’s important to wrap tightly. But if you pull the plastic wrap too tight around your dining room chairs or your coffee table, you can snap the legs right off. This applies to any other pieces of furniture with legs, like upright pianos, sideboard tables, and the rare dining room or kitchen table with legs that don’t detach.
Similarly, I don’t advise plastic-wrapping cheap IKEA-type furniture. That bookcase you bought and put together yourself will likely collapse under the weight of the wrap and tension.
#5. Don’t let your plastic wrap fall or roll on the ground.
As heavy and solid as a roll of plastic wrap is, you might think the stuff is indestructible. But that weight will be its undoing if you drop it on the floor. The edge of the roll will get dented, and the next time you try to use it, the plastic will get stuck in itself where that dent is, rendering the entire roll useless.
For the same reason, you also want to avoid rolling plastic wrap across the floor, your driveway, or the floor of your truck or container. Even one small rock can nick the surface, causing the plastic to pull apart in pieces the next time you try to use it.
Alternatives to Plastic Wrap for Moving
Plastic wrap is versatile, but it isn’t the only way to protect your belongings. Depending on your situation, you may be able to swap it out for other moving supplies:
- Furniture pads and moving blankets: Great for covering wood, leather, or fabric surfaces without trapping moisture. They’re reusable and more eco-friendly. (See our moving pads cost comparison for details.)
- Bubble wrap: Best for small fragile items, dishes, or electronics. Bubble wrap provides cushioning but won’t hold things together like plastic wrap does.
- Straps or ropes: Ideal for keeping furniture pads in place or securing large items inside the truck. Reusable and adjustable.
- Mattress bags: Provide full protection for mattresses, especially in storage or long-distance moves. Unlike plastic wrap, they’re designed to be breathable and resist tearing.
Each alternative has its strengths, but none fully replaces the versatility of plastic wrap. Still, if you’re trying to reduce waste or cut costs, these options can fill in the gaps.
FAQs About Plastic Wrap for Moving
Can I use kitchen plastic wrap instead of moving wrap?
It’s not a good idea to use kitchen wrap instead of moving wrap. Kitchen plastic wrap is too thin and breaks far too easily. Moving-grade plastic wrap is much thicker, stretches without tearing, and clings tightly to itself so it actually holds furniture pads and parts in place.
How much plastic wrap do I need for a move?
How much plastic wrap you need depends on the size of your home and furniture. A one-bedroom apartment usually needs one or two rolls (about 1,000–1,500 feet total). A family home will likely need three to four rolls. If you have a lot of upholstered or oversized furniture, plan for extra.
Is plastic wrap reusable?
Sometimes. Heavy-duty wrap may be reused once or twice if you cut it carefully and it doesn’t tear. But most of the time, once it’s stretched and stuck to itself, you’ll need to toss it.
Does plastic wrap protect furniture from rain?
Plastic wrap will help a little with light rain or drizzle, but it’s not waterproof. If you’re moving in wet weather, use plastic wrap over furniture pads and load items quickly. For serious water protection, look into mattress bags or plastic furniture covers.
Can I buy plastic wrap for moving on Temu or Amazon?
Yes, you can purchase plastic wrap online, but review the product details carefully before ordering. Look for rolls labeled as moving wrap or stretch wrap, at least 80-gauge thickness. And read reviews to confirm the quality. Cheap rolls can tear easily and waste your money.


 The total number of scams alone doesn’t tell us much about the impact they might have on people who fall victims to various kinds of moving fraud. Another way to gain an understanding of a moving scammer’s impact is to look at the amount of money lost to moving scams over the years.