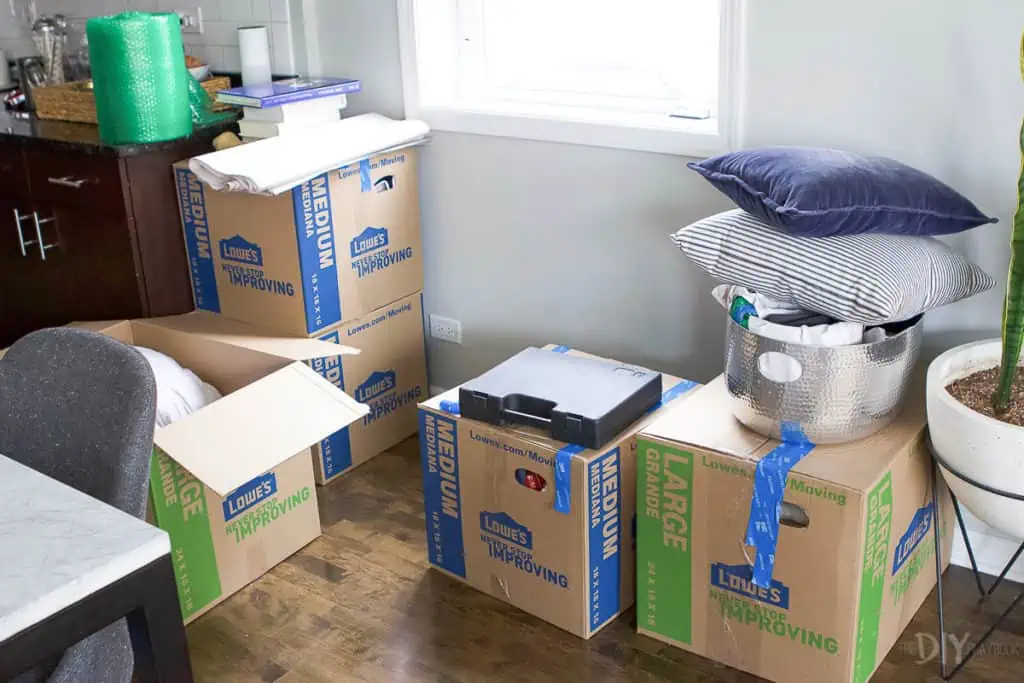
Your highly anticipated move date is finally here. You woke up early, have all your ducks in a row, and can’t wait to get started. But where are the movers?
Waiting for 15 minutes or so past the contracted ETA isn’t a big deal. But delays longer than that— especially when paired with a lack of communication from the moving company — may be a sign of something more serious.
First up: Check in with the moving company to get an update. They may be delayed by weather or traffic. However, if they don’t communicate, you might need to start thinking of a plan B for transportation or contact someone to get started on a claims process for your belongings.
If you’re worried about this happening to you, don’t panic just yet. From contacting your moving company to reaching out to friends and family for help, we’ll explain the steps you can take to get your move back on track.
Immediate Steps to Take if Your Moving Company is Late
If your movers are late by 15 minutes or so, don’t worry. Instead, use the time to complete any last-minute cleaning or other tasks still on your to-do list. In many cases, the team is on its way and just running behind due to traffic or another job going over. If the delay goes beyond the 15-minute mark, it’s time to start looking for answers and, depending on what you find out, alternative solutions.
If you’re a HireAHelper customer, call us and we’ll help you work toward a resolution. Even though movers work independently of HireAHelper, we’re here to facilitate a smooth and stress-free moving day whenever possible.
Here’s what else you can do if your moving company is late:
Verify your appointment details. Double-check that you have the right date, time, and location for your meet-up with the movers.
Call the moving company for an update. Contact the company directly, explain the situation, and ask for an updated time of arrival.
Begin documenting everything. To make sure you don’t forget any details amidst the chaos, write down everything that happens once your movers are officially late. That includes documenting who you called and when, just in case you need to escalate the issue.
Keep your landlord and service providers in the loop. You may have a cleaning crew, maintenance workers, or your landlord waiting to access an empty property. Let them know you’re experiencing a delay and that you’ll update them as things develop.
Review your contract. While you wait, reread your contract’s delay policy. Use this information to inform your next steps.
Create a backup plan for help loading and/or unloading your stuff. If the initial delay turns into a no-show, you need to have a plan B. Contact anyone who can help you load and unload your truck — including HireAHelper, if you booked through us.
If your belongings are missing, call the authorities. If your movers showed up to load your belongings but never made it to your new home, and there’s no other reason for the delay, it’s time to contact the authorities and other governing bodies.
Hopefully, your minor delay never turns into a major problem. But if your best-laid plans truly have gone awry, it will be helpful to have a game plan already in place.
Your Backup Plan if Your Moving Help Doesn’t Show
If your moving company is late or doesn’t show at all, that likely means you no longer have hired help to assist with your move. How you tackle this depends on the nature of your relocation.
For a local move: It’s time to activate your local network. Call friends, family members, long-time coworkers, or reach out through your church group or neighborhood social media page. Explain the situation and see if anyone is available to jump in. HireAHelper may also be able to help you find same-day movers.
For a long-distance move: You may need to hire help at your destination unless you already have friends in your new city. Just like with local moves, HireAHelper may be able to assist in booking moving labor at the last minute, so don’t hesitate to reach out for professional assistance.
If you planned on loading and unloading yourself but needed a truck and driver, you may:
Rent a truck and drive it yourself.
Reschedule your move through a more reliable company. HireAHelper can connect you with a trusted provider, ensuring a smooth and dependable move without any bumps.
It may be worthwhile to begin formulating your plan B while you’re putting together plan A. Take note of your second and third choices of moving companies just in case. Let friends and family know your move date, your general plan, and that you may need some last-minute help.
My Stuff is Missing — Now What?
If the issue evolves from movers being late for your final drop-off to not showing up at all, you have an even bigger problem at hand. Assuming you invested in a full-service move (that is, your movers are handling the transportation in addition to loading and unloading your belongings), the no-show means your stuff is missing. This can be a uniquely distressing situation.
First, know that the moving company cannot legally keep your stuff unless you’ve violated the terms of your contract. In some jurisdictions, moving companies have the right to hold onto your belongings if you:
Haven’t arranged a delivery time yet.
Agreed on a delivery time, but weren’t there when the movers arrived? In this case, you must schedule a new delivery time.
Haven’t paid the outstanding charges owed to the moving company.
If none of those scenarios apply, then your movers are legally required to return your belongings to you. Here’s what you should do if your moving company and belongings are nowhere to be found:
Call the authorities. Contact the police and inform them of the situation. Have all the important details handy, including your contract, the moving company’s name, the agreed-upon delivery time, and any steps you’ve taken to make contact and resolve the situation.
Buy the essentials. Put your and your family’s comfort first. Buying essentials, such as toiletries, clothes, and comfort items, may help you feel more at ease while you await a more permanent resolution. Furniture can be rented if you need a place to sit or sleep, or you can get blow-up mattresses and linens at a big box or secondhand store.
While it’s impossible to foresee every possible issue ahead of time, creating and sticking to a moving checklist can make it easier to bounce back from adversity. Creating an inventory list of everything you pack and put onto the moving truck will result in an invaluable resource if you need to make an insurance claim or sue.
Prepping to-go bags packed with essentials that travel with you instead of on the truck is a smart play, too. That way, you’ll have important items like medications, your child’s favorite bedtime books, and a change of clothes handy, just in case.
What to Do if You Can’t Reach the Moving Company
The only thing worse than a late moving company is one that also doesn’t answer the phone. Here’s what to do if you can’t make contact.
Try alternate contact methods. If your moving company is late and you can’t reach them using the originally supplied contact method, try a different approach. Reach out via social media, email, or by texting the number instead of calling.
Check online reviews for common complaints. Read online reviews to see if lateness or no-shows are commonplace for the company. This may help you decide how soon to escalate to the authorities.
If you’re seeking a resolution due to delayed or missing movers, start by reviewing your contract. This is your documented proof of the agreed-upon delivery date and time. Some contracts include a built-in grace period, which means a slight delay (such as a day or two) is not technically a breach of contract. This doesn’t mean you don’t have a right to be unhappy, only that you likely can’t pursue compensation.
Depending on your contract and local laws, your options for recourse may include:
Reporting your issue to the BBB or FMCSA.
When contacted, the BBB will forward your complaint to the moving company within 2 business days and request that they submit a formal response within 2 weeks. The moving company is not obligated to respond, but many do to maintain a favorable BBB rating. Complaints filed through the FMCSA are thoroughly investigated and can become part of a company’s permanent record.
Contacting the authorities (police)
The police can help determine if the moving company has committed a crime, such as fraud, extortion, or theft, or if you’ve been the victim of a moving scam. They may be able to help you locate the movers and recover your belongings. If the crime occurred in another jurisdiction, like your origin city, you can file a report online or request a courtesy report.
Filing a lawsuit
This really only applies to missing belongings, as moving companies typically aren’t required to compensate you for a late delivery. There may be an exception if there’s a significant delay that causes you personal or financial harm, or if your items arrive seriously damaged. You can sue in small claims court if your damages fall under the small claims court cap for your state. This method is often preferred because you don’t need to pay a lawyer. If your claim is higher than the small claims limit, you can file a lawsuit in state court.
“…[K]now that the moving company cannot legally keep your stuff unless you’ve violated the terms of your contract…[If that doesn’t] apply, then your movers are legally required to return your belongings to you.”
Note that many contracts have a clause requiring the contracted parties to resolve complaints through arbitration rather than a lawsuit. Your options for recourse may be limited by the terms of your contract, local statutes of limitation, and the laws in your state. It’s always best to contact a lawyer for more details if a lawsuit is something you’re considering pursuing.
Common Reasons Movers May Be Late
Figuring out what to do when your moving company is late may be easier if you have a general understanding of what could’ve gone wrong. Some common reasons movers are late include:
Traffic or route delays. Life happens, and an accident on the highway or construction could be a perfectly reasonable explanation for a late arrival. This is even more common with long-distance moves.
Delays on the previous job. Local movers often stack moves, meaning they have one job after another. If the appointment before yours runs over, your crew may arrive late. However, they should communicate this as it happens.
Poor scheduling or overbooking. Sometimes, moving companies accidentally overbook, accepting too many jobs without enough workforce or trucks. This is why it’s important to know what’s in your contract regarding no-shows and delays before you sign on the dotted line.
Weather conditions. Stormy weather can make it difficult to execute a timely move, or, in the case of hurricanes and blizzards, cancel your move altogether. In either case, movers should be proactive about informing you of delays or changes. Also, be aware that damage from weather, such as floods and tornadoes, is typically not covered by moving insurance.
Mechanical or equipment issues. If a truck breaks down or gets a flat tire, the company should inform you of the delay and their new ETA.
The bottom line is that delays happen, but great communication can make a huge difference in how the delay is perceived. Try to be patient if your movers call with a valid explanation for the delay — it’ll pave the way for a better day for all involved.
Protecting Yourself from Mover Issues in the Future
Even if it’s too late for this move, it’s never too early to prep for the next one. A few smart steps now can help you avoid no-shows, delays, and miscommunications down the line:
Do your homework. Look up the company ahead of time. See where they’re based and check out what past customers have said in online reviews. A little digging can save a lot of trouble.
Build rapport with your movers. Take an interest in them as professionals (and as people!) during your pre-move conversations. A little appreciation can go a long way in keeping your move top of mind for them.
Ask the right questions. Wondering what kind of equipment they’ll bring? Or if they’re comfortable handling a specific item? Ask! Professional and reputable movers will be happy to answer questions about their services and your move. This is also a good time to make sure you understand the fine print on things like damage protection.
Confirm your booking. Movers often call the day before to confirm, but it never hurts to take the lead. A quick call is all it takes to make sure everyone’s on the same page.
Use a vetted service. You can check a mover’s business license if they’re operating a vehicle, but one of the easiest ways to avoid issues is to book through a trusted network like HireAHelper.
Moving long-distance across the country is already a juggling act. You have to get transportation, find movers, and pack up everything — and then there are your beloved plants to think about. You’ve spent years nurturing that towering monstera deliciosa and tending your English rose garden. At this point, your green friends are basically family! They’ve gotta come with you, right?
The good news is that moving plants cross-country is difficult but doable. And while the task is daunting, it’s possible with the right prep work. Let’s dig (pun intended) into everything you need to know about how to move plants cross-country.
Here’s a quick overview of how to move with plants:
Understand legal regulations and moving company rules.
Decide which plants to move.
Prepare your plants.
Choose a transportation method.
Pack the plants.
Care for plants on arrival.
Know the Rules: Legal & State Regulations
The transportation of plants is carefully regulated in many parts of the United States. The first step in figuring out how to move houseplants all the way across the country is to look into legal restrictions and moving company rules.
Can Movers Move Plants?
Unfortunately, most moving truck and shipping container companies don’t transport plants. Plants are usually not allowed on a moving truck due to certain state laws and possible liability. At the end of the day, it’s just too much of a hassle for the movers to handle living things.
And don’t try to get sneaky and hide your plants among your other belongings, either. Doing so could void your contract with the long-distance movers and would invalidate any protections if the plants lead to a mess that damages your things.
That said, it’s still possible to move your plants long distances. It just requires proper planning and execution.
Moving Plants Cross-Country: The Legal Lowdown
You may not think moving plants across state lines comes with legal pitfalls, but it definitely does.
States that rely heavily on agriculture — specifically, California, Texas, and Florida — are very wary of allowing in any pests or invasive species of plants that could destroy crops. Several have strict regulations around bringing in plants from out of state. California, for example, doesn’t allow you to bring any type of citrus plant from another state. Florida also prohibits citrus unless you have a special permit.
“Once it’s time to dig those plants out of your old garden, you’ll want to be careful not to dig too near the base of the plant…[i]nstead, dig a ring around and a bit away from the main stem of your plant…[f]or larger plants, the ring should be at least 6 inches deep.”
Because the rules for each state are different, you’ll need to research which states you’re traveling through and ensure you don’t risk having your plants confiscated at border checkpoints. Some states allow you to bring in plants that exclusively grow indoors, but may require you to repot them with sterile soil before moving. Others may require a certificate of inspection or have you quarantine your plants before bringing them home.
Contact these departments for each state you’re passing through to check for the restrictions, permits, and inspections you may need when moving plants across state lines.
Here are a few best practices for moving plants cross-country, no matter the destination state:
Get familiar with the restricted plants list specific to your destination. You can typically find this on the state government website, usually under the local Department of Agriculture branch.
Inspect and clean plants to make sure they’re free of pests and soil-borne diseases.
Repot plants in new, sterile soil.
Decide Which Plants Should Make the Trip
Once you figure out which plants you can legally move, it’s time to consider each one individually. After all, not all plants can or should be transported.
Here’s how to decide which plants should come with you to your new home:
Check the destination environment. Only move plants that can survive and thrive in your new climate.
Think about your new outdoor space. Is there a spot for the plant? Does it have the conditions — shade, sunlight, soil type, etc. — to survive?
Evaluate plant age and health. For the best chances of survival, take only hearty and healthy plants. It may sting, but it’s a good idea to leave older or fragile plants behind.
Consider the practicalities. Make sure you have the time and space to dig up, pot, and transport plants. It may not be feasible to bring large plants with you.
Plan for seasonality. The best time to move plants is during the spring or fall when the weather is mild. If you’re moving in the summer or winter, take only the plants that can withstand extreme temperatures.
What do you do with the plants you can’t bring? No proud plant parent wants to say goodbye to their collection, but that may be what you have to do. Spend some time finding them a good home by donating them to friends and family, users on PlantSwap, or people on sites like Facebook Marketplace.
Prepare Your Plants for the Move
Once you’ve decided which plants are worth taking, it’s time to get them ready. A quick drive across town might not require much more than careful packing, but longer moves need a bit more preparation to keep your plants healthy and safe along the way.
If you’re planning a long-distance move, it’s important to prepare your plants properly:
Water your plants a couple of days before the move. This means they’ll be hydrated but not waterlogged for the move. The last thing you want is a sloppy, muddy mess that gets everywhere inside your vehicle.
Inspect your plants for pests or dead leaves, and prune them. Doing this will minimize the risks of damage during your move.
Nestle smaller plants together in a box in their original planters. Use crumpled paper, dividers, or bubble wrap to prevent them from clinking together or moving around. Wine shipping boxes are also great for this — just be sure to leave the top open for adequate airflow.
Use clean, sterilized pots, even if not required by law. This is good practice in general for the health of your plants.
Pack fragile plants with plenty of room for airflow. This helps prevent traumatic experiences for your plant.
Move larger plants to plastic pots. You’ll reduce weight and potentially avoid broken pots. Want to avoid plastic? Use a lightweight, eco-friendly planter. Consider covering the top of the planter with cardboard or a burlap bag to prevent the soil from spilling when things get jostled around.
Transfer your plants to their containers a couple of weeks ahead of the move. You want to give them enough time to adjust to their temporary housing and ensure the moisture level is just right.
How To Move Plants From a Garden
If you’re relocating the plants you’ve grown in your own garden, you’ll need to do a bit of extra legwork. Transferring plants from the ground to containers can be a shock, so it’s important to prepare them for the trip.
Here’s how to prepare garden plants for moving:
Allow for several days of generous watering. Be careful not to overwater. Too much water in the soil can prevent plants from soaking up critical oxygen through their roots.
Dig around the drip line. Once it’s time to dig those plants out of your old garden, you’ll want to be careful not to dig too near the base of the plant. Tearing or shredding the flesh of the roots is unhealthy for the plant. Instead, dig a ring around and a bit away from the main stem of your plant, carefully paying attention to any roots you may find. For larger plants, the ring should be at least 6 inches deep.
Maintain the original soil. Don’t shake or remove any soil from the root ball since this is some of the best protection for your plant during the move.
Contain plants correctly. As you dig up and remove each plant from the ground, waste no time transferring them to the pots, buckets, or burlap you’ll be transporting them in. Remember that you’ll need to keep everything adequately watered, so a pot or tub will keep your burlap-wrapped friend from leaking all over your car!
Choose the Right Method of Transportation
Choosing a transportation method is an important part of figuring out how to move plants cross-country. The most common options are:
Car. Put your plants in boxes, and place them on your car seats.
Rental truck. Pack plants into the cab of your moving truck.
Mail. It’s a little complicated to learn how to ship plants when moving, but it’s possible as long as you follow the carrier’s rules.
Method
Pros
Cons
Car
Affordable
Easy to control the temperature
Easy watering
Limited space
Potential for a mess
Rental Truck
Lots of space
No temperature control
Possible plant damage due to movement
Mail
Saves space
Convenient
Rules and restrictions
Higher cost
Pack Plants Properly
As we stated, moving companies don’t usually transport plants (but it’s worth asking). So, in most scenarios, you’ll be moving them yourself.
How to Prep Plants for Different Vehicles
Here are some prepping tips, depending on how you’re getting to your new home, since the type of vehicle you use will impact how you pack and care for your plants along the way.
For Cars
Pack with care: Don’t seal them in a box! They need space, especially for fragile or temperature-sensitive plants. In some cases, you may want to place them in front where you can control the climate. And be sure to keep them out of the trunk, where airflow is limited.
Secure plants carefully: Again, you want to avoid much movement. Use seat belts to keep the plants in place. Or, if that’s not feasible, use ropes, string, or bungee cords.
Avoid open vehicles: It may be tempting to throw ‘em all in the back of your truck, but heavy winds and bad weather can damage plants — especially over a long time. Do yourself a favor and keep them in a covered space.
Consider your fragile or sensitive plants: Some of your green friends may be particular about temperature. They should go in the front, where there’s access to A/C or heat, and the driver can keep an eye on them.
Keep an inventory: If you have a lot of plants, you may want to keep a list of them all. This makes tracking their needs and locations easier.
For Rental Trucks
Store in the front cabin only: As you would in a car, place plants in the front cabin where they’ll get proper airflow and sunlight. Keep in mind that rental companies like U-Haul may even provide plastic bins to help contain any mess.
Clean carefully: Remember that U-Haul, Penske, and Budget Truck Rental have cleaning fees if your plants leave a mess. However, U-Haul is a little vague with its cleaning fee policy, and Budget simply claims a “reasonable fee.”
How to Prep Plants for Shipping in the Mail
If it’s not possible to personally drive your plants to your new destination, you’re not totally out of luck.
Believe it or not, the second-best option when moving plants across the country is to mail them. It’s not ideal since you can’t directly control how they’re handled or allow them to get water and sunlight while in transit. However, you can take steps to minimize the risks.
First, choose a fast shipping option to reduce the time in transit, but not so fast that your plants arrive at your new home before you do. And be prepared for higher shipping costs.
Here’s how to pack plants for shipping:
Remove the pot. Trim the roots, wrap them in a few wet paper towels, seal them with a plastic bag, and place them in a box. For longer trips, add a couple of teaspoons of polymer moisture crystals to water and apply this slurry to the roots before wrapping them in plastic. You can also loosely roll the plant in newspaper before packing it to help protect the stems and leaves.
Pack securely. The box you choose should be sturdy but not too roomy, as you don’t want the plant to bounce around inside. You should fill every empty space around the plant with newspaper and bubble wrap to ensure it stays secure. You can also put a “fragile,” “live plant,” or “this end up” label on the box (even better, all three) so handlers know to be careful.
Timing is key. Ship it at the beginning of the week. Much of the USPS doesn’t operate on weekends, increasing the odds your plants will sit in a dark room for a couple of days. Additionally, check the weather for the day of your box’s arrival so your beloved plant doesn’t freeze or wilt.
As soon as you arrive at your new home, you’ll have a hundred things to do. But keep in mind, unlike your flat-screen TV or dining table, plants can wilt and die. It’s important to sort out your garden and replant as quickly as possible.
Get planting spots ready: Be sure to have your plants’ new homes ready to go before you take them out of their old ones. The less time your flowers and plants spend in limbo, the better.
Use enough soil for transplants: If you’re transplanting from smaller pots to bigger ones, put lots of soil at the bottom and have more on hand to fill in the extra space around the edges.
Prep the ground properly: If you’re planting directly into the ground, make sure each new hole is big enough, and water it thoroughly before you pull anything from its pot. Pack the soil solidly, but not so much that the water runs off and away.
Water generously in hot weather: If you can’t help but exercise your green thumb in the heat of summer, douse your freshly dug holes with even more water before transferring those plants. The roots will need lots of moisture to mitigate the shock of being uprooted and exposed to the hot air and sun.
Pro Tips for a Smooth Plant Move
Ready to hit the road with your garden? Use these tips to keep your plant family happy and healthy during the drive to your new home:
Use plastic bins and trays to prevent leaks. You’re going to want to water your plants during the move, and all that moisture has to go somewhere. Place your pots in plastic bins or trays to keep moisture off your car seats.
Make a plant care kit. Be prepared to keep your plants safe on the drive by packing extra bubble wrap, a small pair of pruning shears, and plenty of water. It can’t hurt to bring some extra soil and a few extra pots in case of breaks or cracks.
Time your drive carefully. Heat can stress your plants, so try to travel before noon or in the early evening to keep temperatures in check.
Ventilate the car. Plants need plenty of fresh air, so consider cracking a window every so often. This is easy to forget, especially if you’re traveling in hot or cold weather, but it makes a big difference.
Download apps in advance. Download a few plant-care apps to your phone to help you handle any issues during your trip. Great options include Planta, Plant Parent, and Pl@ntNet.
Think before leaving plants in the car overnight. Staying at a hotel along the way? Bring your plants with you if you expect the temperature to change dramatically overnight. If the weather is consistent, crack two windows to allow ample airflow.
Learning how to move plants cross-country requires quite a few details, but it’s completely doable. By carefully choosing which plants to take and going the extra mile to prepare and transport them correctly, you can ensure they arrive safely in your new city. And with your new place filled with your old friends, it will start to feel like home before you know it.
We’ve all seen it: $19.95 per day. That attractively low cost advertised on the side of seemingly every U-Haul truck and van across the country. And that price looks nice.
A little too nice, you might say. And indeed, you’d be right. Just like renting a truck is only one small part of your move, that low $19.95 U-Haul cost is likely to end up being just a fraction of your final bill. We know, because we set out to rent a U-Haul with one question in mind: How much does a U-Haul really cost?
Keep reading for a transparent, in-depth look at our first-hand research into U-Haul’s real rental rates.
U-Haul Rental Rates: Local/In-Town Moves
The table below compares the four U-Haul truck sizes side by side in a simple, no-frills, local move. Basic insurance coverage was purchased, and we drove 50 miles. That’s it.
As you can see, while the base rate for each truck ranges between $20 and $50 per day, the actual daily rental cost is over $100 in every case.
How Much Is a U-Haul Per Day?
U-Haul Truck Size
Base Daily Rate
Mileage Fees ($1.19)
Miles
Basic Coverage
Add’l Fees and Taxes
Gas ($3.12)
Total Cost Per day
10-ft Truck
$19.95
$59.50
50
$15
$7.83
$12.98
$115.26
15-ft Truck
$29.95
$59.50
50
$15
$8.53
$15.60
$128.58
20-ft Truck
$39.95
$59.50
50
$15
$9.23
$15.60
$139.28
26-ft Truck
$49.95
$59.50
50
$15
$9.93
$15.60
$149.98
Clearly, there’s much more to U-Haul’s pricing than the $19.95 per day base rate. In this article, we’ll be covering the ins and outs of U-Haul pricing so you can get a clear picture of the real price of DIY moving with a rental truck.
Here’s everything we learned.
U-Haul Fees and Charges Explained
After trying to rent a truck on their website, we found out the $19.95 price point refers to local moves only, not a “one-way” move, where you drop off the truck at a different location – aka a long-distance move (more on those U-Haul prices later).
And most importantly, the $19.95 only accounts for U-Haul’s lowest daily “rental truck fee.” While this price is consistent for local moves, U-Haul mileage fees and taxes can vary based on location, too.
Here are the U-Haul fees that make up a U-Haul bill:
Rental truck fee: Starting at $19.95/day, and subject to availability
Mileage fee: Varies depending on location, time of year, and day of week (doesn’t apply to trailers)
Damage coverage fees: Various options, including accident protection, cargo protection, and supplemental liability coverage
Fuel costs: Varies (doesn’t apply to trailers)
Environmental fees: $1.00 – $5.00 (doesn’t apply to trailers)
The famous $19.95 price point is also exclusive to U-Haul’s three smallest rental options:
8′U-Haul pickup truck
9′U-Haul cargo van
10′ U-Haul rental truck (what we rented)
Other Fees: Damages and Cleaning
Of course, if you pay for damage protection when you rent the truck, you most likely won’t have to worry about paying damage fees. But note that if you leave some kind of noticeable mess, you could be charged a cleaning fee.
It’s clear there are a lot of factors influencing U-Haul rental costs, but the most impactful is the distance of the move. Local U-Haul moves under 50 miles average just $138, while mid-range moves up to 250 miles cost $301, and long-distance moves average $1,142.
How Much Did It Cost Us To Rent a U-Haul for a Day?
Our final cost was $53.79 for the most bare-bones rental. We’ll break down how we got to that number, as well as all the costs you could possibly run into throughout the rest of the article.
How Much Do the Bigger U-Haul Trucks Cost?
It’s not possible to pinpoint the exact cost of a specific truck size because mileage and tax rates vary, but base daily rates for local U-Haul truck rentals are consistent everywhere. There are sites that ballpark individual truck size costs, but if you want an estimate based on user-reported, real-time prices for U-Haul moves, click on the graph below.
Yes, you can (usually) extend your rental at the same daily rate if you need it longer than 24 hours (for a local move). All we had to do was call before the truck was due back and ask the store for an extension.
There’s also no limit to the number of days we could extend our rental. The only exception would be if our truck was already reserved by another customer for the days we wanted. It’s best to decide how many days you’ll need your rental at the time you make your original reservation. Otherwise, you may have to return your truck and get a new rental for the additional days you want.
“We went online and used a credit card to book a 10′ rental truck…and we thought the booking was all paid up. But it wasn’t — our card was just used to make the reservation.”
If you wanted to extend your rental to multiple days and there were no rental trucks available, U-Haul would likely sell you on one of their moving containers as an alternative, if those are available in your area.
For long-distance, one-way moves, a minimum number of days is included in the rental period, depending on the distance of your move. This might just be a single day for a shorter distance, like 150 miles or less. We asked, and yes, you can add days to your long-distance rental — but only by coordinating with your local U-Haul store in advance, and only as long as your truck is still available.
Beware! The following prepaid fees apply if you choose to extend a one-way rental:
U-Haul trucks – $40 per day
U-Haul trailers – $20 per day
U-Haul towing devices – $20 per day
By the way, there are no discounts for returning the moving truck earlier than the minimum assigned number of days, but you can still return it earlier if you want. Virtually the only advantages would be that it reduces the likelihood of anything happening to the truck while in your care, and to get it off your to-do list.
Mileage, Fuel, and Other Add-On Costs
As you can gather, one of the biggest variables that affects your final U-Haul price is the mileage fee. Not to mention, your mileage will ultimately impact how much gas you need to pay for.
How Much Does U-Haul Charge for Mileage?
In general, the price per mile is region-specific and can also vary by season and time of the week. U-Haul mileage fees are also usually higher for local moves.
U-Haul Mileage Fees: Local Moving Truck Rental
The mileage fee quote we got for our local Florida move was $1.19/mile on a Tuesday. Setting the rental date to a Saturday instead increased that rate to $1.39/mile for all truck sizes.
To give you an idea of how U-Haul mileage fees vary based on region and day of the week, we requested some more quotes from U-Haul and found the following:
Los Angeles mileage rates (box trucks):
Weekday quote: $1.09/mile on a Tuesday for all truck sizes
Weekend quote: $1.39/mile on a Saturday for all truck sizes
Weekday quote: $0.99/mile on a Tuesday for all truck sizes
Weekend quote: $1.19/mile on a Saturday for all truck sizes
U-Haul Mileage Fees: Local Pickup Truck or Cargo Van Rental
For our Florida move, the mileage rates for a U-Haul pick-up truck or cargo van were the same as for the box trucks, but that wasn’t the case in L.A. or Columbus. Here’s what we found:
Los Angeles mileage rates (cargo vans/pickup trucks):
In Florida, we drove our U-Haul truck all of eight miles from and back to the U-Haul store to take pictures. For this, we were charged $1.19/mile, for a total of $9.52.
You can probably start to imagine how much your mileage fee will stack if you drive your rental 20, 50, 100, or even more miles to and from the rental location.
How Do U-Haul Gas Fees Work?
Simply put, you will pay for any gas you use. You need to bring the truck back with at least as much gas as it started with.
The U-Haul clerk marked down the exact mileage and gave us their daily rate for gasoline. We had the choice of filling up what we used ourselves out in the wild, or paying U-Haul $4.75 a gallon(!) to do it for us after we returned it as a “convenience fee.”
And heed this warning straight from our receipt: “If returned with less than 1/4 tank, I agree to pay a $30.00 service fee.”
We spoke with a U-Haul rep who told us there’s no universal rule at U-Haul for this convenience fee, so this may be location-specific. In case you were wondering, U-Haul usually won’t reimburse you if you return the truck with more gas than you had to start with, so only get what’s needed at the gas pump.
A 10′ U-Haul box truck can get up to 12 mpg, while the larger trucks can get up to 10 mpg — “up to” being the key phrase here. According to the website, these estimations are for ideal driving circumstances — which means once your truck is loaded down with boxes and furniture, the fuel efficiency will likely decrease.
The 15′ trucks and bigger are equipped with a fuel economy meter on the dashboard that shows you whether or not you’re getting the “Best MPG” in real-time. Our 10-footer had one too.
Pro Tip: Sometimes a U-Haul rental will have a full tank of gas when you pick it up, and sometimes it won’t. Either way, you’re only required to replace the gas you use. We were given a truck with only 5/16 of a tank of gas, for instance.
If the U-Haul you’re renting from has gas pumps, ask for a full tank before you take it off the lot. And by full, we mean as full as possible. The fuel tank capacity for the 10′ truck is 31 gallons, according to the website.
U-Haul Rental Rates: Long-Distance/One-Way Moves
What about when you’re renting your U-Haul for a long-distance or out-of-state move? In that case, rental pricing works a bit differently.
What Are the Mileage Rates for a Long-Distance/One-Way U-Haul Rental?
If you’re moving long-distance, a certain number of miles is accounted for and rolled into your final rate. There are technically no mileage limits, but if you exceed your mileage estimate, you’ll be charged $1.00/mile for the excess. Fortunately, this rate seems to be consistent for long-distance rentals regardless of location.
Remember, a one-way/long-distance rental simply means the truck is being returned to a different location than it was rented from. Technically, this could mean as near as one town over.
But while mileage is cheaper for long-distance moves, other fees are way, way more expensive, so if at all possible, make sure you stick to local (in-town) U-Haul rental rates, and return your truck to the location it came from.
Do U-Hauls Have Unlimited Miles?
With U-Haul, for both local and long-distance moves, there’s no limit to the number of miles you’re allowed to drive.
But remember, for local, in-town rentals, miles are never included in the advertised day rate — you’re charged per mile separately. For long-distance moves, you’ll be charged $1.00/mile for anything beyond the expected mileage that U-Haul determines is necessary for your move.
“…[W]hen it comes to some moving equipment, you can save money by renting instead of buying. U-Haul rents out furniture pads for $5 per half-dozen, as well as furniture dollies, appliance dollies, and utility dollies — for around $7 to $15 each”
If you do need to put on some extra miles, you’re better off looking at Penske or Budget. This is where the advertised $19.95 price really falls apart, unless you’re moving something a short distance.
U-Haul Trailers and Hitches: 101
We didn’t rent a trailer with our truck, but we got all the info straight from U-Haul.
Types of Trailers: What’s the Difference Between the Three Different U-Haul Trailers?
For smaller loads or something super fragile, U-Haul offers trailers that hitch to cars and trucks (depending on location availability). There are actually three different kinds of trailers you can typically rent.
Here are the three types of trailers U-Haul offers:
Cargo trailers
Utility trailers
Vehicle trailers (Available only at some locations)
Here’s what you should know about each kind:
Cargo trailers: As cargo trailers are enclosed, these are generally used for moving household items and furniture that you don’t want exposed to the elements. U-Haul likes to say they’re great for moving a dorm room.
Utility trailers: These open trailers are ideal for transporting bulky or awkwardly shaped items that can withstand some exposure to the elements. You’ll often see them on the backs of pick-up trucks hauling landscaping equipment or construction waste.
Auto transport/vehicle trailers: You can haul your car on U-Haul’s vehicle trailers, which come equipped with loading ramps, security chains, and multiple heavy-duty tie-downs. They also offer a tow dolly, which is a two-wheeler that lifts just the front wheels of the car off the ground. This can be a good choice for most front-wheel-drive and many rear-wheel-drive vehicles.
For local moves, U-Haul trailer rentals generally cost as little as $14.95 for the smallest options and as much as $34.95 for the largest ones (before taxes and fees). And obviously, unlike with U-Haul’s moving trucks, you don’t have to worry about a mileage fee because there’s no speedometer.
How exactly does renting a U-Haul cargo trailer work?
U-Haul cargo trailers officially come in three different sizes — 4′ x 8′, 5′ x 8′, and 6′ x 12′. And each one comes with a built-in, lockable latch to keep it secure.
Word of warning: Generally, none of the cargo trailers come built with the U-Haul “EZ Ramp,” so be prepared for some extra lifting, or consider hiring moving labor.
Like their trucks, U-Haul advertises its cargo trailers as being $14.95 (not including tax), and just like the trucks, that quote is for the smallest size trailer and only if you’re moving locally.
There’s no limit to the number of days you can keep a trailer, as long as availability permits. Depending on the distance of your move, a certain rental timeframe will be included in your estimate. A short, one-way move might just include a single day, while a cross-country move could include up to 11 days.
Several of U-Haul’s regular fees don’t apply to trailer rentals, such as mileage, refueling, environmental fee, and the vehicle license/cost recovery fee. However — and most importantly — trailer rentals do require a hitch installation fee if you don’t already have the proper hitch.
U-Haul Costs: Installing a Hitch
All types of U-Haul trailers require a proper hitch and lighting to hook to your vehicle.
You can use your own hitch if it’s compatible: a Class 2 or Class 3 with a 2-inch hitch ball.
If you don’t have a proper hitch — or you don’t have a clue what the above specs are talking about— you’ll probably have to have one installed. You can either get that done on your own or have U-Haul take care of it for an installation fee of around $100 or more. But take note — this is the fee to install and does NOT include the cost of the hitch itself! According to U-Haul’s website, the average cost for a trailer hitch is between $150 and $300 (not including installation).
Another note on hitches: If you’re thinking of buying a cheaper hitch elsewhere and bringing it to U-Haul to have them install it, think again. U-Haul won’t install third-party hitches.
We asked U-Haul how much it would cost to get one of our cars modded for towing a trailer, including parts and installation. We were quoted $469.09 online to mod my 2014 Kia Soul.
Hitch: $149.95
Hitch unlimited lifetime warranty: $5
Ball mount: $24.95
Hitch ball: $12.95
Pin & clip: $2.95
Wiring: $91.95
Wiring service plan: $10
Subtotal: $297.75
Installation: $132
Tax: $39.34
Total for hitch and installation: $469.09
The U-Haul rep I spoke with about hitches told me that the cost of installation depends on the complexity of the work involved. Installation tends to be cheaper on older cars because the electrical wiring is simpler than with more expensive, newer cars.
We were actually quoted a slightly better price over the phone — $446.89 — so you may want to give U-Haul a call as well as run an online quote for the hitch, and pick the best price.
“…[T]he $19.95 only accounts for U-Haul’s lowest daily “rental truck fee.” While this price is consistent for local moves, U-Haul mileage fees and taxes can vary based on location, too.”
Either way, this isn’t exactly a deal, given that it doesn’t even include the rental truck. But at least you’ll be good to go for the future. U-Haul will provide you with all the pieces you need, but be prepared to get up-charged more than if you found it all elsewhere.
Also, let it be known that, technically, you can rent a trailer for your U-Haul truck rental — which already has a hitch — if you want to tow your car or if you need additional loading space.
How much does a U-Haul Cargo Trailer cost?
Local moves with a cargo trailer
Without any hitch installation and for single-day use, the smallest cargo trailer (4′ x 8′) with no ramp was quoted to us at exactly $14.95, before taxes or miscellaneous fees.
For their biggest cargo trailer (6′ x 12′), it was $29.95 under the same stipulations.
Long-distance moves with a cargo trailer
For a long-distance move, that quote gets significantly higher. Our quote from Tampa, Florida to Dallas, Texas (1,100 miles) for the smallest trailer (4′ x 8′), with no coverage, and up to five days with unlimited miles, came to $213 plus tax. And the largest cargo trailer (6′ x 12′) was $496 plus tax for the same route! If the local daily rates were applied to one-way rentals, those trips would cost about $75 and $150, respectively.
Don’t forget the hitch installation charges if you need it, which adds another several hundred, at minimum, depending on the year/make/model of your car.
Utility trailers are needed when you have to transport something tall or oddly shaped. So when you move your arcade cabinet or (more likely) a refrigerator, you can strap it to this and haul it behind your vehicle.
You’ll need to bring your own ramp, though, because only the 5′ x 9′ and 6′ x 12′ utility trailers come with U-Haul’s fold-down “EZ-loading” ramps. And be careful when you book, there’s a 6′ x 12′ utility trailer without a ramp, too.
How Much Does a U-Haul Utility Trailer Cost?
Local moves with a utility trailer
For local moves, prices generally begin at $14.95 for the smallest utility trailer and go up to $34.95 for the largest option with a ramp. You can expect both larger and smaller utility trailers to scale roughly the same in cost as U-Haul cargo trailers.
Long-distance moves with a utility trailer
We were only able to get a quote for a long-distance move with a 5′ x 9′ Utility Trailer because it turns out the 4′ x7′, 5′ x 8′, and 6′ x12′ options are only available for local and round-trip moves. Our quote was $425 before taxes for a five-day rental with unlimited miles from Tampa, FL to Dallas, TX. Keep in mind this doesn’t include optional damage coverage or having a hitch installed.
Finally, if you need to transport your vehicle and aren’t looking to ship it, check U-Haul’s car towing site, and maybe also call ahead to see if the U-Haul near you has any car and motorcycle trailers available.
This type of move can definitely save you some cash compared to normal car shipping, but keep in mind that do-it-yourself car transport is not for beginners and requires both a lot of time and some skill.
How Much Does a U-Haul Vehicle Trailer Cost?
Local moves with a vehicle trailer
For our local move, U-Haul rental rates for a tow dolly started at $44.95/day, and an auto transport trailer started at $54.95/day.
Long-distance moves with a vehicle trailer
To get an idea for a hypothetical long-distance move, we came prepared with two faraway ZIP Codes. Before taxes, our vehicle trailer cost for a move from Tampa, Florida to Dallas, Texas was quoted at $151 for a tow dolly and $301 for an auto transport trailer. Each quote included five days of use. We were told by the customer service rep that there’s usually a difference of about $100 between the tow dolly and auto transport rental fees, but apparently it can be even more than that!
“Some stores told us you have to pay U-Haul the exact moment you return the vehicle for any and all damages, while others told us it goes through insurance — so you should probably ask when you rent the truck what your location’s policies are.”
I was told my personal vehicle wasn’t heavy enough to tow our other car, so I would need to rent a U-Haul truck for that — an additional potential cost to keep in mind.
Please note that hitch installation, taxes, and other fees aren’t included in this quote, which, as you can see, is actually cheaper than the cost to buy and install a hitch.
The rep also told us U-Haul won’t let you rent any trailer of any kind if your vehicle doesn’t have a hardtop (e.g., convertibles and some SUVs and Jeeps). They also strongly recommend you not exceed 55 mph with any of this stuff attached to your vehicle.
We also didn’t actually rent a storage container, but were told they are available for long-distance moves. The U-Box container comes in one size with a volume of 257 cubic feet. Each U-Box holds enough for about 1.5 rooms, so you order as many U-Boxes as needed to accommodate your move. Here was our long-distance U-Box quote without insurance coverage:
U-Box Container Quote from Tampa, FL to Dallas, TX:
For a complete breakdown of all U-Box moving container costs before you make your U-Haul U-Box reservation, check out the Moving101 U-Box page.
U-Haul Insurance 101
What Are My U-Haul Insurance Options?
U-Haul has two main kinds of insurance. They’re called Safemove and Safemove Plus. Just like everything else, the added cost varies depending on whether your move is local or long-distance.
Keep in mind that there are exceptions, and Safemove Plus doesn’t cover “damage caused by improper packing, normal shifting of cargo in transit, or theft of cargo.“
Here’s a look at U-Haul’s two main coverage options:
Safemove
Safemove is essentially coverage for if someone hits your truck. It gives you:
Damage waiver: Covers most accident damage to rental equipment, including tire damage and overhead
Cargo protection: For damage or loss to cargo due to fire, collision, windstorm, or overturn of the rental truck
Medical/life protection: For you and other passengers in the cab of your U-Haul rental truck
You’ll have to look to your own insurance if you hit someone else, or get Safemove Plus, which covers you against damage done to another vehicle. And your belongings inside the truck are only covered if you get hit, there’s a fire, a windstorm, or if your truck literally overturns.
Safemove Plus
Safemove Plus offers all the same coverage as Safemove, plus it also includes liability insurance (and has a $0 deductible):
Supplemental liability coverage: This safeguards your personal insurance policy up to the first one million dollars of losses.
No deductible: There’s a $0 deductible on ANY accidental damage claims for the U-Haul truck.
All Safemove protection: Damage waiver, cargo protection, medical/life protection are included.
It’s also the only coverage that includes 100% overhead damage, like the kind you see on YouTube where people slam their trucks into low clearances.
And as a safeguard to your personal insurance, if you were to cause an accident or mess up their equipment somehow, this covers up to the first million dollars of losses.
For our simulated move, we went with U-Haul’s regular Safemove coverage for $15. Safemove Plus would have cost us $28.
Additional Coverage Options:
Safetow
Safetow is U-Haul’s coverage for trailers, tow dollies, and auto transports. The cost varies significantly depending on coverage levels and how far you’re driving. Here’s what it includes:
Damage waiver: This covers damage to the U-Haul rental trailer or towing device.
Towed property protection: There are multiple levels of protection to cover damage to your cargo or your vehicle while being transported with a U-Haul rental trailer, tow dolly, auto transport, or toy hauler. That is — unless you’re in Virginia. For some reason, automobiles aren’t covered by Safetow in Virginia.
Medical/life protection: In case of an accident (subject to exclusions), this coverage provides you with some degree of medical and life protection. Your passengers are only protected by this coverage while they’re riding in the passenger area of the towing vehicle.
Safetrip
U-Haul also offers Safetrip supplemental roadside protection for an extra $5 per local rental or $7 per one-way rental. Safetrip comes in handy if you need a jump start or fuel service, get stuck in snow, lose your keys, or have trouble with your trailer hook-up. Hopefully, none of these things would happen during your move, but Safetrip is an option if you’re worried about it.
Safestor
Safestor protects your things while they’re being stored in a U-Box container or self-storage unit. It covers loss or damage caused by major perils such as fire, hurricane, vandalism, burglary, earthquake, flood, and more.
Safehaul
Safehaul covers your items while they’re in transit within a U-Box container, in case they become damaged along the way.
Do I Have To Buy Insurance With My U-Haul?
No, you don’t have to buy insurance of any kind to rent a U-Haul.
But should you?
Here’s the thing: While you’re statistically in the clear, U-Haul’s policies are perfectly crafted to leave you on the hook if absolutely anything were to go wrong.
Your personal auto insurance policy most likely does not cover damages to rental trucks.
Your credit card likely does not cover any damages to rental trucks.
You’re responsible for damages, even if it’s not your fault, including things like vandalism.
Some stores told us you have to pay U-Haul the exact moment you return the vehicle for any and all damages, while others told us it goes through insurance — so you should probably ask when you rent the truck what your location’s policies are.
Keep in mind that U-Haul only offers Safemove Plus for their box trucks. When you rent a pick-up truck or cargo van, your only option is Safemove.
U-Haul Equipment
We didn’t rent any equipment or buy any boxes or supplies, but we definitely had the option!
It’s possible to move without renting (or buying) any special equipment. But even if you hire a crew of movers to come in with all their hand trucks and dollies to load (and unload) your truck, you’ll at minimum still need your own blankets to protect your belongings.
Here’s how much the stuff would’ve cost us had we opted to buy supplies from U-Haul
U-Haul Moving Equipment Online Purchase Prices:
Padlock: $4.95 to $16.95 (best value is a 4-pack for $10.50) unless you want to get really fancy with a $49.95 braided steel cable lock
Stretch plastic wrap: $10.95–$29.25
Boxes: $1.30–$2.34 per box for small, medium, and large boxes (They offer tons of specialty boxes, too, and you’ll pay a lot more them — like $144.95 for a bike box.)
Tie down rope: $3.95
Moving straps: $24.95
2-rolls of packing tape & dispenser: $8.99
Furniture dolly: $19.95
Speaking of which, when it comes to some moving equipment, you can save money by renting instead of buying. U-Haul rents out furniture pads for $5 per half-dozen, as well as furniture dollies, appliance dollies, and utility dollies — for around $7 to $15 each, depending on whether your move is local or one-way.
*These prices came from U-Haul’s website and may vary by location. You may want to check your local store first before buying online in case their prices are cheaper.
How Much Does Moving Labor Cost?
When you go to a U-Haul shop, it’s likely they’ll try and sell you on movers. Even the inside of their trucks have advertisements for moving labor all over them.
How much are U-Haul movers? Mover prices will vary dramatically, depending on the number of hours booked, how many movers you book, whether they are loading, unloading, or both, and how soon you need them.
U-Haul’s base rate is for two helpers with a two-hour minimum per location (either your starting point or end point). But if both locations are near each other, you may be able to combine the loading and unloading at both locations into one two-hour block.
The U-Haul moving labor quotes we were provided averaged about $245 each, with most between $200 and $300, and one for $600! Such wild differences are exactly why you should get your own moving labor quotes to compare against theirs.
“If the U-Haul you’re renting from has gas pumps, ask for a full tank before you take it off the lot. And by full, we mean as full as possible. The fuel tank capacity for the 10′ truck is 31 gallons, according to the website.”
The way U-Haul’s movers work is that they have a network of local movers that sign up to receive job requests via their marketplace.
But unlike HireAHelper’s $1,000 guarantee, if anything goes wrong or gets broken during a move with U-Haul, you’re mostly taking your chances. They’ll connect you with movers, but it’s between you and them after that.
We found this part of their terms, too:
“Furthermore, the Moving Help request and its acceptance and if applicable, any resulting provision of Services, are solely between You and the Moving Help®. Therefore, when and where there are any claims, demands, liabilities, damages or losses incurred as a result of the same, You, your heirs, successors and assigns, do hereby waive and release Us (Our officers, directors, agents, parent, subsidiaries, affiliated companies and employees) from any such claims, demands, liabilities, damages or losses.
You acknowledge and agree that both You and the Moving Help® each have the right to pursue a claim against one another in a Court of competent jurisdiction or in another similar forum of dispute resolution.”
This is compared to movers through HireAHelper, which provides some insurance for free (and that $1,000 service guarantee if anything goes wrong), plus additional insurance starting at $12.
Are Movers Actually Worth It?
The difference between a move that takes you all day, breaks your back, and keeps your stuff out of the hands of amateurs could be as little as $200, depending on how much stuff you have. Movers may be the most value you can get from any single add-on.
Other Things To Know About Your U-Haul Quote
What Actually Happens at the U-Haul Store After You Reserve Online or Over the Phone?
We went online and used a credit card to book a 10′ rental truck, and we thought the booking was all paid up. But it wasn’t — our card was just used to make the reservation.
While our vehicle was reserved online, we had to reproduce the same or another form of payment in person (cash was acceptable as well), regardless of what we used online to reserve it. Makes sense, but might be a stumbling block for some people.
After that, U-Haul put a hold on our bank account upfront for all the estimated costs (i.e., rental fee, environmental fee, tax, and mileage). They asked us how many miles we thought we’d drive for our local move and added that to the total cost for the hold. If you end up driving less, they’ll charge you less in the end. If you end up driving more, they’ll charge more. Plus, they’ll add any applicable miscellaneous fees.
When we returned with the vehicle, they checked out the truck before charging us to verify gas level and mileage (and probably to check for damage). We were given a paper receipt with the total costs. Because we used a debit card already on file, no further action was needed.
Paying for a U-Haul in Cash?
We were told that customers paying in cash for a local rental need to put down a $100 deposit, or the estimated rental charges, whichever is greater. This would eventually be reimbursed, minus our total cost, upon return of the vehicle.
Here’s what to expect if you’re paying in cash, straight from their website:
“If you’re paying with cash, the following is due when you pick up your equipment:*
In-Town truck – $100 or estimated rental charges (whichever is greater)
One-Way truck – $100 plus rental rate
A major credit card or debit card with a major credit card logo is required at time of pick up for all Cargo Van and Pickup Truck rentals.
The total estimated charges for your rental are due when you pick up your equipment regardless of your method of payment. Payment can be made by credit card, debit card or cash.
Cash is accepted for pickup and van rentals. However, a valid credit or debit card with a major credit card logo will also need to be presented in the name of the renter.”
U-Haul Discounts
There are no formal military, senior, or student discounts at U-Haul. It’s really just up to the discretion of the U-Haul store you’re renting from if they give you a deal or not. The rep told us that a discount anywhere between 10% and 15% is what they’re allowed to apply to an order if they’re so inclined.
How Old Do You Have To Be To Rent a U-Haul?
Wanting to test the age limits, we sent one of our 20-year-old team members to officially do the honors of picking up the vehicle. It didn’t matter, as U-Haul says you just need to have a valid driver’s license and be at least 18 years old to rent a truck and 16 years old to rent a trailer.
Real U-Haul Rental Costs We Paid
Our final cost for our U-Haul rental was $53.79. Without skimping on coverage completely, it’s the cheapest we could get it.
Rental fee: $19.95
Mileage charge: $9.52
Safemove damage coverage: $15.00
Environmental fee: $1.00
Vehicle license/cost recovery fee: $1.20
1.6 gallons of gas: $4.99
Tax on rental: $2.13
Total: $53.79
We got a 10′ truck, U-Haul’s smallest with no ramp, and drove it eight miles. We bought the cheapest insurance, absolutely zero equipment and zero labor, and got hit with no other fees.
Our bill was still almost three times the advertised price.
Of course, $53.79 isn’t a bad deal, depending on what you need it for. The problem is that if you only need a quick lift to pick something up, $50+ can render a lot of good deals useless.
On the other hand, if you were seriously moving, odds are great you’d drive many more miles, and your fuel usage would probably be way higher, given you wouldn’t be hauling air. And if it’s during the busy moving season, the mileage rates will likely be higher too, with it all adding up to quite a bit more than $19.95.
The Bottom Line
Nobody pays $19.95 plus tax on a U-Haul rental.
An extremely conservative estimate for a very small, local move is probably closer to around $125 for the rental. You’ll realistically need one of the larger trucks for a real move.
And that’s strictly local. For long-distance moves, even a small load will be much closer to $1,000 or more. And that’s assuming you don’t need a hitch installed.
How much you finally shell out will depend on your circumstances, your preferences, and your requirements. Keep the above in mind as you plan out your move. You’ll probably save at least enough for some extra coffee on the drive to your new home!
Packing for a move is already a big job without the need for last-minute surprises, which is why it helps to know what is not allowed on a moving truck before you accidentally pack a prohibited item. Some banned moving items are restricted for safety or legal reasons, while others just aren’t covered under insurance if something goes wrong.
Below, we’ve explained what can’t go on a moving truck and why, along with a few smart tips to help you pack with confidence, avoid last-minute delays, and keep your belongings safe from start to finish.
Perishables: Items That Can Spoil on the Truck
These banned moving items mainly include food and houseplants:
Houseplants fall in this category, too, since they don’t hold up well in the extreme temperatures often found in the back of a moving truck.
Aside from the risk of spoiled food or wilted plants, transporting perishables, especially plants in soil, can attract pests. This is why movers typically won’t allow them.
Combustibles and Other Dangerous Items
Transporting a gallon of ice cream in the back of a moving truck is a bad idea, but it is legal. Transporting a gallon of gasoline is not. Thankfully, it’s entirely safe and lawful to put that lawn mower on your moving truck, provided you drain all the oil and gasoline out of it first.
There are plenty of other items that fall into this category, some of which might surprise you:
Generally, if it’s explosive or combustible, it’s not going.
To be clear, some items may or may not be forbidden, depending on the moving company or the rental truck you’re using. U-Haul allows loading propane tanks onto their trucks, but Budget does not. Meanwhile, U-Pack’s list of prohibited items includes spear guns having charged heads. So it’s always best to ask for the rules and policies when you’re renting your truck.
If you’re moving with a major van line, check the company website for what is and isn’t allowed. Here is the United Van Lines list, which best reflects the industry standards.
Plants, Pistols, and Alcohol
Crossing state lines with certain plants or guns can be illegal. Even when you’re just driving through, every state’s laws apply. To protect yourself and avoid having anything confiscated, check these U.S. state laws for plants and firearms before your move to ensure compliance.
“[Movers] can, and they should, [refuse to move an item] if something isn’t safe to load. Movers have to follow strict policies when it comes to what goes in the truck, especially with anything hazardous or restricted.”
Laws prohibiting the interstate transport of alcohol tend to be less restrictive, provided it’s for personal consumption. Still, double-check with the states you’ll be entering.
Valuables, Antiques, and Irreplaceable Items
This category includes items that either have incredible sentimental value or are difficult and time-consuming to replace if lost during the move.
So, it’s best to keep the following items with you at all times during your move:
Shoeboxes full of cash (don’t label them “CASH”!)
Checkbooks, credit cards, ATM cards, insurance cards, and policies
Official documents, like birth/marriage certificates, social security cards, passports, visas, residence cards
Sentimental valuables and family heirlooms
Bank statements, financial records, mortgages, stocks/bonds
Tax returns
Medical/dental records and any medications/prescriptions
Works of art
Laptops, PCs, and any work-related documents and research papers
Final Thoughts
The list of what’s not allowed seems pretty long. But getting your packing list right the first time could save time in the long run. Take the steps necessary to ensure that you, your stuff, and your truck all make it there safely.
Frequently Asked Questions
Can I pack cleaning supplies in a moving truck?
It depends. Some basic supplies like sponges or unopened soaps are fine, but liquids like bleach or anything flammable (like aerosol sprays or ammonia) usually aren’t allowed. If you’re unsure, check the label or ask your mover before loading day rolls around.
What happens if movers find prohibited items?
Most movers will set the item aside and let you know right away. It’s not meant to slow you down; they’re just following safety and insurance rules. You’ll need to make another plan for that item, whether that means tossing it or taking it in your own vehicle.
Can movers refuse to transport items?
They can, and they should, if something isn’t safe to load. Movers have to follow strict policies when it comes to what goes in the truck, especially with anything hazardous or restricted. A quick heads-up before the move can save everyone time and trouble.
Moving to a new apartment isn’t always easy. Tight spaces, unclear rules, and even hidden fees can quickly derail your carefully laid plans.
To help you avoid any moving-day surprises, we’ve put together this guide on what to know before moving into a city apartment. By the end, you’ll know how to avoid the unexpected costs of moving into an apartment, understand your building’s lease terms and regulations, and learn how to avoid fines.
Know What Date and Time You Can Move In
Moving can be disruptive, and apartments aren’t particularly known for being soundproof. Even if you’re mindful, you can make a lot of noise coming back and forth with boxes or rearranging furniture. Quiet hours often apply in apartment communities, so you may have to plan around them.
Traffic, noise ordinances, and general rules can also affect your move-in. If your building uses an elevator, there may be specific hours or days that management allows you to book it.
Depending on your complex, you may have to move in on a Saturday. Others might specify that you have to move on a weekday when foot traffic is lighter. Check your building’s move-in policies in advance if you have time constraints for getting everything moved in.
Plan the Best Places to Park Your Moving Truck
Moving into an apartment is often more complicated than relocating to a house with a clear driveway. And if you live in the heart of a big city, it can be even harder. Ask your management office about hours, time limits, permits, and where you need to park. If you need a permit, apply as soon as possible so processing times don’t delay your move-in.
Some buildings offer a rear service entrance or loading dock. This can make things easier since you have a designated place to park, but you may have to schedule a block of time to use it.
Ask About Your Apartment’s Unloading Policy
Before moving day, ask your building management about how and where unloading works. Some apartment complexes require you to unload onto a staging area and move your truck away from the loading dock or service entrance as quickly as possible.
“A COI is a Certificate of Insurance. It lets your apartment complex know that your moving company is insured and provides important coverage details, such as policy limits, effective dates, and other key details.”
Others won’t allow you to leave items out, or they’ll require you to keep clear paths for egress. Don’t forget to inform your moving team of any rules or requirements.
Bonus Tip: Know Where to Dispose of Boxes
Many buildings set specific rules for how to dispose of moving boxes and packing materials. Even if a recycling bin is available, they may ask that moving debris not be placed there to prevent it from filling up too quickly.
Your building manager can tell you the preferred way to dispose of boxes. You can also try giving away empty boxes on social media. Or, if you unpack quickly, the movers might be willing to haul the boxes away for you.
Take Floor Protection Seriously
Many buildings require floor protection to prevent damage in shared areas, especially those with hardwood or tile flooring. For example, an area with nice hardwood or marble flooring may require Masonite: wooden hardboards that can prevent damage to the floor while you’re shifting furniture. If you need it, make sure your movers have one on hand. Some buildings may have hardboards available to lend you, so ask ahead of time.
And don’t stop at protecting just the floor. Some management companies require additional protection in doorways and stairwells.
Familiarize Yourself With Your Movers’ Insurance
Most licensed moving companies have to provide basic liability insurance. However, some buildings in big cities require proof of moving insurance or even the purchase of extra policies. That way, if an accident happens, they can recoup the cost quickly. Without insurance, you could be left with hidden apartment move-in fees.
“Even if you’re mindful, you can make a lot of noise coming back and forth with boxes or rearranging furniture. Quiet hours often apply in apartment communities, so you may have to plan around them.”
If you need proof of insurance, tell your moving company as soon as possible. They’ll need time to get a COI form from the office and return it with all the necessary paperwork from their own insurance company. The building may not let you move in if you don’t have the proper paperwork filed, so check carefully.
Review City Apartment Moving Rules
There’s plenty more to know to make your move seamless. Check with your apartment complex about common rules like:
Building move-in hours: Confirm whether there are set moving hours listed in the lease.
Elevator reservations: If you need an elevator reservation, familiarize yourself with the process in advance. Make sure you book the reservation early to get the best date and time for moving day.
COI requirements: A COI is a Certificate of Insurance. It lets your apartment complex know that your moving company is insured and provides important coverage details, such as policy limits, effective dates, and other key details.
Noise and disturbance levels: Evenings and weekends may be subject to noise restrictions. While you shouldn’t be particularly loud while moving, you also want to avoid a costly fine for violating regulations.
Fire safety regulations: While you move, avoid any fire safety violations. Ensure that you never obstruct fire exits or safety equipment.
Parking: Know where to park your moving truck (and where guests should park if friends or family are coming to help you).
Prepare for a Smooth City Move
Ready to make your move as smooth as possible? Check out our moving checklist to make sure you have all the necessary supplies, such as dollies, stretch wrap, and moving blankets.
Additionally, if you’re moving on a narrow city street or to the top of a towering apartment building, let us know. We make budgeting for apartment moves easy by providing clear, upfront quotes from local moving companies. Compare services and book trusted, vetted, and highly rated movers through HireAHelper’s online platform.
Moving with a TV can be intimidating, especially if you have an old-school tube TV or a very large flat screen. The heavy weight, large size, and unique shape of these (and most other) TVs mean they probably won’t fit in your typical moving boxes.
Our packing experts are here to explain how to protect your TV from scratches, electrical damage, and cracks. We’ll guide you on how to pack a TV for your move safely — whether you’re transporting personal belongings or hiring a moving company.
Supplies Needed to Pack a TV Safely
The supplies you’ll need vary depending on your TV’s size and weight, but here’s what we find typically works best:
Packing materials for protection:
TV Box (original or moving box): If you don’t have the box your TV came in, you may be able to find a similar-sized box at Home Depot or U-Haul.
Bubble wrap: Cushion your television with multiple layers of bubble wrap so the screen doesn’t break during transit.
Packing paper or packing peanuts: Fill empty spaces in your TV box so the TV doesn’t move around.
Moving blankets: If you aren’t using a box, cover your TV with moving blankets to prevent scratches. Stock up on stretch wrap to hold the blankets in place.
Edge protectors: Apply these foam pieces on the corners of your flat-screen TV for shock absorption and impact protection.
TV cover (optional but helpful): A foam flat-screen TV cover or antistatic TV cover can help protect the screen during a move.
Tools and accessories for organization:
Plastic storage bags or a small container: Pack remote controls, cords, and cables in a separate bag or box so they don’t get damaged during the move. Make sure to label it, or (if using a bag) tape it to the TV’s box.
Packing tape: This is used to seal the box closed and to secure bubble wrap or other packing material around your TV.
Scissors or box cutter: Use these to cut tape, bubble wrap, and to unseal the box when you’re ready to unpack.
Permanent marker: Used for labeling. Make sure you write the labels on multiple sides of the box so it’s visible no matter where the TV is placed in the moving truck.
Step-By-Step Guide for Packing a TV
We’ve put together a clear, step-by-step guide so you can learn how to pack your TV like a pro. Whether it’s a flat screen or an older model, these tips will show you how to protect your TV—and all its accessories—so everything arrives safely.
Step 1: Clean Your TV
Dust and debris may not cause a problem while your TV is mounted or on a shelf. However, these tiny particles can cause scratches if they’re pressed or rubbed against the screen. This can happen if your TV is dirty when you nestle it in bubble wrap or foam.
Check your owner’s manual for instructions on cleaning your TV. You can typically use a microfiber cloth and a gentle electronic cleaning spray.
Step 2: Remove Parts and Accessories
Unplug cords and cables from your TV before packing it. These items will go in plastic bags, small cardboard boxes, or storage bins. You may also need to take off the TV stand or legs.
Remember to remove your Roku or other streaming device from the TV and pack your remote control separately, and be sure to clearly label any boxes and bags these accessories go into. You don’t want to waste time digging through boxes blindly for the remote or stand at your new place.
Step 3: Protect Your TV
Your screen is the most delicate part of your TV, so treat it with care. Now’s the time to apply your antistatic screen protector or other screen cover if you’re using one. You can also apply foam edge protectors.
“…your flat-screen TV should never lie flat. Place your TV upright in the moving truck, as setting it flat can put excessive pressure on the screen, which can cause it to crack or shatter.”
After you protect the screen, apply thick layers of bubble wrap over your TV. Pull the bubble wrap from one side to the other, and then secure it with packing tape. You can also cover your TV with moving blankets and secure them with stretch wrap. Avoid getting tape directly on your television, as it may damage the screen or other parts.
Step 4: Place Your TV in a Box
Gently slide your bubble-wrapped or foam-covered TV into a moving box. Ask someone to hold the box in place while you slide the TV inside. If the TV is bulky or heavy, you may also need help lifting it.
Fill gaps in the box with additional bubble wrap, packing paper, or packing peanuts. Make sure the TV is snug inside the box.
Step 5: Secure and Label the TV Box
Tape the TV box shut and label it “Fragile” or “Breakable.” Keep the box upright as much as possible.
How to Transport a TV Safely
You’re probably already well aware that a misstep or bump while handling your TV can cause scratches, dents, and loose electrical components. A drop can even shatter the screen. But don’t panic! By following certain steps, you can learn how to transport your TV safely.
Protect Your TV Before Loading
Don’t just unplug your TV and stick it on the moving truck. As we outlined earlier, your TV should be surrounded by bubble wrap or foam, then covered by a box or moving blankets.
Keep Your TV Upright
Despite the name, your flat-screen TV should never lie flat. Place your TV upright in the moving truck, as setting it flat can put excessive pressure on the screen, which can cause it to crack or shatter. A flat TV may also be more likely to break if a moving box falls on it during the drive. Label the moving box with “Please place upright” or something similar to help keep your TV safe while movers are loading and unloading it.
Choose the Right Spot for Transport
A TV should never be crammed in a trunk or tied on top of your vehicle. Set your upright TV between flat, sturdy boxes so it doesn’t slide around the moving truck.
“Remember to remove your Roku or other streaming device from the TV and pack your remote control separately, and be sure to clearly label any boxes and bags these accessories go into.”
For additional protection, secure your packed TV with straps or surround it with moving blankets.
Drive Mindfully
You should always drive carefully in a moving truck, but this is especially not the time to race through yellow lights or slam on the brakes at stop signs. Drive slowly and carefully with your TV in the truck.
Unload Your TV Right Away
Severe weather, such as frigid temps or high heat, can damage your TV. Avoid leaving it in the moving truck for longer than necessary. If you’re traveling a long distance, use a climate-controlled vehicle or run the HVAC system while you drive.
Large TVs can be difficult for one person to move. Consider having a moving company load and unload your TV, or ask a friend or family member for help. Remember to bend at the knees when lifting the television to avoid straining your back.
Can I move a TV myself, or should I hire professionals?
Some people feel more comfortable letting professional movers handle fragile yet bulky items like TVs. They’ve got plenty of experience, after all! However, if you have the strength and patience, you can definitely move your own TV.
Should I remove the cords and cables before packing a TV?
Yes, you should remove cords and cables because these are tripping hazards for movers. Your TV’s wires could also get damaged during the move. Play it safe, and pack cords and cables separately.
How do you unpack a TV?
Some boxes have tearaway sides for easy TV removal. If yours doesn’t, open the top or bottom of the TV box, and then carefully slide the TV onto a soft surface. You may need help from a friend or family member. Try to keep the TV upright as you remove it.
When it’s time to move, your bike deserves more than just being wedged between boxes in the back of a rental truck. Whether it’s a daily commuter, a weekend trail companion, or a prized carbon road bike, packing your bicycle correctly matters — not just to avoid bent parts or scratched paint, but to keep your ride ready to roll the moment you arrive.
The truth is, bikes aren’t built for tight, jostling spaces. That’s why we created this guide — to show you exactly how to pack your bike for a move the way the pros do it, so it stays protected and ride-ready.
Give yourself 30 to 45 minutes for this process, especially if it’s your first time.
Supplies Needed to Pack a Bike Safely
Packing a bike doesn’t take much, but it does require the right supplies — and knowing which tools do what makes a big difference. Before you start breaking down your setup, take stock of what you’ll need:
Bike box or hard-shell case:A properly sized bike box (available from most local bike shops) offers solid protection. For higher-end bikes or long-distance moves, consider investing in a reusable hard-shell bike case.
Foam tubing or pipe insulation: This wraps around the frame tubes to prevent dings and scratches. Many bike shops will let you take discarded foam tubing from new bike shipments.
Zip ties or Velcro straps: Use these to hold loose parts like handlebars, pedals, and wheels in place without scratching the frame.
Packing tape: Tape seals the box and secures padding or protective materials. Choose a heavy-duty tape that holds up in transit.
Bubble wrap: Cushions delicate components like derailleurs, shifters, or disc rotors.
Wrenches or hex keys: These tools help remove and reassemble parts like pedals, handlebars, and seat posts.
Plastic bags and labels: Labelled bags keep small parts organized, like stem caps or axle bolts.
Permanent marker: Use it to mark your box with “Fragile” and “This Side Up” to make handling easier and safer.
You can find most of these supplies at hardware stores, online retailers, or through your local bike shop. A bike shop is also a great place to ask for a box if you don’t have your original packaging.
Step-By-Step Guide for Packing a Bike
Moving your bike? You don’t need to be a mechanic to do it right — just a checklist, a little patience, some basic tools, and about an hour of prep time. This step-by-step guide walks you through everything, from cleaning and dismantling your bike to padding and boxing it up so it arrives safe, sound, and ready to ride.
Here are 10 steps to pack your bike for a move.
1. Clean your bike thoroughly
Wipe down the frame, chain, seat, and components. A clean bike not only prevents dirt from scratching the paint during transit, but it also makes reassembly easier once you arrive.
2. Remove the pedals
Use a pedal wrench or hex key to remove both pedals. Pro tip: The left pedal unscrews clockwise (it’s reverse-threaded). Put them in a labeled bag along with any washers.
3. Take off accessories and extras
Remove water bottle cages, bike computers, reflectors, lights, and saddlebags. Store small parts together in clearly labeled bags to make reassembly easier.
4. Lower or remove the seat post
If your seat post fits snugly in the frame, lower it all the way. If it sticks or needs better protection, remove it and wrap it in shrink wrap or foam.
5. Detach the handlebars or rotate them sideways
Most movers recommend removing the handlebars and strapping them to the top tube using Velcro or zip ties. If your bike has an adjustable stem or quick-release faceplate, you may be able to rotate them sideways instead. Either way, protect the brake levers with padding.
6. Remove the front wheel
Use a quick-release lever or hex wrench to take off the front wheel. Wrap it in bubble wrap or slide it into a wheel bag. Place spacers between disc brake pads to keep them from compressing.
7. Secure loose parts
Bundle and strap any parts you’ve removed, including the front wheel, pedals, and handlebars, alongside the frame inside the box. Make sure they can’t move freely or rub against each other.
8. Protect the frame
Slide foam tubing onto the top tube, down tube, seat stays, and fork legs. If you’re using bubble wrap, tape it gently but securely. Avoid putting tape directly on the bike.
9. Pack the bike into the box or case
Slowly lower the frame into the box. If space is tight, tilt the handlebars or use padding between parts to prevent contact.
“You can move a bike without taking it apart, but it’s riskier (unless you have a hard shell box, in which case, you definitely can). If not disassembling, wrap the entire bike in padding, turn the handlebars sideways, and remove the pedals if possible.”
Fill in any gaps with crumpled paper, foam blocks, or bubble wrap.
10. Seal and label the box
Tape all openings securely, and label the outside with “Bike: Fragile” and “This side up.” You can also add “Top load only” if the bike is particularly lightweight or high-value.
How to Transport a Bike Safely
Now that the packing is done, you have to actually move the bike. Keep these transport tips in mind to protect it:
Keep it upright: Transport your bike box standing on its side rather than flat. This helps protect the drivetrain and distributes weight more safely.
Secure the box: Use straps or moving blankets to secure the bike box so it doesn’t shift during transit.
Avoid stacking: Never place heavy boxes or furniture on top of your bike box, even if it seems sturdy.
Watch the temperature: If you’re moving in extreme heat or cold, try not to leave the bike in the truck or trailer overnight, especially if it’s carbon or contains hydraulic brakes.
Mark it clearly: Labeling helps everyone assisting with the move treat it with the care it deserves.
If you’re hiring movers through the HireAHelper marketplace, use our notes section to flag your bike box as fragile and provide specific handling instructions.
Unpacking and Reassembling a Bike After Moving
Getting your bike back in action post-move is all about taking your time and working through the packing process in reverse.
Unpack in a clean, flat workspace. Avoid scratching parts on asphalt or concrete. Lay out a towel or tarp to protect the frame as you work.
Remove padding carefully. Save any reusable foam or straps for future moves or storage.
Reinstall parts in reverse order. Attach the wheel, pedals, then handlebars. Use your labeled bags to keep track of screws or bolts.
Check your brakes and gears. Spin the wheels, check for rubbing, and test shifting through the gears.
Do a safety check before riding. Tighten bolts, align the saddle and handlebars, and make sure the brakes engage fully.
If your bike has hydraulic brakes or electronic shifting, consider taking it to a bike shop for a quick post-move tune-up, especially after a long-distance haul.
What’s the safest way to pack my bike for a long-distance move?
Disassemble your bike by removing the pedals, front wheel, handlebars, and seat. Wrap the frame with foam or bubble wrap, and place everything in a sturdy bike box. Secure loose parts inside with padding, and clearly label the box for the best protection during long transit.
Can I transport my bike without disassembling it?
You can move a bike without taking it apart, but it’s riskier (unless you have a hard shell box, in which case, you definitely can). If not disassembling, wrap the entire bike in padding, turn the handlebars sideways, and remove the pedals if possible. Then, strap it upright inside the vehicle to avoid movement.
These Moving Companies Move Domestic Abuse Victims for Free
Domestic abuse happens more than you might think, and is a complex issue with many layers, making it difficult to address.
According to “DoSomething,” a wide-reaching non-profit organization in the United States, about a quarter of women around the world will experience domestic abuse in their lifetime. It’s estimated that about half of all homeless women and children in the U.S. are fleeing domestic violence.
Victims are often left with nowhere to go due to emotional, social, and economic barriers for leaving an abusive relationship. For these reasons and more, it’s common for victims to stay when facing the alternative of living in a shelter or on the street. Yet, some have found that addressing the financial aspects of relocating can often stop cycles of abuse.
Note: See the bottom of this article for potential resources if you or someone you know needs help.
The Movers Who Rescue Victims
Aaron and Evan Steed are co-founders of Meathead Movers, a brick-and-mortar chain that offers professional moving services. If you’re moving soon and you reside in California, they offer a variety of moving and storage services at the rate of 18,000 moves a year. They claim this makes them the largest independently owned moving company in the state.
However, what’s even more impressive is that they offer these services for free to victims of domestic abuse. Meathead Movers is among a growing number of moving companies committed to helping victims of domestic violence move out of their abusive households at no cost.
“…half of all homeless women and children in the U.S. are fleeing domestic violence.”
After the California-based company was founded in 1997, frantic phone calls would come in from victims without financial means who were seeking to flee dangerous domestic violence situations, according to Dawn Ventura, Director of Marketing and Communications for Meathead Movers. They couldn’t turn them away, explained Ventura. “The brothers knew it was the right decision to get them out of there.”
The choice to provide moving services to victims for free was decided right away. It has remained their business policy for over 25 years.
Risks on the Job
Meathead Movers quickly found out there are more than financial risks when taking on this type of endeavor.
During one of their earliest rescue moves, the situation turned volatile when the alleged abuser of the victim came home in the middle of the move, Ventura told HireAHelper. “It was very scary for the (founders of Meathead),” she said. “Luckily, they were able to call law enforcement, who came to the scene and removed the abuser so that the move could be completed.”
After this experience, Meathead Movers decided to partner with a local shelter to make sure the victims and moving crew were safe and supported throughout the rescue process. In 2000, the company began its first official affiliation with a shelter called SLO Women’s Shelter.
“For the safety of our team and the victim, we only complete moves that the shelter partner has first had a chance to vet,” Ventura explained. The shelter determines the greatest need and works with the movers accordingly. “There is also always a shelter representative onsite throughout the move, and sometimes law enforcement, as needed,” she added. The company has since partnered with an additional seven shelters across California to help facilitate moves.
“Google nearby shelters and moving companies that may be able to help, even if you don’t plan on using them.”
Though dangerous, this too remains far from the only challenge the company has faced over the years.
Back in 2008, during The Great Recession, Meathead Movers encountered what they described as “enormous” financial struggles. Ventura said that at one point, they thought they’d be closing their doors due to financial hardship. Still, the company continued to offer free services to abuse victims. “We knew that it was our purpose and mission,” Ventura explained.
Today, Meathead Movers remains in operation after two decades of growth and expansion despite challenges. They have maintained a policy of free rescues and feel their success proves that altruism can exist within a successful moving business model.
As of 2022, they’ve helped relocate “hundreds” of domestic violence victims in the Southern Californian area for free.
A Moving Trend
Meathead Movers team members
Unfortunately, rescue services continue to be needed. No matter how many free moves Meathead Movers offers, as a localized chain, their reach covers only a small portion of victims of abuse.
“In light of the growing cases of domestic violence, and on the heels of the national attention this free moving program has garnered, Meathead Movers is now encouraging businesses across the nation to step up and make an impact in their local communities as well,” Ventura said.
The good news is that many businesses have stepped up, including other moving companies.
In 2016, Meathead Movers launched the #MoveToEndDV campaign, challenging businesses to donate services for victims of domestic violence in their respective communities. Searching this hashtag still helps people find resources on social media. This trend has garnered the commitment of an increasing number of moving companies and businesses in other sectors.
College HUNKS Hauling Junk and Moving — another store-run chain that offers professional moving services in dozens of cities across the U.S. — began offering its services for free in October 2020 (which is Domestic Violence Awareness Month). This happened in response to news reports of increasing domestic violence during pandemic lockdowns. Within the past year, College HUNKS has helped move more than 400 domestic violence victims across the U.S., all at no cost.
How to Move Out Safely From a Domestic Violence Situation
If you’re trying to leave an abusive relationship, you’re not alone. There are resources to help you find a safer living situation. While HireAHelper isn’t a direct crisis service, we believe in providing helpful information so that, when you’re ready to move, you have as much support as possible.
Here’s a step-by-step guide on how to prepare and execute a safe exit strategy if you or your loved ones are experiencing domestic violence.
1. Know Important Crisis and Helpline Numbers
If at any point you feel you or someone else is in immediate danger, call 911. Otherwise, here are additional hotlines and support services that offer free, confidential assistance:
National Domestic Violence Hotline: call 1-800-799-SAFE (7233), text “START” to 88788, or visit thehotline.org
TTY for Deaf/Hard of Hearing: 1-800-787-3224
Childhelp National Child Abuse Hotline: 1-800-422-4453
RAINN (National Sexual Assault Hotline): 1-800-656-HOPE (4673)
2. Contact a Domestic Violence Advocate or Shelter Immediately
If you’re weighing your options, talking to someone who understands what you’re going through can make a huge difference. Trained advocates offer warmth, empathy, and practical help. They can explain what resources are available in your area and help you figure out the next step.
Here are some typical services many hotlines and shelters provide:
24/7 emergency hotlines
Housing and shelter referrals
Legal advocacy (for example, help obtaining protective orders)
Counseling and safety planning
Many local domestic violence shelters have on-call advocates and emergency housing available. You can search for shelters at DomesticShelters.org or dial 211 for local referrals.
If you aren’t ready to leave right away, talking with a professional can give you clarity, hope, and a much-needed listening ear.
3. Create a Concrete Exit Strategy
Thinking about leaving can be scary, but making a simple plan can help you feel more in control of your future. Even small steps can boost your confidence and keep you safer when the time to leave arrives:
Mark a physical calendar with a tentative move-out date or range of days
Consider times when your abuser is less likely to notice (for example, when they’re at work)
Consider who you trust to keep your location confidential
Emergency shelters can be life-saving when you need immediate refuge
If finances allow, choose a place where you’ll be harder to locate (like hotels and motels)
4. Secure Financial Resources
Financial control is a common tool of abusers, which can make leaving seem impossible. Remember there are small yet meaningful ways to gain financial footing, even if it feels overwhelming:
Use a different bank than your abuser
If physical access is an issue, look into an online-only bank you can set up with minimal paperwork
Hide money in safe, unexpected places
Ask a trusted friend or relative to hold onto what you’ve saved
Having your essential paperwork in order can spare you significant stress later. Even just making copies and tucking them away can be a powerful first step toward independence:
Birth certificates and social security cards
Driver’s licenses or photo IDs
Insurance documents (health, car, home)
Protective or divorce papers, custody orders
Medical records for you and any children
Bank statements, credit cards, and financial documents
Evidence of abuse (photos, police/medical reports)
Store these items in a discreet folder or bag. If it’s safe, you can also scan and upload them to a secure cloud folder (Google Drive or Dropbox) with a strong password your abuser can’t guess.
6. Arrange School and Childcare Permissions
Worrying about children’s safety is often one of the biggest hurdles in leaving. Give yourself credit for protecting them — and know there are systems that can help.
Add or remove pick-up permissions at your child’s school or daycare
Alert school officials if you have a protective order; provide a copy if possible
Set up a secret password with your kids (if they are old enough) so they know who is safe
7. Shield Your Digital Footprint
Many abusers track phone calls, texts, browsing history, or even your location through GPS or “spyware” apps. It’s understandable to feel nervous about technology, but there are ways to protect yourself.
Use a safe device, like a friend’s phone or a public library computer, for sensitive research
Turn off location services on social media and messaging apps
Get a new or prepaid phone if you suspect your current one is compromised
Delete your search history and use incognito browsing windows or clear your browser cache regularly
Update passwords with questions only you can answer (avoid shared memories or guessable info)
For more detailed tech safety help, visit NNEDV’s Safety Net Project. You have a right to communicate freely without being watched or threatened.
8. Plan for Move Day
When that day arrives, try to streamline as much as possible. Make checklists, enlist friends to help, and coordinate quietly if you can.
Secure weapons if any are in the home, or remove them if you can safely do so
Change online logins and passwords right before leaving
Disable your car GPS if your abuser might be tracking you
Coordinate with movers and let them know this is a sensitive situation so they can be discreet
Prepare an emergency bag with medications, clothes, important documents, chargers, and cash
9. Explore Additional Legal Protections
Legal help may feel intimidating, but knowing your rights can empower you and put critical safeguards in place.
These Movers Offer Free Services to Domestic Violence Survivors
Encouragingly, Meathead Movers and College HUNKS are only two of many movers offering free services to domestic abuse survivors.
Below is a non-exhaustive directory to help you or anyone you know who is a victim of abuse. If you don’t see a company near where you live, search for movers in your area. Or, call a local company and ask if they have any connections or knowledge of a similar service.
Aussie Moving provides full-service residential moving, as well as commercial moving and storage. The company pledges to provide free moving services to victims of domestic violence in coordination with a local shelter in Santa Barbara County.
Located in the Dallas-Fort Worth metro area, Brown Box Movers offers a variety of services, from residential moving, to move-in/move-out cleaning, to junk removal. The company pledged these services to help those experiencing domestic violence in the area.
Daymakers Moving & Storage serves Wisconsin and the Twin Cities, MN. They offer confidential emergency moving services at no charge for survivors of domestic violence and sexual assault, transporting them quickly and discreetly to a safe place.
Einstein Moving Company has locations throughout Texas, including Austin, Dallas, Houston, San Antonio, and more, and can complete statewide moves. The company also pledges up to $2,000 a month for moving services to Safe Place in Austin.
Gentle Giant is involved with several charities, including a strong alliance with charities involved with housing assistance and homeless prevention. Gentle Giant pledges to offer a free move to those who need help getting out of a domestic violence situation.
Contact: (801) 562-0093 (Sandy), (801) 809-7800 (SLC), (801) 735-4144 (Provo) or send a message
You may recognize Helping Hands Moving and Maids from the show Extreme Makeover, or from its extensive charity work in Utah, as well as overseas. The company pledges its services to domestic violence victims in need.
Moving at Ease is a family business that tailors its moving services to senior citizens and their families. It can accommodate local and long-distance moves. The company pledges to volunteer its time and resources to help those in need in the Phoenix metro area.
VMA employs a 100% veteran workforce and self-identifies as a “values-based company.” It’s partnered with SafeHaven to provide free services to domestic violence victims.
What’s the difference between preparing for a local move and planning a long-distance move? If you guessed “time,” that’s only part of the equation. When it comes to moving long distances, it takes a lot more planning, preparation, and money.
There are many, many more steps to take than a local move, and it can get a little overwhelming. That’s what this guide is for! Learn everything about how to move long-distance, including tips on moving across the country and packing up your things.
How Much Do Long-Distance Moves Cost?
Interstate and long-distance moving companies charge based on weight, distance, and any extra equipment or insurance options you opt into.
One more big factor to consider is if you have any specialty items to move, such as a baby grand piano or gun safe.
What counts as a long-distance move? Generally, a long-distance move is one that is 400 miles or more. However, the exact number used to determine “local or long-distance” may vary from one moving company to the next.
Cost-Cutting Long-Distance Moving Tips
Here are some money-saving pro tips to keep in mind as you collect estimates and plan your long-distance move:
1. Start a Moving Fund
If you have time before your move, try to start a moving fund to prepare yourself for the upcoming expense of moving long-distance. This may not necessarily save you money, but it’ll help ensure you have the nest egg you need when the time comes.
2. Understand Binding vs. Non-Binding Estimates
It’s important to understand the difference between a binding and non-binding estimate when working with a full-service moving company.
A binding estimate means you’ll pay the final price of the estimate regardless of whether your stuff ends up weighing less or more than expected.
A non-binding estimate means you could end up with a different final tally, either less or more, depending on the weight.
3. Take Advantage of Off-Season Moving Rates
Summer is the most popular time to move and, as a result, moving rates are typically the highest during that season. You can bring the price down by being flexible with your moving dates and scheduling your move during weekdays, especially in the winter (or at least not during the summer).
See prices for local moving labor. Read real customer reviews. Easily book your help online.
4. Ask for Discounts and Promotions
Ask moving companies about any discounts or current promotions that you could take advantage of. For example, members of the military and veterans often get cheaper rates for rental trucks and containers.
5. Get Multiple Quotes
Always get moving quotes from at least three different companies, whether you’re moving with a rental truck, portable moving containers, or a full-service moving company. Just remember that cheaper isn’t always better. It’s a good idea to take a look at online reviews and customer satisfaction scores as well.
6. Inquire About Corporate Relocations
Those who are moving for work should see if their employer offers reimbursements for any or all of the move.
7. Make a Budget and Stick to It
Once you have a clear idea of what it’s going to cost to move long-distance, put together a budget. Be sure to keep track of spending along the way, saving receipts and noting expenses, to keep moving costs from getting out of control.
What Kind of Transportation Do I Need?
You have a number of options when planning a long-distance move, and all of them will depend on these three things:
How much stuff you’re hauling
Your budget
Personal preference
Unless you’re selling everything you own and driving into the sunset, you’re going to need something safe and reliable to get all your stuff to your new place.
But don’t worry, you’ve got choices. Here are your best transportation options for a long-distance move.
Driving Yourself
Driving yourself and your stuff in your car is by far the cheapest option. People sometimes decide to take this approach when their long-distance move involves bringing a car or two. If you’re thinking about going this route, there are a few things you should consider first:
The age and mileage of the car
Whether the car can handle a long trip without breaking down
How many people and things need to fit in the car
If you need to get repairs ahead of time, then trust us, do that first. If you don’t have money to sink into repairs, or you just don’t want to add hundreds of miles to your car, consider getting your car shipped.
“Bubble wrap is an attractive option for particularly expensive or hard-to-replace breakables, but it’s bulky and becomes expensive quickly (not to mention, it’s not great for the environment). Packing paper is more than adequate for packing most things.”
If you decide this is the end of the road for your car, consider selling it or trading it in before your move (or you could donate it).
Cons: Way more time investment, adds mileage to your car(s), limited space for your stuff, very difficult without movers
Price: $
Rental Truck
Driving your own car might be the cheapest option, but it’s one that dpesn’t afford a lot of room for your other stuff. Sometimes, a truck is necessary if you want to take all your things with you.
The three major rental truck companies you’re likely to have access to are U-Haul, Penske, and Budget. But, there might be alternatives near you.
If you decide to rent a moving truck, you’ll get a better mileage rate for doing a “one-way” drive (picking up a rental vehicle at one location and returning it to another). Of course, keep in mind that getting and driving the truck is only one aspect. You still have to pack and load everything in there yourself.
Pros: More affordable than most other long-distance moving options
Cons: Much fewer customer service options, no labor estimate, difficult without movers to help, more expensive than just driving your car.
Price: $$
Long-Distance Movers With a Truck
What if you don’t want to figure out where to get the truck or you don’t want to drive it? Then you can hire long-distance movers to transport everything for you.
Note: Long-distance movers with a truck are not van lines. There’s a difference!
With this option, you pack and load everything into the movers’ truck and they transport it to your new home. This frees you up to take a scenic road trip or fly to your new home with just your essentials. Moving this way is more expensive, but it takes a lot of time, effort, and planning off of your plate.
Pros: You don’t have to worry about driving a big moving truck
Cons: More expensive the more stuff you have, less affordable than other types of moves
Price: $$ to $$$
Van Lines
You’ve probably seen the van line trucks on the road before: ABF/UPack, Old Dominion, and more.
This is how it works: a semi-truck trailer is dropped off at your home, you load your stuff (or have someone load it for you), and you partition it off to keep it separate from other customers’ belongings.
A driver will come to take the trailer away and drive it to your new home. Sharing space on a trailer with other people who are moving is a cost-effective way to get your belongings across the country because you only pay for the space on the trailer you take up.
That said, because this moving option involves multiple individuals’ prize possessions packed inside in shared moving trucks, we highly recommend hiring movers to load the trailer for you. The pros have experience and know how to keep your stuff safe and take up the least amount of space possible.
Pros: You pay only for the space you use,and transportation is all taken care of.
Cons: More expensive the more stuff you have, some companies offer less flexibility with loading and unloading dates. Can have a high claims rate as your things may be unloaded and loaded multiple times during other deliveries, and there is a risk of your things getting mixed up with other customers’ belongings.
Price: $$$
PODS/Moving Containers
Moving containers are ultra-convenient for long-distance moves for a few important reasons.
Portable moving containers are like a freight trailer but a lot smaller. Your container is dropped off empty and picked up when full, then kept in storage untouched until you request delivery at your new home. One of the biggest benefits for moving containers is being able to load your belongings at your own pace. Companies like PODS bill you monthly (while others at least give you a few days).
“Both your departure and arrival towns likely have parking rules, which will come into play as you’re loading and unloading, especially if you’re leaving a PODS container somewhere for a week or more.”
If you’re planning to use a portable container for storage, be aware: unlike more traditional self-storage, access to your portable container is only easy if you keep it in your front yard. When kept at a storage facility, an appointment is generally necessary and may cost you extra, so plan ahead.
Pros: The most flexibility of any long-distance moving option, transportation is taken care of, storage options are built-in
Cons: More expensive than a moving truck rental, can add complexity if you keep your container in their storage centers
Price: $$$
Full-Service Movers
If money is no object, hire a full-service moving company. They can assess your home and schedule a crew of movers to come with the packing supplies to pack, load, drive, and unload your stuff within the month of your choosing. You can even pay for the movers to disassemble and reassemble furniture for you.
Pros: Aside from coordination with the moving company, your move is practically done for you
Cons: Almost always the costliest option, requires more time to plan (sometimes a month or more ahead of time)
Cost: $$$$
How Do I Pack for a Long-Distance Move?
If you’ve already decided to hire full-service movers, you can skip ahead — they’ll take care of all the packing! Otherwise, read on. Below are some general estimates for how long it will take to pack, as well as some of our best tips for packing for a long-distance move.
How long does it take to pack for a long-distance move?
It’s important to know when to start packing, so here are time-requirement estimates for packing a home:
Studio/1BR Apt: 1 Day
2BR Apt: 1–2 Days
3BR Apt: 2–3 Days
2BR House: 2–3 Days
3BR House: 3–4 Days
4BR House: 4–5 Days
In the estimates above, “one day” is about eight hours of one person packing. If you only have time to pack for four hours a day, double those estimates. With that in mind, the single best strategy for packing is to start well in advance of when you think you should start, no matter which transportation option you choose. In all my experience, I never heard someone say that packing took less time than they expected.
Long-Distance Moving Tips for Packing
Packing is one of the most time-consuming parts of any long-distance move. To save you time, and save your sanity, here are some tried and true packing tips for moving long distances.
Test your packing speed:
Pick a closet or a room, or even just part of one room, and time how long it takes to pack.
This may give you an idea of how long it will actually take you to pack up your entire home. It will probably start looking like it will take much longer than you originally thought.
Decide what your non-essentials are:
Make a list of the kinds of things you won’t need for a while. This will make it easy to decide what to pack first once you get started and are faced with that mountain of accumulation in the garage or spare room.
Things you don’t need for a while often include:
Out-of-season clothes
Holiday items
Books
Sentimental items
Decorations
Seasonal bedding
Even if you’re undecided about what to do with some of your belongings, other categories are a no-brainer. Get them packed up and out of your way.
Shelve the sentimental. You will undoubtedly come across items you think you might want to get rid of but aren’t quite sure about. Expect that. Instead of wasting time fretting over Grandma’s lace tablecloth, set it aside for later. The monstrous task of packing tends to help people clearly see what they really need and what they can let go of.
Pack an essentials bag for every member of the family:
The last thing you want is to realize you’ve packed every single sock you own or, worse yet, your emergency contact lenses. Make a list of the things everyone is going to need access to during the move and set those things aside. Before moving day, have everyone pack up a carry-on or duffel bag with what they’re going to need before the new house is unpacked.
Things you will likely need to keep on hand:
Clothing
Toiletries
Essential electronics and chargers
Medications
Child’s favorite toys
Shower rod, rings, and curtain
Towels
Coffee maker, coffee, and your favorite mug
This list can get pretty subjective, so think about what you can’t live without during your move and add to it as needed.
DO NOT pack important paperwork, documents, and irreplaceable items:
When it comes to sensitive documents, shred those you don’t need and secure (and keep with you) the things you do.
Identifying documents such as birth certificates, social security cards, driver’s licenses, passports
These items should stay with you during your move, secured in suitcases, safes, and binders.
See prices for local moving labor. Read real customer reviews. Easily book your help online.
Don’t pack your boxes too heavy:
You want to be able to actually move your moving boxes, so avoid packing boxes that weigh more than you (or the movers) can comfortably carry. Using small boxes for heavy items and large boxes for lighter items is a good rule of thumb.
Label boxes as you go and keep an inventory:
If you’re thinking, “I’ll unpack these boxes in a week. I know what’s in there,” trust me — at the end of your move, you’ll have no idea what’s in all those boxes.
Do yourself a favor and get a pack of Sharpies, labels, and a fresh spiral notebook.
Label your boxes with the following on two sides:
A unique number (1, 2, 3…)
Which room it belongs in
What you’ve packed inside
Then note all that down in your inventory notebook. This will make unpacking much easier and you’ll be patting yourself on the back when move-in day comes.
Use packing paper, towels, and linens instead of bubble wrap:
Bubble wrap is an attractive option for particularly expensive or hard-to-replace breakables, but it’s bulky and becomes expensive quickly (not to mention, it’s not great for the environment). Packing paper is more than adequate for packing most things. It’s also easier to handle. Make sure you use the right kind of tape, too.
For some extra padding and protection for your most important and fragile items, consider using clothing, linens, or towels to wrap those items and line your boxes. You have to pack those things anyway, so might as well use them to protect your favorite mugs.
Experts suggest taking photographs, especially for anything of great value. You may want proof of exactly what condition the items you keep are in before they are packed away on the moving truck (or whatever mode of transportation you choose).
Where Can I Get Packing Materials for a Long-Distance Move?
The easiest way to get clean, sturdy boxes and packing paper is usually to buy them from your moving service provider. Many self-storage facilities also offer these items, along with tape and other packing essentials. However, from a price perspective, you could probably save some money by getting your packing supplies from a home improvement store instead.
You could theoretically choose to ship some of your things via UPS, FedEx, or the U.S. Postal Service (USPS). Yes, it’s cheapest to send through USPS, but pricing typically levels out for packages weighing more than two pounds.
Should I Get Rid of My Things?
You might recognize by now that the less stuff you have to move, the better off you’ll be. After all, professional moving companies generally charge you based on the weight of the stuff being transported. In other words, both literally and figuratively, you will lift a weight off your shoulders if you downsize before moving.
Some ways you can unload your stuff before moving day:
Sell stuff online through Craigslist, eBay, or Etsy
Have a traditional garage sale
Give away things to your friends and family
Donate items through charities or religious organizations
How To Pack the Truck (If You’re Doing It Yourself)
If you’ve decided to DIY your move with a rental truck and now have to load it yourself, remember these two pro tips:
1. Keep the Heavy Boxes on the Bottom
The idea is to avoid anything being crushed. Heavy boxes of books? Those should be packed under the China tea set. Flatscreen TV? That should be secured upright between the couch cushions without anything on top of it.
2. Load Your Belongings in “Tiers”
This means building walls, i.e., vertical layers of furniture, boxes, and assorted loose items. Furniture pads are crucial for this.
For example, set down your dresser and a desk (wrapped in padding, of course), with some not-too-heavy boxes set on top of them, and top it off with outdoor equipment, pillows in plastic bags, etc. This all makes up one tier.
Build one tier at a time, mixing furniture, boxes, and miscellaneous stuff. It’s critical to pack tightly to avoid damage from everything shifting and bouncing around in transit. Naturally, not all your tiers will be uniform, but do your best to balance the weight throughout the truck as you pack.
Other Considerations When Moving Across State Lanes
Interstate moves are particularly complicated due to differences in state laws. You still legally have to know what you’re responsible for when moving to a new state, so the first step is to do your homework. Here are some
Moving Company Licenses
Hiring movers? Some moving companies can’t even provide service for interstate moves because they lack the proper license. Check-in with your mover ahead of time. (Of course, the HireAHelper search tool filters all that stuff automatically once you input your zip code.)
Parking During Your Move
It’s important to know both state and local laws and ordinances that may be relevant to you during your move. Both your departure and arrival towns likely have parking rules, which will come into play as you’re loading and unloading, especially if you’re leaving a PODS container somewhere for a week or more.
State-Specific Restrictions
Also, some states have certain laws restricting what you can bring in. For instance, there are several items that are illegal to bring into California, including certain firearms, fruits, and certain pets, like ferrets.
Moving Long-Distance with a Pet
Interstate moving with a pet adds one more tricky factor to the moving mix. It’s not impossible, though, and these tips can help make it a lot easier
×
I'm Moving
Moving? Thinking about moving? Whether your move is off in the distance or you already have one foot out the door, you'll learn about everything you should expect through our useful how-to's, cool articles and much more. It's all specially curated for you in our "I'm Moving" section.
For rookies or veterans alike, our "I'm a Mover" section is filled with extensive industry news, crucial protips and in-depth guides written by industry professionals. Sharing our decade of moving knowledge is just one way we help keep our professional movers at the top of their game.


 First, know that the moving company cannot legally keep your stuff unless you’ve violated the terms of your contract. In some jurisdictions, moving companies have the right to hold onto your belongings if you:
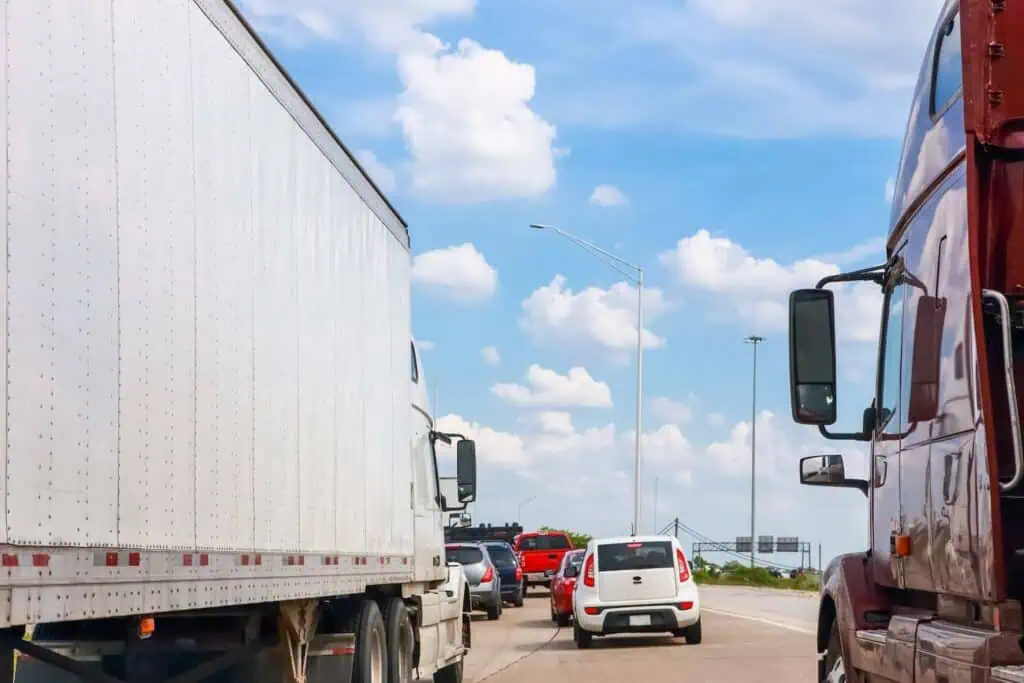


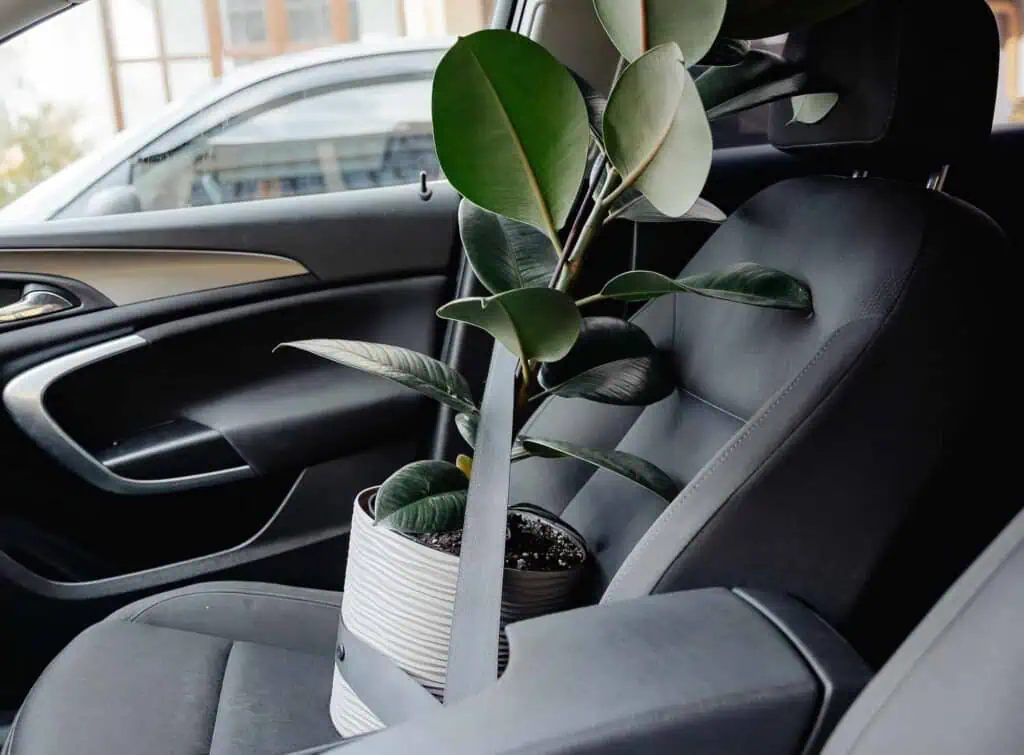


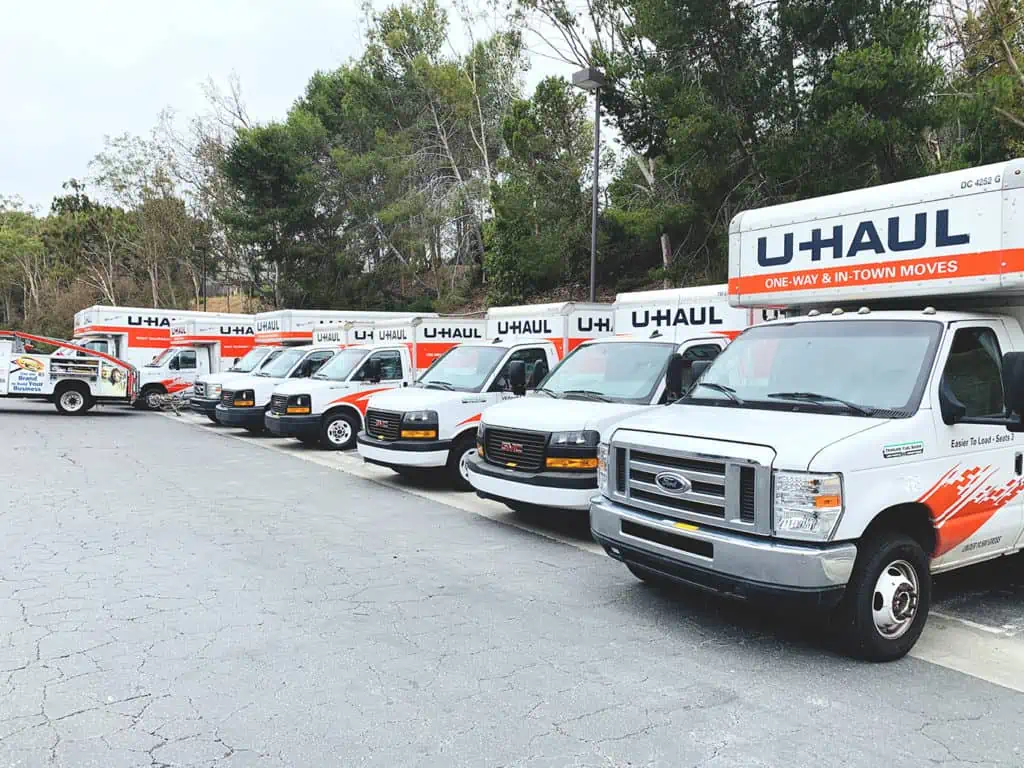
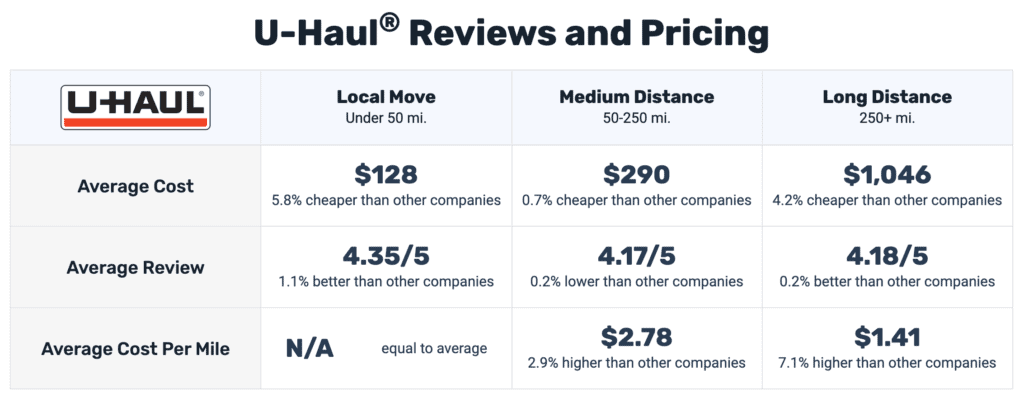
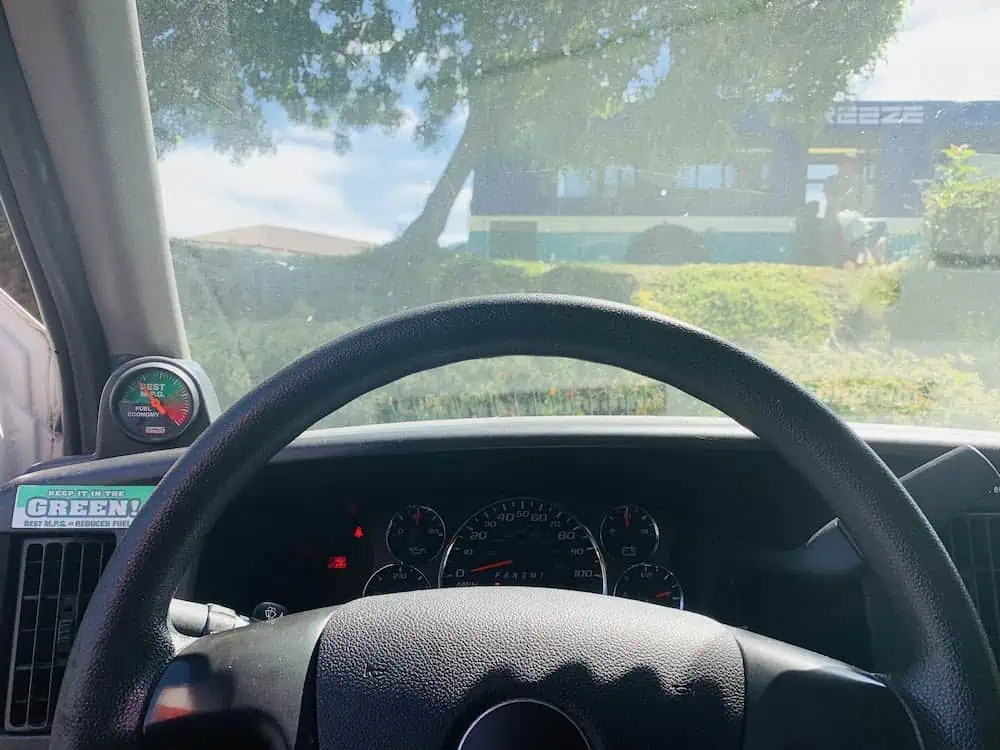
 The U-Haul clerk marked down the exact mileage and gave us their daily rate for gasoline. We had the choice of filling up what we used ourselves out in the wild, or paying U-Haul $4.75 a gallon(!) to do it for us after we returned it as a “convenience fee.”
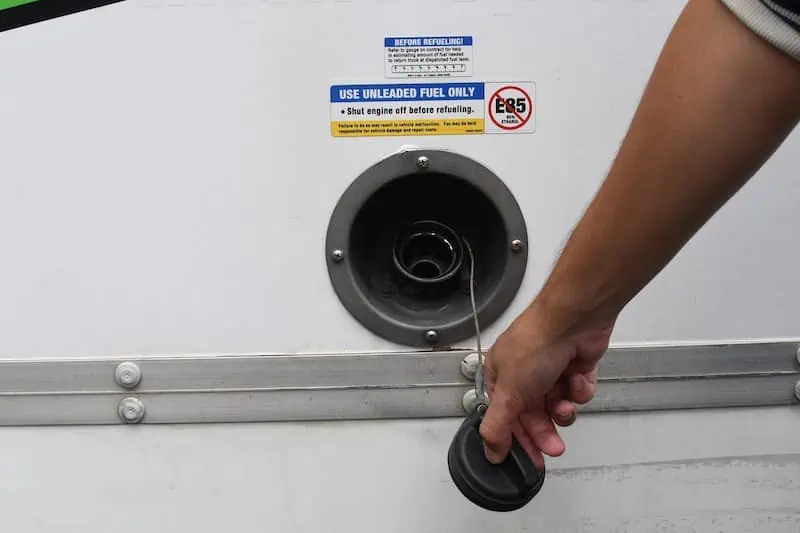

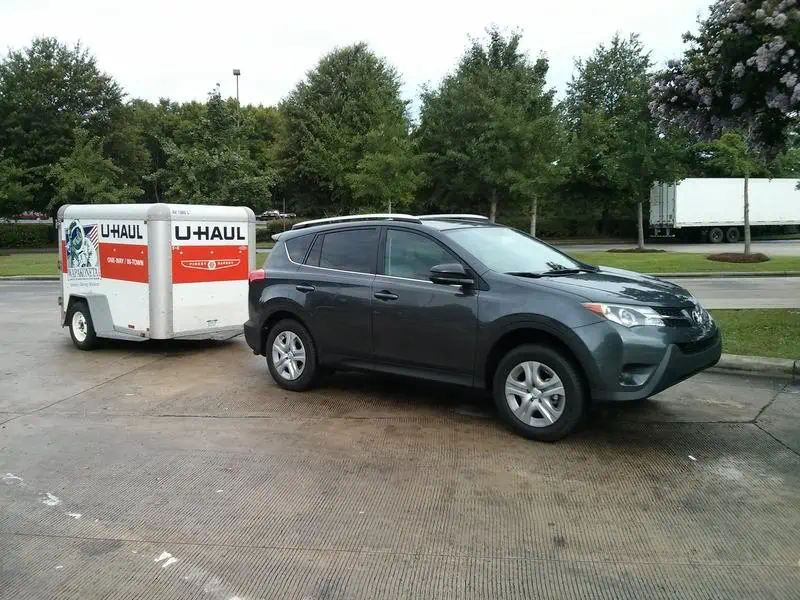

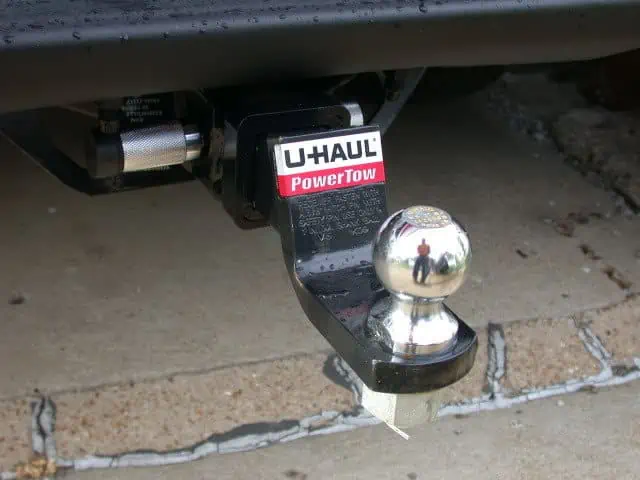
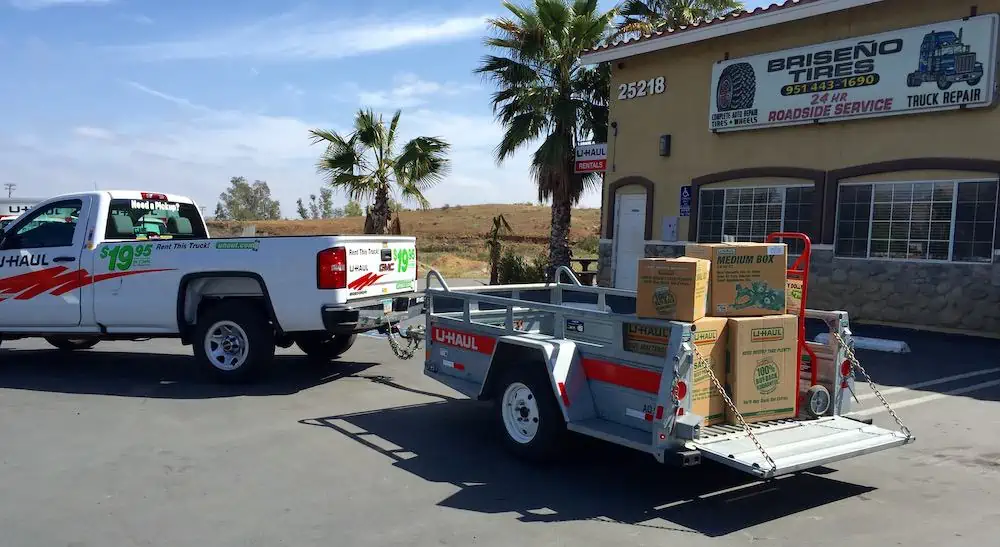
 We were only able to get a quote for a long-distance move with a 5′ x 9′ Utility Trailer because it turns out the 4′ x7′, 5′ x 8′, and 6′ x12′ options are only available for local and round-trip moves. Our quote was $425 before taxes for a five-day rental with unlimited miles from Tampa, FL to Dallas, TX. Keep in mind this doesn’t include optional damage coverage or having a hitch installed.
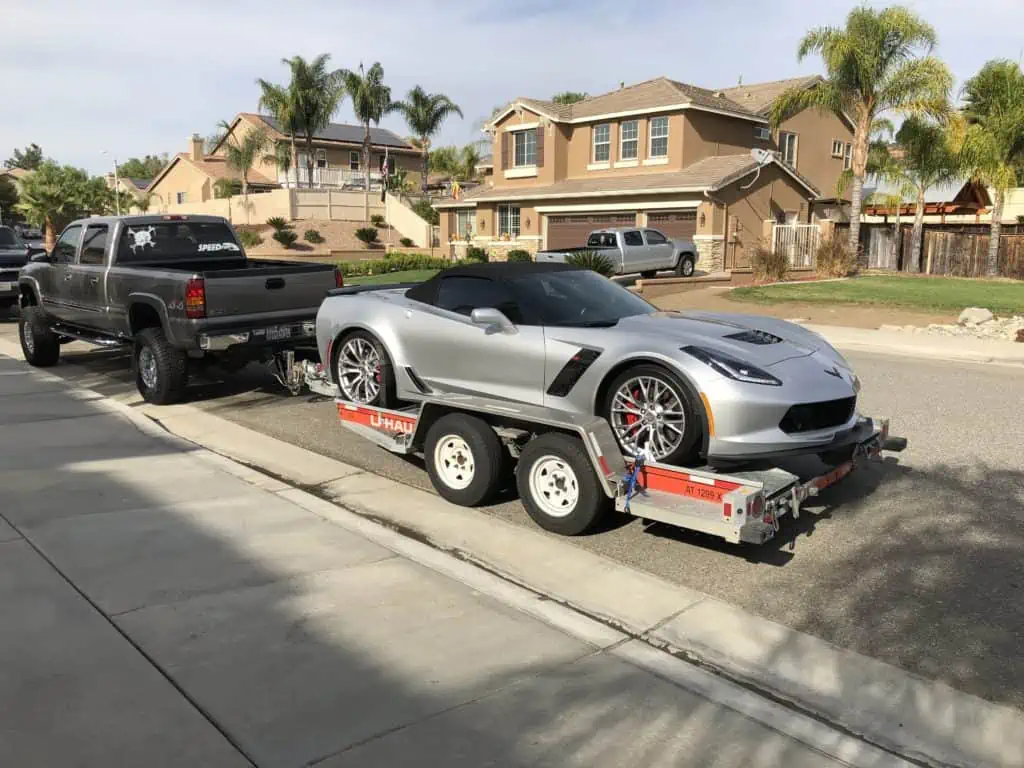

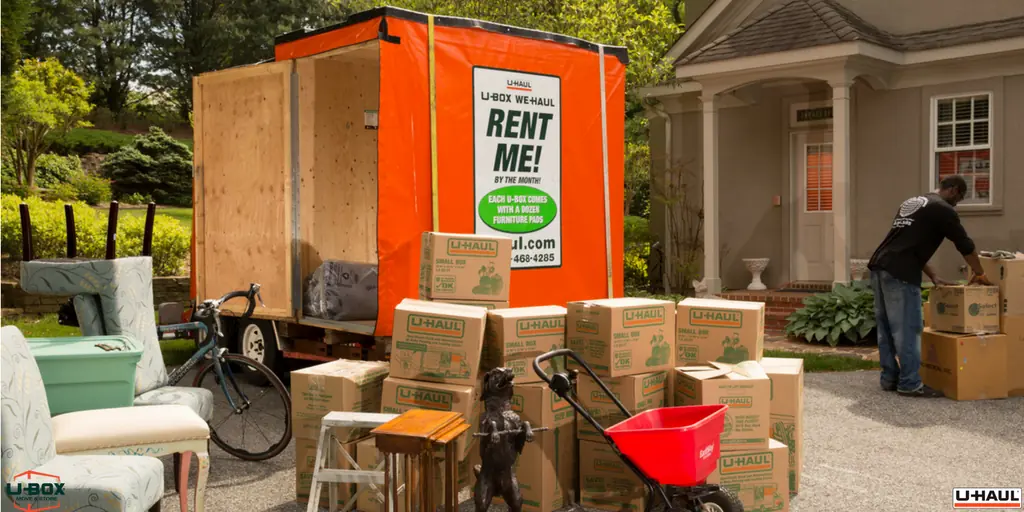
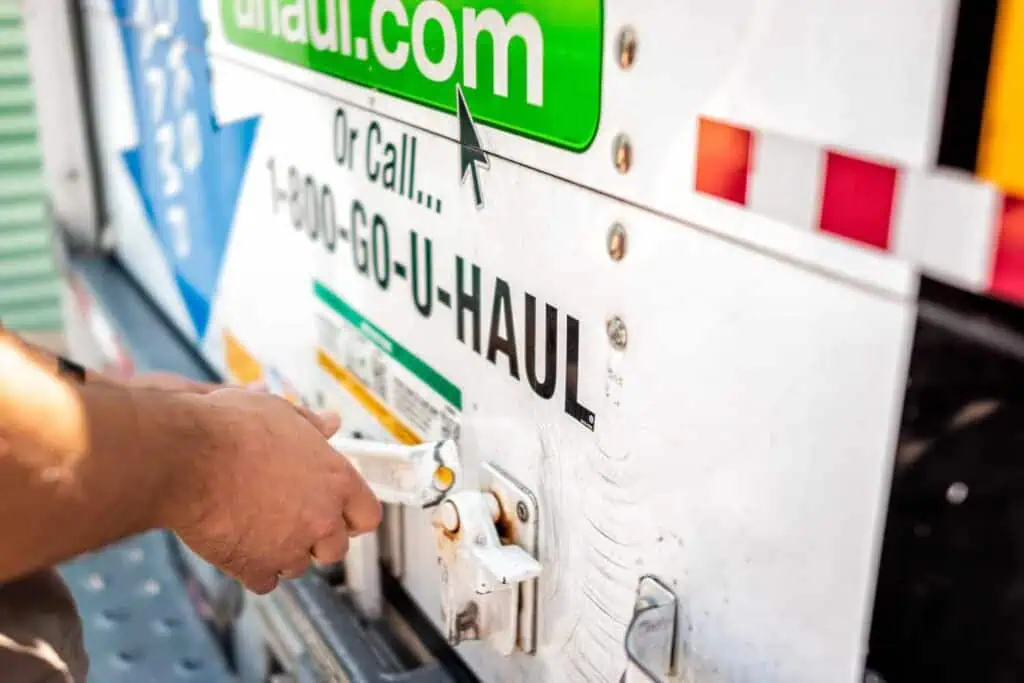
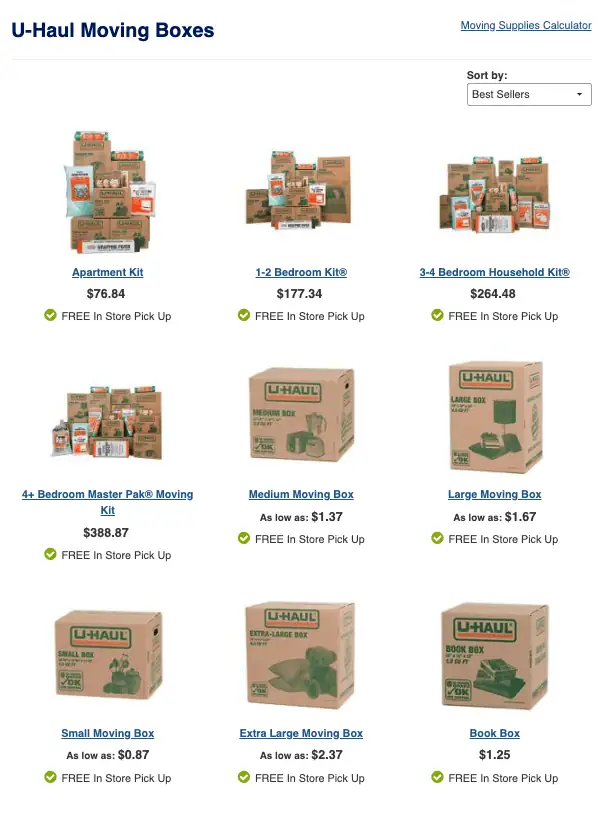 It’s possible to move without renting (or buying) any special equipment. But even if you hire a crew of movers to come in with all their hand trucks and dollies to load (and unload) your truck, you’ll at minimum still need your own blankets to protect your belongings.
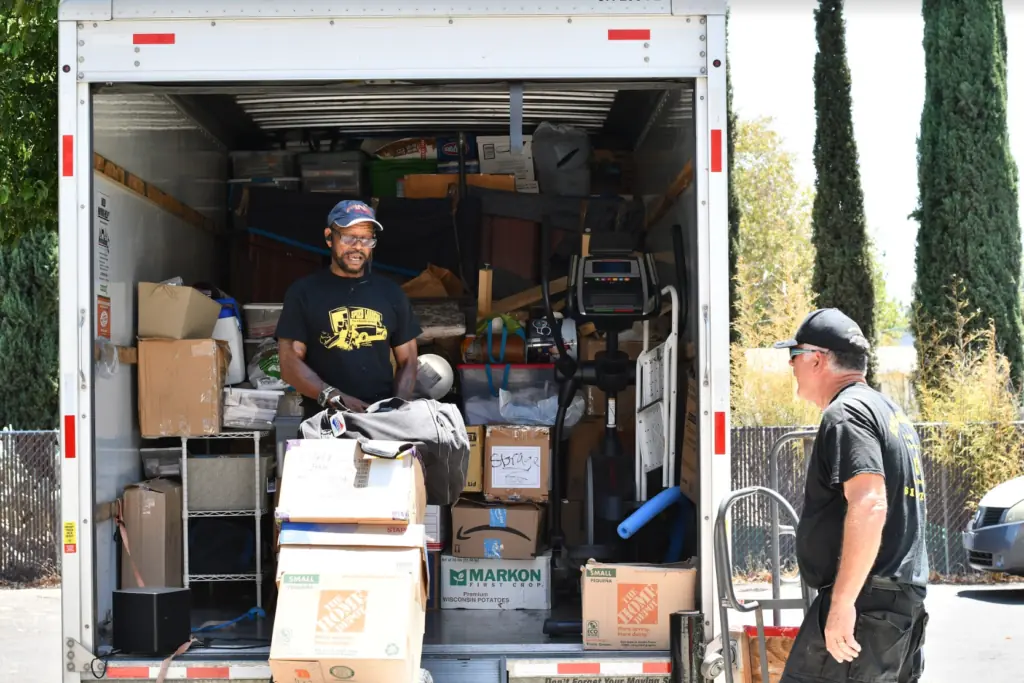
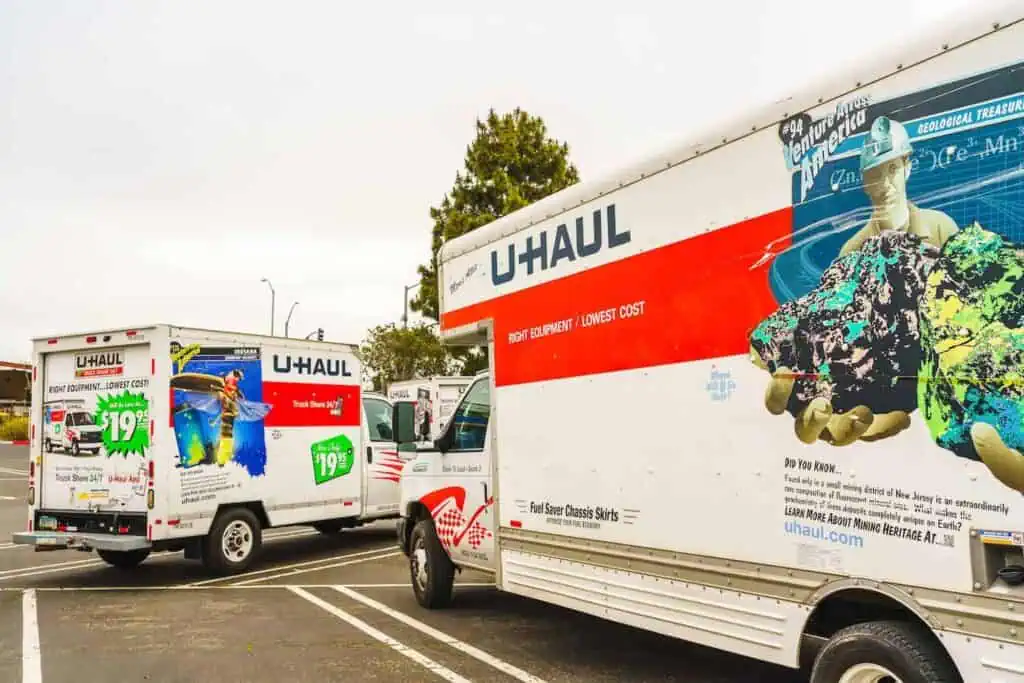
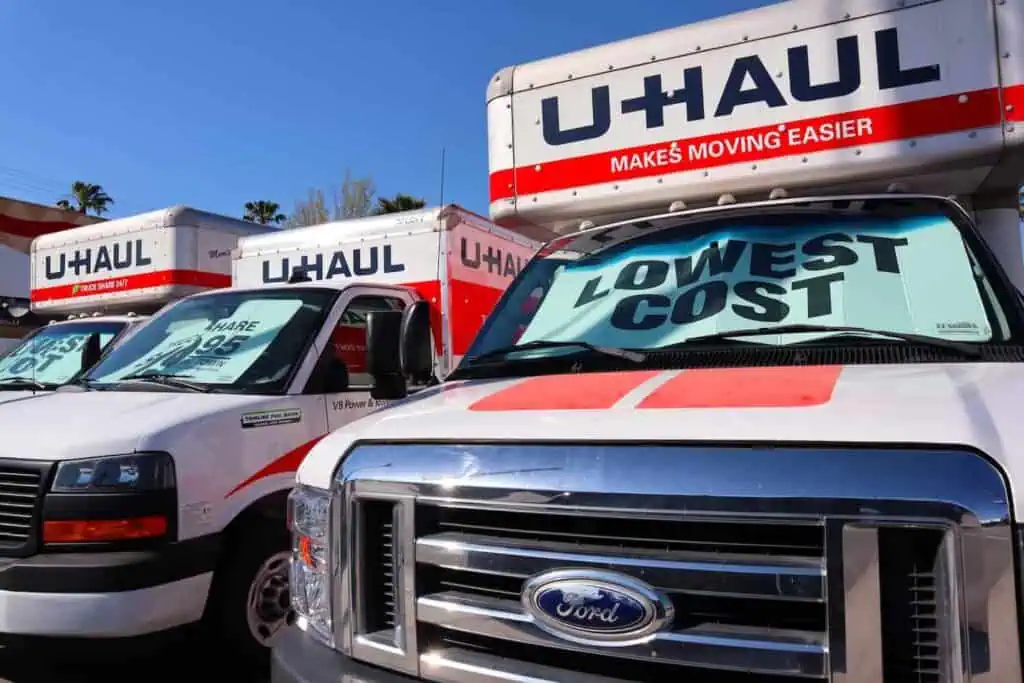


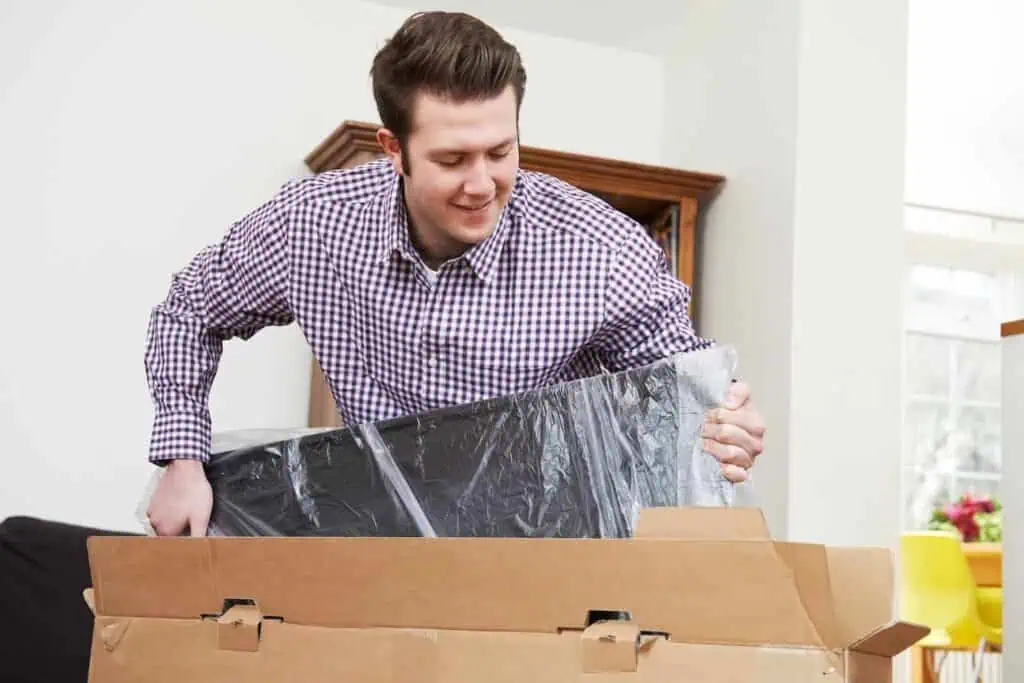


 During one of their earliest rescue moves, the situation turned volatile when the alleged abuser of the victim came home in the middle of the move, Ventura told HireAHelper. “It was very scary for the (founders of Meathead),” she said. “Luckily, they were able to call law enforcement, who came to the scene and removed the abuser so that the move could be completed.”