Packing Up Memories: How to Move After the Loss of a Loved One

Author:

Publish Date:

Last Modified Date:

Category: Moving Advice

Tags: Tags: , , , , , ,

Packing up a home after losing someone you love is one of the hardest parts of grieving. A room once full of comfort might suddenly feel impossible to face. Even the smallest items can carry emotional weight, especially when you’re trying to make decisions while still grieving.

If you’re here, you’re probably navigating two tough transitions at once: mourning and moving. And that’s not something anyone is ever truly prepared for. We know how heavy it all gets, and we’re here to help make this part of the process feel a little more manageable.

We designed this guide to give you steady support along the way and take some of the pressure off. You’ll find practical ideas for how to approach packing after loss, along with a printable Memory Sorting Checklist. It’s a tool you can use to sort through belongings at your own pace, with room to reflect as you go.

Between 2.5 million and 12.5 million people in the U.S. lose a loved one every year. If you’re one of them, and you’re facing a move, you’re not alone. We’re here to walk with you, one step at a time.


Why Grief and Moving Are So Hard to Untangle

a couple sits on a couch, visibly upset and unhappy. Several moving boxes are stacked in the foreground

When you’re grieving, everyday tasks already feel heavier. Moving, which demands decisions, deadlines, and physical effort, adds another layer of emotional and logistical weight. Unlike other projects, this one often doesn’t feel optional. Keep in mind that it’s completely normal to feel stuck. Letting go of things that belonged to someone you loved can feel like letting go of them all over again. At the same time, keeping everything may not be practical. The result? An emotional tug-of-war that plays out in closets, basements, and storage bins.


“When it comes to things that feel personal, such as letters, notes, recipes, or handwritten notes, consider digitizing them. Scanning or photographing these pieces creates a permanent archive you can access anytime.”


If you’re feeling torn or overwhelmed, you’re not doing it wrong. There’s no roadmap for how to handle this part of grief, and there’s no single right way to move through it. But there are ways to make it easier, and you don’t have to figure them out alone.


Create Emotional Space

Packing while grieving can start with a pause instead of a plan, just long enough to set some intentions and make it easy on yourself. Remember:

  • You might find that certain times of day feel easier than others: For example, early mornings can be quieter and less emotionally charged. Or, maybe late afternoons feel better because someone else is home. There’s no ideal time, only what feels doable for you.
  • It’s important to ask for support: Some find comfort in having someone nearby, while others need to be alone. Both are valid. A friend sitting quietly in the next room or checking in via text can make a difference, even if they never lift a box. 
  • Starting small can help lower the emotional stakes: Think one drawer, one shelf, or one category of items at a time. Setting boundaries like these gives you permission to stop when you need to.
  • Grief doesn’t always show up in tears: It might look like brain fog, dissociation, irritability, or a sudden urge to reorganize everything. Whatever you’re feeling, remember to go easy on yourself. 

Start With the Easy Stuff

a woman stands in front of her pantry to organize it

When you’re surrounded by a lifetime of belongings, even opening a closet door can feel like too much. That’s why it can help to begin in spaces that carry less emotional weight. The pantry, office, bathrooms, and laundry room don’t usually hold the same kind of memories as the kitchen, living room, and bedrooms.

As you go, try thinking in terms of purpose. Some things might still serve a role in your daily life. Others might no longer be useful or relevant, and you may feel ready to let them go.

Moving doesn’t have to be stressful, but rushing can make it even more challenging. Often, it helps to take the time to name what something is and why it matters before choosing where it goes next. Choosing to take your time whenever you can will be one of the best decisions you make. 


Approach Decision-Making Carefully

A woman sits on a chair in front of an open moving box. She has a contemplative expression and is holding her phone in one hand.

Grief has a way of making everything feel important. Even a receipt or a worn-out pair of shoes can suddenly seem untouchable. That feeling is real, and it doesn’t mean you’re being irrational. There’s no formula for deciding what to keep and what to get rid of, but asking the right questions can help create clarity when your emotions feel tangled:

Am I keeping this because it mattered to them, or because I feel guilty letting it go?

Grief can create a sense of attachment to certain belongings. But honoring someone’s memory doesn’t require holding onto everything they owned. Guilt often disguises itself as sentimental value. It helps to pause and ask how you truly feel about the item.

Would they want this taking up space in my future?

This question can help you see things from a different perspective. It offers a way to reflect on what your loved one might wish for you and how you want to feel moving forward.

What feeling does this bring up in me?

Rather than starting with practicality, try starting with emotion. Relief, warmth, tension, anxiety — these responses can be more revealing than the object itself.


“…it can help to begin [packing] spaces that carry less emotional weight. The pantry, office, bathrooms, and laundry room don’t usually hold the same kind of memories as the kitchen, living room, and bedrooms.”


If it brings you peace, keep it. If it creates heaviness, you may not need it anymore. 

Is there a way to remember this without keeping the physical item?

Sometimes a photograph, a digital scan, or a handwritten memory in a journal can preserve what you value most about an object. Letting go becomes easier when the story gets to stay.

Do I want this to be part of my life going forward?

There’s no shame in keeping something because it brings comfort, or letting something go because it doesn’t fit anymore. Framing the decision in terms of your future honors both the memory and your right to move forward.

It’s okay if the answers take time. Some decisions settle in slowly, especially when memories are involved.

The printable worksheet included in this guide offers space for questions like these, with room to reflect and work through your feelings. Writing your feelings down can help shift the focus from what’s being packed to what’s being honored.


Find Creative Ways to Preserve Memories

A woman hugs her older relative, who is holding and looking at a framed photo. There are moving boxes all around the room.

For many people, finding a way to preserve the essence of a loved one’s belongings can bring a sense of comfort and control to an otherwise overwhelming process.

When it comes to things that feel personal, such as letters, notes, recipes, or handwritten notes, consider digitizing them. Scanning or photographing these pieces creates a permanent archive you can access anytime. The same goes for voice recordings, cards, or old home videos. Preserving these in a new format gives them space to last.

You might also create a small memory box. This could be as simple as filling a box with mementos that bring comfort, or creating a scrapbook with concert tickets, a keychain, a lock of hair, and a handwritten note.


Know When to Pause (Or Ask for Help)

Some days, you might make more progress than expected. Other days, going through a single drawer can feel like too much. That’s a sign to step back and take care of yourself, not push through the pain.

Emotional flooding can show up in different ways. Some signs it might be time to pause include:

  • You feel suddenly exhausted or unable to focus
  • You’re getting stuck on a single item
  • You notice rising frustration or irritability over small things
  • You’ve started crying and can’t pinpoint exactly why
  • You feel numb or disconnected from what you’re doing
  • The task feels impossible, even if it felt manageable earlier

If any of these show up, it’s okay to take a break. Asking someone to join you — even just to sit nearby, pack, lift some boxes, or make lunch — can ease the weight. However you move through it, the path is yours, and it doesn’t have to make sense to anyone else.


Final Thoughts: Moving Forward, Gently

You don’t need to have everything figured out to be doing a good job. One thoughtful choice can help you feel more grounded. And as you move forward, it’s okay to do so slowly, quietly, or with someone by your side.

To help, we created a printable Memory Sorting Checklist for you to go through at the pace that’s right for you, and to ensure you don’t miss a single step.


Worksheet

a pdf checklist for information and help moving after the loss of a loved one

A pdf checklist with advice and help for moving after the loss of a loved one

Things Not Allowed on a Moving Truck (and Why)

Author:

Publish Date:

Last Modified Date:

Category: Moving Checklists & Planning, Moving Trucks

Tags: Tags: , , , , , , , , , , , , , , , , , , , , , , ,

Packing for a move is already a big job without the need for last-minute surprises, which is why it helps to know what is not allowed on a moving truck before you accidentally pack a prohibited item. Some banned moving items are restricted for safety or legal reasons, while others just aren’t covered under insurance if something goes wrong.

Below, we’ve explained what can’t go on a moving truck and why, along with a few smart tips to help you pack with confidence, avoid last-minute delays, and keep your belongings safe from start to finish.

Perishables: Items That Can Spoil on the Truck

a box of vegetables including bell peppers, squash, potatoes, cucumbers, and zucchini

These banned moving items mainly include food and houseplants:

  • Frozen foods
  • Refrigerated foods
  • Open or half-used foods
  • Most kinds of produce

Tip: If you’ve got some perishable food you won’t finish in time for your move, why not donate it? Give any unopened food to a local charity pantry or food bank before you pack.

Houseplants fall in this category, too, since they don’t hold up well in the extreme temperatures often found in the back of a moving truck.

Aside from the risk of spoiled food or wilted plants, transporting perishables, especially plants in soil, can attract pests. This is why movers typically won’t allow them.

Combustibles and Other Dangerous Items

a red can of gasoline sits on a lawn

Transporting a gallon of ice cream in the back of a moving truck is a bad idea, but it is legal. Transporting a gallon of gasoline is not. Thankfully, it’s entirely safe and lawful to put that lawn mower on your moving truck, provided you drain all the oil and gasoline out of it first.

There are plenty of other items that fall into this category, some of which might surprise you:

  • Perfume
  • Gasoline
  • Paint and pool chemicals
  • Fertilizers
  • Pesticides and weed killers
  • Aerosol cans
  • Kitchen cleaners
  • Nail polish remover

Generally, if it’s explosive or combustible, it’s not going.

To be clear, some items may or may not be forbidden, depending on the moving company or the rental truck you’re using. U-Haul allows loading propane tanks onto their trucks, but Budget does not. Meanwhile, U-Pack’s list of prohibited items includes spear guns having charged heads. So it’s always best to ask for the rules and policies when you’re renting your truck.

If you’re moving with a major van line, check the company website for what is and isn’t allowed. Here is the United Van Lines list, which best reflects the industry standards.

Plants, Pistols, and Alcohol

Crossing state lines with certain plants or guns can be illegal. Even when you’re just driving through, every state’s laws apply. To protect yourself and avoid having anything confiscated, check these U.S. state laws for plants and firearms before your move to ensure compliance.


“[Movers] can, and they should, [refuse to move an item] if something isn’t safe to load. Movers have to follow strict policies when it comes to what goes in the truck, especially with anything hazardous or restricted.”


Laws prohibiting the interstate transport of alcohol tend to be less restrictive, provided it’s for personal consumption. Still, double-check with the states you’ll be entering.

Valuables, Antiques, and Irreplaceable Items

an image of hundred dollar bills falling out of part of a cardboard box

This category includes items that either have incredible sentimental value or are difficult and time-consuming to replace if lost during the move.

So, it’s best to keep the following items with you at all times during your move:

  • Shoeboxes full of cash (don’t label them “CASH”!)
  • Checkbooks, credit cards, ATM cards, insurance cards, and policies
  • Official documents, like birth/marriage certificates, social security cards, passports, visas, residence cards
  • Sentimental valuables and family heirlooms
  • Bank statements, financial records, mortgages, stocks/bonds
  • Tax returns
  • Medical/dental records and any medications/prescriptions
  • Works of art
  • Laptops, PCs, and any work-related documents and research papers

Final Thoughts

The list of what’s not allowed seems pretty long. But getting your packing list right the first time could save time in the long run. Take the steps necessary to ensure that you, your stuff, and your truck all make it there safely.


Frequently Asked Questions

Can I pack cleaning supplies in a moving truck?

It depends. Some basic supplies like sponges or unopened soaps are fine, but liquids like bleach or anything flammable (like aerosol sprays or ammonia) usually aren’t allowed. If you’re unsure, check the label or ask your mover before loading day rolls around.

What happens if movers find prohibited items?

Most movers will set the item aside and let you know right away. It’s not meant to slow you down; they’re just following safety and insurance rules. You’ll need to make another plan for that item, whether that means tossing it or taking it in your own vehicle.

Can movers refuse to transport items?

They can, and they should, if something isn’t safe to load. Movers have to follow strict policies when it comes to what goes in the truck, especially with anything hazardous or restricted. A quick heads-up before the move can save everyone time and trouble.

How Do I Pack a Glass Lampshade?

Author:

Publish Date:

Last Modified Date:

Category: Pro Packing Guides

Tags: Tags: , ,

Clothing, books, and bedding are fairly easy to pack when you’re moving. They stack nicely in boxes, and you can even use some of them to cushion other items. Packing a glass lampshade, on the other hand, requires a bit more study.

The general shape of lampshades—round, tall, and hollow inside—presents challenges with space and stacking. They also might have decorative elements like etching, painting, or colored glass, which makes them extra delicate. Add in the fragile nature of glass, and you can see why you need to pack this item with complete care.

Keep reading for packing tips for glass lampshades, so you can protect yours like a pro during transport.


Supplies Needed to Pack a Glass Lampshade Safely

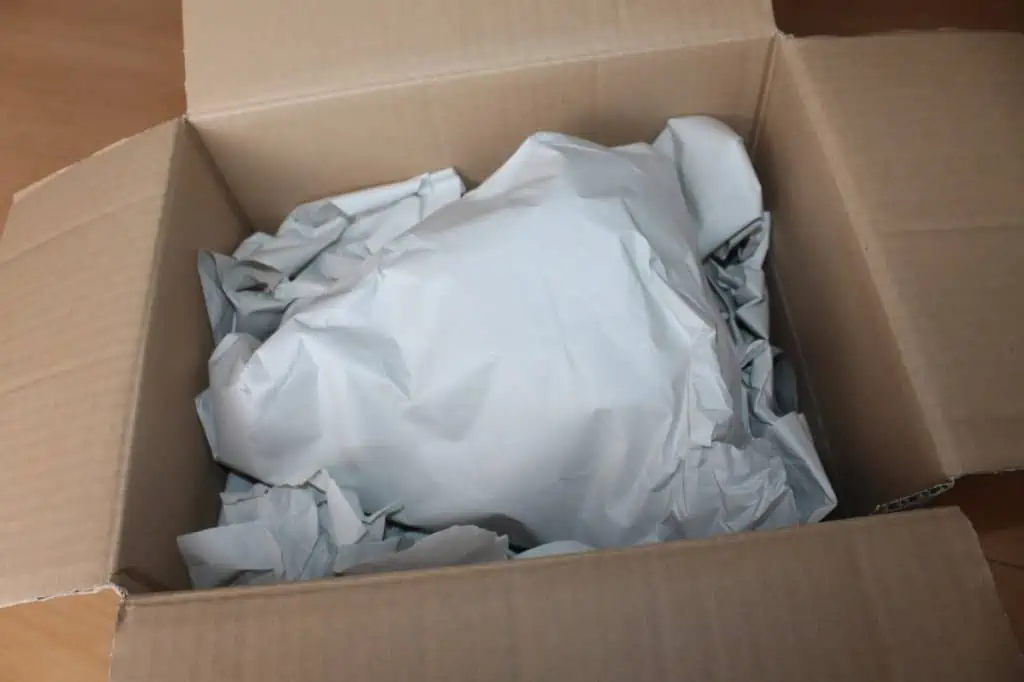
a lampshade sitting on packing paper

Before you nestle a glass lampshade safely in a box, you’ll need the proper supplies. Items to gather when packing this type of item include:

  • A box: Choose a box slightly larger than the lampshade. Consider buying a new, sturdy moving box from a home improvement, office, or moving supply store for this purpose. You don’t want an older box ripping or buckling with a fragile item inside.
  • Padding to protect the lampshade: Something like packing paper, moving blankets, or bubble wrap works well. Alternatively, you can use soft personal belongings like clothing, towels, or small pillows.
  • Tape: High-quality packing tape helps you secure the box and ensures a snug seal that keeps the contents safe during transport.
  • Labels and markers: Ensure you and your moving service know there’s a glass item inside. Labeling your boxes helps support extra care for appropriate items and streamlines the unloading and unpacking processes.
  • Glass cleaning supplies: Cleaning items as you pack them can make for a better unpacking experience later.

You can pack other belongings in the same box with your glass lampshade to cut down on moving supply needs. However, try to choose soft items that won’t scratch or crack the glass.

If you have hardware pieces, like screws, to reattach the shade, consider placing them in a labeled envelope. You can tape that envelope to the inside of the box used to pack the lampshade. Keeping hardware with each appliance, lighting fixture, or piece of furniture cuts down on frustrating hunts when it’s time to set up your new home.


Step-by-Step Guide for Packing a Glass Lampshade

a lampshade covered in bubble wrap and sitting on packing paper

Packing a glass lampshade requires more than placing the item in a box. Safely removing the lampshade from the lamp, cleaning it, and protecting it during transport are all part of the process. Here’s a step-by-step guide for packing a glass lampshade:

  1. Take the lampshade off the lamp.
    It’s generally not ideal to pack the entire lamp as one item. That’s a heavier, more awkward item, and packing it all together increases the risk of breakage. Once you remove the shade, wrap the cord around the base, wrap the base, and secure it in a separate box.
  2. Clean the lampshade.
    Cleaning light fixtures before moving to your new home helps reduce work after unpacking. It also helps you set up a fresh new space you can enjoy right away. Clean glass lampshades carefully with a microfiber dusting cloth. For stubborn dirt, consider using a glass cleaner. Spot test the cleaner on a section of the lampshade to make sure the product you’re using won’t damage it.
  3. Wrap the lampshade to protect it.
    Use packing paper, bubble wrap, towels, or other soft items. Start wrapping at the bottom or top of the shade. Pass the wrapping through the inside of the shade, around the outside, and back inside. Repeat the process, looping additional protective material inside and out until the entire shade is covered. If you’re using packing paper, repeat this process to create two to three protective layers.
  4. Place a base layer of cushion in your box.
    Put something in the box that creates an inch or two of cushioning between the box and the lampshade. A towel, a small pillow, or packing paper works.
  5. Carefully place the wrapped lampshade in the box.
    Don’t push or force a fit. If the box is too small, try another one.
  6. Fill in any gaps in the box.
    Fill in the empty space around and inside the lampshade with packing materials or soft personal items like dish towels. The less space the lampshade has to move around, the less chance there is for it to knock into the side of the box and break.

If the structure of your lampshade prevents you from wrapping it like this, wrap just the outside. Then you can fill the inside with soft packing materials or personal items to protect it.


How to Transport a Glass Lampshade Safely

Even if you do pack a glass lampshade like a pro, damage can occur if you aren’t careful while loading, unloading, and transporting it. Thankfully, you don’t need to be a pro to handle it.


“If you have hardware pieces, like screws, to reattach the shade, consider placing them in a labeled envelope. You can tape that envelope to the inside of the box used to pack the lampshade.”


Start by loading boxes without fragile items. Avoid putting heavy boxes on top of a box with a glass lampshade—or any breakable item.

If your glass lampshade is designer quality or a family heirloom, consider transporting it in your own vehicle instead of adding it to the back of a moving truck.


Unpacking and Reassembling Glass Lampshades

a lampshade packed and secured in a box

After moving with a glass lampshade, take care unpacking it. You don’t want to go through the effort of safeguarding it only to drop it on your new living room floor.

Locate the box with your glass lampshade and put it on a stable surface, like the floor or a table. Carefully cut the tape and open the box. Remove any cushioning from inside and around the lampshade.

Lift the lampshade out carefully and place it on a cushioned surface, like a couch. Carefully remove any packing materials you wrapped around the shade before installing it back on the base.


FAQs About Moving Glass Lampshades

What if My Item Is Fragile or Oversized?

Glass lampshades come in all types and sizes. If you have an especially fragile shade made of thin glass, take extra care when packing it. You could use bubble wrap instead of paper to protect the glass, and avoid putting anything in the box that isn’t cushioning. If you have an oversized glass lampshade, consider wrapping it in packing materials and driving it to your new home in your personal vehicle with other fragile items.

Can I Move a Glass Lampshade Myself or Should I Hire Professionals?

Once you know how to pack a glass lampshade for a move, you can move a glass lampshade yourself. If you hire professionals to help with your move, make sure you label the lampshade box, and let them know you have fragile items you’d like them to handle with care.

See prices for local moving labor. Read real customer reviews. Easily book your help online.

Moving Day Survival Guide: What Should I Keep With Me?

Author:

Publish Date:

Last Modified Date:

Category: Moving Checklists & Planning, Moving Day

Tags: Tags: , , , ,

Moving into a new home is an exciting milestone, but it can also be overwhelming. Proper preparation can make the transition smoother and help you settle in quickly.

One of the most important steps in this process is knowing what to keep on hand during the move and what to pack for your first few nights. This guide will help you plan and organize everything you need to make your move-in day a success.


What to Keep With You When Moving

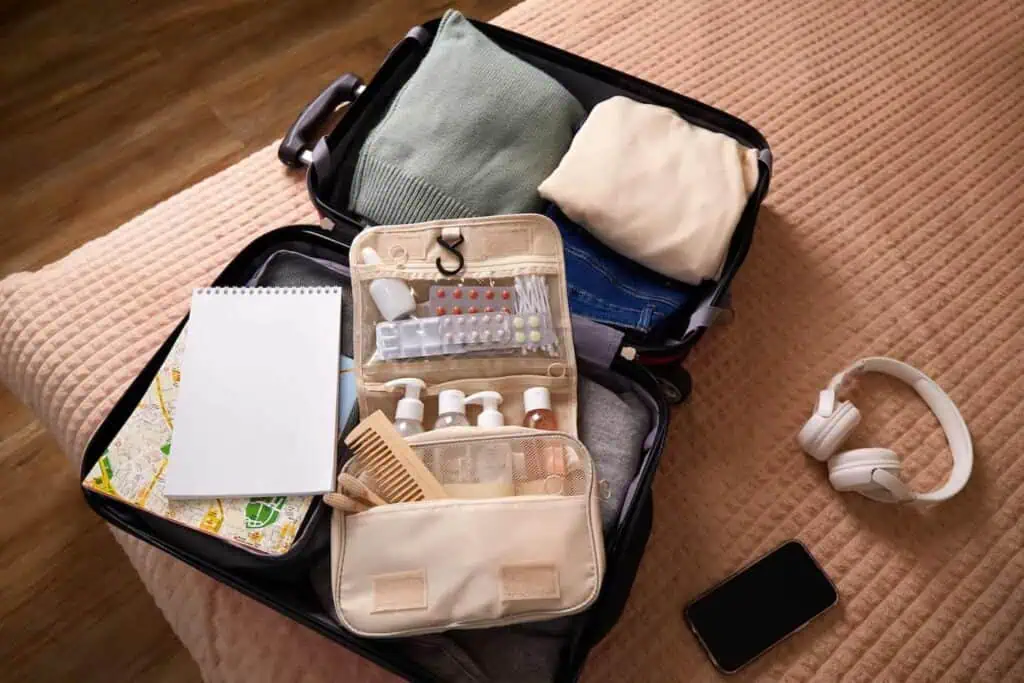
A suitcase filled with clothing, notebooks, and toiletries that include medication

One of the biggest mistakes you can make on moving day is packing away items you’ll need immediately, so it’s important to distinguish between what should stay with you during the move and what can wait until you’re ready to fully unpack.

Food and medicine should generally stay close to you and be immediately accessible when you get to the new place. Your antique tea set, on the other hand, can probably stay safely packed in a box until you have time to find a place for it later on.

Here’s a comprehensive list of items you should have readily accessible on your moving day:

Clothing and Personal Care:

  • Comfortable, closed-toe shoes
  • A change of clothes (in case of a spill or accident)
  • Glasses or contact lenses
  • First aid kit
  • Medications
  • Hand sanitizer
  • Sunscreen (depending on the weather)

Important Documents:

  • Personal documents
  • Lease or purchase agreement
  • Identification

Contacts:

  • Emergency contacts
  • Moving company contact information
  • Realtor

Insurance Information:

  • Health insurance card
  • Home or renters insurance details

Food and Hydration:

  • Water
  • Snacks
  • Paper towels
  • Trash bags

Valuables:

  • Prized or sentimental items (e.g., jewelry, collectibles)

See prices for local moving labor. Read real customer reviews. Easily book your help online.

What to Pack for Yourself When Moving

There are two important groups of items you should prepare before your moving day. One is a first-night box containing everything you need to settle in comfortably without rummaging through packed boxes. Preparing one ensures immediate access to necessities without added stress after a long day of moving.

The other is an essentials box, which will carry must-have items you’ll need in the first few weeks as you unpack and organize. These boxes help you maintain a sense of normalcy while adjusting to your new space.


“An essentials box is helpful for local moves, but it’s even more important for long-distance moves…to make your new home more comfortable and functional during the early days…”


Beyond these, you need to personally transport valuables, important documents, and irreplaceable items. Movers do their best to handle belongings with care, but keeping these critical items in your possession minimizes risk and ensures they’re available when needed. Additionally, mobile devices, medications, and personal-care items should be within reach for safety and convenience.

If a family member is helping you pack, share this list of items with them so they don’t accidentally miss anything you’ll need on day one of your move.

What Is a First-Night Box?

A man carrying a cardboard box. In the background, there is a chair wrapped with shrink wrap and several more boxes

A first-night box is a great way to organize your must-have items for the first night in your new house. This box contains all the immediate necessities you’ll need right after moving in. Carry this box to your new residence in your personal vehicle, or make it the last item you load into the moving van so it’s the first thing you can pull out when you start to unpack.

To make your first-night box easy to find, label it with a special marker or color-code it. Keep your box in an accessible, designated place that’s not in the way of your other unpacking activities.

The point of the first-night box is to have a single container you can reach into for the various odds and ends you’ll need to make yourself comfortable immediately after you’ve moved in. Here are some example items to include:

Bedding and Comfort:

  • Two sets of sheets per person
  • Towels

Kitchen Essentials:

  • Dishes or disposable plates, and cutlery
  • Some cookware, such as a pot, pan, spatula, and egg beater
  • Salt, pepper, cooking oil

Toiletries and Personal Care:

  • Toothbrush and toothpaste
  • Shampoo and soap
  • Toilet paper
  • Hairbrush and other grooming tools

Cleaning Supplies:

  • Disinfectant wipes
  • Multi-surface cleaner
  • Sponges and dish soap
  • Trash bags

What Do You Put in Your Essentials Box When Moving?

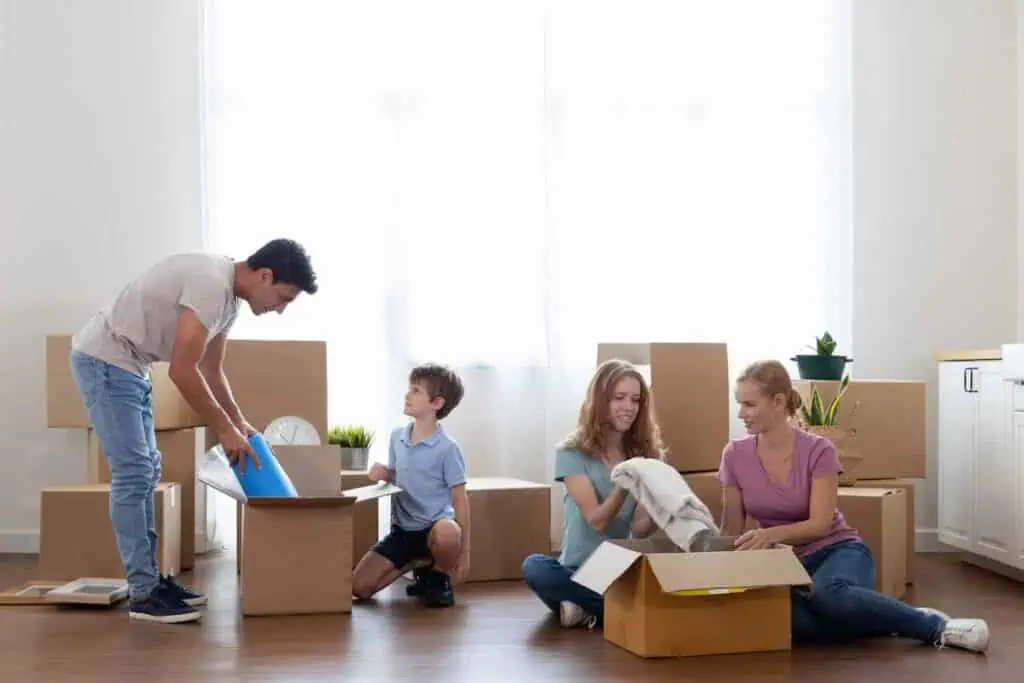
A family packs boxes with towels and other necessities

The essentials box differs from the first-night box in that it contains items you’ll need beyond the first day, potentially lasting up to a month. While there may be some overlap between the two, the essentials box should be tailored to your specific needs during the early days in your new place.

Since your belongings may arrive at different times depending on the distance and moving service, pack accordingly. Additionally, unpacking may take longer than expected, so having this box on hand ensures you have everything necessary while settling in.


“One of the biggest mistakes you can make on moving day is packing away items you’ll need immediately…Food and medicine should generally stay close to you and be immediately accessible when you get to the new place.”


An essentials box is helpful for local moves, but it’s even more important for long-distance moves. When you’re in a new place, far from your former support systems, having a box of essentials to make your new home more comfortable and functional during the early days can make a world of difference during a transition period.

Here’s what you should include in your essentials box:

Clothing and Personal Items:

  • Enough outfits for a week
  • Extra socks and underwear
  • Pajamas
  • Comfortable shoes

Kitchen and Food Supplies:

  • Coffee maker or kettle
  • Non-perishable snacks and easy meals
  • Can opener
  • Basic seasonings and condiments
  • Reusable water bottles

Toiletries and Bathroom Necessities:

  • Extra toilet paper
  • Towels and washcloths
  • Deodorant, lotion, and shaving supplies
  • First aid kit with bandages and pain relievers

Cleaning and Maintenance:

  • Vacuum or broom and dustpan
  • Laundry detergent and stain remover
  • Toolset with screwdriver, hammer, and nails

Electronics and Office Supplies:

  • Chargers for phones, laptops, and tablets
  • Extension cords and power strips
  • Notebooks, pens, and scissors

Moving Essentials List

A couple surrounded by boxes looks over something on a clipboard as well as their laptop

Preparing each step beforehand will make you feel much more confident after your move, so here’s a handy checklist that outlines everything you need for the days, weeks, and months after your moving day.

During the Move

Moving day can be hectic, but having the right things with you will take some of the stress off. Packing a small bag with key items will help you stay prepared for unexpected situations.

Here are the key items you’ll need during the move:

  • Comfortable clothing and shoes
  • Important documents
  • Medications and a first aid kit
  • Snacks and water
  • Valuables and personal items

The First Night

Your first night in a new home should be as relaxing and stress-free as possible. A designated box with necessary items will save you from having to dig through more boxes or making store runs—and help you get a good night’s rest.

Here are the key items you’ll need during the first night:

  • Bedding and towels
  • Toiletries and hygiene products
  • Simple cookware and eating utensils
  • Basic cleaning supplies

See prices for local moving labor. Read real customer reviews. Easily book your help online.

The First Month

As you settle into your new home, you’ll gradually unpack and organize everything you need for daily living. The first month is about creating a functional and comfortable space so you can transition into unpacking the rest of your things.

Here are the key items you’ll need during the first month:

  • Clothing for various occasions
  • More in-depth kitchen setup
  • Electronics, chargers, and power accessories
  • Laundry and cleaning supplies

No matter how carefully you plan, moving can still feel overwhelming even days and weeks after you’ve settled in.

By planning ahead and organizing your moving essentials, you can significantly reduce stress and ensure a seamless transition.

How to Pack a Moving Box Like a Pro: The Basics

Author:

Publish Date:

Last Modified Date:

Category: How To Pack

Tags: Tags: , , , ,

Packing is arguably the biggest part of any move. Learning how to do it like a pro saves time, reduces stress, and lowers the risk of damage to your belongings. Here’s the process broken down into six simple steps:

  1. Gather your supplies
  2. Tape the bottom of the box
  3. Wrap fragile items
  4. Completely fill the box (no empty spaces!)
  5. Close the box with tape
  6. Label your boxes

Of course, there’s a lot more to it than this overview. Keep reading for the ultimate guide on packing moving boxes—from finding the right supplies to knowing when to start—so you can get your move off to the right start.


How Long Before a Move Should I Start Packing?

Packing is the single most time-consuming part of moving, so starting early is the easiest way to cut out the stress and hassle. Most households should start packing at least one to two months before the planned move.

That sounds like a long time, but once you start, you’ll realize how much time the whole process really takes.


“…it’s a good idea to construct [boxes] from the bottom up, especially if [they] came pre-printed with ‘THIS SIDE UP’ messages. This way, people helping you move don’t unintentionally flip your items over and damage them during the move.”


Two months before your move, it’s a good idea to start gathering supplies and decluttering. Gather the things you don’t want or need anymore and either sell, donate, give away, or dispose of them. Then, prioritize what you pack based on how often you use each item. Start packing non-essentials like books, seasonal items, or rarely-used goods. In the last few weeks before your move, start packing up more frequently used items, leaving daily-use items for the last few days.


Gather Your Supplies

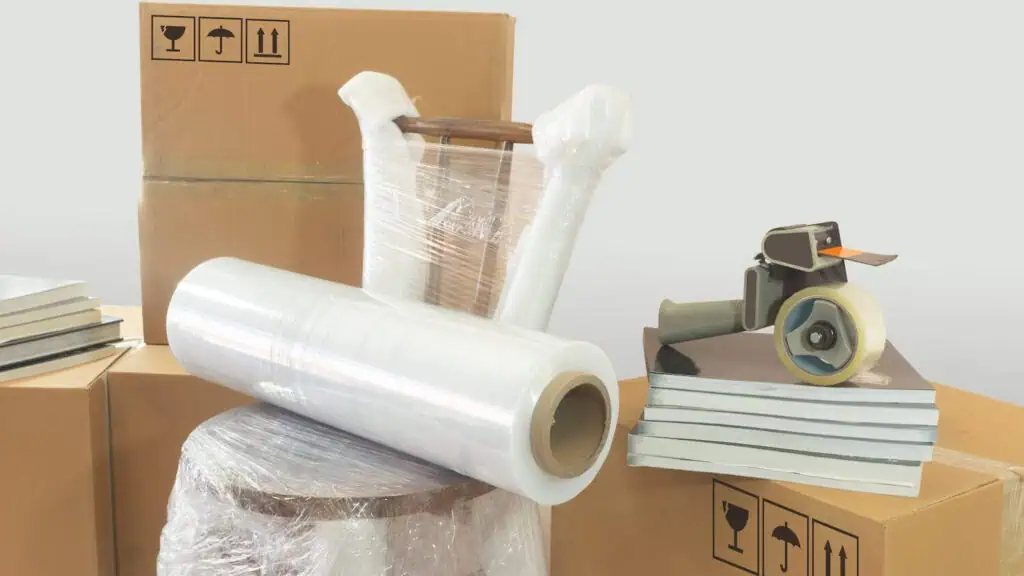
stacked boxes are in the background behind a chair wrapped in shrink wrap and tape

While you can make do with just a few basics in a pinch, having everything you need while packing tends to make the process quicker and easier. Check out and stock up on these commonly used packing supplies.

  • Moving boxes (opt for various sizes and consider specialty sizes like TV boxes or wardrobe boxes)
  • Moving blankets
  • Permanent markers (choose oversized tips so any writing is easy to see at a glance)
  • Labels
  • Packing tape (with a packing tape dispenser for easy use)
  • Packing paper
  • Bubble wrap for fragile items
  • Shrink wrap for your upholstered furniture (if needed)
  • Scissors and box cutters
  • Tools to disassemble furniture or items

1. Choose the Right Moving Boxes

You can often get your hands on free boxes through community forums or at various retailers.

However, new, high-quality boxes also provide you with peace of mind, knowing they’re structurally sound and ready to live up to the job.

While shopping, think beyond the usual small, medium, and large boxes. Commonly used specialty boxes include:

  • Flat panel TV boxes: TV boxes protect your flat-screen television from damage. They include inserts to cushion the device and come in a range of sizes for a snug fit
  • Bankers’ boxes: Books and paper can get heavy quickly. Bankers’ boxes are small, stackable, and easily organized. Plus, they feature handles and lids for easy moving
  • Wardrobe boxes: Skip folding and wrinkling all your hanging clothes by putting them into a wardrobe box. They have a bar across the top, allowing your clothes to hang just like they would in a closet
  • Dish boxes: While you could use regular boxes for your plates and glasses, dish and glassware boxes include cardboard dividers for extra protection while maximizing usable space
  • Mattress boxes: Mattress bags don’t provide the same degree of protection as boxes. A box helps keep your mattress clean while in a moving truck or when it’s moved around outside

See prices for local moving labor. Read real customer reviews. Easily book your help online.

2. Get LOTS of Packing Tape

Packing tape is just as important as boxes when moving, and you’ll likely need more than you initially estimated. Generally speaking, moving a small apartment tends to use up three to four rolls of tape. A larger house might use five to seven.

Pro tip: Duct tape is not nearly as good for moving boxes as packing tape. It doesn’t stick well to cardboard, resulting in a weaker seal, which means your belongings are in danger of damage from falling out of the boxes.

3. Select the Right Packing Material for the Job

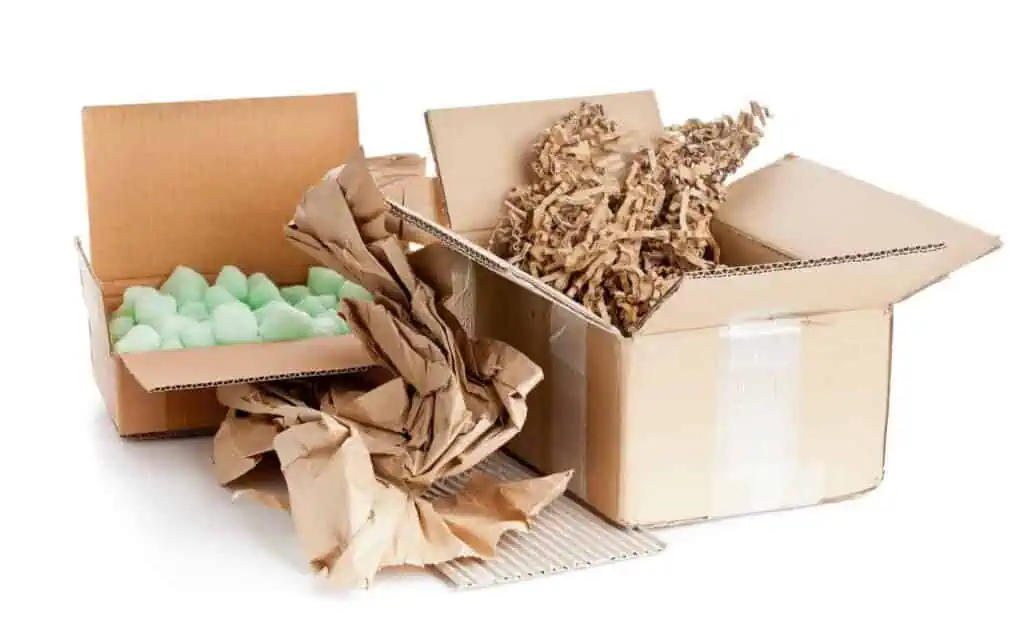
various types of packing material like peanuts and paper in boxes

Packing materials come in so many varieties for a reason, and it’s likely you’ll need several different ones during your move. While you can get by with free or cheap materials in a pinch, like using towels to wrap your fragile items, there are plenty of reasons to have specialty moving supplies on hand.

  • Packing paper: Crumpled pieces of packing paper can be stuffed into tight gaps to immobilize items inside your box. While it’s more eco-friendly than plastic bubble wrap, it’s generally not as cushioning
  • Bubble wrap: Bubble wrap surrounds your fragile items to prevent scratching or breaking. Choose larger bubbles for items you’re worried will bang around and smaller bubbles if your main concern is scratching
  • Foam sheets: Placing foam sheets between your dishes is a great way to protect them. When held in place and padded, dishes are less likely to get broken in a move
  • Packing peanuts: Packing peanuts are fantastic for electronics, glass figurines, and other delicate items. They fill empty spaces well, and their rigid structure keeps them from compressing like paper does. However, unless you specifically get the biodegradable kind, they are one of the least eco-friendly options

4. Invest in Labels

Unless you like surprises, it’s highly recommended that you label your boxes as you pack them so you can find and place items quickly after a relocation. At a bare minimum, have some large-tipped permanent markers on hand so you can write down what’s in each box and which room it should go to.

For a more streamlined experience, color-code your boxes with tape in different shades. You can designate a color to a corresponding room—for example, red for the kitchen, blue for the bathroom, etc. Then, on the strip of tape, write down what’s inside with a permanent marker.

5. Have Cutting Tools on Hand

You need a way to cut through tape as you build boxes and while unpacking. Scissors work fine to cut tape, but a packing tape dispenser often speeds up the process. Avoid using scissors for re-opening a closed box, though! They’re inefficient and increase your likelihood of injury. Opt for a box cutter instead.


Tape the Bottom of the Box

A person tapes the bottom of a box with tan colored packing tape on a roll

While there’s rarely a structural difference between the top and bottom of a moving box, it’s a good idea to construct them from the bottom up, especially if your boxes came pre-printed with “THIS SIDE UP” messages. This way, people helping you move don’t unintentionally flip your items over and damage them during the move. While you can fold the box into shape, taping the bottom is what actually keeps it secure. Follow these four easy steps for constructing your boxes:

  1. Unfold your box into a cube and flip it upside down. The bottom flaps should be at the top
  2. Fold the bottom flaps down flat, starting with the shorter flaps first, then the longer ones
  3. Apply packing tape down the middle seam. Make sure each end extends 2 to 3 inches along the side of the boxes for extra security
  4. Apply tape across the edges perpendicular to the middle strip. This step helps reinforce the corners and improves overall stability. For heavier boxes, include extra tape to better reinforce the box’s seams

Wrap Fragile Items

A woman wraps a mug in thin packing foam before putting it in a box

Fragile and valuable items should be carefully wrapped to improve their chances of arriving in your new home safely. Jewelry like necklaces and dangly earrings, for example, can easily tangle in transit and create quite a hassle the next time you go to wear it.

Items That Benefit from Wrapping

Make sure you wrap fragile items like:

  • Glassware and glass figurines
  • Porcelain
  • Ceramic
  • Dishes
  • Heirlooms and prized items
  • Jewelry

Best Materials for Wrapping Fragile Items

Not sure if you can use the same packing materials for your fragile items and collectibles as you can for your appliances and books? In general, you can! Here are some to use to keep your delicate belongings safe:

  • Bubble wrap: Bubble wrap is ideal for cushioning irregular items. However, it can get expensive if you need a lot of it.
  • Plastic shopping bags: If you have a collection of plastic shopping bags, consider using them to wrap up items you’re concerned will get scratched in transit. However, several states and cities have banned free plastic bags, so you might not find them as readily as before
  • Newspaper: Newspapers and classified ads that come in the mail can be a low-cost way to pad your items. They’re also great for adding bulk in void spaces. However, the ink can sometimes rub off onto items in transit, so be careful what you choose to wrap with it
  • Foam sheets: Foam sheets are great for protecting dishes and other flat, fragile items that stack in boxes. However, they’re not particularly eco-friendly

Don’t forget to tape any wrapping down so it doesn’t unfold or fall off while packing or in transit.


Completely Fill the Boxes

The best way to pack boxes for moving is to avoid any empty spaces. Regardless of how heavy or light the items are, gaps inside the box let things shift around, increasing the likelihood of damage during the move. So how do you fill the space? You’ve got plenty of options!


“You can often get your hands on free boxes through community forums or at various retailers. However, new, high-quality boxes also provide you with peace of mind, knowing they’re structurally sound and ready to live up to the job.”


While you can always opt for packing materials, you can also get creative with other items you need to move. For example, if you have a fragile lamp that takes up most of the center of a box and doesn’t allow for many other rigid items to be added, you could stuff the empty spaces with your kid’s stuffed animal collection or your spare linens.

Just keep in mind that you should always avoid overstuffing the box. If it won’t close flat or if the sides are bulging, it’s probably too full. Likewise, if you have several small, heavy items like books, you also shouldn’t pack them all into one large box, even if they all fit. If the box is too heavy, the bottom won’t hold, and it’ll be harder to carry.


Close the Box with Tape

A woman sitting on the floor tapes a cardboard box closed. There are others already packed beside her

Once your box is full, it’s time to close it the same way you sealed the bottom during construction. Fold down the shorter flaps, then the longer ones. Apply packing tape (not duct tape!) across the middle seam, then reinforce along each edge.

However, if your box is too full or not full enough, it’s not going to close correctly. If the flaps won’t lie flat or the sides are bulging, it’s probably overfilled—and you’ll need to reconfigure or remove some items for a better fit.

Conversely, under-filled boxes can also be an issue. Items can shift around and bang into each other inside. If there’s anything fragile in there, it’s bound to get broken. It’s also not uncommon for half-filled boxes to cave in during loading or unloading because they can’t maintain their shape. Either find more to add to the box or fill the empty space with packing materials or padding supplies.

Is It Better to Tape or Fold Moving Boxes?

Taping your moving boxes gives them more structural security and minimizes the risk of the bottom collapsing. You should tape your boxes whenever possible to avoid this. There are plenty of videos online showing you how to fold boxes without tape, but it’s generally not recommended.

However, if you’re packing something lightweight, like a box full of your kid’s plushies or some pillows, you can probably get away with a quick fold method. Just keep in mind that the box might not stack as well and that you should be cautious about putting too much on top of it.

See prices for local moving labor. Read real customer reviews. Easily book your help online.

Label Your Boxes

Labeling your boxes as you pack helps you keep track of where all your items are. It also makes moving into your new home easier since you can take boxes directly to the room they belong in. Beyond just labeling with rooms, consider also marking down the general contents of a box. If you’ve got a kitchen full of moving boxes, for example, you’ll probably want to know which ones have your dishes so you’re not digging through all of them just to eat dinner.

Consider writing down the rooms on your boxes and have corresponding sticky notes on the doors for the rooms in your new home, especially if you’ve packed up several bedrooms. As mentioned before, another great labeling method is to color-code boxes to their proper rooms with tape.


As long as you start planning in advance and ensure you understand the best practices on how to pack boxes for moving, you should enjoy a more streamlined, frustration-free relocation.

Do Movers Charge Extra for Stairs?

Author:

Publish Date:

Last Modified Date:

Category: Moving Checklists & Planning

Tags: Tags: , , , , ,

The very short answer? Yes, moving companies can charge extra for stairs. When movers have to carry items up and down stairs, it increases labor time and physical exertion. It also increases risk and liability, leading to additional insurance costs for the business.

However, some movers only charge a fee for a certain number of flights. Or, if they do charge a general stair fee, some companies use a flat rate while others use a formula. The real solution is to ask your movers about their policies ahead of time.

But if you don’t even know what questions to ask, don’t fret! This quick guide will give you a good starting point to get the right information from your movers about the stairs in your home.


How Much Do Movers Charge for a Flight of Stairs?

If you have a staircase in your home or you live in an apartment, you might be wondering how extra you’ll be paying. Unfortunately, there’s no cut-and-dry answer to “What is the average stair fee?” There are a lot of factors movers consider when (and if) they charge one.


“…a flight of stairs is defined as 12 to 16 steps between a landing or the stories in a building.”


But here are some good guidelines that will help you understand the fees better and what kinds of questions you should ask your movers about their stair policies.

  • What’s included in the base price: Some moving companies include one or two flights of stairs in the base cost and only charge extra for additional stairs. Other moving companies don’t include any stairs in their base price, so even a single flight could raise your total cost.
  • The number of flights: Moving companies may charge by the flight or a flat rate for multiple flights of stairs. Some moving companies adjust quotes depending on individual factors. For example, if you have two flights of stairs but only a couple of items on the top, they may only account for one flight in the moving quote.
  • What the mover considers a flight of stairs: Some companies may not count “flights” as the steps between stories or landings. They may instead provide a quote based on the total number of steps. If a company considers 10 steps to be a flight, you might be charged for three flights if you have 30 steps — regardless of landings or stories.
  • Type and size of items: If movers must navigate stairs with large items like couches or kitchen appliances, it may add time and expense to your move.
  • Unique staircase designs: Winding or narrow staircases or other uncommon architecture could impact the efficiency of a move, leading to higher costs.

What Do Movers Count as a “Flight” of Stairs?

a photo taken from the top of a winding staircase looking towards the ground

Most commonly, a flight of stairs is defined as 12 to 16 steps between a landing or the stories in a building. While this is a common industry benchmark, the definition of a flight can vary depending on moving company policies, differences in regional architecture, and the type of building you’re in.

For example, a single-family bi-level home typically includes two short flights of steps. Movers might treat these as a single flight or two flights, depending on their policies. An apartment on the second story of a building might be accessed by stairs broken up with a landing. In that case, one moving company could treat it as a single flight while another counts it as two flights.

When researching moving companies, be sure to ask if they charge extra for stairs, about rates related to stairs, and how they define a flight of stairs.

See prices for local moving labor. Read real customer reviews. Easily book your help online.


Will Movers Go Up Stairs?

Yes, movers will go up and down stairs when loading or unloading your things. However, some moving companies may charge extra for stairs — especially if more than two flights are involved.

Moving companies may define flights differently, so it’s essential to discuss stairs and how they might impact moving costs. You should also consider whether your furniture will fit in and up stairs and how the complexity and labor involved in such moves might impact your quote.

How To Load a Moving Pod

Author:

Publish Date:

Last Modified Date:

Category: Loading & Unloading Guides, Moving Containers

Tags: Tags: , , , , , , , , ,

Millions of people move every year. Around 25 million, at last count. And every year, more and more of them are using portable moving containers instead of trucks.

For good reasons, too! Moving containers offer a convenient, versatile, cost-effective way for you to move your stuff down the road or across the country.

If you’ve already booked a moving pod (or if you’re considering getting one), you can either hire a couple of pros to load it up for you or you can roll up your sleeves and try to fit everything in there by yourself.

We’ve got you covered if you want pros to handle your belongings. But if you’d rather DIY it, read on and see how to pack your moving container the safest and most efficient way possible.


Before You Start Loading

Like always, preparation is key. Here are some steps to take before you load the first box into your pod. It’ll help make the whole process even easier!

Disassemble what you can

two people disassemble a shelf with tools. A toolbox sits next to them.

Taking apart your furniture before loading makes everything lighter and easier to carry. It also saves valuable space in your container so you can fit more, and lessens the chance any delicate parts will break off in transit. Here’s what you should disassemble:

  • Take apart bed frames
  • Remove table legs
  • Take apart dining chairs if feasible
  • Take unattached shelves out of bookcases, curios, etc.
  • Remove anything else that sticks out of a piece of furniture or could fall out and break, like dresser mirrors or TV stands/bases

Pro Tip: Movers keep a small cardboard box called a “parts box” on hand to hold all the hardware from the items they disassemble. Use (and label) Ziploc bags to keep all the nuts and bolts and screws for each piece of furniture separated.

Wrap things up in furniture pads

Furniture pads keep your things (and the walls and floors) safe from damage as you haul it all out of your home. Pads also keep your furniture protected against the moving and shifting that will occur as your pod is taken to your new place.

You can usually rent them from your moving container company or buy them in stores or online — and possibly sell them online when you’re done.

Pro Tip: When wrapping furniture pads around your china hutch, curio, or any other item with a glass surface, add some extra protection by placing a piece of cardboard big enough to cover the glass over the part of the pad that is hiding the glass. Then, tape or shrink wrap the cardboard in place.

Clear the Way

For safety’s sake, you want to keep a clear path all the way to the door and out to your container. From rugs to stray rolls of tape, make sure there is nothing on the floor that can make you slip or trip.

Also, pay attention to what’s above you: the height of a doorway, the slope of the staircase ceiling, light fixtures, fuse boxes, smoke detectors, and anything else sticking out of the walls and ceilings. You don’t want to knock your couch or dresser into something important!


How to Load a Moving Pod: The Basics

Now that you’ve made preparations, it’s time to start loading up the container. There’s a definite method to the madness of trying to fit everything you own into a box — even a box as large as a pod. Here are some helpful terms and concepts that will give you the proper know-how to get started.

Tiers

These are vertical layers (basically walls) of furniture and boxes that reach clear up to the roof of your pod. Our aim is to build up tiers, one at a time, using a mix of furniture and boxes in each one.

Base

The foundation on which each tier is built. The pros always start their first tier with some base, which is usually made up of stout pieces of furniture like a dresser or a desk. On top of this will go boxes and items of medium size and weight. Then, you finish off each tier with light stuff.

See prices for local moving labor. Read real customer reviews. Easily book your help online.

Weight Distribution

This term refers to the balance in your load, both side to side and front to back. Remember that things in your pod will shift in transit, so too much heavy stuff in the back or on one side can mean your lighter stuff gets knocked into and broken.

Density

This refers to how much room is available and is crucial for safety. Just like a half-empty cardboard box will tend to get crushed, empty space in a loaded pod has room for everything to move around and, quite possibly, end up damaged.


“A great way to avoid [the door getting stuck] is to strap off your last tier…Better yet, use a mattress or a couple of large bookcases (or whatever other large items you have) for your final tier.”


Table legs and shelves (wrapped and padded, of course) can fill these spaces. In a pinch, stick sofa cushions, rolled-up blankets, and even sleeping bags into empty areas to make your tier more dense while adding extra protective padding. You’ll probably still have some space at the top of your load, and that’s okay. Just keep it tight side to side and front to back.


How to Load a Moving Pod: Expert Level

Now that you’ve got the basics down, let’s go through all you need to know to load your pod like a pro.

Start with some base

You may be tempted to begin by stacking a bunch of boxes neatly in the back corners of your container. But movers always build their first tier with a foundation of a large, solid base, using things like long dressers and stout desks. Stacking some boxes on top of that base, with some loose items to fill in up top, will make for a stable first tier.

Don’t build a wall of boxes

Stacking boxes is easy — until you run out of them. Then you’ll have to build tiers of furniture and garden tools and all that stuff in the garage. This is a recipe for disaster. Build each tier with a mix of furniture, boxes, and loose items.

Keep it loose up top

a moving pod packed with furniture and boxes. There is remaining space at the top.
The free space on top of the already-packed items is great for tools and chairs

All those items in the garage — folding chairs, garden tools, sports equipment, bicycles — have to go somewhere. The best place for such items is on top of your tiers, where density is least critical.

Add strength front to back

Tall bookcases, entertainment centers, refrigerators, and mattresses can serve as walls, placed between tiers throughout the pod, making your load more stable, safe, and secure. Mattresses can also be placed against glass surfaces common in items like china cabinets and curios.

Get creative with large, flat items

Headboards and padded dining table tops can be loaded against the side walls, perpendicular to your tiers. Mirrors and large picture frames (so long as they’re packed safely in flat cardboard cartons) can fill in spaces in tiers with items of varying widths.

Stand your sofa on end

You don’t want to start piling stuff on top of your sofa cushions or the frame underneath. So unless your couch is super light and you can put it on top of one of your tiers, stand it upright on one end. Use furniture pads to create a pillow underneath so that the end at the bottom doesn’t get crushed.

Tier down

two men load a washer into a moving truck
This example in a moving truck applies to moving pods as well

Remember that density is critical for a secure, safe load? You don’t want any empty floor space between your last tier and the door of your pod. If there is, everything will come crashing down into that empty space while in transit.

In all my years of moving, I’ve never had a load fit perfectly into a moving pod (or a truck for that matter), but we always had to make sure our last tier rested right up against the door to keep the load stable.

Furthermore, each tier needs to be tall enough to support the tier behind it. It takes some foresight, but the top of your load should slope gently downward towards the door, each tier a little shorter than the one behind it.

Pro Tip: Pods, like moving trucks, normally have vertical rows of cleats inside for attaching straps that can hold your load in place. If your belongings will not take up the entire pod, placing large items like mattresses and tall bookcases against your last tier and strapping them firmly in place is a great way to keep everything secure.


What To Do If Your Moving Pod’s Door Is Stuck

A moving pod will have a roll-up door that can get jammed if the load inside shifts and ends up leaning against it. If this happens, push on the door and try to edge the items inside away from the door. This may require some time and patience, not to mention a bit of elbow grease, but the alternative is to call your container company and hope they can come out and help.


“…the equipment and the trucks carrying loaded pods have weight limits for the combined weight of the pod and its contents. Since a larger pod weighs more, there is less leftover weight capacity for what is inside.”


A great way to avoid this scenario is to strap off your last tier to keep everything from shifting and falling against the door. Better yet, use a mattress or a couple of large bookcases (or whatever other large items you have) for your final tier. Large items are much easier to strap in place.


How Do You Pack a Couch in a Pod?

Two women put shrink wrap around a couch in preparation for moving it

As mentioned above, it is not advisable to set your couch flat on the floor of your pod. Stacking things on top of it will damage the cushions, the frame, or both. Instead, follow these steps to make sure your couch comes through the move in one piece.

  • Shrink Wrap Your Couch: Shrink wrap not only keeps your furniture pads firmly in place, but it also keeps dust and dirt off the upholstery. However, don’t use it on wood, leather, or vinyl — the shrink will damage those materials. And make sure you leave a few open spaces for ventilation to avoid mold.
  • Use furniture pads for support: Placing one on the floor underneath your sofa serves as a cushion. If the end of your couch is not flat, add extra pads so the entire end of your sofa is supported.
  • Orient your sofa properly: The back of your couch should rest against the tier behind it to keep everything back there in place, and the legs should be against the side wall.

What Cannot Be Moved in a Pod?

As with moving trucks, there are quite a few things that are prohibited from being transported in a moving pod. Most of these items present a fire hazard, but there are other potential problems involving things like mold, pests, and legality. To avoid these issues, refrain from loading up the following:

  • Matches
  • Oil and gasoline
  • Fireworks
  • Paint and paint thinner
  • Car batteries
  • Aerosol/pressurized cans/containers
  • Propane
  • Perishable foods
  • Plants and/or soil
  • Firewood and untreated wood
  • Animals, alive or dead
  • Household cleaning products
  • Lawn chemicals and fertilizer
  • Explosives and ammunition

Your moving pod company may have additional items on their “no-go” list. Check if you have any uncertainty about anything you are thinking of loading.

See prices for local moving labor. Read real customer reviews. Easily book your help online.

How Much Weight Can a Moving Pod Hold?

Good question! Moving pods are built to carry a heavy load, but they do have their limits, and so does the equipment used to drop off and pick up moving pods.

The weight limits for a common moving pod company’s pod sizes are:

  • 5,200 pounds for an 8-foot pod
  • 4,700 pounds for a 12-foot pod
  • 4,200 pounds for a 16-foot pod

Looking at these numbers, you might think something is wrong. Why do the larger pods have lower weight limits? Because the equipment and the trucks carrying loaded pods have weight limits for the combined weight of the pod and its contents. Since a larger pod weighs more, there is less leftover weight capacity for what is inside.

Inquire about specific weight restrictions with your chosen moving pod company.

What Happens if My Pod is Overweight?

Maybe nothing. At least one moving pod company out there does not charge any extra fees if you go over the weight limit for your pod. However, there is a chance that if you are over the weight limit, you’ll have to rent a second pod.

If you are concerned your load might go over the weight limit, rent another pod.

What Fits in an 8-Foot Pod?


An 8-foot pod is generally large enough to accommodate a studio apartment or a lightly-furnished one-bedroom apartment. The interior dimensions of an 8-foot pod are roughly eight feet high, eight feet long, and seven feet wide, which is typically enough for:

  • Large bed
  • Dresser
  • Small sofa and coffee table
  • Dining table and chairs
  • TV/entertainment center
  • Bookcase
  • Smaller household items
  • 10-20 boxes

For a clear visual of how much space your belongings will take up, use masking tape to mark a seven-foot by eight-foot square on your floor. Then, try to fit some of your larger pieces of furniture inside that square. If it starts getting tight, you might consider getting a larger pod.

What Fits in a 16-Foot Pod?

A 16-footer will hold three or four rooms of furniture and belongings. Of course, everyone’s home is different. But here is an average breakdown of what will fit:

  • King or queen-size bed
  • Two twin beds
  • Two dressers
  • Sofa with coffee table and end tables
  • Dining room table and chairs
  • Washer/dryer
  • TV/entertainment center
  • Two bookcases
  • Various small items
  • Several dozen boxes

Place Your Container In the Right Spot

a PODS container sitting on a level street

When you call to reserve a container, you’ll need to be able to assure the container company you have a suitable place for them to drop it. Check the following before you call.

  • Level surface: It’s imperative to have your portable container placed on a flat, level surface. If a slight incline is unavoidable, like in a driveway, have the back of the container (the side furthest from the door) sit lower so your tiers lean toward the back wall and not your head.
  • Solid ground: Empty containers are heavy, and loaded containers can sink into the dirt or mud. Secure a spot on a paved or cement surface.
  • Room to move: It’s not just your container that needs some space. The truck that will come to drop it off and pick it up will need room to maneuver, too. When you call the container company, ask them how much space they’ll need to get your pod in and out. While you’re at it, take note of any wires and tree branches that might get in the way.
  • Check the rule book: Contact your municipality or HOA head for any rules and restrictions on placing a temporary container, whether on your property or the street. If you rent, check with your landlord before putting your container on the premises.

The Best Way to Load Your Pod

Success in loading your pod means fitting everything in at the start and getting everything back intact at the end. It means using base, building solid tiers, and keeping all that weight distributed — just like the pros.

And if it all seems like too much, HireAHelper has your back. We can connect you with professional movers who can get the job gets done right, leaving you with a successful start in your new home.

When Is the Best Time To Move?

Author:

Publish Date:

Last Modified Date:

Category: Moving Checklists & Planning

Tags: Tags: , , , , , , , , , , , ,

One of the biggest questions when it comes to moving —after where you’re moving — is when to make the trip. After all, getting the timing right allows you to fit the move into your life and can make a huge difference in the cost and the moving experience.

You probably already have an idea about when you’d like to move, but is there a best time for moving? You bet!

If cost is your top concern, the best time to move is during the off-season, mid-month, in the middle of the week, and first thing in the morning.

But sometimes, other factors besides cost, such as weather conditions and school schedules, can play a bigger role in your decision. For instance, families with school-aged children may prefer to move during summer break to avoid disrupting the academic year, while those in regions prone to intense winter weather conditions might favor milder seasons to ensure safer travel conditions.

Balancing these factors with cost considerations can help you find the ideal time for your move. Here’s what you should know as you plan your moving timeline.


When Is Moving Season?

toy boxes and a truck sit on top of a calendar

Just like in sports or hunting, there is a definite moving season. Moving activity typically peaks during the summer months, between May and September — essentially, when the school is out and the weather is warmer.

During this period, movers often charge more because demand is at its highest. Movers also book up fast, so it can be harder to reserve the dates you want during the busy summer season. For long-distance moves, there can be longer timelines between pick-up and delivery dates as well.

If it’s best for your situation to move during the summer, you’ll want to reserve a date as soon as possible, ideally well ahead of the season. You may also want to consider a less expensive moving solution like driving a rental truck and hiring hourly moving help rather than booking a full-service mover. Or, give yourself enough time to shop around for moving companies to find the best price.


When Is the Best Time of Year to Move?

a yellow moving truck drives down a road lined with trees in autumn colors

Given what we know about the seasonality of moving activity, it follows that the best month to move would be outside of the busy summer season —between late fall and early spring. During this time, moving demand is lower, and generally so are prices.

As mentioned earlier, choosing the right time to move isn’t just about cost. You also have to think about weather conditions and other considerations.

While the “off season” is usually the best time to move, it’s not always the best for everyone. Here’s a breakdown of the pros and cons of each season to help you make the most informed decision about when to schedule your move.

Season Pros Cons
Spring (March-May) – Mild weather in most regions

– Less snow and ice to worry about

– Lower demand and better prices compared to the busy summer season

– Possibility of rain

– Can conflict with spring break or school schedules

Summer (June-August) – Warm weather with less risk of snow and ice

– Ideal for families with kids (no school disruptions)

– Higher demand can lead to higher costs

– Hot weather can impact heat-sensitive items like plants and artwork

– 60% of moves happen during this period, so movers book up fast

Fall (September-November) – Cooler weather

– Lower demand for moving services, which can mean better prices

– Mild weather conditions make moving easier

– Back-to-school schedules can interfere

– Hurricane season in some regions (e.g., Southeastern states)

Winter (December-February) – Cheapest time to move

– Less competition for movers and homes

– Potential for good real estate and rental deals

– Extreme winter temperatures and snow in many regions

– Risk of difficult weather conditions like ice or snowstorm delays

Regional considerations, like local events, road closures, and spring break traffic, can also impact your moving experience, even outside of peak moving season. For instance, the Atlantic hurricane season extends until the end of November 30 — something for those in Southeastern states like Florida and Georgia to watch out for.

Here are some regional moving tips to keep in mind:

Region Considerations
Northern U.S. Avoid winter moves due to snow and icy roads if you’ll be doing the driving yourself.
Southern U.S. Be mindful of peak summer heat and hurricane season.
Coastal areas Avoid spring break or other high-traffic beach holidays, and monitor storm patterns in hurricane-prone regions.
Mountainous areas Avoid winter moves due to snow and potential road closures.

When Is the Best Time of the Month to Move?

Not only are there better times of the year for moving, but there’s also a better time of the month to move.

About a third of the country rents their homes, and most renters move every one to four years. Thanks to most leases beginning early in the month, the first and last weeks tend to be the busiest for moving companies.

This means the middle of the month tends to be the most cost-effective time to move.


“If you’re moving during a warmer season, starting the move early in the day helps you and your movers avoid hauling boxes when the sun is at its hottest.”


While it’s common for rental leases to begin on the first of the month, sometimes renters have the flexibility to move in earlier with prorated rent, or they have the option of a middle-of-the-month lease start date. If this is a possibility for you, consider moving during the middle of the month for lower rates and greater mover availability.

In fact, some apartments may give special discounts when you move in in the middle of the month, just as they offer discounts during times of the year when occupancy is low.

See prices for local moving labor. Read real customer reviews. Easily book your help online.

When is the best time to move into an apartment?

When apartment hunting, you can save money by signing a lease during non-peak times — during the fall (September through November) and winter (December through February).

The longer an apartment sits on the market, the more likely it is that the owner will drop the rent to attract a tenant. So, looking for an apartment before or after the seasonal rush is a great way to save. The tradeoff is that there will be fewer units available, so you’re less likely to find exactly what you’re looking for.

Depending on the terms of your lease, you might not have any flexibility about scheduling your move. But if you do have some wiggle room, aiming for the middle of the month is best, when movers have more availability and you may possibly pay less of a premium for their services.


When Is the Best Time of the Week to Move?

As you might guess, the most popular part of the week to move is the weekend. Most people get time off from work and school on the weekends — and so do their friends or family who are helping them out with the move. This means that weekdays are the best time of the week to move, and the earlier in the week, the better.

If you can swing it, take time off and move during the week. If you’re planning on hiring moving labor or a moving company, this is your best bet for booking movers before calendars fill up. You might even save money on your move (for instance, U-Haul’s truck rental prices are slightly lower on weekdays compared to weekends). As a bonus, you won’t have to worry about childcare if school is in session and you’re moving locally.


When Is the Best Time of Day to Move?

a woman stands by a sunny window holding a cup of coffee. A half-open moving box is behind her.

When it comes to moving day, the morning is the best time of day to move for several reasons.

First, your movers are more likely to show up on time. They won’t have any jobs to complete before yours, so there’s less chance of a delay. They’re also more likely to show up fresh and energized.

If you’re moving during a warmer season, starting the move early in the day helps you and your movers avoid hauling boxes when the sun is at its hottest.

Plus, a morning move means you arrive at your new place sooner, giving you ample time to unpack and get settled. Try to get started around 8 am to 10 am — earlier if possible. It’s an early start, but definitely worth it in the end.


FAQs: The Best Time to Move

a couple surrounded by moving boxes discusses something in front of a laptop

When is the best time to buy or rent a home?

It depends on what your priorities are. Just because you’ll find the lowest prices doesn’t necessarily mean it’s the “best” time for you to buy or rent.

That said, the height of the home-buying season tends to take place in the late summer and early fall. This means the best home prices can be found closer to the end of the year. Buying a home during this off-season means you’ll deal with less competition and find better prices, but there may be fewer homes on the market that meet your specific preferences or needs.


“…[T]he best month to move would be outside of the busy summer season —between late fall and early spring. During this time, moving demand is lower, and generally so are prices.”


Rental prices tend to hit their lowest points around December through March. This coincides with the best time of year to move, as there is less demand between the late fall and spring months. However, just as with buying a home, while you may have more negotiating power during these off-season months, there will be fewer rentals on the market.

If having more available inventory or aligning with your kids’ school year is more important to you, then doing your home shopping over the summer may be the best time of year. But you also might consider getting a head start in the spring or waiting until the tail end of the summer.

What month is the most expensive to move?

As the summertime is peak moving season, the most expensive months to move are June, July, and August. Because of the increase in demand, it’s common for movers to charge more for their services during this time. After Labor Day, moving activity decreases significantly, which is reflected in lower rates and roomier calendars.

When is the cheapest month to move?

Moving is cheapest at the tail end of the year and at the beginning of the year — during November through March. At this time, you can save as much as 20 to 30% on moving compared to the busy moving season. After this, as moving activity picks up, prices can rise significantly, depending on the moving solution you choose.


The Best Time to Move

“When is the best time to move?” is ultimately a personal question —the answer depends on your budget, priorities, and the unique circumstances of your move. Following the guidelines above will not only help you save some cash, but it can make a world of difference in your moving experience as well.

Need a helping hand? No matter what time you choose to move, making sure you have reliable, professional moving help is a must. Find the top-rated moving help near you to get started.

Relocating Your Home Office: A 6-Week Stress-Free Moving Guide

Author:

Publish Date:

Last Modified Date:

Category: Moving Advice, Moving Checklists & Planning

Tags: Tags: , , ,

Moving is always an adventure, but when your home office is on the line, it’s time to kick your organization skills into high gear. Whether you’re running the show from your living room or managing a small business from your spare bedroom, your home office is the heartbeat of your professional world. No worries, though—we’ve got you covered with a simple, week-by-week game plan to help you move your home office without missing a beat.

Week 1: Get the Lay of the Land

A woman sits at a desk, focused on writing on a piece of paper with a pen in her hand

Time to take a deep breath and get organized. Before you start tossing things into boxes, let’s get a clear picture of what you’re dealing with. This week is all about laying the groundwork so you can make smart, stress-free decisions as you go.

Take inventory 

Start by getting a clear picture of what you’re working with. Take inventory of every piece of equipment, office chairs, furniture, and yes, even that collection of paper clips. This is your chance to decide what’s coming along to your new space and what’s better left behind. If you’re questioning whether to bring that old printer, now’s the time to let it go.

Map out your move 

Next, create a master checklist. This will be your roadmap for the next six weeks, helping you stay on top of tasks like buying packing supplies, scheduling movers, and notifying utility companies. A little planning goes a long way, and this checklist will make sure nothing slips through the cracks.

Set a budget 

No one likes surprise costs. Start by estimating expenses for moving services, supplies, and any new office furniture or tech you might need. Set aside a little extra for those “just in case” moments—because they always happen. With your budget in place, you’ll be able to manage your move without the financial stress.

Week 2: Declutter and Start Packing

A smiling woman is sitting on a stack of boxes in an empty room, surrounded by piled boxes

Now that you’ve got a plan, it’s time to start rolling up your sleeves. This week, we’re all about shedding what you don’t need and getting a head start on packing the things you won’t miss right away.

Declutter for clarity 

It’s time to roll up your sleeves and tackle the clutter. Sort through your office items, separating what’s essential from what’s just taking up space. This is also a great moment to organize your documents. Shred what’s outdated, and keep only the essentials. A clutter-free space makes for a smoother move and a fresh start in your new office.

Digitize your documents 

Got a stack of papers that you can’t part with? Consider going digital. Scan important documents and store them securely in the cloud or on an external drive. Not only does this cut down on physical clutter, but it also means your documents are safe and easily accessible when you need them.

Pack non-essentials first 

With the clutter gone, start packing up non-essential items like books and extra supplies. Label each box with its contents and the room it’s destined for. Trust us—future you will thank you when it’s time to unpack.

Week 3: Research and Book Your Helpers

A man and woman seated on a couch, focused on a laptop in front of them, engaged in a collaborative activity

You’re making progress! Now, let’s think ahead. This week, you’ll be researching and booking the right moving help to make sure everything gets from point A to point B without a hitch.

Find the right movers 

If you’re hiring movers, now’s the time to start your search. Get quotes from several companies, but don’t just go for the lowest price—check out their reviews and credentials. You want movers who will treat your office equipment with the care it deserves.

Book your movers 

Once you’ve found the right fit, lock in your moving date. Make sure you confirm all the details—costs, insurance, and services provided. Understanding their policies upfront will prevent any surprises on moving day.

Update your contacts 

Don’t forget to notify your bank, clients, and colleagues about your move. Also, make sure your internet and utility providers know when to disconnect and reconnect services. Keeping everyone in the loop will ensure your new office is ready to go from day one.

Week 4: Gather Supplies and Pack Essentials

A person is closing a packing box with a tape dispenser

With moving day on the horizon, it’s time to get serious about packing. This week, you’ll gather all the supplies you need and start packing up the essential items you can’t work without.

Get your packing supplies 

You’ve done the prep work, and now it’s time to gather supplies. Stock up on boxes, tape, bubble wrap, and labels. If you’ve got delicate electronics, invest in specialty boxes to keep them safe during the move.

Pack your office gear 

It’s time to pack up your essential office equipment. Start with your computer, monitors, and other electronics. Use the right packing materials to protect your gear, and label all cables for easy setup later. Keep like items together, and make sure everything is clearly labeled.

Prepare a moving day kit 

Pack a separate box with the essentials you’ll need right away in your new office—think important documents, chargers, and basic supplies. This way, you can hit the ground running without digging through boxes.

Week 5: Final Preparations

A woman stands before a desk, speaking on the phone while working on her laptop

The big day is almost here! This week is all about double-checking your plans and making sure everything is set up for a smooth move.

Confirm everything 

Double-check all the details with your moving company. Confirm the date, time, and any special instructions you’ve given them. Also, go over your checklist to make sure you haven’t missed anything.

Prepare your office 

As you pack the final items, take a moment to plan your new office layout. Consider any new furniture or equipment you might need and get everything ready for a smooth setup. Clear labels on your boxes will help the movers place everything in the right spot.

Coordinate services 

Make sure all your services are set to go at your new place. From internet to electricity, confirming these details now will prevent any hiccups once you’ve moved in.

Week 6: Moving Day and Beyond

A well-organized home office featuring a desk, a chair, a desktop, and a bookshelf filled with books

This is it—moving day has arrived! Stay calm and organized, and you’ll be enjoying your new home office in no time.

Moving day 

The big day is here! Stay organized by keeping a close eye on the movers and directing them as needed. Take breaks, stay hydrated, and remember to breathe—you’ve got this.

Set up your new office 

Once you’re in your new space, it’s time to set up shop. Arrange your furniture, plug in your equipment, and test your internet connection. Take your time to organize everything so you can hit peak productivity right away.

By following this plan, you’re well on your way to a smooth, stress-free home office move. With your new, clutter-free space, you’ll be ready to tackle anything that comes your way. Happy moving!

Click here to download our 6-Week Streess-Free Moving Checklist!

×

I'm Moving

Moving? Thinking about moving? Whether your move is off in the distance or you already have one foot out the door, you'll learn about everything you should expect through our useful how-to's, cool articles and much more. It's all specially curated for you in our "I'm Moving" section.
Explore
×

I'm a Mover

For rookies or veterans alike, our "I'm a Mover" section is filled with extensive industry news, crucial protips and in-depth guides written by industry professionals. Sharing our decade of moving knowledge is just one way we help keep our professional movers at the top of their game.
Explore