What to Know Before Moving Into a City Apartment

Author:

Publish Date:

Last Modified Date:

Category: Loading & Unloading Guides, Moving Day

Tags: Tags: , , , , , , , , , , , , , , , , , , , , , , , , , , , ,

Moving to a new apartment isn’t always easy. Tight spaces, unclear rules, and even hidden fees can quickly derail your carefully laid plans.

To help you avoid any moving-day surprises, we’ve put together this guide on what to know before moving into a city apartment. By the end, you’ll know how to avoid the unexpected costs of moving into an apartment, understand your building’s lease terms and regulations, and learn how to avoid fines.


Know What Date and Time You Can Move In

a couple happily walks up the stairs carrying boxes and plants to move into their new apartment

Moving can be disruptive, and apartments aren’t particularly known for being soundproof. Even if you’re mindful, you can make a lot of noise coming back and forth with boxes or rearranging furniture. Quiet hours often apply in apartment communities, so you may have to plan around them.

Traffic, noise ordinances, and general rules can also affect your move-in. If your building uses an elevator, there may be specific hours or days that management allows you to book it.

Depending on your complex, you may have to move in on a Saturday. Others might specify that you have to move on a weekday when foot traffic is lighter. Check your building’s move-in policies in advance if you have time constraints for getting everything moved in.


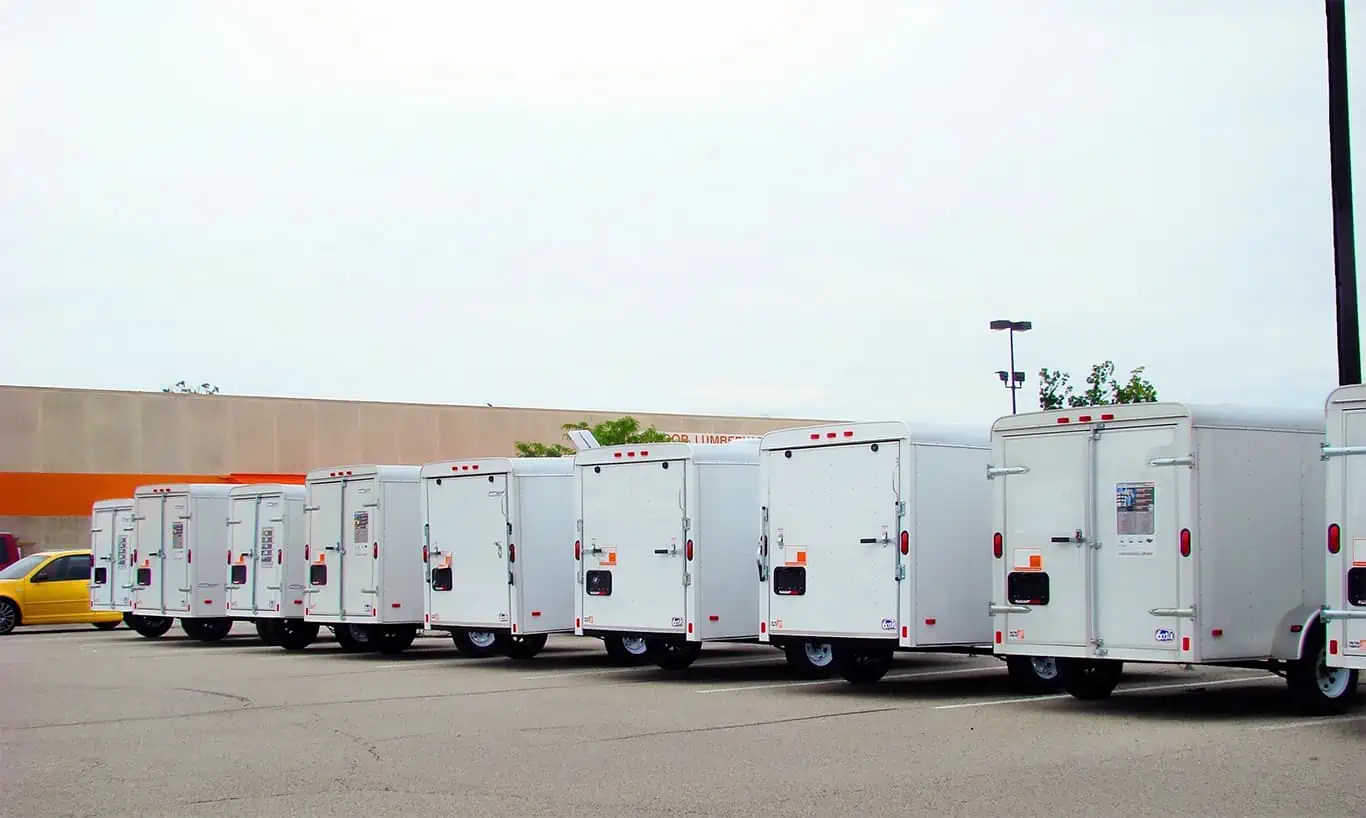
Plan the Best Places to Park Your Moving Truck

a white moving truck is parked outside of an apartment building

Moving into an apartment is often more complicated than relocating to a house with a clear driveway. And if you live in the heart of a big city, it can be even harder. Ask your management office about hours, time limits, permits, and where you need to park. If you need a permit, apply as soon as possible so processing times don’t delay your move-in.

Some buildings offer a rear service entrance or loading dock. This can make things easier since you have a designated place to park, but you may have to schedule a block of time to use it.


Ask About Your Apartment’s Unloading Policy

Before moving day, ask your building management about how and where unloading works. Some apartment complexes require you to unload onto a staging area and move your truck away from the loading dock or service entrance as quickly as possible.


“A COI is a Certificate of Insurance. It lets your apartment complex know that your moving company is insured and provides important coverage details, such as policy limits, effective dates, and other key details.”


Others won’t allow you to leave items out, or they’ll require you to keep clear paths for egress. Don’t forget to inform your moving team of any rules or requirements.

Bonus Tip: Know Where to Dispose of Boxes

Many buildings set specific rules for how to dispose of moving boxes and packing materials. Even if a recycling bin is available, they may ask that moving debris not be placed there to prevent it from filling up too quickly.

Your building manager can tell you the preferred way to dispose of boxes. You can also try giving away empty boxes on social media. Or, if you unpack quickly, the movers might be willing to haul the boxes away for you.


Take Floor Protection Seriously

An apartment's floor is protected as a kitchen is remodeled for a move-in

Many buildings require floor protection to prevent damage in shared areas, especially those with hardwood or tile flooring. For example, an area with nice hardwood or marble flooring may require Masonite: wooden hardboards that can prevent damage to the floor while you’re shifting furniture. If you need it, make sure your movers have one on hand. Some buildings may have hardboards available to lend you, so ask ahead of time.

And don’t stop at protecting just the floor. Some management companies require additional protection in doorways and stairwells.


Familiarize Yourself With Your Movers’ Insurance

Most licensed moving companies have to provide basic liability insurance. However, some buildings in big cities require proof of moving insurance or even the purchase of extra policies. That way, if an accident happens, they can recoup the cost quickly. Without insurance, you could be left with hidden apartment move-in fees.


“Even if you’re mindful, you can make a lot of noise coming back and forth with boxes or rearranging furniture. Quiet hours often apply in apartment communities, so you may have to plan around them.”


If you need proof of insurance, tell your moving company as soon as possible. They’ll need time to get a COI form from the office and return it with all the necessary paperwork from their own insurance company. The building may not let you move in if you don’t have the proper paperwork filed, so check carefully.


Review City Apartment Moving Rules

There’s plenty more to know to make your move seamless. Check with your apartment complex about common rules like:

  • Building move-in hours: Confirm whether there are set moving hours listed in the lease.
  • Elevator reservations: If you need an elevator reservation, familiarize yourself with the process in advance. Make sure you book the reservation early to get the best date and time for moving day.
  • COI requirements: A COI is a Certificate of Insurance. It lets your apartment complex know that your moving company is insured and provides important coverage details, such as policy limits, effective dates, and other key details.
  • Noise and disturbance levels: Evenings and weekends may be subject to noise restrictions. While you shouldn’t be particularly loud while moving, you also want to avoid a costly fine for violating regulations.
  • Fire safety regulations: While you move, avoid any fire safety violations. Ensure that you never obstruct fire exits or safety equipment.
  • Parking: Know where to park your moving truck (and where guests should park if friends or family are coming to help you).

Prepare for a Smooth City Move

Ready to make your move as smooth as possible? Check out our moving checklist to make sure you have all the necessary supplies, such as dollies, stretch wrap, and moving blankets.

Additionally, if you’re moving on a narrow city street or to the top of a towering apartment building, let us know. We make budgeting for apartment moves easy by providing clear, upfront quotes from local moving companies. Compare services and book trusted, vetted, and highly rated movers through HireAHelper’s online platform.

How to Pack Wine for a Move

Author:

Publish Date:

Last Modified Date:

Category: How To Pack, Pro Packing Guides

Tags: Tags: , , , , , , , , , , , ,

Packing wine for a move may not be as enjoyable as sipping on a new pinot noir or chardonnay, but arriving with every bottle intact makes the effort worthwhile.

Wine bottles and glassware are inherently fragile. They need to be packed safely while also protecting the wine itself from temperature shifts, vibration, and prolonged exposure to light. With professional advice, you can prep your collection for a safe, spill-free ride.

Before we dig into the details of moving wine, there’s one more thing to keep in mind. If you’re moving to a new state or country, look up local alcohol regulations as you plan. There may be guidelines dictating how you must transport and declare alcoholic beverages.


Supplies Needed to Pack Wine Safely

A man holds up a bottle of wine from a box with a cardboard insert. Next to it are more wine bottles and cardboard packing cushions.

When moving with wine, it’s crucial you set yourself up for success by assembling the right packing materials. You’ll need:

  • Dedicated wine boxes or crates. Boxes and crates designed to hold wine will have separate compartments for each bottle. These containers often hold 6-12 bottles at a time, though you don’t have to fill all the slots.
  • Other boxes/shipping containers. In a pinch, sturdy all-purpose moving boxes will work as an alternative to dedicated wine boxes, but you’ll need to add extra padding or inserts. Keep in mind that full wine bottles are heavy, so choose packing containers that are sturdy and durable. And be sure to cut up an extra cardboard box into rectangular slats to separate bottles when packing.
  • Bubble wrap and/or packing paper.These are the materials you’ll use to wrap each bottle. You’ll also use some as extra padding to keep wrapped bottles from getting too close to the side of the box or each other.
  • Packing tape.Once your wine bottles are safe and secure, you’ll use packing tape to seal the box to prevent accidents during transit.
  • Labels. Using printed stickers that say “Fragile” and “This Side Up” ensures everyone knows these boxes need additional care and attention.
  • Waterproof wine protectors (optional). Many companies now offer waterproof wine protectors that envelop each wine bottle and close with an airtight seal. These bags are less about protecting the wine and more about preventing a broken bottle from spreading. These eco-friendly baggies are reusable, too! You can use them again when you bring wine home from vacation or take a bottle to a dinner party or picnic.

In general, your goal is to cushion your wine in a container strong enough to support the weight of a full case of bottles, and the listed materials will be best at helping you meet that goal.


Step-By-Step Guide for Packing Wine

Now that you know what you need to have on hand, you can begin the packing process. It’ll take longer than you think, especially since you’re working with fragile or expensive bottles. So as you start breaking down your cellar or wine fridge, keep these 6 packing tips for wine in mind.

Step 1: Have Your Collection Appraised

two experts appraise a bottle of wine. One of them is holding a clipboard

If you own a lot of high-value bottles, have your collection appraised (if you haven’t already).

An official appraisal by a qualified professional can be used to insure your wine in case the unthinkable happens as you move.

Step 2: Sort Wine by Type and Size

Always pack similar wine types and bottle sizes together to streamline the process. This also prevents accidentally unbalancing a box by putting a half bottle (375ml) on one side of a container and a magnum (1500ml) on the other.


“Wine endures a lot of rolling and shaking during travel. This can result in a phenomenon called “bottle shock” that causes the wine’s flavors to seem muted or off.”


Also, take this opportunity to set aside any opened or partially full bottles — these aren’t ideal for transport and are more likely to leak or spoil.

Step 3: Wrap Each Bottle Individually

Every bottle should be wrapped separately using bubble wrap, packing paper, or specialized bottle sleeves. I

f you’re using waterproof wine bags as an extra precaution, put those on your bottles before adding padding. Cushion bottles generously so that you can’t feel the hard curves of the glass through the wrapping.

Step 4: Tuck Wrapped Bottles Into Your Boxes

wine bottles sit in each section of a divided insert in a box. Only the very tops of the foil around the bottles' corks can be seen.

If you’re using a dedicated wine box, you can slide one wrapped bottle into each slot. If you’re using a regular shipping box or other container, only pack as many bottles as the container can securely hold without being too heavy (usually 40 lbs is the limit per box). Use cardboard slats to separate bottles.

Step 5: Fill in the Gaps

Keep wine bottles from shifting during your move by filling any empty spaces with wadded packing paper or bubble wrap. Bottles shouldn’t be in contact with each other or with the side of your shipping container.

Step 6: Add Labels

Label all your boxes with warnings that are impossible to ignore. “Fragile” labels are a must, while “Delicate” and “Keep Upright”/”This Side Up” with an arrow indicating which side is up can also be helpful.

Pro Tip: Remember to transport and store bottles “lying down” to keep the wine in contact with the cork. This keeps the cork moist and expanded to help maintain the bottle’s seal and prevent pesky leaks and oxidation. Wine bottles with non-cork seals (like twist-offs) can be stored standing up.


How to Transport Wine Safely

A person puts a box labeled "fragile" into a truck

After learning how to pack wine for a move, the next step is learning how to transport it to your new home safely.

Even though you’ve labeled your boxes, take a moment to remind your movers that the wine is fragile. Boxes shouldn’t be stacked too high or put on an unsteady surface.

Always transport wine in a temperature-controlled vehicle held at a consistent 55 degrees Fahrenheit. Exposure to excessive heat or cold can cause the wine to expand, contract, or spoil, potentially pushing corks out or affecting taste. If your moving truck does not include a climate-controlled cargo hold, consider shipping your wine with an approved courier that does, or transporting it in your own vehicle.


Unpacking and Reassembling Wine

Wine endures a lot of rolling and shaking during travel. This can result in a phenomenon called “bottle shock” that causes the wine’s flavors to seem muted or off. It’s an easy fix, however — just let the wine sit undisturbed for at least a week. This allows sediment to settle before you uncork your first bottle for a celebratory drink.


“Every bottle should be wrapped separately using bubble wrap, packing paper, or specialized bottle sleeves. If you’re using waterproof wine bags as an extra precaution, put those on your bottles before adding padding.”


Also, check your bottles and corks for damage as you stock your new cellar, wine fridge, or shelves.

Learn more on our How to Pack Hub.


FAQs About Moving Wine

What if my wine is fragile or oversized?

If you’re moving fragile or oversized wine bottles, it’s even more important that you use specialized wine boxes. This helps prevent shifting during transit and keeps each bottle separate and secure. Especially large bottles may require custom-made boxes.

Can I move wine myself, or should I hire professionals?

If your collection is extensive or contains expensive and rare vintages, consider hiring professionals who specialize in wine transport. They can ensure proper handling, packing, and temperature control throughout the move.

How to Pack Wine Glasses

Author:

Publish Date:

Last Modified Date:

Category: Pro Packing Guides

Tags: Tags: , , , , , , , , , , , , ,

The kitchen can be a challenging and intimidating room to pack. Not only is it filled with items of all shapes and sizes that can be awkward to pack, but it’s also where everyone’s delicate and fragile dishes and glassware reside. This includes precious stemware.

Thankfully, once you learn how to pack wine glasses for a move, it helps you pack other delicate items confidently, including champagne flutes, cocktail glasses, oil cruets, glass decanters, and decorative glass vases and bottles.

Just follow this step-by-step guide and you’ll be packing wine glasses (and more!) like a pro in no time.

Supplies Needed to Pack Wine Glasses Safely

An example of a dishpack with dividers and glasses wrapped in packing paper 
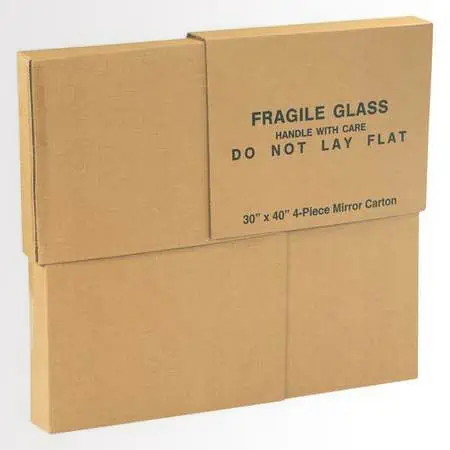
If you’re moving with wine glasses or fragile dishes, the right materials can make all the difference in preventing chips and cracks. Consider investing in the following supplies:

  • A sturdy dish-packing box. Buy a double-walled box with reinforced handles designed to carry the weight of dishes. The extra support reduces the risk of damage to your glassware if the box is bumped during transit.
  • Divider inserts. Invest in cardboard grid inserts that create individual compartments for each glass in your box. This streamlines packing while keeping wine glasses from knocking into each other during transport.
  • Packing paper or bubble wrap. Choose clean, flexible paper that you can easily wrap around each glass. You can also use bubble wrap. Unused gift wrap and tissue paper can work in a pinch, but not quite as well. Avoid using old newspapers because the ink can smudge and stain your glasses.
  • Tape. Use high-quality packing tape to seal your boxes once they’re full.
  • Labels and markers. Have supplies to ensure boxes are labeled in a way that won’t fall off or smudge during the move.
  • (Optional) Foam sheets or towels. You can use dish cloths or other linens you need to pack anyway.

Step-by-Step Guide for Packing Wine Glasses

Take your time when packing wine glasses to ensure your stemware is well protected for loading, unloading, and transport. Follow these 9 steps to keep your glasses intact and ready for another toast in your new home.

Step 1: Clean your stemware

someone cleans a wineglass with a paper towel

Wine glasses that aren’t used regularly may have collected a layer of dust. Run them through the dishwasher or hand wash and dry them before you pack. Cleaning your dishes prior to packing helps you arrive at your new home with a truly fresh start.

Step 2: Reinforce the bottom of the box

Start by adding an extra strip or two of packing tape to the seams to reduce the risk of the bottom opening during transport. Consider adding a layer of packing tape across the entire bottom of the box if you’re reusing a box or want to protect valuable collectible stemware.

Step 3: Add a shock-absorbing layer

Create a layer at least 2 inches deep of crumpled packing paper, folded towels, foam padding, or another soft substance on the bottom of the box.

Step 4: Place dividers

Insert cell dividers if you’re using them. You can make your own by cutting pieces of cardboard from extra boxes.

Step 5: Wrap each wine glass

a family packs wrapped wineglasses into a box

Place a piece of clean packing paper on a table or counter. Lay a wine glass diagonally across it at one corner. Carefully roll the glass and paper, tucking the corners and sides into and around the glass. Think of it like creating a snug little wine glass burrito.

Step 6: Reinforce delicate wine glasses

Add another sheet of packing paper or some bubble wrap if you have especially delicate glasses.

Step 7: Pack glasses in the box

Place them upright, even though it might be tempting to put them upside down. If you’re using a divider, place glasses one per divider. If you don’t have dividers, place glasses in the box so they fill up the space without touching each other or the sides of the box.

Step 8: Pad all the gaps

Carefully fill in the spaces between the glasses with packing paper, towels, bubble wrap, or other soft material. The glasses shouldn’t shift when you shake the box slightly.


“For optimal security, wedge the box [with your wineglasses] firmly between soft items [in the moving truck] for transport. Moving blankets, couch cushions, and bed pillows are all ideal for this purpose.”


Aim for at least 2 inches of space between the tops of the glasses and the box lid. Add towels, paper, or bubble wrap to fill in that space.

Step 9: Seal and label the box

Tape the box shut with several strips of packing tape, then label the box on top and several sides with words like “glassware” and “fragile”. Indicate which side is up so you can safely unpack the glasses later.

Smart Substitutes for Dish Boxes and Paper

a person packs clothing into a plastic tub

If you don’t have a double-walled box, you can also pack wine glasses in other sturdy containers. For instance, a plastic or rubber bin can support the weight of glassware and help protect it from breakage. To pack wine glasses in these types of containers, follow the same steps above, and consider securing the lid of the bin with tape, especially if it doesn’t have its own locking mechanism.

If you run out of packing paper, you can still pack your wine glasses safely. Consider using clean socks, t-shirts, or pillowcases to wrap or otherwise protect your glasses. Don’t, however, wrap delicate stemware in clothing with buttons, zippers, or other hard components. Metal, wood, and even hard plastic items can scratch or damage your glasses.

And if you’re moving the wine as well as the glasses, make sure you know how to pack and transport it.

Learn more on our How to Pack Hub.

FAQs About Moving Wine Glasses

What Is the Best Way to Unpack Wine Glasses?

Always open the box from the top. Then, carefully remove the first layer of padding and lift each glass out individually. Unwrap the glass and place it in a cabinet or wine glass holder. Avoid unpacking wine glasses before you’re ready to put them away, as a bunch of stemware standing around on a random table can be a risk. As you unwrap and put each glass away, take a moment to inspect it for small chips or cracks that may have occurred in transport.

How Can You Transport Wine Glasses Safely?

Keep the box upright at all times and avoid putting heavy boxes on top of it. Label boxes with glasses as fragile so you or your movers know where to stack them in moving trucks, and avoid putting them on uneven surfaces. For optimal security, wedge the box firmly between soft items for transport. Moving blankets, couch cushions, and bed pillows are all ideal for this purpose.

Can I Move Wine Glasses Myself or Should I Hire Professionals?

Professional movers have ample experience carrying and loading fragile items, so it’s not a bad idea to let them handle your wine glasses and other glassware. But you can move wine glasses yourself if you have the right packing supplies and are comfortable handling fragile items. You may prefer to move items yourself if they’re sentimental or especially valuable.

Should I Pack Wine Glasses in Their Original Packaging?

If you still have those boxes and packaging, that’s an ideal way to pack your wine glasses for moving. Ensure you can easily fit everything back in the box without forcing it, and that your glasses are well cushioned. You should still label the box for moving professionals, as many people reuse boxes, so your movers might not assume a box with pictures of stemware contains actual stemware.

How-To Guide for Getting the Best Rental Truck For You

Author:

Publish Date:

Last Modified Date:

Category: Moving Trucks

Tags: Tags: , , , , , , , , , , , , , , , , , , , , , , , , ,

Few people would argue that moving is a huge undertaking, especially if you’re DIYing it all. And undoubtedly the most important part of planning is the truck that is going to move you and all your stuff to your new home. 

The process of renting a truck is pretty easy. But finding the best deal on a reliable truck that will hold all your stuff can be a challenge. Read on to find out how you can snag a rental truck that fits your needs, your preferences, your budget, and, most importantly, your stuff, along with a few pro tips to really get you moving!

Figuring Out What Size Truck You Need

More than anything else, you want a truck big enough for all your belongings. Trust me, finding out your stuff won’t fit in your UHaul is a nightmare you don’t want to live through.

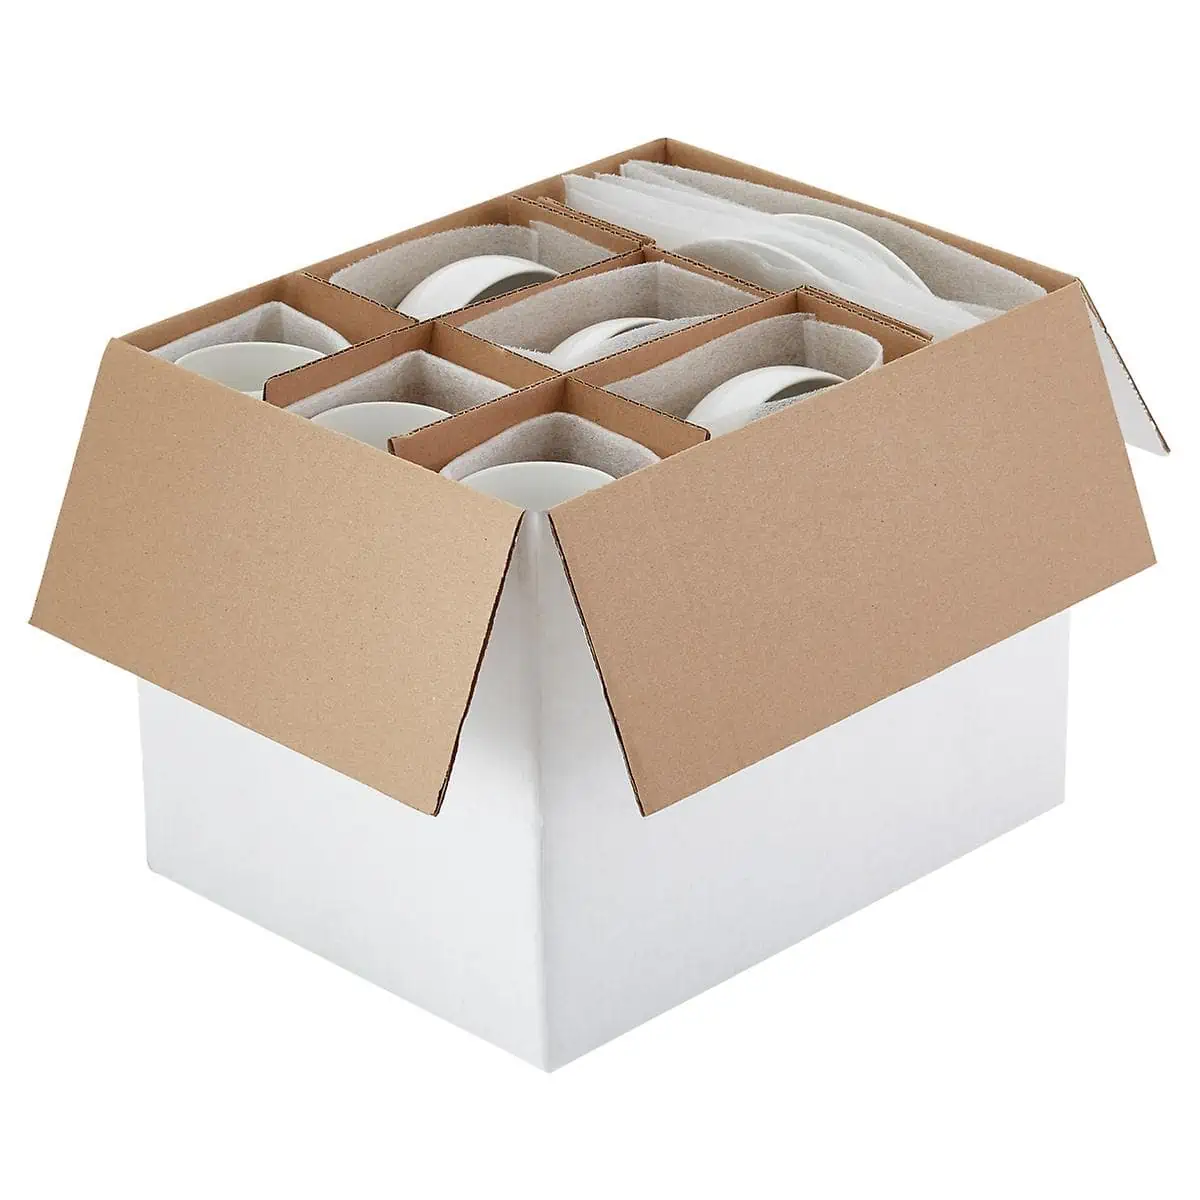
I rarely had a customer who didn’t say something like “I can’t believe how much junk I have!” Until you have to move it all, you probably won’t believe it either.

Fortunately, there is a fairly painless way to figure out how big a truck you’ll need.

Rental trucks only come in so many sizes. If you live simply, without a lot of furniture and other bulky stuff (like exercise machines, vintage arcade games, and baby grand pianos) you should be able to get away with a truck on the small end, meaning around 12 to 14 feet.

Even if you’re a pack rat with a wrap-around couch, the next size up, around 16 to 17 feet, should be big enough. If you are moving with your spouse or if you have children, you might want to think bigger. Check out the chart in this Hire a Helper article for a more detailed look.

Rule of thumb: if you find yourself waffling between sizes — 12 or 14 feet? 15 or 17? — go with the bigger one. The (likely) small difference in price will more than compensate for the stress of not knowing if all your stuff will really fit.

Just don’t forget about everything in the closets and out in the garage!

Whose Trucks Are the Most Reliable?

Two white Penske rental cargo trucks parked in a lot, displaying the brand's name and logo

You can find good and bad reviews on every rental company out there. Years ago I had a terrible experience with a truck from a major moving truck renter (followed by a customer service experience that was not much better), but plenty of people have nothing but good things to say about that same company.

Overall, Penske seems to have the best reputation for clean, reliable trucks. Their fleet is, by all accounts, the newest out there, and their trucks are of the highest quality and relatively fuel-efficient. These are just a couple of snippets from this third-party comparison of Penske and UHaul.

Reliability can refer not only to the truck you rent but the company you rent that truck from. Forbes recently conducted a comprehensive survey of five nationwide rental companies, with Customer Ratings and Customer Support combining for 30% of their overall rating methodology. Penske came out on top.

But again, your mileage may differ! There’s also availability to consider, as well as other company rules or idiosyncrasies that make it less than ideal for your own move. 

Which Company is the Cheapest?

Here’s where your actual mileage can really make a difference.

Sticking with the UHaul versus Penske theme, we did a side-by-side comparison of the two by performing the same move with each. Which came out cheaper? UHaul did – until it didn’t.


“Don’t go to the truck rental place in the morning…Instead, arrange to pick up your truck the evening before your move. You’ll pretty much have your pick of the lot, and you can get as early a start as you want in the morning.”


For a short local move, UHaul will most often be the cheaper option. However Penske, with their lower mileage fee on local moves and more fuel-efficient trucks, can prove the more economical choice as you start to rack up miles. Furthermore, for one-way rentals, Penske offers free unlimited miles while UHaul limits the number of miles you can drive before you start incurring extra charges.

For a broader view of the rental truck landscape check out our cost comparison of Penske, UHaul, Budget, Enterprise, and Ryder (if you are a registered business). Keep in mind that these averages may not reflect the cost of options like insurance, equipment rental, or late fees.

Aside from their established charges, rental companies can adjust the quotes they give you based on a few additional factors:

  • The number and quality of trucks available that day
  • Where you live, i.e. in a high-demand city or region
  • Where you will be dropping your truck off, in the case of a one-way move
  • Your own flexibility

Ultimately, the final cost of your rental will depend on your specific requirements combined with the rental company’s situational logistics. So it’s impossible to say with complete accuracy which company will be able to offer you the best deal. 

But that doesn’t mean you can’t negotiate a better deal than the one they offer you.

Ways to Get a Better Deal on Your Rental Truck

Pick your move day wisely:

Do you have any flexibility at all as to when you move? If so, take advantage. Renting a truck on a weekday in the middle of the month versus the always-busy first and last few days of the month can save you both stress and money.

Try a dealer somewhere out of town: 

The smaller dealers out in the boonies might have trucks hanging around while their colleagues in the city are scrambling. If so, they might be eager to make a deal. Call and find out.

Consider renting round trip: 

Dealers need to keep their inventory of trucks in places that are busiest. Otherwise, they have to move the trucks around themselves. So offer to make things easier for them. If you have a car and aren’t moving too far away, you might be able to score a deal by leaving your car behind, making your move, returning your rental and then driving your car to your new home.

What money you save doing this method may be offset by the extra time and gas it might take, so weigh your options carefully and make your call.

See prices for local moving labor. Read real customer reviews. Easily book your help online.

Ask where they most need your truck when you’re done with it:

Again, inventory logistics are a major part of a rental company’s operations. If you can help them out, they might give you a good deal. For example, if you’re moving to Eugene, Oregon, look for a deal that involves dropping your truck off in Portland. Even with the extra cost of getting back to Eugene, you may still come out ahead.

Make phone calls:

As we see in the above points, and in ways you may not even expect, it can pay off to simply speak to people. Ask about possibilities for mutual benefit that don’t show up online. Be friendly. Be inquisitive. Be persistent. You never know. 

Additional Pro Tips for Renting a Truck

  • Know what kind of insurance you’re getting. It is possible that your car insurance, your homeowner’s insurance, or your credit card company will cover you, at least to some degree, in the unfortunate case of a truck rental accident. As always, call and check! If you have no luck, ask your rental representative what kind of insurance is available – what it costs and what it covers. Here’s a good rundown on rental truck insurance terms.
  • Don’t go to the truck rental place in the morning. That’s what everyone does, and getting the right truck (or any truck at all) can be a hassle. Instead, arrange to pick up your truck the evening before your move. You’ll pretty much have your pick of the lot, and you can get as early a start as you want in the morning. You’ll probably sleep better too!
  • Save cash with deals. If you are booking your rental online, HireAHelper offers discounts on Penske and Budget.
  • Consider renting a trailer from UHaul instead of a truck. Even if you have to pay to have a trailer hitch installed on your vehicle, the money you save renting a trailer instead of a truck will in all likelihood more than cover the cost. Plus trailers don’t break down nearly as often as trucks. 
  • Don’t believe everything you read. You may have seen UHaul advertising its trucks for as little as $19.95 per day on local moves. In reality, that’s just the baseline. Even for a simple one-day in-town move, you’ll end up paying much more.

Cost, quality, customer service, insurance, truck size, and availability. It’s a difficult road to navigate! But with knowledge, persistence, and a few tricks up your sleeve, you’ll be well-equipped to handle this last and extremely important piece of your moving puzzle.

And hey, if you really want your stuff to fit into a truck that’s smaller and less expensive, why not call in the pros? They’ll not only pack your belongings so they take up less space, but they’ll also make sure it’s all packed right, so everything in your truck arrives safe and intact at your new home.

How to Unpack After Moving Like the Pros

Author:

Publish Date:

Last Modified Date:

Category: Loading & Unloading Guides, Organization

Tags: Tags: , , , , , , , , , , , , , , , , , , , , , , , , , , ,

Unpacking should be the best part of the entire moving process. No, really!

You’ve already coordinated all of the logistics of renting a truck and hiring Helpers, you’ve packed everything up, moved, and unloaded your rental truck. Now all that’s left to do is go through all your boxes and get everything in its place so you can enjoy your new home!

So why do some people still dread unpacking? Well, imagine sitting amongst a mountain of boxes with no clue what’s inside any of them or where everything will go. When you put it like that it does sound pretty awful! But it doesn’t have to be that way. Here are some tips on how to make the process a lot easier than you might be dreading.

First Things First: Pack Better To Make Unpacking Easier

Why is unpacking after moving so hard? Well, we all know the quote, “If you fail to plan, you plan to fail.” If you’re not prepared, it won’t go well. Proper planning before your move is the most important step to a smooth unpacking experience

It turns out, there’s much more to packing than randomly throwing items into boxes and calling it a day. You actually can plan the unpacking process to make it easier.


“…[H]ow long does it take to unpack after moving? If you work diligently, you can unpack completely within a few days to a week, depending on how much stuff you have”


How do you make unpacking after a move easier? Here are some things you should do before moving day to prepare and make your unpacking process as smooth as possible.

1. Take photos Before You Start Packing

Before you touch anything, we want you to take out your phone and have a little home photo shoot. 

Here are things you especially need photos of:

  • Bookshelves
  • The back of your TV
  • Kitchen drawers
  • Desk area
  • Toolshed

We urge you to snap pics of the areas in your home that you love! We know all too well how long it can take to get a shelfie looking just the way you want it. By snapping some reference pics now, you’ll be able to replicate that look in your new home in no time.

2. Create a Number and Color-Coded System for Your Boxes

Organization is the key to how to unpack after moving. After the photo shoot, gather all your packing supplies (boxes, paper, packing tape, washi tape, scissors, markers, etc.) and start packing boxes like a pro.

Try to pack items only from one to two rooms inside every box. This will make your life much easier when it’s time to unpack later.

Got a bunch of stuff on shelves? Create a numbered system to remember where everything goes. That way it’s easier to get them unpacked and into their new permanent spots.

And we can’t forget our favorite tip of all — our color-coded box system using washi tape! You can get the full, step-by-step rundown from this post, but the short version is that you need to separate your boxes by the room, marked with bright washi tape so your movers know exactly where to deliver them. If you need an alternative, you can use colored masking tape or colored markers.

3. Make It Much Easier to Unpack Essentials

There are 7 items you’ll want to have on hand for moving day, but we also think you should create a box of moving day essentials.

Imagine the first night in your new home when you’re tearing open boxes trying to find pajamas, your toothbrush, and your medication for the night. Sounds like a disaster.

To prevent that nightmare scenario, this is what should go in your “Moving Day Box” so you don’t have to tear through your moving truck:

  • A change of clothes
  • Utensils
  • Toiletries
  • Prescriptions
  • Phone charger
  • Shower curtain and rod
  • Towels
  • Toilet paper
  • Bedding

Be sure to label this box and keep it near you!

Get Help Unloading Your Rental Truck

See prices for movers by the hour—instantly.

Read real customer reviews.

Easily book your help online.


Clean The 5 Most Important Things

We know you have approximately 10,000 things to do to get your rental deposit back. But trust us, now is the time to give your new place a thorough cleaning because it’s empty. You simply put items in place rather than cleaning and unpacking at the same time. Want to know the five most essential things to clean?

  • Kitchen cabinets
  • The Refrigerator (and refrigerator fan)
  • Bathtub and any tub jets
  • Outside (and Inside) the stove
  • Washing machine

Unpacking Tips

You’ve done the prep work (even the cleaning, you rockstar, you!), and now it’s time to think about how to unpack after moving. Even if you hired help for your unloading (great call), you can still do things to make unpacking time a little easier.

1. Don’t Unpack in a Dirty Room

We know you’ve got thousands of things to do to get your rental deposit back at your last home. But trust us, now is the time to give your new place a thorough cleaning because it’s empty. Want to know the five most essential things to clean?

  • Kitchen cabinets
  • The refrigerator (and refrigerator fan)
  • Bathtub and any tub jets
  • Oven and stove
  • Washing machine

2. Place Your Boxes in Rooms by Color

It may sound easier to just have your Helpers pile up all of the boxes in one spot of your new place, but unpacking will be a lot easier if you follow your color-coded box system and have your unpacking help place each box in the correct room. If you followed our washi tape tip, you should have each door in your new place marked so the Helpers can easily drop the box in the right spot!

Pro Tip: Get your “Moving Day Essentials Box” opened right away so you have everything you need to make it through the next day or two.

3. Use Washi Tape to Figure Out Your Furniture Layout

As long as your movers are there, have them get your furniture in the spot where you want it! We love the idea of using painter’s tape to mark out the layout of furniture right on the floor.

Before you move (or even while your movers are bringing things in and out), go around your place and put tape on the ground to outline your furniture. That way, the movers will know exactly which wall to put your bed on and where that long dresser goes. You can always move things later on, but getting items in the correct space will make your life a lot easier in the coming days.

4. Unpack Only One Room at a Time

While unpacking, it’s easy to feel like you’re climbing an endless mountain. But instead of hopping from space to space, we suggest tackling your rooms in order of importance. Don’t move onto another space until the one you’re on is done, and keep a steady pace. Checking rooms off your list will be satisfying and motivating. 

The kitchen, bedrooms, and kids’ rooms should be high on the priority list, while the guest room and garage may not need TLC right away. Also, make sure you have furniture where you can sit and/or eat and appliances set up before you get too carried away going through boxes.

Did you remember to clean your counters? You’ll also want to have spots to put your items as you whip them out of the boxes, so having counter space, cabinets, shelves, and dressers ready to go is a must!

See prices for local moving labor. Read real customer reviews. Easily book your help online.

5. Unpack the Bathrooms and Bedrooms First

Here’s a vital unpacking tip: Moving day will be exhausting, so if you’re going to unpack anything immediately, make sure it’s your bed and bedding. Once your movers get the mattress into place, find the sheets, comforter, and pillow and make your bed. If you have kids, do theirs too. Having a comfy spot to sleep at the end of a long day will feel amazing!

Unpack your bathroom boxes, too. That way you’ll have all of the toiletries and medications on hand for the night and morning. A fresh shower after a long day of moving will be heavenly, trust us!

6. Save the Kitchen for Tomorrow

When strategizing how to unpack after moving, remember that the kitchen is the most time-intensive room to unpack, due to the amount of tiny and heavy items, so don’t unpack it on moving day.

You might want to take a few appliances out (like the coffee maker or blender if you’re into smoothies for breakfast), and enough dishware to eat a few meals, but the rest of it can be saved until the morning after your moving day. 

7. Avoid Distractions

A calico cat sits in a half-unpacked cardboard box

While a playlist of music or a podcast to keep you energized as you unpack might be a good idea, you probably shouldn’t get your TV set up and turned on right away. You may find yourself sitting on the couch to watch a movie instead of unpacking. 

But are there other distractions to watch out for besides the temptation of entertainment? A few! You’ll want to make a plan for your pets when you’re moving and unpacking, so they don’t get underfoot, and the same goes for kids. Have a plan to keep them occupied or if you can, drop them off at grandma’s house so you have uninterrupted time to unpack. 

So how long does it take to unpack after moving? If you work diligently, you can unpack completely within a few days to a week, depending on how much stuff you have. It’s all about keeping the distractions to a minimum so you can devote enough hours to get your house in tip-top shape.

8. Break Down Boxes as You Go, in Real Time

As you figure out how to unpack after moving, it may be easy to just throw empty ones in a big corner. But trust us, that pile will quickly get out of control and soon you won’t be able to walk around your house without an empty box tumbling down on you. 


“…you need to separate your boxes by the room, marked with bright washi tape so your movers know exactly where to deliver them. If you need an alternative, you can use colored masking tape or colored markers.”


Take one box and make it the designated paper box. As you unpack boxes, crumple up the packing paper and shove it into that box. Then, be sure to break down boxes as you unpack. You’ll want to have a utility knife on hand so you can do this quickly.

9. Don’t Unpack More Than You Have To

There may be some boxes that don’t actually need to be unpacked (we’re looking at you, Christmas decorations!). Make a large pile of items that may be heading to storage or the garage. Then be sure to get those items to that space asap to clear out some space.

What To Do After Unpacking

You’ve made it! You survived moving day and every box in your place is unpacked. You should be feeling pretty darn good about yourself right about now, but the fun isn’t over just yet. There are still a couple important things needed before you can truly settle in.

First, let’s deal with those leftover boxes. If you’ll be moving again soon, then you should hang onto some of the boxes that are still in good condition. Organize your boxes and find a spot to neatly tuck them away. If not, consider turning them into fun projects — like the following:

But if crafting isn’t your thing, this searchable database will let you know the closest place to recycle anything (including moving boxes!). Just be sure to set a deadline for yourself to get those moving boxes out of your new place, so they don’t stay piled in the garage forever.

Similar to the unpacking process, a helpful approach is to focus on one room at a time. Spend half an hour or so every day on small organizational tasks, like getting your desk set up in your home office, organizing the bookshelves to your preference, or hanging up posters and artwork. Breaking it up makes the process manageable and feel less overwhelming. 


If you’re still not thrilled at the thought of doing all of this yourself, no worries. Some movers also offer packing and unpacking help for an extra fee. But hopefully you’re feeling a lot less dreadful and considerably more confident with all these unpacking tips in mind.

Where Can I Find Free Moving Boxes?

Author:

Publish Date:

Last Modified Date:

Category: Moving Boxes & Supplies

Tags: Tags: , , , , , ,

Free moving boxes are kind of like four-leaf clovers: they’re out there, but it takes a lot of looking and a little bit of luck to find them. 

There are plenty of places to buy moving boxes, but anyone who has moved before knows that A) they don’t come cheap, and B) you’ll always need a lot more boxes than you initially thought. Scoring yourself a pile of free boxes will save you a wad of cash – and add some extra in case you’re short on your estimate of how much space your stuff would take up.

So where can you actually find free moving boxes? There are a few places to start (including ones you’ve never thought would provide boxes) in the list below, and some advice on making your search easier. 


What Kind of Moving Boxes Should I Get? labeled moving boxes of varying sizes and types are stacked together in a small space

Before you really start searching, be sure you know what you’re actually looking for. Moving boxes come in several standard sizes, and are used to pack different things. It’s best to have a general idea of what types of boxes you need, mainly to avoid getting boxes that are too small or too big for most of your things. 

  • Book Boxes (1.5 x 3ft) are for books, along with any other relatively heavy items like CDs, small photo frames, nicknacks, beer mugs, and bottles of wine.
  • Medium Cartons (3 x 3ft ) are most often used for clothing and all the non-breakable stuff in your kitchen.
  • Large Cartons (4.5 x 3ft) are for bedding, pillows, bulky clothing like winter coats, and kids’ toys like Legos, board games, and stuffed animals, among other larger, lighter items.
  • Dishpacks (4.5 x 3ft) are made with double-thick cardboard for packing all the breakable stuff in your kitchen. They’re also useful for electronics and large photo frames.
  • Mirror Cartons usually come in four corner pieces that overlap to fit snugly around large pictures and mirrors. 

So whether you’re a bookworm or have antique tea sets, knowing what kind of boxes you need will help make your search a lot less frustrating. 

First Step? Go Social

free moving boxes

Let the people you are connected with know that you are moving, and that it would be a huge help if anyone had any leads on used boxes.

The wording is key! Instead of asking people if they themselves have used boxes (although it couldn’t hurt), ask them to help you by sharing, retweeting, or reposting your request. You’ll reach a lot more people this way, and increase your chances that someone has a ton of boxes lying around, or knows a business that does. If you use Facebook, search for local groups with keywords like “buy sell trade”, “no buy”, and “free” in their names.


“…the most extensive supply of used boxes anywhere will be at your local agency for one of the big van lines…[you’d be] hard-pressed to find certain types of moving boxes, namely dishpacks and mirror cartons, anywhere else.”


Granted, searching for free boxes on social media is totally hit or miss. It only takes a few minutes to spread the word and see what’s out there, but it can take a lot longer for anyone to respond – if they do at all.

In other words, hope your social media posts work, but act like they won’t, and start looking through other potential resources.

Best businesses for sturdy boxes

free moving boxes

Books are heavy. Mugs and a lot else in your kitchen can break. For these, you want sturdy boxes, and because these businesses deal in similar products, they’re your best place to look. 

  • Bookstores: Check the chains like Barnes & Noble along with any small independent bookstore in your city. University bookstores are another decent bet, particularly at the start or end of a semester.
  • Office Supply Stores: Office Depot, Kinko’s, FedEx, and similar stores have strong printer paper boxes with lids. Print shops might also have heavy-duty cartons to unload.
  • Restaurants: Fast-food joints especially will have plenty of sturdy “fry boxes” that are usually clean inside since they are typically used for frozen food.
  • Liquor Stores: Boxes for wine and liquor are not only very sturdy but may come with cardboard dividers inserts that help with packing things like mugs and glassware. 

Any mover will tell you that kitchen stuff should go in dishpacks. However, they can be pretty hard to find (except at moving companies, which we’ll get into later) so strong, stout boxes like the ones mentioned may be your next best bet. Make sure to label them “fragile” or “kitchen” so they can be given due attention, and pack them with plenty of cushion. 

Where to find medium and large moving boxes

free moving boxes

To pack items like clothing, bath towels, and bedding, you’ll want bigger boxes. As with the previous types of boxes, it’s a good idea to look for them at places that sell the same or similar things. 

  • Specialty Retailers: Clothing stores and shops that sell bedding are obvious starters. Drug stores, dollar stores, and sporting goods shops are also good ones to add to your list of possibilities.
  • Retail Giants: Stores like Costco, Walmart, Sam’s Club, and Target take in tons of bulk inventory. And they have to do something with all those emptied boxes.
  • Supermarkets: You may find they have boxes lying around after they’ve restocked their shelves. But, you’ll want to stay away from produce boxes, which usually have holes and bits of leftover organic matter in them. Instead, look for the big cardboard cartons used for paper towels, diapers, Kleenex, toilet paper, and dry foods like cereal.
  • Recycling Centers: Some (but not all) will have cardboard boxes accessible. If this is the case in your area, you might have your pick from boxes of all sizes and shapes, so it’s a good idea to check. 

Other not-so-obvious places to look

free moving boxes

  • Apartment Buildings/Complexes/Leasing Offices: Who will probably have a lot of boxes they’d love to get rid of? People who just moved! Your best bet would be to call the leasing, rental, or management office.
  • Hospitals & Medical Centers: Hospitals go through tons of supplies and produce mountains of cardboard boxes, but make sure you call a non-emergency number ahead of time to ask if they have boxes on hand and where you can safely pick them up.  
  • Marketplace Websites: Online resources for freebies do exist. Freecycle is one such site. Craigslist also has “free stuff” pages.

See prices for local moving labor. Read real customer reviews. Easily book your help online.

Where to find the best variety of moving boxes 

As a former mover, I am willing to bet that the most extensive supply of used boxes anywhere will be at your local agency for one of the big van lines. United, Atlas, North American, Allied, Mayflower: any of them will very likely have stacks and stacks of used boxes, in all sizes and in decent, usable condition.


“You may find [supermarkets] have boxes lying around after they’ve restocked their shelves. But, you’ll want to stay away from produce boxes, which usually have holes and bits of leftover organic matter in them.”


You’d also be hard-pressed to find certain types of moving boxes, namely dishpacks and mirror cartons, anywhere else.

However, while there is a chance these places may offer boxes for nothing, you might also have to pay around a dollar a piece for them. This is definitely a buck more than free. However, if you’ve looked everywhere else and can’t find a particular type of box you need (like dishpacks or tall boxes for jackets and clothing you don’t want wrinkled) one dollar is certainly less than you’ll pay at specialty stores or elsewhere. 


Of course, these aren’t the only places you can find moving boxes. Any business in your area that might get a lot of supplies in several kinds of boxes is a good bet to try. Also, even if you can’t get all the boxes you need for your move with the free options, whatever you do manage to get will still help you save, since you don’t have to get as many boxes as before. 

Bubble Wrap 101: Protips, What It Doesn’t Work With, and Solid Alternatives

Author:

Publish Date:

Last Modified Date:

Category: How To Pack

Tags: Tags: , , , , , , , , , , , , , , , , , , , , , , , , ,

For keeping your most valuable, most expensive stuff protected when you move, it may seem like there’s nothing better than bubble wrap. But we’ll let you in on a little secret. 

Movers very rarely – if ever – use the stuff.

Not because it doesn’t work. It does. But the pros know, all those little bubbles add up to some bulky and relatively expensive bit of cushioning. Packing paper, used correctly, will serve most any packing purpose and save you both space and money.

Still, you may be more comfortable enveloping your flat screen TV, your electronics, your stemware and your china in bubble wrap. That’s totally understandable. So if you decide to go this route, here are a few things to keep in mind.

Using Bubble Wrap: 5 Quick Tips

  1. Put a layer of packing paper between your TV and that bubble wrap. Plastic can leave marks on your screen, particularly in extreme temperatures. This goes for anything you wrap in bubbles. For items with sharp edges or corners, some extra paper can help keep those sharp areas from poking right through the plastic.
  2. Wrap your items with the bubbles facing inward for better protection against exterior pressure and accidental impact. The flat side is easier to write on (in case you want to be able to identify each item quickly) and will hold the tape in place much more effectively.
  3. Don’t bank on one layer of bubble wrap. Two layers of small bubble sheeting might be enough for a piece of stemware, though this would be in addition to packing them with plenty of packing paper and, for extra peace of mind, individual cells inside your cardboard box. If you are using the stuff with the bigger bubbles for heavier items like a large framed mirror or your CPU, one layer may suffice – but again, only in addition to some crumpled packing paper for extra cushioning on all sides.
  4. Keep that bubble wrap firmly in place by taping not just along the edges, but all the way around the item. You splurged on that bubble wrap, don’t start skimping on the tape!
  5. Have a pair of scissors on hand when you are unpacking. It would be a real bummer to break something – or drop and break something – while trying to tear that bubble wrap off using only your hands. 

You might love our:

Moving Cost Calculator

If the quote from your movers felt expensive …
Make sure it lines up with the costs reported by other Americans.

What to Pack in Bubble Wrap

bubble wrap

Valuable items. Fragile items. Heavy and hard-to-replace items. If you’re staring at something and you can’t decide whether to bubble wrap it, err on the side of caution and wrap it.

Specifically, you’ll want to consider bubble wrap for:

  • Large picture frames and mirrors
  • Flat screen TVs
  • Glass tabletops and shelving
  • Electronics and computers
  • Stemware and fine china
  • Fragile decorative items

Remember, bubble wrap alone will not do the trick. Even surrounded by two or three layers of air pockets, the things on this list will still need to be packed firmly in cardboard cartons with enough crumpled packing paper on all sides to keep them from shifting and bouncing in transit while keeping them safe from exterior impact.

After the bubble wrapping is done, use the right kind of box.

There’s no point in being safe if you use the wrong box for your stuff. Finish the job right by packing each bubble-wrapped item properly, surrounded by plenty of crumpled packing paper. Moving boxes come in specific shapes and sizes for your items, use accordingly.

bubble wrap

Mirror Cartons

Picture frames, mirrors, glass shelves and flat-screen TVs go in mirror cartons – sets of two, if not four pieces that you can use to form a custom-sized box.

Double-Walled Dish Pack Cartons

bubble wrap
containerstore.com

Electronics and computer components are best protected when packed in double-walled dish pack cartons, the same boxes we use for dishes, plates and glasses. And yes! This includes your china and stemware. Fragile decorative items like statuettes and ceramics can still be packed in medium (3 cubic foot) boxes, provided they are cushioned well and the boxes are clearly marked to minimize the chances of someone putting a box of books on top.

Cardboard Cells

A note about stemware: Nothing gets broken more often than this stuff. Wrapping each piece well is crucial, but so is packing it all correctly into your dish pack as the items on the bottom will have to support the weight of everything else in there.

bubble wrap
cactuscontainers.com

The best thing to do is get your hands on some of those cardboard cells, which not only keep your wine glasses from knocking against each other but offer an appreciable amount of vertical support, keeping all the weight of those glasses off the ones at the bottom of the box.

If you can’t find any cardboard cells, don’t despair! A thick layer of crumpled packing paper on the bottom of your dish pack and another layer of crumpled paper on top of each successive tier of firmly-packed stemware is what the pros use to keep everything safe. If you aren’t comfortable with that, line your entire dish pack with bubble wrap and put a couple of sheets in between your tiers of glasses. This isn’t the most cost-efficient way to pack your stemware, but it beats a box full of expensive shards of glass.

Alternatives

If not bubble wrap, then what? As stated earlier, packing paper is the standard. However, towels, crumpled newspaper, or virtually anything form-fitting, sturdy and that’s plenty soft can often do the trick for cheaper. Sound too simple? It really is. As long as you pad your items in a balanced way, it doesn’t need to be as expensive as bubble wrap. Just as long as “this one, extra towel” isn’t the only thing keeping your priceless vase safe. Check the moving supplies section at your local hardware store for bubble wrap alternatives.

A Note on Packing Peanuts

bubble wrapYou may like the idea of those Styrofoam nuggets, but in general, they are bulky, costly, and non-biodegradable. The eco-friendly alternative cornstarch peanuts are even more expensive and don’t make for a very satisfying snack, no matter how hungry you are at the end of your move. Plus, they end up getting scattered all over the floor and clinging to your clothes. In short, use (and eat) them if you like, but I don’t recommend them.


Admit it. It’s hard to resist popping those plastic bubbles once you’re done with that bubble wrap. But think for a moment how easy it is to pop them – and how much all the boxes you are packing must weigh.

Keep this in mind when you are packing up all those valuable, expensive, fragile items. On its own, a sheet of bubble wrap can’t adequately protect your stuff. You’re going to need plenty of packing paper (or towels or clothes) in a pinch. Pack those items firmly in the center of your box, protected on all sides.

And really, save yourself a headache (and maybe the stomachache) and stay away from those peanuts!

Movehacks: How to Unpack and Organize Before, During and After You Open a Box

Author:

Publish Date:

Last Modified Date:

Category: Organization

Tags: Tags: , , , , , , , , , , , , ,

Some people tell us unpacking is the most enjoyable part of their move. (“It’s like Christmas!” they say.) Others dread unpacking like nothing else in the world. (“It’s worse than a triple root canal!” they cry.)

Either way, unpacking can quickly turn your new home into an ocean of cardboard and newsprint. To make the process more manageable – dare we say more enjoyable? – here are some industry tips for getting your unpack off to a raging start.

What to Do Before the Unpack

Yeah, you gotta clean before you unpack 

You might not want to hear this right off the bat, but be prepared to clean before you begin to unpack. Even if it’s just wiping the shelves and countertops and giving the floors a quick sweep, unpacking in a clean home is infinitely more pleasant than unpacking in a dusty one. These items definitely take priority when it comes to cleaning:

  • Kitchen cabinets
  • Refridgerator
  • Bathtub and bathtub jets
  • Stove
  • Inside the washing machine

Don’t unpack from down on the ground, clear some counter space

In the kitchen or dining room, do whatever you need to do so you can get your boxes up high. Why? Because you’ll need that counter space to place boxes on before you carry your things around your new place.

Why on a shelf? Because if you unpack from the place you dropped down that heavy box, you’re going to feel it in your lower back the next day. And week. Trust me, unpack up high. Always.

Unpack to shower and sleep first

No one in the history of unpacking has ever unpacked in one day. Unless you think you can be the first, don’t wait to unpack your bedding, set up your bed, hang your shower curtain and dig out what you need to feel clean and refreshed after a long day (or week? or month?) of moving.

Protip: Yes, this involves a little foresight when packing. Mark the boxes that contain the things you want to access first. (This may also include real plates, glasses and utensils to make you feel more at home when you sit down for dinner that first evening.)

What to Do During the Unpack

Unpack the “easy” boxes first to make room 

It takes almost no time to unpack your books and stick them on the shelves of your bookcase. In a matter of minutes, you can transfer your t-shirts and jeans from boxes to dresser drawers. And for goodness sake, get those massive and bulky wardrobe boxes unpacked and out of the house!

Go about halfway with the pictures 

Unpacking large pictures, mirrors and paintings is also quick, and you can then get rid of those bulky mirror cartons. Some folks, however, suggest hanging your pictures up early on to give your new place that homey feel. I say lean them up in a corner somewhere until you get all your furniture in place. Later on, you can do the “a little to the right…a little more…no back left…no not that much…okay there, no, a shade higher…yeah, that’s perfect” thing.

Make a quota of boxes unpacked per day and stick to it

If you are the motivated type, feel free to skip this tip. If you are easily distracted and tend to put things off, you might find it helpful to …. Hey, are you listening? …  set goals for yourself. Commit to unpacking one room per day, six boxes per hour, whatever. And reward yourself for sticking to your plan by going out afterward. Just remember how satisfying it will be when you’re all finished. 

Repack what you don’t actually need for storage

As you empty your boxes, set aside those items you decide you won’t need right away – or for a long time. Keep a few of those now-empty boxes handy and consolidate those items you put aside for quick transfer to the basement, the attic or the back of your closet.

Protip: Just as you did when you first packed, write the contents of each box with a marker as you go through your consolidation.

Don’t unpack the TV

The ultimate distractor. Do unpack the tunes, though. 

Purge. Again

We suggest purging while unpacking. On move after move, it’s common to see people wait for weeks (or months) for the family’s stuff to arrive. Living without most of their stuff, they often realize that so many things were unnecessary. And while packing stuff in a box allows you to forget about it, having to unpack it and find a place for it helps you decide whether you really need it. As with the stuff you’ll be storing in the attic or the basement, set up a box or two for these things you’ve decided to part with.

What to Do After the Unpack

Hide your paper trail

Keep a couple of medium-sized boxes on hand, and use them to stash all the packing paper that would otherwise turn the floors of your new home into a churning sea of crumpled newsprint. Flattening and folding all that paper will save a lot of space – if you have the time and patience – but doing so also helps you find smaller items that can go unnoticed and disappear forever. I can’t count how many times a customer dropped their used moving boxes off at our warehouse with items still buried in the packing paper inside.

Protip: Packing a large box with flattened paper can make it surprisingly heavy. Medium boxes are more manageable in this respect.

Now, about getting rid of all those boxes…

First, get them out of your way. The garage – if you have one and there’s room – is the obvious choice. (Think twice before stashing them in the basement “temporarily”.) If the weather is good and it feels appropriate, start breaking down your empty boxes and putting them out by the curb. Unless your new home is on a cul-de-sac it may not be long before you see passer-by stop and take those boxes off your hands. If this doesn’t work, here are three ideas that don’t require a box-hungry passerby.

  • If you have the time, the storage space and the mental fortitude try passing on your boxes to someone else who is getting ready to move. Facebook groups and Craigslist are two widely-used resources for advertising moving boxes for sale or for free.
  • Some moving companies will be happy to take your boxes and your packing paper off your hands. If none of the smaller local movers will take them, check for national van line agencies in your area (like United, North American, Atlas and Allied). The agencies I worked for never bought used boxes from people, but we were always happy to take them if they were in decent shape. 
  • Recycle if you can’t find someone who will reuse them.

Unpacking can prove a more formidable task than expected. Whether you think it’ll be like Christmas or a root canal, putting these tips into practice will help you feel at home faster.

Then you can sit back and watch the TV.

How To Properly Take Care of Your Back While You Pack

Author:

Publish Date:

Last Modified Date:

Category: Pro Packing Guides

Tags: Tags: , , , , , , , , , , ,

This month’s packing tip has nothing to do with protecting our customer’s belongings. Instead, we’re going to talk about protecting ourselves.

As movers, we know well the importance of lifting and carrying stuff the right way so we don’t kill our backs. Packing rarely involves heavy lifting, but spending a few hours in someone’s kitchen can still end up being a pain in the lower back (yes and the neck but that’s different). Here are three steps for avoiding that physical strain.

First, clear a space on a table or a counter where you can set and wrap your customer’s dishes, bowls, glasses and everything else waiting in those cupboards and cabinets. You want to be standing upright, not hunched over a coffee table or kneeling on the floor. (If you are packing and moving your customer on the same day, make sure your team leaves that kitchen table until the end, or at least until you’re done packing in there.)

Second, place the box on top of something, so you don’t have to bend over so far as you fill it with bundle after bundle of wrapped dishes and coffee mugs. Wrapping and packing an entire kitchen can involve a hundred or two hundred separate items. Setting your dish pack on a chair or a low (and adequately wide) stool, or even a couple of (extremely well-packed) book boxes, can save you from a lot of unnecessary back-bending.

As a bonus, your box will be easier to lift once it’s all packed.

Third, simply apply these simple tips to every other box in every other room you pack. Even when you’re packing light stuff – clothes, bedding, shoes and small picture frames – the less you have to bend over the better and stronger you’ll be throughout the day.

It may seem like not a huge step to pack boxes in this elevated way, but trust me – the energy saved absolutely adds up throughout the day, let alone throughout a career.

×

I'm Moving

Moving? Thinking about moving? Whether your move is off in the distance or you already have one foot out the door, you'll learn about everything you should expect through our useful how-to's, cool articles and much more. It's all specially curated for you in our "I'm Moving" section.
Explore
×

I'm a Mover

For rookies or veterans alike, our "I'm a Mover" section is filled with extensive industry news, crucial protips and in-depth guides written by industry professionals. Sharing our decade of moving knowledge is just one way we help keep our professional movers at the top of their game.
Explore