How to Pack Dried Flower Arrangements

Author:

Publish Date:

Last Modified Date:

Category: Pro Packing Guides

Tags: Tags: , , , , , , ,

As you prepare to move, you may be wondering how to safely transport that dried flower arrangement you’ve kept since your wedding or graduation. These arrangements need breathing room to support their fragile structure while also staying secure enough to avoid shifting during the move.

It’s a delicate balance, but with some friendly guidance, you can become a pro at knowing how to pack your dried flowers for moving. This guide walks you through the entire process with an emphasis on carefully handling both the flowers and their container at every stage. That way, your delicate arrangements arrive in one piece and ready to display.


Step 1: Gather the Right Supplies

Paper Nest for Dried Flowers

We recommend gathering the right supplies early to help protect your flowers:

  • A rigid, sturdy box: Dried flowers need a strong outer layer to stay protected during transit. Dimensional arrangements that sit in a vase for a 360-degree view should travel upright in a deep, vertical carton. Flat arrangements meant to be viewed from the front should rest flat on their back in a shallow, horizontal box.
  • Packing paper: Use plenty of packing paper to fill spaces around your flowers for extra padding, but avoid direct contact. The texture may be too rough for delicate petals.
  • Tissue paper: Tissue paper offers a soft, gentle surface for dried flowers and helps absorb moisture to preserve their condition.
  • Bubble wrap: Bubble wrap creates a protective barrier inside the box, shielding your flowers from bumps, potholes, and uneven roads during transit.
  • Packing tape: Once your flowers are packed, secure the box with packing tape so everything stays contained and protected during the move.

When combined, these supplies create a shell that’s soft and padded on the inside, but tough and durable on the outside. It’s a win-win, and will get your flowers from point A to point B intact and ready to display.


Step 2: Prep the Container and Flowers

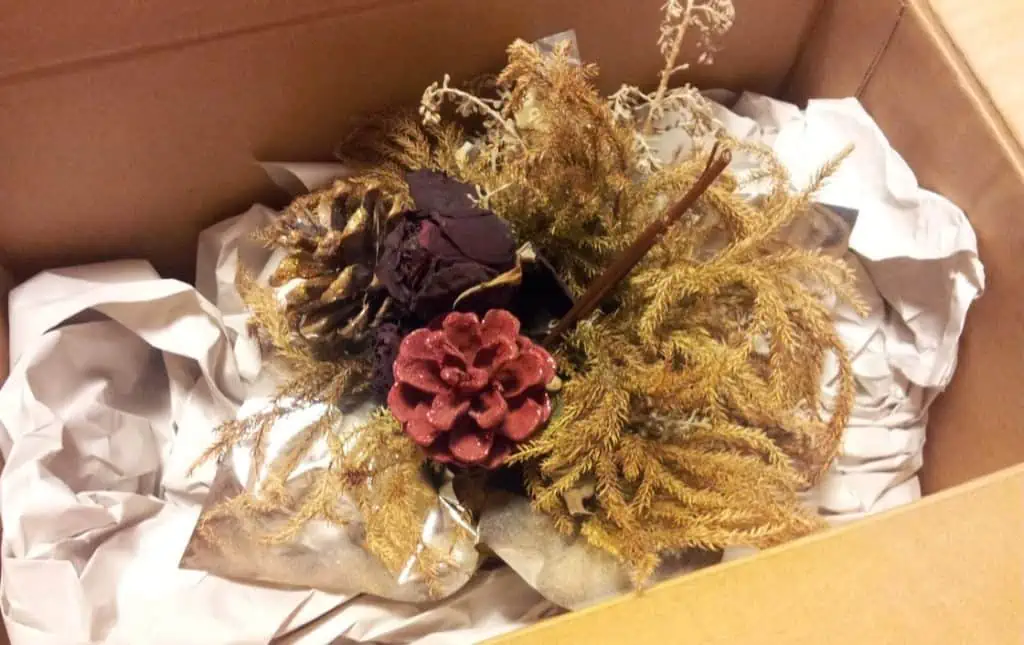
Packing a Dimensional Dried Flower Arrangement

After gathering your supplies, it’s time to package your dried flowers for transport. Keep these tips in mind as you prepare:

  1. Wrap individual stems or small bunches: Use tissue paper to gently wrap each flower or group of stems. This helps protect delicate petals and reduces the risk of breakage.
  2. Choose the right box size: The box you choose should be slightly larger than the arrangement, so the flowers fit comfortably without being cramped. A box that’s too small increases the risk of crushed branches, but a box that’s too big leaves room for the flowers to jostle around and risk damage.
  3. Double-check orientation: Make sure the box is constructed correctly and oriented right side up before placing anything inside.
  4. Line the interior: Start with a layer of bubble wrap on the bottom and sides to cushion the box, then add a layer of tissue paper on top of the bubble wrap to absorb moisture and offer extra padding.
  5. Create a nest: Fashion a paper nest along the bottom using loosely crumpled tissue paper. This gives your flowers a secure, padded spot to rest.

Pro Tip: If you’re traveling in hot weather, consider placing the box inside a cooler to help regulate temperature and protect the flowers from heat-related damage.

Should you spray dried flowers with hairspray?

Spraying dried flowers with hairspray can help preserve their shape and prevent dust buildup, but it can also sometimes leave a sticky or dull finish on the petals. However, it’s not a required step, and it isn’t a substitute for careful packing.


“Let anyone who’s helping you move know—verbally and in writing—which boxes contain fragile arrangements so they can handle them with extra care.”


So, if you don’t have any on hand, don’t worry. Our expert packing tips are more than enough to help keep your dried or artificial flowers safe throughout the move.


Step 3: Pack and Secure the Flowers in a Box

How to pack dried flower arrangements

Packing dried or artificial flowers requires delicate handling and a little strategy. Keep these tips in mind as you arrange and secure your floral arrangement:

  1. Consider flat vs. dimensional arrangements: As mentioned earlier, dimensional arrangements, like those in a vase with a 360-degree display, should stand upright. Flat arrangements designed to be viewed from the front should lie on their back.
  2. Limit empty space: After wrapping your flowers, strategically arrange them to minimize gaps. Then, use packing paper or bubble wrap to fill any remaining space, add cushioning, and prevent shifting during the move.
  3. Add support with packing materials: After your flowers are nestled in the box, use additional packing paper and bubble wrap to cushion the sides and top. These layers prevent shifting and absorb shocks during the move.
  4. Tie down the arrangement: For extra stability, poke holes in the box walls with a pen or pencil and thread string through to secure the center of the arrangement. Use 2–3 ties for flat arrangements and 4–5 for dimensional ones. Tape the string ends to the outside of the box to hold them in place.
  5. Label clearly and consistently: Proper labeling makes loading and unpacking much easier and helps prevent mishandling. We recommend adding a “fragile” tag and noting the contents. Learn how to do it right with our guide to color-coded box labeling.

Pro tip: Let anyone who’s helping you move know—verbally and in writing—which boxes contain fragile arrangements so they can handle them with extra care.


Step 4: Securely Transport the Box

Dried flowers can break or shed easily, so lift and carry the box carefully. Avoid sudden movements, tipping, or stacking anything heavy on top. Keep the box upright on a flat, stable surface—ideally separated from larger items that could shift during transport.

Temperature matters, too. Extreme heat or cold can cause brittleness or moisture damage. Whenever possible, transport your arrangements in moderate conditions to help preserve their shape and color.

Step 5: Delicately Unpack the Flowers

Once you arrive at your new home, ensure a vase is readily available. Always open the box right side up and place the flowers directly into the vase. The less you move or reposition them, the lower the risk of breakage or shedding.


“If you’re traveling in hot weather, consider placing the box inside a cooler to help regulate temperature and protect the flowers from heat-related damage.”


Next, carefully remove any tissue or wrapping, taking extra care not to tug or twist the stems. And there you have it—your dried flowers in your new home, safe and sound thanks to clear labeling, smart placement, and a gentle touch.

See prices for local moving labor. Read real customer reviews. Easily book your help online.

Packing, Transporting, and Unpacking Dried Flowers

Packing and moving dried or artificial flowers takes some thoughtful preparation, but it’s easy once you know all the steps: soft and supportive materials, clear labeling, and proper handling. With these, you can preserve every stem and petal, and enjoy your arrangement all over again.

How to Unpack After Moving Like the Pros

Author:

Publish Date:

Last Modified Date:

Category: Loading & Unloading Guides, Organization

Tags: Tags: , , , , , , , , , , , , , , , , , , , , , , , , , , ,

Unpacking should be the best part of the entire moving process. No, really!

You’ve already coordinated all of the logistics of renting a truck and hiring Helpers, you’ve packed everything up, moved, and unloaded your rental truck. Now all that’s left to do is go through all your boxes and get everything in its place so you can enjoy your new home!

So why do some people still dread unpacking? Well, imagine sitting amongst a mountain of boxes with no clue what’s inside any of them or where everything will go. When you put it like that it does sound pretty awful! But it doesn’t have to be that way. Here are some tips on how to make the process a lot easier than you might be dreading.

First Things First: Pack Better To Make Unpacking Easier

Why is unpacking after moving so hard? Well, we all know the quote, “If you fail to plan, you plan to fail.” If you’re not prepared, it won’t go well. Proper planning before your move is the most important step to a smooth unpacking experience

It turns out, there’s much more to packing than randomly throwing items into boxes and calling it a day. You actually can plan the unpacking process to make it easier.


“…[H]ow long does it take to unpack after moving? If you work diligently, you can unpack completely within a few days to a week, depending on how much stuff you have”


How do you make unpacking after a move easier? Here are some things you should do before moving day to prepare and make your unpacking process as smooth as possible.

1. Take photos Before You Start Packing

Before you touch anything, we want you to take out your phone and have a little home photo shoot. 

Here are things you especially need photos of:

  • Bookshelves
  • The back of your TV
  • Kitchen drawers
  • Desk area
  • Toolshed

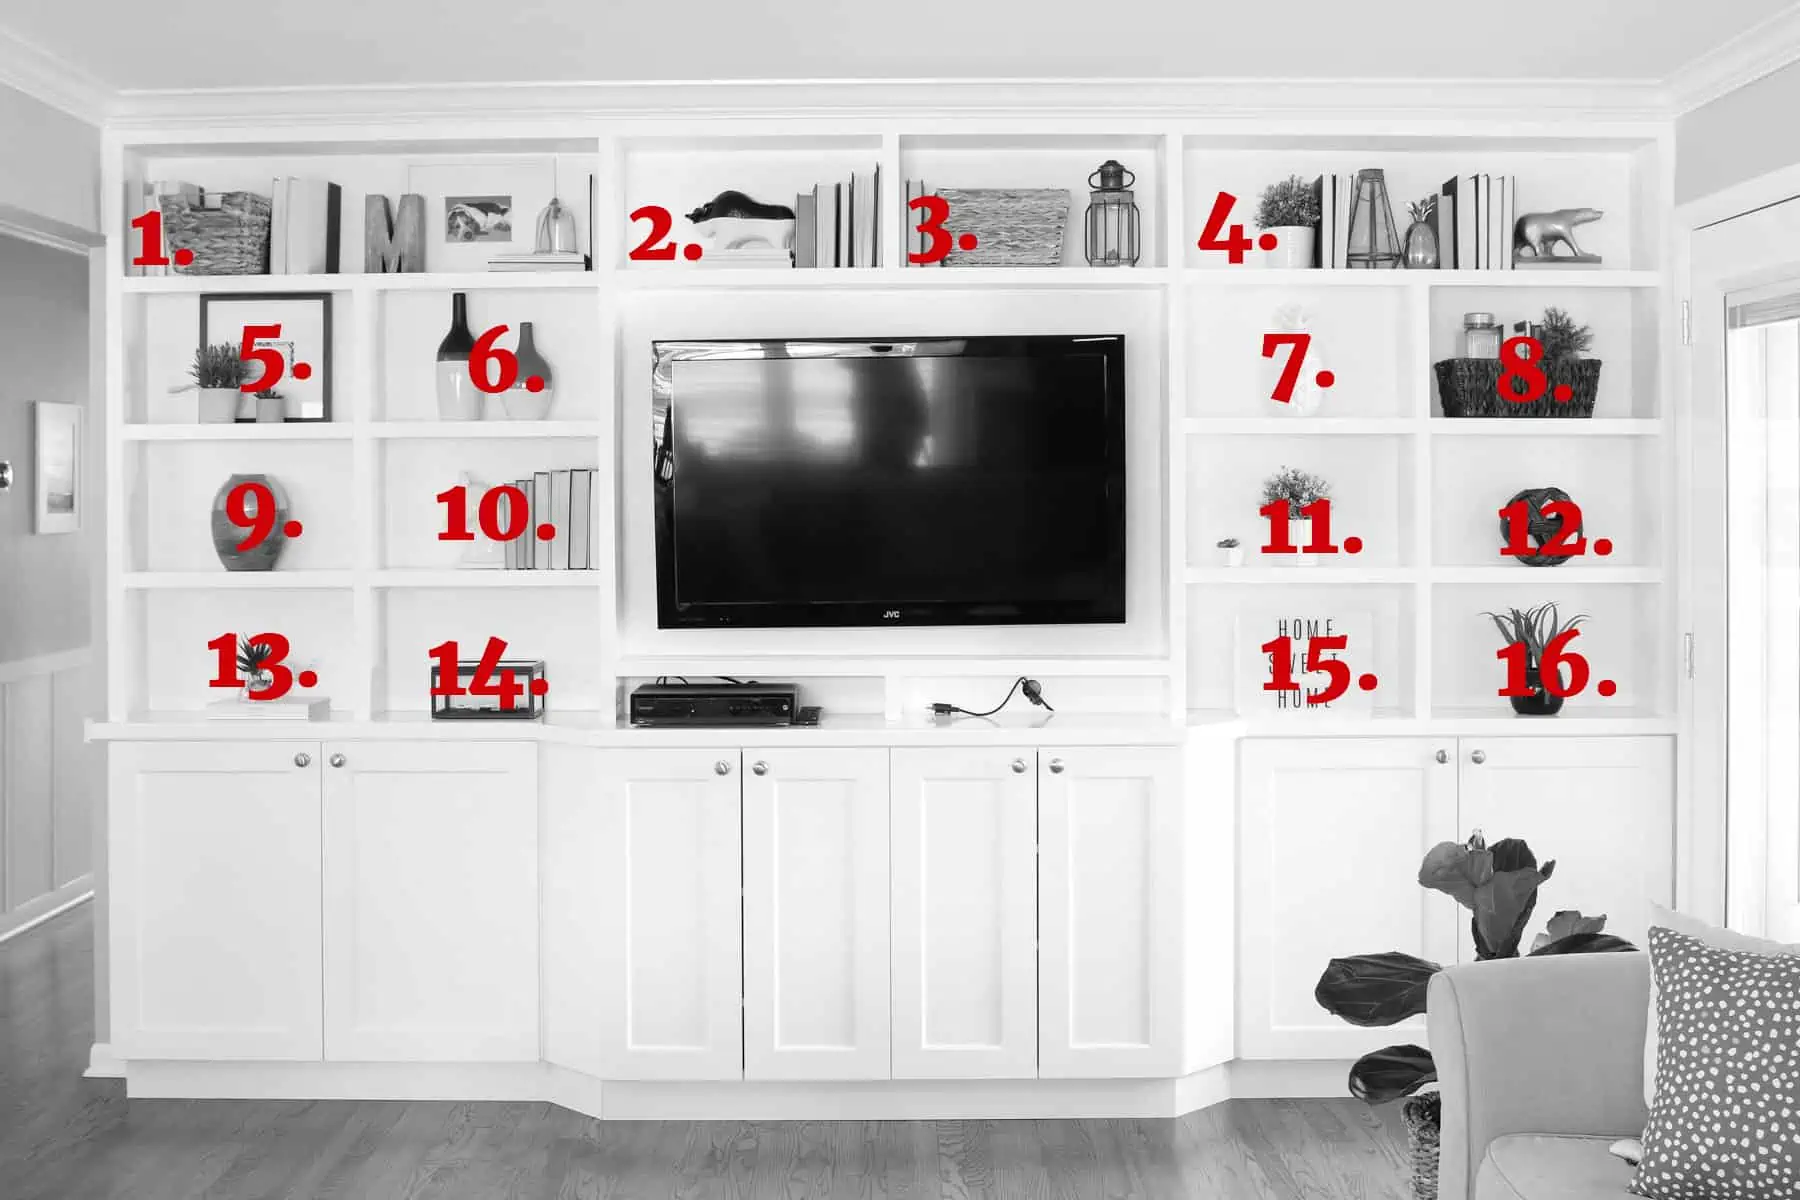
We urge you to snap pics of the areas in your home that you love! We know all too well how long it can take to get a shelfie looking just the way you want it. By snapping some reference pics now, you’ll be able to replicate that look in your new home in no time.

2. Create a Number and Color-Coded System for Your Boxes

Organization is the key to how to unpack after moving. After the photo shoot, gather all your packing supplies (boxes, paper, packing tape, washi tape, scissors, markers, etc.) and start packing boxes like a pro.

Try to pack items only from one to two rooms inside every box. This will make your life much easier when it’s time to unpack later.

Got a bunch of stuff on shelves? Create a numbered system to remember where everything goes. That way it’s easier to get them unpacked and into their new permanent spots.

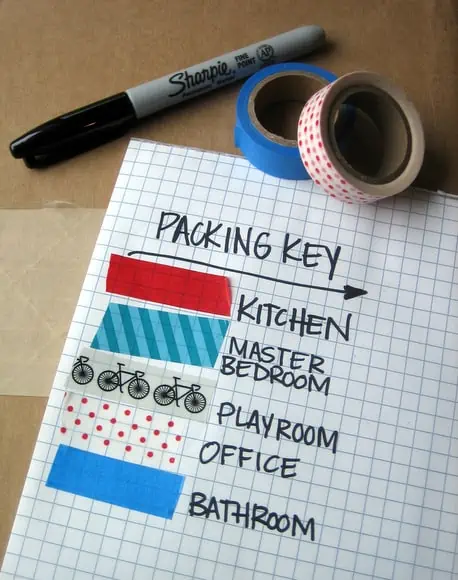
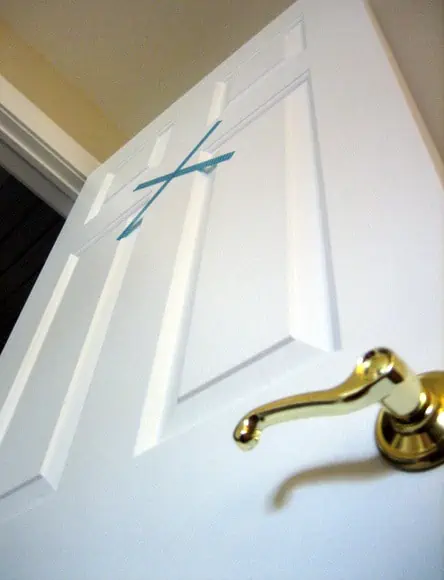
And we can’t forget our favorite tip of all — our color-coded box system using washi tape! You can get the full, step-by-step rundown from this post, but the short version is that you need to separate your boxes by the room, marked with bright washi tape so your movers know exactly where to deliver them. If you need an alternative, you can use colored masking tape or colored markers.

3. Make It Much Easier to Unpack Essentials

There are 7 items you’ll want to have on hand for moving day, but we also think you should create a box of moving day essentials.

Imagine the first night in your new home when you’re tearing open boxes trying to find pajamas, your toothbrush, and your medication for the night. Sounds like a disaster.

To prevent that nightmare scenario, this is what should go in your “Moving Day Box” so you don’t have to tear through your moving truck:

  • A change of clothes
  • Utensils
  • Toiletries
  • Prescriptions
  • Phone charger
  • Shower curtain and rod
  • Towels
  • Toilet paper
  • Bedding

Be sure to label this box and keep it near you!

Get Help Unloading Your Rental Truck

See prices for movers by the hour—instantly.

Read real customer reviews.

Easily book your help online.


Clean The 5 Most Important Things

We know you have approximately 10,000 things to do to get your rental deposit back. But trust us, now is the time to give your new place a thorough cleaning because it’s empty. You simply put items in place rather than cleaning and unpacking at the same time. Want to know the five most essential things to clean?

  • Kitchen cabinets
  • The Refrigerator (and refrigerator fan)
  • Bathtub and any tub jets
  • Outside (and Inside) the stove
  • Washing machine

Unpacking Tips

You’ve done the prep work (even the cleaning, you rockstar, you!), and now it’s time to think about how to unpack after moving. Even if you hired help for your unloading (great call), you can still do things to make unpacking time a little easier.

1. Don’t Unpack in a Dirty Room

We know you’ve got thousands of things to do to get your rental deposit back at your last home. But trust us, now is the time to give your new place a thorough cleaning because it’s empty. Want to know the five most essential things to clean?

  • Kitchen cabinets
  • The refrigerator (and refrigerator fan)
  • Bathtub and any tub jets
  • Oven and stove
  • Washing machine

2. Place Your Boxes in Rooms by Color

It may sound easier to just have your Helpers pile up all of the boxes in one spot of your new place, but unpacking will be a lot easier if you follow your color-coded box system and have your unpacking help place each box in the correct room. If you followed our washi tape tip, you should have each door in your new place marked so the Helpers can easily drop the box in the right spot!

Pro Tip: Get your “Moving Day Essentials Box” opened right away so you have everything you need to make it through the next day or two.

3. Use Washi Tape to Figure Out Your Furniture Layout

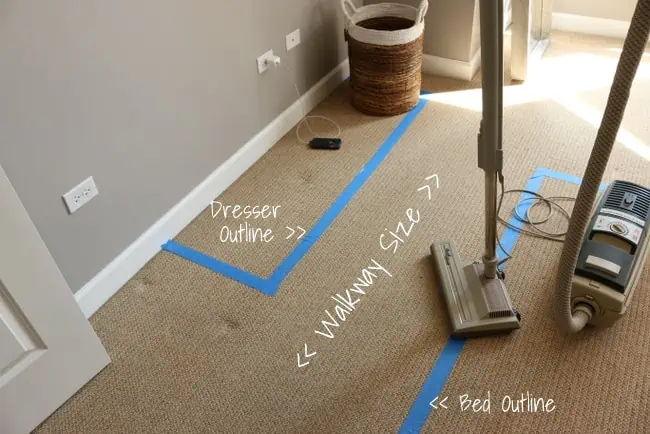
As long as your movers are there, have them get your furniture in the spot where you want it! We love the idea of using painter’s tape to mark out the layout of furniture right on the floor.

Before you move (or even while your movers are bringing things in and out), go around your place and put tape on the ground to outline your furniture. That way, the movers will know exactly which wall to put your bed on and where that long dresser goes. You can always move things later on, but getting items in the correct space will make your life a lot easier in the coming days.

4. Unpack Only One Room at a Time

While unpacking, it’s easy to feel like you’re climbing an endless mountain. But instead of hopping from space to space, we suggest tackling your rooms in order of importance. Don’t move onto another space until the one you’re on is done, and keep a steady pace. Checking rooms off your list will be satisfying and motivating. 

The kitchen, bedrooms, and kids’ rooms should be high on the priority list, while the guest room and garage may not need TLC right away. Also, make sure you have furniture where you can sit and/or eat and appliances set up before you get too carried away going through boxes.

Did you remember to clean your counters? You’ll also want to have spots to put your items as you whip them out of the boxes, so having counter space, cabinets, shelves, and dressers ready to go is a must!

See prices for local moving labor. Read real customer reviews. Easily book your help online.

5. Unpack the Bathrooms and Bedrooms First

Here’s a vital unpacking tip: Moving day will be exhausting, so if you’re going to unpack anything immediately, make sure it’s your bed and bedding. Once your movers get the mattress into place, find the sheets, comforter, and pillow and make your bed. If you have kids, do theirs too. Having a comfy spot to sleep at the end of a long day will feel amazing!

Unpack your bathroom boxes, too. That way you’ll have all of the toiletries and medications on hand for the night and morning. A fresh shower after a long day of moving will be heavenly, trust us!

6. Save the Kitchen for Tomorrow

When strategizing how to unpack after moving, remember that the kitchen is the most time-intensive room to unpack, due to the amount of tiny and heavy items, so don’t unpack it on moving day.

You might want to take a few appliances out (like the coffee maker or blender if you’re into smoothies for breakfast), and enough dishware to eat a few meals, but the rest of it can be saved until the morning after your moving day. 

7. Avoid Distractions

A calico cat sits in a half-unpacked cardboard box

While a playlist of music or a podcast to keep you energized as you unpack might be a good idea, you probably shouldn’t get your TV set up and turned on right away. You may find yourself sitting on the couch to watch a movie instead of unpacking. 

But are there other distractions to watch out for besides the temptation of entertainment? A few! You’ll want to make a plan for your pets when you’re moving and unpacking, so they don’t get underfoot, and the same goes for kids. Have a plan to keep them occupied or if you can, drop them off at grandma’s house so you have uninterrupted time to unpack. 

So how long does it take to unpack after moving? If you work diligently, you can unpack completely within a few days to a week, depending on how much stuff you have. It’s all about keeping the distractions to a minimum so you can devote enough hours to get your house in tip-top shape.

8. Break Down Boxes as You Go, in Real Time

As you figure out how to unpack after moving, it may be easy to just throw empty ones in a big corner. But trust us, that pile will quickly get out of control and soon you won’t be able to walk around your house without an empty box tumbling down on you. 


“…you need to separate your boxes by the room, marked with bright washi tape so your movers know exactly where to deliver them. If you need an alternative, you can use colored masking tape or colored markers.”


Take one box and make it the designated paper box. As you unpack boxes, crumple up the packing paper and shove it into that box. Then, be sure to break down boxes as you unpack. You’ll want to have a utility knife on hand so you can do this quickly.

9. Don’t Unpack More Than You Have To

There may be some boxes that don’t actually need to be unpacked (we’re looking at you, Christmas decorations!). Make a large pile of items that may be heading to storage or the garage. Then be sure to get those items to that space asap to clear out some space.

What To Do After Unpacking

You’ve made it! You survived moving day and every box in your place is unpacked. You should be feeling pretty darn good about yourself right about now, but the fun isn’t over just yet. There are still a couple important things needed before you can truly settle in.

First, let’s deal with those leftover boxes. If you’ll be moving again soon, then you should hang onto some of the boxes that are still in good condition. Organize your boxes and find a spot to neatly tuck them away. If not, consider turning them into fun projects — like the following:

But if crafting isn’t your thing, this searchable database will let you know the closest place to recycle anything (including moving boxes!). Just be sure to set a deadline for yourself to get those moving boxes out of your new place, so they don’t stay piled in the garage forever.

Similar to the unpacking process, a helpful approach is to focus on one room at a time. Spend half an hour or so every day on small organizational tasks, like getting your desk set up in your home office, organizing the bookshelves to your preference, or hanging up posters and artwork. Breaking it up makes the process manageable and feel less overwhelming. 


If you’re still not thrilled at the thought of doing all of this yourself, no worries. Some movers also offer packing and unpacking help for an extra fee. But hopefully you’re feeling a lot less dreadful and considerably more confident with all these unpacking tips in mind.

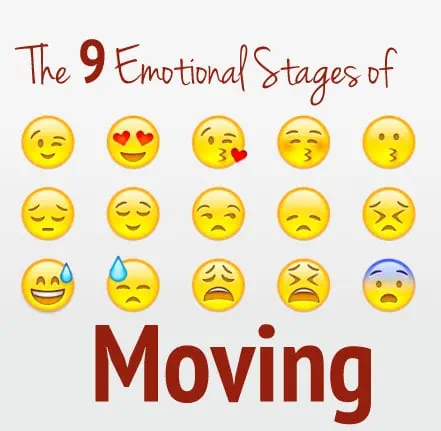
The 9 Emotional Stages of Moving

Author:

Publish Date:

Last Modified Date:

Category: Moving Stories

Tags: Tags: , , , , , , , , , ,

Stages of Moving

Because moving is such a momentous part of life, there are a wide variety of emotions that come along with it. Let’s be honest, most of the time moving gets a bad rap.

Many people just lump moving into the “sucks” category… but we’re here to dispel that theory. Sure, moving can be overwhelming and scary at times, but there are also a heck of a lot of good things that come along with moving. Lots of wonderful, HAPPY emotions.

So let’s take a look at the 9 emotional stages (both the good & the bad) of moving… (more…)

Cardboard Art Projects: 9 Creative Uses for Moving Boxes

Author:

Publish Date:

Last Modified Date:

Category: Home Decorating

Tags: Tags: , , , , , ,

cardboard3

Don’t throw away those moving boxes just yet! We have some creative and genius ways to reuse, recycle and have some serious fun with that extra cardboard. Here are 9 DIY cardboard art projects to save you some money on those new-homeowner projects that we’ve all faced as we settled into our new homes.

Moving 101 (more…)

Real People: PODS vs. U-Pack ReloCubes (ABF)

Author:

Publish Date:

Last Modified Date:

Category: Moving Containers, Moving Stories

Tags: Tags: , , , , , , ,

Picture of Shiromi A.

This post is part of our “Real People” series. Each post is written by a real person, not employed at HireAHelper, that actually used the service listed. These posts offer the inside scoop on the pros and cons of using moving equipment and services from moving container companies like PODS, U-Pack ReloCubes and 1-800-Pack-Rat, or rental truck companies like Penske Truck Rental, Budget Moving Trucks, and U-Haul. Today’s post is from Shiromi A. of Seattle, WA as she documents her research and decision making process when comparing U-Pack vs. PODS


UPDATE: We’ve gone back and updated this post with fresh numbers for 2019.

My husband is a retired military member, so our lives involved moving seven times in four years. Let me tell you, it never gets easier. You’d think we would have the moving thing down by now, but I find each move has its own set of unique challenges to overcome.

When we decided to move from Portland, Oregon up to Seattle, Washington so we could finally live near the water, we knew it would take some planning. We called around a few interstate moving companies, but the quotes were super pricey. We didn’t want to rent a truck because you pay by the day and that time crunch can be stressful.

That’s when my husband and I quickly came to the conclusion that based on our location, either PODS or U-Pack ReloCubes would be our best bet.

(more…)
×

I'm Moving

Moving? Thinking about moving? Whether your move is off in the distance or you already have one foot out the door, you'll learn about everything you should expect through our useful how-to's, cool articles and much more. It's all specially curated for you in our "I'm Moving" section.
Explore
×

I'm a Mover

For rookies or veterans alike, our "I'm a Mover" section is filled with extensive industry news, crucial protips and in-depth guides written by industry professionals. Sharing our decade of moving knowledge is just one way we help keep our professional movers at the top of their game.
Explore