How To Color-Code Boxes for Moving

Author:

Publish Date:

Last Modified Date:

Category: Moving Advice

Tags: Tags: , , , , , , ,

Here’s a scenario: You’ve woken up the day after moving and would love nothing more than a cup of coffee, but your kitchen is filled with half a dozen boxes, and you have no idea which one your Kurig or mugs are in. Not an ideal start to living in your new home.

If you want to avoid the nightmare of digging through mystery boxes, you need a good labeling system. That’s why more and more people are learning how to label moving boxes using a color-coding system.

In this guide, we’ll give you detailed instructions on how to color-code boxes for moving. Whether you’re relocating to a five-bedroom family home or packing up a studio apartment, this method is easy to learn and worth the effort.


Color-Coded Moving System

A color-coded moving system is a visual organization strategy that uses colors—usually on color-coded moving labels, tape, or stickers—to designate where each moving box belongs.


Avoid marking the tops of boxes, as the labels will be hard to see when boxes are stacked in the moving truck.”


Instead of squinting at scribbled notes or opening every moving box to figure out its destination, you (and your movers) can instantly spot where things belong.

Here’s a quick step-by-step guide:

  1. Gather your supplies
  2. Assign a color to each room or zone
  3. Use numbers for boxes in each color category
  4. Mark the boxes
  5. Create a detailed legend
  6. Inform your crew
  7. Create signs to help guide your crew
  8. Dedicate a zone for unloading or furniture building

an example of a color-coded packing key. Different colored tape is assigned a different room, such as red for the kitchen and one patterned with bicycles for the playroomHow It Works

The idea is simple: Assign a unique color to each room or zone, mark every box with that color, and use labels on the boxes and signs around your home to match each box to its destination.

For example:

  • Blue = Bathroom
  • Yellow = Kitchen
  • Green = Living Room
  • Orange = Bedroom 1

To stay even more organized, add numbers or item lists to your color-coded boxes to make them easier to identify and track.

Many professional moving crews, especially those working on large-scale or multi-day moves, use some form of color-coding boxes for moving. It helps them streamline unloading, avoid misplaced items, and keep everything efficient.

That said, not every moving company offers a color-coded moving system by default. The good news? You can create your own method to label moving boxes for a smoother move. If you’re booking through HireAHelper, you can easily communicate with the movers on our platform to let them know your setup before moving day. They’ll take it from there!


Step-by-Step: How to Color-Code Boxes for Moving

Now, let’s take a detailed look at how to create a color-coded moving system that’s efficient and easy to follow. This breakdown will help you avoid confusion, save time, and make unpacking way easier.

Step 1. Gather Your Supplies

An array of colorful masking tape rolls in a box

You’ll need the following to create a color-coded moving system:

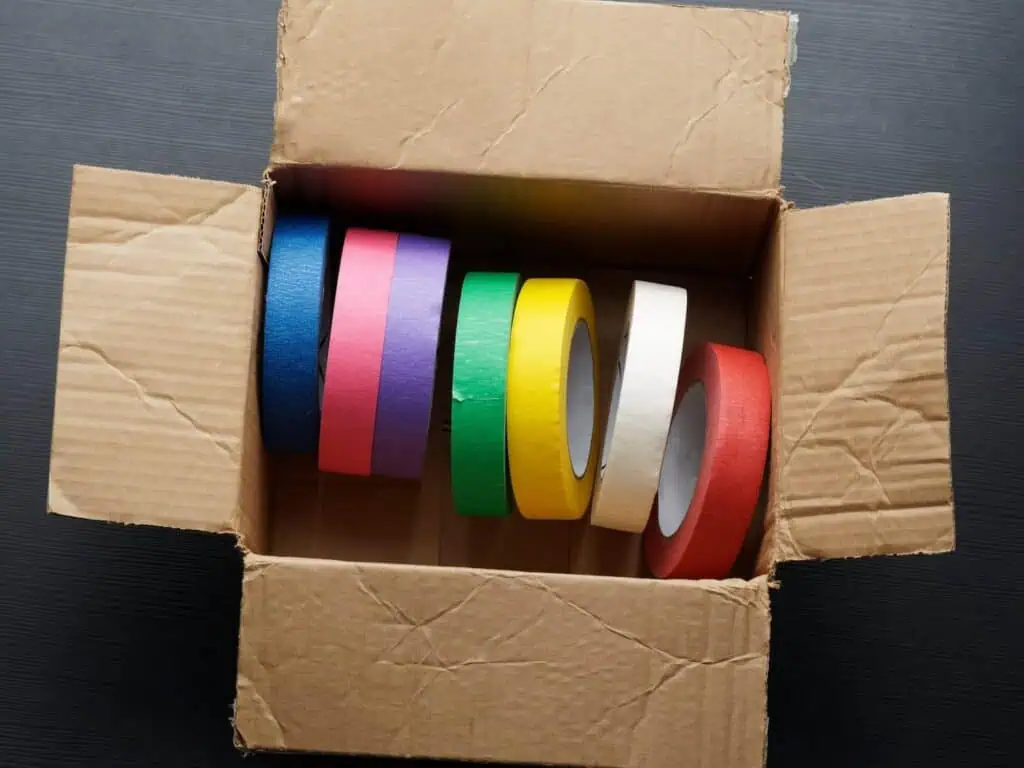
  • Brightly colored duct tape or masking tape: It’s durable and comes in a wide range of colors.
  • Labels or large color-coded stickers: Choose stickers big enough to spot at a glance. Preprinted room labels or large blank labels you can write on work best for visibility and quick sorting.
  • Permanent markers: Use bold, quick-drying markers like Sharpies. Chisel tips are great for big, visible labels. For darker-colored tape, go with metallic or paint markers so your writing stands out.
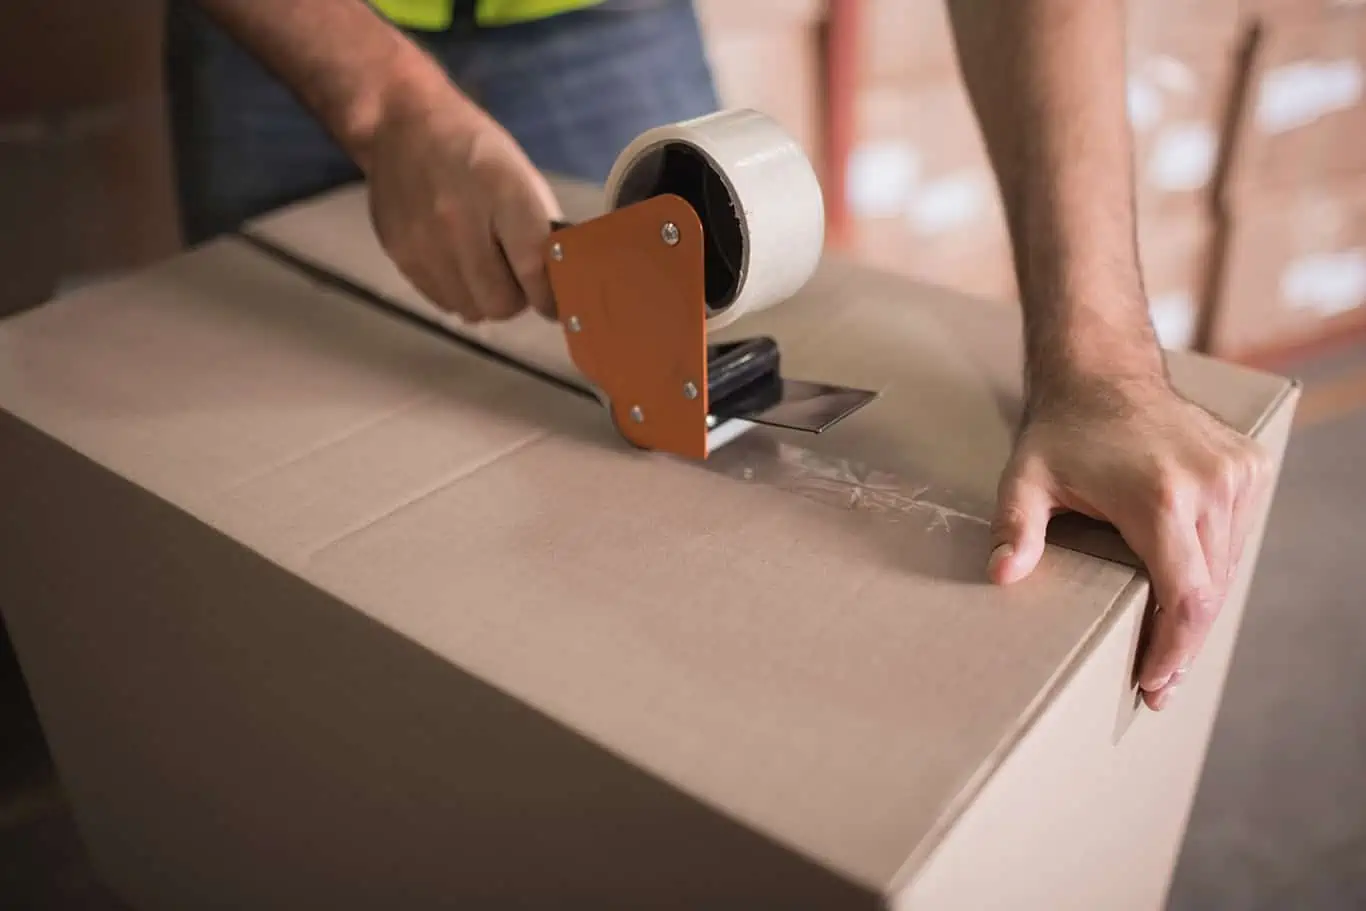
  • Clear Packing tape: Use this to securely seal your boxes. It also works well over labels and stickers to keep them from peeling or getting smudged during the move.

Step 2. Assign a Color to Each Room or Zone

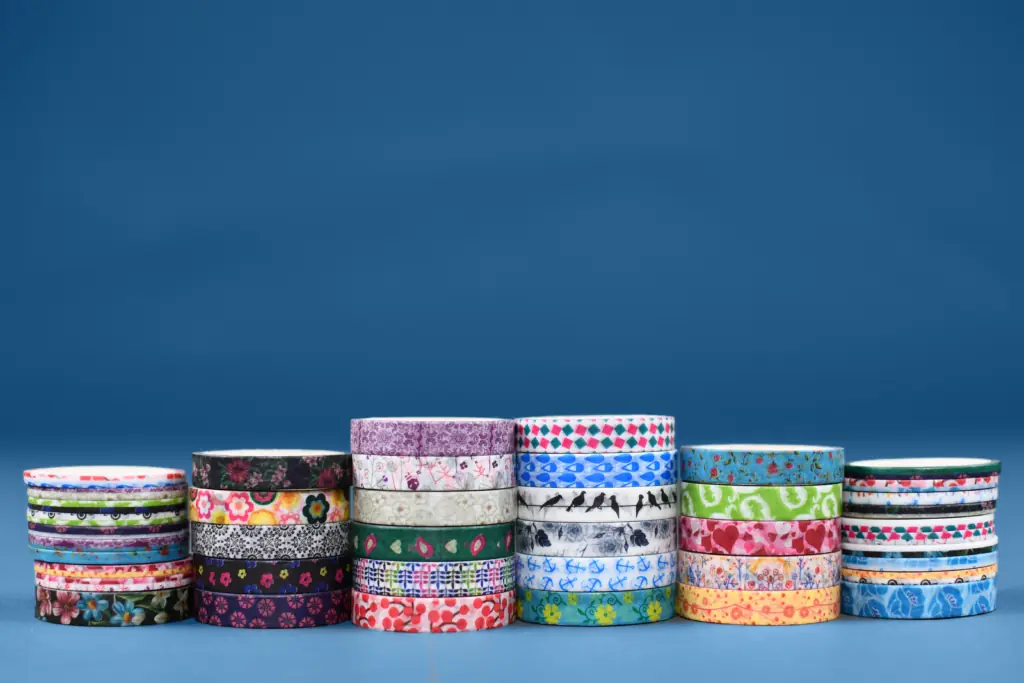
Each color should indicate a zone or room in your new home. You can use tape, stickers, markers, or all three. If you’re using tape and have more rooms in your home than there are colors in the rainbow, don’t worry. Patterned tape works well and can be found in many craft stores. Look for bold patterns that are easy to identify, like stripes or polka dots.


“Let your moving team know about your color-coding system ahead of your move. You could share a hard copy or photo of your legend along with any additional instructions.”


Washi tape is also an option and comes in hundreds of colors and patterns, but you may need to use more than one “row” of it to get the same thickness as other kinds of tape.

Step 3. Use Numbers for Boxes in Each Category

Take the color-coding process to another level by adding numbers and the contents to each box with a marker or sticker. This helps you create a detailed legend that streamlines your move and doubles as inventory.

A cardboard box has a piece of blue tape on its side labeled clearly "shower stuff"For example, if the kitchen is labeled yellow, you might number your boxes Yellow 1 through Yellow 6. Yellow 1 could contain dishes, while Yellow 2 holds pantry items. This way, you’ll know exactly what’s in each box at a glance, and it’ll be easier to notice if a box is missing during unpacking.

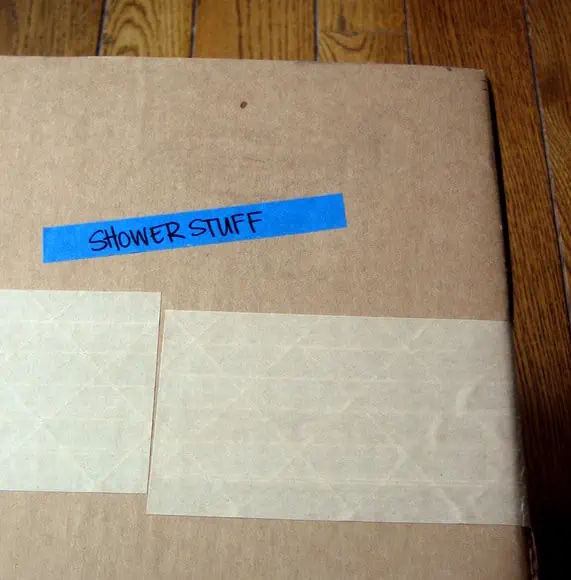
Step 4. Mark Your Boxes

Once you’ve assigned each room or zone a color, you can start packing and marking your boxes room by room. To clearly label each box with its designated color, add a piece of duct tape on each side, or label it with a colored marker or sticker. Avoid marking the tops of boxes, as the labels will be hard to see when boxes are stacked in the moving truck.

To stay extra organized, include a short list of contents on each box or add an additional label with item details. This helps during unpacking and makes it easier to spot missing items.

Step 5. Create a Legend for Your Movers

Create a clear legend to explain your color-coding and numbering system to your movers. If you’ve assigned numbers to boxes, be sure to include them in the legend alongside the color-codes. Place the legend in a visible spot, such as near the front door, so everyone can easily reference it on moving day. Keep it simple and easy to understand for a smooth moving process.

Here’s an example:

Color Room Boxes
Yellow Kitchen 1-6
Blue Bathroom 7-10
Green Living Room 11-19
Orange Bedroom 1 20-24

Step 6. Inform Your Crew

Let your moving team know about your color-coding system ahead of your move. You could share a hard copy or photo of your legend along with any additional instructions. Providing this information in advance helps ensure everyone is on the same page and increases efficiency. If friends and family are helping you with the move, send them a copy, too. Even better, get them to help with the packing!

See prices for local moving labor. Read real customer reviews. Easily book your help online.

Step 7. Create Signs to Guide Your Crew

Provide coordinated signs around your home to help your movers place your belongings in the right place in your new home. For example, if you’ve assigned the kitchen the color yellow, write “kitchen” in yellow marker on a piece of paper and tape it above the kitchen door. Visual cues like this can help streamline your move by reducing confusion and speeding up the unpacking process.

Step 8. Dedicate a Zone for Unloading or Furniture Building

Assigning an unloading and furniture-building zone prevents clutter, keeps walkways clear, and speeds up assembly. It protects your space and helps everyone know where to focus their efforts. Having a dedicated area makes the move-in process safer, faster, and way more efficient.


Benefits of Using a Color-Coded Moving System

Color-coding moving boxes streamlines the move-in process by visually indicating the contents and destination of each box, leading to faster and easier unloading and organization.

Here are some of the benefits of color-coding your move:

  • Faster loading and unloading
  • Fewer misplaced boxes
  • Less confusion for everyone involved
  • Easier unpacking (you know where things are and where they go)
  • Built-in inventory system if you number your boxes
  • Less stress on moving day

It’s also a win for your moving team. Instead of constantly asking where each box belongs, they can follow your signs and focus on getting the job done.

Whether you’re moving across town or the country, learning how to color-code when moving is one of the easiest ways to take control of your move and make the whole process smoother.

Do you need help packing, too? Hire packing help through HireAHelper, and let vetted local pros take care of it for you. We can connect you with the ideal moving company that fits your needs and budget.

How to Unpack After Moving Like the Pros

Author:

Publish Date:

Last Modified Date:

Category: Loading & Unloading Guides, Organization

Tags: Tags: , , , , , , , , , , , , , , , , , , , , , , , , , , ,

Unpacking should be the best part of the entire moving process. No, really!

You’ve already coordinated all of the logistics of renting a truck and hiring Helpers, you’ve packed everything up, moved, and unloaded your rental truck. Now all that’s left to do is go through all your boxes and get everything in its place so you can enjoy your new home!

So why do some people still dread unpacking? Well, imagine sitting amongst a mountain of boxes with no clue what’s inside any of them or where everything will go. When you put it like that it does sound pretty awful! But it doesn’t have to be that way. Here are some tips on how to make the process a lot easier than you might be dreading.

First Things First: Pack Better To Make Unpacking Easier

Why is unpacking after moving so hard? Well, we all know the quote, “If you fail to plan, you plan to fail.” If you’re not prepared, it won’t go well. Proper planning before your move is the most important step to a smooth unpacking experience

It turns out, there’s much more to packing than randomly throwing items into boxes and calling it a day. You actually can plan the unpacking process to make it easier.


“…[H]ow long does it take to unpack after moving? If you work diligently, you can unpack completely within a few days to a week, depending on how much stuff you have”


How do you make unpacking after a move easier? Here are some things you should do before moving day to prepare and make your unpacking process as smooth as possible.

1. Take photos Before You Start Packing

Before you touch anything, we want you to take out your phone and have a little home photo shoot. 

Here are things you especially need photos of:

  • Bookshelves
  • The back of your TV
  • Kitchen drawers
  • Desk area
  • Toolshed

We urge you to snap pics of the areas in your home that you love! We know all too well how long it can take to get a shelfie looking just the way you want it. By snapping some reference pics now, you’ll be able to replicate that look in your new home in no time.

2. Create a Number and Color-Coded System for Your Boxes

Organization is the key to how to unpack after moving. After the photo shoot, gather all your packing supplies (boxes, paper, packing tape, washi tape, scissors, markers, etc.) and start packing boxes like a pro.

Try to pack items only from one to two rooms inside every box. This will make your life much easier when it’s time to unpack later.

Got a bunch of stuff on shelves? Create a numbered system to remember where everything goes. That way it’s easier to get them unpacked and into their new permanent spots.

And we can’t forget our favorite tip of all — our color-coded box system using washi tape! You can get the full, step-by-step rundown from this post, but the short version is that you need to separate your boxes by the room, marked with bright washi tape so your movers know exactly where to deliver them. If you need an alternative, you can use colored masking tape or colored markers.

3. Make It Much Easier to Unpack Essentials

There are 7 items you’ll want to have on hand for moving day, but we also think you should create a box of moving day essentials.

Imagine the first night in your new home when you’re tearing open boxes trying to find pajamas, your toothbrush, and your medication for the night. Sounds like a disaster.

To prevent that nightmare scenario, this is what should go in your “Moving Day Box” so you don’t have to tear through your moving truck:

  • A change of clothes
  • Utensils
  • Toiletries
  • Prescriptions
  • Phone charger
  • Shower curtain and rod
  • Towels
  • Toilet paper
  • Bedding

Be sure to label this box and keep it near you!

Get Help Unloading Your Rental Truck

See prices for movers by the hour—instantly.

Read real customer reviews.

Easily book your help online.


Clean The 5 Most Important Things

We know you have approximately 10,000 things to do to get your rental deposit back. But trust us, now is the time to give your new place a thorough cleaning because it’s empty. You simply put items in place rather than cleaning and unpacking at the same time. Want to know the five most essential things to clean?

  • Kitchen cabinets
  • The Refrigerator (and refrigerator fan)
  • Bathtub and any tub jets
  • Outside (and Inside) the stove
  • Washing machine

Unpacking Tips

You’ve done the prep work (even the cleaning, you rockstar, you!), and now it’s time to think about how to unpack after moving. Even if you hired help for your unloading (great call), you can still do things to make unpacking time a little easier.

1. Don’t Unpack in a Dirty Room

We know you’ve got thousands of things to do to get your rental deposit back at your last home. But trust us, now is the time to give your new place a thorough cleaning because it’s empty. Want to know the five most essential things to clean?

  • Kitchen cabinets
  • The refrigerator (and refrigerator fan)
  • Bathtub and any tub jets
  • Oven and stove
  • Washing machine

2. Place Your Boxes in Rooms by Color

It may sound easier to just have your Helpers pile up all of the boxes in one spot of your new place, but unpacking will be a lot easier if you follow your color-coded box system and have your unpacking help place each box in the correct room. If you followed our washi tape tip, you should have each door in your new place marked so the Helpers can easily drop the box in the right spot!

Pro Tip: Get your “Moving Day Essentials Box” opened right away so you have everything you need to make it through the next day or two.

3. Use Washi Tape to Figure Out Your Furniture Layout

As long as your movers are there, have them get your furniture in the spot where you want it! We love the idea of using painter’s tape to mark out the layout of furniture right on the floor.

Before you move (or even while your movers are bringing things in and out), go around your place and put tape on the ground to outline your furniture. That way, the movers will know exactly which wall to put your bed on and where that long dresser goes. You can always move things later on, but getting items in the correct space will make your life a lot easier in the coming days.

4. Unpack Only One Room at a Time

While unpacking, it’s easy to feel like you’re climbing an endless mountain. But instead of hopping from space to space, we suggest tackling your rooms in order of importance. Don’t move onto another space until the one you’re on is done, and keep a steady pace. Checking rooms off your list will be satisfying and motivating. 

The kitchen, bedrooms, and kids’ rooms should be high on the priority list, while the guest room and garage may not need TLC right away. Also, make sure you have furniture where you can sit and/or eat and appliances set up before you get too carried away going through boxes.

Did you remember to clean your counters? You’ll also want to have spots to put your items as you whip them out of the boxes, so having counter space, cabinets, shelves, and dressers ready to go is a must!

See prices for local moving labor. Read real customer reviews. Easily book your help online.

5. Unpack the Bathrooms and Bedrooms First

Here’s a vital unpacking tip: Moving day will be exhausting, so if you’re going to unpack anything immediately, make sure it’s your bed and bedding. Once your movers get the mattress into place, find the sheets, comforter, and pillow and make your bed. If you have kids, do theirs too. Having a comfy spot to sleep at the end of a long day will feel amazing!

Unpack your bathroom boxes, too. That way you’ll have all of the toiletries and medications on hand for the night and morning. A fresh shower after a long day of moving will be heavenly, trust us!

6. Save the Kitchen for Tomorrow

When strategizing how to unpack after moving, remember that the kitchen is the most time-intensive room to unpack, due to the amount of tiny and heavy items, so don’t unpack it on moving day.

You might want to take a few appliances out (like the coffee maker or blender if you’re into smoothies for breakfast), and enough dishware to eat a few meals, but the rest of it can be saved until the morning after your moving day. 

7. Avoid Distractions

A calico cat sits in a half-unpacked cardboard box

While a playlist of music or a podcast to keep you energized as you unpack might be a good idea, you probably shouldn’t get your TV set up and turned on right away. You may find yourself sitting on the couch to watch a movie instead of unpacking. 

But are there other distractions to watch out for besides the temptation of entertainment? A few! You’ll want to make a plan for your pets when you’re moving and unpacking, so they don’t get underfoot, and the same goes for kids. Have a plan to keep them occupied or if you can, drop them off at grandma’s house so you have uninterrupted time to unpack. 

So how long does it take to unpack after moving? If you work diligently, you can unpack completely within a few days to a week, depending on how much stuff you have. It’s all about keeping the distractions to a minimum so you can devote enough hours to get your house in tip-top shape.

8. Break Down Boxes as You Go, in Real Time

As you figure out how to unpack after moving, it may be easy to just throw empty ones in a big corner. But trust us, that pile will quickly get out of control and soon you won’t be able to walk around your house without an empty box tumbling down on you. 


“…you need to separate your boxes by the room, marked with bright washi tape so your movers know exactly where to deliver them. If you need an alternative, you can use colored masking tape or colored markers.”


Take one box and make it the designated paper box. As you unpack boxes, crumple up the packing paper and shove it into that box. Then, be sure to break down boxes as you unpack. You’ll want to have a utility knife on hand so you can do this quickly.

9. Don’t Unpack More Than You Have To

There may be some boxes that don’t actually need to be unpacked (we’re looking at you, Christmas decorations!). Make a large pile of items that may be heading to storage or the garage. Then be sure to get those items to that space asap to clear out some space.

What To Do After Unpacking

You’ve made it! You survived moving day and every box in your place is unpacked. You should be feeling pretty darn good about yourself right about now, but the fun isn’t over just yet. There are still a couple important things needed before you can truly settle in.

First, let’s deal with those leftover boxes. If you’ll be moving again soon, then you should hang onto some of the boxes that are still in good condition. Organize your boxes and find a spot to neatly tuck them away. If not, consider turning them into fun projects — like the following:

But if crafting isn’t your thing, this searchable database will let you know the closest place to recycle anything (including moving boxes!). Just be sure to set a deadline for yourself to get those moving boxes out of your new place, so they don’t stay piled in the garage forever.

Similar to the unpacking process, a helpful approach is to focus on one room at a time. Spend half an hour or so every day on small organizational tasks, like getting your desk set up in your home office, organizing the bookshelves to your preference, or hanging up posters and artwork. Breaking it up makes the process manageable and feel less overwhelming. 


If you’re still not thrilled at the thought of doing all of this yourself, no worries. Some movers also offer packing and unpacking help for an extra fee. But hopefully you’re feeling a lot less dreadful and considerably more confident with all these unpacking tips in mind.

The Best Type of Packing Tape to Use When Moving

Author:

Publish Date:

Last Modified Date:

Category: How To Pack, Moving Boxes & Supplies

Tags: Tags: , , , , , , , , , ,

Packing tape is an item you probably don’t give much thought to until you really need it, after which it’s the only thing that really seems to matter.

If you’re painting a room, you’ll want to find the perfect painter’s tape to get the job done right. If you’re in the midst of moving your “to buy” list probably includes boxes, moving blankets, packing material, and yes, packing tape!

But what type of packing tape is best to use when moving?

It depends on what you are taping, so first you need to know a couple of things.

After moving lots ourselves, we’ve concluded that not all tape is created equal. Some tapes are not right for moving boxes and will make packing a heck of a lot harder. Not only that, but only having one type of tape won’t work well for each step in your moving process.

So knowing what we know now, let’s chat about how the tapes you’ll find at the store are actually different…

Tape Factors

There are lots of factors that differentiate each type of tape. Here are things to keep in mind when choosing the right tape for your packing needs.

  • Temperature: Some tapes are better than others when it comes to standing up to certain temperatures and humidity levels. You’ll want to take the environment into account when deciding on a tape so it stays sealed even in a humid storage unit or on a chilly moving truck.
  • Grade: The grade is a fancy word for the stickiness and strength of the tape. The higher the grade, the thicker and stronger the tape.
  • Adhesive: There are a few different kinds of adhesives for different stuff you’re sticking together. Most notably, hot melt adhesive and acrylic adhesive.
  • Width and Color: How wide is the tape, and is it wide enough to cover the gap in your boxes? What color is it? Color is something to think about when it comes time to organize and sort all of your boxes during the unpack.

Okay now that we got the technical jargon out of the way, let’s figure out what tape is best for you and your move!

Best Tapes for Moving

#1: Shipping Tape

Shipping tape is going to be your best bet for your move. This tape is often a hot melt adhesive and thus is strong enough to withstand the handling of your moving boxes as you get from point A to B. You’ll also want to grab a handheld tape dispenser so it’s easy to cut and apply to boxes quickly. (Plus, this makes you feel pretty cool knocking out boxes like a pro.)

You can buy this tape and the tape “gun” at any home improvement, office, or moving store—it’s often clear and comes in 2-3 inch widths. Shipping tape also lacks a cloth backing, so it’s easy to undo from your boxes when it’s time to unpack.

Use For: Building and sealing moving boxes.

Price: ~$9-12 on Amazon

#2: Storage Tape

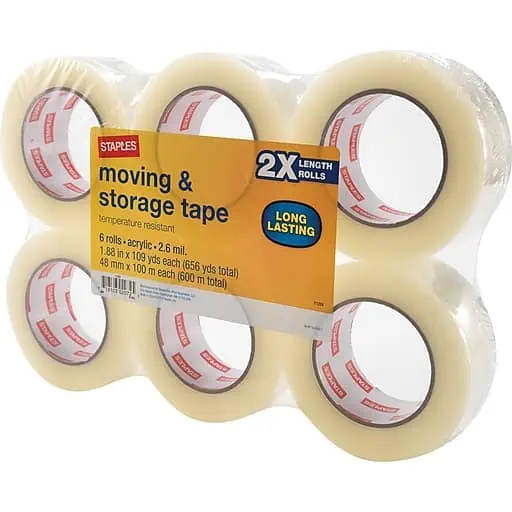
This special tape should be used for boxes that are going into your storage unit with no plan to get them out any time soon. We’re looking at you, boxes of Beanie Babies from 2nd grade. Because it’s a heavier acrylic adhesive, this stuff can last up to 10 years in any type of temperature or humidity. So you can leave those boxes in your storage unit knowing that they’ll stay tightly closed.

Use For: Boxes going into storage for the long-haul.

Price: ~$15-20 on Amazon

#3: Masking Tape

Most of us have used masking tape … it’s that thin beige tape that you may use for random tasks around the house. While this tape comes in handy during the moving process, it shouldn’t ever be used for sealing. It’s really just not that good at it. But it’s still a worthwhile tape to pick up when packing because you can use it to bundle kitchen utensils or even label boxes.

Of course, it’s really great tape to write on, so grab that permanent marker and start labeling, baby!

Use For: Labeling and bundling packing items.

Price: ~$10 for 4-pack on Amazon

#4: Washi Tape

Washi tape is quite possibly our favorite tape on the list because it has so much personality. Plus, it’s way cuter than tapes #1-3. You used to only be able to find this tape at craft stores, but now it’s popping up all over the place because people can’t seem to get enough of the cute patterns and colors. This tape comes in handy if you want to have an organized move and color code all of your boxes.

We especially love this idea to make sure your boxes stay organized by room and end up in the right place on moving day!

Use For: Organizing boxes.

Price: ~$5-15 for wide varieties of patterns and colors on Amazon

Tapes You Shouldn’t Use for Moving

If you stick to our top four tapes for your move, then you should be good to go. But just to make sure you stay on track, we want to mention the tapes that you should avoid for moving.

  • Electrical Tape
  • Plumber’s Tape
  • Medical Tape
  • Cellophane Tape (aka Scotch tape)

Time to Get Taping!

So are you feeling a bit more informed about your taping needs for your upcoming move? Who knew there were so many varieties to choose from? But if choosing the perfect tape for your move makes the process a tiny bit less stressful, then we think it’s worthwhile to spend the time buying the right stuff to get the job done! Go on that tape shopping spree and load up your cart with all of your taping needs.

×

I'm Moving

Moving? Thinking about moving? Whether your move is off in the distance or you already have one foot out the door, you'll learn about everything you should expect through our useful how-to's, cool articles and much more. It's all specially curated for you in our "I'm Moving" section.
Explore
×

I'm a Mover

For rookies or veterans alike, our "I'm a Mover" section is filled with extensive industry news, crucial protips and in-depth guides written by industry professionals. Sharing our decade of moving knowledge is just one way we help keep our professional movers at the top of their game.
Explore