How To Seriously Lessen Your Carbon Footprint When You Move

Author:

Publish Date:

Last Modified Date:

Category: Green Moving

Tags: Tags: , , , , , , , , , , , , , ,

Around 32.1 million Americans—some 14 million households—moved back in 2019. That’s a lot of moving and shaking, and it’s a lot of extra strain on the environment. An increasing number of Americans are committing to doing more to protect the environment, and green moving is becoming a popular topic. 

Eco-friendly moving—and especially zero-waste moving—requires some time and detailed planning. But that’s a good thing because you’ll have all of your ducks in a row by moving day, which means you’ll have an easy time of it. Here at Hire a Helper, we’re all about making your life easier, but we’re also about doing our part to take a load off the environment. This guide will help you achieve a green relocation, no matter how far you have to go.

Before You Move: You Need a Smart Downsize

moving boxes

Moving houses is a great opportunity to go through everything you’ve collected since you moved into your current place. Depending on how long you’ve been there, this may be a quick task, or it may take some serious time. Either way, taking the time to do it right is better for the environment, since you’ll be less likely to toss stuff in the trash just to be rid of it—you’ll have more time to dispose of your discards in a more eco-friendly way. Here’s how to do it right.

The eco-friendly plan

Make your plan—and write it down. Maybe you’ll do a room each week, or a closet each day. Allow yourself more time for basement and attic storage spaces and closets that send an avalanche of stuff down on top of you when you open them.  

Create a space for these specific piles

Before you start decluttering, set aside space in your home, or label some boxes to put things in that you’re planning on getting rid of. Have a clearly labeled box, bag, or pile for:

  • Things you’ll donate to charity
  • Things you can sell
  • Things you want to give to specific people
  • Trash
  • Things you can (surprisingly!) recycle
    • Old carpeting
    • Old mattresses
    • Scratched CDs, game discs, and DVDs
    • Stained or torn clothing or bedding
    • Large and small appliances, from the dryer to the microwave
    • Electronics, including old cell phones, TVs, computers, printers, and stereos
    • Crayons and dried-up markers
    • Ink cartridges
    • Working and non-working holiday lights
  • Hazardous waste 
    • Call your local hazmat office and ask where you can drop them off. These items include:
      • Paints
      • Fertilizers
      • Cleaners
      • Solvents
      • Motor oil
      • Pesticides

Eco-friendly Moves Really Happen During the Packing

eco friendly packing

Leaving packing for the last minute means you’ll probably end up shoving things into garbage bags, which makes it less likely you’ll sort stuff correctly (and it’s super annoying to unpack). The sooner you get started on packing, the more time you can take to do it right and in a way that’s environmentally friendly.

If you’re going to have movers pack you up, and if they’re bringing all of the supplies, choose a moving company that uses sustainable packing materials and reusable or recyclable boxes. (Just ask!) Find out how to best prepare for their arrival. If you’re packing yourself, planning is everything. Are you going to jam through your whole house over the course of a week, or will spend the month before the move getting packed? Decide on your game plan, and use these tips to make your packing adventure as green as possible.

Only use these eco-friendly packing materials

What, exactly, does “eco-friendly” mean when it comes to packing and packing supplies? It means that everything you use to pack your things—boxes, wrapping, padding, tape—is made from recycled materials and/or is recyclable, biodegradable, or compostable.

Eco-friendly packing supplies include:

Cardboard boxes. When you’re done unpacking, pass your boxes on to someone else who’s moving, or put them out for recycling. When possible, source used cardboard boxes. If you must purchase new ones, choose boxes that are made from post-consumer recycled materials.

Cornstarch peanuts. If you’ve got to use peanuts for extra-fragile items, choose the eco-friendly variety instead of styrofoam peanuts, which don’t biodegrade—at least, not in our lifetime. Green packing peanuts are made from non-toxic materials like cornstarch or wheat. They’re biodegradable and dissolve in water, and you can compost them. As an added bonus, eco-friendly packing peanuts don’t have an electrostatic charge, so they won’t stick to everything.

Eco-friendly bubble wrap. Traditional bubble wrap is made from low-density polyethylene film, which generally isn’t picked up by your curbside recycler but can be recycled with your plastic bags when you take them to your local drop-off location. Eco-friendly bubble wrap is greener than traditional because it’s made, in part, from recycled materials. But it’s not biodegradable or compostable, so if you don’t recycle it, it’s hardly green at all.corrugated cardboard

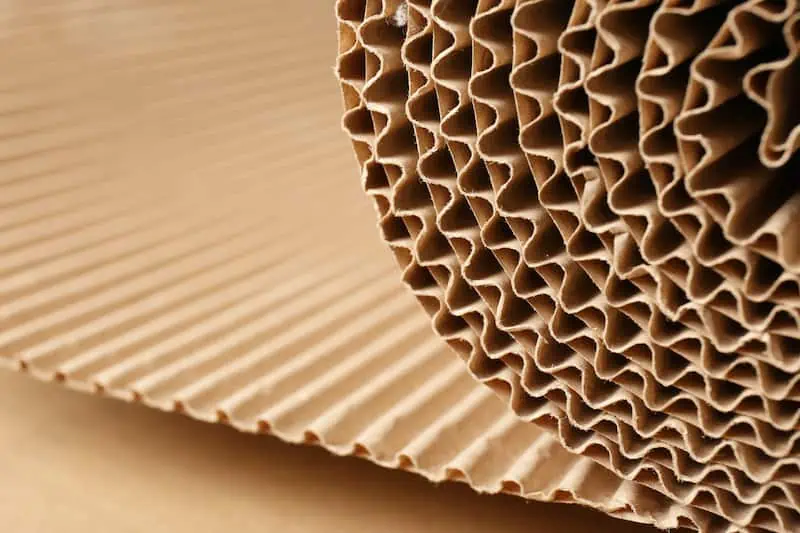
Corrugated cardboard wrap. Made from 100 percent recycled cardboard, corrugated cardboard wrap is sturdy, protective, biodegradable, and recyclable. (See picture!)

Non-plastic tape. Plastic tape isn’t biodegradable, but paper and cellulose tape, which are made from trees, are. Paper tape typically comes with a water-activated adhesive and requires a special dispenser that wets the tape as you pull it out. Cellulose tape looks like plastic, but it’s made from trees, and you can tear it like paper. Both types of tape are biodegradable.

The zero-waste packing method

If you’re hardcore, you can achieve zero-waste moving by packing carefully. Plan ahead with these tips:

  • Use your clothes, towels, sheets, pillows, cushions, and linens to protect fragile items. Bonus: you won’t have to pack these items
  • Save your newspapers and junk magazines and inserts to wrap items in, and recycle them after you unpack
  • Rent reusable containers. Moving companies often rent reusable, heavy-duty moving crates that come in many shapes and sizes, including a wardrobe box to make moving your clothes easier than ever. When you’re done moving, return the boxes
  • Pack what you can in empty drawers, laundry baskets, suitcases, buckets, tote bags, and other receptacles you already have on hand
  • Source free cardboard boxes from friends and local stores. Close them by interlocking the flaps, and recycle or pass the boxes along to someone else when you’re done
  • For mattresses and other large items you might otherwise wrap in non-biodegradable plastic sheeting, opt instead to drape blankets, sheets, or a cloth drop cloth over these pieces

See prices for movers by the hour – instantly.

Read real customer reviews.

Easily book your help online.


Moving Day Must-do’s

It’s the big day! You’ve downsized your belongings without adding unnecessary waste to the local landfill, and you’ve packed your things in the most eco-friendly way you could. Now it’s time to finish up the move with the smallest possible environmental impact, which will be easy as pie if you follow these tips:

Turn off the HVAC while you load

Since your doors will be wide open while you’re loading boxes into the moving truck, turn off the heat or A/C while you load to save energy. Keep the lights off unless you need them on. To empty out the house faster so you can get the heat or A/C back on, move everything as close to the door as you can before you start moving it out. 

Save on gas and reduce exhaust

If you’ve hired a moving company, you don’t have much control over how much fuel they consume during your move, but you can rest assured that your company will want to conserve gas if only to boost their bottom line. Moving companies plan their loads and routes carefully for that reason. Depending on how much stuff you have and how far you’re moving, hiring a moving company may be your best option for an eco-friendly relocation.

If you’re moving yourself, here’s what you can do to save on gas:

Plan your route. Take a route to your new place that will use the least amount of gas. The best route may be the shortest, or it may be a long one that has the least traffic congestion and therefore the fewest idling stops. 

Make as few trips as possible. The fewer trips you need to take to get your stuff to your new place, the more eco-friendly your move will be. When you’re packing, fill your containers as full as possible so you’ll need fewer of them, which will require fewer trips. Pack your things in the vehicle(s) carefully so there’s little wasted space. 

Recycle those packaging materials

Eco-friendly moving isn’t really eco-friendly until you deal with the aftermath—the boxes and the packing materials. As you unpack each box, set the packing materials aside—designate a pile for what can be recycled curbside and a pile for what you’ll need to drop off. Remove any tape from these materials and from your boxes before you break them down. Give the boxes to friends, or put them up on a free online marketplace for people to claim. If they’re beaten up, set them out for recycling. 

A New Start: Going Green for Good

Now that you’re all settled in, take a deep breath, relax, and take a good look around your new place. What can you do to reduce your carbon footprint—and your utility bills—as you begin a new era? We’re glad you asked. 

Protect your air quality

Poor air quality in your home is bad for your health and for the environment. Keep your indoor air quality as high as possible for a reduced footprint and increased well-being.

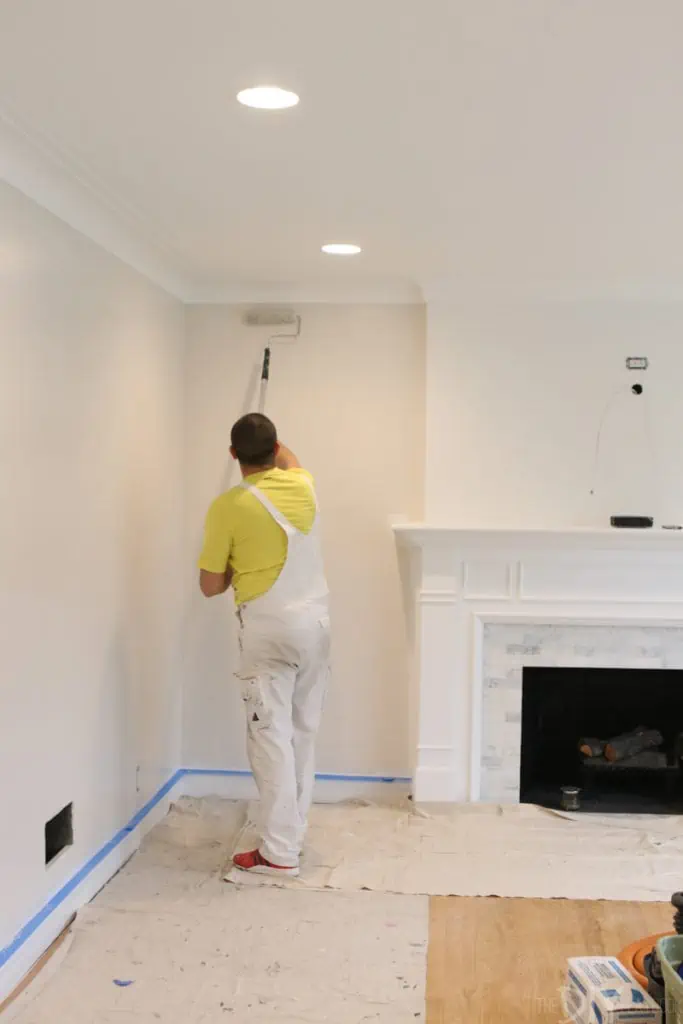
Use eco-friendly paints for walls. Paint is notorious for off-gassing volatile organic compounds, or VOCs, into your home, and the production of conventional paint has serious environmental consequences. When it’s time to decorate, choose low-VOC paint, which is less harmful to the environment and your health.

Use non-toxic cleaners. Conventional home cleaning products are rife with toxic chemicals, and when they go down the drain, they can end up in our natural waterways and poison aquatic wildlife. You can either buy non-toxic cleaners or use ingredients from the kitchen, like vinegar and baking soda, to get the entire place sparkling clean without putting your health at risk.

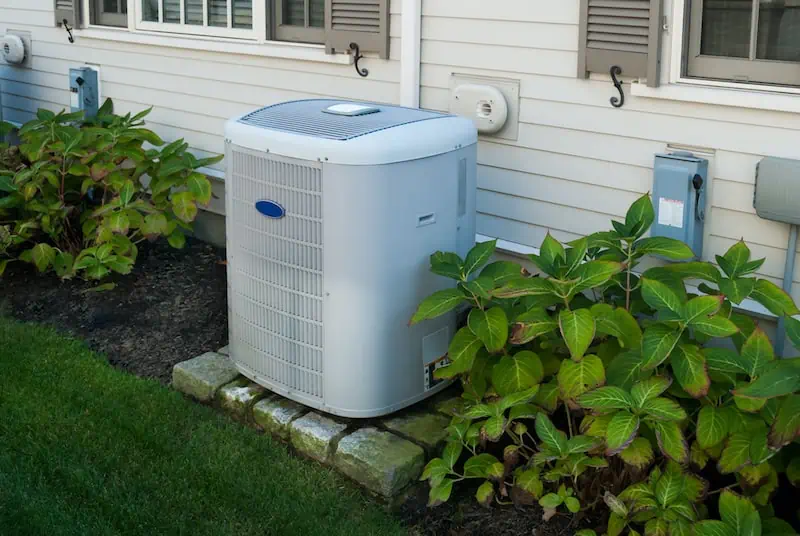
Change the HVAC filter. The air filter in your HVAC system traps impurities as your home’s air moves through it. A dirty filter is far less efficient than a clean one at catching particles like pollen, mold, bacteria, and viruses. Only use high-quality air filters in your system. Inspect your filter each month, and replace it when it’s dirty.

Conserve energy and lower your utility bills

The less energy you use at home, the better for the environment—and the lower your gas and electricity bills will be. 

Maintain your furnace and A/C. Your HVAC system is responsible for a large portion of your home’s energy consumption, so keeping it in tip-top shape will not only lower your utility bills but also reduce your home’s use of non-renewable resources and its emissions of greenhouse gases. Have your furnace professionally tuned up before you need it each fall, and have your A/C serviced before it’s time to turn it on in the spring. 

Install solar panels. When it’s time to make upgrades, consider installing solar panels on your home. Solar power has come a long way in the past decade, and it’s less expensive and more reliable than ever before. Solar power is pollution-free, and it’s less expensive than the non-renewable alternatives.

Invest in ENERGY STAR appliances. As you move through life in your new home, replace appliances that break down with new ENERGY STAR appliances. ENERGY STAR is a program by the U.S. Department of Energy that clearly identifies the household appliances with the highest energy efficiency and, therefore, the lowest operating costs. 

Conserve water better

xeriscape

Less than one percent of the earth’s water is available for human use, and our current global civilization is quickly depleting the supply. It’s up to everyone to conserve water, and here are some ways to do it at home.

Low-flow fixtures. Low-flow fixtures, including showerheads, dishwashers, and toilets, are easy to install, and they don’t affect the quality of your showers, the cleanliness of your dishes, or the force of your flush. However, they do conserve water, using considerably less than their conventional counterparts.

Run the shortest cycles on the dishwasher and washing machine. Unless your clothes or dishes are heavily soiled, the shortest cycle on the washer or dishwasher will get them just as clean as a longer cycle, but it’ll save a lot of water over time.

Re-think your lawn. The lawn is one of the worst offenders when it comes to environmental damage. Maintaining a lawn involves fertilizers and pesticides that leach into groundwater, and keeping it green and barefoot-worthy requires a lot of water. Mowing requires non-renewable gasoline and emits greenhouse gases. Consider ditching your lawn for a beautiful, low-maintenance xeriscape, which requires little to no water.

Finally get your household waste under control

In 2018, Americans generated more than 292 million tons of household waste—around five pounds per person per day. With a recycling and composting rate of just 32.1 percent, America sends the majority of its solid waste to landfills, where it produces methane, carbon dioxide, and other poisonous gases. So your first order of business in your new place is to recycle religiously if you don’t already. Also:

Go paperless. Paper accounts create a huge amount of waste, and although most paper can be recycled, much of it isn’t, or can’t be. Reduce your paper consumption as much as possible—opt for paperless bill paying, invoicing, and receipts, and opt out of junk mail. Clean up spills with microfiber instead of paper towels or disposable wipes, and invest in a stack of cloth napkins instead of using disposable ones.

Compost. A backyard compost pile provides you with rich compost for your garden, and it helps you dramatically reduce food waste, which accounts for a large portion of household waste. But food isn’t the only thing you can compost. Other things you can toss on the compost pile include non-glossy paper, cardboard, natural fabrics, dryer lint, and wine corks. Shred these items into small pieces before adding them to the heap.

Buy in bulk. Food packaging has a giant, terrible impact on the environment. It comprises half of all municipal waste, and it ends up in waterways and inside wildlife as microplastics. It strangles sea creatures, traps land critters, and breaks down into toxic chemicals in the soil. Whenever possible, buy your food in bulk. Bring your own bags to the store with you, and skip the produce bags—or reuse them. 

Change your mindset. Being a consumer is fun, there’s no doubt about it. But if you tend to buy things mainly for the quick hit of dopamine it provides—and if most of those baubles quickly end up in the back of closets and drawers, unseen until you move again in 10 years—it’s time to change your ways. When you pick up that shiny thing at your favorite big box store, ask yourself: Do I really need this? If the answer is a (reluctant) no, save your money for something spectacular later on.


From the moment you decide to move, it’s easy to honor your commitment to reducing your impact on the environment. With some planning ahead, you can easily achieve an eco-friendly or zero-waste move. Once you’re unpacked, a few tweaks of some old habits and some brand-new habits are all it takes to start your new life on the right foot—one with a lighter print.

Budget Halloween: The 10 Best DIY Costumes on TikTok

Author:

Publish Date:

Last Modified Date:

Category: DIY Projects, Seasonal & Holidays

Tags: Tags: , , , , , , , , , , ,

There are two types of people in this world: Those that buy pre-packaged Halloween costumes, and those that DIY.

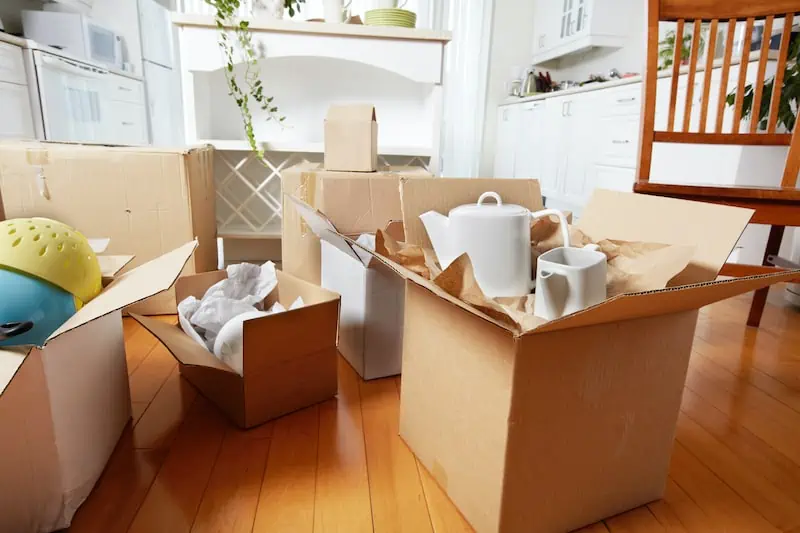
But the DIY route isn’t just for rich and talented designers… especially if you take advantage of free, simple materials like cardboard boxes leftover from a recent move, or Amazon order. (Need free boxes? Check these places.)

But wait… you don’t believe DIY costumes can look that great? Just ask TikTok.

Below are 10 examples of super creative costumes put together by TikTok users using mostly cardboard. Now watch, get inspired, then get crafting before that Halloween party gets here.


1. Steve from Minecraft

@b3v3r463this is why I haven’t posted???? #costume#minecraft♬ original sound – Cerebro ???? Grande????????

If you know a kid between the age of 3-30, you’ve probably heard about Minecraft. Cardboard boxes are perfect for recreating the block-like characters and accessories featured in the game.


2. Haunted House

@inbetweenbranchesBB UR A HAUNTED HOUSE! #Halloween #halloweencostume #cardboard #costumes #reels #creativestylist #creativedirector♬ Baby You’re a Haunted House – Gerard Way

Did someone say house party? Raise the roof at your next Halloween gathering by showing up in this inventive cardboard creation.


3. Transformer

@w855173wWhen your son wants to be bumblebee we make it a challenger! #bumblebee #transformers #transformercostume #cardboardcostume♬ Knight Rider – TV Themes

If you want to guarantee your kid will win the costume contest at school, we recommend this cardboard box Transformer costume that changes from Bumblebee to a Dodge Challenger. (Instructions not included.)


4. T-Rex

@mamabearxx08#foryoupage #fypシ #cardboard #art #dinosaur #handmadecostume #halloweenlook♬ Fancy Like – Walker Hayes

This cardboard dino costume stands out from the crowd with a long, swinging tail. But with arms like these, parents might need to help out by carrying the candy pail. 


5. Butterfly

@heymonaheyyyAre you DIYing your costume this year? Cardboard is really versatile! #halloweenlook #fyp♬ TWINNEM – Coi Leray

For a simple but beautiful Halloween costume, these butterfly wings made from cardboard are a great DIY idea. Bonus: you can throw them over just about any outfit.


6. Springtrap

@bigjoedadyMy 14 year old son made his own costume. springtrap took 3 months cardboard, foam and felt #fyp #HappyHalloween #40something #fivenightsatfreddys♬ Viva La Swing aka #SandoTwist by @Abiud_Sando – Mingaling 2.0

For those with some major creative muscles to flex, this Springtrap character costume from the popular video game Five Nights at Freddy’s is both cute and creepy (okay, mostly creepy).


7. Terrance (or Phillip)

@knotpossible#southpark #terranceandphillip #cardboard #upcycle #recycle #reuse #repurpose #diy #cardboardcostume #cosplay #art #canadian #comedy @comedycentral♬ South Park Theme – Voidoid

Fans of the pottymouth characters of South Park will get a kick out of this DIY Terrance of the “Terrance and Phillip” duo. 


8. Cake Slice

@craftychicaHow to make a cake slice Halloween costume! #LearnOnTikTok #TikTokPartner #cakeslice #halloween #costume #cardboardbox #boxtume #halloweencostume♬ BOLD AND BEAUTIFUL – TJ Carter

Going for a look that’s more sweet than spooky? Just add sprinkles! You’ll be the belle of the dessert table with this cake slice Halloween costume made from cardboard boxes. 


9. Outhouse

@michelleypetersonKiddo revealing his costume to family and his #GirlFriend #halloween2020 #costume #OutHouse #CountyKid #pnw #GottaPoop #CowboyBoots #CardboardBox♬ original sound – Chicken_Mama

This costume takes “potty humor” to a whole new level. Enough said.


10. Taco Truck

@oliviagevPet costume idea under $15 #foryou #foryoupage #halloween #petcostume #walmart #costumeidea #bulldog #englishbulldog #taco #tacotruck #dog #cute #woof♬ El Jarabe Tapatio – Mariachi Vargas Tecalitlán

Don’t leave your fur babies out of the fun this year. Cardboard boxes can be used to craft adorable pet costumes too. Taco ‘bout a Halloween hit. 

The Best Way to Unpack After Moving

Author:

Publish Date:

Last Modified Date:

Category: Loading & Unloading Guides, Organization

Tags: Tags: , , , , , , , , , , , , , , , , , , , , , , , , , , ,

Unpacking should be the best part of the entire moving process. No, really!

You’ve already coordinated all of the logistics of renting a truck and hiring Helpers, you’ve packed everything up, moved, and unloaded your rental truck. Now all that’s left to do is go through all of your boxes and get everything in its place so you can enjoy your new home!

So why do some people still dread unpacking? Well, imagine sitting amongst a mountain of boxes with no clue what’s inside any of them or where everything is going to go. Okay … yeah, that does sound pretty dreadful. But it doesn’t have to be that way! By planning your unpack, you can save time, money and headaches.

How to Make Unpacking Easier Before Moving Day Happens

We all know the quote, “If you fail to plan, you plan to fail.” The most important step to a smooth unpacking experience is proper planning before your move. 

Of course, you’ll have some planning to do if you’re booking movers and renting a truck … but you still need to spend some time packing. And no, we’re not talking about randomly throwing items into boxes and calling it a day.

Here are some things you should do before moving day to make unpacking easier.

Take Photos Before You Start Packing

Before you touch anything, we want you to take out your phone and have a little home photo shoot. 

Here are things you especially need photos of:

  • Bookshelves
  • The back of your TV
  • Kitchen drawers
  • Desk area
  • Tool shed

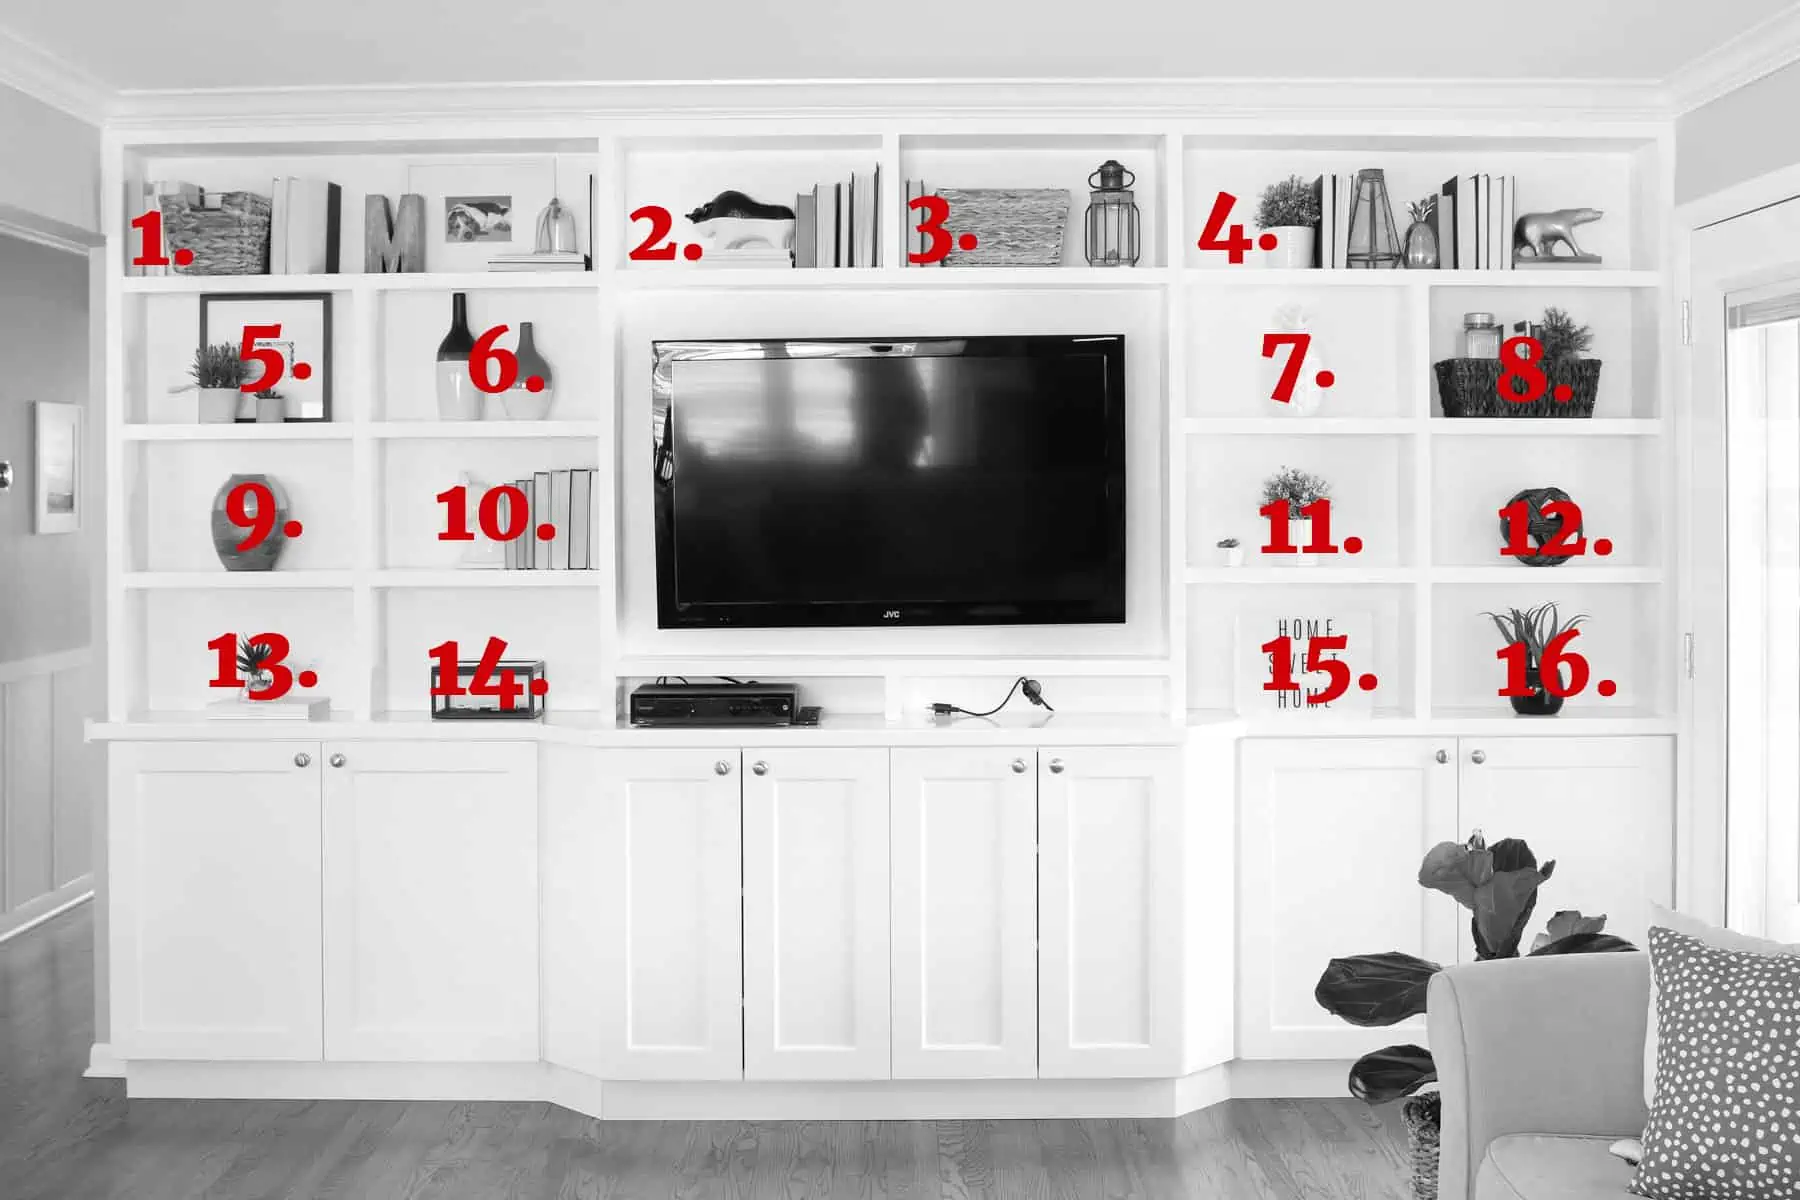
We urge you to snap pics of the areas in your home that you love! We know all too well how long it can take to get a shelfie looking just the way you want it. By snapping some reference pics now, you’ll be able to replicate that new look in your home in no time.

Create a Number and Color-Coded System For Your Boxes

After the photo shoot, gather all of your packing supplies (boxes, paper, tape, scissors, markers … the works!) and start packing boxes like a pro.
Try to only pack up items from one to two rooms inside every box. This will make your life much easier when it’s time to unpack later.

Got a bunch of stuff on shelves? Create a numbered system to remember where everything goes. That way it’s easier to get them unpacked and into their new permanent spots.

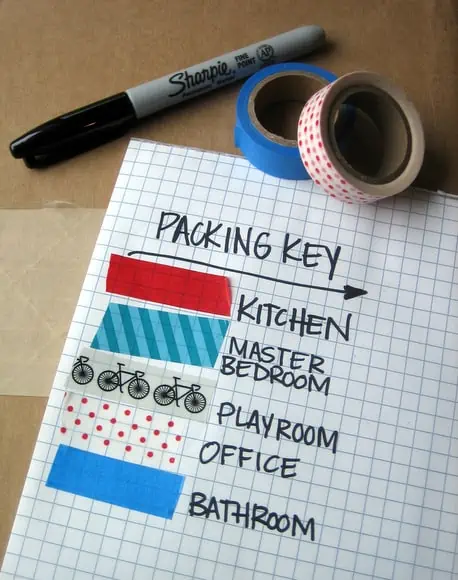
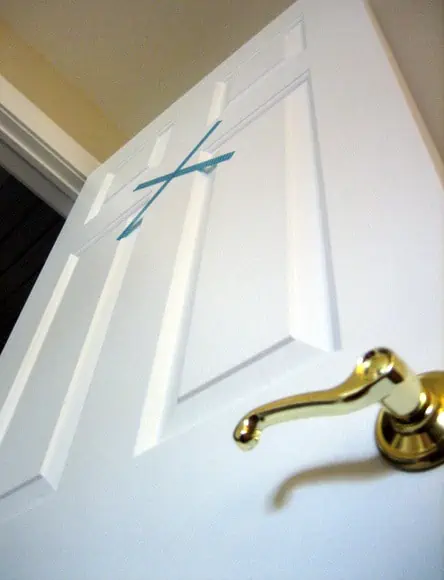
And we can’t forget our favorite tip of all … our color-coded box systemWith this technique, you get to use our most beloved crafting tool—washi tape! Get the full instructions from this post, but the short version is that you need to separate your boxes by the room, marked with bright washi tape so your movers know exactly where to deliver them. Genius and oh so colorful!

Make it Much Easier to Unpack Essentials

There are 7 items you’ll want to have on hand for moving day, but we also think you should create a box of moving day essentials. Because imagine the night of moving day when you’re tearing open boxes trying to find pajamas, your toothbrush, and your medication for the night. Sounds like a disaster to us.

This is what should go in your “Moving Day Box” so you don’t have to tear through your moving truck:

  • A change of clothes
  • Utensils
  • Toiletries
  • Prescriptions
  • Phone charger

Be sure to label this box and keep it near you!

Get Help Unloading Your Rental Truck

See prices for movers by the hour—instantly.

Read real customer reviews.

Easily book your help online.


Clean The 5 Most Important Things

We know you have approximately 10,000 things to do to get your rental deposit back. But trust us, now is the time to give your new place a thorough cleaning because it’s empty. You simply put items in place rather than cleaning and unpacking at the same time. Want to know the five most essential things to clean?

  • Kitchen cabinets
  • The Refrigerator (and refrigerator fan)
  • Bathtub and any tub jets
  • Outside (and Inside) the stove
  • Washing machine

Unpacking Tips

You’ve done the prep work (even the cleaning, you rockstar, you!), and now moving day is here! Even if you hired help for your unload (great call), there are still things you can do to make unpacking time a little easier. 

Place Your Boxes in Rooms by Color

It may sound easier to just have your Helpers pile up all of the boxes in one spot of your new place, but unpacking will be a lot easier if you follow your color-coded box system to get each box in the correct room. If you followed our washi tape tips, you should have each door in your new place marked so the Helpers can easily drop the box in the right spot!

Protip: Get your “Moving Day Essentials Box” opened right away so you have everything you need to make it through the next day or two.

Use Washi Tape to Figure out Your Furniture Layout

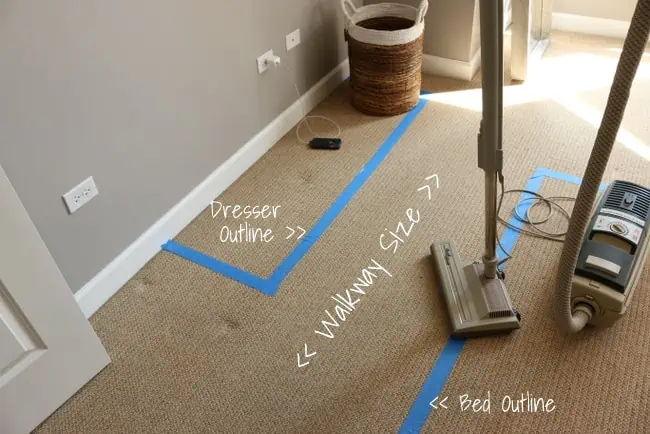
As long as your movers are there, have them get your furniture in the spot where you want it! We love the idea of using painter’s tape to mark out the layout of furniture right on the floor.

Before you move (or even while your movers are bringing things in and out),  go around your place and put tape on the ground to outline your furniture. That way the movers will know exactly which wall to put your bed on and where that long dresser goes. You can always move things later on, but getting items in the correct space will make your life a lot easier in the coming days.

Unpack the Bathrooms and Bedrooms First

Moving day will be exhausting, so if you’re going to unpack anything immediately, make sure it’s your bed and bedding. Once your movers get the mattress into place, find the sheets, comforter and pillow and make your bed. If you have kids, do theirs too. Having a comfy spot to sleep at the end of the long day will feel amazing!

Unpack your bathroom boxes too. That way you’ll have all of the toiletries and medications on hand for the night and morning. A fresh shower after a long day of moving will be heavenly, trust us!

Save the Kitchen for Tomorrow

The kitchen is the most time intensive room to unpack, due to the amount of tiny and heavy items, so don’t unpack it on moving day. Your brain will be tired by the end of moving day, and you’ll want to be refreshed and recharged before you tackle this space. Save the kitchen until morning when you can make a fresh pot of coffee.

How to Stay Organized After Moving Day

You’re into your new home and you’re surrounded by all of your possessions. First, take a deep breath. You’ve made it this far! Now it’s time for the actual fun part … making your house a home.

Avoid Distractions, Don’t Unpack Games or TV

We might suggest making a playlist of music to entertain you, but we don’t think you should get your TV setup and turned on right away. You may find yourself sitting on the couch instead of unpacking if you have a TV show or movie on. So much temptation…

Another distraction? Little ones. You’ll additionally want to make a plan for your pets when you’re moving and unpacking, so they don’t get in the way. The same goes for kids. Have a plan to keep them occupied or if you can, drop them off at grandma’s house so you have uninterrupted time to unpack. It’s all about keeping the distractions to a minimum so you can devote enough hours to get your house in tip-top shape!

Unpack Only One Room at a Time

Instead of hopping from space to space, we suggest making a list of your rooms in order of importance. Then, don’t move onto another space until the one you’re on is done.

The kitchen, bedrooms and kids’ rooms should be up high on the priority list, while the guest room and garage may not need TLC right away. Also, make sure you have furniture and appliances setup before you get too carried away going through boxes. Did you clean your counters first? You’ll want to have spots to put all of the items as you whip them out of the boxes, so having dressers and cabinets ready to go is a must!

Break Down Boxes as You Go, in Real Time

As you unpack boxes, it may be easy to just throw empty ones in a big corner. But trust us, that pile will quickly get out of control and soon you won’t be able to walk around your house without an empty box tumbling down on you. Take one box and make it the designated paper box. As you unpack boxes, crumple up the paper and shove it into that box. Then, be sure to break down boxes as you unpack. You’ll want to have a utility knife on hand so you can do this quickly.

(And Don’t Unpack Everything)

There may be some boxes that don’t actually need to be unpacked. We’re looking at you, Christmas decorations. Make a large pile of items that may be heading to storage or the garage. Then be sure to get those items to that space in the coming days.

What to Do After You’re Unpacked

You’ve made it! You survived moving day and every box in your place is unpacked. You should be feeling pretty darn good about yourself right about now, but the fun isn’t over just yet. There are still a few things you can do to really get your unloading and packing done.

Make Use of Those Moving Boxes

If you will be moving again soon, then you may want to hang onto some of the boxes that are still in good condition. Organize your boxes and find a spot to neatly tuck them away. Are you thinking, “What the heck do I do with all of that cardboard?!” Don’t fret! Instead, try out some of the cardboard hacks.

If getting creative with cardboard isn’t your speed, you can recycle your moving boxes. Check out this searchable database that’ll let you know the closest place to recycle anything (including moving boxes!). Just be sure to set a deadline for yourself to get those moving boxes out of your new place, so they don’t stay piled in the garage forever.

Use These Organization Protips

We’re all guilty of just shoving random items into a cabinet or closet and calling it a day. But to really feel settled in your new home,  be intentional with what goes where. Check out this post on how to organize house keys:

Whenever we’re on an organization spree, we go room by room with a notepad and write down areas that need our attention. Then we’ll spend 30 minutes each night giving those spots some TLC. Those short increments of time seem much more doable than an entire day spent organizing an entire home.

Let the Decorating Begin! (In a Month)

We always say that you need to live in your home for a while in order to decorate it well. So many people quickly buy furniture and accessories for their place without ever giving each room a test run, and they end up with design regret. Yep, don’t paint the walls until you’ve spent a little time in your new place!

We promise that you’ll make much smarter decor decisions after 2-3 months.

Here’s how to get started when it’s time to begin: 

It may not seem like it, but unpacking can be the best part of the moving experience! We promise that these tips will make your unpacking experience easier and more efficient.

The sooner you unpack, the sooner you can enjoy your new life!

We Asked 12 Professional Organizers How They Made Their Moves Easier

Author:

Publish Date:

Last Modified Date:

Category: Moving Checklists & Planning

Tags: Tags: , , , , , , , , , , , , , ,

While moving to a new home is exciting, it is also an overwhelming task due to all the things that need to be done before, during, and after you start enjoying new adventures and experiences. Just thinking about preparing for a big move can make you feel anxious. We reached out to expert home organizers and asked them for tips to help you overcome this task.

Read on to check out our list of easy moving and packing tips.

How do you get organized before moving?

Getting organized for a move requires a project management approach. You will have extensive lists and planning to help you keep your sanity.

  • Start with developing a timeline for your move. Work backward on your timeline to include dates the movers will load the truck, packers will arrive, the time you will be off residence while packing occurs, decluttering, change of address, optional items you will sell or donate before the move, and other items coming out of storage for your move. Record this timeline in your planner.
  • Add team members to your project. This includes movers, packers, professional organizers, childcare help, and other resources. It’s much harder to do this project entirely alone. Be sure to add the cost of all these additional tasks to add to your budget.
  • Start decluttering at least THREE months in advance, if you can. You can eliminate what you don’t use or need at your new residence. This saves you money and lowers your stress.
  • Keep your move organized with labels. Have plenty of markers available to write the contents on your boxes. You can label the boxes with a room name or assign a number to the room. Your movers will appreciate knowing that they can unload in the correct room without your direction because you have labeled the rooms and boxes.
  • Remember the “last in, first out” box, and your personal needs during this move. The last in, first out box should contain all the hardware for beds and the remote controls. These are vital to your happiness during the first 24 hours in your new home. Your personal needs items include medications and stuffed animals that must be a part of your first night in your home.
  • Keep calm and carry on! It will take a little longer than you like to settle in, even with every box unpacked. Happy moves happen with a plan!

-Ellen R. Delap at Professional Organizer

How exactly do you make a schedule for moving?

Moving has been ranked as one of the three most stressful life experiences! The good newsit doesn’t have to be. I’ve been helping people with all aspects of moving for over 15 years, and my biggest tip for less stress and a smooth move is to create a moving schedule with specific dates as soon as you decide to move. 

  • Start with an old-school blank calendar. Even if your whole life is digital, there is something about seeing your key dates on paper – starting with your move date and current commitments – that gives you a realistic overview of what to do when. 
  • Search online for “move checklist for a general sense of the steps involved. Most will have a 6-8 week plan. The checklist I use with clients is 18 pages long to ensure nothing falls through the cracks.

Customize the checklist to reflect your needs and time frame. If you’re moving locally, there’s less to do; there’s more to do if you’re planning to pack and move yourself and not use movers (Pro tip: unless your move is very small, it’s worth getting a free quote from movers – hiring movers is usually money well spent.) 

  • Make appointments with folks who can helpfrom professional organizers to help manage your move and declutter beforehand to movers to handymen to install your TV and window treatments.
  • Block out time in your main calendar to work on your move.
  • Stick to your schedule – and adjust as necessary. Plan for the unexpected!

By creating a realistic, comprehensive moving schedule, you’ll save yourself time, money, and aggravation and will feel in control of the process. Get started!

-Lisa Zaslow at Gotham Organizers

How do you pack kitchen items?

Use small boxes when packing a kitchen and label the boxes with the roomkitchen, dining room, or pantryand with the contents. 

Pare down your kitchen items as you pack. Get rid of any gadgets that only do one thing (avocado slicer, banana saver, lettuce knife, etc.) Movers charge by weight. If you have a set of china, crystal, or silver you haven’t used in years, get rid of that before you pay to move it! 

Use up the food and pantry items you already have and don’t buy anything in bulk for the last few months in your old house. If you come across expired foods and spices, throw those away as you pack.  

Finally, pack your kitchen in phases

Up to 2 months ahead:

Pack entertaining/party supplies or anything you know won’t need before you move. 

If you are moving far away, think ahead of time about who can use your extra food, toiletries, and cleaning supplies when you leave. Women’s shelters often take these kinds of things, even if they have been opened. 

Up to 2 weeks ahead:

Pack up everything else in the kitchen by category, leaving out the bare essentials. You want to leave enough plates and glasses, napkins, and sippy cups for your family to cook and eat for a day. Pack all but one pot and two pans, two dishtowels, etc. Think about what you’d find in a rental unit. Leave just the basics, nothing extra. 

The day before you move out:

Pack up these everyday supplies and food (if it’s a local move). Label those boxes “KitchenOPEN FIRST.” Once you arrive in your new kitchen, you can open those 2-3 boxes and make due until you have time to unpack fully. 

Nonnahs at Get Organized Already

Moving far away?

Do it cheaper.

HireAHelper.com can save you up to 40%, compared to traditional interstate van lines.

Compare our long distance moving company options.

Tips for packing your clothes

My favorite tips for packing clothes begin with a plan!

Before I pull anything out of the closet, I make a list of the specialty pieces I may need for where I’m going (e.g., exercise clothes, swimsuit, ski jacket, etc.) I also note if I need multiples, like four pairs of ski socks, for four days of skiing.

Then, I make a note of how many days of clothes I’ll need, how many nights (pajamas), as well as anything else, like underclothes and belts. I’ll also look up the weather, so I know I want to take long-sleeved tops and not short sleeves. I’ll pull out however many of each item and scratch it off my list. I consider myself a “folder”, so I like to fold these items into stacks that will fit neatly into my suitcase or bag. But, if rolling works better for your wrinkle-prone pieces, please do so! Laying out the items in stacks or rolls also allows me to quickly assess whether I need a piece of luggage in a different size. Now that I’ve secured my clothes, I can snugly fit shoes, accessories, and toiletries in the space between clothes’ stacks and other pockets. 

-Amy Trager at Amy Trager

What order should you pack in?

Begin with the home areas that you use the least because you will have to live without these items from now until you have unpacked in the new space. Start with rooms you rarely use or are mainly used for storage, like guest bedrooms, rooms of children away at college, and the basement, attic, and garage. 

Consider whether you really need and want to keep the item. Keep a boxed marked “Donate” by the doorway. Any item that doesn’t make the cut for your new home should go there. As you pack, move carefully stacked, inventoried, and labeled boxes to one side so you can see your progress as items “disappear” and the boxes are filled.

Methodically move cabinet-by-cabinet, or drawer-by-drawer. However, because there may still be weeks (or more) until you move, you will now not only consider whether to move, donate or discard something, but you may need to keep it in place until much closer to moving day. 

If it’s winter, pack the summer clothes and shoes from your closets. In living or family rooms, keep the TV and sound system, but pack up the books, puzzles, photo albums, and games. In the linen closet, pack everything except one change of sheets per bed and a few extra blankets. In the kitchen for your remaining time at home, pack whatever you can live without (e.g., gadgets, small appliances you rarely use, specialty supplies, and items). In your home office, pack all of your files in bankers boxes, and pack office supplies you won’t need daily in a separate container. Box up financial files and essential documents related to the move separately to travel with you; don’t leave them with the movers.

In areas you use most often, envision what you’d pack if you were setting up a vacation cottage for just a few weeks. Only leave minimal cookware, enough supplies to prepare simple meals, and adequate silverware, plates, and glasses to serve your needs for your time away. Then, pack everything else, leaving only your imaginary vacation essentials unboxed until right before moving day!

While packing, if you find something in the “wrong” space, move it to the room that corresponds to where it will go in your new house.

Finally, the only things left to pack should be what you will need for the first few days in your new home. Use a small suitcase or duffel bag for each person’s clothes, accessories, school or work items, toiletries, and medications, plus a box of first-night essentials like chargers, toilet paper, and a new shower curtain. Keep these items and all financial records safely with you during transit.

-Julie Bestry at Julie Bestry 

moving tips

The top 3 most important factors before moving

  1. Take time to declutter before moving. Moving is an excellent opportunity to declutter since everything has to be touched anyway. Ask yourself if you use or love each item and have a place to store it in your new home. If you don’t use or don’t love it or you can’t easily store it, now’s a great time to let it go. You won’t have to pack it, move it, and unpack it.
  2. Organize your packing. If you’re packing yourself, group items that go together in a room into categories and pack them in the same boxes. That way, you can label each box with a category. (For example, a kitchen box might also have the label food storage containers.) That will make it easier to unpack in an organized fashion and, if it takes you a while to unpack, you’ll be able to find the appropriate box if you’re looking for something. If you hire movers to pack, take the time to group categories of items together before they pack so that your boxes don’t contain a hodgepodge of stuff. Try to also label your boxes for the destination room (not the origin room) so that movers can get them into the right room. 
  3. Start early. The earlier you start organizing and decluttering, the less likely you will pay to move stuff you end up donating on the other end. Starting early also cuts down on stress and makes the move calmer. You’re more likely to get the dates you want with movers if you book them early. And if you’re hiring a professional organizing company or move manager to help, the earlier they get on board, the easier everything will be.

-Janine Adams at Peace of Mind Organizing

How do you pack valuables?

It’s going to depend on what the valuables are. If you still have the original packaging for jewelry (or anything!), use that. If any of your valuables are fragile, it may be worth hiring professionals to pack them.

  • See if you can lighten your load of any physical paper you don’t need anymore. For example, if you have care instructions for valuables, can you scan them? Or, if you have a valuation and a scanned copy is enough proof, shred the physical paper.
  • You will want to keep valuables like medicines and prescriptions close and in an “Unpack First Night” box, or in your suitcase or toiletries.
  • If you can’t keep valuables close, mark the box by room instead of by content. For example, “Living Room” instead of “Antique Vase”.
  • Keep track of all your valuables with some system. Take pictures, write descriptions and values. Consider an app like Sortly to keep track of everything.
  • If you’re using a packing cube or driving yourself, invest in a disc lock, as they’re a lot harder to break.
  • Use an inexpensive tracking device like Tile or TrackR so you’ll be able to know where your items are if you’re using a truck.

– Julie Coraccio at Reawaken Your Brilliance

What do you unpack first at your new home?

Be sure to unpack the rooms that you use daily first. Necessity is always first when it comes to unpacking. Think logically about the things that you will use first; sleeping, eating, and taking a shower are the essential and first activities you’ll do in your new home.  

The bedroom: After a long day of traveling and packing, you are going to want a good night’s sleep in your own bed. Reassemble the bed frame, unpack your sheets and make up your bed along with the pillows and bedspread. The rest of your bedroom items can wait. 

Set up the bathroom. You’ll feel instantly at-home if you get yourself settled into the bathroom. Hang a shower curtain, fill the medicine cabinet, and hang your towels. 

Next can be the kitchen, or kids and pet items. 

-Betsy Fein at Clutterbusters

How many days before moving should I start packing?

If you are packing yourself, ideally you’ll start packing as soon as you know you are moving! But as far as three months will make things easier (and cheaper) for you.

People often wait until the last minute and then get overwhelmed. We recommend starting to pack non-essential items (e.g., holiday, guest room, memories, decor, etc.) and queue them up in the garage, or a less frequently used space in the home. Make sure to set aside and identify things you’ll need during the move (e.g., clothing, pet care, personal items, linens, chargers, etc.), and as the move date gets closer, start packing more and more. By the time you are a few days out, the only things left should be furniture and a few bare essentials. This gives space to deal with any issues or emergencies and reduces the overall stress of the move. Be sure to label every box with its contents and final destination!

-Liz Jenkins at A Fresh Space

The Most Trusted Moving Checklist on the Web

The Moving Checklist: Everything You Need to Know to Move

How do you move perishable food (i.e., refrigerated/frozen foods)?

Take an inventory of what you have

One month prior to your scheduled move date, create an inventory of the perishable food you have on hand throughout the house (don’t forget the refrigerator in the garage and the deep freezer in the basement).

Create a plan to shrink your inventory

Your plan for dealing with perishable food will depend on a few factors:

  • Whether your move is local vs. long distance
  • Whether you are using a moving company

It’s important to understand that there are sometimes laws that prevent movers from transporting perishable items. So whatever you plan to move will need to be transported by you. Given these limitations, your goal should focus on reducing the volume of refrigerated and frozen food you have as much as possible before moving day.

With your inventory in hand, create a meal plan for the next few weeks that incorporates the food you want to consume. When you’re a week away from your move date, reassess what you still have and determine if anything can be given away to neighbors, family, or friends.

Locate your portable coolers and make sure you have plenty of ice packs on hand if you plan to transport any perishables on move day.

Prepare food for move day

On the morning of your move, set aside whatever food you need for breakfast, lunch, and dinner that day. If you are moving locally, pack whatever food remains in your coolers with ice packs. If it’s a long-distance move, you’ll need to toss whatever perishables remain.

By planning, you can avoid wasting food (and money!) during the move process.

– Natalie Gallagher at R​efined Rooms

Love Your Long Distance Move

Happy Moving Customer

We’ve helped over 450,000 families move nationwide.

Join our long list of happy customers who loved making a long distance move with HireAHelper.

Is there a packing system you recommend for a move?

Make a checklist of your items! – It is the one thing you need to prepare for a move and the best way of not forgetting anything. List all the things you need for your move, for example, purchasing boxes and tape. Include all the rooms that still need to get packed. Don’t forget to add a list of what you need to do before and after moving, like any spaces in your home that need to be repaired or painted. You won’t regret having a list!

Color code boxes and rooms When it comes to packing systems, I am all about setting up color-coding systems for each room, such as red for the kitchen, blue for the bathroom, yellow for the bedrooms and, so on. Then when you start packing, you can tape the box with the corresponding room color. It does not have to be the entire box, but enough to see where the boxes will belong. By giving each room of your new home a designated color with tape or even a sign on the door, it makes it super easy for your movers to put boxes in those areas.

Label boxes by room and sub-section – You can keep it simple with the name of where it will go. However, I like to take it a step further. For example, for the bathroom, instead of writing just the location of where it is going to, I would write “Bathroom Shower Items” or “Bathroom Under The Sink”. This will make it easier to unpack those items in the new home.

-Shanice Bannis at City of Creative Dreams

Should you pack by room or item category?

When packing, you should go room by room. However, this is also a great opportunity to first move items that are in the wrong room to the room that they belong to. Mark each box with the room it will go to in the new space and what types of items are packed. If you don’t have the same number of rooms in the new home, consider that as you label your boxes. Unpacking is much easier the more organized you are during the packing process. 

Start by packing the rooms that don’t have as many daily use items in them. On our last move, I started with the garage. After that, the dining room and the living room. Then came the kitchen; I kept out a small number of dishes and utensils we would need before the move. I continued with the bathrooms and bedrooms in much the same way. I boxed up the items we weren’t using daily and labeled each box for where they would go in the new home and what types of things were inside. When we got to the new house, I put papers on the doors saying which room was which, so the movers knew exactly where the boxes should go. It made our move a much smoother process.

-Julianna Poplin at The Simplicity Habit 

Now you are ready for your big day! Follow these tips (and to shave off tons of time, consider hiring a professional mover) to have a way less stressful move.

The Toxin I Uncovered During My Basement Remodel

Author:

Publish Date:

Last Modified Date:

Category: Buying & Selling a Home

Tags: Tags: , , , , , , , , , , , , , , ,

I grew up with the handiest dad in the entire neighborhood. When I was a kid, it felt like every six months there was a different room getting a facelift, ranging from completely renovating the kitchen to turning a small attic into our playroom.

This mentality rubbed off on me. Today, I’ve not only made improvements to my own home, but I’ve even taken on a few house flips in my spare time. However, the time and labor that goes into these projects shouldn’t be underestimated. My dad made it look easy, but there are always curve balls.

My Initial Purchase

For my past two house flips, I purchased bank-owned foreclosures. I found this process much easier than most people think, and it also typically leaves a nice cushion in your budget to invest in the renovation.

However, after renovating these homes, I was left with less of a profit than I initially calculated. This time around, I took a risk and bid on a home through a foreclosure auction. (The main difference between auction and bank-owned is that the homes at auction often are bid on sight unseen!) However, living in a rural part of New York, I have become familiar with the homes in the area and had a general sense of what I would be dealing with.

First Impressions

After finalizing the deal, I drove to the location with my husband and two children to get an initial look at our new property. As soon as we arrived, I began to see the potential that this home had to offer. A beautiful paint-chipped, white ranch that was constructed in the early 1950s. Set back on about an acre of land, all I could think was how perfect this home would be for a family to live and grow, with plenty of space for children to roam freely and enough privacy while having a central location near to highways, plazas, and our neighborhood.

We opened the front door to the main entrance with our fingers crossed, praying that the inside would be salvageable. Other than the extremely worn hardwood floors, everything was generally intact. Four bedrooms and two bathrooms, seemingly unscathed by the many cold winters that occurred over the years. Slight cracks ran the walls and almost everything was outdated, however, these changes would be minor, as I still wanted to ensure the home would maintain its timely character.

On the surface, our initial evaluation of the purchase was going well, briefly discussing our plans as we moved room to room. However, our luck was about to change as we descended the rickety steps into the basement.

The Monster in the Basement

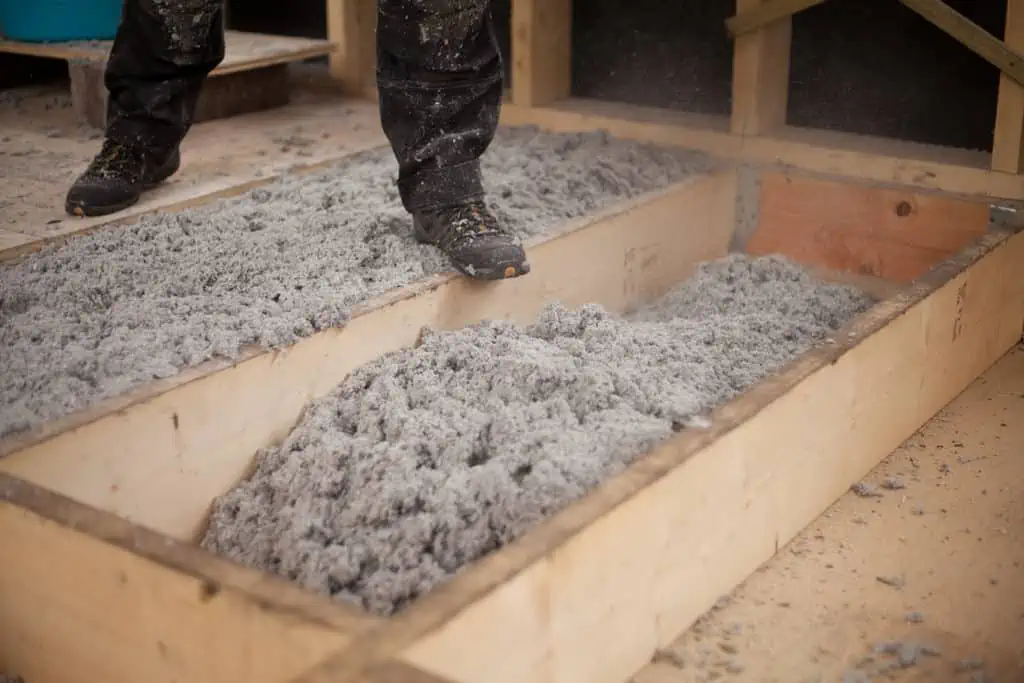
As we entered the unfinished basement, nothing seemed out of the ordinary. It was a small space but could be used as an extra bedroom or guest room if it was finished. The drywall was cracked in multiple spots, exposing the insulation underneath. This initially concerned me, as given the age of the home I knew that the insulation could very well contain asbestos, a deadly carcinogen when exposed to humans. The basement was also very damp, which upon further inspection, it appeared that there was an abundance of mold along the ceiling.

The basement needed much more than a cosmetic lift.

Before we began any repairs, we had to have the home professionally inspected and tested, as we knew that the possibility of health risks was too high for us to begin renovating the basement.

Unfortunately, it seemed that our fears became a reality. Not only was there asbestos-containing insulation in the basement, but it was in other areas of the house as well! Flipping houses I’ve learned that asbestos was once a common additive in a variety of building materials, due to its unsurpassed resistance to heat. But asbestos was also found in our basement floor and ceiling tiles, somewhere I never expected a toxin to be present. While the mold was a quick fix for the abatement team, the insulation was the true task and a much larger undertaking.

A Delay in the Process

It took weeks for the insulation to be properly tested and eventually remediated. The time we could have spent renovating the home was used to break open a large percentage of the walls in the house by the remediation team and rid them of the dangerous material. Some spaces were left untouched, such as the attic, but this area was far too small for anyone to access.

The whole time our insulation was being replaced, the only thoughts I had were, what if they missed an area? What if there were asbestos fibers floating around without my knowledge? It was scary to think that we bit off more than we could chew with this flip. However, tests came back and our home was cleared for the projects we had planned.

Better to Be Safe Than Sorry

This home taught me the biggest lesson of all, no matter how big or small your home improvement project may be, it’s important to get your home checked out before you begin.

I’ve started doing this no matter what the quality of the house is.

With the bank-owned foreclosures, I was able to get an inspection done before the purchase. But with this most recent flip, I’m glad I had this done prior to breaking down any walls. The risks I could have put myself and my family in put a pit in my stomach, and it’s unfortunate that many of those who do these projects on their own unknowingly expose themselves to dangerous toxins. If you do decide to renovate your home by yourself, have it tested for all toxins.

And if you can’t complete the project on your own, consult a professional who can assist. Trust me.


Gina Wheeler is a content creator and freelance writer from New York. Beyond her obsession with interior design and home updating, Gina has a passion for the mind, body, and health excellence. Gina enjoys learning about the intricacies of the body including exercise, nutrition, and preventative care.


The Year-Long Home Maintenance Checklist: When To Do Big Chores?

Author:

Publish Date:

Last Modified Date:

Category: Home Improvement, Organization

Tags: Tags: , , , , , , , , , , , , , , ,

Every year you aim to start good habits with your health, your career, your relationships. But what about your home? The space you spend time in every.single.day should receive some TLC and attention, too.

Instead of vowing to get your body in shape, let’s get your home in shape! In 2018, you may have neglected your home and we’re not judging. (I mean, who really knows the last time they changed their air filter?)

Your 2022 Home Checklist

We’ve curated a handy-dandy checklist to map out the year ahead. If you accomplish each task every month, your home is going to be a well-oiled machine. Now let’s get to it!

Note: Tasks marked with * are recurring tasks you’ll complete multiple times over the course of the year.

Winter Tasks

When you’re stuck inside due to the cold, you might as well put your downtime to good use. We both love starting the year with a nice purge. And if you haven’t seen the new Marie Kondo show on Netflix (seriously, where have you been??), then it just may give you the kick in the pants to part with all of your stuff.

While there will always be recurring tasks to complete on the checklist, the winter time is all about purging and organizing every nook and cranny in your home.

Split it up over the next 3 months and it won’t be quite as overwhelming!

January

February

  • Compile tax documents; set up a time to complete taxes
  • Purge and donate kitchen gadgets
  • Purge and donate pantry foods
  • Wipe down fridge*
  • Clean garbage disposal*
  • Change furnace filter*

March

  • Purge and organize toiletries
  • Purge and organize the linen closet
  • Check caulking around bathtubs and showers
  • Clean car inside and out*

Spring Tasks

No duh: the springtime is all about spring cleaning! You spent the past few months purging and organizing spaces in your home, but now it’s time to give everything a nice deep clean. (And don’t forget to clean these 6 overlooked areas.)

Not to mention, the springtime is the start of all your big outdoor projects. Get your lawn and garden cleaned, manicured, and ready for new life to grow. These are especially crucial because you really can’t do anything about it once you miss your window!

April

  • Get air conditioner serviced
  • Aerate lawn
  • Wash drapes, rugs, upholstery
  • Launder shower curtain and liner
  • Wash windows and screens*
  • Clear your gutters*
  • Dust light fixtures*
  • Wipe down baseboards*

May

  • Setup outdoor patio furniture
  • Inspect home’s exterior and roof for necessary repairs
  • Prune overgrown bushes
  • Clear dead plants and shrubs (early May)
  • Plant flowers (late May)
  • Change furnace filter*
  • Change batteries in smoke & CO2 detectors*

June

  • Replace outdoor lights that have burned out
  • Clean grill and check propane tank
  • Clean deck and make necessary repairs
  • Power wash sidewalks and walkways
  • Clean car inside and out*

Summer Tasks

Oh, the sweet summertime. It can be easy to let your household chores slide during the summer months. We get it, summer is about vacations and relaxing. But these are worthwhile tasks to accomplish when the temps are warmer and you’re spending more time outside (hopefully).

Also, as you near Labor Day, school will be on the mind. That’s when you’ll want to make sure your home is still organized from your hard work earlier this year. Purge paper clutter and books so you can start the school year fresh!

July

  • Fix broken screen doors
  • Add fresh mulch to landscaping
  • Organize and sweep out the garage
  • Dust light fixtures*
  • Wipe down baseboards*

August

  • Hose down garbage cans
  • Purge office and organize paperwork for the upcoming school year
  • Purge and donate books
  • Clean faucet and shower heads
  • Wipe down fridge*
  • Change furnace filter*

September

  • Service chimney
  • Empty out planters
  • Store lawn furniture
  • Clean car inside and out*
  • Wash windows and screens*

Fall Tasks

Keep that momentum going into the fall season! Fall is the time to prepare for the cold months ahead. Focus on prepping the exterior of your home to protect it against the snow and ice that will soon be here.

With the holidays approaching, this is also a time when you’re the most likely to host guests. Luckily, your home should be running smoothly with all of the work you’ve put in this year. We also encourage you to keep December a little light on the home projects, since you will most likely have limited free time.

October

  • Plant spring-blooming plants, shrubs, tall grasses, etc.
  • Remove hoses from water spickets
  • Fertilize lawn
  • Check your sump pump
  • Clear your gutters*
  • Dust light fixtures*
  • Wipe down baseboards*

November

  • Check weatherstripping on doors and windows
  • Have heating systems serviced
  • Rake and gather leaves
  • Purge pantry and donate (good timing for the holidays!)
  • Change furnace filter*
  • Change batteries in smoke & CO2 detectors*

December

  • Purge toys and books (good timing for the holidays!)
  • Purge and donate extra holiday decorations
  • Clean car inside and out*

Free Printable – Home Checklist

If you’re ready to make 2022 the best year yet for your home, then we encourage you to download or screenshot this free printable. That way, you can print it out and check things off as you go. (Trust us, there is no better feeling than checking off those little boxes!)


Illustrations by M. Dean

Your Kitchen Remodel: Cost Factors, Layout Ideas and How to Renovate

Author:

Publish Date:

Last Modified Date:

Category: Home Improvement

Tags: Tags: , , , , , , , , , , , , , ,

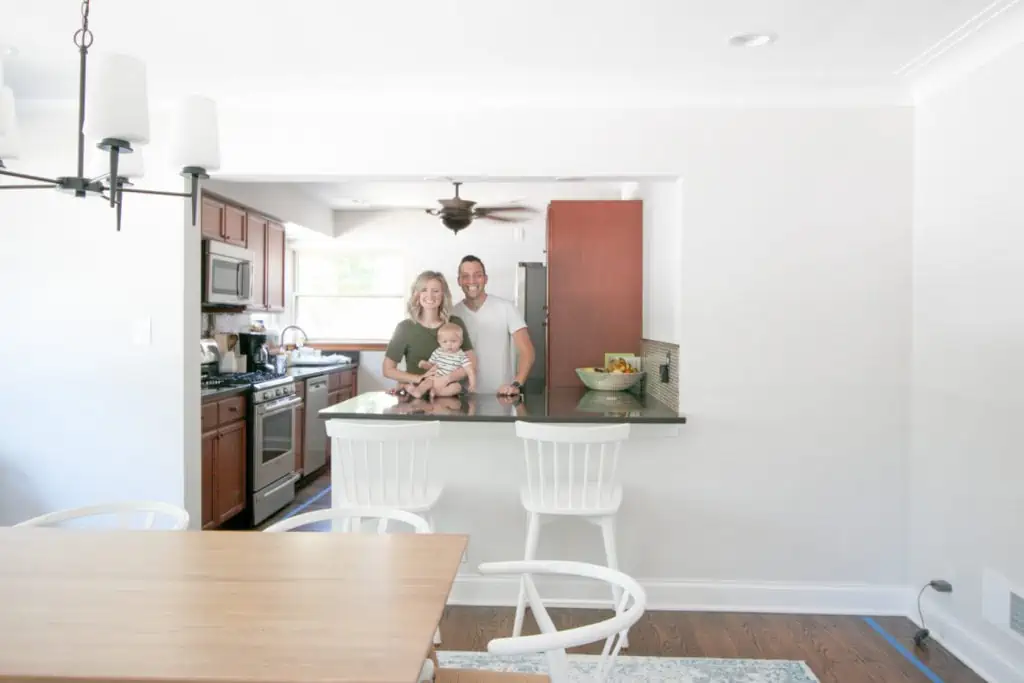
Going into a kitchen remodel is a very intimidating task, especially if you are not very familiar with the process. In spite of this, there are a lot of people blindly diving into this large-scale project every year … including me!

How many? According to the National Kitchen and Bath Association, over ten million Americans had their kitchens remodeled in 2015. And the numbers have only risen in the years since.

If you are one of those more than 10 million people tackling a kitchen remodel this year, this post is for you.

Everything To Expect When Remodeling A Kitchen

Kitchen Remodel

When I set out to get my kitchen remodeled, I honestly had no clue where to start. I had such a hard time finding info online that could map out the process for a rookie like me.

I vowed right then and there I would offer the internet everything I learned after I lived through that experience!

Take it from me, seeing the whole picture from the start is extremely helpful.

Most of the hard work (for anyone not physically putting together their kitchen infrastructure themselves) is at the front end of the process. Renovation is a lot like cooking: there’s a lot of prep.

Read over the complete process someone goes through before any work actually happens on a kitchen space:

  • Establish a budget
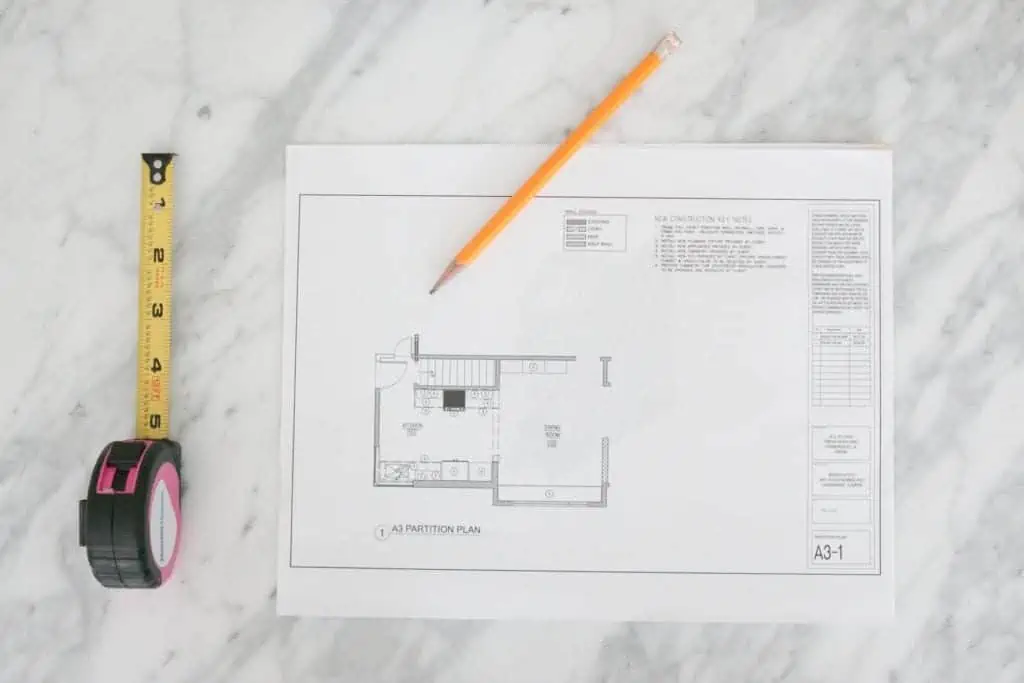
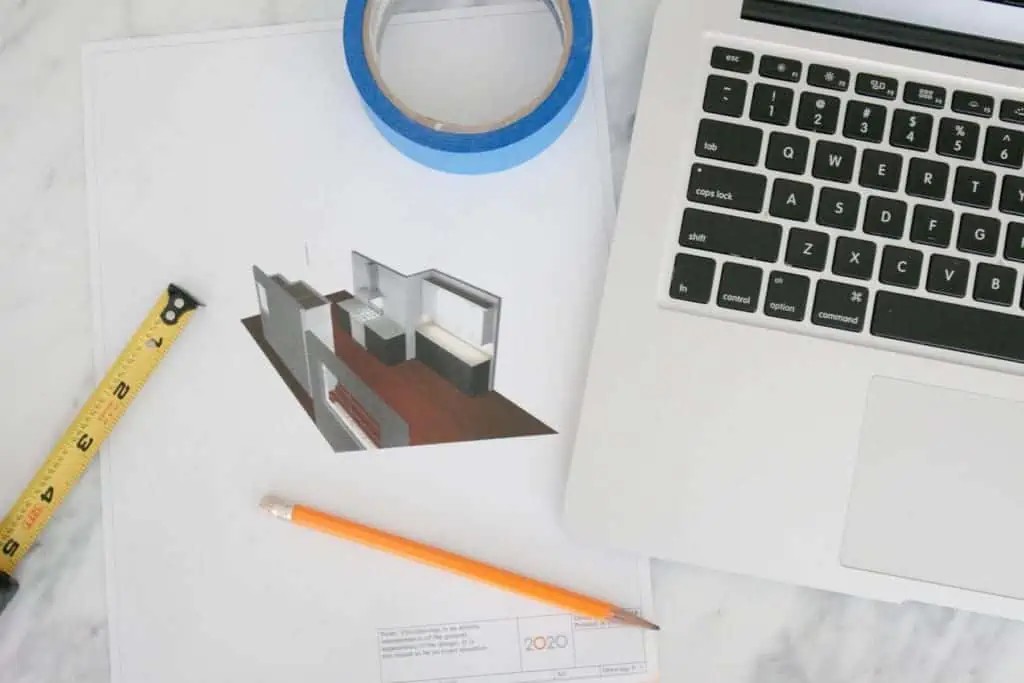
  • Find a designer to confirm new layout and provide accurate blueprints
  • Find and hire a contractor you trust and can afford
  • Identify where you want to buy cabinets and countertops
  • Research colors, textures, trends, materials, etc.
  • Order your cabinet and countertop and triple check to confirm your kitchen’s specs
  • Order anything else you may need (appliances, backsplash, light fixtures, faucets, sink, range hood, etc.)
  • Work with your contractor to establish a timeline
  • Keep track of all of all materials as they arrive
  • Clean out all of your old kitchen cabinets
  • Set up a temporary kitchen somewhere else in the house
  • Allow the contractors to do the heavy lifting, but be prepared to live in total chaos

Seems like a lot, huh? Don’t worry, here’s the step-by-step process.

Get Help Loading Your Container

See prices for movers by the hour – instantly.

Read real customer reviews.

Easily book your help online.


The first step is to create a layout, with or without a designer

Kitchen Remodel

If you plan on changing the layout your kitchen, the first thing you should do is hire a designer to work with you in identifying the best layout. Believe it or not, there’s a website for that. Head to ASID (the American Society of Interior Designers) to find one for hire near you!

From there, the designer will provide scaled blueprints that you will need to move onto the next steps. This step is technically optional, but it turned out to be the best thing I did during my remodel process!

Collect bids from contractorsKitchen Remodel

The next step in the process is collecting bids from contractors you are interested in hiring to complete your project.

Usually, bids come at no cost, so I encourage you to get several bids so you have a more accurate idea of what the project will cost you in the end. Before you decide on the contractor you wish to work with, be sure to check out this contract hiring guide and make sure you outline all of the details before you commit (and pay!).

What Specific Decisions Will I Have To Make?

To be perfectly honest, the amount of decisions you need to make as you prep for a kitchen renovation is overwhelming. But preparing for them in advance makes each task a lot more manageable.

Outside of the obvious questions regarding color and style, there are a lot of other things you will need to consider and purchase. Here is a list to keep handy:

  • Cabinet hardware
  • Cabinet door design
  • The material of the cabinet (which impacts cost)
  • The material of the countertop (which, again, impacts cost)
  • Box cabinets or special order cabinetry
  • Backsplash style, size, material
  • Appliances (style, brand, cost, color, “extras”)
  • Open shelving or closed cabinetry
  • Flooring materials and costs
  • Window treatments
  • Light fixtures
  • Extra organization (there are options built-into your cabinetry)
  • Installation of the cabinetry
  • Size of the cabinets (depth, width, and height)
  • Drawers vs. cabinets
  • Timeline
  • Can lights or fan
  • Material of sink
  • Plumping changes
  • Electrical changes

Be smart when shopping for materials

Kitchen Remodel

Once you hire the contractor, they will be a great resource for pointing you in the right directions for your materials, specifically for cabinets and countertops.

Sometimes contractors can get these products at a discounted rate if you shop at the retailers they recommend. Talk to them about this option before you decide on where you want to purchase your big-ticket items.

And if they don’t have any recommendations, you can always shop at big box hardware stores.

Protip: You will need to bring your exact measurements from your designer (or contractor) when you go out to physically shop, as well as have an idea of what design you want the kitchen to have. Of course, the salesperson can also help you make these decisions, but this is your kitchen, after all!

Finished buying? Your timeline begins now

Kitchen Remodel

After you make the cabinet and countertop order, your contractor will work with you to create a timeline of the projects that need to be done before the cabinets arrive, which will include:

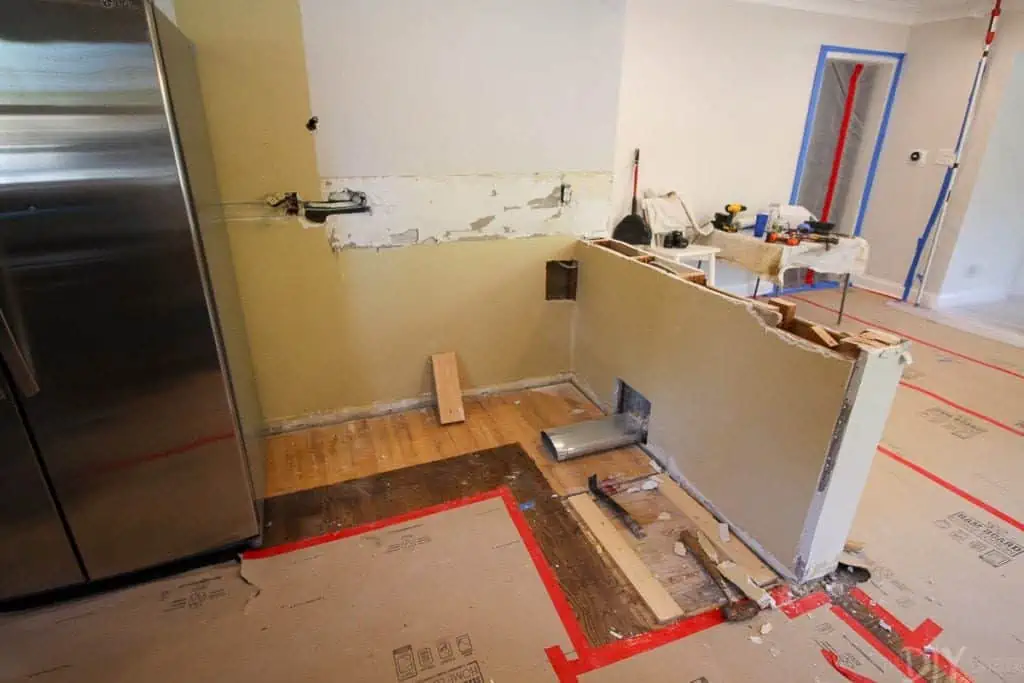
  • Demolition
  • Electrical work
  • Plumbing work

Remember, cabinets can take up to eight weeks to arrive, and possibly longer if they are custom. Getting to work before the cabinets arrive will ensure they are ready to install quickly after they get to your front door.

Your contractor (or you) will get to work

Kitchen Remodel

It’s time to get to work! If you have contractors, they will work to demo your current kitchen, then work even harder to put the new and improved one back together. If you did get a contractor, this is the easy part for you because, at this point, the work is out of your hands. Most all of your hard work should have already occurred during the front end of this project.

Hope you don’t mind living without a proper kitchen for a while. Be patient and your new kitchen will be ready soon enough for you to enjoy!

How long will a kitchen renovation take?

Kitchen Remodel

Every kitchen renovation will vary in terms of timing, depending on the scope of work and the size of the space. But traditionally, a kitchen renovation can run on average 4-8 weeks. Living without a kitchen for that long can be a large inconvenience, but I am here to reassure you that if we can manage it, so can you!

Kitchen Remodel

My best advice to handle this chaos is to set up a temporary kitchen prior to demoing your current kitchen. We have our fridge, microwave, and crockpot working overtime! Plus, we meal prep at our parent’s house to make healthy food for the week (so you don’t have months and months of takeout).

Is It All Really Worth It?

Kitchen Remodel

Now being on the other side of it, it was absolutely worth it!

According to HGTV, a kitchen remodel is projected to give you a 70% return on your investment, while statistics from Today’s Homeowner reports that this number could be as high as 91% of a return on this investment! So as much as this intimidating task may seem overwhelming at first and chaotic to live through, coming out the other side will be worth it in the long run. You are adding significant value to your home by making these updates now and getting a gorgeous kitchen to enjoy at the same time.

Of course, there is a lot more information you can devour as you prepare for your upcoming kitchen remodel, but I hope this beginner’s guide gave you an overview of what to expect. Seeing the bigger picture from the start will provide you peace of mind to tackle each step with confidence, and maybe even a little bit of excitement!

How to Do Noisy Home Improvement When You Have Neighbors

Author:

Publish Date:

Last Modified Date:

Category: Apartment Life, Home Improvement

Tags: Tags: , , , , , , , , , , , , , , , ,

As two girls who are constantly improving our homes, we’ve completed our fair share of DIY projects.

And in case you were wondering, most home improvement projects come with a fair amount of noise.

While this can obviously be disruptive to the people in your own home, it can be especially disruptive to your neighbors.

Luckily, because DIY projects are sort of our thing, we have some tried and true ways to tackle home improvement projects without making our neighbors hate us. We’ll discuss how these tips vary depending on your living situation, with one of us living in a condo building in the city, the other in a single-family home in the suburbs.

Home Improvement Projects in a Condo Building

I, Casey, live in a five-unit building in the heart of Chicago—and I’m super lucky. Why? Because I absolutely love all of my neighbors.

They all know about my passion for DIY and have come to embrace the noise that erupts from our unit every weekend or so.

However, the reason they love me in spite of that fact is because I’ve taken lots of the following measures to be as respectful as possible to everyone living under the same roof as me, especially with any of my large-scale projects.

Read Your Home Owners Association (HOA) Rules

Every HOA comes with its own rules. You should definitely give that little handbook a read before you start any projects.

Take note of what projects are allowed (sometimes you’re not allowed to make updates on the exterior of your unit/building for instance), what permits are required, and the times when construction can take place. Being up to date on the rules will come in handy when you tackle the next item on this list…

5 Sweet Garage Upgrades That Up Your Home’s Value

Garage additions and upgrades like the five in this list can produce an estimated 65 percent return-on-investment.

Discuss Your Project At Your Next Building Meeting

In our building, we get together every few months to discuss finances, building issues, and other random items that pop up. Most condo buildings do this. Before my husband and I renovated our guest bathroom, we brought up our plan at our condo association meeting.

This was months before we were set to begin our project, but we wanted to get it on everyone’s radar and address any concerns ahead of time.

It ended up working out wonderfully because not only were our neighbors supportive, but we were able to gain insight on a few contractors our neighbors had used in their own homes!

At these meetings, it’s also important to give everyone your contact information so they can text or email you if things get too noisy or out of hand.

Giving your neighbors the go ahead to reach out at any point can potentially save you from headaches when the project begins. No one wants an angry neighbor pounding on their door!

Have a Plan for Extra Trash

In our building, we pay to have our trash and recycling hauled away each week. If our cans are overflowing, we face some extra charges and fines. When you’re gutting a space, you’re bound to have lots of trash, so make a plan to discard all of it.

Our plan was that we were able to pay our contractor to haul away all of the debris. This worked out perfectly because it didn’t hog up valuable space in our building’s crowded dumpster. Make a plan of attack before you start and let your neighbors know that you have things under control!

Always Keep Hallways and Common Areas Clean

Home improvement projects bring loads of dust and dirt into your home. And sometimes? The mess can spill into the hallway and common areas of your building. Be respectful. Keep those spaces as clean as possible. After a long day of DIY, don’t just clean up your own home, tackle those communal hallways too.

After we renovated our bathroom, I made sure to do a deep clean of the hallways and front of our building when the project was 100% finished. My neighbors appreciated it and I felt good knowing that our property was neat and tidy even after such a large construction project.

Stick to a Schedule

Your HOA may have specific rules on when you can do construction work. Ours didn’t have set hours, but we never started a project before 8 a.m. and tried to always finish by 7 p.m.

If we were up early and wanted to get moving, we would only do quiet tasks (getting out tools, taping walls, etc.) and we kept the loud tasks (like using the wet saw to cut tile!) to mid-day.

It’s also important to keep your neighbors in the loop when it comes to the timeline of your project. We thought our bathroom renovation would take four weeks, but it somehow extended into seven weeks. I emailed our neighbors a few times throughout the process to let them know that things were being pushed back and addressed any concerns. The new deadline ended up being a non-issue and I really believe it was because we were so open with our neighbors throughout the process.

Always Say Thank You

When we (finally!) completed our bathroom project, we left handwritten thank you notes on everyone’s front doors. We even went the extra mile and put coffee gift cards into each one. This was a simple way to say thanks for putting up with all of our noise and our neighbors really appreciated the gesture!

Home Improvement Projects in a Single-Family Home

While Casey lives in a condo in the city, I navigate these same noisy projects a little differently inside a single-family home located in the suburbs. Some of her tips are still helpful to consider, but the rules are slightly different for neighborly etiquette when you’re not living in such close quarters.

But even with the extra space a single family home offers, it’s still important to consider your neighbors when tackling large and noisy projects! Here’s how!

Physically Go Talk to Your Nearby Neighbors

Sounds simple enough, but it’s critically important to talk to your neighbors well in advance! Discussing your plans will avoid them feeling off-guard one the project (and noise) starts.

You also don’t want to cause alarm if they start seeing foreign vehicles from contractors or workers parked outside of your home while you’re away at work. Getting them in-the-know before the project starts will actually be to your advantage. Heck, get on their good side and maybe they could field a delivery if you’re running late or let a worker inside if needed. Neighbors want to help – in most cases – especially when they know what’s going on.

Secure a City Permit

Securing a permit, if your city/village requires one, is essential before starting any large-scale projects. (And this will protect you just in case a problem arises from one of your neighbors.) If they are unhappy about the noise, or dumpster placement, or anything else, and then they take action to report you, not having a permit will be a bigger problem than your neighbor’s complaints.

Start Inside Early and Move Outside Later

There have been plenty of times when we are knee-deep in a DIY project that we get up super early to continue. But, truly, saws are very noisy, so we typically wait for that step until it’s appropriate, or we take the time to get everything set up early (even if it is outside) and don’t cut until late in the morning.

Don’t waste time waiting for your neighbors to get up, but don’t go about your business waking them up either!

Let Your Neighbors Follow the Progress

An easy way to keep neighbors in the loop is to invite them in a time or two throughout the process to share your progress! Show them what you’re working on and how excited you are for the progress. Including your neighbors helps them feel special and they will be less inclined to be annoyed if things do get a little noisy or messy.

Overcommunicate

Overcommunicating is always a good idea to avoid confrontation. Don’t be afraid to let your neighbor know when the dumpster is scheduled to get picked up, any problems that may impact your deadline, when a large delivery is expected, etc. The more they know in advance on some of these larger “issues”, the fewer problems will arise. Use Nextdoor. Communicate, communicate and overcommunicate.

Keep Your Contractor up to Date Often

This overcommunication should also be applied to your contractors. Be sure to share with them your expectations on start times, end times, and any other issues that may impact the neighborhood. Don’t go to your contractor only after you’ve heard complaints or it’s become a full-blown problem. Being proactive and communicating your expectations in advance will hopefully help avoid any issues in your neighborhood.

Celebrate Together!

Now it’s time for the fun part! Once your noisy project is over, don’t be afraid to invite some of the neighbors over to check out the new space and enjoy a few cocktails while they’re there. We just had a large landscaping renovation happen that made our streets, sidewalks and overall curb appeal a huge mess for several weeks.

Once our patio was paved and the mess was cleared, we invited our neighbors over to enjoy the new space with some food, but most importantly, to thank them for their patience.

They were all so grateful and gracious, which gives me a lot more confidence to tackle another noisy project soon. Knowing I have their support makes the process a whole lot less stressful!


We hope these steps help you tackle your next noisy home improvement project while still keeping the peace. We’re no Mr. Rogers, but we’re confident you can tackle those DIY projects and still make it a beautiful day in the neighborhood for your neighbors.

When Your DIY Projects Will Fail

Author:

Publish Date:

Last Modified Date:

Category: DIY Projects

Tags: Tags: , , , , , , , , , , , , ,

We love a good do-it-yourself project. There’s just something about improving your home all by yourself without the assistance of a professional that feels so darn good! (Heck, our blog is called The DIY Playbook, so obviously we are obsessed with all things DIY.)

But it may shock you that we firmly believe that there are many instances when you should not do a project yourself. (Ever heard of “nailed it”?)

Yep, we’ve outlined all the times when you need to call in a pro to get the job done below.

Time Will Inevitably Be More Valuable Than Money

Many people assume that just because a project is easy, they should do it themselves. However, even simple tasks take time.

Here’s a real situation we were both in recently. Painting a room only takes 1-2 days. The problem is that it takes an entire 1-2 days of your time, and we were moving.

If you have 1,000 things on your moving to-do list, then it may make sense to call in a pro to get it done quickly and efficiently. (Hiring help to move is another bright idea when that to-do list is bursting with items!)

It cost us each about $1,000 to hire this DIY out, but we weighed that against packing up one house to move to another, closing on a home, and finishing things up at your old pad. So yeah, painting a room will only take about 1-2 days and costs roughly $100 in supplies, but sometimes you don’t have an open schedule.
In our particular case, an additional $900 was a resource well spent, because hiring it out ensured that we could subtract our labor, plus have a crisp white trim and fresh paint on the walls as we moved our new items in.

Don’t worry DIY fans; as we’ve designed each room in our homes later on, we’ve re-painted a few spaces with new colors ourselves. From experience, what sounds like a great DIY project is only realistic after you have the time.

Some DIY Projects Have Sneaky Costs

People turn to DIY to save money. And it’s true, often times labor is the most expensive part of a large project. However, there are some sneaky costs that you need to keep in mind before you decide to handle a project by yourself. Here are the two biggest ones we’ve figured out are the worst.

Transportation: This line item is way too often overlooked when it comes to large-scale projects. If you need a lot of large materials for a project, figure out how the heck you’re going to get those supplies home before you consider it worthwhile.

DIY Playbook has lived it. We decided to add a large decorative wall treatment to a guest bedroom, not realizing that we would need 12-foot wooden boards from the home improvement store. We had to rent a truck on the fly (which cost about $75). It made us question the savings.

Tools and Supplies: The more you DIY, the more tools and general DIY supplies you’ll acquire, making this a thing of the past. But the first time you tackle a project, you’ll probably have to buy all.the.things.

We recently completed a large tiling project for the first time and that meant we had to buy trowels, sponges, and a wet saw for the job. That added up to a couple hundred dollars pretty quickly! Of course, the next time we do a tiling project we will be prepared (and won’t have to spend quite as much), but buying all new supplies is something you’ll want to consider.

However, by making that investment in purchasing and learning how to till ourselves, we saved about $2,500 in labor. (Granted it took us two months to get the bathroom done, but heck … that’s still some big saving!)

Think through a project carefully, jot down some numbers, and add everything up before you start a project on your own.

Be Honest When You Don’t Know How

As DIY’ers ourselves, we always encourage people to expand their skill. However, if you’re an average homeowner, there are projects that will be far too advanced for you.

For instance, while we think most people can easily learn how to install a faucet online, we’d advise hiring a plumber to move plumbing lines in a bathroom. Sometimes it isn’t just safety to you and your materials, but not knowing regulation and keeping things to code also matters. The project don’t necessarily have to be too advanced for you to need an expert opinion.

And of course, some projects are incredibly dangerous if you handle them yourself! Gas repairs or extensive electrical work are not DIY projects. Know your limits and hire out when necessary.

Don’t DIY “ASAP Projects”

As a homeowner, you’re bound to run into emergency issues that need to be fixed ASAP. Whether it’s a flooded bathroom or a busted hot water heater, you’ll want to have a professional on call immediately.

When we were renovating our bathroom, we accidentally bumped the toilet valve and it immediately started leaking. Not wanting to flood our new bathroom, we called in a plumber to swap the old valve with a new one. This set us back about $275, but the job was done correctly and in about an hour. Plus, we felt much more at ease knowing our new bathroom wasn’t going to flood from that pipe!

These urgent issues should be handled by a professional. When you don’t have the time to research and buy the correct supplies, you can make a mistake trying to do an extensive repair yourself. If it’s a home emergency, call it in.

Don’t Experiment If You’re Gonna Stare at It Every Day

If there are any perfectionists tuning in, this category is for you. You may be stuck looking at the results of your DIY for years, so if you are someone who may constantly critique minor (or major) mistakes, then DIY-ing a large project may not be worth the money saved.

We recently renovated our guest bathroom (more on that here!) and I stare at all of the tiles in there when I shower. I’ll always focus in on the corners where I know a tile is 1/8 of an inch off from our handiwork. It’s minor, but it really bugs me!

We know this question sounds like a silly one to ask yourself, but DIY-ing is never worth it if you’re not going to love the end result, or even worse, hate it more than when you started.

The DIY Projects We Recommend

There are lots of DIY projects that you can (and should!) tackle on your own. Here are some ideas to get your creative juices flowing…

  • Changing Doorknobs
  • Painting your Front Door
  • Changing a Faucet
  • Installing a Ceiling Fan
  • Swapping out Light Fixtures
  • Changing an Outlet
  • Adding Cosmetic Woodworking to Walls
  • Installing a Smart Thermostat
  • Fixing a Screen Door
  • Painting a Room
  • Changing out your Baseboard

To DIY or not to DIY? Sometimes the answer is crystal clear. But when you’re unsure, we hope you consult this list so you make the right decision for you (and your home!).

×

I'm Moving

Moving? Thinking about moving? Whether your move is off in the distance or you already have one foot out the door, you'll learn about everything you should expect through our useful how-to's, cool articles and much more. It's all specially curated for you in our "I'm Moving" section.
Explore
×

I'm a Mover

For rookies or veterans alike, our "I'm a Mover" section is filled with extensive industry news, crucial protips and in-depth guides written by industry professionals. Sharing our decade of moving knowledge is just one way we help keep our professional movers at the top of their game.
Explore