Where to Buy Moving Blankets

Author:

Publish Date:

Last Modified Date:

Category: Moving Boxes & Supplies

Tags: Tags: , , , , , , ,

If you hire full-service movers, you don’t have to think about whether or not to use moving blankets. Also called furniture pads, those big, thick blankets that movers wrap around your furniture and major appliances usually come as part of the deal.

However, if you decide to rent a truck and DIY your move, those blankets become an optional, added expense. This may leave you wondering if you really need them.

The short answer is yes. You need them, just like the pro movers do. And we’ll walk you through where the best places to get moving blankets are, how much they cost, and more tips to ensure your DIY move goes off without a hitch.

Moving Blankets: What They Are and How They Make a Difference

A stack of blue moving blankets placed into a truck at the end of a ramp

Moving blankets (AKA furniture pads) are big, thick, heavy squares of quilted cloth and padding. If used properly, they keep your furniture and appliances (and anything else that doesn’t fit in a cardboard box) from getting scratched or irreparably damaged in transit.

While they aren’t cheap, a few $12 moving blankets could actually save you hundreds to thousands of dollars in damages. Imagine your flat-screen TV rubbing against the corners of your antique wooden dresser for hours — that’s why moving blankets are worth it!

Plus, they do more than help prevent scrapes and scratches.

Dust, Dirt & Grease

Moving blankets help protect your appliances and electronics from dust and dirt, especially those with sensitive components. This includes washers, dryers, refrigerators, pianos, microwaves, and speakers. And let’s face it, how often does anyone clean behind and under their sofas and bookcases? Once you start moving all that stuff, you’ll be kicking up months or years of dust and dirt.


“A lot of movers use tape or shrink wrap to keep their pads in place. Others use big rubber moving bands, which are costlier upfront but are reusable and more environmentally friendly.”


You’ll also be disconnecting your washer/dryer, clearing out your garage, boxing up the basement and attic, and tackling the stuff in the yard. In short, moving out is dirty work.

However, taking the time to cover your furniture and major appliances in moving blankets will protect them from the inevitable moving day dust storm and grime.

Save Your Floors

Dragging a dresser across the floor can instantly damage wood, tile, or linoleum. Instead, position the dresser on a furniture pad, which is both safer and easier to move. Of course, it doesn’t work for all furniture. While a dresser with a flat bottom or short, thick feet will slide across the floor nicely when placed on a pad, a dresser with long, spindly legs will break.

Navigating stairs is also much easier with a pad. As long as you have a solid, flat surface to work with, you can wrap an appliance or a piece of furniture in pads and slide it down (or even up) a flight of stairs relatively safely and easily.

Added Stability During Transport

An example of a packed truck where moving blankets are used as both wrapping for furniture and cushion in the spaces between boxes

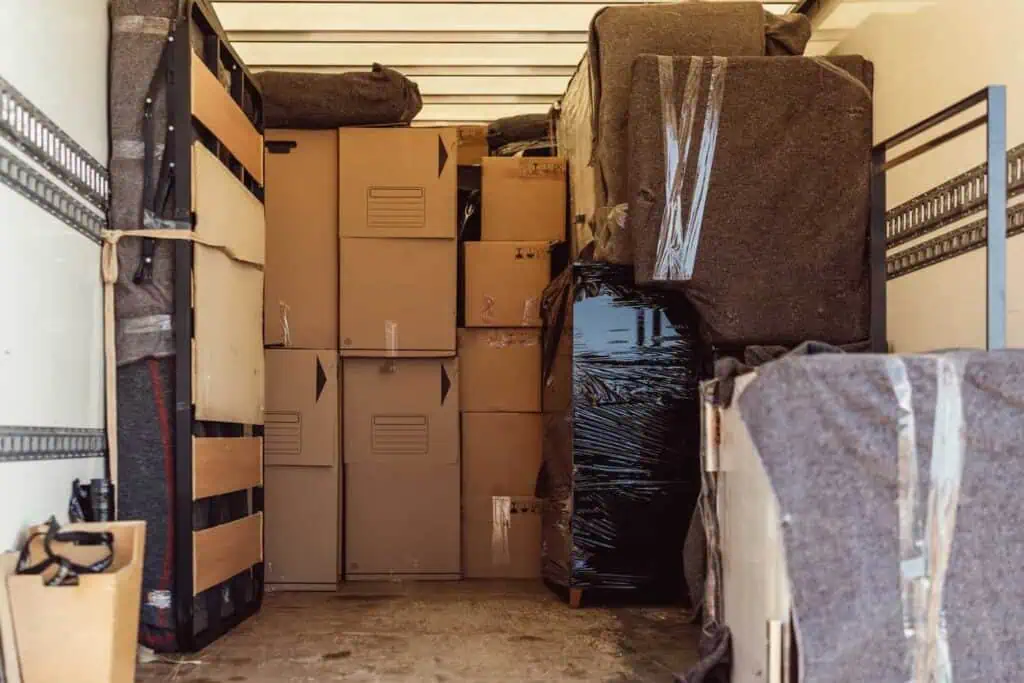
For movers, loading a truck is like a game of Tetris. Not only do they have to make sure everything fits, but it all has to sit snugly. If there are gaps between the boxes and odd-shaped items, your entire load will start to shift during transport.

If your stuff starts moving around back there, that’s when things get damaged. To prevent this, movers wedge rolled-up pads into those spaces and gaps, keeping everything stable and secure.

If you’re packing up your own rental truck, you’ll want to do the same. You could also use blankets, comforters, sleeping bags, and even couch cushions to keep your stuff from shifting. Just make sure you put them in plastic bags first so your bedding or cushions don’t get damaged or dirty.


Where Can I Get Moving Blankets?

Two large stacks of moving blankets strapped down onto a pallet

As mentioned earlier, furniture pads are part of the deal when you hire full-service movers, and companies like UHaul, Budget, and Penske offer moving blankets as an add-on when you rent one of their trucks.

If you decide to buy moving blankets, there are plenty of options to choose from. Make sure when you’re shopping around that you consider the size and weight of the blankets in addition to price. Here are some of the best we’ve found:

  • Amazon offers some of the cheapest blankets, in both price and quality.
  • U-Boxes has a large range of moving blankets varying in price and quality.
  • New Haven and US Cargo Control sell pads that are generally tougher and geared toward professional use. The price might reflect that, too.

Some types of moving blankets, referred to as burlap pads, moleskin pads, or simply skins, are much thinner, lighter, and usually smaller than regular furniture pads. These are meant to be wrapped around items found in your garage or shed, like rakes and shovels, not your lacquered black walnut dining room set.

Should I rent U-Haul moving blankets instead of buying them?

Considering the number of blankets you’ll need for your move (and the odds of never needing them again), renting may, on the surface, seem more sensible than buying. But if you do rent furniture pads, there are a few things to know:

  • Pads for rent are not always the size and quality you’d want or expect.
  • Rented pads have very likely been used many times, which can degrade their quality. Also, rental agreements usually require you to return the pads in good condition, or you’ll have to buy them. Take note, and take pictures before you use them.
  • Outside of U-Haul, Budget, and Penske, you may be hard-pressed to find a company that rents moving blankets.

As a last resort, you can give online marketplaces a shot. Check eBay or Craigslist for a deal on used (or maybe even new or never used) moving blankets and pads.

Does the weight of the furniture pad matter?

Yes, it does. Price can be one indicator of the quality of a pad, but a much better measure of quality is how heavy it is.

Durable, quality pads weigh in at around 5.5 lb. each, if not more. Cheaper ones are lighter, around 3.5 lb., and noticeably thinner. If they’re that thin, they might not offer full protection, though they can work well for items like patio furniture or bicycles.

How many moving blankets will I need?

A stack of moving blankets is set close to the lens of the camera. In the background, there is a very tall stack of boxes.

There’s a lot of advice out there, sometimes contradictory. Twelve blankets for every bedroom. Twelve to fifteen pads, or maybe twenty-four, for a one-bedroom apartment. Some say you need a dozen pads for every five cubic feet of truck space.

Ignore those “rules.” Instead, get an accurate count by taking note of every item in your house that you’ll need to wrap. Then, you can estimate how many pads you’ll need by understanding how many each furniture item takes to wrap.

Going with the standard 72” x 80” furniture pad, here are the number of pads you’ll need to wrap common household items:

  • 1 furniture pad: Nightstand, end table, small bookcase, dining room chair, average-sized flat-screen TV, microwave, small computer stand/table
  • 2 furniture pads: Large bookcase, washer, dryer, headboard/footboard, upholstered chair, smallish kitchen/dining room table (one for the tabletop and one for the legs, once you remove them)
  • 3 furniture pads: Entertainment unit, armoire, large kitchen/dining table (two for the tabletop and one for the legs), loveseat, refrigerator, large dresser
  • 4+ furniture pads: Sofa, piano, hot tub

If you aren’t sure how many pads a piece will require, go high. It’s always better to have too many pads than too few!

Can I use shrink wrap instead of moving blankets?

Two women use shrink wrap on a couch

In short, no, you can’t use shrink wrap instead of moving pads, but it might be a good idea to use it with moving pads.

Shrink wrap is the plastic material that movers sometimes use to wrap furniture. Resembling a huge roll of Saran Wrap, shrink wrap is safe to use on cloth upholstery. However, it can cause irrevocable damage to leather or wood if left for long periods, especially under extreme temperatures. Shrink wrap also tends to trap moisture, leading to mold.

Movers generally use shrink wrap in addition to furniture padding. It helps keep the pads in place and offers extra protection against dust and dirt. Shrink wrap also has a slightly sticky texture, giving you a better grip when carrying heavy items down stairs, through doorways, and onto the truck.

Pro Tip: When pad-wrapping furniture with a glass surface, like a china hutch or curio, wrap a piece of cardboard over the glass with shrink wrap before covering it with a furniture pad. This adds extra protection and signals that there’s glass underneath.

Can I just use old blankets instead of furniture pads?

Technically, yes, but moving blankets are much better at protecting your nice stuff than old blankets.

If you’d like to save some money or effort by using fewer moving blankets, there’s a compromise. Wrap your nice furniture in clean moving blankets and save your old blankets for dirty garage and outdoor items.

Are moving blankets easy to use?

Pad-wrapping a piece of furniture tends to be easier than keeping those pads in place. A lot of movers use tape or shrink wrap, while others use big rubber moving bands, which are more expensive upfront than shrink wrap, but are reusable and environmentally friendly.


“While a dresser with a flat bottom or short, thick feet will slide across the floor nicely when placed on a pad, a dresser with long spindly legs will break.”


Tape is probably your cheapest option. However, shrink wrap is the quickest and best way to get the blankets to stay in place while giving your hands a good grip.

Pro Tip: It’s much easier to handle and haul a shrink-wrapped piece of furniture with your bare hands than with gloves on.

Will my stuff be safe if I use enough moving blankets?

A mover wraps a tall piece of furniture in a moving blanket

Wrapping up your furniture and appliances in quality pads is a great move and will help keep your stuff safe. But blankets don’t make your things lighter. If loaded onto the truck improperly, your stuff will start tipping and slipping all over the place. When that happens, blankets aren’t enough to save your flat screen. This is why so many people opt to have vetted movers like the professionals at HireAHelper do the heavy lifting and loading for them.

If you want to DIY your move, go for it! Just be sure to stock up on plenty of moving pads — for your furniture, appliances, and a little peace of mind.


How Much Do Moving Blankets Cost?

Moving blankets typically cost anywhere from $8 to $15 each, but the prices can vary widely based on quality, size, and weight. Whether you need one to move heavy furniture down the stairs or several to protect your belongings while loading a PODS container, you have plenty of options.

Consider buying moving blankets online as opposed to in-store for more options and better prices.

Retailer Cost What to Keep in Mind
Walmart $12.86
  • Moving blankets come singly or in two-packs.
  • Walmart’s website includes listings for third-party sellers.
The Home Depot Starting at $15.98
  • Many moving blankets at The Home Depot come in multipacks. Consider buying in bulk to reduce the price per blanket.
U-Haul Starting at $8.95
  • U-Haul calls its moving blankets furniture pads.
  • Quilted furniture pads are available for heavier-duty protection.
Target $16.99
  • Target has a limited selection of small moving blankets available. However, they’re costlier and smaller than what you can get at other retailers.
Amazon Starting at $14.99
  • Numerous sellers on Amazon offer moving blankets.
  • Buy in bulk to reduce per-blanket price.
  • Some blankets may be available for free, expedited, or same-day delivery if you have an Amazon Prime membership.
Lowe’s $22.98
  • Lowe’s sells moving blankets, but they tend to be pricier than at other retailers. If you’re already there for other packing supplies and only need one or two, it may be more convenient to grab them anyway. If you need several, consider other retailers to reduce costs.
U-Boxes Starting at $41.19/2-pack
  • U-Boxes provides a range of moving blankets at various prices.
New Haven Starting at $36
  • New Haven sells moving blankets designed for frequent, professional use. If you value durability or plan to move frequently, they may be worth the extra cost.
US Cargo Control Starting at $6
  • US Cargo Control offers an affordable way to bulk-buy moving blankets. For the best deals, buy them in larger quantities.
  • Some high-quality, professional-grade blankets cost substantially more, with specialty options like sound blankets costing over $70 each.
The amounts in this table were accurate as of the time of publishing, based on the online marketplaces of the companies and services listed.

How to Pack Your Glasses for a Move: Step-by-Step Guide

Author:

Publish Date:

Last Modified Date:

Category: Moving Advice

Tags: Tags: , , , , , , , ,

Nothing ruins moving day quite like opening a box containing your precious crystal wine glasses only to find a shattered mess. The key to avoiding that mess and transporting glasses safely is in the packing. Get that right and you’ll be opening boxes with confidence.

After speaking to some of the best movers in the business about how to pack glasses for a move, we’ve taken their tips and advice and compiled a HireAHelper definitive guide. Follow these simple steps and you’ll be packing glasses like a pro in no time!


Supplies Needed to Pack Glasses Safely

Packing supplies, including a box cutter, packing tape, bubble wrap, and boxes

Having the right supplies is essential when packing and moving with glasses. Without the right materials, you risk glassware chipping or breaking.

Everything you need can be purchased online or at stores like Home Depot, Walmart, and U-Haul. It’s also possible to source free boxes — if you know where to look.

Packing Paper

Packing paper is the pro’s choice for preparing fragile items for moving. Its flexibility makes it perfect for wrapping, padding, and filling in gaps between glasses. Although not as thick, old newspapers are a great alternative if you’re looking to save on moving costs.

Moving Boxes

Small or mid-size boxes are ideal — and the sturdier the better. Reinforced double-walled boxes provide the best protection. However, repurposed boxes may work just as well, especially if the openings and sides are properly secured with strong packing tape.

Packing Tape

A packing tape dispenser sits on a table. Bubble wrap and extra rolls of tape are placed next to it.

A good quality packing tape is essential for sealing boxes — not flimsy gift wrap tape or masking tape (although this is usually fine for labeling boxes). You don’t want to spend hours packing only for a box to open accidentally and spill your glasses all over the floor.

Bubble Wrap

Although not essential, bubble wrap can make packing easier. It’s great for lining boxes and providing extra protection around paper-wrapped glasses.

Box Dividers

Box dividers, like the ones you usually find separating bottles of wine in a box, are handy for packing tumblers and wine glasses, especially when they’re all the same size.


“When you don’t have packing paper or newspaper, try using clothing, small towels, and other soft materials to cushion and protect your glasses.”


If you source boxes from a liquor store, you may find them already inside. Don’t panic if you don’t have any or can’t source them. There are other ways to secure your glasses, and you can always just add extra padding between each glass. The key is to make sure each glass can’t knock into the ones packed next to it.

Markers or Labels

Movers like to know which boxes contain breakable items so they handle them extra-carefully and don’t place them at the bottom of a pile when loading the moving truck. Use permanent markers or colored labels/colored tape to mark each box as fragile.


Step-By-Step Guide for Packing Glasses

Packing drinking glasses is a delicate process, as each style of glass requires a slightly different packing method. Following this step-by-step guide will ensure you have an intact glass to fill with champagne when you celebrate your successful move.

1. Prepare the Box

Secure the base of your box with a double layer of packing tape to prevent it from opening or splitting during your move.

2. Add a Protective Layer

Line the base and sides of the box with a protective layer to prevent the glasses from resting against the box. This can be bubble wrap, scrunched-up packing paper, or newspaper. You can even use towels, blankets, or a couple of T-shirts to save on buying packing supplies.

3. Wrap Your Glasses

A person wraps a glass in bubble wrap

Now it’s time to start wrapping your glasses. Here are our top packing tips for glasses of all kinds.

Tumblers, pint glasses, and highball glasses

Lay a sheet of packing paper or bubble wrap on a flat surface and place the glass at an angle at one corner. Begin rolling the glass up in the paper (or wrap), folding in the excess at the bottom and pushing the top end into the opening of the glass as you go.

Make sure the lip of each glass is well wrapped to avoid chipping. Make the package even more secure by wrapping it in a second layer — it’s always better to be safe than sorry.

Wine glasses and other stemware

Delicate wine glasses, champagne flutes, and martini glasses require special attention to protect the stems. Fold a sheet of packing paper into a thin strip and wrap it around the stem before wrapping the entire glass in paper.

Glass beer mugs

Similar to stemware, beer mugs and other glasses with handles need extra care. Place a ball of paper between the handle and body before wrapping the glass.

4. Place Your Glasses in the Box

A person places glasses and mugs in a box with cardboard dividers

If you’re packing glasses of the same shape and size, consider using box dividers. Place each glass upside down and pad any gaps with scrunched paper to ensure they’re snug in their slot.

When packing a box with different-shaped glasses, always place the heaviest ones at the bottom. Arrange the glasses in a layer on the bottom and fill in any gaps with padding. Add a layer of bubble wrap or scrunched-up paper before placing lighter glasses, such as wine glasses, on top.

5. Add a Protective Layer on top

Once you’re happy that all your glasses are secure, add another layer (or two) of cushioning to fill the box and ensure no glass will touch the lid. It’s important not to overfill, so make sure the lid shuts and doesn’t press down on the contents when closed.

6. Seal and Label the Box

Seal the box securely with packing tape. Write FRAGILE, ideally in bright lettering, on the top and at least one side. You want everyone to know these boxes contain fragile items, even when another box is stacked on top.


“Small or mid-size boxes are ideal — and the sturdier the better. Reinforced double-walled boxes provide the best protection.”


Also, if the labelling isn’t already on the box, make sure to draw arrows and indicate which side is up. You don’t want the boxes being turned onto their side or upside down. Don’t forget to help your movers by labeling which room the box is destined for.

Learn more on our How to Pack Hub.


FAQs About Moving Glasses

Should you pack glasses standing up or lying down?

It really depends on the style of glass. Some glassware sets can be packed upright, especially if using dividers. If you’re packing glasses of varying shapes and sizes, it’s better to lay them down. Whichever way you pack them, make sure you use plenty of padding to cushion and protect each and every glass.

Is it better to wrap glasses in paper or bubble wrap?

We (and moving pros) prefer wrapping glasses in packing paper rather than bubble wrap. Although bubble wrap is an essential part of the packing process, paper is more flexible and can be easily crumpled, folded, and shaped to fit individual glasses.

How to transport glasses without paper?

When you don’t have packing paper or newspaper, try using clothing, small towels, and other soft materials to cushion and protect your glasses. Socks (ideally clean ones!) are great for wrapping around wine glass stems, and slim highball glasses fit snugly inside thick socks. In addition to protecting your glasses, you’ll be packing two items at once (a piece of clothing and a glass), cutting down on space and reducing the amount of packing supplies needed.

How to Pack Dried Flower Arrangements

Author:

Publish Date:

Last Modified Date:

Category: Pro Packing Guides

Tags: Tags: , , , , , , ,

As you prepare to move, you may be wondering how to safely transport that dried flower arrangement you’ve kept since your wedding or graduation. These arrangements need breathing room to support their fragile structure while also staying secure enough to avoid shifting during the move.

It’s a delicate balance, but with some friendly guidance, you can become a pro at knowing how to pack your dried flowers for moving. This guide walks you through the entire process with an emphasis on carefully handling both the flowers and their container at every stage. That way, your delicate arrangements arrive in one piece and ready to display.


Step 1: Gather the Right Supplies

Paper Nest for Dried Flowers

We recommend gathering the right supplies early to help protect your flowers:

  • A rigid, sturdy box: Dried flowers need a strong outer layer to stay protected during transit. Dimensional arrangements that sit in a vase for a 360-degree view should travel upright in a deep, vertical carton. Flat arrangements meant to be viewed from the front should rest flat on their back in a shallow, horizontal box.
  • Packing paper: Use plenty of packing paper to fill spaces around your flowers for extra padding, but avoid direct contact. The texture may be too rough for delicate petals.
  • Tissue paper: Tissue paper offers a soft, gentle surface for dried flowers and helps absorb moisture to preserve their condition.
  • Bubble wrap: Bubble wrap creates a protective barrier inside the box, shielding your flowers from bumps, potholes, and uneven roads during transit.
  • Packing tape: Once your flowers are packed, secure the box with packing tape so everything stays contained and protected during the move.

When combined, these supplies create a shell that’s soft and padded on the inside, but tough and durable on the outside. It’s a win-win, and will get your flowers from point A to point B intact and ready to display.


Step 2: Prep the Container and Flowers

Packing a Dimensional Dried Flower Arrangement

After gathering your supplies, it’s time to package your dried flowers for transport. Keep these tips in mind as you prepare:

  1. Wrap individual stems or small bunches: Use tissue paper to gently wrap each flower or group of stems. This helps protect delicate petals and reduces the risk of breakage.
  2. Choose the right box size: The box you choose should be slightly larger than the arrangement, so the flowers fit comfortably without being cramped. A box that’s too small increases the risk of crushed branches, but a box that’s too big leaves room for the flowers to jostle around and risk damage.
  3. Double-check orientation: Make sure the box is constructed correctly and oriented right side up before placing anything inside.
  4. Line the interior: Start with a layer of bubble wrap on the bottom and sides to cushion the box, then add a layer of tissue paper on top of the bubble wrap to absorb moisture and offer extra padding.
  5. Create a nest: Fashion a paper nest along the bottom using loosely crumpled tissue paper. This gives your flowers a secure, padded spot to rest.

Pro Tip: If you’re traveling in hot weather, consider placing the box inside a cooler to help regulate temperature and protect the flowers from heat-related damage.

Should you spray dried flowers with hairspray?

Spraying dried flowers with hairspray can help preserve their shape and prevent dust buildup, but it can also sometimes leave a sticky or dull finish on the petals. However, it’s not a required step, and it isn’t a substitute for careful packing.


“Let anyone who’s helping you move know—verbally and in writing—which boxes contain fragile arrangements so they can handle them with extra care.”


So, if you don’t have any on hand, don’t worry. Our expert packing tips are more than enough to help keep your dried or artificial flowers safe throughout the move.


Step 3: Pack and Secure the Flowers in a Box

How to pack dried flower arrangements

Packing dried or artificial flowers requires delicate handling and a little strategy. Keep these tips in mind as you arrange and secure your floral arrangement:

  1. Consider flat vs. dimensional arrangements: As mentioned earlier, dimensional arrangements, like those in a vase with a 360-degree display, should stand upright. Flat arrangements designed to be viewed from the front should lie on their back.
  2. Limit empty space: After wrapping your flowers, strategically arrange them to minimize gaps. Then, use packing paper or bubble wrap to fill any remaining space, add cushioning, and prevent shifting during the move.
  3. Add support with packing materials: After your flowers are nestled in the box, use additional packing paper and bubble wrap to cushion the sides and top. These layers prevent shifting and absorb shocks during the move.
  4. Tie down the arrangement: For extra stability, poke holes in the box walls with a pen or pencil and thread string through to secure the center of the arrangement. Use 2–3 ties for flat arrangements and 4–5 for dimensional ones. Tape the string ends to the outside of the box to hold them in place.
  5. Label clearly and consistently: Proper labeling makes loading and unpacking much easier and helps prevent mishandling. We recommend adding a “fragile” tag and noting the contents. Learn how to do it right with our guide to color-coded box labeling.

Pro tip: Let anyone who’s helping you move know—verbally and in writing—which boxes contain fragile arrangements so they can handle them with extra care.


Step 4: Securely Transport the Box

Dried flowers can break or shed easily, so lift and carry the box carefully. Avoid sudden movements, tipping, or stacking anything heavy on top. Keep the box upright on a flat, stable surface—ideally separated from larger items that could shift during transport.

Temperature matters, too. Extreme heat or cold can cause brittleness or moisture damage. Whenever possible, transport your arrangements in moderate conditions to help preserve their shape and color.

Step 5: Delicately Unpack the Flowers

Once you arrive at your new home, ensure a vase is readily available. Always open the box right side up and place the flowers directly into the vase. The less you move or reposition them, the lower the risk of breakage or shedding.


“If you’re traveling in hot weather, consider placing the box inside a cooler to help regulate temperature and protect the flowers from heat-related damage.”


Next, carefully remove any tissue or wrapping, taking extra care not to tug or twist the stems. And there you have it—your dried flowers in your new home, safe and sound thanks to clear labeling, smart placement, and a gentle touch.

See prices for local moving labor. Read real customer reviews. Easily book your help online.

Packing, Transporting, and Unpacking Dried Flowers

Packing and moving dried or artificial flowers takes some thoughtful preparation, but it’s easy once you know all the steps: soft and supportive materials, clear labeling, and proper handling. With these, you can preserve every stem and petal, and enjoy your arrangement all over again.

How Do I Pack Glass Plates?

Author:

Publish Date:

Last Modified Date:

Category: Pro Packing Guides

Tags: Tags: , , , , , , , , , ,

One Plate, One Sheet of Paper

“Use plenty of packing paper” is one of the first rules of packing a kitchen. Pad the bottom of the carton.  Cushion the sides. Pad the top with more paper.

“And make sure you wrap those breakables up good!”

Of course. That means lots of paper in between all those plates and everything, right?

Nope. Not necessarily. (more…)

×

I'm Moving

Moving? Thinking about moving? Whether your move is off in the distance or you already have one foot out the door, you'll learn about everything you should expect through our useful how-to's, cool articles and much more. It's all specially curated for you in our "I'm Moving" section.
Explore
×

I'm a Mover

For rookies or veterans alike, our "I'm a Mover" section is filled with extensive industry news, crucial protips and in-depth guides written by industry professionals. Sharing our decade of moving knowledge is just one way we help keep our professional movers at the top of their game.
Explore