The Stuff That’s Illegal To Bring Into California

Author:

Publish Date:

Last Modified Date:

Category: Moving Checklists & Planning, Packing & Unpacking, Regulations

Tags: Tags: , , , , , , , , , , , , , , , , , , , , , , , , , , , , , , , , , , , ,

In 2024, California claimed the title of most-moved-to U.S. state according to the HireAHelper 2024 Migration Report, making up 6.9% of all American moves and 15% of all millennial moves. The Los Angeles area alone accounted for over 4% of all U.S. moves in 2024, so California’s entry checkpoints are busier than ever. That’s a lot of cross-country U-Hauls — and a lot of opportunities for one little pest or plant to slip through.

You’re not the first to wonder if your potted lemon tree or iguana can cross the California border. Before you load up for the Golden State, take a minute to make sure everything in your home or garden is welcome.

In this guide, we’ll cover wild and exotic animals, marijuana and alcohol, citrus and diseased plants, firearms and specialty weapons, and a quick legal checklist for newcomers.


Pets and Other Animals

California’s animal import rules aim to keep invasive species out, which you might think doesn’t apply to your cute pet. However, there are several exotics and other animals that don’t make the cut to cross California’s border. Penalties range from confiscation at the checkpoint to steep fines, and in some cases, criminal charges. Play it smart and review the restricted species list before you move to California.

Cats and Dogs Are (Mostly) Good to Go

If you’re a cat owner, you’re in luck. The California Department of Public Health doesn’t require any paperwork for felines, so they’re in the clear. For dog owners, your requirements are still pretty simple. All you need at the border is proof of up-to-date rabies vaccination. But don’t forget: Once you get here, California law says you have to license your dog or cat in your new city or county.

Exotic Pets? Not So Fast

Ferrets, hedgehogs, sugar gliders, many reptiles, and a surprisingly long list of birds, amphibians, and small mammals are a hard no in California — even if they’re perfectly legal in your previous state. The Department of Fish and Wildlife (DFW) in California keeps a thorough list of restricted animals, and yes, it’s worth double-checking.

If you’re not sure where your pet iguana (or bearded dragon or macaw) stands, do yourself a favor and check directly with DFW or your new county authorities.

Bringing Livestock? Get Your Papers Ready

Moving with horses, cows, goats, pigs, or poultry? The state expects anyone transporting livestock to show up with official health certificates and be ready for inspections at the border. The paperwork required for livestock is typically far more in-depth than that required for pets, so make sure you know exactly what you need long before you start transporting your animals.


Marijuana and Commercial Alcohol

If you’ve heard California is laid-back about weed and wine, you’re not wrong — but that’s only after you’ve passed the border. Interstate moves are under federal law, and those are a lot less permissive when it comes to alcohol and marijuana.

Marijuana

While it’s legal for adults over 21 to use marijuana in California, the second you cross the state line, federal law is king. It’s always illegal to transport any marijuana across state lines— and that includes gummies and vape pens.


“California’s agriculture industry generates over $60 billion annually and depends on strict controls to protect crops from pests and disease. Absolutely no citrus plants, trees, or even loose citrus fruit can cross into the state.”


If border agents spot your stash, they can confiscate it, fine you, or worse. There’s no shortage of dispensaries once you arrive, so skip the risk at the border.

Alcohol

Bringing wine or spirits for personal use? No problem — as long as you’re 21 or older, and it’s for yourself or your household. If you’re hauling a suspiciously large “personal” supply, expect questions. For anything commercial (selling, events, or business), you need a license from the California Department of Alcoholic Beverage Control. Get the paperwork in advance to avoid delays or fines.

Open Container Laws

California draws a hard line here, and officers will check. Here are the rules:

  • No open bottles, cans, or containers of alcohol or cannabis are allowed anywhere in a moving vehicle: This rule applies to everyone in the vehicle — not just the driver.
  • State Vehicle Code Section 23223(a): Even open alcohol in the passenger compartment is an automatic violation. Section 23222 covers cannabis.
  • No Trunk? If your vehicle doesn’t have a trunk, you must lock up any open container and place it completely out of reach.

Violating these laws can lead to fines or other serious penalties, so make sure your open bottles and other containers are safely stored and out of the way.


Citrus Plants and Diseased Plants

Thinking about bringing your favorite lemon tree, backyard apples, or that lush pothos hanging in your kitchen? California border officers don’t want to see those in your luggage — and for good reason.

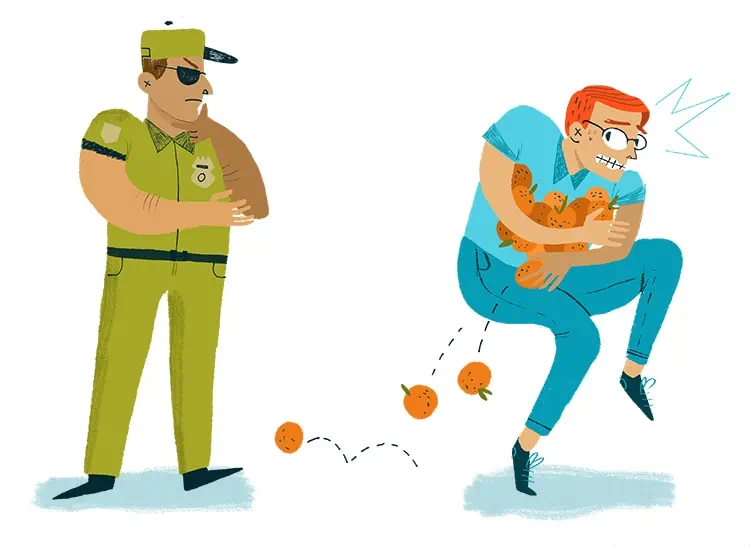
Citrus plants and fruit

California’s agriculture industry generates over $60 billion annually and depends on strict controls to protect crops from pests and disease. Absolutely no citrus plants, trees, or even loose citrus fruit can cross into the state. Lemons, limes, oranges, grapefruits, and kumquats are all forbidden, no matter how healthy or beautifully potted they are. If it’s citrus, leave it behind.

Other fruits, nuts, and vegetables

A long list of produce, including apples, peaches, mangos, potatoes, and various nuts, is also banned at the border by the CDFA. Look at it this way, if it’s from your backyard, a farmers market, or looks like fresh food, don’t pack it. Inspectors tend to err on the side of caution, and you should too.

Houseplants

The good news is that most houseplants in store-bought, sterile soil are okay. The bad news? Anything planted in dirt from your backyard isn’t allowed. As for worse news, inspectors will quickly confiscate plants with any signs of infestation or disease, no matter how attached you are.

The CDFA has a handy Q&A to help you make a final call about which plants you can bring into California. Just one rogue bug or spore could wreak havoc on California crops and ripple across the country.


Unregistered Firearms and Specialty Weapons

If you’re planning to bring your gun collection — or even just a single family heirloom pistol — into California, pause and make sure you’re following California law. The rules start the moment you hit the border, and yes, officers will check.

Anyone transporting handguns into California has three choices, per the Attorney General:

  • Register your firearm with the California Department of Justice using the official New Resident Report of Firearm Ownership form.
  • Sell it to a licensed dealer or, through them, to someone else.
  • Surrender it to law enforcement (i.e., the police or sheriff’s department).

You’ve got 60 days to handle this paperwork, but don’t put it off too long, or you might face a not-so-warm welcome.

There are also rules and regulations for how you should store and transport different types of guns. Here are some common models:

  • Handguns: You must unload and lock these in a secure container, not the glove compartment, not the center console — think a case with a lock and key.
  • Rifles and shotguns: You must also unload these during transit. Unlike handguns, you don’t have to lock them up, but keeping them secure is never a bad idea.
  • Assault weapons: Many models, such as AR-15s, AK-47s, or some tactical shotguns, are strictly banned. If you’re even slightly unsure, double-check with the CA DOJ or a local dealer before you move. Accidentally crossing the border with an illegal firearm can mean serious trouble, so don’t risk it.
  • Specialty weapons: The list includes nunchucks, cane swords, lipstick knives, brass knuckles — even some types of slingshots. If it sounds like something from a 1980s ninja flick, it’s likely on California Penal Code 16590’s do-not-bring list.

Still have doubts? Trust your gut and call ahead. Border agents really do appreciate it when movers do their homework.


Other Legal Things to Check If You’re Moving to California

Bringing your belongings into California is just the first hurdle. Once you arrive, the state’s legal clock starts ticking. Use the guidance below to make sure you don’t miss a deadline or rack up a single dollar in fines.

California Driver’s License and Car Registration

You’re considered a California resident for DMV and tax purposes as soon as you:

  • Accept a job in California
  • Rent or buy a home
  • Register to vote
  • Enroll your child in a California school
  • Claim a property tax exemption

You must apply for a California driver’s license within 10 days of establishing residency. And you have 20 days to register your vehicle.

Most vehicles require a California smog inspection before registration unless the car is a gasoline vehicle from 1 to 3 model years old (so 2022, 2023, 2024 models as of 2025), electric vehicles, hybrids, motorcycles, diesel under 8,500 pounds, or classic cars 1975 and older.

Law enforcement and neighborhood parking officers in California are on the lookout for out-of-state plates. Driving with them beyond your 20-day window is a ticket risk, and penalties can run between $100 and $250 or more per violation, plus late fees for registration itself.

California State Taxes

California’s individual income tax is progressive with 9 brackets, ranging from 1% to 12.3%. There’s an additional 1% millionaire’s tax on taxable income over $1 million, making the effective top rate 13.3%.

  • The average combined state and local sales tax is 8.85%, but some shoppers pay up to 10.75% in certain cities.
  • Property tax averages 0.68% of a home’s assessed value, but newer residents or recent buyers usually pay more than long-time homeowners.
  • If you bring a car you bought out of state within the last 12 months, you’ll owe use tax (at your local sales tax rate) when you register it.
  • Prop 19 has changed how homeowners can transfer their tax bases. If you’re over 55 or disabled, check if you qualify to keep your old property tax rate or transfer it to a new home.
  • California taxes most retirement income (pensions, 401(k)s, IRAs) as regular income at the same rates. Social Security benefits are not taxed by California.
  • If you plan to rent your home out or sell investments, California taxes capital gains as ordinary income, not at lower federal rates. The first $250,000 or $500,000 gain (for couples) on a home sale is exempt.

California Tenant Rights

California renters have more legal protection than in almost any other state. As a newcomer, it’s good to know:

Movehacks: How to Unpack and Organize Before, During and After You Open a Box

Author:

Publish Date:

Last Modified Date:

Category: Organization

Tags: Tags: , , , , , , , , , , , , ,

You’ve circled your moving date on the calendar, and now it’s time to pack. But wrangling everything from your toaster to your toothbrush can be daunting. How do you pack up your home while making the most of every box and keeping fragile items in one piece?

This guide walks you through the best packing shortcuts, from putting together an action plan to room-by-room moving hacks. These workarounds help you pack your kitchen, bedroom, and living room efficiently. You’ll stack and wrap like a pro, use every inch of space, and cut down on expenses. And because you organized your belongings before they went into the moving truck, it’ll be much easier to unpack and set up at your destination.


Hacks for Making Packing a Breeze

two people planning and talking about their move at a kitchen table. there are several packed boxes stacked to the left side of the shot.

Before you start packing, you need a plan so you’re not tossing things randomly into boxes. Not only does this not make the best use of the space inside the boxes, but packing haphazardly runs the risk of damaging your stuff. Use these moving hacks to pack purposefully and keep items accessible.

  • Number each box and track the contents in a spreadsheet or an app like Sortly. You can create QR codes for each box and link them to a digital inventory so you can scan boxes and immediately know what’s inside.
  • Assign each room a color and wrap colored duct tape around boxes for that room. You can see where boxes belong from afar and unload them quickly into the right space.
  • Keep the bolts, screws, and Allen keys in resealable plastic bags when taking apart a piece of furniture. Tape the bag to the furniture so the hardware and tools are at your fingertips when you reassemble, and you’re not wondering what piece a loose screw goes to.
  • Take full advantage of empty space by putting items inside other items. Put measuring cups and can openers inside a slow cooker (cushioned with dish towels), or place stuffed toys inside a laundry hamper.
  • Contain messes by lining boxes with plastic bags when packing liquids. This keeps spills from items like shampoo and lotions from seeping through.
  • Use suitcases for small but dense items like books and appliances rather than clothing, so you can wheel heavy items instead of lifting them.
  • Pack your vacuum cleaner, broom, and cleaning supplies in a wardrobe box. These boxes are tall, so they can easily fit appliances and tools with long handles. Place the box last on the truck so you can clean areas in your new home before putting heavy furniture down.

Hacks for a Low-Stress Moving Day

A man and a woman walk into their new home happily while carrying boxes

While efficient packing is important, the big day-of can also get pretty chaotic without a plan. Stay calm, cool, and organized on moving day with these sanity-saving hacks:

  • Create a comfort box as a reward after a tiring day. Fill it with snacks, wine, comfy clothes, and your favorite bubble bath for a relaxing unwind.
  • Freeze bottles of water. Tuck them in a cooler with your moving day snacks so they’re thawed and chilled when you need to hydrate.
  • Set phone alarms to remind you of things on your to-do list, like emptying the freezer or locking doors and windows.
  • Pack overnight bags as if you’re going on a trip. Include your toothbrush, pajamas, a change of clothes, medication, contacts/glasses, and your hair dryer so you’re ready for both bedtime and the next morning. Also, keep in mind your kids need their favorite stuffy, bedtime books, and night-light to ease the transition to their new surroundings.
  • Place items you’ll need right away — such as tools, bedding, and towels — at the rear of the truck so you don’t have to wait for them to be unloaded.
  • Use clear containers for essential items so you can spot them among the cardboard boxes.
  • Take a video walk-through of your home before leaving, documenting the condition of the walls, floors, and closets. Look for forgotten items, such as chargers, as you go.
  • Keep a laundry basket handy for the last-minute, miscellaneous items you’re taking with you but not packing.

Hacks for Decluttering Your Stuff

The less you have to move, the easier and cheaper it is. That’s why decluttering is such an important step. Lighten your load with these decluttering hacks and move only what you need.

  • Gather like items and evaluate them all at once. It’s easier to declutter when you see you have a dozen of the same USB cable or 20 coffee mugs.
  • Keep a bag for recycling, donations, and trash in every room. You’re less likely to take unneeded items if there’s somewhere else to put them while packing.
  • Shred papers and documents you no longer need, like school essays and utility bills. Not only do you free up space, but now you have plenty of packing paper to help cushion items.
  • Use up things in your freezer or donate unopened pantry items so you don’t have to move them. One good way to do this is to host a “moving” dinner party for your friends and neighbors.
  • Take photos of trophies, children’s artwork, souvenirs, programs, and other memorabilia. This can make it easier to let go of something that’s sentimental but takes up a lot of space.

Hacks for Saving Money While Moving

Packing supplies, movers, and other miscellaneous relocation costs can add up. And if you want to keep your belongings protected and easy to haul, there’s no avoiding buying some moving supplies.


“Before you start packing, you need a plan so you’re not tossing things randomly into boxes. Not only does this not make the best use of the space inside the boxes, but packing haphazardly runs the risk of damaging your stuff.”


But, you can keep your moving expenses in check with these smart workarounds.

  • Cut up old sheets for wrapping items, and save on the cost of packing paper.
  • Pick up blankets from the thrift store to pad furniture instead of buying moving blankets.
  • Check local Buy Nothing groups, as people often give away boxes and bubble wrap after they’ve moved.
  • Fill large, reusable shopping bags with non-fragile items, as they’re easier to carry than boxes. They don’t stack as well, but they’re significantly less expensive. Borrow bags from friends if needed, as people often have them sitting around.
  • Plan dinner ahead of time so you don’t order expensive takeout on moving day. Freeze a casserole and transport it in a cooler in your car. You can pop it in the oven at your new place while you’re setting up essentials.
  • Take apart furniture before the movers arrive to get things done more quickly.

Hacks for Moving Your Kitchen

A woman leans back, relieved and happy, against her kitchen counter. There are several boxes on the countertop behind her.

Your kitchen has an array of different items that can be breakable, expensive, or both. Here are shortcuts for packing up fragile or awkwardly shaped items in your kitchen.

  • Use socks to wrap and cushion glassware. Slide the sock over the bottom of a glass, pulling the edges of the sock up and tucking the material into the hollow.
  • Wrap knives in dish towels and secure them with rubber bands, or place them inside thick oven mitts.
  • Place flat items, such as trivets, cutting boards, cookie sheets, pizza stones, and cooling racks, vertically in a box.
  • Use paper plates or coffee filters to separate dinner plates to prevent scratching. Stack plates vertically in a small box, with generous cushioning in empty spaces so the plates don’t shift.
  • Pack cutlery trays in their entirety, wrapping them in a towel or stretch wrap to keep items in place.
  • Lay durable kitchen utensils such as spatulas and wooden spoons on packing paper and roll them up together, placing them flat in a box.
  • Distribute weight so boxes are easier to carry and the risk of collapse is lessened. Rather than filling a box with only heavy pans, replace some of them with plastic containers and whisks.

Hacks for Moving Your Living Room

Your living room has a lot of items you use often, and oftentimes expensive electronics like TVs, gaming consoles, and entertainment centers. Use these living room packing hacks to bundle up everything from devices to decor.

  • Tape remotes to the back of TVs, game consoles, and air conditioners. Or tape them inside the drawer of an entertainment unit or coffee table.
  • Wrap decorative items in pillowcases to prevent chipping and scratches.
  • Remove light bulbs from lamps and box them in a plastic storage container with plenty of crumpled paper.
  • Use painter’s tape to keep the glass in framed art in place in case of a crack. Place two strips of tape diagonally on the glass to make an “X.”
  • Place wrapped picture frames in large shopping totes to keep them right side up.
  • Take photos of how your electronics are wired before unplugging them. It helps to put different colored tape on each cord to identify it.

Hacks for Moving Your Bedroom

One man sitting on a bed instructs another to pick up a pillow from a nearby chair. There are several boxes already packed around them.

You spend the most time in your bedroom, so this may be one of the last rooms you pack up. Here are hacks for packing up bedroom essentials quickly and efficiently.

  • Repurpose a lidded ice cube tray to hold the rings and necklaces from a jewelry stand. You can also secure the lid with tape.
  • Place socks inside shoes and pool noodles inside tall boots to help footwear hold its shape during a move. Then slip plastic shower caps over the soles to contain the dirt.
  • Fill soft-sided duffel bags and backpacks with clothing and squeeze them into gaps in your moving truck.
  • Place lightweight items such as pillows in dresser drawers, then seal the drawers shut with stretch wrap. Because these items don’t weigh all that much, they won’t affect the weight of the dresser, vanity, or other furniture pieces you store them in.
  • Keep clothes on hangers and stack them into groups. Slip a trash bag over the clothes from the bottom up. Tie the drawstring firmly around the top of the hangers so you can put them directly into the closet in your new home.
  • Use old fitted sheets as mattress covers for short-distance moves. Place one sheet on each side of the mattress to keep out dirt. Even better — put a clean sheet on first so all you have to do at bedtime is pull off the protective ones.
  • Label boxes in order of priority for opening. The box containing your bedside lamp, alarm clock, and phone charger should be unpacked before out-of-season clothing items.

Moving Hacks Recap: You’ve Got This!

Moving doesn’t have to be a source of mayhem — our creative packing hacks help you get things done faster and more efficiently. Before you know it, you’ll be down to your last box and basking in the pleasure of bare closets and shelves.

Moving Box Sizes: The Complete Guide

Author:

Publish Date:

Last Modified Date:

Category: Moving Advice

Tags: Tags: , , , , , , , , , , , , , , , , , , , , , , , , ,

Moving box sizes vary widely, and choosing and packing the right size takes some planning. Carelessly tossing all your dishes into an extra-large box spells trouble when it’s time for the mover to load it, and the bottom gives out from the weight.

A typical moving box size is 18″ x 18″ x 16″ (medium-sized), with a volume of 3 cubic feet. These boxes work well for most household items, but sometimes they won’t be right for packing certain things. Toys, oddly shaped items, bulky blankets, books, and many other odds and ends probably won’t fare well in this box size.

When you’re moving, it’s best to use a range of box sizes and types to give every item the right protection and support. We break down everything you need to know, from standard moving box sizes to when and how to use specialty boxes.


Standard Moving Box Sizes and Dimensions

a stack of moving boxes under a window that are all of different sizes

Most average moving boxes come in small, medium, large, and extra-large sizes. Keep in mind that exact moving box dimensions and weight limits may vary, depending on where you buy them. However, they’re usually pretty close to the moving box size guide provided below.

Small Moving Boxes

  • Dimensions: 16″ x 12″ x 12″
  • Volume: 1.5 cubic feet (up to 65 pounds)

If you have small, dense items, such as canned goods, books, or tools that you want to pack together, a small moving box’s dimensions usually work well. They limit how much you can put in, keeping the weight manageable. They’re also great if you need to pack smaller items that go together, such as the contents of a drawer or silverware.

Medium Moving Boxes

  • Dimensions: 18″ x 18″ x 16″
  • Volume: 3 cubic feet (up to 65 pounds)

Medium moving box dimensions accommodate most common household goods. Just be careful not to overload them. They’re a top pick for kitchenware, decor, linens, medium appliances, toys, crafts, and office supplies.

Large Moving Boxes

  • Dimensions: 18″ x 18″ x 24″
  • Volume: 4.5 cubic feet (up to 65 pounds)

Large moving box dimensions are well-suited for tall, bulky, or oblong items that take up a lot of space. They’re great for clothing, desk lamps, heavy blankets, curtains, speakers, and small or medium electronics.

Extra-Large Moving Boxes

  • Dimensions: 24″ x 18″ x 24″
  • Volume: 6 cubic feet (up to 65 pounds)

Extra-large boxes are ideal for bulky but lightweight items, like bed comforters, pillows, lampshades, and winter coats. Just because these boxes can hold up to 65 pounds doesn’t mean they should be packed that heavy — overloading increases the risk of the box tearing or collapsing, and you should only be lifting boxes that weigh 40 lbs or less.


Specialty Moving Box Sizes and Dimensions

Not all moving boxes are structured the same. Some are made of corrugated cardboard for extra durability. Others have specialized sizes that make them useful specifically for one or two types of items, but they’re worth having on hand.

We’ve broken down the main specialty moving boxes and their common dimensions below.

Wardrobe Boxes

A wardrobe box and several other types of boxes sit near a wall

  • Dimensions: 18″ x 21″ x 46″ to 24″ x 21″ x 48″
  • Volume: 10 to 14 cubic feet (up to 100 pounds)

What they’re for: Clothes on hangers (coats, blouses, skirts, dresses, pants, suits, etc.)

How to pack them:

  • Pack a wardrobe box like you would a closet. Hang each piece of clothing on the box’s horizontal metal bar.
  • Use the bottom of the box for accessories like belts and shoes to maximize space and balance the weight of the box.

Alternatives: Plastic storage boxes or vacuum-sealed bags work well, especially for bulkier coats or winter garments. Or use pieces of casual clothing to cushion other delicate items in boxes.

Dish Pack Boxes

  • Dimensions: 24.125″ x 12″ x 11″
  • Volume: 1.85 cubic feet (up to 65 pounds)

What they’re for: Plates, bowls, glasses, coffee mugs, other cookware

How to pack them:

  • Cushion each item with bubble wrap or newspaper before packing.
  • Start with the heaviest, sturdiest plates on the bottom row of the divider. Then nest similarly sized dishes vertically in each slot, and pack each section tightly so the items don’t shift during transit.
  • Check out this kitchen packing video playlist, our detailed guide to packing dishes, for more tips.

Alternatives: A regular small or medium moving box works in a pinch. Just make sure you label it as fragile. Fill in all gaps so the items can’t move around and chip or break.

Glass Pack Boxes

a man packs mugs in a dish ware box

  • Dimensions: 18″ x 18″ x 28″
  • Volume: 5.25 cubic feet (up to 120 pounds)

What they’re for: Glasses, mugs, champagne flutes

How to pack them:

  • Wrap individual items in bubble wrap or foam sheets before packing.
  • Place a layer of bubble wrap across the bottom of the box for extra cushioning.
  • Insert items in their designated sections in the glass pack box.

Alternatives: Use a regular small or medium moving box, and make sure there’s extra cushion between the items if you’re not using a divider.

Picture Boxes

  • Dimensions: 37″ x 4″ x 27″ to 48.25″ x 4.31″ x 70″
  • Volume: 2.3 to 8.42 cubic feet (up to 65 pounds)

What they’re for: Photographs, artwork, mirrors, plaques, other framed objects

How to pack them:

  • Wrap each item in bubble wrap or a towel to protect the glass.
  • Place one wrapped frame flat inside the box. If packing more than one, stack them horizontally with the heaviest on the bottom, and use dividers or padding between each to prevent damage.
  • Fill in excess gaps to prevent shifting while moving.
  • Got an odd-shaped frame? Follow our guide to packing odd-shaped mirrors. The same process applies to artwork and other framed items.

Alternatives: If you don’t have boxes that fit the size or shape of your frame, wrap it in a foam sheet or bubble wrap. Use a heavy blanket to double-wrap the frame, then secure it with tape on the corners.

TV Boxes

a woman and another person off-screen readies a tv to put it in a box

  • Dimensions: 24.5″ x 6.125″ x 48.75″ to 48″ x 6.31″ x 88″
  • Volume: 4.2 to 15.42 cubic feet (between 45 and 120 pounds)

What they’re for: Televisions and large computer screens (between 32 and 70 inches)

How to pack them:

  • Take a photo of your setup before disassembling. Then, put all cables, remotes, and accessories into a big zipper bag.
  • Remove the TV’s stand or wall mount.
  • Wrap the screen in a foam sleeve, moving blanket, or bubble wrap to prevent scratches.
  • Place the TV upright on a flat surface. Slide the first half of the box over the top of the TV, then secure it with packing tape. Avoid laying the TV flat, as this can cause internal damage.
  • Use furniture pads, towels, bubble wrap, or other soft materials to fill out the gap between the screen and the box’s wall.
  • Slide the second half of the box onto the TV. Use packing tape to secure the sides of the box.
  • Check this guide for everything you need to know about packing and moving a TV.

Alternatives: Carefully wrap the TV with a thick layer of bubble wrap. Use foam cushioning on the corners, then double-wrap the screen in a heavy blanket. Secure the blanket with moving tape. Just keep in mind, this isn’t as protective as a box, so move with caution.

Electronics Boxes

  • Dimensions: 20″ x 20″ x 12″ to 24.5″ x 24.5″ x 27.5″
  • Volume: 2.8 cubic feet to 9.55 cubic feet (between 65 and 125 pounds)

What they’re for: Computers, game consoles, microwaves, stereo systems, and other electronic appliances or devices

How to pack them:

  • Remove all batteries or cartridges to prevent leakage and corrosion.
  • Place cables and other attachments in a zipper bag, then tape the bag to the appliance.
  • Protect the device in bubble wrap, foam sleeves, blankets, or other soft material.
  • Load the heaviest items on the bottom, then stack the rest on top for a tight fit to prevent shifting.

Alternatives: Because electronics are delicate (and expensive), sturdy boxes are highly recommended. If you’d rather skip them, standard 3-cubic-foot boxes or large cartons with plenty of cushioning also work.

Book Boxes

  • Dimensions: 12″ x 12″ x 12″
  • Volume: 1 cubic foot (up to 65 pounds)

What they’re for: Books, board games, photo albums, small picture frames, DVD collections

How to pack them:

  • Double-tape the bottom of your book boxes to reinforce them.
  • Add a layer of bubble wrap across the bottom for extra cushioning.
  • Sort books by size and pack books with similar dimensions together. Lay books flat with spines facing each other.
  • Fill any gaps with packing paper or bubble wrap. Then seal the box with tape.

Alternatives: Any box or plastic storage bin works well. Just stick to the smaller sizes to avoid overpacking. Keep in mind that while book boxes can often hold upwards of 60 pounds, regular cardboard moving boxes aren’t usually as durable.

Plastic Storage Bins and Totes

a stack of plastic storage containers in varying sizes

What they’re for: Cleaning products, office supplies, bathroom items, towels, linens, curtains, tools, miscellaneous accessories

How to pack them:

  • Plastic bins are durable and reusable, making them ideal for items you’d typically store in them post-move, like cleaning products or bathroom supplies. Just make sure to cushion the contents and seal any liquids in plastic bags to prevent spills or breakage.
  • Fold towels and linens and place them on the bottom. Arrange other items on top tightly to avoid excess room that allows for movement.
  • Reinforce the bin’s lid with moving tape.

Alternatives: Any kind of organizational container can usually substitute for a plastic storage bin. Metal or wood crates, wire baskets, and even spare suitcases, backpacks, or gym bags often fit these items just fine. In a pinch, you can leave lightweight items in your dresser or desk drawers and shrink wrap them shut, although this will make the larger item heavier to lift, so proceed with caution.

Plastic bins come in a wide range of sizes, making them incredibly versatile during a move. Whether you need something small to contain miscellaneous craft or office supplies or you want something large for holiday decorations, you can find a plastic bin that fits. Check out common volumes and their typical dimensions below.

Plastic Storage Bin Size Chart

Plastic Bin Size Volume Typical Dimensions (Height x Width x Depth)
Small 5 gallons 9.9″ x 13.2″ x 17.63″

8.9″ x 12.5″ x 17.1″

8.6″ x 12.3″ x 16.4″

Medium 12-20 gallons 12.5″ x 22″ x 16.3″ (12 gallon)

12.5″ x 26.9″ x 18″ (17 gallon)

16.25″ x 17.5″ x 23.75″ (20 gallon)

Large 20-40 gallons 15.75″ x 18.25″ x 23″ (20 gallon)

16.09″ x 21.92″ x 32.42″ (30 gallon)

16.4″ x 22″ x 38.2″ (40 gallon)

Extra Large 40-75 gallons 18″ x 21.37″ x 36.75″ (40 gallon)

23.2″ x 21.1″ x 46.5″ (64 gallon)

22.52″ x 23.71″ x 46″ (75 gallon)

How Many Boxes Do You Need?

a pile of boxes takes up every inch of the image's frame

Ultimately, it depends on how much you have to pack. If you’re a minimalist at heart or you have more stuff than usual, the number of boxes you’ll need might be more or less than what’s typically recommended by home size. Don’t be afraid to adjust based on your unique move and needs.

An easy way to estimate the number of boxes is to plan for 1 box for every 10 square feet of living space. It’s not a hard-and-fast rule, but it can give you a starting point. If you have rooms with more stuff in them, or if you’re packing in smaller boxes to cut down on weight, you’ll likely need more. You could also pick up a moving box kit to get started. Kits are usually packaged by home size.

If you need a general breakdown based on home size, read through the table below. It doesn’t include specialty boxes, like TV or wardrobe boxes. However, it’s a good starting point, and you can always pick up more boxes later if you decide you need them. In general, it’s better to have more boxes than you need than fewer.

Recommended Box Count Chart

Home Type Small Boxes Medium Boxes Large Boxes
College Dorm 2 5 2
Apartment 10 10 10
Small House (1 to 2 Bedrooms) 20 20 10-15
Large House (3+ Bedrooms) 25 35 15-25

What Are the Best Size Boxes for Moving?

The right size moving box depends on what and how much you’re packing. If you must settle for one size, medium boxes tend to work well enough for the vast majority of items.

Generally, it’s best to use a variety of sizes. That way, you can split your belongings in ways that make sense. For example, maybe you’re an avid reader with a home library. If you tried to shove everything into an extra-large box, it might fit and close just fine, but you’d want to think twice before trying to lift it. The weight would likely tear out the bottom, or be too heavy to move safely.


“In a pinch, you can leave lightweight items in your dresser or desk drawers and shrink wrap them shut, although this will make the larger item heavier to lift, so proceed with caution.”


On the other hand, trying to shove lightweight but bulky items (like towels) into small boxes creates its own issues. You’ll likely be left with far more boxes to move than if you’d chosen a larger option.

Review the chart from the previous section to help you choose the right assortment of sizes based on your home size.


Tips for Choosing and Using the Right Size Boxes

To help you decide what the right box sizes should be for your move, consider these tips:

  • Try to keep boxes 40 pounds or under each, regardless of dimensions or how much the box is rated to hold. This prevents strain while lifting and reduces the risk of the box’s bottom falling out. If you think a box looks overloaded or if it’s heavier than 40 pounds, split up the items. It’s better to have two smaller boxes filled correctly than one big box that’s difficult to move.
  • Choose specialty boxes when they make sense. They usually offer better protection for those specific items, so they’re a good investment, especially if you have things like work clothes, paintings, or electronics that would benefit from the extra care.
  • Pack fragile items in the smallest boxes they’ll fit in with plenty of padding. They’ll have less room to move around, making it less likely they’ll break.
  • Leave extra-large boxes for big items that can’t be broken down or for large, lightweight items like comforters and pillows. Everything else should go into small and medium boxes, which are usually easier to move.
  • Choose a plastic storage bin instead of a cardboard box if you’re packing liquids like cleaners or food products. That way, if something leaks, it won’t disintegrate the box.
  • Consider looking for free moving boxes. While this is great in a pinch or if you need to keep costs low, it’s often recommended to buy new moving boxes. They don’t have the wear and tear that could leave them prone to breaking.

A Jumbo Guide to Moving Really Big Stuff

Author:

Publish Date:

Last Modified Date:

Category: Pro Packing Guides

Tags: Tags: , , , , , , , , , , , , , , ,

Do any of you guys have scars that remind you of something? Something crazy you did? Some incredible, life-affirming moment you experienced?

I do. Sort of. I have a scar on my chin that reminds me of a refrigerator, a hand truck and a set of stairs.

When it comes to moving heavy appliances, some things are not so obvious – until of course you get hit in the chin. This month we go over a few things to know before you start wrangling with that big shiny fridge.

(more…)

×

I'm Moving

Moving? Thinking about moving? Whether your move is off in the distance or you already have one foot out the door, you'll learn about everything you should expect through our useful how-to's, cool articles and much more. It's all specially curated for you in our "I'm Moving" section.
Explore
×

I'm a Mover

For rookies or veterans alike, our "I'm a Mover" section is filled with extensive industry news, crucial protips and in-depth guides written by industry professionals. Sharing our decade of moving knowledge is just one way we help keep our professional movers at the top of their game.
Explore