Packing Shoes the Right Way

Author:

Publish Date:

Last Modified Date:

Category: Pro Packing Guides

Tags: Tags: , , , , , , , , , , ,

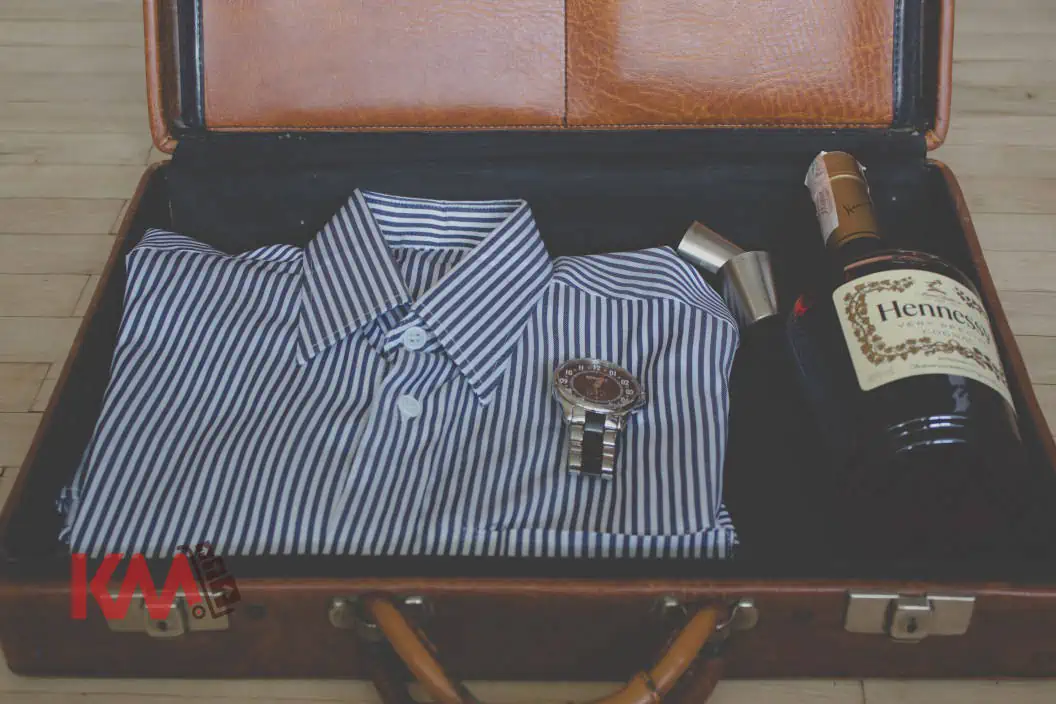
There are two basic ways to pack shoes.

  • Line a carton with paper, drop in a pile of shoes, tape the box shut and mark it with a big fat “SHOES” sticker
  • The right way

Even if the customer’s stuff will only be in boxes for a few days, improperly packed shoes can come out ruinously misshapen. Here are a few tips to prevent this from happening.

Before the Pack

shoeskevinbefore-copy

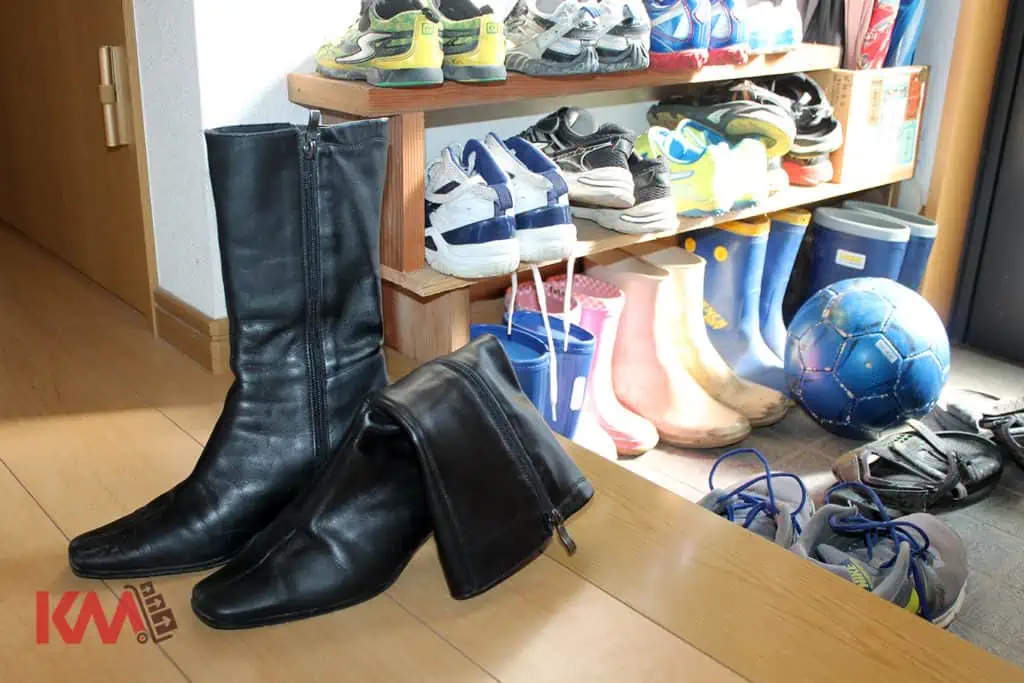
We’re basically talking about shoes here, not sneakers. But whatever the case, a few preventative measures should be considered:

  1. Pack only dry shoes. Moisture can do bad things, particularly to suede and leather. But mold? It can make even the king’s cross-trainers smell.
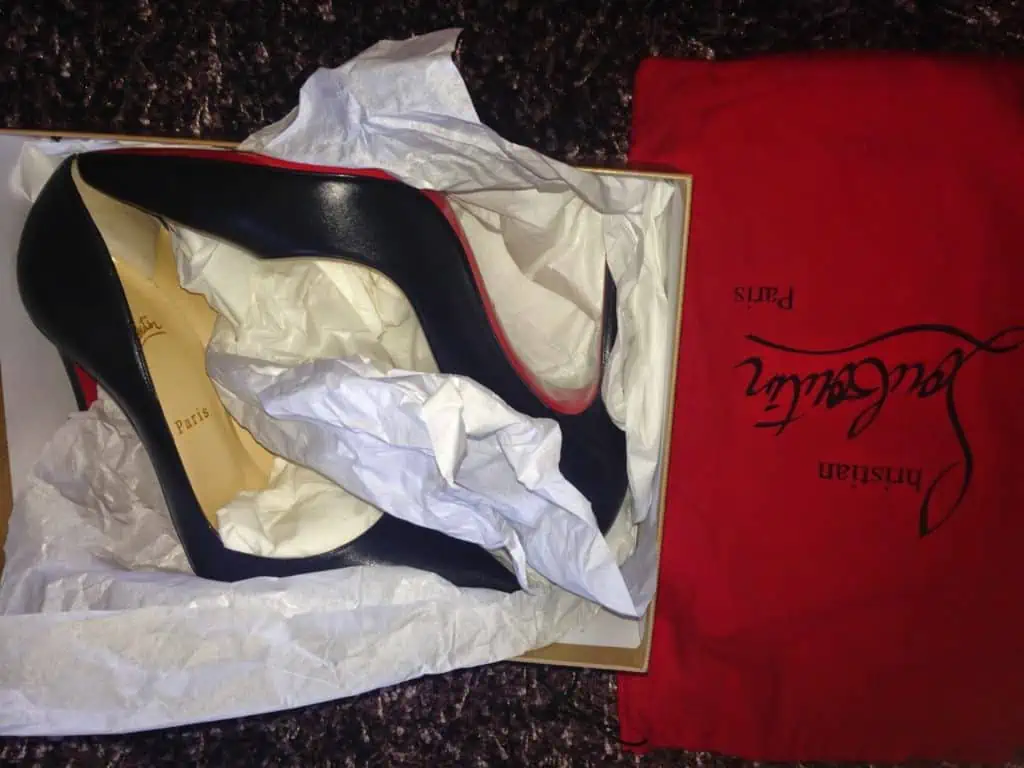
  2. You know those balls of tissue in the toes of the shoes in the shoe store? They’re not there just to annoy us. Besides helping a shoe maintain its shape, some balled-up paper can absorb any residual moisture that might be lingering. Pro Tip: Consider using socks for this.
  3. Wipe those nice shoes clean. No need to set up a shoeshine booth, but dust and dirt can mar a shoe’s surface over time.

For the Pack

010
https://simplystyledbyemma.blogspot.com/

Now that we’ve taken measures against moisture, mold and marring, our prime concern is to make sure our customer’s shoes don’t get crushed.

  1. When possible, pack shoes in their original boxes. The nicer the shoes, the better the chances the customer will still have them. Regardless, it’s still a great idea to wrap them in paper to keep them from rubbing and scuffing each other. When enough paper is used it prevents that shoebox from getting crushed.
  2. Unless you’re packing (a) long-legged boots or (b) Shaquille O’Neal’s size 23 Nikes, one sheet of packing paper should be enough not only to adequately cover both shoes but to provide enough excess to form some protective padding for your bundle. Roll up one shoe, then the other in order to keep them separated – no need to be a neurosurgeon here but keeping the left and the right off each other is good practice. Note that some sources suggest wrapping shoes with their soles touching, others with the soles out. We lean toward putting the soles in against each other.
  3. Start with a cushiony layer of paper at the bottom of the carton. Usually a 3-cube works for packing shoes but a 4.5 will work too. Either way, those shoes at the bottom will want a bit of protection underneath. A layer of paper between layers of shoes further protects against crushing.
  4. Pack shoes on their sides to allow the soles to add some support and integrity to your carton. Form a layer of bundles of shoes on top of a layer of packing paper. Generally, heavier shoes go at the bottom. However, boots (those ladies’ long dress boots, not bad weather boots) can suffer creases in those long leggy parts if there are several bundles of shoes on top of them. Pack these items on top, again making sure there is paper separating them.
  5. Dress sandals and open-toed shoes are particularly susceptible to being misshapen. While less critical, sneakers and summer sandals (i.e., flip-flops) should be shown at least some degree of care.

A Final Word

Moving across town might not demand the same amount of care as a long distance multi-day move that involves storage. Good old common sense goes a long way and saves precious time. But with a customer’s pricey shoe collection we can never be too careful. Replacing those wingtips or stilettos might not be impossible, but getting all bent out of shape is a hassle the customer would undoubtedly like to avoid.

Packing an Oil Painting: Slick Tips

Author:

Publish Date:

Last Modified Date:

Category: Pro Packing Guides

Tags: Tags: , , , , , , , ,

[Synopsis: Packing higher-end art calls for special materials and top-notch techniques.]

We come across large picture frames and mirrors often enough to know how to pack them. Wrap them in newsprint – or better yet, large sheets of kraft paper or that brown paper the big guys always have on hand. Grab a mirror carton or custom-size a box and pack the corners with packing paper and tape it up well.

Nothing to it, right?

But the day may come (if it hasn’t already) when we come face to face with an oil painting. We may use the same brown paper process and come away unscathed, but there are a few tips and tricks we can employ to keep that piece of art in prime shape, maybe even impressing our customer in the process.

Our Weapons of Choice

For the specialized packing we are about to attack upon we’ll need a few things we might not normally have on hand:

  • Bubble wrap
  • A mini roll of plastic wrap (on a handy-dandy dispenser)
  • A locking tape measure
  • Some large sheets of foam board
  • A knife to cut them to size

For that ultimate professional touch, we’ll arm ourselves with a couple of new weapons, namely artist tape and a type of water-resistant, grease-resistant paper called Glassine. And, as the guys in the following two videos prove, the ability to wield a tape gun can really come in handy.

Food For Thought: Video #1

In this first videoour host tackles his oil painting pack job by using foam board and a mini roll of shrink wrap to make what he calls a painting sandwich. Pretty slick, ay? (Start at the 2:35 mark. It goes to about 3:50.)

Note: Our painting sandwich maker uses peanuts for protection – and makes a decent mess of things. We suggest sticking with packing paper.

Mega-Supplies: Video #2

The host of our second video is a real stickler for protection. But so are his customers. First, he breaks out his Glassine at about the 1:23 mark. To keep it in place he uses artist tape rather than packing tape or even masking tape. Watch from the 1:43 mark to hear the (probably obvious) reasons why.

Done with the Glassine, he turns to his massive stash of bubble wrap, keeping the flat side against the surface of the painting. And he uses PLENTY of the stuff, in two different bubble sizes! We may not need to go nearly as crazy – unless our customers want us to. Ask them ahead of time.

For glass frameworks of art, our hero puts strips of artist tape right on the glass, to prevent damage to the art should the glass crack or break in transit.

Finally, at about 14:50 he talks about putting cardboard corners on before the bubble wrap. He also ensures the safety of the piece by placing a piece of cardboard over the front/glass side.

Note: He does admit that not all of us will have mountains of the stuff on hand, and suggests at the 6:25 mark using sheets of Styrofoam. Again, this is an option – but so is our packing paper.

Wrapping Up

We may or may not encounter a customer with fine artwork. But they do exist, and what if those people are looking for someone who knows how to handle their oil paintings or other expensive paintings? If you have that skill on your list of offered services, you may just get the call over someone else.

How to Pack Wine for a Move (Like the Pros)

Author:

Publish Date:

Last Modified Date:

Category: How To Pack, Pro Packing Guides

Tags: Tags: , , , , , , , , , , , ,

[Synopsis: Packing wine obviously requires care. Here we go into a few important particulars.]

Customers will sometimes wonder: Can wine be safely and legally transported? The answer, of course, is yes! But there are a few things that both we and the customer should know about all those bottles of red and white adult juice.

5 Tips for The Mover

wine-426463_1920 copy

  • Wine is heavy. 12 bottles will weigh around forty pounds. Not only need a book carton, but a new one is strongly suggested.
  • Strengthen that carton. Use plenty of tape on the bottom. Those bottles will also put pressure on the carton in a way books won’t. An extra piece of (corrugated) cardboard adds strength as well as a little more cushioning.
  • Since glass is much stronger when kept vertical it seems logical to pack wine upright in the box. But some people (including Mayflower) advise laying those bottles down to keep the corks moist (particularly salient with expensive-side red wine). Others (like the folks at FlatRate) say transporting reds upside down is best “to ensure that the corks stay wet and sediment remains undisturbed.” (This after disturbing the sediment by rolling each bottle in packing paper.) We suggest packing bottles of wine upright, with a caveat in Customer Tip #1 below. However, Mayflower says (without explaining why) that sparkling wine and champagne should always be transported upright.
  • As with plates and glasses in a dish pack, wine in a book box should be packed tightly. In addition to that extra piece of cardboard at the bottom, some extra packing paper might work although crumpled paper makes for an uneven surface and may make the tops of the wine bottles sit higher than the top of the box. A dish towel or two might be the better bet. Dividers (sometimes called ‘wine cells’) can lend vertical strength to the carton (especially if the wine bottles are significantly shorter than the carton) but if they aren’t packed tightly the carton loses some horizontal integrity. Adequate amounts of packing paper, around and in between the bottles, is critical whether we use dividers or not.
  • Filling in the spaces between the skinny bottle necks is particularly important along the sides of the carton, but to support the top layer of packing paper (or dish towels) it’s a good idea to be generous with the newsprint.

5 Tips for the Customer

photo-1441035430039-1c421470b6c01 copy

Moving to the next town, or even the next state, may not pose problems for a box of wine in the back of a truck. But for longer periods of time due to a long-distance move or a long period of storage, there are a few things the customer might consider.

  • If your wine has been packed upright, it might be a good idea to lay that box on its side overnight or when it goes into storage, to keep those corks moist.
  • Extreme temperatures can ruin a good bottle of wine. Consider climate control during transport if that is an option, or think about keeping that box in the car or the cab of the truck to guard against the summer heat or the winter chill.
  • If moving out of state, check for laws regulating how much wine or other forms of alcohol can be transported across state lines.
  • Allow wine to sit for a week after being transported. If you doesn’t want to wait that long to crack open a bottle to celebrate finishing your move, go out and find a liquor store in your new neighborhood since hey, you’re probably going to want to know where it is anyway. (Just saying.)
  • If you’re supplying your own boxes, the local liquor shop is a good place to find some good wine cartons, complete with those dividers.

One final point: Packing and transporting uncorked bottles of wine – or any bottles that have been opened – is risky for obvious reasons. The safer bet is for the customer to finish off any opened bottles (preferably before the day of the move) or give them to their neighbors or friends who will likely be happy to help with at least THAT aspect of the move.

Keeping Print Photographs Protected

Author:

Publish Date:

Last Modified Date:

Category: Pro Packing Guides

Tags: Tags: , , ,

When was the last time you bought a roll of camera film? When was the last time you even saw a roll of camera film? About the same time you last used a pay phone maybe? But do you also have – in an old album if not in a shoebox in the back of a closet somewhere – a bunch of old print photographs that you just can’t get rid of? So do some of our customers. Today we go over a few tips on taking care of those irreplaceable, ancient keepsakes.

Photos Already in Albums

…are the easiest to pack – usually. But there are a couple of things to watch out for.

Like books and papers, photo albums fare best when they are placed flat in the carton. Unlike books and papers, photo albums contain materials – like the photos and their plastic sleeves – that can become hopelessly stuck together under certain conditions: pressure from having an apartment’s worth of furniture and books on top of them along with extreme temperatures and humidity.

To keep the pressure off them, pack photo albums in something other than a book box. In between sweaters and t-shirts in a 3-cube isn’t a bad idea – as long as you mark the carton properly. Guarding against the elements can be a tougher proposition. Mention to your customer that environmental factors can affect their photos, and if they are concerned about the weather or the time their photos will be in storage suggest climate control for their storage unit and a general awareness while they are in transit. If conditions outside – and thus inside the back of the truck – begin to get extreme, taking those packed up photos to a milder environment couldn’t hurt.

A Few More General Tips

Packing Photos in a Shoebox for a Move

Avoid stacking unprotected pictures – in those aforementioned harsher conditions, even if they aren’t all that harsh, those unprotected photos can easily stick together and be ruined. Suggest to the customer (even if they’ve had those photos in a shoebox since the last time they saw a pay phone) that separating their photos with packing paper is a great way to help keep them protected from the elements – though doing this with even just one shoebox of photos can take a load of time. Tell them you’d be happy to do it, of course, but also remind them that they are paying you by the hour.

Avoid wrapping photos (or photo albums) in plastic – the possibility of trapping moisture resulting in mold is too great.

If you have a habit of using foam peanuts when packing certain items, avoid using them for packing photos and photo albums. The peanuts and particularly the crumbs can get static clingy and are a pain in the neck to have to pick off all the photos and their plastic housings.

For those special photos your customer wants to take particularly good care of, consider placing them in between the pages of a hardcover book – between pieces of packing paper as older books’ ink might rub off and the glossy pages of newer books, not to mention those big coffee table picture books, can wreak havoc on a photo, especially in hot and humid conditions.

* Note: Most types of packing paper are acid-free and lignin-free…which is good news for those photos.

Packing Photos in Frames

Yes, we do it all the time, with rarely a nick or scratch. Be aware, though, that the glass of the frame actually makes a photo more vulnerable to damage, not less, and if the frame seems delicate or the glass thin and fragile it is always an option to take that extra-large family portrait from 2002 out of the frame and pack it separately.

Preserving Those Most Precious Photos

If no digital copy of the last photo ever taken of your customer’s dearly beloved Grandma exists, suggest scanning it and creating a digital file, along with any other treasured photos that have no digital counterpart. When packing such photos, if they are not in frames or otherwise fully protected, it shows extra care if you wear gloves to keep the oil on your hands from damaging the photographs.

Packing Digital Photos

Okay, we don’t exactly pack digital photos. But we do pack the devices they are stored on. Packed correctly, these devices and thus the pictures stored in them should arrive safe and uncorrupted. But occasionally things happen. Even people who are not in the middle of moving have seen their external hard drive crash.

Two ways to help prevent the loss of all those gigs of images: Suggest a backup on another external hard drive (nothing groundbreaking here) or (maybe more helpful) uploading their archives to a cloud storage site. Using a cloud service (like Dropbox, Windows SkyDrive, Apple’s iCloud) will incur a monthly charge for anything more than a couple of gigs. Online photo storage website Flickr offers 1,000 gigs of free photo storage. Shutterfly offers unlimited photo storage for the same low price.

Your customer may be fine with a shoebox full of stacked and unprotected photos. But for everyone else, a few preventative measures can help preserve a lifetime of memories.

How To Pack Wardrobe Boxes

Author:

Publish Date:

Last Modified Date:

Category: Pro Packing Guides

Tags: Tags: , , , ,

How To Pack a Wardrobe Box

Basic Bits & Pieces of Gold

We know a lot of you guys have been around a while. Long enough to know the ins and outs of properly packing a wardrobe box, right? But like everyone else we are always looking for more of those priceless bits of wisdom.

This month we thought we’d go over some of both – some basics of wardrobe packing along with a few bits of gold worth sharing.

Packing a wardrobe box: Basics & Gold

B – Keep your wardrobe carton flat until you get it to the place you’ll be filling it up. Setting up all your wardrobes in the hall may seem like a time-saver at first, but maneuvering them through doorways, around corners and among furniture and other boxes can be more than a bit of a hassle and potentially damaging. Plus they can really get in the way.

G – Tape the bottom of that wardrobe well, sealing up all the edges. Wardrobes usually end up on the floor of the truck – right along with any dirt, dust and (in a few cases) strange liquids. The clothes hanging in that wardrobe might not be touching bottom, but some things will when we follow this next basic bit…

B – Look for light items to place at the bottom of the box, to fill up all that empty space. Pillows, blankets, comforters and other similarly bulky and relatively light items are perfect for this.

G – Find these light, bulky items and place them in the wardrobe before hanging all those clothes in there.

B – Don’t go crazy trying to cram in as many shirts, blouses, suits, dresses and coats as you possibly can. It will all just end up wrinkled, totally defeating the purpose of the wardrobe.

G – Another reason not to go crazy: That bar is only going to hold so much weight. If that bar caves in the entire carton starts to go down, right along with whatever’s on top of it.

B – Once you’ve finished packing up and you close the flaps at the top, press the exposed ends of the wardrobe bar inward, to keep its edges from catching onto and possibly damaging something like a door jamb, another carton or your crew guy’s hand.

G – Take your damage prevention a step further and tape over these edges so that door jamb or carton or crew guy’s palm will slide right over, no damage done, no splinters and no blood spilled.

And the B & G of taping around the sides of your finished wardrobe, up near the top.

B – The flap on the front of the wardrobe that opens wide so we can get all those clothes in there will usually end up folded underneath the side flaps. This means there isn’t much to support that front top edge. Extra tape around your wardrobe like a LeBron James headband can help keep that side in place, preventing a slow implosion.

G – Run that headband over those bar ends (i.e. LeBron’s ears) and over the tape already there from sealing the top. This will help even more in keeping those suckers covered – and keep your crew’s hands intact.

As always, we welcome your personal golden nuggets of packing knowledge. Got any to share?

×

I'm Moving

Moving? Thinking about moving? Whether your move is off in the distance or you already have one foot out the door, you'll learn about everything you should expect through our useful how-to's, cool articles and much more. It's all specially curated for you in our "I'm Moving" section.
Explore
×

I'm a Mover

For rookies or veterans alike, our "I'm a Mover" section is filled with extensive industry news, crucial protips and in-depth guides written by industry professionals. Sharing our decade of moving knowledge is just one way we help keep our professional movers at the top of their game.
Explore