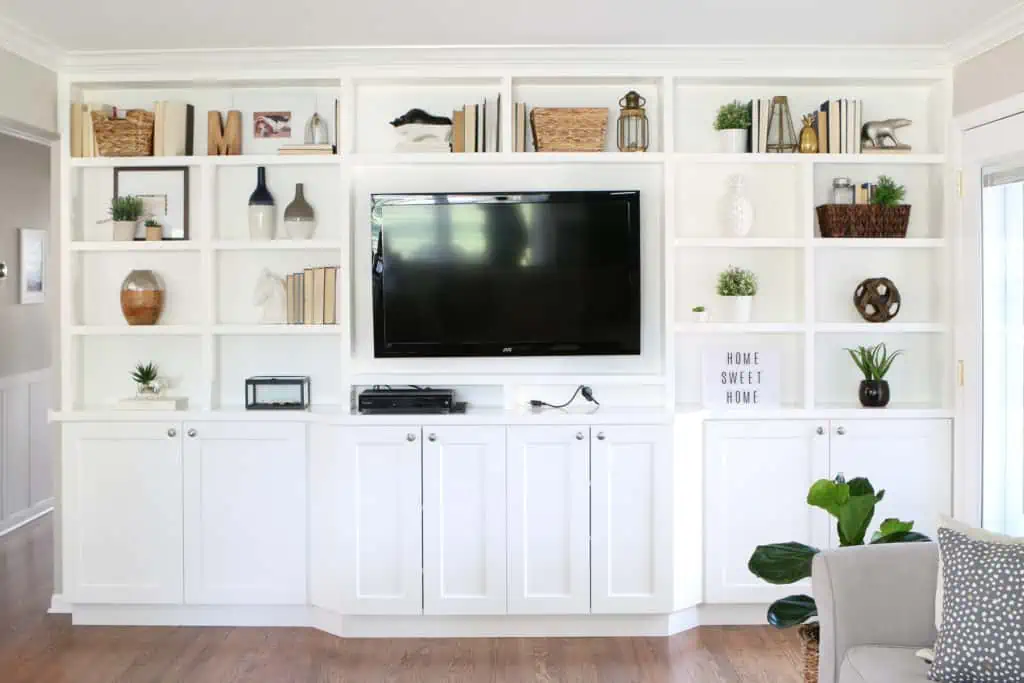
Usually, if you have a shelving display in your home that you absolutely love, chances are it has taken you quite a long time to arrange and re-arrange the decor to get it “just right”. Now it’s time to move, you’re taking the shelves with you, but you don’t want to lose the successful setup you have worked so hard to perfect, right?
The great news is that we have a super simple moving hack that will not only help you preserve this treasured look but will also make unpacking it in your new place a breeze. Allow us to explain.
Create a Numbering System
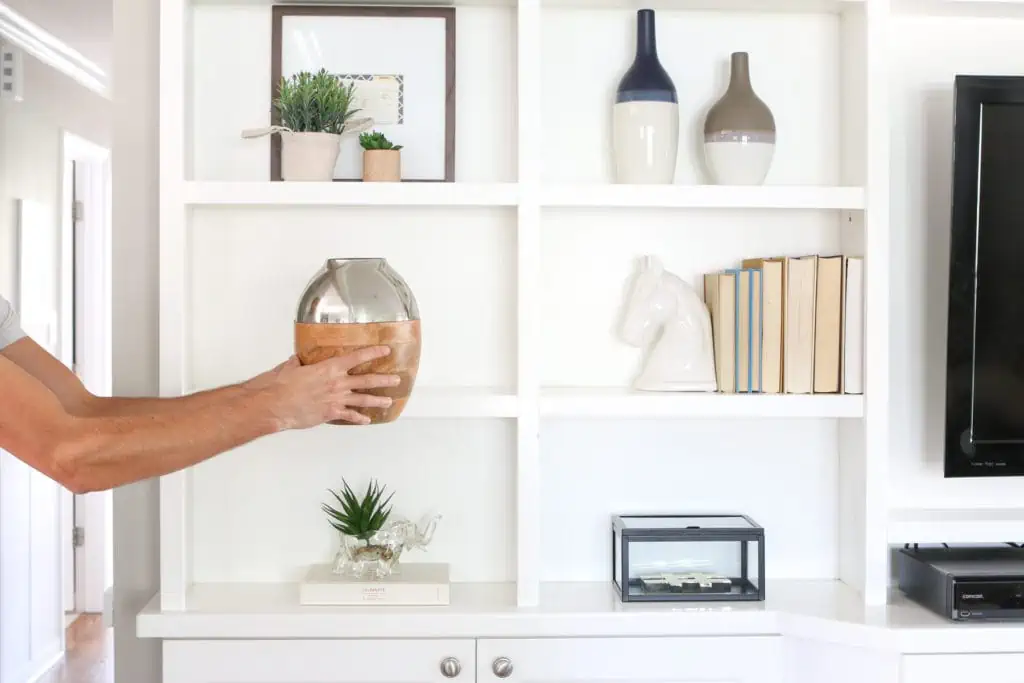
The first thing you have to do is create a numbering system for your shelving unit. You can use any method you want and don’t need to make a fancy graphic like this, you just have to make sure you remember which shelf corresponds with what number. Some may be able to easily memorize the number system, but if you’re not confident in your ability to do that, you can always put a piece of painter’s tape on each shelf with the corresponding number so you remember. This trick will take about 1 minute and won’t damage the shelving unit at all.
Start Emptying Your Shelves
The next step is to start emptying your shelves and carefully wrapping the items to eventually add to a moving box.
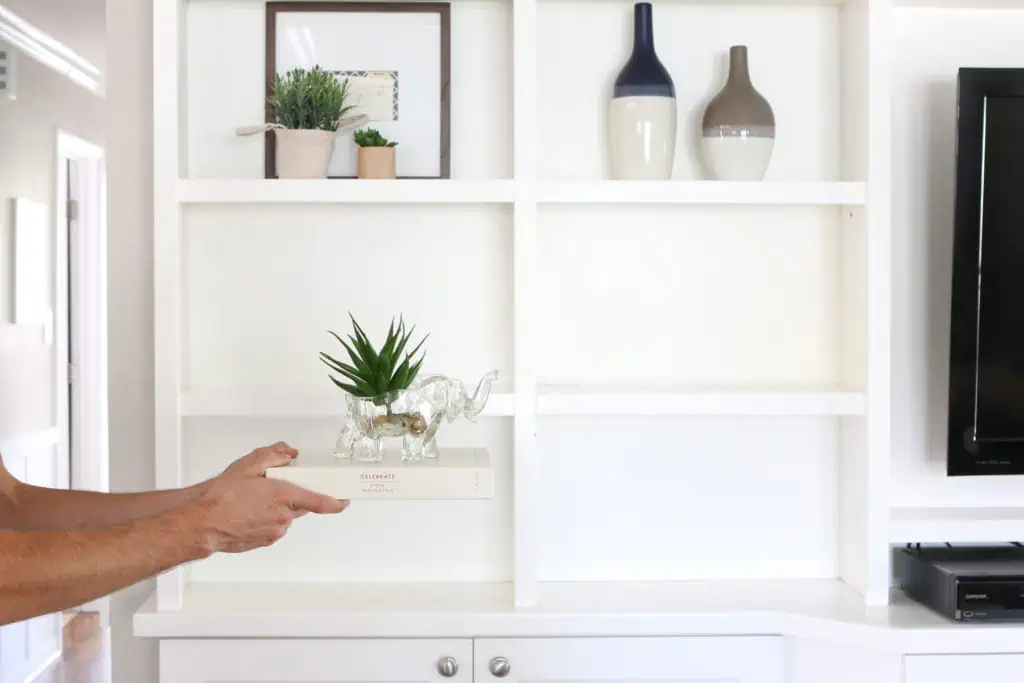
But the trick of this moving hack is to take careful note of what you are removing from each shelf as you start packing each box. Carefully wrap and box the items like you would normally do, but try to keep as many of each shelf’s contents together in one box. For example, the grouping of books, the picture frame and planter in box #4 should all make their way into the same moving box.
5 Sweet Garage Upgrades That Up Your Home’s Value
Garage additions and upgrades like the five in this list can produce an estimated 65 percent return-on-investment.
Pack and Label
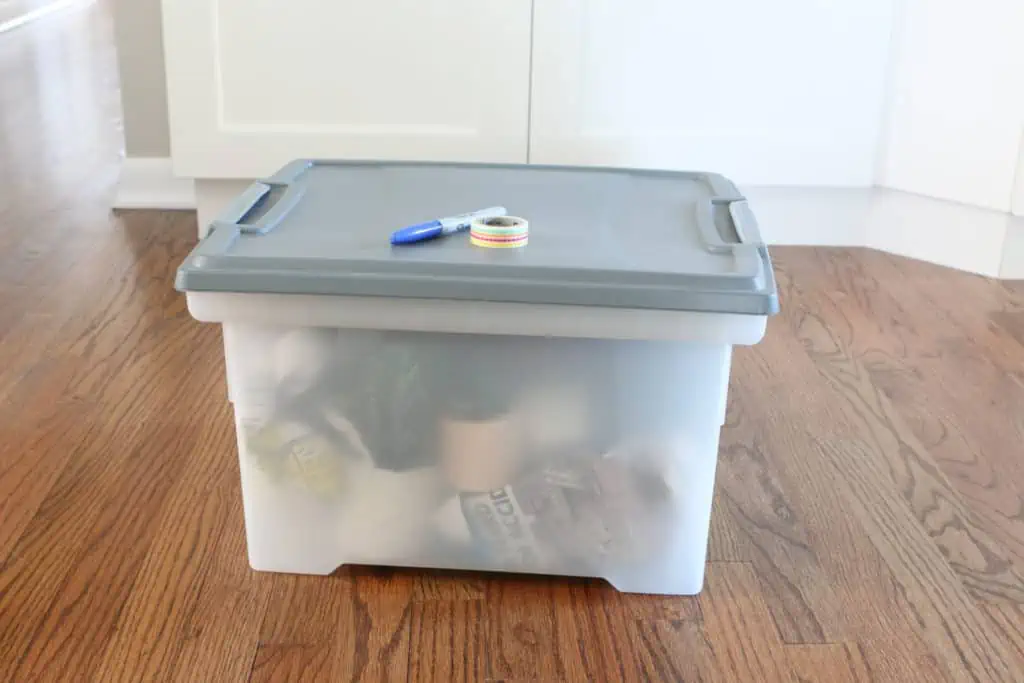
Each of your moving boxes can hold far more than just one shelf’s contents. So feel free to add several of your shelves’ decor into one moving box, just be sure that each shelf’s decor stays together with its counterparts.
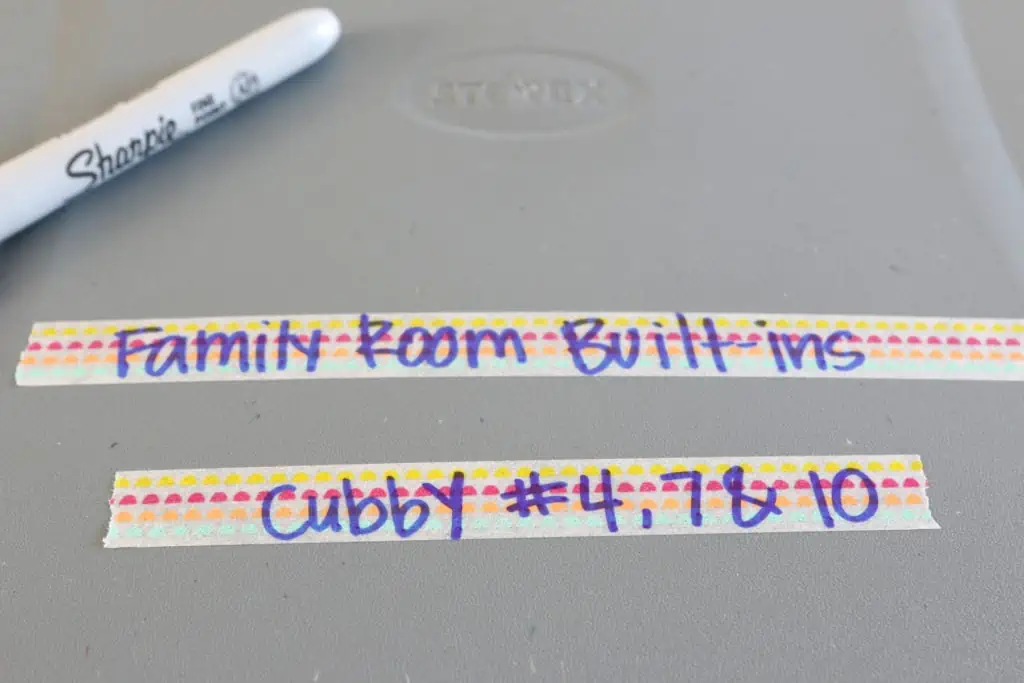
After you fill up your moving box, assess what shelf decor is inside of it. In my case, I added the decor from Shelf #4, #7 and #10 into this box so I simply noted that on the top of the moving box. This way I know that when it’s time to unpack this box and refill this shelving unit at my next house, I know exactly where to put this decor in order for it to look just like it did before!
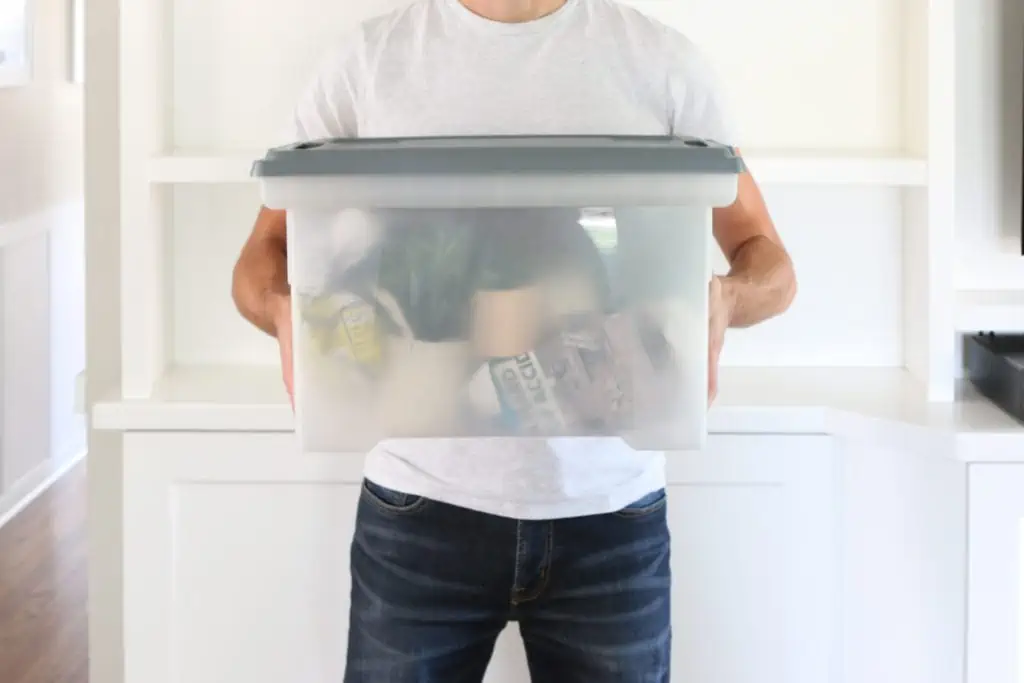
Repeat this packing/labeling process over and over again until your shelving unit is emptied. You should be left with a pile of moving boxes with clear labels and a precise plan on executing this look at the new house.
All you have to do in the new house is set up the shelves and simply place each item right back in the place it used to be. You don’t have to waste time trying to remember what goes where because those labels will take the guess-work right out of it, making unpacking these boxes in the new house a total breeze!
Safe & No Sound: How and Why to Pack Household Batteries Correctly
So you’re packing up someone’s kitchen and you reach for the wall clock. First thing you notice is how long the pack job is taking. (Time flies when you’re having fun, right?) But then as you take that clock off the wall you hear it ticking softly and you think “Oh. Battery.”
And it’s not just the clock in the kitchen. So many things in a house that take batteries. Most of these items aren’t running – the flashlights, the handheld games, the remote controls for the TV, the toys and that drone that’s mostly illegal – so you won’t be draining their batteries if you leave them in. Unless of course a switch gets flipped or a button gets pressed in that carton packed full of stuff and something ends up turned on for the duration of the move. (I’ve had plenty of situations, including packing my own kids’ stuff, where something in a box starts making all sorts of noise and I have to dig the culprit out and shut it off and repack it.)
When you see batteries while packing
But what to do with the battery in that clock, and the batteries in all the other items you don’t want running while they’re all packed up?
Take out the batteries and put them back in backwards. From a convenience, as well as a loss-prevention standpoint, this makes sense. But there are those who say this is not a good idea. These people usually use a lot of terms and offer explanations that are entirely Greek to most of us, so to be on the safe side for a move longer than a couple hours, we might want to just skip to our second option.
Yes, take out the batteries and pack them separately. Which doesn’t necessarily mean in a separate box, just separate from the items they came out of. Wrap them in paper, tape up the bundles and mark them well so they don’t get thrown in the trash or the recycling bin with the rest of the packing paper. Tape them directly onto the items they came from if need be. (Taping unwrapped batteries directly to unwrapped clocks and drones is a practice best avoided.)
What about spare batteries lying around?
That takes care of all the batteries being used. Now, what about the batteries not being used? You know, all the used ones half buried in a junk drawer. Can we just dump them in a box with all the other stuff in that drawer?
Yes we can. But no we shouldn’t.
Because those batteries – those little packs of stored energy – constitute a fire hazard. It’s true. They may look completely harmless lying dead in that drawer, not hooked up to anything. But under the right (see: wrong) conditions, bad things can happen.
Specifically, mixing those batteries with small metal items like paper clips or spare keys and a random scrap of paper or two spells trouble. Those rectangular 9-Volt batteries with the positive and negative terminals sticking out of the top are of particular concern. Don’t believe it? Check out this video news piece to see how easy it is for a fire to ignite where there’s nothing but a battery, some metal and a piece of paper.
At the tail end of the piece, we’re told that “it’s only 9-volt batteries that have this problem”. Tell that to the victims of this fire, started in the console of their SUV by the combination of a few AA batteries, a couple of DVDs and some random bits of paper. “You confine (these things) in a drawer or put it in a paper sack and confine it, it will build up enough heat that it can’t dissipate out into the air,” says Fire Captain Ken Bailey. “Eventually it will reach 451 degrees, which is the ignition temperature of paper.”
Preventing the possibility of igniting a fire is simple: Pack any and all loose batteries separate from anything metallic. Wrap them in plenty of paper, taped side by side or sealed in a plastic bag if you really want to go that extra mile.
To be quite honest, with all the millions of loose batteries lying in all the millions of junk drawers in this country and only a couple of fires on record (that we know of), the chances of those loose batteries actually starting a fire can seem pretty slim.
But then again, why take chances?
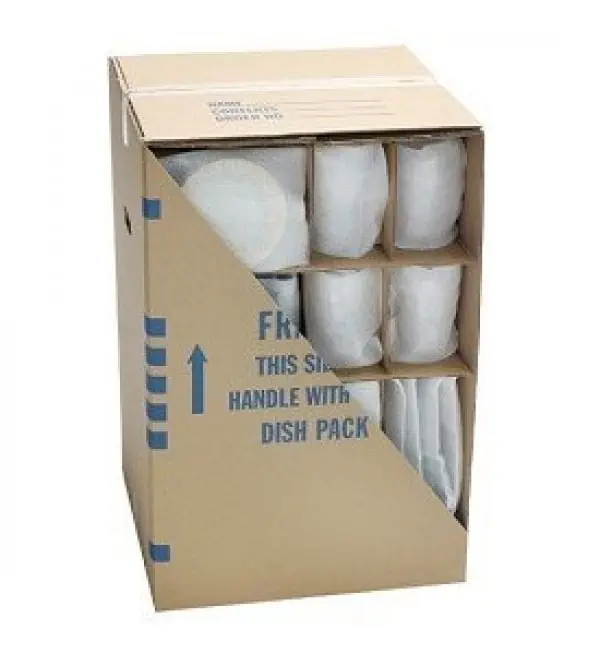
How to Pack Stemware Safely, With or Without Dividers
I remember the first time I had to pack a china cabinet full of stemware. Wine glasses. Champagne flutes. Crystal crafted and etched so delicately it might as well have come straight out of a fairytale castle.
My hands shook as I wrapped each piece. My stomach churned as I watched my buddy load that dish pack onto the truck, underneath a stack of other boxes.
20 years later I still have nightmares about it.
I’ve dealt with plenty of stemware since then, and while I wonder now and again whether anything I’ve packed has gotten damaged in transit, I’ve learned enough from people who have been around longer than me to know how to minimize the chances. Below is a summary of what those people taught me.
Packing With Dividers
While dividers can add stability to the carton and protection to the contents, the fundamentals of packing still apply.
Make it tight. Density still matters, even inside those cells.
Create cushions of packing paper between layers.
Be generous when padding the bottom and the top of your dish pack.
In addition, there are things that require extra attention.
Image by: Done Right Moving
No matter what you are putting at the bottom of your dish pack, lining the bottom of the carton with nothing but crumpled paper isn’t the best way to go. Have you ever watched a child jump into one of those massive tubs full of plastic balls? That child doesn’t land on top, they sink down, pushing all those plastic balls to the sides. All that stuff you pack in your dish pack will do the same thing unless you cover that (thick, tight) layer of crumpled up paper with several sheets of crumpled-then-uncrumpled paper. (Imagine laying a tarp across the top of that tub full of plastic balls.)
This goes a long way in keeping those crumpled up paper balls in place under the weight of all that kitchenware. This will also prevent your dividers from sinking and potentially exposing the stemware those dividers are supposed to be protecting.
Be aware that dividers aren’t always the perfect height for the stemware you are packing. If your wine glasses are a bit short, add extra paper beneath and on top to fill out the space in each cell. Are those champagne flutes too tall? Don’t leave them sticking out of the top! Make a double layer of dividers, pad those glasses above and below, and, to use that extra space wisely, fill the remaining space in each cell with smaller glasses (that are also well-protected).
No one in the history of packing has ever had the exact amount of stemware needed to perfectly fill the number of cells in the dividers they are using. Since the customer has requested you use those dividers for all, not most, of their stemware, don’t skimp or cheat at the end and pack those last few crystal wine glasses loose among the coffee mugs and tea cups. Fill that last divider level with those remaining pieces of stemware plus whatever other items will fit in those cells. And if you find you have more dividers than you need? Use the leftover pieces to create a sort of cardboard roof over your top divider level so you can pack and fill the remaining space in your dish pack with confidence.
Packing Without Dividers
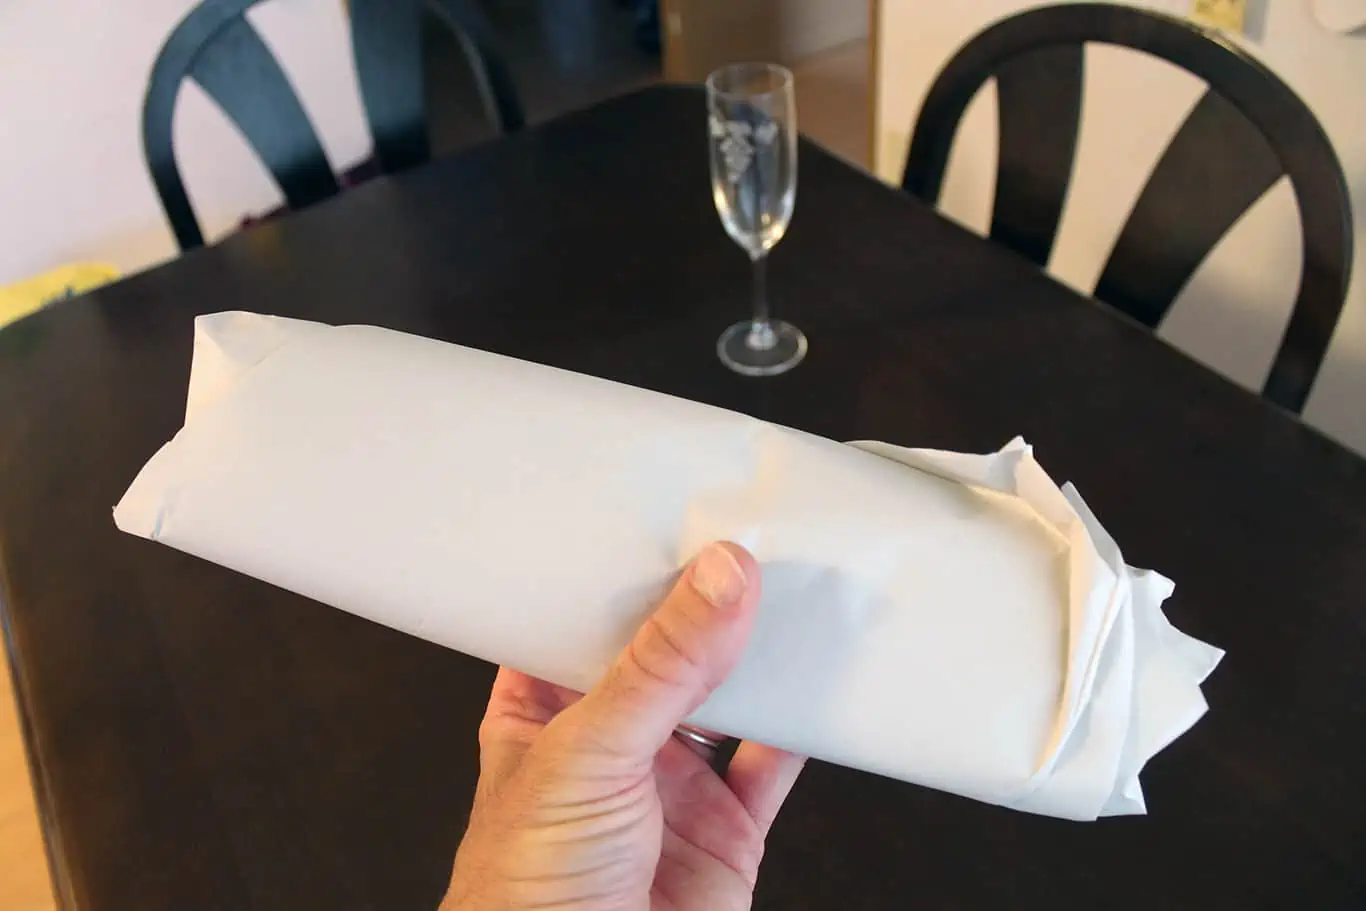
This was the case that first time I had to pack stemware. And while it is absolutely possible to pack a bunch of fine, fragile wine glasses safely without dividers, it takes a lot of care – and plenty of paper!
The biggest concern in wrapping stemware is that most fragile part: the stem. The thing is, all the paper in the world won’t guarantee the survival of that stem if the pressure is too great. Still, that’s the first part we want to protect.
The longer the stem, the more critical it becomes to wrap that stem in paper. We do this mainly to create a more cylindrical item we can then wrap completely. Cylindrical bundles allow for a tighter, denser pack. The more empty space there is around the stems of those wrapped glasses, the greater the chance those glasses will shift and generate uneven pressure inside the carton.
I see and hear all the time how important it is to stuff the inside of your wine glasses with paper. To be honest, I don’t get it. If there’s enough lateral (sideways) pressure being exerted on the outside of a glass to break it, crumpled paper cannot offer nearly enough strength to counter that pressure. What the paper CAN do is add a degree of protection against vertical pressure. As with packing glass lampshades, stuffing each glass with enough paper so that paper extends beyond the rim of the glasses means extra cushioning between layers.
Speaking of layers, as we mentioned earlier, a stable layer of paper at the bottom of the carton is critical for the overall protection of the contents. When packing stemware without dividers, we want to make sure the cushioning on top of and below each layer of wrapped stemware is thick and stable. Lay some wrinkled paper across your layer, add a layer of crumpled paper balls, then cover with more flattened paper before packing your next layer of glasses. Without the strength of those vertical dividers we need to make sure our dish pack is jammed with paper not just between layers but between and around all those glasses – which we should be packing upside down, by the way! And of course, a dense, thick layer of paper on top is a must.
One final point about packing stemware: the use (or not) of bubble wrap. As with stuffing paper inside your wine glasses, I’ve seen plenty of tips involving wrapping stemware with bubble wrap. Personally I’ve never used it on any type of glassware. Ever. Nor have I ever done an unpack and seen it used. Does this mean you can’t use it? Of course not. It just might not be your most practical option. If you do use it, be aware that some people will strongly advise against wrapping a glass in plastic without wrapping it in paper first. One reason is the possibility of the plastic leaving marks that are hard to get rid of. Another is the tendency of plastic to stick to glass, increasing the likelihood of pressure and thus damage.
In simple terms, use it at your own risk.
To sum up, if you use dividers when packing stemware, make sure they are level in the carton and that the cells are filled tightly. And make sure those stems aren’t going to end up sticking out the top. If you aren’t using dividers, use common sense. That is, use plenty of paper! Make your carton super cushioned and super stable.
And pack those stemware items upside down.
Movehacks: How to Unpack and Organize Before, During and After You Open a Box
Some people tell us unpacking is the most enjoyable part of their move. (“It’s like Christmas!” they say.) Others dread unpacking like nothing else in the world. (“It’s worse than a triple root canal!” they cry.)
Either way, unpacking can quickly turn your new home into an ocean of cardboard and newsprint. To make the process more manageable – dare we say more enjoyable? – here are some industry tips for getting your unpack off to a raging start.
What to Do Before the Unpack
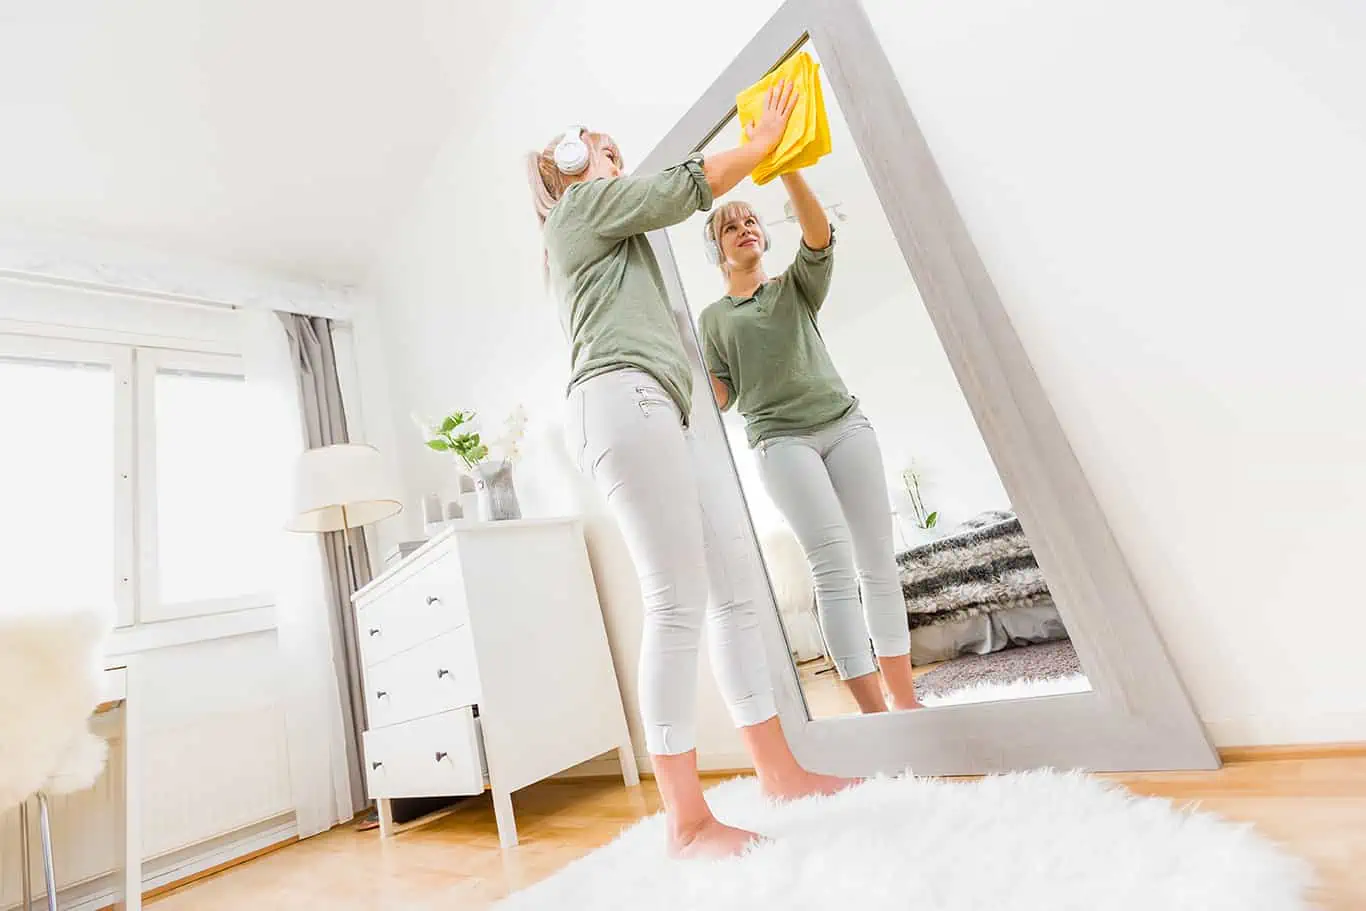
Yeah, you gotta clean before you unpack
You might not want to hear this right off the bat, but be prepared to clean before you begin to unpack. Even if it’s just wiping the shelves and countertops and giving the floors a quick sweep, unpacking in a clean home is infinitely more pleasant than unpacking in a dusty one. These items definitely take priority when it comes to cleaning:
Kitchen cabinets
Refridgerator
Bathtub and bathtub jets
Stove
Inside the washing machine
For more a more in-depth look at the how and why for house prep, check out this post.
Don’t unpack from down on the ground, clear some counter space
In the kitchen or dining room, do whatever you need to do so you can get your boxes up high. Why? Because you’ll need that counter space to place boxes on before you carry your things around your new place.
Why on a shelf? Because if you unpack from the place you dropped down that heavy box, you’re going to feel it in your lower back the next day. And week. Trust me, unpack up high. Always.
Unpack to shower and sleep first
No one in the history of unpacking has ever unpacked in one day. Unless you think you can be the first, don’t wait to unpack your bedding, set up your bed, hang your shower curtain and dig out what you need to feel clean and refreshed after a long day (or week? or month?) of moving.
Protip: Yes, this involves a little foresight when packing. Mark the boxes that contain the things you want to access first. (This may also include real plates, glasses and utensils to make you feel more at home when you sit down for dinner that first evening.)
What to Do During the Unpack
Unpack the “easy” boxes first to make room
It takes almost no time to unpack your books and stick them on the shelves of your bookcase. In a matter of minutes, you can transfer your t-shirts and jeans from boxes to dresser drawers. And for goodness sake, get those massive and bulky wardrobe boxes unpacked and out of the house!
Go about halfway with the pictures
Unpacking large pictures, mirrors and paintings is also quick, and you can then get rid of those bulky mirror cartons. Some folks, however, suggest hanging your pictures up early on to give your new place that homey feel. I say lean them up in a corner somewhere until you get all your furniture in place. Later on, you can do the “a little to the right…a little more…no back left…no not that much…okay there, no, a shade higher…yeah, that’s perfect” thing.
Make a quota of boxes unpacked per day and stick to it
If you are the motivated type, feel free to skip this tip. If you are easily distracted and tend to put things off, you might find it helpful to …. Hey, are you listening? … set goals for yourself. Commit to unpacking one room per day, six boxes per hour, whatever. And reward yourself for sticking to your plan by going out afterward. Just remember how satisfying it will be when you’re all finished.
Repack what you don’t actually need for storage
As you empty your boxes, set aside those items you decide you won’t need right away – or for a long time. Keep a few of those now-empty boxes handy and consolidate those items you put aside for quick transfer to the basement, the attic or the back of your closet.
Protip: Just as you did when you first packed, write the contents of each box with a marker as you go through your consolidation.
Don’t unpack the TV
The ultimate distractor. Do unpack the tunes, though.
Purge. Again
We suggest purging while unpacking. On move after move, it’s common to see people wait for weeks (or months) for the family’s stuff to arrive. Living without most of their stuff, they often realize that so many things were unnecessary. And while packing stuff in a box allows you to forget about it, having to unpack it and find a place for it helps you decide whether you really need it. As with the stuff you’ll be storing in the attic or the basement, set up a box or two for these things you’ve decided to part with.
What to Do After the Unpack
Hide your paper trail
Keep a couple of medium-sized boxes on hand, and use them to stash all the packing paper that would otherwise turn the floors of your new home into a churning sea of crumpled newsprint. Flattening and folding all that paper will save a lot of space – if you have the time and patience – but doing so also helps you find smaller items that can go unnoticed and disappear forever. I can’t count how many times a customer dropped their used moving boxes off at our warehouse with items still buried in the packing paper inside.
Protip: Packing a large box with flattened paper can make it surprisingly heavy. Medium boxes are more manageable in this respect.
Now, about getting rid of all those boxes…
First, get them out of your way. The garage – if you have one and there’s room – is the obvious choice. (Think twice before stashing them in the basement “temporarily”.) If the weather is good and it feels appropriate, start breaking down your empty boxes and putting them out by the curb. Unless your new home is on a cul-de-sac it may not be long before you see passer-by stop and take those boxes off your hands. If this doesn’t work, here are three ideas that don’t require a box-hungry passerby.
If you have the time, the storage space and the mental fortitude try passing on your boxes to someone else who is getting ready to move. Facebook groups and Craigslist are two widely-used resources for advertising moving boxes for sale or for free.
Some moving companies will be happy to take your boxes and your packing paper off your hands. If none of the smaller local movers will take them, check for national van line agencies in your area (like United, North American, Atlas and Allied). The agencies I worked for never bought used boxes from people, but we were always happy to take them if they were in decent shape.
Recycle if you can’t find someone who will reuse them.
Unpacking can prove a more formidable task than expected. Whether you think it’ll be like Christmas or a root canal, putting these tips into practice will help you feel at home faster.
Then you can sit back and watch the TV.
A Trash Bag Is by Far the Most Useful Movehack Item. Here’s Why
When you’re in the midst of a move, you may find yourself running to the store every other day to pick up supplies. It may seem like you can never have enough boxes, tape and packing paper, but there is another item you should add to your essentials list… trash bags!
This versatile item can be used in so many ways to help you move. Let’s review all of these trash bag hacks.
They’re Essential for Hanging Clothes
Instead of purchasing wardrobe boxes for your move, we suggest keeping your clothes on their hangers and protecting them with trash bags. All you have to do is take a stack of clothes off the rack and bring a trash bag from the bottom of the clothing up towards the hanger. Then, use the drawstring on your trash bag and tie it tight around the hanger. This will ensure that the bag doesn’t come off during transport. It’s the perfect garment bag hack! Bonus…buy those scented trash bags so your clothes smell fresh when you get to your new home!
Make a Simple Donation Section
Trash bags make it super easy to corral and easily identify all of the items you’re planning to donate. This is especially helpful when it comes time to clean out that stuffed wardrobe of yours! We suggest that you keep a trash bag in your closet in the months leading up to your move. As you try on items that you no longer love, toss them into the this conveniently located trash bag. Little by little, the bags in your closets will start to fill up with donation items, and you won’t have to spend an entire weekend purging out your closets! Trust us, you won’t want to move any other way.
Trust us, you won’t want to move any other way.
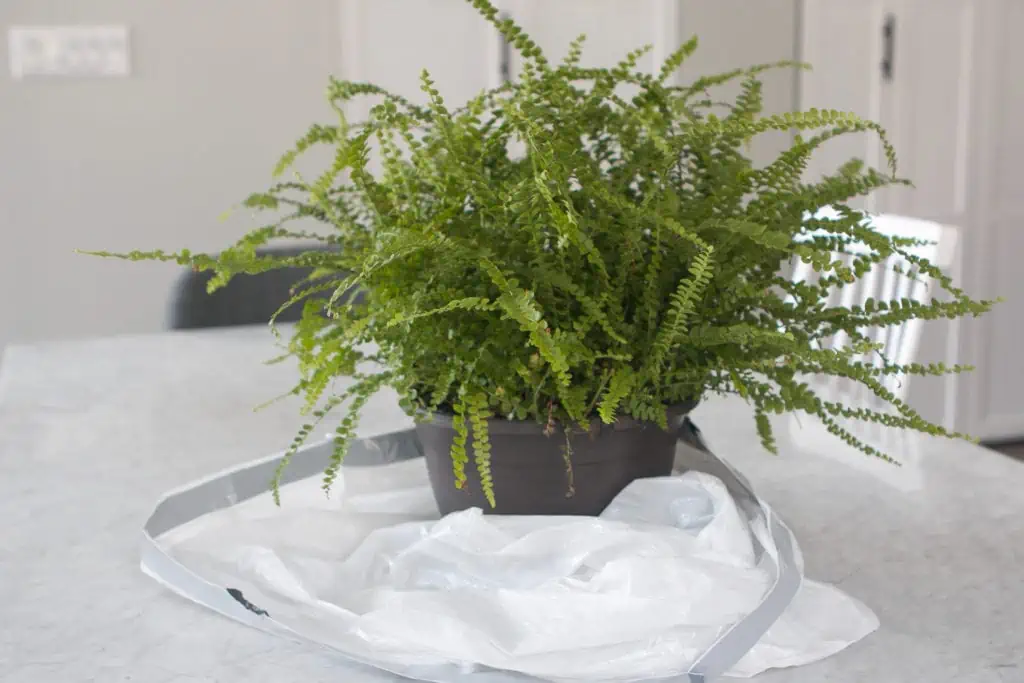
Transport Your Plants Without the Mess
Plants are a tricky one to move because no one wants dirt all over their vehicle – so grab that handy dandy trash bag of yours and place the bottom of the plant inside. This ensures that the dirt doesn’t get all over and you can easily move your greenery to your new space. If you can though, keep the top of your plant out so it still gets lots of fresh air!
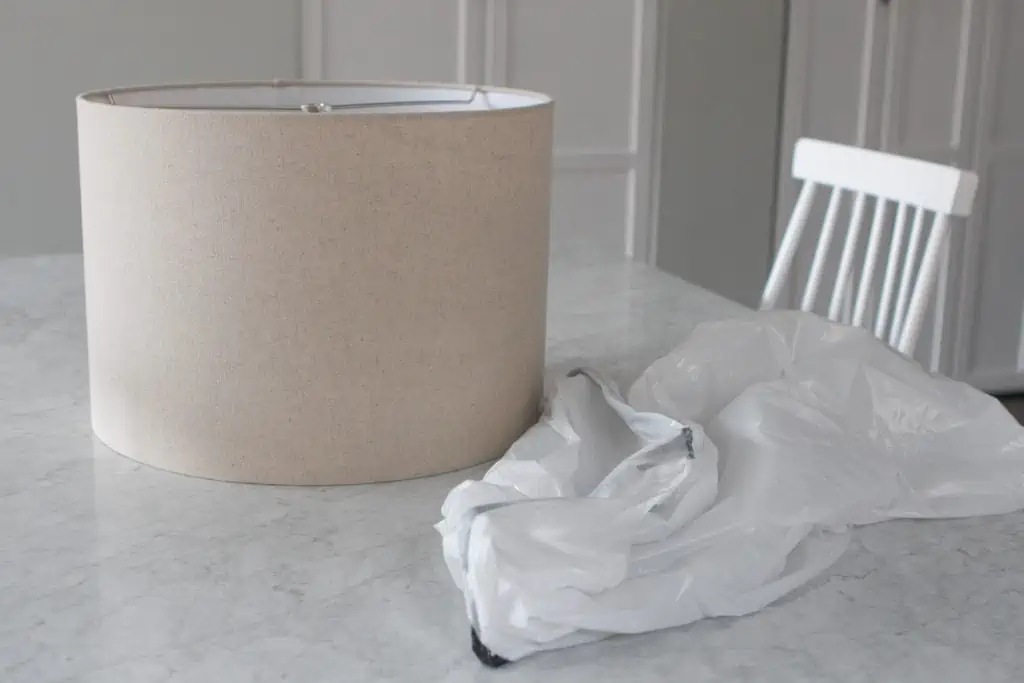
Wrap Unusual Objects Easily
When packing, you’re bound to run into items that will make you scratch your head and say, “How the heck do I pack that up?!” (Lamp shades are one of them.) How can you make sure your shade doesn’t get dirty and gross on its ride to your new pad? Well, use a trash bag to cover those unusual objects and keep them safe!
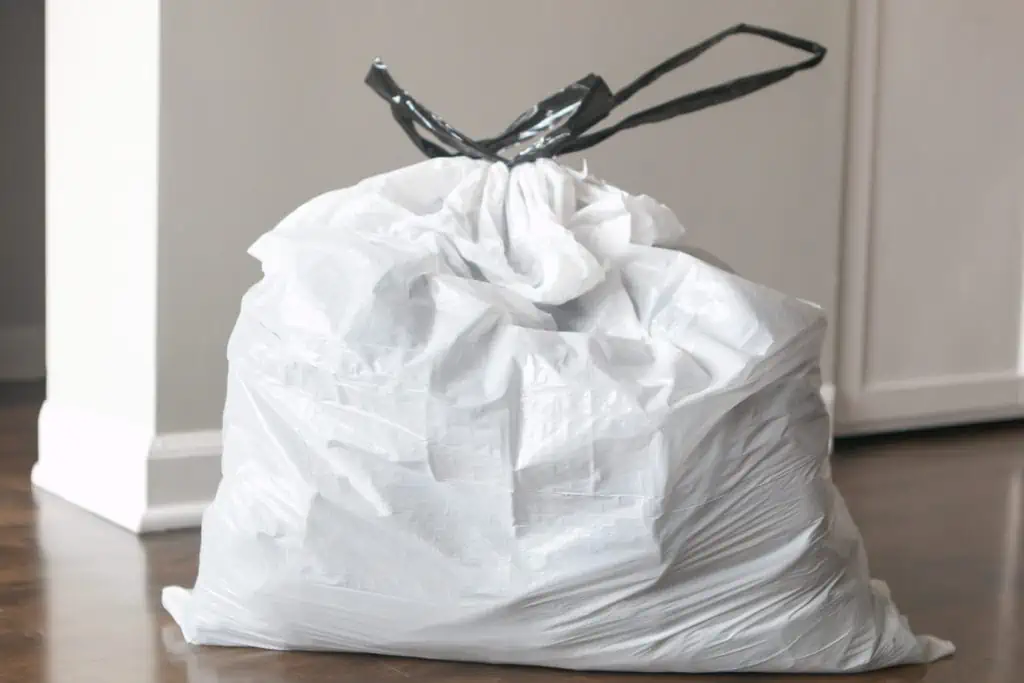
If It’s Anything Other Than Sunny, You’ll Need a Ton of Them
If you’re worried about special items getting wet during your move, we suggest using a trash bag inside your cardboard box. Simply put your precious items in a trash bag (books, papers, throw pillows, etc) and then put that bag inside the box! That way it’s got double protection from the elements.
And You Can Throw Your Away Trash (Duh!)
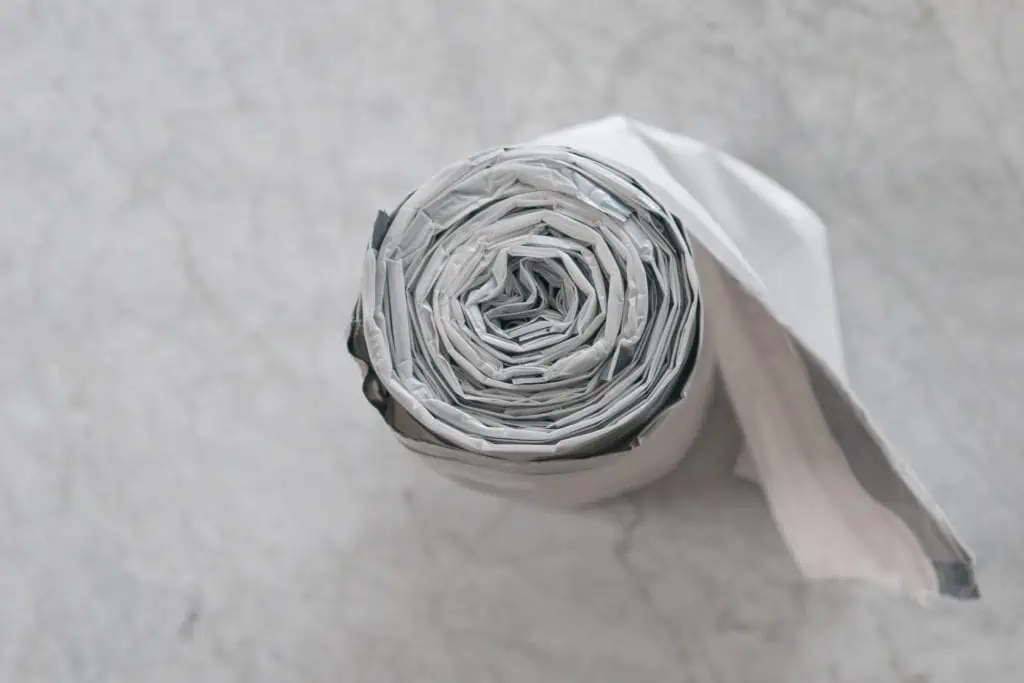
Okay, of course, you’ll need trash bags for trash. And you’ll probably have a lot more than usual when you’re packing up your home to move. Stock up on a lot of garbage bags and you’ll be set for this, and everything else on this list for the duration of your move.
It’s official: you need to head to your nearest Costco before your move and find the largest roll of trash bags you can find. Trust us!
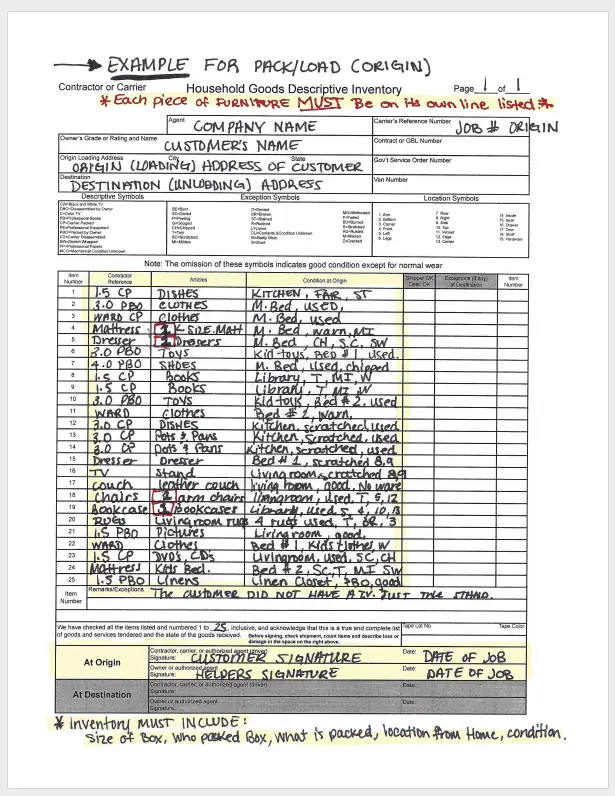
Inventory Sheets Legally Keep You From Losing Your Stuff on a Move. Here’s How to Use Them
Among the many pieces of paperwork that a full-service mover will ask you to sign is a piece of paper called a “Household Goods Descriptive Inventory”. It’s more commonly known as an Inventory Sheet, and it’s basically an itemized list of everything the movers are transporting for you, from your furniture to your boxes to every last golf club, garden tool and garbage can in the shed.
We know, you hardly have time to search for a coffee filter, let alone make a list of every single thing you own. But why is writing all that stuff down so important before the movers haul it away?
You Probably Want Your Stuff Back
On move day, before the rest of the crew starts carrying your stuff out the door, the lead person or someone else who knows the drill will be going around putting numbered stickers on everything and writing a description of each item on the corresponding numbered line on the “IS”. So if you make one, you’ll get a copy of that inventory sheet – or more likely several inventory sheets – and when your stuff is delivered you’ll check off each numbered item as it comes off the truck. Armed with your inventory sheets, you can make sure everything is there.
Here’s what happens on a move with completed paperwork.
Example #1: Your movers have emptied the truck, everything is moved in and accounted for according to the inventories. You and the mover both sign each IS as documentation that all items have been received.
Example #2:Once the movers have emptied the truck, you find that one item on your inventory sheets has not been checked off. You and your movers search high and low for the item (because you both want to find it!), but it is nowhere to be found. Near the bottom of the IS you will write very clearly which item is missing, then you and the mover both sign off on the paperwork. (Make sure to keep a copy!) This is your documentation for filing a claim for your missing item.
Inventory Sheets Also Keep Track of the Condition of Your Stuff
Nobody wants to end up with a scratched and dinged up dining room table. Likewise, your movers don’t want to be held responsible for any scratches and dings that were already in that table. A special column on the inventory sheet, where your movers can record any existing damage, serves as a safeguard for both of you.
Example #1: If your dining room table is all scratched up upon delivery, but those scratches are documented on the inventory sheet as already existing when the movers came to move you, you cannot hold your mover falsely accountable.
Example #2: If there is any discrepancy between the condition of your dining room table as recorded on the IS with the condition of that table when it gets delivered, you’ll have the legal evidence and documentation you need to get reimbursed for the damage. Describe clearly the new damage in the “Remarks/Exceptions” box, then take pictures of the damage as further proof. (These pictures can also help your moving company determine whether to repair or replace the item.)
It’s Important to Prepare Ahead of Your Move
It’s hardly practical to follow your mover around to witness every notation they make on every inventory sheet and to check every box, every piece of furniture and every loose item in your garage. Go ahead and try if you like, but I bet you’ll drive both yourself and your mover crazy.
Instead, be proactive before the move. On the day of your relocation, check your furniture, your appliances, your bookcases and your bicycle. The actual paper itself is pretty straight forward: Just plainly denote any significant scratches, gouges and dings. Then point them out to your inventory taker. Seeing how you are paying attention, they’ll be inclined to do more of the same.
On packing: If you’re doing your own packing, keep track of how many boxes you have. Number them as you label them with what is inside. Make a rough list of your boxes if you like, noting what size or kind each box is. Such a list may not amount to a legal document but you can use it to make sure your mover has the same number of boxes listed on their official inventory sheets.
Finally, familiarize yourself with a typical IS, including the most common abbreviations movers use when taking inventory:
PBO – a box that was packed by the owner, i.e., you
CP – a box that was packed by the mover, i.e., the carrier
MCU – Mechanical Condition Unknown, to prevent false claims by the customer that something “was working before I moved.”
For a good example, take a good look at this standard Household Goods Descriptive Inventory form:
The inventory sheet is your best (and perhaps only) friend if something gets lost or damaged. Make sure you are well-acquainted – both before and after your mover fills it out – before it’s finally time to sign off at the bottom.
How To Properly Take Care of Your Back While You Pack
This month’s packing tip has nothing to do with protecting our customer’s belongings. Instead, we’re going to talk about protecting ourselves.
As movers, we know well the importance of lifting and carrying stuff the right way so we don’t kill our backs. Packing rarely involves heavy lifting, but spending a few hours in someone’s kitchen can still end up being a pain in the lower back (yes and the neck but that’s different). Here are three steps for avoiding that physical strain.
First, clear a space on a table or a counter where you can set and wrap your customer’s dishes, bowls, glasses and everything else waiting in those cupboards and cabinets. You want to be standing upright, not hunched over a coffee table or kneeling on the floor. (If you are packing and moving your customer on the same day, make sure your team leaves that kitchen table until the end, or at least until you’re done packing in there.)
Second, place the box on top of something, so you don’t have to bend over so far as you fill it with bundle after bundle of wrapped dishes and coffee mugs. Wrapping and packing an entire kitchen can involve a hundred or two hundred separate items. Setting your dish pack on a chair or a low (and adequately wide) stool, or even a couple of (extremely well-packed) book boxes, can save you from a lot of unnecessary back-bending.
As a bonus, your box will be easier to lift once it’s all packed.
Third, simply apply these simple tips to every other box in every other room you pack. Even when you’re packing light stuff – clothes, bedding, shoes and small picture frames – the less you have to bend over the better and stronger you’ll be throughout the day.
It may seem like not a huge step to pack boxes in this elevated way, but trust me – the energy saved absolutely adds up throughout the day, let alone throughout a career.
If You Only Clean 5 Things When You Move in, Just Make Sure It’s These Things
Moving into a new house is SUCH an exciting time! There are so many fun memories that lie ahead, including everything about unpacking, getting settled in and decorating your gorgeous new home. But before totally settling in and getting cozy, we think it’s important to do that super important deep clean.
We are sorry to report – in case you didn’t already know – that packing your entire home into moving boxes is no small task. You’ll be happy to hear, however, that the list of packing supplies you need is short.
But while the list is short, there’s a catch; You’ll need a lot more of each thing than you think.
Moving? Thinking about moving? Whether your move is off in the distance or you already have one foot out the door, you'll learn about everything you should expect through our useful how-to's, cool articles and much more. It's all specially curated for you in our "I'm Moving" section.
For rookies or veterans alike, our "I'm a Mover" section is filled with extensive industry news, crucial protips and in-depth guides written by industry professionals. Sharing our decade of moving knowledge is just one way we help keep our professional movers at the top of their game.
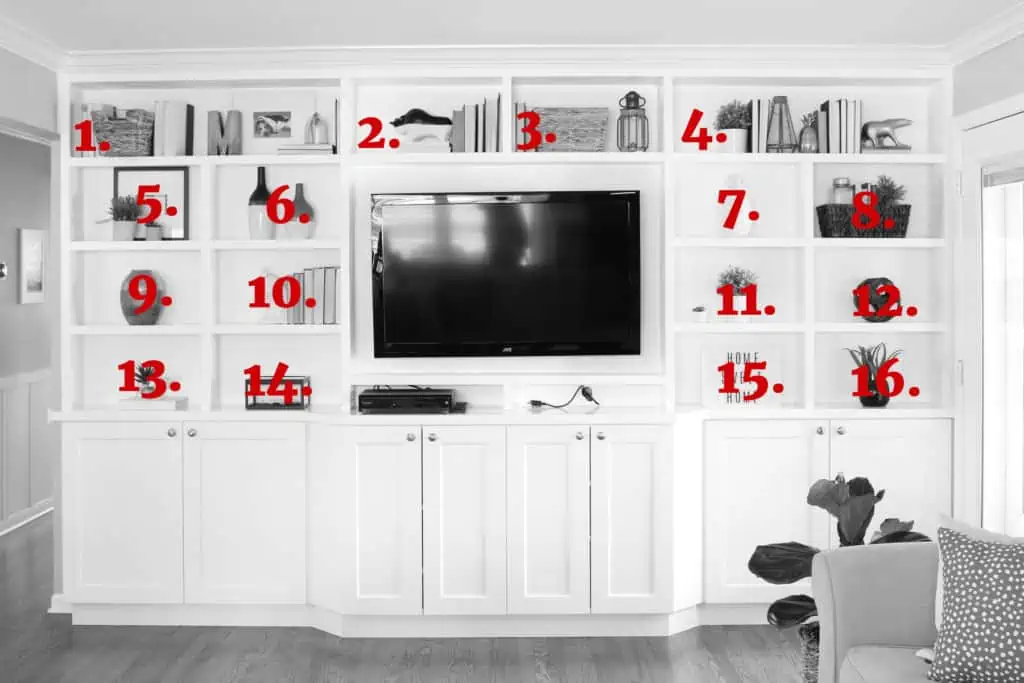 The first thing you have to do is create a numbering system for your shelving unit. You can use any method you want and don’t need to make a fancy graphic like this, you just have to make sure you remember which shelf corresponds with what number. Some may be able to easily memorize the number system, but if you’re not confident in your ability to do that, you can always put a piece of painter’s tape on each shelf with the corresponding number so you remember. This trick will take about 1 minute and won’t damage the shelving unit at all.
 Carefully wrap and box the items like you would normally do, but try to keep as many of each shelf’s contents together in one box. For example, the grouping of books, the picture frame and planter in box #4 should all make their way into the same moving box.
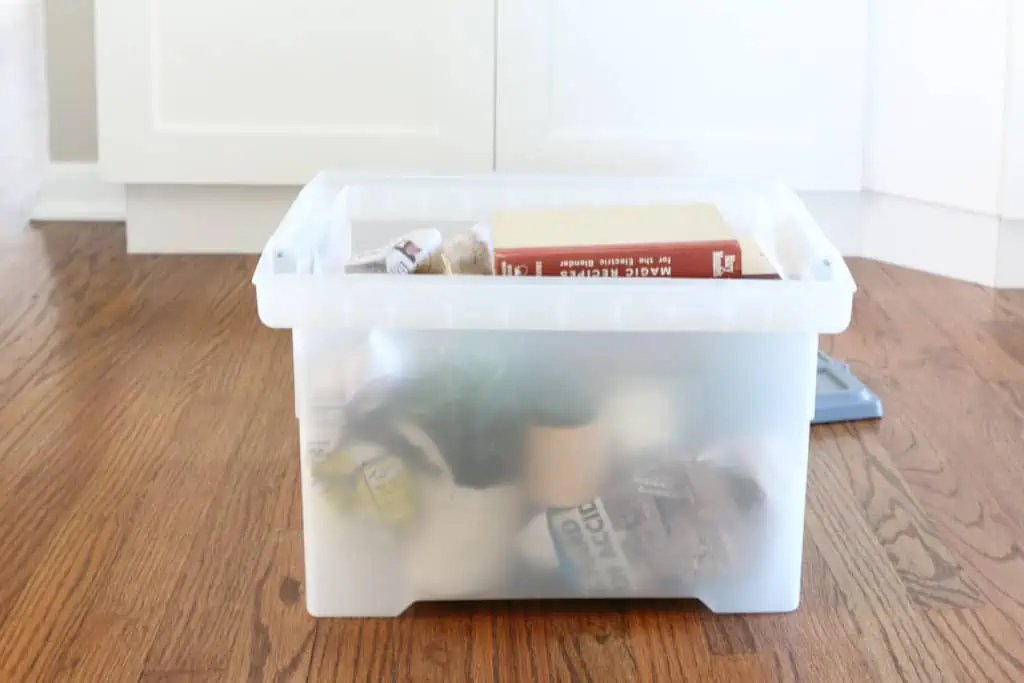
 Because those batteries – those little packs of stored energy – constitute a fire hazard. It’s true. They may look completely harmless lying dead in that drawer, not hooked up to anything. But under the right (see: wrong) conditions, bad things can happen.