What Do Movers Do? A Guide to Moving Companies and What Else They Help You With

Author:

Publish Date:

Last Modified Date:

Category: Movehacks

Tags: Tags: , , , , , , , , , , , , , , , , , , , , , , , , , ,

Moving can be stressful — and science agrees. Data reveals that a whopping 55% of people feel overwhelmed by the moving process, and approximately 10% of people describe moving as traumatic, not just highly stressful. In fact, nearly 1 in 3 people would rather get a divorce than move again!

The reason for this is in part because moving often involves a never-ending to-do list, which can leave you feeling frustrated and stressed. You’ve got boxes to pack, furniture to disassemble, and utilities to set up or disconnect. You may even need junk hauled away or last season’s wardrobe donated.

The good news is you can delegate these tasks to the pros. Many of today’s movers don’t just lug some boxes onto a truck and call it a day. Depending on the company, services range from basic transport to full-service packing, storage, and junk removal. Below you’ll find a breakdown of what movers can actually do, plus tips on finding the right help for your next move.


How Do Moving Companies Work?

There are many different types of movers, including labor-only movers for heavy lifting and full-service moving companies that load, unload, and transport your stuff.


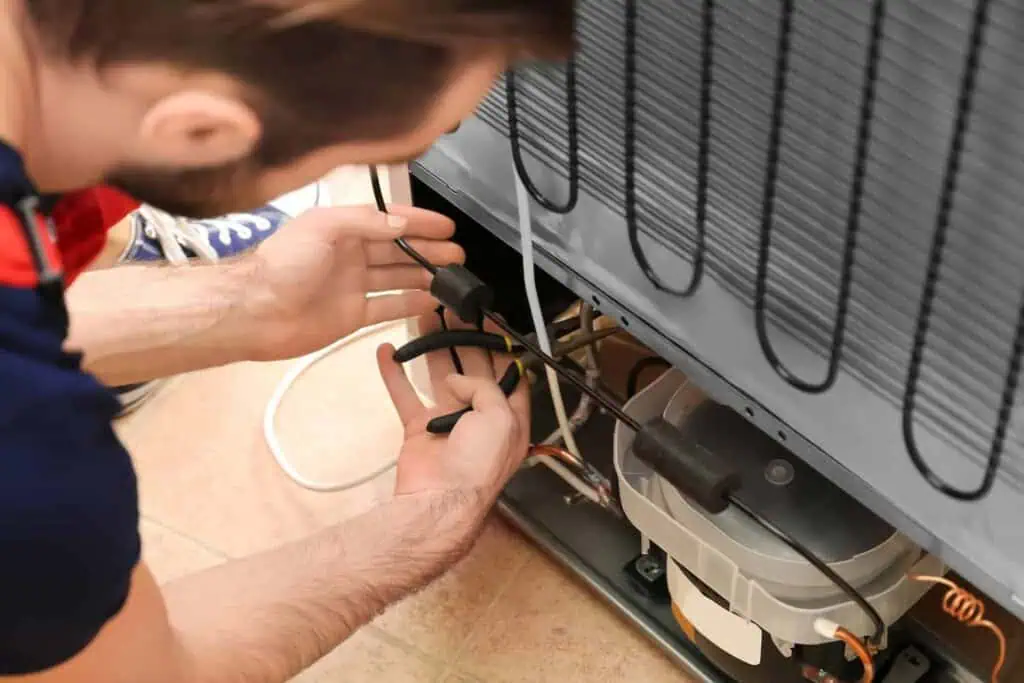
“Unhooking or installing your appliances, such as washers and dryers, is not necessarily a DIY-friendly task. Let experienced pros disconnect or reconnect your equipment instead.”


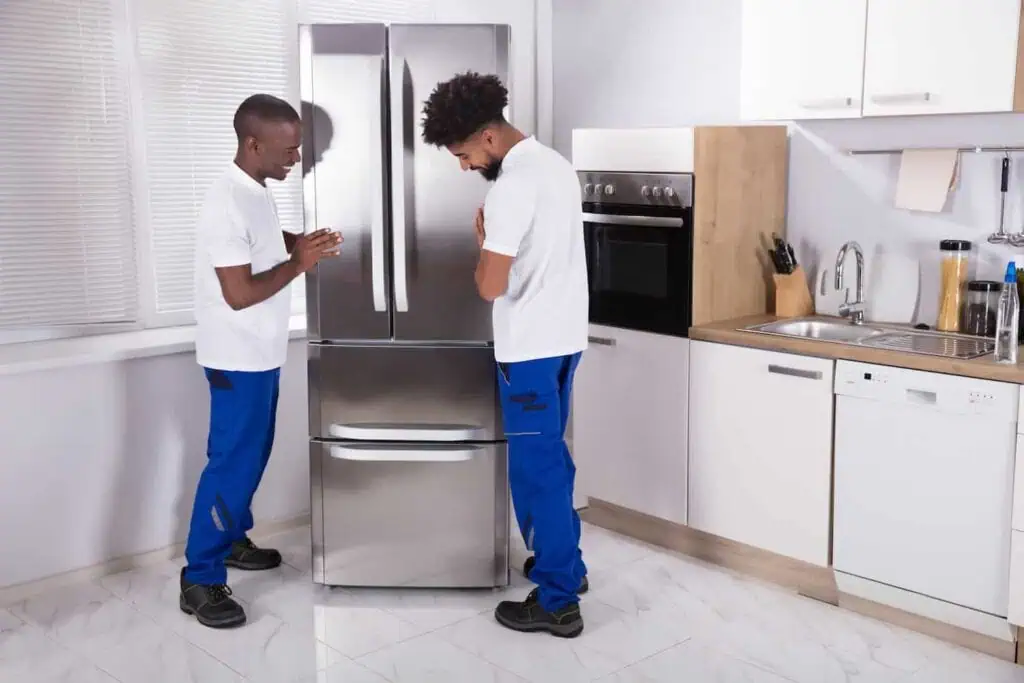
When people think about moving companies, they often envision a team of professionals arriving with a moving truck. The movers then load your packed belongings onto the truck, drive them to your new home, and unload everything. If this is how you picture movers, you’ve got the basics down.

Here’s a rundown of core moving services — AKA the basics — and what they involve:

  • Packing and unpacking: Movers will help you pack up your things (including all the fragile stuff that needs extra care) using supplies you provide. You can typically opt for them to handle just a few rooms or take care of your whole home. When you arrive at your new place, they can unpack everything for you as well.
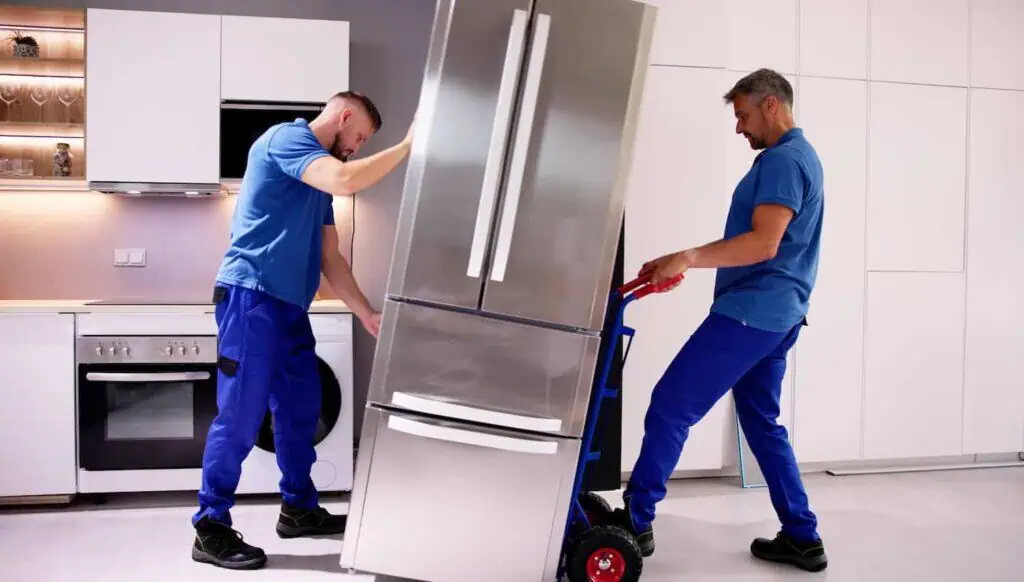
  • Loading and unloading: Skilled movers carefully lift and load packed possessions in a moving truck, then unload everything at your desired destination. Items are unloaded into the rooms you request.
  • Transport: A moving company arrives with a moving truck and safely transports items from Point A to Point B. Items are secured with bungee cords and straps when needed to prevent shifting during transit.
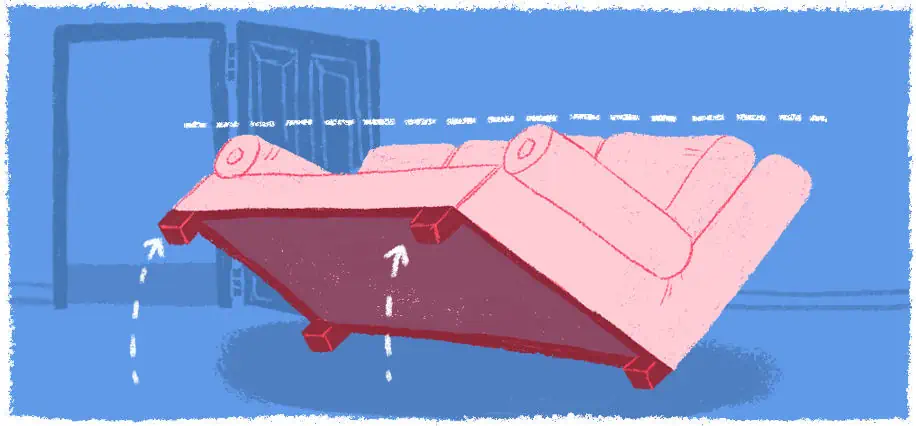
  • Furniture disassembly and reassembly: Avoid wrestling with stubborn recliner legs or multi-piece bed frames, and let the movers take apart furniture for you. Your movers can reassemble everything at your new home and place it in the correct rooms. They’ll bring their own tools, such as wrenches and screwdrivers.
  • Assistance with local and long-distance moves: Rely on reputable movers for assistance, whether you’re moving across the street or to the other side of the country. Movers have the logistics, supplies, and equipment needed for local and long-distance moves.

Types of Moving Services

Various types of moving services are available for your relocation. You can find a moving company with experience moving locally, across the country, or even overseas.

Here are some popular services that traditional movers provide:

  • Local: Local moves are typically within the same city, town, county, or metropolitan area, and usually have a limit of 50 to 100 miles.
  • Long-distance: These moves often involve multiple moving teams or trucks, and require more oversight since they can cross state lines. Depending on the distance, storage may also be provided.
  • International: These moves often require customs paperwork, shipping containers, and air freight. Your moving company can coordinate the door-to-port logistics and help you navigate red tape during an international move.
  • Full-service: Enjoy the VIP experience with a full-service moving company that handles everything, from loading to transporting and unloading your belongings. They even bring a truck and professional driver, and full-service movers can also help with furniture assembly and disassembly. Add-ons, such as packing and unpacking, are often included for an additional fee.
  • Labor-only: Consider labor-only movers if you need a team for heavy lifting, which includes loading and unloading the moving truck. You’re responsible for the truck rental and transporting your belongings during a labor-only move.
  • Specialty item: Cranes, dollies, and climate-controlled trucks can help your moving company move specialty items, such as pianos and fine art collections, safely.

Do Moving Companies Provide Moving Supplies?

Many moving companies offer moving supplies, which is more convenient than buying them yourself. Below are the most common supplies you’ll need, divided into those movers provide and those you’ll purchase yourself:

Provided by movers (rented or sold):

  • Cardboard boxes: A moving-day staple available in various sizes and shapes. Great for packing toys, books, and housewares.
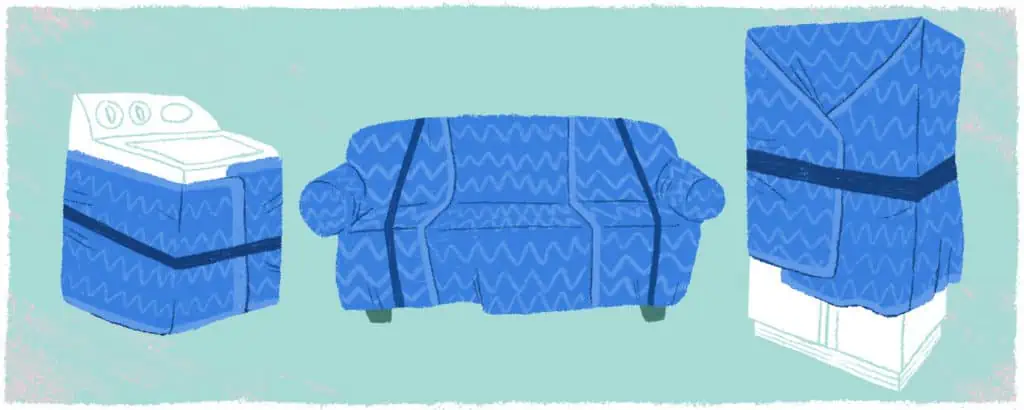
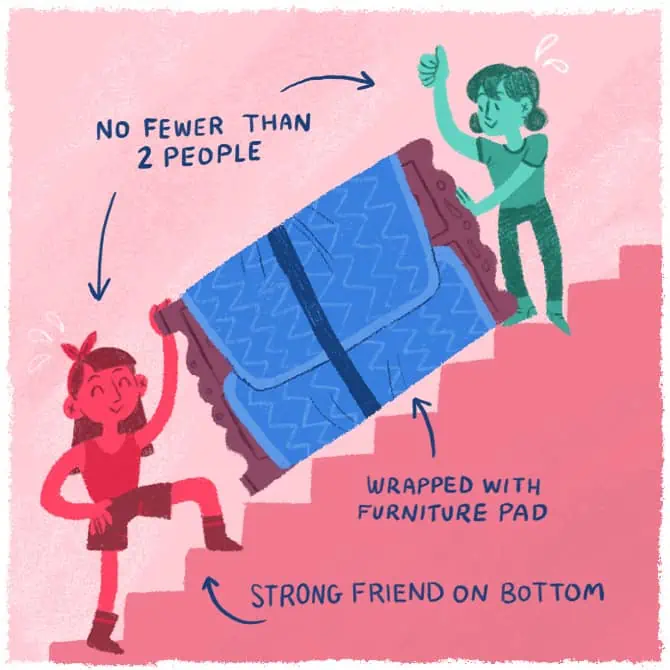
  • Furniture pads and blankets: Reduce the risk of scratches, dents, and dings by wrapping items in pads and blankets.
  • Storage containers: Make organization simple with storage containers for your items. Some companies offer tubs for rent rather than purchase, so keep that in mind as you pack.

Typically bought yourself:

  • Wardrobe boxes: Tall boxes equipped with sturdy bars. You can transport clothes from your closet to the box, then straight into your new closet — no hanger removal needed!
  • Packing paper and bubble wrap: Cushion and protect fragile items, including dishes, electronics, and glassware, with packing paper and bubble wrap.
  • Tape and shrink wrap: To secure boxes and items with these packing essentials.

Keep in mind that while movers may sell supplies directly, prices are often higher than what you’d find at a local store. If you want convenience, buy from your movers, but if you’re budget-conscious, it’s best to compare prices first.


Extra Services Movers Can Provide

What do movers do aside from loading and transporting boxes? Many moving companies go beyond the basics, making your life easier with time-saving services.

Here are some extra services your moving company may provide:

  • Storage: Need to move before your new home is ready? Movers can help you coordinate on-site or off-site storage for your belongings, such as PODS container rentals or climate-controlled facilities.
  • Specialty item moving: Get help transporting your beloved pool table, large safe, valuables like a grandfather clock, or piano with specialty moving services.
  • Appliance disconnections and reconnections: Unhooking or installing your appliances, such as washers and dryers, is not necessarily a DIY-friendly task. Let experienced pros disconnect or reconnect your equipment instead.
  • Cleaning: Some moving companies partner with local cleaning companies for deep cleaning services, such as move-out or move-in cleans.
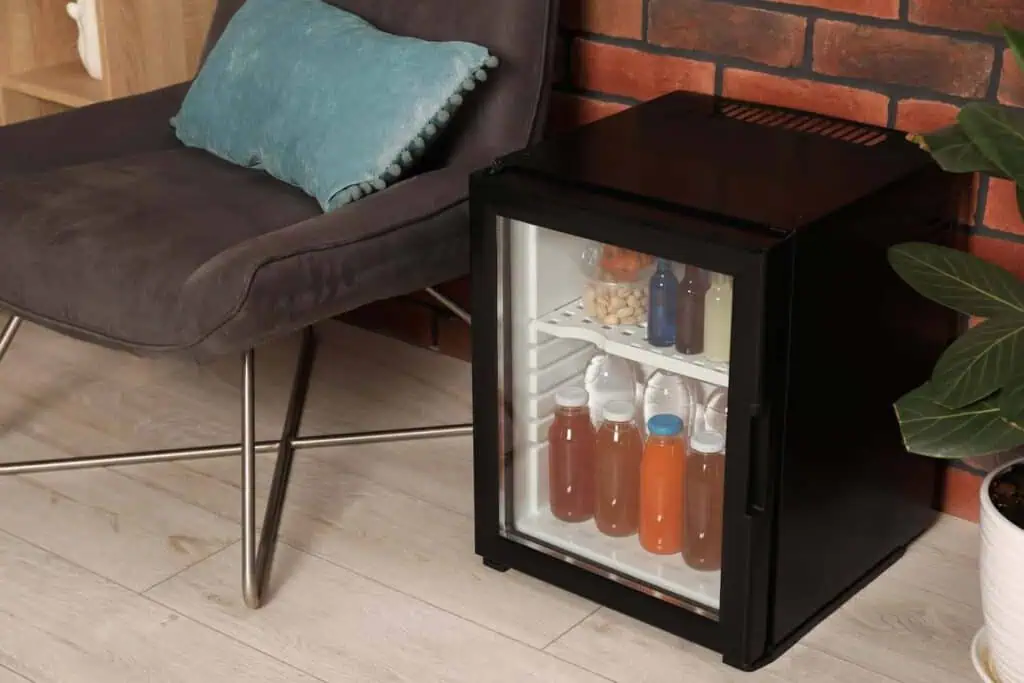
  • Junk removal: Tired of looking at that old fridge in your garage? Have movers haul it away instead of bringing it to your new place.
  • Logistics support: Some movers handle permits, parking, and scheduling, such as booking an elevator for a set time.

Need a service not listed above? Ask your moving company if it’s available. You might be surprised by what the company offers, and even if they can’t provide the service, they might be able to direct you to someone who can.


When Do You Need Each Type of Service?

The secret is knowing what’s best for your situation — and your bank account. Consider your property’s size and how far you’re relocating when comparing different types of moving services.

Sometimes you just need the basics, like a team to load and unload your boxes. Other times, you want the works: loading, unloading, transporting, sand ome help packing, too.

Here’s a rundown to help you decide which moving services you need:

  • Small apartment: Labor-only movers are your best choice if you’ve already rented a truck but don’t want to handle all the heavy lifting on your own. They handle the loading and unloading, and you take care of transportation for your belongings.
  • Large family home: Full-service movers can pack your wedding china, disassemble the bedframes (and rebuild them at your new home), and haul your washer and dryer onto the moving truck. They’ll even bring their own moving truck and transport everything to your new home.
  • Corporate relocation: Long-distance or international movers are your go-to pros here. These experts can navigate customs and shipping logistics, plus help keep your company’s laptops from disappearing during the move.
  • Downsizing/decluttering: A move paired with junk removal or storage services is ideal for folks who are downsizing. Retirees moving into a smaller home can eliminate decades-old items they no longer need.

Need more help deciding between different types of moving services? Share your situation with your movers so they can help you make the right choice.


Cost Considerations by Service Type

Some moves cost less than a weekend getaway, while others rival a small wedding. Services play a big role in what you pay. Here are some estimates for popular moving services:

  • Movers: Expect to shell out around $930 for a full-service moving experience (loading, unloading, and transporting your items) and about $410 for labor-only (loading and unloading help) if you’re moving locally. Costs for a long-distance move vary drastically, but you’ll likely spend $840 to $6,650 based on the type of move you book. Learn more in our guide to moving costs.
  • Packing: Our research shows you’ll probably spend $25-$40 per hour per packer (so if you have multiple packers, the rate will increase). Materials, labor, and time could range from $200 to $2,000.
  • Junk removal: Junk removal usually runs around $150 to $350 per load. Costs can increase significantly if you have multiple bulky items or need a full-house cleanout. Rates typically depend on truck space (how many cubic yards your junk takes up) rather than weight, but every junk removal company has its own system.

For quick reference, here’s how the most common moving services stack up in cost:

Service

Typical cost range

Local movers

About $930 full-service, $410 labor-only

Long-distance movers

$840–$6,650

Packing

$25–$40/hour per packer, $200–$2,000 total

Junk removal

$150–$350 per load

Discuss pricing with your mover or junk removal company in advance so there are no surprises on moving day.


How to Choose the Right Company for Your Situation

Moving can be stressful, but it doesn’t have to be unbearable. The right moving company will understand your expectations and budget, making the process hassle-free.

Here’s what to consider before you book movers for the big day:

  • Identify your needs: Do you want the convenience of full-service movers who do it all, or do you just need help moving furniture and boxes?
  • Check movers’ credentials: Make sure movers are licensed and insured, and check reviews to see what other families say. With HireAHelper, you don’t have to wonder: every mover is licensed, insured, and backed by verified reviews.
  • Compare quotes: If you’re hoping to keep costs low, compare price quotes from a few companies.
  • Avoid red flags: Companies should not ask for huge deposits or send confusing contracts.
  • Watch for green flags: Clear fees, easy-to-understand contracts, and dedicated customer service professionals are green flags.

Trust your instincts — and honor your budget — to find the perfect movers for your situation.


Final Thoughts

Movers don’t just move boxes — although they’re happy to do so! The right moving company can make your life easier every step of the way, whether they send in a cleaning crew or pack up your home.

Make your moving day manageable by choosing the right movers. Take advantage of extra services like junk removal, storage, or logistics support. You deserve the convenience and support of movers who offer the services you need.


FAQs

Got questions about different types of moving services or types of movers? You’re in the right place! Let’s run through some common questions below.

What do full-service movers do?

Full-service movers make your move hassle-free by helping with loading, unloading, and transportation. They even provide the moving truck, so you don’t have to worry about securing a rental. For an extra fee, many full-service movers can also help with packing and unpacking. They often handle furniture disassembly and reassembly too, so your beds, tables, and other bulky items are ready to use in your new home.

Do movers pack for you?

Yes — but only if you add packing on as a service. It isn’t a baseline service for most moves, and not all movers offer it. The good news is you can customize the service, whether you need just the kitchen packed up or your whole house handled from top to bottom, giving you flexibility based on your needs and budget.

Do moving companies provide boxes?

Typically, movers don’t include packing supplies with their services. Some companies may sell supplies if you request them, but it’s usually more expensive than buying your own from a home improvement or big-box store. If you’re planning to book packing services, you’ll want to either buy your supplies ahead of time or budget extra for purchasing them from your movers.

How do I find movers who will pack my stuff?

HireAHelper makes it simple to find movers who offer packing as an add-on service. When booking, you’ll see whether a mover provides packing and can even select how many rooms you want packed. Every mover on the platform is licensed, insured, and backed by real customer reviews, so you can feel confident that your movers will handle your belongings with care.

How To Move A Refrigerator

Author:

Publish Date:

Last Modified Date:

Category: Moving Advice

Tags: Tags: , , , ,

When you’re packing kitchen utensils and dishes, you’re likely keeping an eye on total box weight. After all, it does no good to pack perfectly padded plates in a box that’s so heavy no one can manage it. But what do you do about items that are heavy on their own?

A standard fridge can weigh 150 to 300 pounds or more, and that’s after you empty out the food and drinks. Trying to move one without help is more than frustrating — it can be a safety issue. It’s a good idea to handle this moving task with help from friends or professional movers.

But knowing how to move a refrigerator safely helps you plan ahead, protect your appliance, and avoid injury. We walk you through the steps below, from checking the owner’s manual and getting measurements to protecting your floors and moving it.


Moving Your Refrigerator, Step by Step

If you’ve ever explored how to move a refrigerator to clean behind it, you know it’s not something you want to tackle solo. That’s even more true when you need to get the appliance out of one house and into another.


“You probably shouldn’t [move a fridge by yourself]. At minimum, a DIY refrigerator move requires a sturdy appliance dolly, ratchet straps, and someone to help guide or spot you.”


One option is to hire movers for the job. When you book professional help through HireAHelper’s platform, you don’t have to approach this task alone. You can connect with moving services on our marketplace that handle the entire fridge relocation, and come with the proper equipment to move it safely to your new home.

That said, if you’re moving it with help from others, review the 14 steps below to make sure it’s done safely.

1. Check the Owner’s Manual

Start by checking your refrigerator’s owner’s manual for potential safety considerations and brand-specific precautions. Some manuals also include transport details like how long to wait until you plug a fridge back in after moving it or whether you can lay the appliance on its side.

If your model has water lines, built-in filters, and other features, they may require special prep or handling during a move.

Don’t have the manual for your fridge anymore? Not to worry, you can typically look it up on the manufacturer’s website using your model number.

2. Measure Everything

someone measures the width of their fridge with yellow measuring tape

Measure your refrigerator’s height, depth, and width. Then, measure doorways, hallways, stairwells, and tight turns along the exit path of your old home. Do the same for the entry path of your new home. And don’t forget to check your moving truck’s clearance height too.

Knowing the exact dimensions of your fridge and the spaces you need to get it through helps you make a plan. You may need to re-route your fridge through the back door and along the side of the house to avoid a tight hall, for instance.

3. Gather the Right Supplies

You’ll need a few essentials to move a fridge safely:

  • A heavy-duty dolly with straps
  • Moving blankets
  • Packing tape or stretch wrap
  • Furniture sliders

Using these tools reduces the risks of injury to yourself and damage to the fridge during transport. And don’t forget a buddy to help with balance and navigation. Moving any kind of fridge by yourself (except for a mini fridge or a skincare fridge) is not recommended.

4. Empty the Fridge

a woman on the phone takes fruit out of her fridge

Fridges are already heavy enough without being full of bottles, frozen goods, or accessories. Remove everything inside before you move the appliance, including the produce in the crisper and whatever’s hanging out in the deli drawer. Not to mention, your fridge will need to be unplugged while you move it, which could last hours — most perishable stuff that’s not frozen is going to spoil anyway.

Place items in coolers right before you move so you can transport them to your new home. If you’re low on cooler space or don’t want to worry about moving food, you should start eating down the fridge a week or so before you move to reduce the need to pack the items.

5. Unplug and Defrost

Unplug your fridge before you move it, allowing enough time for any necessary defrosting. Modern fridges don’t typically need to be defrosted before you move them. However, turning them off and unplugging them for 30 minutes to a few hours ahead of time helps ensure everything settles and that you don’t have water or melted ice in the moving van.

If your fridge or freezer does get ice buildup inside, you’ll need to defrost it. This can take a few hours to a few days, depending on the model and how much ice there is. Plan accordingly, as you won’t be able to keep food in the fridge during this time safely.

6. Clean and Dry Thoroughly

A woman wearing a mask and gloves cleans the inside of a fridge with a towel

An empty, defrosted fridge is much easier to clean than one that’s plugged in and housing food. Take the time to scrub it inside and out with warm, soapy water. Remove shelves and drawers, and scrub under and behind those areas.

Dry everything completely before shutting the fridge door. A clean, dry refrigerator cuts down on odors and mold, and reduces the risk that water might damage items in the moving truck. Plus, starting off in your new kitchen with a crystal clean fridge is super nice.

7. Secure Loose Parts

Ensure loose or moving parts don’t bang or swing during transport. Tape down doors, shelves, bins, and drawers, or remove the parts you can before transport (this cuts down on the weight, as an added bonus). Wrap shelves and other parts in towels and pack them in boxes if you opt to remove them, but make sure everything is labeled for easy reinstallation.

8. Cover it Up

When you’re moving something as big and bulky as a fridge, it’s likely to brush up against or hit things. Wrapping the appliance in a moving blanket and stretch wrap can help cushion it.

“Don’t have the manual for your fridge anymore? Not to worry, you can typically look it up on the manufacturer’s website using your model number.”

If you hire help for your move, let the pros know a fridge is part of the moving day list. They’ll probably bring their own padding, and they know how to wrap a fridge well already.

9. Protect Your Floors

Dragging a heavy appliance over laminate or wood floors can leave some unsightly gashes and scratches, so use furniture sliders or cardboard under your fridge to avoid damage.

If you’re moving a fridge over carpet, put a board or thick cardboard down to help protect the flooring and keep your load stable.

10. Tilt and Load Onto Dolly

Two movers lift a fridge that has been loaded onto a hand truck/dolly

Knowing how to move a refrigerator into a truck usually involves a dolly. With help from another person, tilt the fridge slightly and slide the dolly underneath from the side — not the front or back. Strap the fridge on tightly and tilt the entire thing back slowly so you can move the dolly. Don’t tilt it back too far — this can mess with the internal mechanisms that keep a fridge cold or pose a danger to you and your helpers. You just need to tip it back enough to get it moving and balanced.

11. Navigate Through Tight Spaces

Take it slow and use a spotter to help you clear corners and thresholds, and remove doors or handrails if needed. If the fridge must be tilted far back to get through a doorway, avoid turning it fully on its side to prevent oil or refrigerant issues.

12. Transport Carefully

If possible, always move a fridge in an upright position. Doing otherwise could seriously damage the internal components and cooling ability.

If you absolutely have no other choice, you technically can transport a refrigerator on its side. But doing so risks oil backflow or refrigerant disruption. Check your owner’s manual to see if you can put your fridge on its side for any period of time.

Take the same level of precaution as you would with packed fragile dishes when securing the fridge. If possible, ensure it’s secured to the wall of the moving truck so it can’t slide or fall on anything during the ride.

13. Let It Sit Upright Before Plugging In

Let the fridge sit upright and unplugged for several hours — or as long as your manual requires. This lets compressor oil settle back into place, which protects internal components when you power the appliance back on.

14. Plug In and Monitor Temperature

Plug in the fridge and turn it on. Don’t put food in it yet — it can take a while for the refrigerator to get to the right temperature for safe food storage. Keep an eye on the appliance for a few hours, checking the internal temperature occasionally. You can restock when it reaches around 37 degrees Fahrenheit for the fridge and 0 degrees Fahrenheit for the freezer.

Staying Safe While Transporting a Refrigerator

two men in white shirts and blue pants stand on either side of a fridge in a kitchen

Moving a fridge is physically demanding, and if you’re not prepared, you can put more than your muscles at risk. Here are tips to mitigate the risks of property damage or personal injury:

  • Lift with your legs, not your back. Bend at the knees and keep your spine straight when you lift or tilt the fridge. Let the dolly do most of the work.
  • Wear closed-toe, non-slip shoes. Footwear that gives you traction reduces the risk of slips and falls. Protective footwear also shields your feet and toes from items that might fall on them.
  • Secure power cords. Coil up cords and tape them to the fridge to keep them from hanging loose and causing tripping hazards.
  • Disconnect and drain. Shut off and drain the water line before moving to prevent electric shock and water leaks.
  • Cushion sharp edges and corners. Adding a bit of cushion helps protect people and property. A fridge corner can easily knock a hole in drywall as you move down the hall. A quick wrap in a moving blanket can prevent that.
  • Don’t do the job solo. We’re repeating this because it’s that important. Even with a dolly and other tools, avoid moving a fridge on your own. Have at least 2 people so someone can act as a guide while the other maneuvers the dolly.

When to Hire Professional Movers to Move Your Fridge

While packing pots and pans or moving your own dishes might be something to DIY, hiring professionals to move the fridge makes good sense. When your fridge might be difficult to move — because it’s oversized or has a built-in water dispenser — pros can provide added peace of mind. Moving services might also help reduce the frustrations of moving a fridge if you need to get it through a narrow space.

How Do You Move a Refrigerator By Yourself?

You probably shouldn’t. Most refrigerators weigh 150–300 pounds, and trying to move one on your own can put serious strain on your back. At minimum, a DIY refrigerator move requires a sturdy appliance dolly, ratchet straps, and someone to help guide or spot you.

If you’re second-guessing yourself, that’s a good sign that it’s time to book professional help. HireAHelper makes it easy to find the right crew for the job.


FAQs

How long should a fridge sit after moving?

If the fridge was upright throughout the moving process, let it sit for a couple of hours before plugging it in. If you had to lay it down to move it, ensure it sits at least the same amount of time upright before plugging it in. Consider allowing a full day when possible, and consult your fridge’s manual for details on your model.

How to move a refrigerator in a truck, car, or SUV?

Transport a refrigerator upright in a truck or moving van. Use straps to keep it secure, and place it near the back wall to prevent tipping. Never move a full-size fridge in a car or SUV — it won’t fit and isn’t safe.

If you have a small fridge that can lie on its side in an SUV, check the manual to ensure laying it down won’t hurt it before you attempt the move. A mini fridge can usually fit on the backseat, and you might be able to use the seatbelt to secure it during the drive.

Is it OK to plug in a fridge right after moving?

Only if it was transported upright the entire time, and even then, it’s a good idea to wait a few hours.

If your fridge was on its side, wait at least 24 hours before plugging it in to avoid damaging the compressor. It’s always best to check the owner’s manual for brand-specific wait times.

How heavy is a refrigerator?

The average refrigerator weighs 150–300 pounds, though larger French door or commercial models can weigh 400 pounds or more.

How to move a refrigerator without scratching the floor?

Use furniture sliders or a dolly with rubber wheels to protect floors. Tape down doors to keep them from swinging open and hitting the floor during transport.

Can You Lay a Refrigerator on its Side?

Author:

Publish Date:

Last Modified Date:

Category: Moving Advice

Tags: Tags: , , , , ,

If you’re out of options and your fridge needs to get horizontal to make a move happen, you can do it. Generally, though, the answer is, “It’s not a great idea.”

Transporting your fridge on its side comes with the risk of damaging the internal components and impacting its cooling functions. You’ll need to take some precautions to ensure you end up with a working fridge after your move.

When you’re moving to a new home, knowing how to safely relocate the fridge is as important as packing your pantry, fridge, and freezer items the right way. Keep reading to learn why laying a refrigerator on its side is a risky move and what leading fridge manufacturers recommend if you don’t have other options.


Why You Need to Be Careful When Transporting a Refrigerator on Its Side

a worker repairs a broken fridge from the components in the back

Can you lay a refrigerator on its side to transport it without risk? Not 100%. Reasons to avoid moving a fridge on its side include:

  • Compressor oil displacement. When the fridge is positioned horizontally, oil in the compressor can move into the refrigerant lines. Displaced oil could cause blockages or negatively impact cooling.
  • Refrigerant distribution issues. Tilting the fridge to extreme levels could cause uneven refrigerant distribution, which impacts functionality.
  • Internal component damage. If you lay a refrigerator on its front or back, it can cause pressure on internal parts like shelves or drawers, which could crack or break.
  • Strain on the appliance structure. Fridges aren’t designed to rest on their sides. The weight could impact frames, joints, and other infrastructure, leading to misalignment.

However, manufacturers’ recommendations for transporting refrigerators can vary widely depending on the model and design. Some brands allow specific units to be laid on their sides, while others warn against it entirely.


“Mini fridges are lighter and easier to maneuver, but they have the same internal systems as full-sized models. The same rules apply…”


Before you move your fridge, it’s best to consult your owner’s manual or check the brand’s official guidance. We’ve summarized some guidelines from major brands below.

Brand Recommendations for Moving Refrigerators

Brand Refrigerator Moving Guidance
GE Top-freezer and side-by-side models can be laid on their sides for transport. Lay side-by-side models down on the freezer side.

French-door, bottom-freezer, compact, and built-in models must always be transported upright.

If you transport the fridge on its side, stand it upright for an equal amount of time as it was on its side before plugging it in.

LG Move the refrigerator in as much of an upright position as possible. If you have to transport it on its side, leave the fridge upright for 24 hours before plugging it back in.
Whirlpool Strap a refrigerator upright in the moving truck. If you must lay the fridge down, only do so on the left or right side (not the front or back). Stand the fridge upright for at least 8 hours before restarting it after transporting.
Samsung Keep fridges upright when transporting if possible. If not, stand them upright for at least 4 hours before plugging them in.
Frigidaire Move refrigerators upright if possible. If you have to lay them down, stand them up in their new location for at least 24 hours before plugging them in.
Bosch Keep the fridge upright during a move. If you can only transport it laying down, ensure it stands upright for at least 3 hours before you plug it in.
KitchenAid Transport refrigerators upright unless it’s not possible to do so. If you moved a fridge on its side, leave it standing upright for 24 hours before plugging it in.

What to Do if You Must Transport a Refrigerator on Its Side

Sometimes, it’s not a matter of can you lay a fridge down, but how can you do it with the least risk. When tight doorways or limited space require tilting a refrigerator all the way down, follow these best practices:

  • Lay the fridge on the left or right side. Don’t lay it on the front or back to avoid damage to internal structures.
  • Remove shelves and drawers. If it moves, take it out to prevent shifting and cracking during transport.
  • Secure the doors. Use straps, tape, or stretch wrap to keep doors in place during the move.
  • Protect the exterior with padding. Use moving blankets or other padding to avoid scratching or denting the fridge.
  • Stand it upright as soon as possible. Don’t leave a fridge on its side in your new home — unload it and get it into the right position immediately.
  • Allow the fridge to sit unplugged. Follow manufacturers’ guidance, which is 3 to 24 hours depending on the brand and model. If you don’t have manufacturer guidance, play it safe with 24 hours or more of wait time.

Transporting Your Refrigerator: Special Cases

A mini fridge filled with snacks and drinks sits in a living room

Knowing how to move a refrigerator goes a long way toward a new home kitchen that’s functional. And since you didn’t go through all the work of packing pots and pans to avoid cooking because your fridge was damaged during the move, following the steps above is a good idea. Here are a few more tips related to special fridge transport cases:

Can you lay a refrigerator on its side for 30 minutes?

Yes, but you still need to follow the same precautions. Even a short trip can shift compressor oil or refrigerant. That is why the same precautions still apply: lay it on its side, secure all internal components, and stand it upright as soon as possible. Once it’s upright again, let the fridge rest unplugged for at least as long as it was on its side or for the length of time recommended by the manufacturer.

Can you lay a mini fridge on its side?

Mini fridges are lighter and easier to maneuver, but they have the same internal systems as full-sized models. The same rules apply, so avoid laying one on its side unless you have to.

A Pro’s Guide to Moving Heavy Furniture Without Hurting Yourself

Author:

Publish Date:

Last Modified Date:

Category: Loading & Unloading Guides

Tags: Tags: , , , , , , , , , , , , , , , , , , , ,

Learning how to move heavy furniture by yourself can be difficult and risky. In 2018 alone, 184,470 workers in the transportation and moving sector sustained injuries on the job that were serious enough to require time off to recuperate. And they had professional experience!

If you’re considering tackling a solo move, it’s important to plan ahead and know how you’re going to handle all the heavy lifting. From getting organized and assembling the right supplies to having proper posture, these tips will help set you up for success.


1. Plan Your Move

Your plan to get organized for your move should start ASAP. Kevin the Mover, a HireAHelper expert with years of experience in the moving business, puts it like this:

“Abraham Lincoln once said, ‘Give me six hours to chop down a tree and I will spend the first four sharpening the axe.’ Okay, that’s a little weird, but moving heavy furniture is the same idea. You gotta really, really prepare.”

Whether you have a room full of home gym equipment, a collection of inherited antiques, or just a living room with a nice sectional and loveseats, chances are you have some heavy furniture to transport. Planning ahead allows you to sort through your belongings and single out heavy pieces that will be more difficult to move.

For each large piece, ask yourself:

  • Will this fit through my doorways?
  • Can I get it down the stairs?
  • How will I get it into my vehicle/the moving truck?

The answers to those questions will inform your next steps and your shopping list. You need the right gear to protect yourself and your furniture. This is not a task to skip over or minimize — your well-being and wallet depend on developing and sticking to a safety-first strategy.

Also, always let someone know you’re planning to move furniture by yourself. They can sound the alarm if you are injured and fail to check in.

When to Call a Professional Mover

While moving furniture by yourself is typically an option, in some cases, it just isn’t practical or safe. Call a professional mover to take over if:

  • You feel pain or discomfort.
  • The item you’re moving is too fragile or valuable.
  • Stairs or narrow spaces make the move dangerous.

Your health and well-being should always come first. If at any point you feel unsure, you should stop and reevaluate before getting extra help. It’s really not worth it to damage your furniture, your home, or yourself trying to tough it out.

2. Gather Your Tools

An illustration of a furniture dolly

Moving heavy furniture requires the right tools. Some of which are almost universally necessary, while others are specialized for certain types of furniture.

  • A furniture dolly for easier transport.
  • Furniture sliders to go under the legs of bigger pieces to facilitate movement and protect your floors.
  • Moving blankets to protect furniture, walls, and floors.
  • Protective gloves to protect your hands and enhance grip.
  • Stretch wrap to keep drawers closed.
  • Lifting straps help evenly distribute the weight of items being carried, and are usually used for heavier furniture like big dressers and couches.
  • Hand trucks for moving items over uneven ground.
  • Packing tape for extra security and keeping moving blankets in place.
  • Ratchet straps and grips to secure cargo during transport.

If you have a prior injury, you may want to wear back or knee braces for extra protection and support.


3. Prepare Your Furniture and the Space

It’s not just materials you have to prepare for, either. Your furniture and home should also be set up so you can have an easier, smoother, and safer time on moving day.

Disassemble Heavy Furniture

Disassembling furniture can make it easier to move items, secure them, and increase the amount of space you have to work with in the moving truck or container. But you don’t need to take items apart completely if that’s not feasible for you. Instead, you can simply take the legs off your dining room table or the mirror off the back of your dresser. Always put nuts, bolts, and screws in a labeled baggie for stress-free re-assembly at your destination.

Some items may not be sturdy or high-value enough to bother taking apart and moving. As Kevin says:

“If you have any pressboard furniture or any furniture that – be honest with yourself – is generally cheap and flimsy, consider selling it or giving it away. Moving it costs time and money and will more than likely turn it into an unusable piece (or pieces) of trash.”

Wrap and Attach Straps

Furniture wrapped with blue moving blankets

Use wraps and straps to make lifting items easier by redistributing weight and improving your grip. Sometimes, moving items as-is to the truck and then prepping them for secure transport gives you more leverage while lifting and loading.

Kevin the Mover explains it best:

“Moving pads can make it hard to keep a firm grip on your furniture. I always preferred to wrap everything in the staging area, or right there on the truck.”

Use Sliders

Place furniture sliders under the feet of couches, tables, chests, desks, appliances, and any other heavy furniture you plan to slide out instead of lifting. These feet, which come in plastic and felt versions, help furniture glide over the floor without damaging your carpets, hardwood, or tile.


4. Clear a Path

Another key to successfully moving furniture alone is to pinpoint potential hurdles before they happen. Before actually picking anything up, walk the path you plan to take heavy furniture through. Look for anything that could trip you up, such as extension cords, loose tile, or frayed carpet. You should also protect your flooring and walls by following these steps:

  • Use sliders or towels to safeguard the finish on areas with hardwood or tile.
  • Use plastic sliders or a dolly over carpeted areas.
  • Cover door frames and walls with moving blankets, foam strips, or bubble wrap.
  • Lay down cardboard or blankets to keep the floors clean.
  • Place temporary runners or mats on the floor to help sliders and dollies move more easily over uneven surfaces.

If you have a large space to traverse and a limited budget, you can create a staging area in the middle. Move everything to that staging area first. Then, move your pads, blankets, and runners to the second half of the path, and relocate everything from the staging area to the truck.


5. Use Proper Lifting and Moving Techniques

An illustration of a sofra being angled through a doorway

Just like your floors, walls, and furniture, you should protect yourself when lifting heavy items. Use these tips to protect your body along the way:

  • Warm up. Do some stretches to warm up your muscles rather than just lifting “cold.”
  • Wear the right clothes. Cover your arms and legs to protect your limbs from scrapes and bruises, and wearing closed-toe shoes with grippy bottoms is also recommended.
  • Practice your posture. Lifting starts with a spine in natural alignment — no stooping or slouching. Stand close to the item you’re lifting and place your feet about shoulder’s width apart for a stable base.
  • Lift from your knees, not with your back. It’s an old adage, but it’s great advice. Tighten your core and squat down to pick up something heavy. Never arch your back.
  • Get a grip. Ensure you have a strong grip before lifting anything. You may need gloves to help mitigate sweaty hands.
  • Straighten up strategically. Use your legs to stand up, keeping your load close to your body at or around waist height.
  • Keep your body aligned. As you walk, always make sure your feet, hips, shoulders, and head point in the same direction. No twisting or abrupt pivoting.

Avoid lifting heavy items above waist height. If you need help getting items into an elevated truck bed, rent a ramp or ask for help.

Finally, always listen to your body. If you need a break — or a complete change of plan — it’s worth the delay to keep yourself healthy. Injuries to the back, ankle, shoulder, knees, and hands are all common when moving. Being aware and planning ahead can prevent you from joining those ranks.


6. Check Yourself and Your Furniture

One of the last steps when you move heavy furniture by yourself is to ensure you and your furniture are in good shape at your destination. Furniture that has been disassembled needs to be reassembled and checked over to make sure everything is tightened and in proper alignment.


“[A]lways let someone know you’re planning to move furniture by yourself. They can sound the alarm if you are injured and fail to check in.”


After unpacking, walk through your main pathways again to clear any debris that could cause trips or falls as you get used to your new space. Items like leftover stretch wrap, a dolly sticking out, or a bunched-up moving blanket can be unexpected hazards if you don’t notice them.

Also, check yourself for injuries. Don’t ignore minor pains that don’t seem to ease up. A simple anti-inflammatory or Epsom salt bath may be helpful for easing basic aches and pains. Anything more serious should be checked by your new primary care physician or a healthcare professional at your local urgent care. Back injuries, in particular, should never be ignored.


Considerations for Moving Heavy Furniture Up or Down Stairs

An illustration of two people safely moving a piece of furniture via a stairway

There’s a reason movers sometimes charge extra for stairs — it’s not easy moving furniture up or down them. The best way to prepare is to look into equipment designed for navigating stairs during a move, such as a stair-climbing dolly. Don’t push or slide items — they’ll likely be in for an unfortunate landing.

This may also be the one time you simply can’t go it alone. Kevin the Mover recommends using the buddy method for moving stuff when stairs are involved:

“Hauling large pieces of furniture – more importantly, heavy pieces of furniture – down a flight of stairs is a dangerous proposition if you don’t take it slow (and smart). Make sure you have a strong friend(if not two) on the lower end as you go down (or up) the stairs. Take those steps one at a time. Rest as often as need be.”

Also, watch out for walls, banisters, artwork, and hanging light fixtures. Remove anything that can be taken down before you start moving.

Keep in mind that moving furniture downstairs increases the risk of injury or property damage. You may want to consider moving insurance that includes coverage in case of a stairs-related accident.


Bonus Safety Tips When Moving Heavy Furniture by Yourself

Here are a few extra tips to help you think outside the box while moving heavy objects by yourself.

  • DIY furniture sliders by cutting circles from plastic lids.
  • Move during cooler times of day, like mornings and evenings, to maximize comfort and lessen the risk of things like heat stroke.
  • Take breaks and hydrate often.
  • Consider renting tools instead of buying them.
  • Take photos of your furniture before and during disassembly to use as a guide for reassembly later on.
  • Take doors off their hinges to gain a couple of extra inches of clearance and help large items fit through.
  • Bungee or strap items to your dolly to prevent slippage.

FAQ

How to move a dresser by yourself?

To move a dresser by yourself, start by removing its contents and drawers. Take off any protruding elements, such as a large mirror or spindle legs. Use furniture sliders or a dolly to help move the dresser from your room to the staging area or moving truck.

Make sure you’re using a dolly with straps or moving straps if you need to carry or roll the dresser instead of sliding it. It may be harder to move heavy furniture by yourself downstairs. In that case, call a friend or hire professional movers to put safety first.

How to move a heavy bed by yourself?

To move a heavy bed by yourself, start by clearing a path to your staging area or truck. Then, take apart the bedframe. Separate the mattress and wrap it in a protective cover, and use furniture sliders or a dolly to transport the disassembled pieces.

You should also use lifting straps to maneuver bigger pieces, such as the headboard and footboard. Lift with your legs, not your back, and take as many breaks as necessary. Always secure furniture to your dolly and in the truck for safety and to prevent damage.

How Often Should You Clean These 20 Household Items?

Author:

Publish Date:

Last Modified Date:

Category: Home Improvement, Organization

Tags: Tags: , , , , , , , , , , , , , , ,

Cleaning the house is one of those things that most people just don’t like to do. Getting out the rubber gloves, smelling all of the chemicals and spot cleaning with a toothbrush isn’t exactly the most appealing activity.

However, different areas in your house can be a breeding ground for bacteria, mold and fungus. Places you didn’t know were hazardous like your kitchen and bathroom sinks can become some of the most disgusting places.

So how often, exactly, should you clean each area of the home? We’ve got your answers!


[SEE FULL INFOGRAPHIC]


How Often Should You Clean Your Living Room

Living Rooms

Your living rooms are naturally some of the cleanest parts of the home. However, we can track dirt in or kids and pets can make spills, so it’s best to keep up with this area fairly often. Here’s how often you should clean things in your living room.

Carpet

Once a week: Your carpet is a place where dust, dirt and allergens tend to hide. Giving your floors a weekly clean with a good-quality vacuum cleaner is super important. In places with constant foot traffic, you may want to vacuum more than once a week.

Protip: If you need to spot clean a stain, you can mix a teaspoon of liquid dish detergent with a quart of warm water and ¼ teaspoon of white vinegar. Apply this mixture on the spot and then rinse and blot dry!

Couch

Once every two weeks: Most people don’t realize how much dirt, dust, fur and oils your furniture absorbs. It can host allergens and other nasty things if left unattended. Regular cleaning can help extend the life of your furniture, which means a surface cleaning every couple of weeks using the upholstery attachment on your vacuum.

Protip: You should also plan to have a professional clean the upholstery about once a year, depending on how much you use the piece of furniture. If you develop a stain in between cleanings, put your iron on the “steam” setting and wave it back and forth over the problem spot.

Windows and Blinds

Once a month: The windows and blinds in your house can accumulate dust and dirt. To keep the mess at bay, you should try to wipe down your windows and blinds at least once a month.

Protip: When cleaning your blinds, you can use an old sock dipped in a 50/50 solution of vinegar and water. Stick your hand inside the sock and swipe it over each blind for a quick and easy clean.

Ceiling Fans

Once a month: Have you ever had dust accumulate on the blades of your ceiling fan? Since it’s so high up, many people forget that it’s up there until the dust bunnies have already taken over. To prevent the dust buildup, dust the top of your blinds once a week.

Protip: You can prevent the dust from falling everywhere if you use a pillowcase to dust your fan blades. Simply slide each fan blade into the pillowcase and enclose the case around it, then slide it off. The dust will stay inside the pillowcase and you can easily throw it in the wash when you’re done!

Baseboards

Once a month: Your baseboards can collect dust and dirt, but most homeowners don’t see cleaning the baseboards as a priority. If you keep up with cleaning them once a month the task won’t be too time-consuming.

Protip: Use the brush attachment on your vacuum to swipe the top edge where the dust settles. If there are scuffs or spills, wipe them away with an erasing sponge.

How Often Should You Clean Your Bedrooms

Bedrooms

Your bedroom may accumulate more germs than you realize. Since you spend a good amount of time here (approximately one-third of your life), it tends to accumulate germs. How often exactly should you clean your sleeping quarters? We explain here.

Bed Linens

Once a week: Bed sheets can accumulate a serious collection of sweat, body oils, dirt from outside and more. When they get too dirty they can become a breeding ground for bacteria and fungi. Those are not things you want sharing a bed with you! While most people wash their sheets only every four weeks, experts recommend washing them once a week.

Protip: If you have white sheets, toss a squeeze of lemon juice in the washer. It’s a natural brightener without the chemicals in bleach products.

Duvet Cover

Once a month: If you use a top sheet you can get away with washing your duvet cover once a month. If you don’t, you may want to wash it every two weeks just to be safe. Like pillows and bed linens, duvet covers can be a breeding ground for bacteria, fungus and dust mites.

Protip: Changing a duvet cover is on most people’s list of top annoying things, but did you know there is a simple hack to make the job easier? Use the burrito method for an easy switcharoo. Turn your duvet cover inside out and place comforter on top. Roll it up, tuck it in, and unroll it—it’s magically on!

Bed Pillows

Every three months: While you should be washing your sheets (and pillowcases) once a week, you should be washing the pillows themselves once every three months. Pillows can play host to critters and debris like dirt, oil, skin cells and even dust mites.

Protip: Most down-alternative pillows can go in the washing machine, while feather pillows need to be dry cleaned. Buy down-alternative to ensure cleaning is easy and frequent.

Mattress

Every three months: Your mattress is another thing that can accumulate sweat, dust, dust mites and allergens quite easily. To keep the bacteria and fungi at bay, clean your mattress with the seasons. You can use the upholstery attachment to vacuum the mattress, and clean its cover (if it has one).

Protip: Spot clean oil stains or food spills with a mix of baking soda, salt and water. Cover the stain, let it sit for 30 minutes then wipe it away with a damp cloth.

Closets

Twice a year: It’s usually a best practice to do a full-closet cleaning and purge twice a year. While it can seem like a daunting task, having a clean closet full of clothes you actually wear can be a game changer for your morning routine.

Protip: When purging, keep basic, classic items and toss anything trendy you haven’t worn in over a year. You can also ditch duplicate items or things you don’t feel comfortable in. Your closet should be full of only things that make you happy!

How Often Should You Clean Your Bathroom

Bathrooms

We all know the bathrooms can get pretty gross, but most people probably still don’t clean them as often as they should. Things like bath towels and bath mats can accumulate mold, while your toilet and sink can be a bacteria breeding ground. Here’s how often you should clean the things in your bathroom.

Toilet

Every day: Toilets have a reputation for being the dirtiest place in the house, but the average toilet is cleaner than you think. To make sure your toilet stays sanitary, it’s best to give it a light clean every day, then give it a deep clean once a week.

Protip: Want to keep toilet stains at bay? Pour vinegar in the top of your toilet and let that sit while you spray vinegar around the seat and clean.

Bathroom Sinks

Every day: Did you know that your bathroom sink is even dirtier than your toilet seat? The bacteria travel from your hands onto the sink every time you wash your hands, so it’s incredibly important to disinfect your bathroom sinks every day.

Protip: You can use disposable disinfecting wipes daily to make sure the area stays sanitized. It’s easy, and you can throw the whole mess away afterward!

Bath Towels

Every three or four uses: Towels are tricky, because the more you use them, the more often you will need to change them. If you take more than one shower a day, or if you have multiple family members using a towel, it may need to be cleaned once every couple of days.

Protip: On the other hand, if you’re the only one using it and you shower at the gym three times a week, you may be able to get away with washing it weekly. Be sure to wash your towels in water that is at least 140 degrees Fahrenheit (60 degrees Celsius) so that you kill all of the bacteria that’s inevitably breeding them.

Shower Grout

Once a week: Your grout can be one of the most annoying things to clean in your bathroom. However, it can also make the most impact on how clean your bathroom looks. Nobody likes a shower with dirty grout, so keep up with cleaning it weekly.

Protip: To clean, dip a toothbrush in bleach and scrub any discolored areas. Every once in a while you will need to seal your grout so that water and mold can’t seep in.

Bath Mats

Once a month: Bath mats that have rubber backing can wear out faster if they are washed more than once a month. However, mats that don’t have a rubber backing, or that are in a frequently used or extra-dirty space like the kids’ bathroom can be washed more often.

Protip: If a rug doesn’t have time to dry out it can harbor all kinds of mold and fungi. To kill all signs of life, wash the rug on high heat. Rugs with rubber backing should be air-dried.

How Often Should You Clean Your Kitchen

Kitchens

Believe it or not, your kitchen is the dirtiest place in your house. This is pretty unsettling considering we cook our food here. But, that’s precisely why it’s so dirty! Germs like e.coli can stick on cutting boards, hide in your fridge and set up camp in your sink. Here’s how often you’ll need to clean to maintain a safe and sanitary cooking environment.

Kitchen Counters/Sink

Every day: The kitchen sink and counters can be another place that germs accumulate. Since you’re often cutting meat and dealing with food products, the kitchen sink can actually end up being one of the dirtiest places in the whole house.

Protip: To keep your eating area sanitary, use one tablespoon bleach in one quart of water and spray down the sink daily. You can also use disposable disinfecting wipes here.

Sponges

Every week: Unfortunately, the trend is to keep your kitchen sponges until they smell and fall apart. Letting them get this bad means that they’re teeming with bacteria, funguses and things that can potentially make you sick. You should be cleaning your sponge weekly, and replacing them every two to three weeks.

Protip: For their weekly cleanings, mix ¾ cups bleach in one gallon of water and let your sponges soak for several minutes. Then just rinse and you’re done!

Oven

Once a month: Many people think that cleaning their oven is something to save for a special occasion, but the longer you wait to clean it, the harder it will be. Keeping up with monthly cleanings is the best way to make sure your oven stays in good working order.

Protip: A trick to making the process easier is to put a bowl of water in the oven and turn it up to high for 20 minutes. This will help loosen some of the dried dirt and grease. Then, wait for the oven to cool before wiping it clean!

Dishwasher

Once a month: Most people don’t realize that their dishwasher can accumulate all sorts of gunk and grime. It cleans the dishes you eat off of so you will want to make sure you give it a routine cleaning once a month (and a deep cleaning once or twice a year).

Protip: Place a cup of vinegar inside the dishwasher and run it on a hot water cycle. This is a great way to routinely clean your dishwasher and keep it in tip-top shape.

Refrigerator

Four times a year: A clean fridge is a safe fridge, yet nobody likes to deep clean it. While it’s best to give it a wipe down daily, you should only need to give it a deep clean about four times a year.

Protip: When you’re getting ready to clean the fridge, purge it of any ingredients that are past their “use by” date. Remove and soak the drawers in warm water while you wipe down the rest of the fridge. It’s best to work in sections so that all of your food doesn’t get too warm!

How Often Should You Clean These Household Items

×

I'm Moving

Moving? Thinking about moving? Whether your move is off in the distance or you already have one foot out the door, you'll learn about everything you should expect through our useful how-to's, cool articles and much more. It's all specially curated for you in our "I'm Moving" section.
Explore
×

I'm a Mover

For rookies or veterans alike, our "I'm a Mover" section is filled with extensive industry news, crucial protips and in-depth guides written by industry professionals. Sharing our decade of moving knowledge is just one way we help keep our professional movers at the top of their game.
Explore