The Unexpected Perks of Local Moves

Author:

Publish Date:

Last Modified Date:

Category: Local Moving

Tags: Tags: , , , , , , , , , , , , , ,

Often when people move, it’s across the country or at least across the state. But for my recent move, it was just about seven blocks away! Yes, I just completed a local move. And I’m a little surprised about all the unexpected perks.

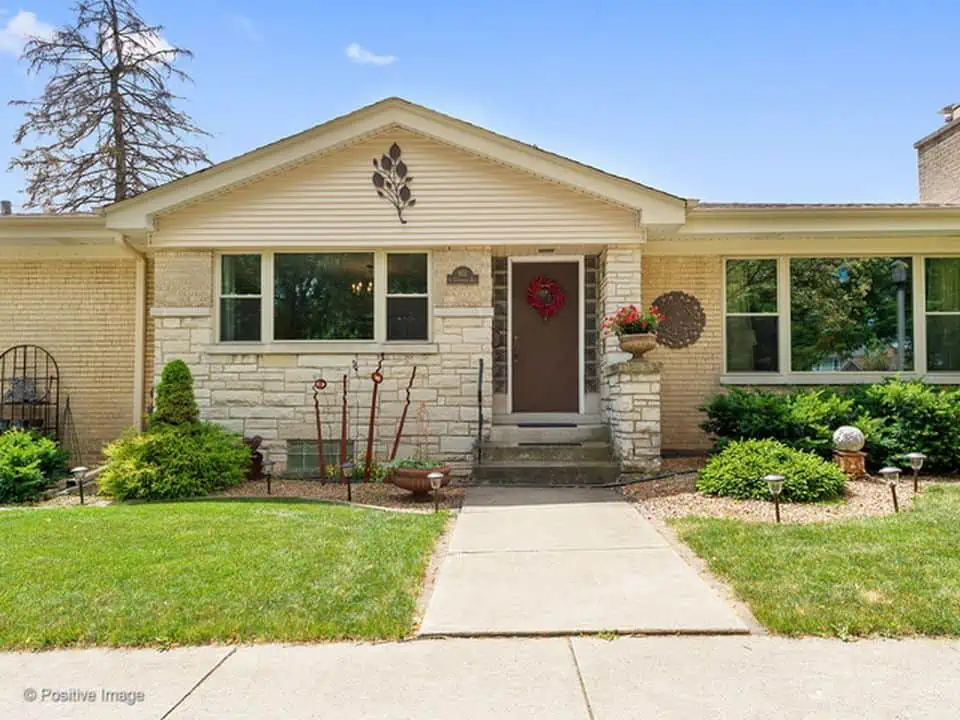
Here’s the story: My husband and I are expecting our first child and have had our eyes peeled in our “dream neighborhood” for over a year. This neighborhood came with a much better school district, a house big enough to accommodate our growing family, and a close-knit community that we were eager to join.

So although it seems silly to think we put in so much effort for a move just seven blocks away, we think it was well worth the investment and are so happy with the decision.

What We Learned

We didn’t have to be as organized.

A lot of my friends have moved across the country and in doing so, have had to really focus on their moving gameplan because it came with some serious logistics. How many days and miles do you need the moving truck for? Who will drive the moving truck and who will drive the family’s cars? What do you gotta bring on the moving truck to survive the few days en route?

Figuring out this information wasn’t exactly impossible for them, but I found out (the easy way) that common logistic problems definitely didn’t sneak up on me because our move was local.

Scheduling and driving a rental truck was easy-peasy.

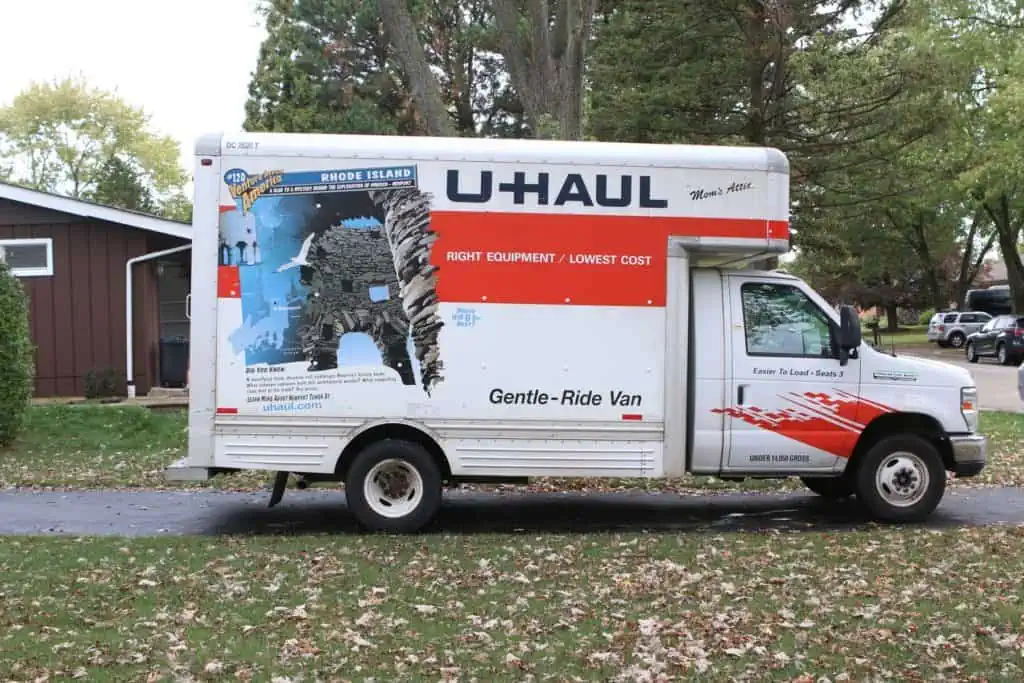
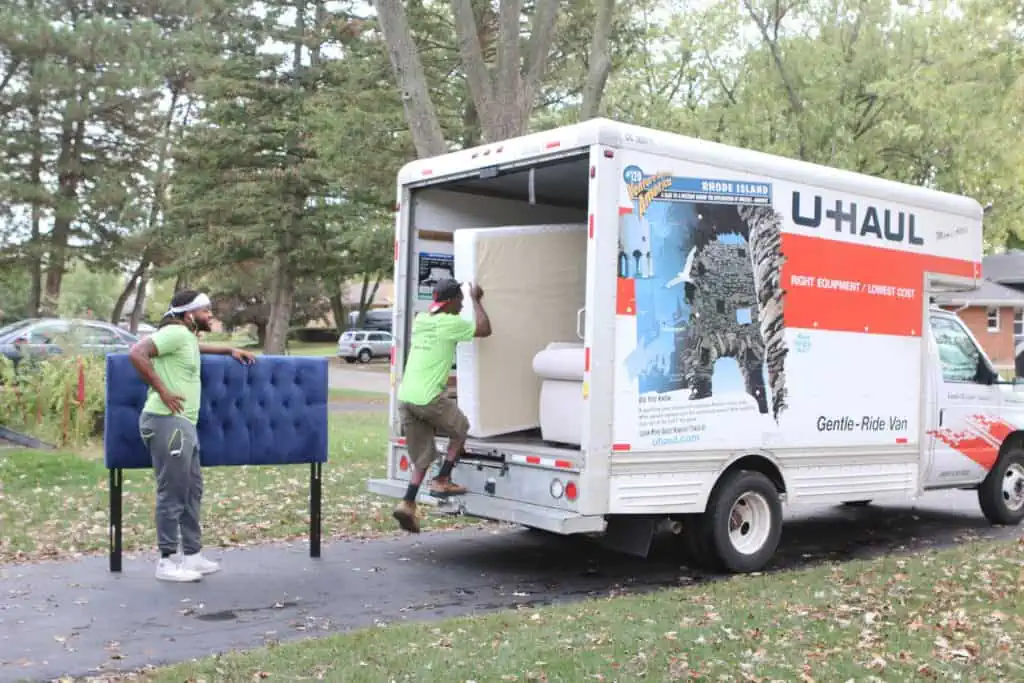
To save money, I opted for a Hybrid Move. Translation: I hired Helpers for the heavy lifting, but rented and drove the moving truck myself. Because my move was local, when I was choosing the truck I needed, my priorities were strictly around the size. Nothing else.

Here’s another thing: Often times during long-distance moves, new homeowners need to research a truck that has extra seating, valuable leg room, USB or GPS capabilities, etc. Guess what? That extra information didn’t matter so much to me as I was zipping back and forth. Plus, the rental process was a breeze because there were so many trucks available in our area that fit our minimal requirements.

4 Cases Where You Really Should Move to Save Money

If you like to burn money, don’t read this post.

Even details like where or when I needed to drop the truck off were far less complicated because I was going to pick-up and drop-off at the same location, which meant I was dealing with one salesperson the entire day. And yes, he quickly got to know me when I picked it up and was very flexible on when I brought it back. Repition is nice.

Plus, I’m not necessarily “used to” driving a 15-foot moving truck, but I can do anything for 7 blocks, right?! I would have been a bit more hesitant to drive a solo mission across the country, but zipping around a neighborhood I was already familiar with was definitely a perk that came along with this local move.

My neighbors were a huge resource.

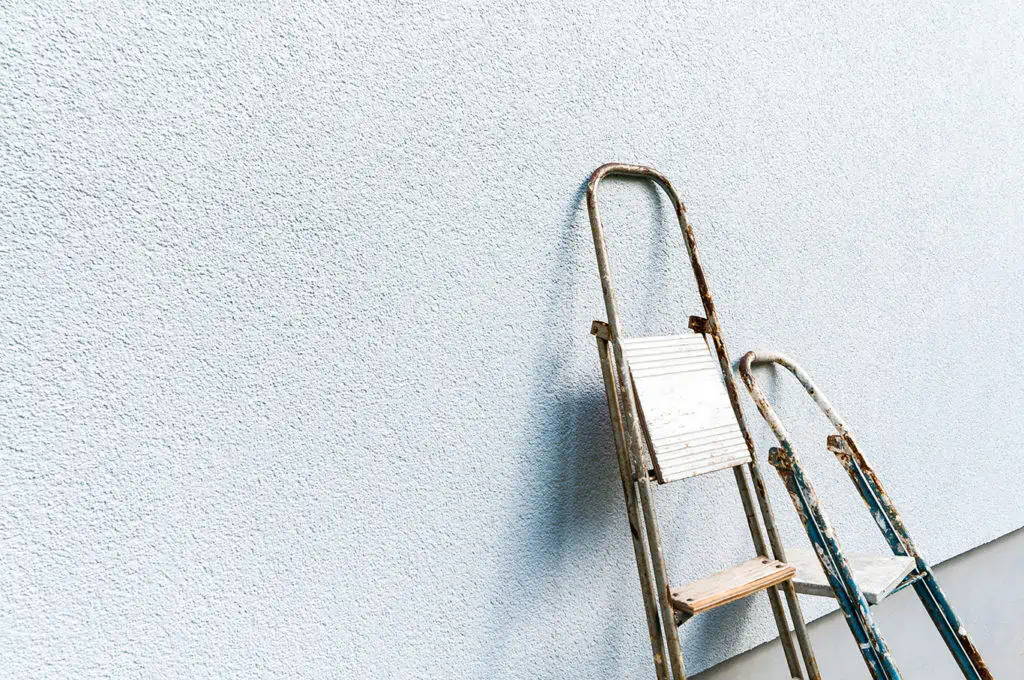
When we moved into our new house, we needed an extension ladder to get up on the roof right away. The homeowner before us left several decorative ornamental pieces on the siding around our home and I couldn’t stand to look at these eyesores another day! You’re probably laughing at me, but seriously, a missing extension ladder was the only thing holding me back.

Google Map image of my new home.


Sure, we could have purchased one, but they’re expensive (like almost $200!) and it would’ve taken up quite a bit of non-existent room in our limited garage space.

But – yet again – because we still lived so close to our old house, we were able to borrow the ladder from our old neighbor! We drove it the seven blocks to our new house, used it, did a happy dance on our lawn once the job was done, then drove it right back to our old digs. I had no idea that the network we made in our old neighborhood would pay off so quickly, but staying local does have its perks … especially when you find yourself in a bind!

Potential financial overlaps pay off … big time!

Paying two mortgages at the same time is not fun, but ironically for the few days that we had possession of both our old house and the new house was pretty amazing in terms of moving perks. If you’re moving locally and have the chance to close on your new house just a few days before the old ones, do it! I can’t begin to tell you all of the hidden perks that came along with this situation.
For one, we were able to accomplish a lot of our DIY projects in the new house without having to live through the mess. We demoed the trim, added new trim, painted the walls, and had the floors re-finished all before we had to move into our new place. This was an epic success because we were not only able to dodge the mess and dust, but these jobs were so much easier (and quicker) to accomplish without the nuisance of all of our delicate, new furniture.

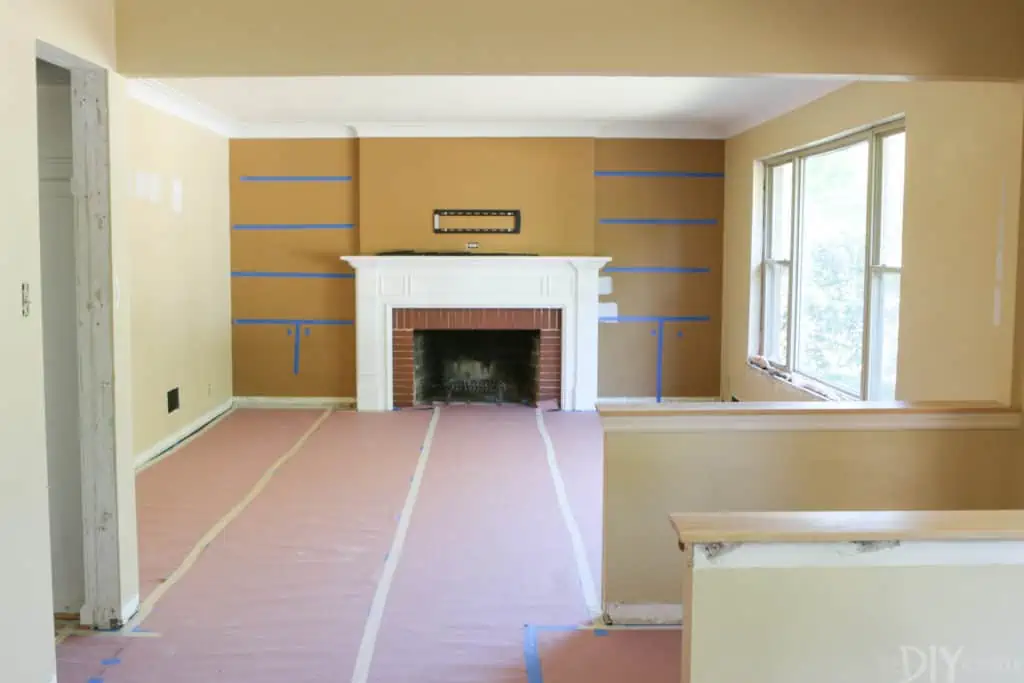
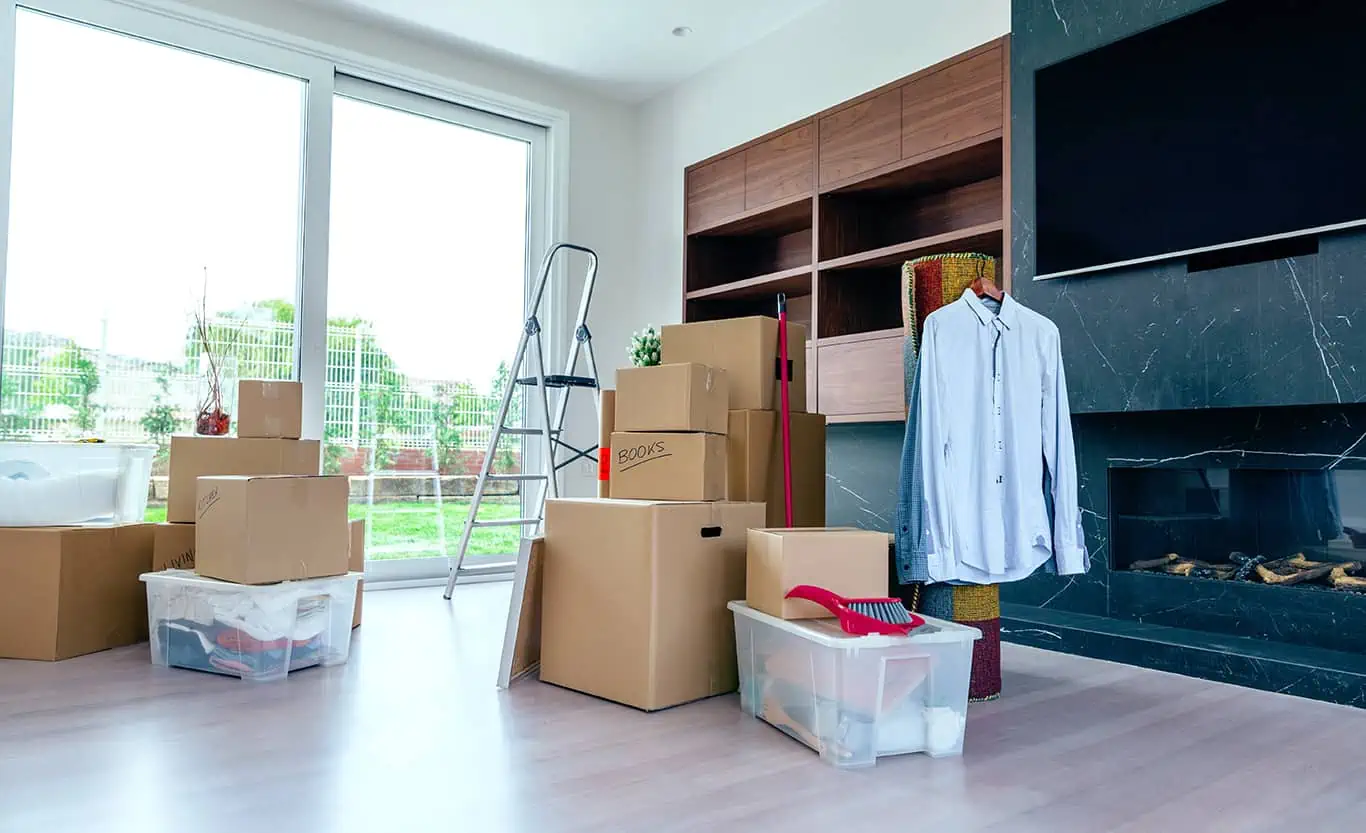
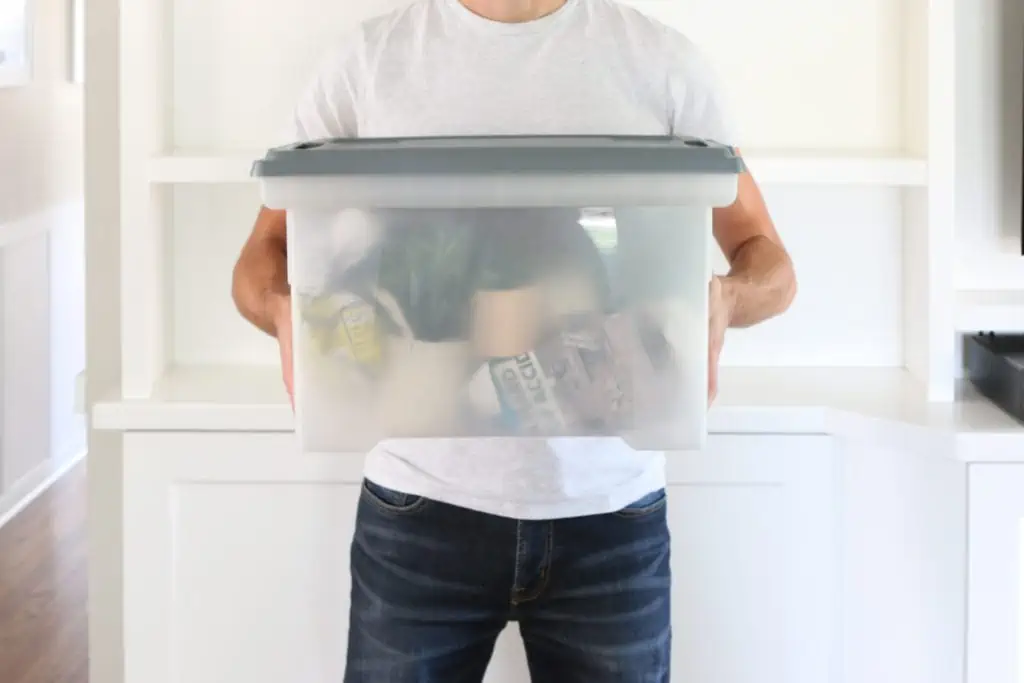
And speaking of all my “stuff”, after the DIY dust settled, we started bringing over the light-weight boxes to our new home. Anytime we would drive to the new house, we would fill up our cars with a few boxes and before we knew it, a lot of our stuff was already there and it wasn’t even moving day yet!

I can’t stress enough how much time, money and stress we were able to save thanks to this overlapping, local ownership.

We leisurely unpacked our wardrobes, bathroom essentials, and entire kitchen before moving day. When moving day finally arrived, we needed to hire the minimal amount of Helpers, then, the entire job was done in two hours! Plus, the unpacking process was a lot less stressful because nothing needed to be unpacked immediately since the closets, bathrooms and kitchens were already done.

With the help of the movers, moving day turned out to be relaxing (yes, that’s a thing!) … a welcome perk I definitely didn’t see coming.

The transition of utilities was seamless.

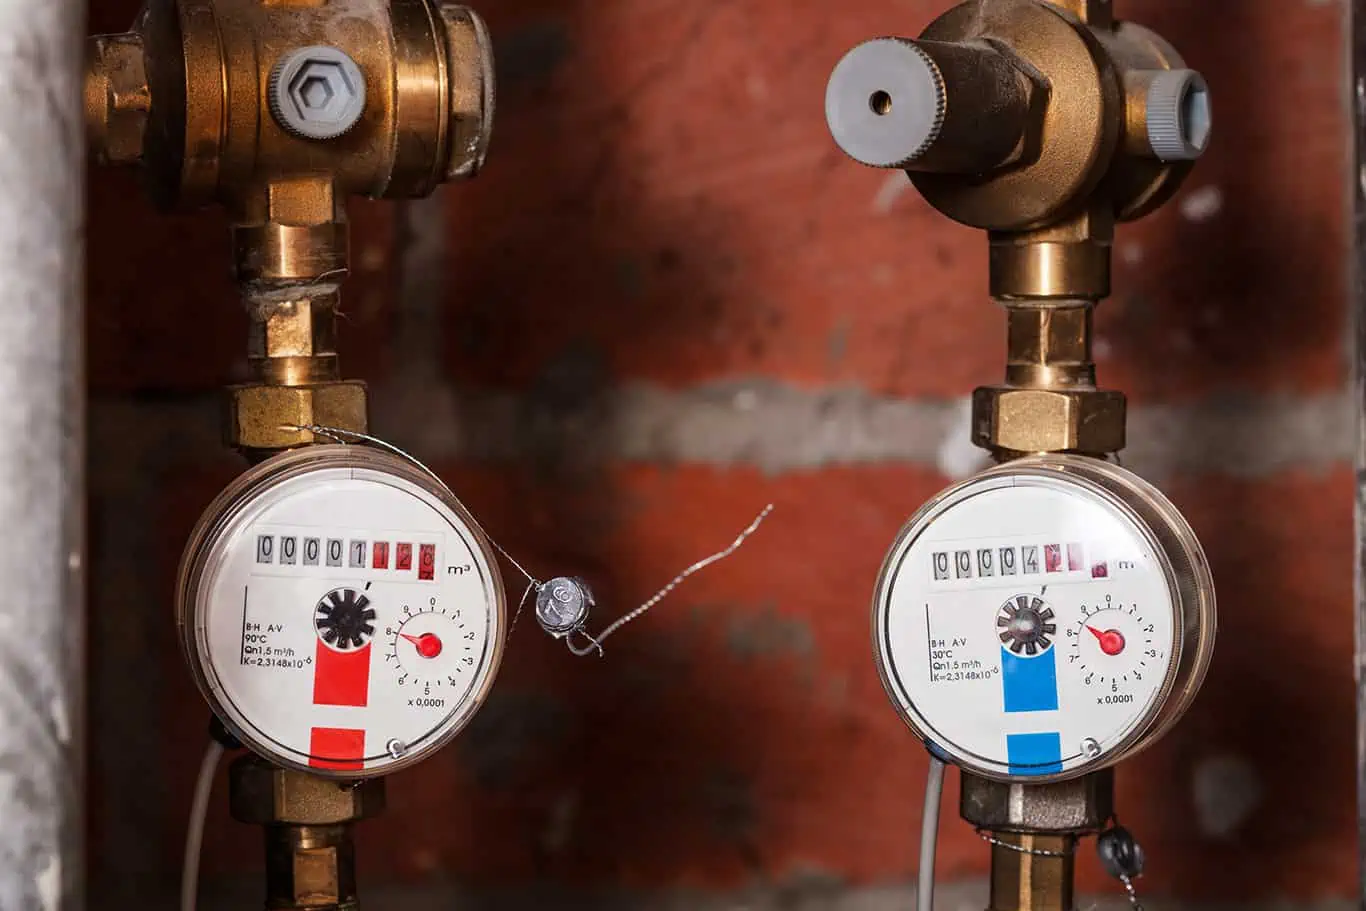
When we called about canceling some of our monthly utilities, some of the companies quoted us a cancellation fee because we would be ending our contract. But much to our surprise, a lot of these cancellation fees were waived if we had these services transferred over to our new house instead. We obviously opted for that option, which made the transition pretty seamless and much more affordable.

It also made paying our bills a whole heck of lot less time-consuming because we didn’t have to set up new automatic pay accounts through our bank for all of these new utility companies. So we could continue making payments and the utilities continued just like usual. It was definitely a win-win!

All our food stayed fresh.
How to Pack Up a Kitchen - Fridge, Pantry, and Freezer

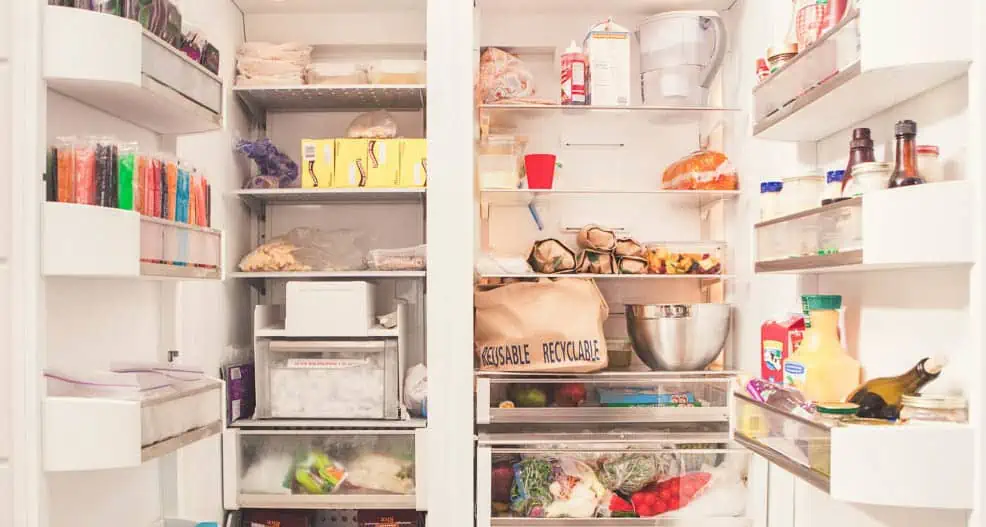
Another unexpected perk was not as significant as the previous ones, but one I still appreciated!

In a long distance move, transferring your frozen or refrigerated food is another task that needs some pre-planning and an exact game plan. Groceries are far too expensive to let them go to waste because of poor planning. But in my local move, none of this pre-planning was necessary. No cooler (or planning) necessary! I don’t know about you guys, but I could get used to this trend of not having to pre-plan during a move!

Long story short, my seven block move came with some pretty unexpected perks that ending up saving me time, money and stress. Some of our family and friends rolled their eyes at us when we announced that we were hopping just one neighborhood over, but I’m happy to report it wasn’t that big of a deal to do, and the perks for us were huge; Even if it’s just seven blocks away from our old one!

The DIY Playbook are Bridget and Casey, two crafty bloggers writing out of Chicago about cool DIY projects, lifehacks and money saving techniques. After 15 years of blogging, they believe that if they can figure out how to DIY it, you can definitely do it too.

How to Choose the Right School for Your Kids Before You Move

Author:

Publish Date:

Last Modified Date:

Category: Kids & Pets

Tags: Tags: , , , , , , , , , , , , , , , , , , , ,

There are many factors that go into choosing a new home … the size, the layout, the number of bedrooms and the cost. But if you’re a parent, soon-to-be-parent or a someday-parent, then there’s another thing you really have to factor in: the school.

As a teacher, a soon-to-be mom and a homeowner who just moved to be in the school district of her dreams, this topic has been on my mind a lot lately! When looking for a new home, my husband and I narrowed down the location based on the best public school district in our area. There were plenty of homes we loved that were outside of the exact district lines, but we chose to ignore those open houses so we could concentrate specifically on finding the home AND school of our dreams for our child.

But how do you even go about finding the best school for your child? What information is important to consider? That’s what today’s “lesson plan” is all about!

Consider Private vs. Public

First up, you need to choose between private or public schooling. The primary difference between these two options comes down to funding. Public schools typically receive government funding, whereas private schools charge tuition for each student. Let’s look at how that impacts other critical factors.

The Cost of Schooling

Here’s the 101 on private and public school financials.

Because public schools are financed through federal, state and local taxes, they must follow all the rules set by the government. Unfortunately, sometimes this can lead to some public school systems being underfunded. For us in the Chicagoland area, the location of the district makes a big difference for how well-funded it is. Obviously, better funded public schools are often found where the average housing costs are higher. Therefore, families often pay extra in housing costs to live in the “ideal” neighborhoods in order to be in the best public school districts. When it comes to admission, by law, public schools must accept all children. And a lot of kids are attending public school … about 90% of children in America, according to the National Center for Education Statistics.

Conversely, private schools generate their own funding through tuition, private grants and fundraising efforts. According to the National Association of Independent Schools, the median tuition fee for private schools is close to $12,000 per year. Often times parochial schools charge much less than that (around $3,000 per year), whereas boarding schools often come with a higher price tag (up to $37,000 per year).

Because these institutions are in demand, private schools can be selective when it comes to admission. This means that the admission process often involves interviews, essays and testing for each student.

The Best Location

But how does choosing public or private affect where you’re going to live?

If you choose the private school route, you’ll have a bit more leeway into where you choose to settle down. But of course, you will want to consider your child’s commute to school every day. Often times private schools do not offer transportation, or if they do, it’s with extra fees, so making sure your child will have a safe and efficient way to get to and from their private school is definitely something to consider.

Public schools are a little more complex. Namely, there are specific district lines that you must live within in order to send your child there. In fact, all districts require proof of residency before you can enroll your kids in a public school. When you’re searching for a new home, often the listing on sites like Zillow and Redfin will include the nearby schools and give a “School Rating.” But if you’re buying a home, it’s always best to call the district to verify, especially because district lines can suddenly change and the real estate site’s information may not accurately reflect this updated information just yet.

Check out a School’s Report Card

Just like kids, schools get report cards too! But it’s up to you to do your homework online to gather all of this crucial info. Both GreatSchools.org and The National Center for Education Statistics offer data for each school district, including information on test scores, education programs, graduation rates, and teacher quality.

When it comes to teachers, there is a difference in certification between public and private schools. Teachers in public schools are usually state certified, whereas teachers in private schools may not be required to have certification. They often have subject-matter expertise or an undergraduate degree in the subject they teach, but actually don’t always have to meet the standards that the state outlines for a teaching license.

Also, don’t forget to review the curriculum at the schools you’re considering!

This isn’t always the same between private and public schools. Public schools follow state guidelines, a curriculum that must meet specific standards and common state assessments, while private schools have the freedom to design their own curriculum and don’t always mandate standardized tests.

To get real reviews from other parents about their school satisfaction, you can check out GreatSchools.org. Here, parents write detailed reviews about their school’s curriculum, class sizes and thoughts on the teachers. This real talk may be insightful as you narrow down your top choices.

Consider Your Child’s Personality

But those “report cards” don’t always give the full picture. Because every child is different, be sure to think about the unique qualities and characteristics of your child when choosing a school. The right combination is not always super obvious.

With that in mind, when finalizing your top school contenders don’t forget to review:

  • Class sizes
  • Student-teacher ratio
  • Special education needs
  • Accelerated programs
  • Extracurricular activities

Make sure you’re giving your child what they need from their education! Consider questions like these: Is your child introverted? Does she like a particular sport? Does he need special attention or accommodations? Answer these crucial questions about your child while thinking about the list above.

Private schools may have programs for gifted students and can specialize programs to offer extra curriculum surrounding the arts or technology. However, most private schools are not able to fully accommodate students with learning disabilities. Because public schools have a responsibility to teach all students, they often have programs set up and funded just for children with individualized academic or developmental needs.

Extra Credit: Ask the Neighbors

If you’re really interested in a neighborhood and school, speak to parents in that area. This is a great way to gauge the area and see if the parents there are satisfied. If you find glowing reviews from real parents, chances are you can trust that they are doing a stellar job!


When it comes to deciding between private or public school (and choosing a school district), it’s important to remember that it’s a very personal choice for you and your family. There is no right or wrong answer. Do your homework, but at the end of the day know that only you can make the best decision for your family.

As for me, even though my baby isn’t here yet, I’m happy to know that when school time eventually gets here we already have our ideal home and school district all planned out for his future. That’s because we did our homework before we started searching for a new home!

If You Have Kids, Test Your Home for These Things Right Now

Author:

Publish Date:

Last Modified Date:

Category: Home Improvement, Kids & Pets

Tags: Tags: , , , , , , , , , , , , , , , , , ,

I recently moved while pregnant and let me tell you, the struggle is real! Although there were some unexpected perks (it helps to have a literal built-in excuse not to have to do the heavy lifting), there were also a slew of concerns and precautionary steps I took to keep me and Baby Mac safe throughout the process. (In case you’re wondering, he’s due in February!)

I’m definitely not here to scare any future moms. We all know there’s plenty of material available that can do that. But I also didn’t want to go into my move blind to the potential hazards that a new house can pose to you or your baby’s health.

So as an expecting mom and a special education teacher who sees the effects of these household dangers far too often, I’m here to share important research so we can be diligent in taking the necessary steps to keep our babies safe.

You Need to Get Your New Home Tested for Lead

According to the Centers for Disease Control and Preventions (CDC), 1 in every 38 kids is impacted by lead poisoning. Exposure to lead at a young age can come from many things, but usually include these lead-based sources:

  • Lead paint
  • Lead in a tainted water supply
  • Lead fumes during construction

When a child is exposed to this dangerous toxin, they are at high risk of developing a learning disability, a lower IQ and/or damaged organs. In some extreme cases, it can even cause death.

We can all agree that we would never want to expose our babies or young children to lead, but the scary part is that sometimes we do so without even realizing it. That’s why with just a little research and the right tools, you can arm yourself with the resources you need to test for lead products. And often times, all you really need is yourself!

How to Test for Lead

Large companies, such as 3M, sell DIY lead checking products (some for under $10!) that you can purchase and use to test the paint in your home. The directions will coach you on how to swipe the painted surface and almost instantly identify whether or not that paint is contaminated.

If you are an avid DIY-er like us, be sure to use these strips to test any furniture you may be giving a makeover for the new nursery, too. You definitely don’t want to sand down an old dresser that was previously painted with lead paint. That dust can be extremely dangerous when it becomes airborne. You also don’t want to paint over it since your little one could peel away that paint some day and ingest it. There are plenty of old dressers that need a lot of DIY love (so don’t ditch this creative idea entirely!), just be sure to choose one that doesn’t have a history with lead.

https://www.youtube.com/watch?v=BWgxU9BSBng&feature=emb_title

According to the Environmental Protection Agency, 10-20 percent of our exposure to lead comes from water. This is especially dangerous because we may not even realize we are mixing lead-infused water in our baby’s formula and potentially causing serious damage in the process. To test the water in your new home, simply contact your water supplier and ask for it to be tested. If this is not a service they provide, the EPA has contact information for approved testing labs you can reference right here. Just click on your state and search your state government’s resources!

What to Do If Your Child Has Already Been Exposed to Lead

If you have little ones and are concerned that they may have already been exposed to lead (sometimes it can be inhaled through contaminated dust without you even realizing it), don’t freak out – you can often get their lead levels tested at your local pediatrician, just make the appointment today.

Take the precautionary steps to avoid this contamination, and you are your little one will be safe. Just be sure you use the resources available to confirm that your new home is clear of any risk before it’s too late. The bottom line is that lead poisoning is extremely dangerous and fetuses and small children are unfortunately at the highest risk of the side effects.

Get Your Home Tested for Radon

Who knew some old houses could have a dangerous build-up of radon lurking within? I had no idea until right before I moved into my new house and did some investigating. I’m definitely not a pro on the topic, but here’s all the info I found out through my moving experience.

Radon is a dangerous gas that radiates out of the soil over time and is more prominent in some areas of the country versus others. Those areas’ homes catch these gases, trapping them inside and increasing the levels of radon to a point that can be dangerous to live in over long periods of time. According to the American Lung Association, radon is the second leading cause of lung cancer … right behind smoking! I don’t want my baby exposed to second-hand smoke and I don’t want him exposed to high radon levels either.

How Do I Get a Radon Test? How Much Does it Cost?

Getty Images

The great news is that high levels of radon in your home don’t need to be a deal breaker because there are solutions to lower the levels of gases. Each state’s EPA shares resources on which companies you can call to test your home for radon right here. This test costs a couple hundred bucks (depending on location, house size, etc.) and it takes a few days to complete. To test for it, a tracker is placed in your new home, usually in the basement. Note that the longer the tracker can stay in the home, the more accurate the read will be.

For reference, the average level of radon in households across America is 1.3 picocuries per liter and according to the EPA, you need to take action on reducing radon on or above 4.0 pCi/L. Talking to the company who tested your home will be the best resource to start identifying what specific steps you can take to decrease these radon levels now and eliminate them from rising in the future.

Other Harmful Chemicals to Consider

Okay, the two biggest chemicals that may lurk in your home prior to moving in are out-of-the-way, but we don’t want you to forget about the ones that may pop up throughout the moving or nesting process. Here’s a list of other common products that could be useful as you get settled in, but ones you need to take precaution so you are not exposed to:

  • Rodent/Insect pesticides
  • Landscaping pesticides or fertilizers
  • Paints with VOC
  • Polyurethane finishes for floors
  • Paint removing liquids
  • Spray paints (it’s better to roll/brush no-VOC paints if possible!)
  • Arsenic (which is a substance that a lot of outdoor decks or wood is treated with)

Especially if you’re pregnant like me and someone in your home needs to use these listed products, be sure to use proper ventilation, steer clear, or even see if you could stay at a friend’s place until the fumes are gone. It’s always better to be safe rather than sorry, right?

Overall, I went into my move feeling a lot more at ease about these potential dangers because I invested a little time and money into having my house tested for both lead paint and radon levels. Also diving into these topics a little deeper helped me identify how I can take steps later in my pregnancy (or in future pregnancies) to stay safe, which I’m very grateful for. If you’re looking to move while pregnant, I hope you too can find peace of mind by getting your home tested (and cleared!)

House Hunting While Expecting? Don’t Forget About These Things

Author:

Publish Date:

Last Modified Date:

Category: Kids & Pets

Tags: Tags: , , , , , , , , , , , , , , , , ,

As a mom-to-be, I had one thing in mind when my husband and I were recently house hunting while expecting: a space that was ideal for our growing family. We were no longer just looking for a home that was perfect for both of us, but instead, we had to think about our soon-to-be family of three (or someday even more!).

As if house hunting wasn’t hard enough, the “future family factor” can make the process even more daunting. If you’re expecting, or hope to start a family someday, then you’ll definitely want to keep the factors below in mind when searching for the home of your family’s dreams.

Floor Space

The most obvious and non-negotiable place to start is the size of any prospective home. Will it be able to accommodate you and your partner, along with one or more kids? Ask yourself these questions:

Where are the bedrooms located to one another?

Of, course you want to have enough bedrooms, but that alone isn’t enough. Like someone sketching out the perfect blueprint, you’ll want to consider where the bedrooms are located to one another. It’s preferable to have all the bedrooms on the same floor, so they can easily get to their child’s room at night.

Is there more than one bathroom?

Surprising nobody, people will walk away from incredible arrangements if this single factor is off – and it’s no wonder why. Whether this is your forever home or not, multiple family members getting ready for work and school in one tiny bathroom won’t cut it long-term.

Are stairs going to be a factor for you? (Probably.)

Parents who are city dwellers know how difficult it can be if you live on the third floor of a walk-up building. Even after pregnancy, bringing a stroller, a baby and groceries up and down three flights of stairs is quite the trek! Especially if you’re at the beginning of your family adventure, stairs may be a major factor to consider.

Is there an open floor plan?

These days, open floor plans are the most desirable, as parents can keep an eye on their kids playing while making dinner. Make sure whatever layout you choose is one that works well for you and your kid’s safety.

Where are you gonna store extra stuff?

Kids come with a lot of stuff. Strollers, clothing, toys, sports equipment … is there storage space for all of these things in your potential home? Make sure you have a concrete plan to contain the clutter!

Safety Concerns

Even if there weren’t any kids to consider, safety is a priority when house hunting. Add kids to the mix and you become even that much more aware of potential safety hazards that lurk in a potential property.

Is this home near a busy street?

A busy street can be a potential deterrent for a number of factors. First, it may be pretty noisy which isn’t ideal for sleeping babies, trust us. But (somehow) even more importantly, you don’t want your kids playing in a yard that’s on a street with lots of traffic. Here’s a protip: Google Maps highlights streets by their traffic. The darker the color, the more that’s “happening” there. A double-edged sword, to be sure!

What about a fence?

A fence in the backyard or front yard may be a priority for some expanding families, as it allows kids to roam the patio without wandering off too far. If there isn’t a fence (and you want one), budget in the cost of adding one when checking out potential properties.

Can kids play in the neighborhood?

When house hunting, you’ll want to get a feel for the neighborhood. If kids are out riding their bikes and playing in the streets, it may be a kid-friendly spot where your future kiddos can hang with their neighbors. If you want to get a feel for the crime rate, there are definitely handy websites that show you the police blotter for any given area. Your notes shouldn’t begin and end at the front door!

How far are you from your personal doctor or an urgent care/hospital location?

You know that scene in movies where a nervous husband carts his “in-labor-and-about-to-burst” wife into the car before zooming through traffic? Well, planning out where the hospital is not a one-and-done trick. While we hope you won’t be using this route often, make sure where your health insurance is accepted and where you live aren’t majorly out of sync. Speaking of this tip …

Location

Location, location, location. It’s always the number one factor when buying a home of any kind. But throw a kid or two into the mix and where you live is more important than the view.

What’s the school district like?

We’ve chatted all about the importance of house hunting with a school district in mind on the HireAHelper blog before, and we maintain this shouldn’t be overlooked. Do your research, look into the numbers, and make sure you’re in a school district where your children can thrive!

5 Sweet Garage Upgrades That Up Your Home’s Value

Garage additions and upgrades like the five in this list can produce an estimated 65 percent return-on-investment.

How long does it take to get to school?

When my husband was a kid, he had to take a 30-minute bus ride to the other side of town for school every single day. If you don’t think about this before buying, trust us, you will afterward. Can your child walk to school? Can you drop them off on the way to work? Is the bus ride manageable? Even if your kid is far from their first words, this is a crucial variable to think about when searching for your perfect home.

Are there other families in your neighborhood?

When narrowing down locations, it may be beneficial to take a stroll through the neighborhood on a weekend afternoon. Are there young families at the park? Are the kids a lot older? Is the demographic mostly older people without families? Do some research online (like with this app) and get a feel for the demographics of the neighborhood to see if your future family will fit right in. It helps to have a helping hand and a night out once and awhile!

Where’s the closest park/library/swimming pool?

When you’re a parent, you want to keep your kids entertained to prevent anyone from saying the b-word (no, “bored”). Having parks, libraries, swimming pools and other fun activities nearby is always a good idea. Nobody wants to have to make a field trip out of every excursion.


Starting a family. Buying a home. These are big milestones for anyone! But combining these two life events? You’ve got the recipe for a lot of important decision-making. Our advice is to be thoughtful, consider every angle, and think about your life 5, 10, or even 25 years from now. That way, you’ll be certain you’re making the best choice for you and your future family no matter what it looks like.

The Must-Read Guide to Prepare for Your Home Inspection As a Buyer

Author:

Publish Date:

Last Modified Date:

Category: Buying & Selling a Home

Tags: Tags: , , , , , , , , , , , , , , ,

Let’s back up to right before you schedule your home inspection.

Chances are you just signed a contract, which means the lender, realtor and lawyers are probably already approaching you with their list of requests. You need to get your current home on the market, you probably have a busy job and a few kiddos at home, and life has officially taken a turn to Crazytown!

But just because things are busy doesn’t mean you should neglect your obligatory home inspection. Not only can not giving attention to your home inspection impact the sale, but the results could cost you well into your future if you’re not prepared. This must-read guide gives you all of the facts you need to have for scheduling your home inspection, with helpful tips on how you can make the most of this tedious step … even amidst the chaos of buying and selling!   

What will a home inspection cost me?

Home Inspection
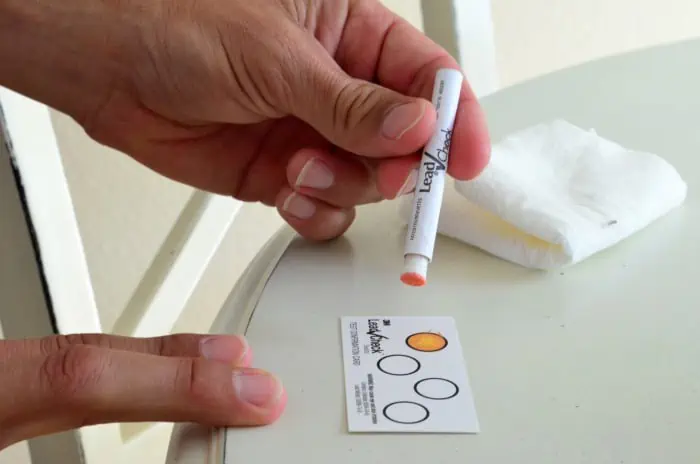
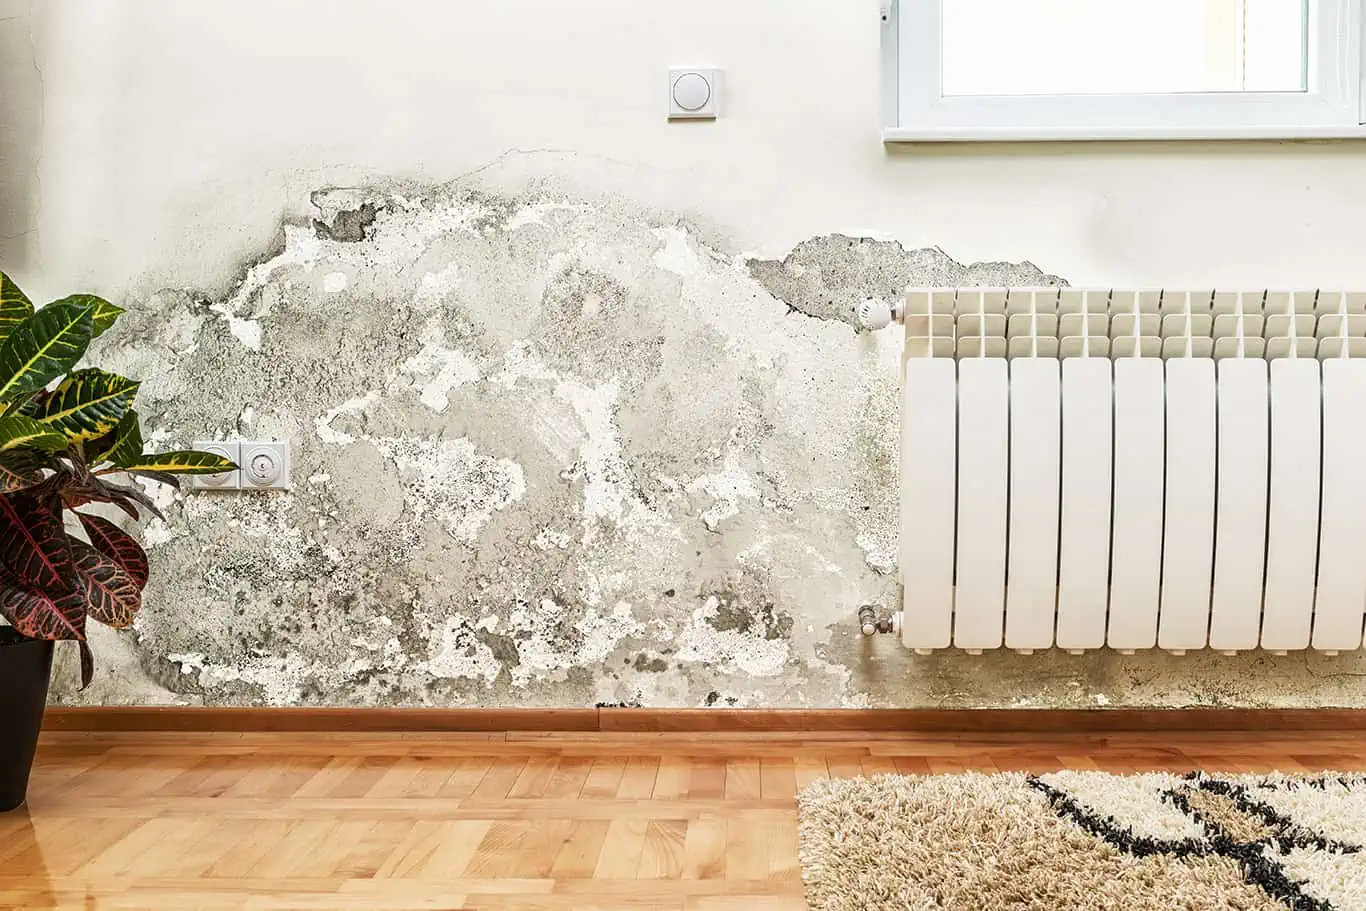
A quality home inspection will cost you, the homebuyer, about $250-$400 depending on the size of the home. As much as these unexpected expenses seem endless during the moving process, this is one expense you do not want to skip. Hiring a quality inspector can make such a significant difference to highlight the good, bad and potentially dangerous components of your new home. You want to make sure you hire an inspector who is licensed and knowledgeable … even if that costs a few extra bucks. This tiny investment can save you thousands of dollars (and a lot of heartache) in the long run.

How do I find a quality inspector?

Home Inspection

So you know you want to invest in a quality inspector, but you’re not really sure where to find one. You’re not alone! The best place to look is your realtor. If you really trust your realtor, she probably has some recommendations. Usually, realtors come to their buyers’ inspections, so chances are they have met a lot of inspectors and have seen which ones are thorough and which ones aren’t.

Says Lexi Newman, a real estate agent heading Lexi Newman Real Estate out of the Los Angeles area, “I’ve observed countless inspections over the years, and while some inspectors spend hours examining every nook and cranny and then doing additional research at home, others breeze on through doing the bare minimum.”

Again, you want to squeeze every bit of usefulness you can out of every step of the process. Continues Newman,
“Your realtor attends inspections day in and day out, knows what constitutes a quality inspection, and can point you in the right direction … Find out if the inspector is certified with the American Society of Home Inspectors (ASHI). Ask them how long they’ve been inspecting, if they come from a construction or contracting background, and what they did professionally before becoming a home inspector. Also, find out what sort of report they put together and how fast they are able to send it to you -this is a crucial part of repair negotiations during escrow, and a quick turnaround time is extremely important so your realtor has time to negotiate.”

And if you don’t love your realtor? Try speaking with friends or neighbors for their recommendations. The bottom line is that you should always go with someone who has good “cred” with someone else you trust and respect. There’s too much riding on the line to go with someone who hasn’t proven to be anything less than amazing.

HireAHelper is a nationwide marketplace where you can compare and book local movers to help you pack, load and unload your moving truck or container.

Hire A Helper Logo

How long will the inspection take?

The time for an inspection varies based on the size of the home you are purchasing and how thorough your inspector is. On average, we suggest allowing for at least two hours, but on the long end, it’s usually not any longer than three hours. 

What should I bring to the inspection?

Home Inspection

Some inspectors expect payment at the completion of the inspection, so be sure to have an approved payment method ready for the cost of the inspection on hand. Beyond that, we suggest wearing casual clothes in case the inspector wants to bring you into the deep nooks and crannies of the basement or attic to educate you about future maintenance. This is not required of course, but it is a sign of a great inspector!

We also think it’s extremely important for you to bring these things:

  • Notebook
  • A pen
  • Cell phone camera
  • Measuring tape

And here’s why …

What else can I do while the inspection is happening?

This may be the last time you have access to your new home until the final walk through (or even closing day!), so be as prepared as possible to get the most out of this critical time. Of course, your first priority is following along with the home inspector and listening to them as they relay observations, maintenance tips or stats on any of the home’s mechanicals. There will be a lot of information coming your way, which is why the pen and notebook will come in handy to jot down all of these tips.

However, there’s another important opportunity here!

Your homeowner’s insurance company will request information about your new dwelling in order to prepare an insurance quote over the next few weeks. Usually, they request information about the mechanics and age of specific parts of the home (like the roof) for the end proposal. Sometimes they even have discounts available if parts of your home were recently replaced, so getting all this information while your home inspector is with you is a great way to be ahead of the game for the insurance team.

What should I do if the inspector doesn’t want me tagging along?

Home Inspection

Sometimes home inspectors don’t want you following them from room to room taking notes while they create a detailed report. In that case, we still think you should keep busy doing the following things. First, take as many photos as possible of the home, and specifically, these things:

  • The layout
  • Outlets
  • Doors
  • Anything you want to change when you move-in

The last one will help you calculate how much time you’ll need in order to have everything you need by moving day.

Because you probably won’t have access to the home until the day (or day before) closing, these photos will be a very helpful reference. If you have enough time, we also recommend taking your phone and creating a simple video of the home. Why? We find that if we forget to snap a photo of something, we can still find the information we need by looking through the video footage. Plus, having this video for your memory will be fun to look back at someday!

Also, take measurements now!

Do you love the size of the current homeowner’s dining room table, TV, or sectional couch? Measure these items so you can start furniture shopping without problems! Rugs especially can be a tricky accessory because they are often too small for a space. If you find that a previous homeowner has done the rug sizes correctly, take a measurement and make note. Virtually anything you think looks good (or bad for that matter), get it jotted down so you don’t forget. (Trust us, you will forget.)

What should I make sure I get from the inspector?

After the home inspection is complete, you should receive a detailed written report from the inspector. You will need this report to negotiate improvements with the current owner, or in extreme cases, to back out of your original contract. Save this report in your files even if you plan on moving forward with the sale with no issues. 

Is there anything else I should probably know?

Home Inspection

If you really like your home inspector after the inspection is over, don’t be afraid to ask them for referrals for other professionals in the industry.

If you are looking for someone to eventually come fix the HVAC or maybe update the gutters after you move in, inspectors often have some really great contacts to share. Or at the very least, be sure to grab their contact information so you can follow-up later when you’re looking for referrals for just about any job around the house.

Also, don’t be afraid of asking too many questions! These people are professionals and often have an endless wealth of knowledge when it comes to all things home-related. Some important things people often forget to ask:

  • Inquire about all specific mechanics in the home (e.g., furnaces, vents, switches, attic fan, etc.)
  • How often you should be servicing, cleaning or updating these specific items
  • The most updated codes to uphold
  • Routines of services providers (e.g., cable, water, electrical companies, etc.)

It’s overall just smart to ask too much versus too little. Remember that inspection time is mostly for you, not the inspector, so make use of this important moment in your home buying journey!

Lifehack: How to Pack Big Shelves So You Don’t Go Crazy

Author:

Publish Date:

Last Modified Date:

Category: Pro Packing Guides

Tags: Tags: , , , , , , , , , , , , , , , ,

Usually, if you have a shelving display in your home that you absolutely love, chances are it has taken you quite a long time to arrange and re-arrange the decor to get it “just right”. Now it’s time to move, you’re taking the shelves with you, but you don’t want to lose the successful setup you have worked so hard to perfect, right?

The great news is that we have a super simple moving hack that will not only help you preserve this treasured look but will also make unpacking it in your new place a breeze. Allow us to explain.

Create a Numbering System

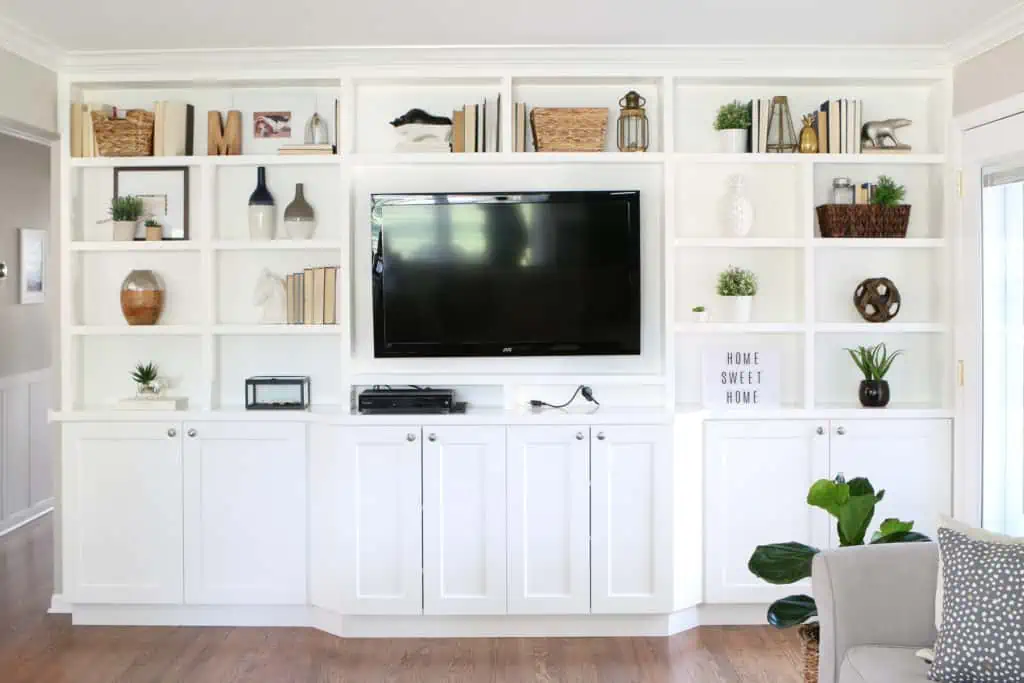
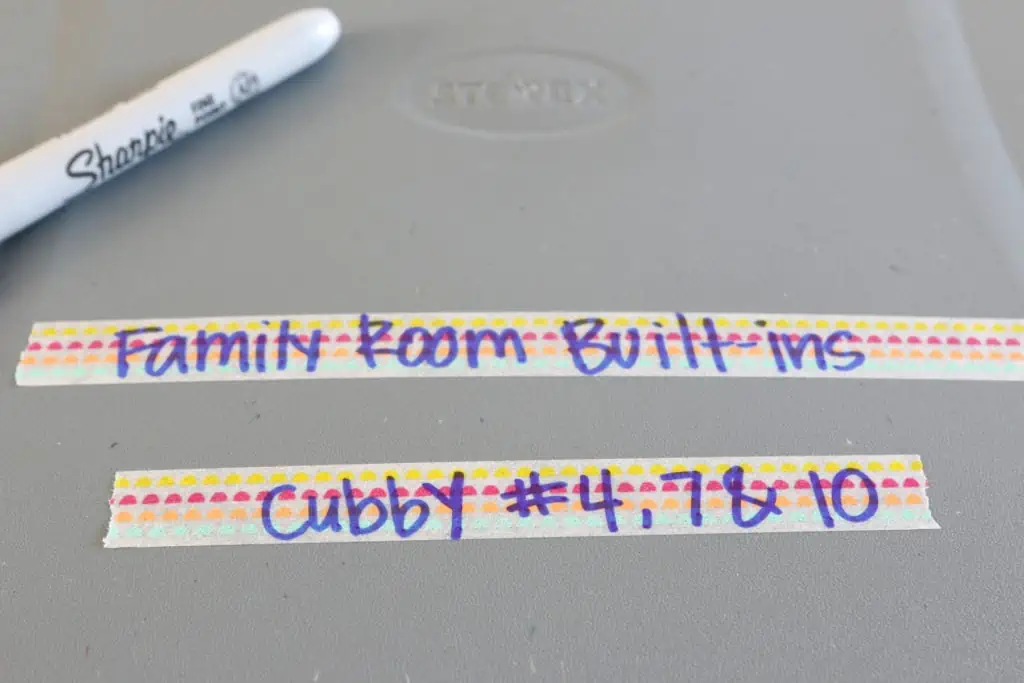
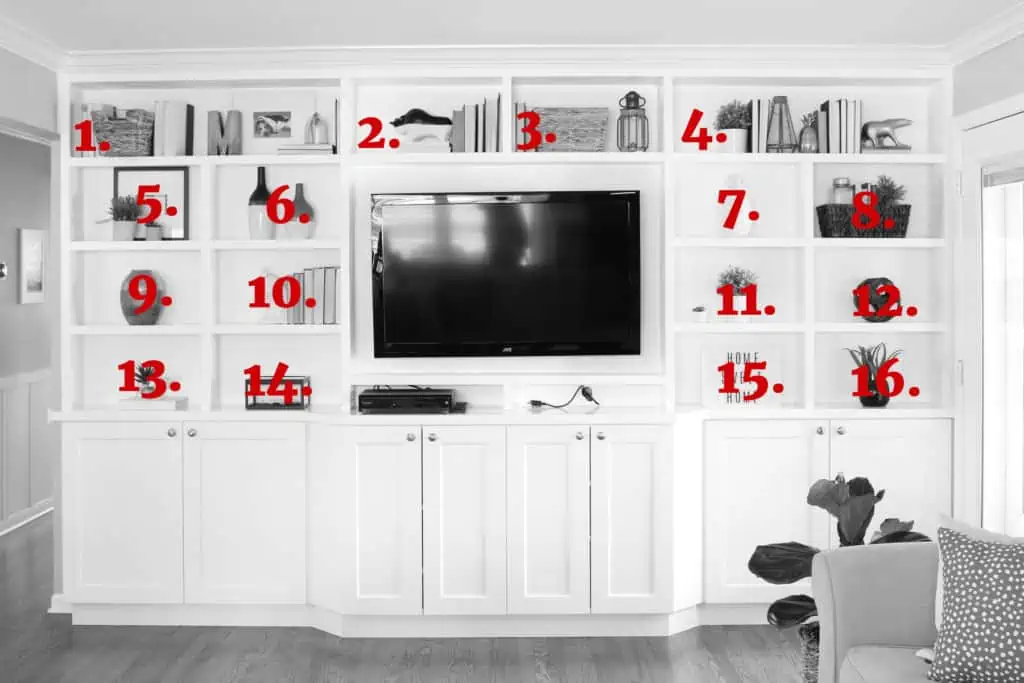
The first thing you have to do is create a numbering system for your shelving unit. You can use any method you want and don’t need to make a fancy graphic like this, you just have to make sure you remember which shelf corresponds with what number. Some may be able to easily memorize the number system, but if you’re not confident in your ability to do that, you can always put a piece of painter’s tape on each shelf with the corresponding number so you remember. This trick will take about 1 minute and won’t damage the shelving unit at all.

Start Emptying Your Shelves

The next step is to start emptying your shelves and carefully wrapping the items to eventually add to a moving box.

But the trick of this moving hack is to take careful note of what you are removing from each shelf as you start packing each box. 
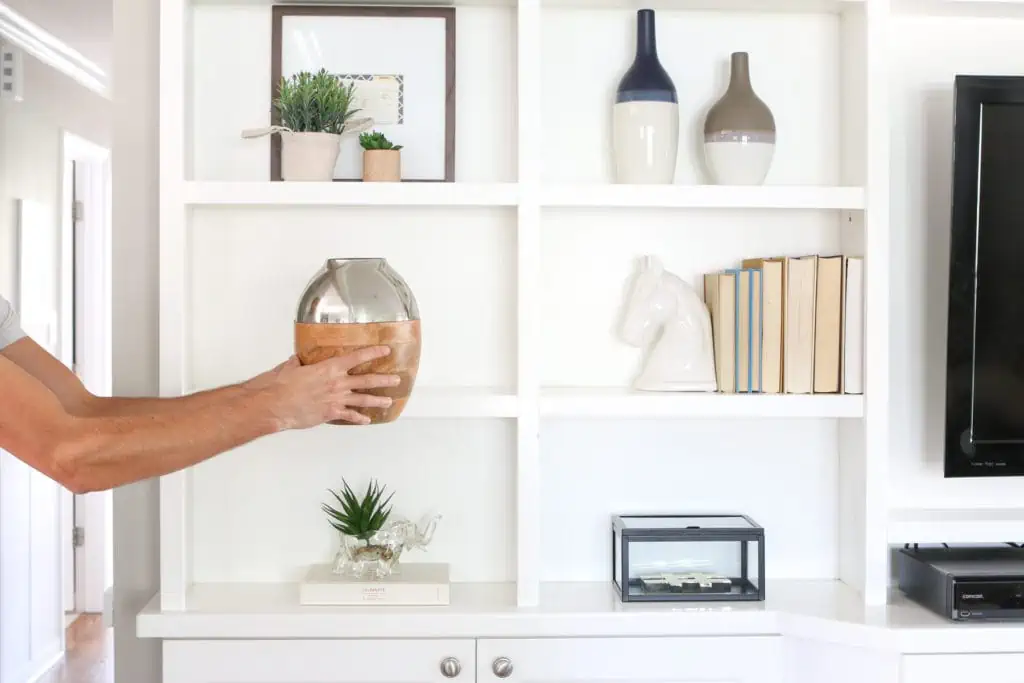
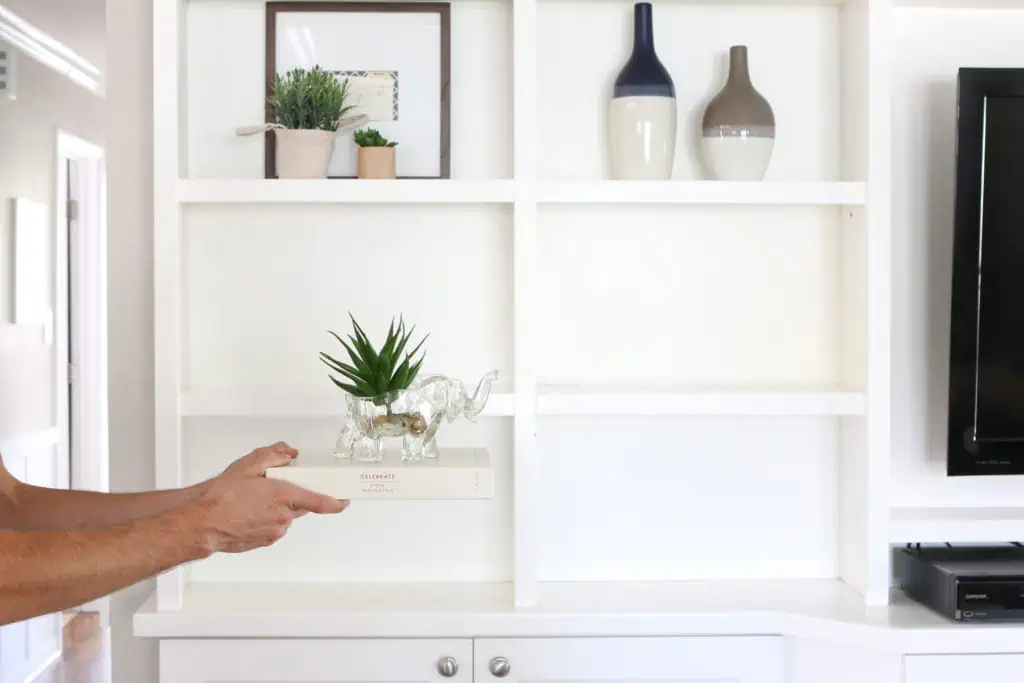
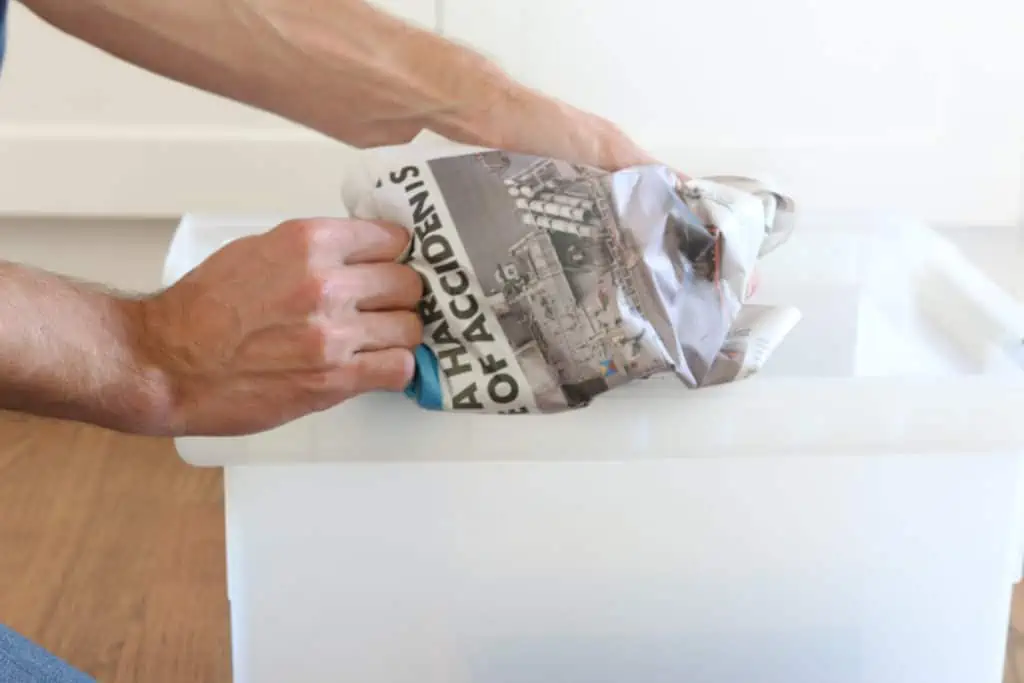
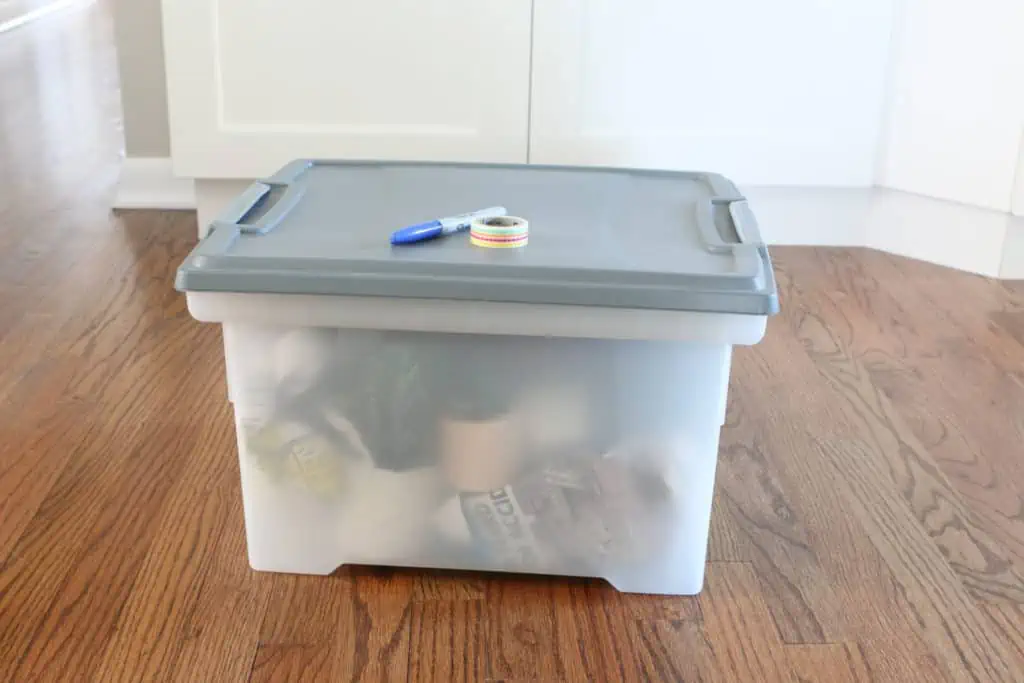
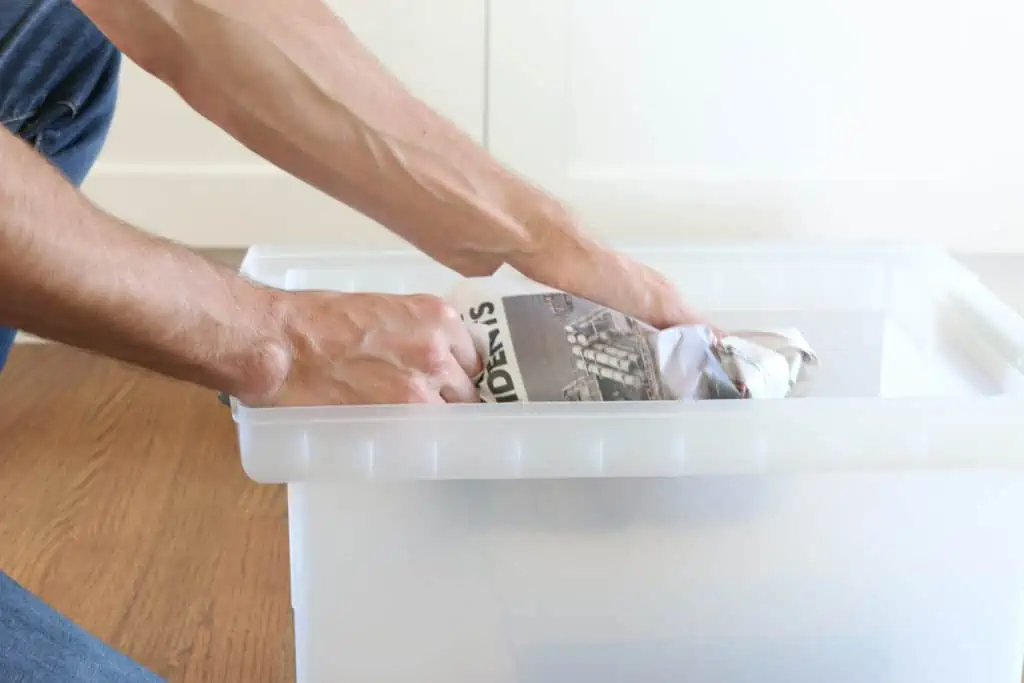
Carefully wrap and box the items like you would normally do, but try to keep as many of each shelf’s contents together in one box. For example, the grouping of books, the picture frame and planter in box #4 should all make their way into the same moving box.
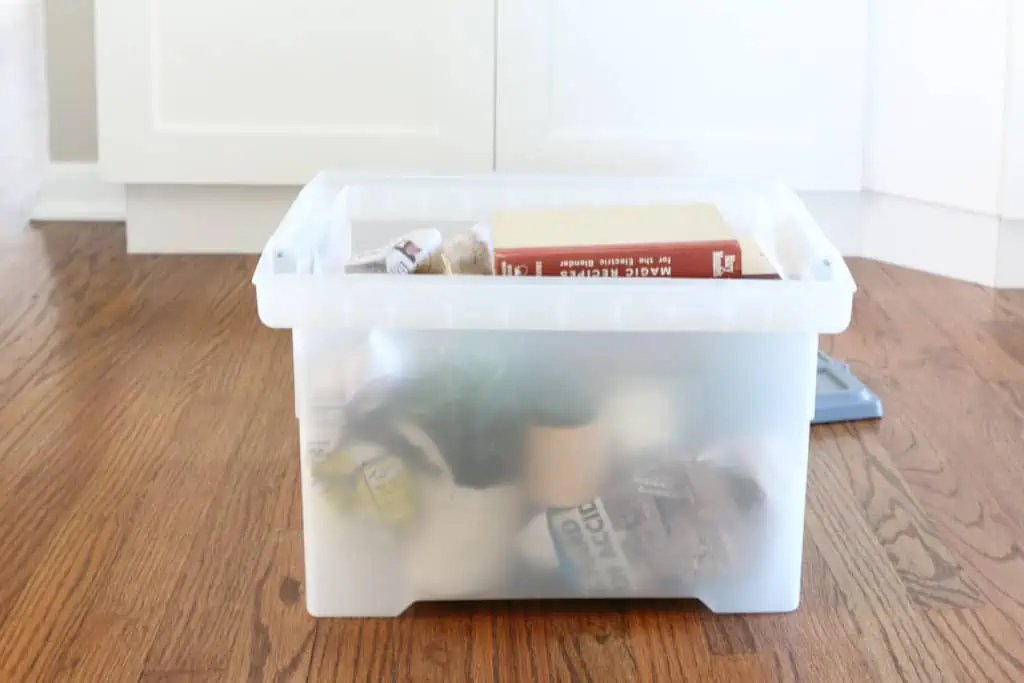
5 Sweet Garage Upgrades That Up Your Home’s Value

Garage additions and upgrades like the five in this list can produce an estimated 65 percent return-on-investment.

Pack and Label

Each of your moving boxes can hold far more than just one shelf’s contents. So feel free to add several of your shelves’ decor into one moving box, just be sure that each shelf’s decor stays together with its counterparts.

After you fill up your moving box, assess what shelf decor is inside of it. In my case, I added the decor from Shelf #4, #7 and #10 into this box so I simply noted that on the top of the moving box. This way I know that when it’s time to unpack this box and refill this shelving unit at my next house, I know exactly where to put this decor in order for it to look just like it did before! 

Repeat this packing/labeling process over and over again until your shelving unit is emptied. You should be left with a pile of moving boxes with clear labels and a precise plan on executing this look at the new house.

All you have to do in the new house is set up the shelves and simply place each item right back in the place it used to be. You don’t have to waste time trying to remember what goes where because those labels will take the guess-work right out of it, making unpacking these boxes in the new house a total breeze!

We Try out the App That Digitally Arranges Your Furniture With Just a Picture

Author:

Publish Date:

Last Modified Date:

Category: Home Decorating

Tags: Tags: , , , , , , , , , , , , , , , , , ,

As DIY’ers and decorators, there’s nothing we love more than an empty room just begging to be styled and filled with beautiful pieces. But some rooms can be a little tricky. Do you put the couch over here? Or maybe you need a small table over there? It can be hard to visualize how pieces will work in a space, especially when you’re starting with a blank canvas. Plus, if you’re buying a few new pieces of furniture, it can be difficult to tell if they’ll really fit and work well in the space. No one wants to purchase a dresser only to find out that it’s actually way too big or small.

An Online Tool to Help You Arrange Furniture

Luckily, there’s a new tool out there that takes all of the guesswork out of the arranging furniture process. It’s called Modsy, and this growing service is changing the game for decorators… but also for new homeowners trying to decide on new furniture or anyone else who has a room that needs some TLC.

Techcrunch.com

Essentially, you can “try on” certain layouts in your specific space in order to visualize how it will work in that room before you move things around, or before you buy anything new. The service costs about $70 (which isn’t exactly free), but in the long run, it may help you avoid design regret (like when you buy a piece that simply doesn’t work for the room), leaving you with a space that is much more functional for your home.

Here’s how it works: You send over photos of your space, some measurements and details on both your vision and style. They then send over a professional 3D rendering with a 360-degree visualization tool.

Real Life Spaces Using Modsy

When we first heard of Modsy, we weren’t quite sold. How could it actually work? But then we saw that a few of our friends in the blogosphere used this service when working on room makeovers. We could hardly believe these photos…

Photo by Bower Power Blog; 3D Rendering of Bedroom via Modsy

Above is the 3D rendering of our friend Katie Bower’s bedroom. She used Modsy to visualize the furniture setup in her bedroom before buying all of the pieces.

Here’s what that space now looks like in real life…

Photo by Bower Power Blog

Pretty crazy, right?! Here’s another one.

Photo by Chris Loves Julia; 3D Rendering of Room via Modsy

Above is the 3D rendering from Chris Loves Julia’s nursery. Below is how the actual room turned out.

Photo by Chris Loves Julia

Let’s Give It a Try

We’re currently working on a living room makeover for a friend, and their tricky living room layout had us questioning where exactly we should place all of the furniture in the space. So we figured this was the perfect time to give Modsy a try and find the most functional livingroom layout. Here is how the website lays out their service:

After setting up an account on our phones, we sent in photos and measurements and they then gave us a blank room to review. 

Because we weren’t totally sure on the style we wanted for the space, we had them give us two design options. One was a bit more glam and feminine, the other a bit more contemporary. This was their interpretations:

We ended up loving the second design, and realized how easily a sectional could fit in the space! We also didn’t realize we would have enough room to add a bookshelf next to the couch, and this helped us view the space in a whole new light. 

This was another rendering from a different angle. We were able to plug-in a few pieces that the homeowners already own to make sure they could continue to work in the room. 

In the end, we were left with a functional layout that we’re confident will work as we help to design this room. It actually worked! While we still have a-ways to go with their space, we are both so excited to get to work and bring this vision board to life.

You Too Can Master the Art of Arranging Furniture

As two gals who can’t seem to get enough of home design and decor, we were incredibly impressed with this visualization tool. Here are our takeaways:

Pros:

  • Surprisingly easy to use
  • Slick, modern app design
  • 3D renderings are professionally done and easy to grasp (and amazing to look at!)

Cons:

  • It ain’t cheap. $70 per rendering (and $199 to include an adviser!)
  • It takes a little over a week to get renders and operates within business hours, so plan ahead
  • Recommended furniture through Modsy store can be great, but also a bit sales-y

If you’re struggling to decorate your new home, we hope you’ll give this tool a try. Hopefully, it will help you determine the best layout for the rooms throughout your home while providing you with design inspiration that is specific to your taste. Plus, you may even gain some confidence when it comes time to buy new pieces of furniture in your space, because you can try before you buy! Happy decorating!

These Things Should Always Be Deal Breakers While House Hunting

Author:

Publish Date:

Last Modified Date:

Category: Buying & Selling a Home

Tags: Tags: , , , , , , , , , , , , , , , , , , , , ,

There are some things you should overlook when house hunting, but being flexible and seeing past a home’s imperfections isn’t always the thing to do. Don’t get us wrong, there are a lot of things that should be overlooked because they can easily be changed down the road. However, some things should never be overlooked. We like to call them “deal breakers”.

Making a list of your deal breakers is essential to finding the perfect home for now and well into the future. That’s why the things on this list should be non-negotiable. Seriously, don’t get emotionally attached to something that will create resentment down the road. Ultimately, it’s up to you and your family to create your own list of deal breakers before your house hunting adventure begins, but we’ve compiled a list of the most important ones in order for you to jump-start the process!

A Real Potential for Water Damage

House Hunting Deal Breaker - Water Damage

A lot of household problems can be fixed, but being subject to water damage is one that is not even close to an easy fit. Before committing to a house, be sure to research if it’s in a flood zone. (FEMA has a handy website that can search all flood areas by address.) Also, take notice of its elevation on the block compared to other homes. Is this house at the lowest point on the street? Will your basement constantly be at risk of flooding and causing you large problems and even larger repair bills? Make sure you look very closely for any signs of water damage.

Do your research so that you know exactly what you are getting into, and are not surprised by a flooded basement after the first rain in your new home.

(All Different Kinds of) Safety Concerns
House Hunting Deal Breaker - Safety Concerns

Safety concerns are a very broad category, so it’s important that you get as specific as possible when creating your house hunting deal breaker list. Safety concerns with electronics can be caused by amateur workmanship, such as plumbing or electrical problems. But this could also be caused by other household issues, such as:

Check the links for helpful ways to test for common safety concerns. Before you buy any house, let alone a suspect one, make sure to hire an inspector. If they report any problems, know exactly what issues result in you walking away from the deal and which ones you are willing to deal with (and potentially pay for!). Having this information clear before the home buying process will allow you to remain objective during this emotional time.

Below Average School District

If you have kids, be sure to investigate the local school district before you buy a home in that district. Niche.com provides a comprehensive look at most every school system in the country, including elementary, middle and high schools. You can also look at schools individually!

House Hunting Deal Breaker - Poor School District

Even if you don’t have kids, we still encourage you to do the same because that school district will impact the resale value of your home in the long run and should be considered before you purchase.

Structural Damage to the Home’s Base

House Hunting Deal Breaker - Structural Damage

Structural damage in a home can cause some serious problems down the road, not to mention what a nightmare it would be to try to re-sell a home that has these large issues. It’s important to consider this when house hunting in order to avoid large project costs down the road. Look for shifting of the home in cracks, uneven floors or a drooping roof to identify potential structural damage. If you’re not sure, don’t be afraid to Google a contractor or professional so they can assess the situation and reassure you the house is a safe long-term investment.

Unless you are buying a foreclosure for pennies on the dollar, structural damage is certain to massively impact your investment in a negative way.

A Floor Plan That Doesn’t Work for Your Family

House Hunting Deal Breaker - Bad Bones aka Floorplan

All rooms can be rearranged, redecorated, repainted or even switched around, depending on your family’s needs. However, don’t trick yourself: a sweet overlook may be cool, but the layout of the home or the square footage of the home is not so easily changed, especially without a massive budget and an extra-large construction project. Are you looking to double your investment by knocking out walls?

It’s okay to look past the cosmetic upgrades in a home, but don’t look past what the pros call “the bones” of the house: the layout, the number of rooms, the number of bathrooms or again, even simply the square footage. The bones are permanent and will directly impact your lifestyle. Are you willing to change your life just for that sweet view?

House Hunting Outside of Your Price Range 

House Hunting Deal Breaker - Over Budget

Buying a home out of your price range is a slippery slope and a financial decision that can put a lot of stress and pressure on you and your family.

It is also the most common deal breaker people ignore!

If you have a strict budget you need to follow, adding this deal breaker to your house hunting checklist will be a great way to “check yourself” and make sure that you are coming in under budget and not putting an unnecessary strain on you, your marriage, or your family. Besides, it is almost always better to invest in a cheaper property than to live with what you cannot afford.

What’s on Your House Hunting Deal Breaker Checklist?

All of these may fall on your house hunting deal breaker checklist, or maybe some of them… or maybe none at all. Technically, the most important thing is shedding light on the fact that people don’t often consider deal breakers ahead of hunting for a house. That’s why a house hunting checklist is crucial to avoid getting emotionally invested and making an impulsive decision that you’ll regret later on.

Remember the biggest rule: once you agree on which deal breakers gets added to the checklist, you cannot purchase any home that has even one of the things on it, regardless of how adorable it may look! This cute house may look great now, but it probably isn’t the best investment for the long run. Hold strong, the right one will come along… it always does!

How to Install a Smart Thermostat in 8 Easy Steps

Author:

Publish Date:

Last Modified Date:

Category: Home Improvement

Tags: Tags: , , , , , , , , , , , , , , , , , , , , , , , , , , , , ,

Adding smart technology into your home is not only a great way to add convenience and value, but it’s also a great way to stay energy-efficient. Take the awesome smart thermostat for example… this gadget can be a high expense up front, but it will end up saving you big money in the long run. Some energy companies are even offering their customers $100+ in refunds if they show proof that they installed a smart thermostat!

Because this technology is a win-win-win in our playbook, we decided to show you how easy it is to make your home smarter with the smart thermostat. And when we say easy, we really mean it!  This entire project can be broken down into eight steps that shouldn’t take you longer than 30 minutes.

We installed the Nest for this tutorial, but there are a lot of awesome smart thermostats on the market. Do your research and find one that works best for you and your home.

What You Need

  • The Nest (or most any smart thermostat device – the product itself provides almost everything you need, including a screwdriver, screws, and a level)
  • Drill (optional)
  • Anchors (optional)
  • Touch-up paint, brush, painter’s tape (optional)

1. Turn off the Power

No matter how experienced you are with DIY projects, we highly recommend turning off the power to this system before moving on to the next steps. This is the safest way to install the smart technology and the only way we advise you to complete this installation. You will also want to make sure you have enough daylight left so you can see the project without the lights on.

2. Open up the Old Thermostat

After the electricity is off, we are ready to get to the fun part! Pop off the face of your current unit, which may require unscrewing a screw, depending on your unit. Ours popped right off, no screwdriver necessary. Above is what most thermostats look like without the cover, though yours may vary slightly. What matters most are the wires.

3. Label the Wires

Before you start removing the labels from your old thermostat, we need to label them so that we are fully prepared for the last few steps of this project. The Nest comes with these convenient stickers (right in the manual!) so you can keep your labels organized. If you don’t have stickers, just use whatever you can to label all of the wires. We only had four wires, but you may have more, so make sure you label everything! You’ll thank yourself later… we promise!

4. Take the Old Thermostat off the Wall

After the wires are clearly labeled, it’s time to unscrew the old thermostat and carefully pluck it off the wall. Use your screwdriver and it should come off fairly easily. Make sure that you’re not taking the wires (or stickers!) with you because you’ll need both of them soon.

5. Hang the New Thermostat

The Nest provides a level within the product (genius!), which makes this process extremely easy.  The level makes it simple to identify when the device is evenly placed on the wall, and that’s when you can make a mark so you later know where to drill. If your smart device has no internal level, don’t worry! It’s a pretty simple process to use an external level to make sure you’re screwing it on the wall correctly.

After you mark the wall, add your trim plate (if necessary – it’s the plastic encasing that goes around a lot of these smart devices) and hang the Nest using the markings you made to guide you. You may need to use an anchor for extra reinforcement into your wall during this step, which does not always come with the kit.

6. Attach the Wires to the New Thermostat

This is when those stickers come in handy. Not only is the technology itself smart, the team that created this kit may be even smarter because these stickers are genius! Simply match each wire’s label to the label on the Nest (or the labels you made yourself), then pop them firmly into place. Make sure the little box the wire goes into pushes down snugly, because that is how you will know it is tight, secure and connected.

7. Turn Electricity Back on 

If the Nest lights up a few moments after you turn the power back on, you have successfully completed the installation. If not, turn the electricity off and recheck the colored wires to make sure they’re both in the right spots and pushed down correctly.

Your little gadget will immediately start prompting you through a series of steps that will guide you to align this new technology with your home.

8. Control Your Heat and A/C from Your Cell Phone

This part is where the “smart” technology really comes in! Once you connect the Nest with your home’s wifi, you can monitor it from anywhere you have a wifi connection. That means you can click on the heat from work, turn on the air before you get back from vacation, or even change the temperature in the house while still laying in bed (that last one is probably our favorite!). If that’s not smart technology, we just don’t know what is.

So do you think you can tackle this project and make your home a little smarter, all while saving money and energy along the way? We’re confident that installing a smart thermostat is so simple that you now have all the steps you need to check this project off of your to-do list… maybe as soon as this weekend.

×

I'm Moving

Moving? Thinking about moving? Whether your move is off in the distance or you already have one foot out the door, you'll learn about everything you should expect through our useful how-to's, cool articles and much more. It's all specially curated for you in our "I'm Moving" section.
Explore
×

I'm a Mover

For rookies or veterans alike, our "I'm a Mover" section is filled with extensive industry news, crucial protips and in-depth guides written by industry professionals. Sharing our decade of moving knowledge is just one way we help keep our professional movers at the top of their game.
Explore