How Moving Helped Me Pay off $107,000 in Student Loans

Author:

Publish Date:

Last Modified Date:

Category: College Moves, Money Saving

Tags: Tags: , , , , , , , , , , , , , , , ,

Student loan debt is higher than ever, with 44 million Americans owing $1.48 trillion on their student loans. In fact, the average Class of 2017 graduate left school owing $39,400.

Assuming a 4.45% interest rate and a 10-year repayment plan, a balance of that size would require a monthly payment of $407.

That’s a serious burden for new graduates, let alone anyone facing today’s sluggish wage growth and sky-high rent.

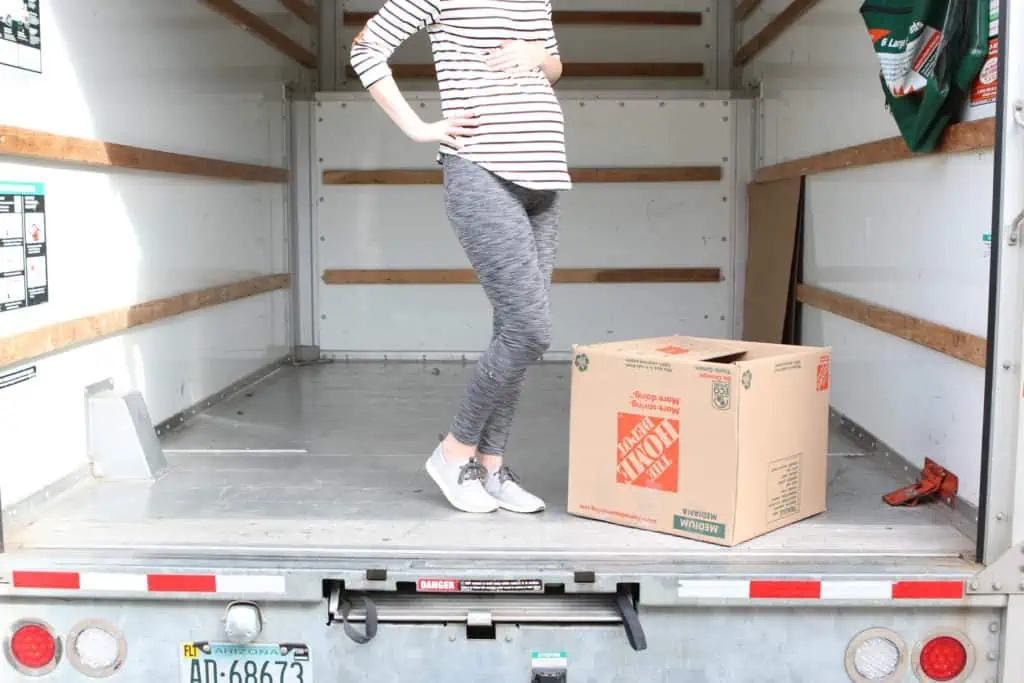
So here’s an out-of-the-box idea for conquering your student loans: Move to another state. I moved from New York City to Austin, Texas, and it helped me pay off $107,000 in student loans.

Here’s how this decision helped my finances, along with surprising reasons why relocating could help yours, too.

Moving seriously lowered my cost of living

Andy Josuweit, CEO of Student Loan Hero

I attended Bentley University and majored in managerial economics. My degree helped me start my business, Student Loan Hero, but it also left me saddled with $74,000 in student loans.

In total, I had 16 different loans from four different loan servicers, none of which helped me understand my repayment options. I put some of these loans into deferment, only to watch my balance balloon to $107,000.

Between the stress of carrying all this debt and the challenges of starting a business, I realized that living in New York, one of the country’s most expensive cities, might not be the best idea for my finances.

In 2015, I decided to move to Austin. I’d heard the quality of life there was great, and I loved its mix of urban culture with outdoor activities. Having grown up in rural Pennsylvania, I was drawn to a city that still had trees and nature.

Plus, the cost of living in Austin was a lower than in NYC. In New York, the median rent for a one-bedroom apartment is $2,070, according to Apartment List. But in Austin, the median cost is just $1,120, nearly half that of New York.

Overall, Numbeo found that rent prices in New York are 97.6% higher than in Austin. Even groceries are 47.26% higher in the Big Apple!

Besides enjoying more affordable rent and food, I also saved money by not owning a car my first two years in Austin. I mainly relied on my bike to get around.

Of course, this might not be an option for a lot of Americans, especially for those who don’t live in cities with many options for public transportation.

In my case, though, giving up my car helped me reach my financial goals.

Relocating could help you save on state income taxes

Decreasing my cost of living wasn’t the only reason I saved money by moving to the Lone Star State. My tax bill also decreased significantly, since Texas doesn’t have state income taxes.

It’s one of seven states that don’t have an income tax. The full list includes:

  • Alaska
  • Florida
  • Nevada
  • South Dakota
  • Texas
  • Washington
  • Wyoming

Additionally, New Hampshire and Tennessee only tax interest and dividend income, which is money you make from stocks or mutual funds.

Between lowering my cost of living and eliminating state and municipal income taxes, I saved over $15,000 by relocating to Austin. Thanks to these savings, I was able to make extra payments on my student loans.

“If you put those savings toward your student loans, you could get out of debt 67 months earlier and save $7,193 on interest.”

As a result, I started to see my student loan balances go down. Not only did I save money on interest, but I also watched my six-figure balance return to a manageable level within a year.

I had been tackling my balance as aggressively as I could since 2013, and moving to Austin helped me pay it off even faster. In August 2016, I made my last payment on my student loans.

How much you save

Since my move helped my finances so much, I was curious about what impact a similar strategy could have for other Americans. To find out, Student Loan Hero conducted a study on the financial impact of relocating to a state with no state income taxes.

Student Loan Calculator

We learned that moving to a state with no income tax would save the average person $1,977 per year. We also found that nearly one out of three people said they would move to an income tax-free state if it meant they’d save money.

Although this number seems fairly high, it’s not all that surprising that debt, taxes, and finances affect where people choose to live.

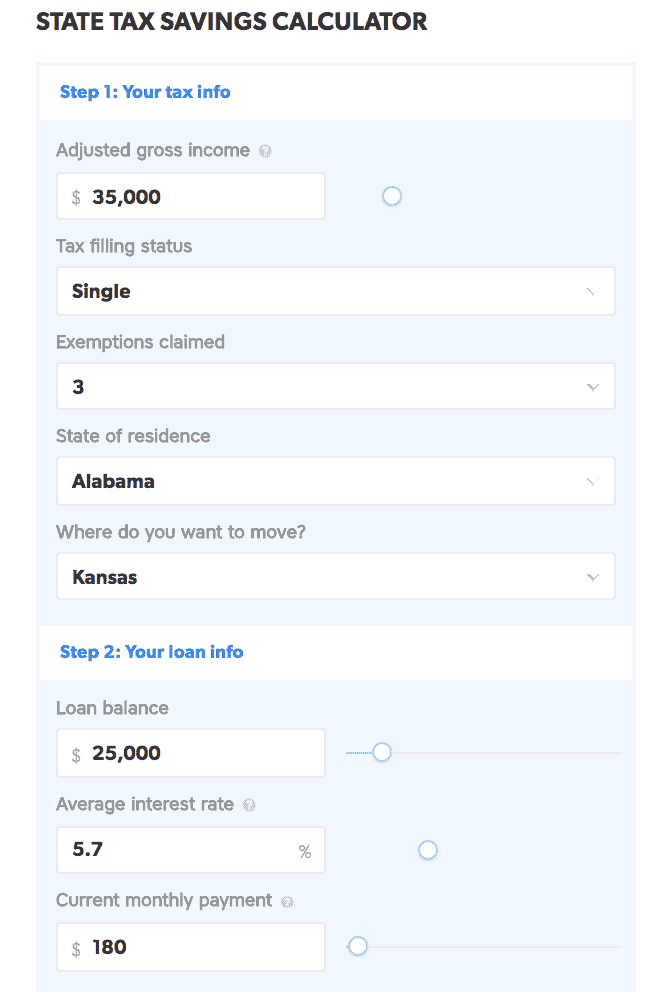
If you’re interested in how moving could affect your finances, check out the state tax savings calculator in the study. It compares costs between two states and reveals how moving would impact your student loans.

If you’re considering a move, be sure to compare the cost of living between your current and prospective cities. But if you’re focusing on state income taxes, the calculator reveals how much you could save year to year.

For example, let’s say you’re living in Oregon and making $60,000 per year. You only have one exemption, and you owe $25,000 in student loans at a 5.70% interest rate. By moving up to Washington, you could save $4,777 per year on state income taxes.

If you put those savings toward your student loans, you could get out of debt 67 months earlier and save $7,193 on interest.

Should you move to pay off your student loans faster?

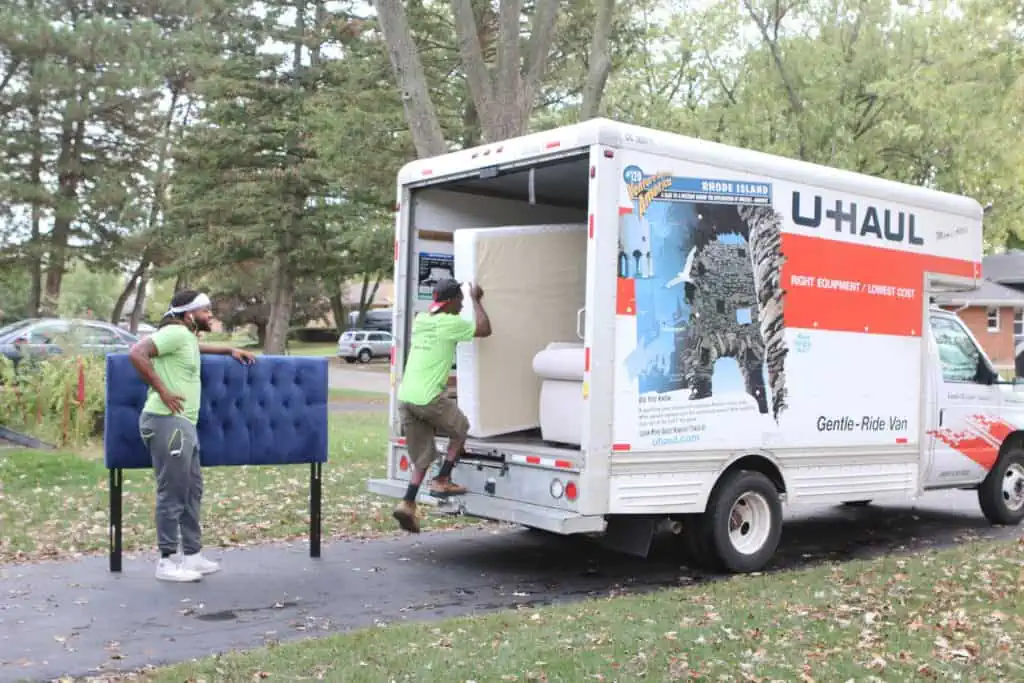
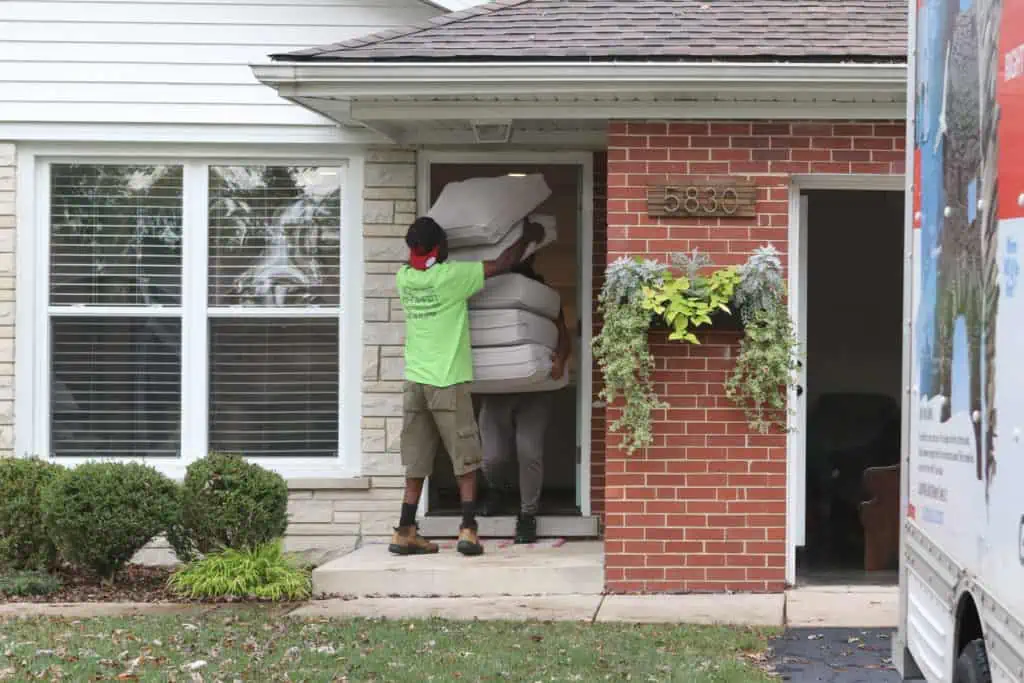
Although I’ve been discussing how much you can save by moving to another state, there are expenses involved in relocating. For one, you have to pay for the move itself. Plus, you must make sure the new destination has job opportunities in your field unless you’re capable of working remotely.

If you’re considering a move, ask yourself these essential questions:

  • Can I find a job in my line of work?
  • Can I work remotely in my current role?
  • How much in moving expenses will I have to cover?
  • What will my new cost of living look like?
  • Is the new state a good fit for me in terms of climate, culture and other factors?

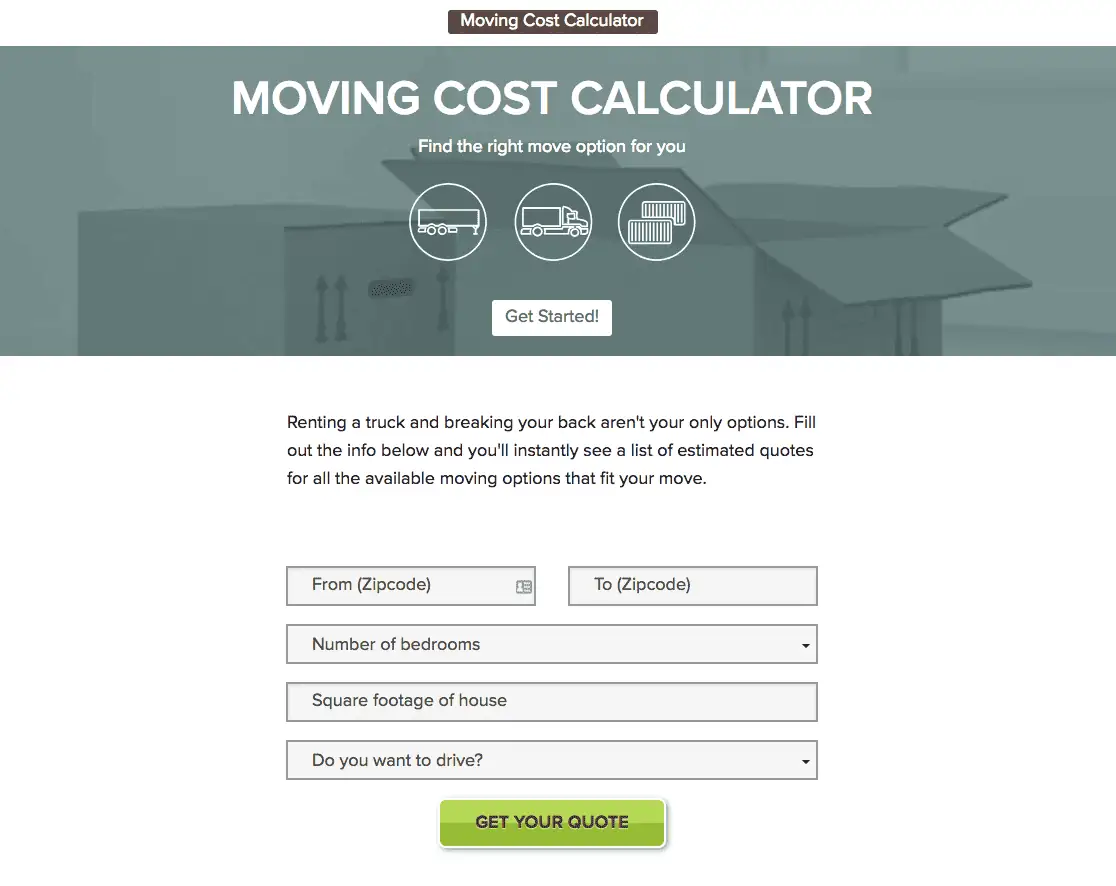
You might also estimate your moving costs with HireAHelper’s moving cost calculator. This tool gives you a quote based on your old and new zip codes so you can prepare for the expenses of your move. The great news is that there are many moving options to considerably lower your moving costs, which you can read about here.

Moving Cost Calculator at Moving101.HireAHelper.com

As long as you’ve done your due diligence, moving could be a smart financial move. With the money you save by choosing an affordable city over an expensive one, you could pay off your student loans ahead of schedule and move closer to a debt-free life.

Saving money, by the way, might not be the only perk in moving. In Austin, I now enjoy 228 days of sunshine, not to mention some of the best tacos I’ve ever had.


Andrew Josuweit Bio: Andrew Josuweit is CEO and Co-Founder of Student Loan Hero. After he graduated with $107,000 in student loan debt, he realized he wanted to help others become debt-free and financially independent.

How to Sell a House: A Guide from A to Z

Author:

Publish Date:

Last Modified Date:

Category: Buying & Selling a Home

Tags: Tags: , , , , , , , , , , , , , , , , , , , , , , ,

If you’ve ever sold something on Craigslist, you probably know how much work even just that can be involved. You’ve gotta take photos of the item, figure out a good price, and then post it online with a descriptive caption and details about the piece. Afterward, you’ve gotta field the emails and calls, then wait for a random stranger to come pick up your item.

Now, take that process and multiply it by 100 … that’s what it’s like to sell a house!

We’re not gonna sugar coat it; there is a lot of work and serious effort involved in selling a home. That’s why we wrote this post to outline the entire process for you. Understanding what you’ll be doing is the first step towards slapping “SOLD” on the sign in your front yard.

Craft a Selling Gameplan

Once you decide to sell your house, you probably would like if it all happened pretty quickly. But nothing good happens without a plan. So the first order of business is to make a selling gameplan. This is what that looks like.

Agent or No Agent?

The first major step in the selling process is figuring out if you’re going to hire a professional real estate agent or sell your home yourself. If you go the “For Sale By Owner” route, you could, in theory, save some money. But if you’re new to the home selling process, you may be way over your head if you DIY it. Ask yourself if you have the time, knowledge and marketing skills to sell your house all by yourself. If you come away with a resounding yes, it could be the right move for you!

Though if you decide to go with an agent, take the time upfront to find a good one. Ask friends for referrals, read reviews online and interview more than one agent before you hire the winner. A good agent should educate you throughout the process, and it ultimately should be someone you deeply trust.

This post outlines tips on who to contact, when, and how to do it.

Choosing the Right Time

The best time to sell is March through June. That leaves parents an entire summer to get their kids adjusted and ready for the new school year. So if you can wait until the spring and early summer months, do it! It’s always best to avoid selling during winter and the holidays, as most people aren’t looking to buy homes during that busy time of year on average.

Find the Right Price

The first 30 days of activity are crucial when it comes to selling your house, so price matters. You may assume that you should start high and then lower your price if you don’t get any attention, but if it sits on the market for too long, your listing can become stale. Buyers may stay away if you price too high or assume that you’re not serious about selling. Price it right from the start and you’ll probably sell your home much faster.

If you’re using an agent, they will work with you to figure out the best price for your home. You can also research other comparable homes in your area, and maybe even attend some open houses. Plus, there are many online resources that will help you track down the perfect number for your area. These things will all get you a good feel for the market and how your home compares.

Prep Your Home

Painting the House

Before you can officially get your home on the market, you need to get it looking it’s very best. If you fail to make your home look presentable, then you may not get the asking price you’re looking for, or even worse … it could sit on the market for far too long. You need to showcase your home in its best light, and the only way to do that is with some hard work and effort. Here’s how to prep your home for the market:

De-Clutter and De-Personalize In Six Steps

This first task will cost you literally zero dollars. Yep, you can already make your home look 10 times better without spending a dime. Here’s how.

  • Find a spot where you can store items out of sight. That could be an attic space, shed, or even a storage unit that you rent while you’re selling.
  • Remove excess bulky furniture. The more space to walk around, the better.
  • Try to pare down at least 10% in each room. Gather extra accessories and items that are taking up space.
  • Permanently clear all counters in your kitchen. And try to get rid of most items on surfaces (i.e., desks, dressers, etc.).
  • Donate everything you clear. (Or add them to your designated storage spot.)
  • Remove any personal items from around your home. This means things like picture frames and family knickknacks.

These six steps will have your home looking so much more sellable. Your space will be lighter and brighter for the photography and showings later on! Don’t forget about closets and drawers too. Buyers are nosy, and they’ll be checking out every nook and cranny in your house.

Make Small Home Upgrades

You don’t necessarily need to renovate your kitchen or bathroom to sell your house, but there are small upgrades you can make to improve your home. Here are some ideas that will instantly improve the look of your space (and potential home value!).

  • Give your walls a fresh coat of paint. Be sure to consult this list of paint colors with the best resale value first!
  • Upgrade your kitchen on a dime. Swap cabinet hardware, replace your faucet, and add new pendants for a quick and budget-friendly new look!
  • Boost curb appeal with a painted door. This post will help you pick the perfect hue. (Also helpful is a cleaned up yard and fresh flowers.)

Finally, if something has been broken (and on your to-do list for years), now is obviously the time to fix it!

Clean From Top to Bottom

There’s another essential (but free) task you’re going to be doing to make your home look a lot better: cleaning everything! Grime and dust can quickly deter buyers from truly considering your home, so get every nook and cranny sparkling. These posts will help you channel your inner Mr. Clean.

Marketing Your Home

If you’ve gotten to this step, your home is in tip-top shape from all of your hard work and it’s ready for its debut to the world! Marketing your home is by far the most important step of the home selling process. You can have the most gorgeous house on the block, but if no one sees the listing it’s never going to sell.

Stage and Photograph Your Space

You’ve already prepped for the staging when you got rid of personal items and removed clutter. Good work, that’s 90% of the battle. Now it’s time to add the finishing touches before your home’s photo shoot.

Make sure every room is clean, all beds are made, and blinds are open to let that natural light in! (Natural light is ideal for photos.) It’s important to keep accessories to a minimum, but if you do want to add a few we suggest opting for plants and flowers. This post has lots of tips on how to do it right.

Pictures are the most important part of a home listing, so it’s crucial to get these right. If you don’t think you can DIY it, then hire a pro! Investing in a professional photographer could potentially be the biggest money spent to money gained ratio in the entire process. If you’re using an agent, often times they will pay for this service. A professional is always a good idea because they will know how to photograph your home to make it look its best.

If you’re selling your house yourself (or just want to save some money), it’s possible to take your own pics. We suggest using a wide-angle lens, shooting during the daytime, and using a tripod. For more DIY photography tips, check out this post.

Promote Your Sale

Don’t solely rely on your agent to promote your listing. You can take some of the marketing efforts into your own hands and broadcast your sale to the world! Put your listing on social media sites, email your friends and family, and let neighbors know that you’re selling. You never know who might be looking to buy, so it’s worth it to use your own network to get the word out. Here are some of the most common sites people use for listing and/or real estate research:

Bring on the Showings

Simply put, homes that don’t get shown don’t get sold. So the first order of business is to make your home available for showings. That could mean a few open houses on the weekends and availability during the week. We highly recommend that you leave the house during showings so buyers can really feel comfortable checking out your space. It may be an inconvenience for you and your family, but remember that it’s only temporary!

You’ll also want to do these 10 things before any open house to get your home looking (and smelling) its best!

Keep It Clean

It’s hard to live in your home like a normal person and keep it ready for showings at all times. But you’ve gotta do your best to keep your home clean and organized. Whenever you leave the house, tidy up and wipe down all of your countertops. That way if you need to have a last-minute showing, your home is ready to go.

Get Everyone Out of the House

It’s important for buyers to check out an empty house. So that means that you, your kids, and any animals should make a plan to high-tail it out of there. That could mean taking the dog for a long walk or heading over to a friend’s house for the day. But no matter what, come up with a plan for where your family will go when those last-minute showings happen. And if you do have pets, be sure to remove their items (e.g., dog bowls, cat litter, etc.) from the home before buyers come in.

How To Get Ready For Closing

If you’ve made it this far, then congrats! You’re almost to the finish line. Here’s what happens now:

Appraisal and Inspection Time

After the listings and showings, you will (hopefully!) get an offer on your place. After you’ve accepted an offer, most buyers will do an inspection of your place within a week. You won’t need to be there for the inspection, and you’ll usually have the results within a few days. At that time, you’ll know if all went well, if you need to fix a few items yourself, or if you’ll offer the buyers a credit to fix things themselves.

Here’s our full guide for how to deal with a home inspection.

Next, it’s time for the appraisal. Appraisals usually happen within a week of the home inspection. You can do some homework before the appraisal to improve the chances of getting a higher price. Provide a list of recent home improvements and receipts to explain the value you’ve added to your home.

The results of the appraisal may take a few weeks. If your home appraises, you’re good to go! If not, you’ll have to negotiate with the buyer to find a price that works for all parties.

Prep to Move

After the appraisal, you’ll be on track for closing day. You can finally start to pack things up and get ready to move out of your home. This would be a good time to think about hiring some help for moving day. It’s also time to start packing! This handy checklist will keep you on task so you stay organized and on top of your move.

See prices for movers by the hour – instantly.

Read real customer reviews.

Easily book your help online.


Saying Goodbye to Your Home

Congrats, you sold your house! All that’s left to do is say goodbye and toast to all of the memories made in your place. As a bonus, you can also leave your buyers a little gift as you head out (like a booklet of your favorite restaurants or just a note with tips on their new house). It’s a great way to hand off your past experiences to the new homeowners. Onward!

(UPDATE) HireAHelper Offers to Train Conor McGregor How to Properly Use a Dolly

Author:

Publish Date:

Last Modified Date:

Category: HireAHelper News

Tags: Tags: , , , , , , , , , , ,

Did you hear the one about Conor McGregor and the dolly? Yeah, a lot of people did.

Look, we’re no experts on how to use a dolly—well, ok, actually we are. And this is not how you use a dolly:

But we saw something in that clip that most others didn’t: potential. So with that in mind, we’ve come up with an offer to help rehabilitate Conor:

Hey Conor,

We couldn’t help but notice your dolly usage is a little rough around the edges. But we see potential in you. With a little training, you might fit right in inside our professional mover marketplace.

Since you may be on the lookout for a new job, we’d like to extend an opportunity for you to go through our Movers Academy to learn how to properly use a dolly, just like one of our thousands of highly trained movers.

www.movers.academy

We’ve helped hundreds of potential movers just like you go from amateur dolly-users to reliable pros. Maybe you’ll be the next one.

What do you say? We’ll even throw in free moving insurance, in case something breaks.

Sincerely,

HireAHelper

We hope to see you at the Movers Academy, Conor!

UPDATE (4/10/18):  

Fox affiliate covered this story in the following segment, showing the world is definitely ready for #ConorTheMover:


Image by: Andrius Petrucenia

‘Move For Hunger’ Saved 2.4 Million Pounds of Food From People Moving in 2017

Author:

Publish Date:

Last Modified Date:

Category: Neighborhood Advice

Tags: Tags: , , , , , , , , , , ,

Move For Hunger is a charitable organization dead-set on fighting two unbelievable stats: 42 million Americans (many children) are food insecure, and 40% of all food grown, processed and transported in the United States is wasted.

Move For Hunger recently released their annual report. Inside, it dissects the way both of those statistics are being brought down simply by

connecting the dots. What they target hits home for us as, unfortunately, a huge chunk of food loss occurs during peoples’ moves. From Adam Lowy, their executive director:

Our network, which now includes 840 moving companies, delivered 2.4 million pounds of food last year, more than we ever have before. We organized a record number of food drives, which helped to raise awareness about hunger in hundreds of communities all across the United States and Canada. We launched our Apartment Community Program, and provided thousands of renters in Seattle and San Francisco with the opportunity to donate their food when they move. And, in the final days of December, we recorded another major milestone by delivering our 10 millionth pound of food.

To recap their 2017, that’s:

  • 840+ movers now contributing
  • 300,000 pounds of food going to victims of hurricanes in Texas, Florida and Puerto Rico
  • 4,899 pounds of food saved from apartment communities
  • 4,536 pounds of food saved from corporate housing
  • 204,153 pounds of food from racing events

All of that good comes in addition to the plethora of personal donations that have come their way, both of food and currency. And the best part about helping them to connect the dots is that you have to do next to nothing to join in. Just ask your mover if you can donate the extra food from your pantry.

You can check out this video to see how Move For Hunger works.

How to Survive Driving a Rental Truck in the Snow

Author:

Publish Date:

Last Modified Date:

Category: Moving Day, Moving Trucks

Tags: Tags: , , , , , , , , , , , , , , ,

Driving a car through snow and ice ain’t no one’s idea of a picnic. You have to watch your speed. You have to constantly glance in your mirrors. You’ve got to stash the phone away and keep a careful eye out for all the death-defying maniacs out there. (You people in the northeast understand.)

Now, if driving your regular car into the teeth of winter’s fury makes you feel like you’ll never see another spring, imagine how it’s going to feel piloting that rental truck. The weight of your entire material world leaning and swaying behind you as you roll down those same icy roads and onto the unforgiving highway.

Maybe you’re absolutely obligated to move now. Maybe you just think it’s time. Either way, across much of the country the elements can be snarling. Before you load up and put that rental truck in gear, make sure you have all the supplies (and do what you need to do) to make it safely to your new home.

Stuff You Should Have

Here’s a list of essential items. It may seem long, but I’ve needed every single one of these at some point in my long moving career.

  • Good boots
  • Warm clothes—and bring extra everything.
  • Sunglasses (Hats do nothing for you when the sun is reflecting off the snow all over the ground.)
  • Food, water and a first aid kit
  • Flashlight, batteries and blankets
  • Ice scraper
  • Toolkit with basic tools
  • Matches in a plastic bag
  • Wiper fluid, windshield de-icer and a jug of anti-freeze

Additional Emergency Equipment

  • Shovel
  • Bag of sand
  • Set of jumper cables
  • Tow straps

And while getting all this stuff together may seem like a hassle, keep in mind: these things aren’t necessarily just for you. Having them may just mean you save another driver’s day.

Protip: If you are stuck in a snowdrift and need traction to get out, sand is what you want. Rock salt is meant to melt snow, not provide traction. So unless you’re willing to hang around and wait for that rock salt to do its chemical reaction thing, make sure you get some sand.

Maintenance You Should Get

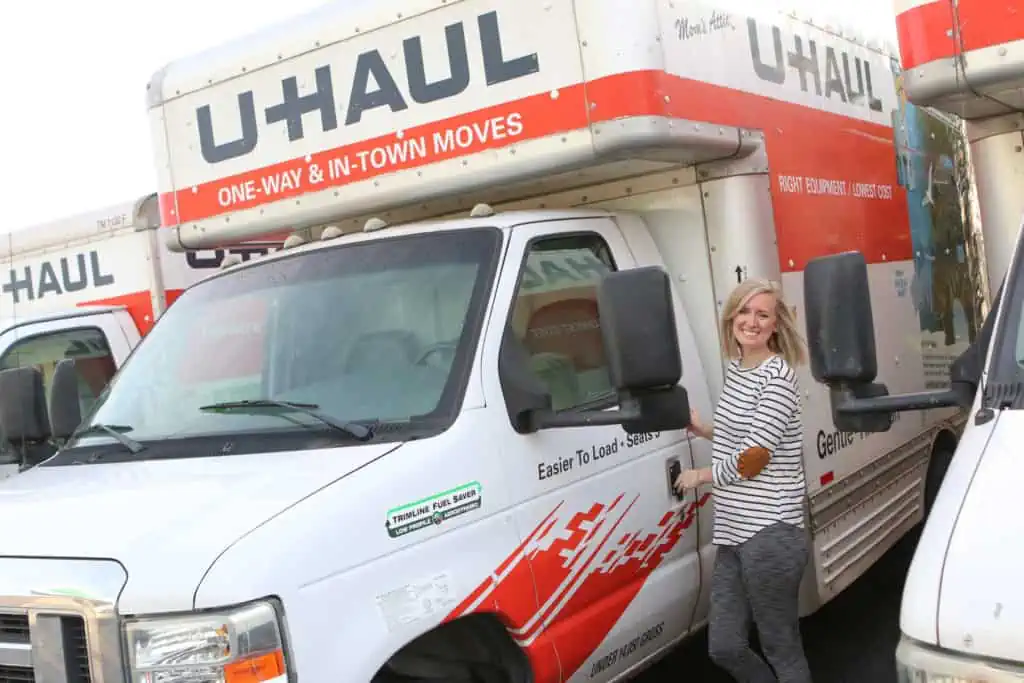
Truck rental places don’t always have their stuff in order, so before you drive off the rental truck lot, make sure all these things are done:

  • Check the anti-freeze and wiper fluid (don’t trust that it’s been done for you). If they’re low, get it taken care of
  • Make sure your truck is properly stocked with spare tire, a jack and a tire iron (you’d be surprised)
  • Flares and those reflective triangles are critical in the event you break down on the road at night. Your rental truck company may not supply them (Flares, by the way, can also be used to start a fire in an extreme situation, while reflectors become even more important if and when your flares go out.)

Also, are you in a snowy and mountainous region? Tire chains are recommended or, sometimes, required. Check this resource for a state-by-state rundown.

Stuff You Should Remember

  • Drive extra slow. Your loaded rental truck is not going to stop on a dime 
  • Leave extra room ahead of you—Other drivers will try to stop on a dime
  • Be extra aware of icy spots, snow build-up, and drivers who are paying attention to none of it
  • Keep your lights and your mirrors clear of ice, frost and fog (Trust me.)
  • Keep your gas tank no emptier than half full – low fuel levels can lead to water condensation in the fuel line
  • Keep your power usage to a minimum. Cold weather decreases a battery’s output, and when it’s freezing out you’re going to want all the power you can get
  • Keep up to date with future weather conditions and forecasts. Clear weather now doesn’t mean blue skies forever

Final Must-Do’s

  • Make sure you have a mobile phone charger that adapts to whatever type of outlet you have in your truck. When you’re really stuck, that phone might be your last resort. Consider keeping an extra phone, fully-charged, on hand for twice the security
  • Any kind of map is critical. Whether it’s a road atlas or a GPS, be able to determine where you are and where you are going. Know your route as best you can before you even get into that seat

Finally, have a clear head. Be relaxed, be awake and stay alert. Your smarts and your reflexes are your first and best defenses in the face of winter’s fury. And when in doubt, hire moving professionals to help you. 

What I Learned Moving at the End of My Second Trimester

Author:

Publish Date:

Last Modified Date:

Category: Moving Stories

Tags: Tags: , , , , , , , , , , , , , , ,

Moving while pregnant is an adventure! When my husband and I found out the exciting news that we were expecting a baby, our first thoughts were obviously to be beyond thrilled and extremely grateful. Can you tell?

However, soon after the initial news that we were having a precious baby boy, we discovered a house for sale in our dream neighborhood, which then immediately prompted us to put our current house on the market. The sellers of our dream house accepted our offer and within 48 hours, we also accepted an offer on our current home, which we had lived in and loved for the past five years.

All while we had planned to do nothing other than being pregnant!

This series of somewhat unexpected developments was a complete whirlwind and still has us looking at one another thinking, “Oh boy! What just happened?!” That was quickly followed by, “How are we going to do this?”

Luckily, we managed to do it all. Yep, I accomplished moving while I was pregnant.

Overwhelmed by the thought of moving while pregnant? I was too.

Baby on the way—check!

New house in our dream neighborhood—check!

Moving while pregnant … eek! 

I didn’t exactly see that coming. And I was a bit overwhelmed at the thought of tackling a move with a baby on the way. For the record, I was in my second trimester when I began planning for my move, heading rapidly towards my third trimester.

Spending the final months leading up to our first child packing, moving, unpacking, and renovating was overwhelming to me. But life happens and I had no choice but to make the best of it. And I’m here to report that I survived! I learned a lot along the way.

I turned out not to be completely useless while helping.

My biggest fear when I found out we were moving while I was pregnant was that I wouldn’t be able to help with anything! For context, I’m a “Type A” personality who enjoys being busy. A surprising source of stress? The thought of leaving my husband with our entire to-do list while I sat back and watched was extremely stressful!

But I was pleasantly surprised to find out that I was far from useless during this time.

My husband and I worked out a system where he would build the boxes, I would organize, pack and label the boxes, then he would stack them all up. Packing was a total team effort, which made me feel productive and my husband was genuinely grateful for my help.

Yes, I made sure to take care of my body, take it slow and avoid lifting heavy boxes during the process, but honestly, I was fully capable of just about everything else. If you find you might be moving while pregnant, one solid teammate might be the only thing you need.

Me on moving day.

Moving day was also a stressor for me because again, I felt like I was going to be totally in the way. I’m happy to report ladies that once again, I was wrong! We opted for a Hybrid Move, which is hiring movers and renting a truck separately to save a lot of money. I was fully capable of picking up the U-Haul and driving it all day. So although I couldn’t lift heavy boxes, I absolutely was contributing in a big way by driving the truck.

I was also able to help oversee the move by organizing which boxes and furniture ended up where. It turned out that it was really helpful having one point-person that wasn’t carrying boxes, but rather solely focused on making sure everything ended up in the spot we had planned.

Plus, getting each box into the correct room was super helpful towards keeping me involved in the unpacking process. I highly recommend this point-person/direction technique, pregnant or not! I didn’t have to bring a certain box to a specific room for unpacking, which meant the boxes were already there, which made getting set up in our new house a lot more efficient!

Hiring movers ended up being necessary.

Although I felt like I contributed a lot before, during and after moving day, I don’t want to give anyone an unrealistic expectation that you’ll be able to do everything on your own, given how intense moving a home truly is. I can honestly say that hiring Helpers as a part of our Hybrid Move was the best investment we could have ever made, pregnant or not. We needed them that day and appreciated their help more than we could have ever anticipated.

Having them to do all of the heavy lifting took the responsibility off of my husband, but it also kept me from feeling bad about not being able to help him with the big stuff. Our Helpers were able to pick up all of our stuff from the old house and bring it to our new house in less than three hours!

My husband and I weren’t stressed at all, which made the process a lot more enjoyable and probably kept the baby healthier. I would definitely recommend hiring help, regardless of whether you’re pregnant or not. But if you are expecting a little one, I have firsthand experience that this is money well spent.

Leaving my old home was harder than I thought it was going to be.

Okay, I blame this part on my pregnancy a little. But in all actuality, the emotional roller coaster that came with leaving our old house will probably be the case for many of you even if you aren’t pregnant. Leaving our old house for the last time was a lot harder than I ever expected.

My husband and I bought this house when we got married and I guess I always pictured we’d someday bring our baby home here. But we were already outgrowing this 1,000 square foot house well before we got the exciting baby news.

Cue all the tears here!

I guess the baby was the excuse we needed to finally make the move. But that still didn’t make leaving this house any easier, and whatever your own circumstances are, it might not be easy for you either. The good news is that the sadness didn’t last too long because there were exciting things ahead.

Starting fresh was amazing.

Those exciting things? Starting a new journey by preparing the new house for your new family! The nesting phase is no joke and may come at the perfect time if you’re pregnant and moving, like me.

I’ve been able to get so much done in the new house because of the baby deadline that is coming closer. Sure, setting up a new house is a ton – especially while pregnant –  but I’m feeling a constant fire under me to get as much done as possible so we’re settled in before the baby arrives.

Of course, I still need to be conscious of my body’s limits, and you should be too. I’m working hard to stay busy throughout my second and now third trimester. Thanks to all that hard work, I survived moving while being pregnant and now I am so thankful we were able to get the move out of the way before the baby comes. Now I can’t wait to invite our new baby into our new home!

Want Your Stuff in Self-Storage to Be Safe? Here’s What You Need to Ask

Author:

Publish Date:

Last Modified Date:

Category: Self Storage

Tags: Tags: , , , , , , , , , , , , , , , , , , ,

Imagine you’re standing outside a self-storage facility. What do you see in front of you? Thick-walled buildings with metal doors bolted and locked up tight? Security cameras? Access code keypads? A tall fence with iron spikes? Heavy front gates and a sign warning would-be burglars about the 24-hour surveillance system?

All self-storage facilities have … some of this stuff. Some places have all of it and even more, providing maybe some peace of mind to anyone storing there.

That’s the idea anyway. But that’s not how it always works.

Colorado’s KDVR News tells us that a certain Denver-area self-storage facility has been burglarized at least fifteen times since January of 2017. That’s right, fifteen! (Which is exactly how many games the Cleveland Browns have won since January of 2013.) From the report,

“In many of the cases, the locks had been cut off and people renting the units weren’t aware their things had been stolen until Public Storage alerted them.

One renter told us he lost everything from leather chairs to sports equipment in February while another renter even lost her deceased parents ashes.

Another man lost $8,000 in items.”

The facility in question? They have iron gates that will not open without the required code. They have surveillance cameras in place. Some of the units are located along the interior corridors of the restricted-access building, providing an even extra layer of security.

So how does even one theft occur, let alone fifteen thefts?

For starters, in at least one instance the facility’s security cameras were, according to the police reports, “not plugged in.” In many instances, the locks on the doors to the burglarized units had been cut, which requires nothing more sophisticated than a stout pair of bolt cutters.

But come on … fifteen times?

We see two possible explanations. Someone who is renting a unit, and therefore has the necessary codes to get into the place, is going in at night (or maybe even the middle of the day) and popping other people’s locks. Assuming the facility’s management is interested in putting a stop to things, they would have checked their security footage and shared what they saw with the authorities.

In terms of that place in Denver, according to KDVR’s report, this doesn’t seem to be the case. Which leads us to our second possibility: the series of thefts could just be an inside job by anyone from a low paid employee to a corrupt head of the company.

No, we don’t have proof of either of these happening at the facility in question, and we aren’t making any direct accusations here. Maybe there are a couple of guys out there who are really good at hopping fences and slipping into locked buildings – and then slipping back out and hopping back over the fence carrying their loot which, in one of those cases, included leather chairs. I’m just saying.

So how can we protect our stored belongings when we don’t even know who we’re protecting it from?

The simple answer to how to best protect yourself is to eliminate as many potential culprits as humanly possible. Look for these things in mass in a self-storage facility:

  • Serious exterior security
  • High fences with iron spikes
  • Surveillance cameras
  • Code-controlled gates and doorways

But even these offer varying degrees of security. Questions to consider include: Do the cameras record grainy still-shots of moving objects or HD video resolution? Is the footage monitored in real time by a human being (who is not sleeping) or does it just get stored somewhere until a theft has already occurred? Are the codes for the gates and doorways changed regularly? Is each customer assigned a unique code to detail who has come and gone when?

You should even ask if a facility records the license plates of vehicles entering and exiting the premises, or whether they check photo IDs of people on their way in. Also, is there is a backup power supply for all those codes and cameras in case of an outage? Don’t be shy about asking such questions. These are things you are paying money for and need to know.

What else should I know?

Other important variables (which you don’t even have to ask about) include

  • If the facility is well-lit at night
  • If the facility is located in a higher-crime area
  • What the surrounding environment consists of, such as, does it stand in developed suburbia or out in a landscape of abandoned lots and industrial parks?

There are also things you can do yourself to decrease your chances of being victimized. Using a lock the facility provides may be convenient, but your better bet is to get your own lock. Law enforcement types and criminals alike will tell you that a padlock is no match for the well-equipped thief. A disc lock or a cylinder lock (if the facility can accommodate one) is much more difficult to cut.

While we don’t recommend it, if you must put certain valuable or irreplaceable items into storage, put them in the rear of your unit to make them less visible and thus less vulnerable. And for the protection of everything you are storing, be aware that while a self-storage provider may offer some kind of coverage against fire, flood or catastrophe, they are under no legal obligation to do so. What’s more, they will, by and large, refuse to be held accountable for any loss due to theft. Most facilities will require renters to have their own insurance policy for their belongings, but your homeowner’s or renter’s insurance policy, even if it covers stored items, may not allow for reimbursement for items damaged by mold, mildew or infestation, regardless of who may be at fault.

And finally, do a little searching at home.

A quick Internet query may turn up some bad news about the self-storage facility that looked so good in person. Now, whether one incident at this or that place may not be grounds for outright rejection in your book. That’s your call. But fifteen thefts in ten months?

You might want to keep on searching.

Meet the World’s Most Expensive Movers

Author:

Publish Date:

Last Modified Date:

Category: Mover Spotlight

Tags: Tags: , , , , , , , ,

Tired of hearing about how expensive it is to move? “Why is there a charge for shrink wrap?” “I shouldn’t have to buy more boxes, you guys should fit everything in the ones out in the garage!” “What do you mean furniture pads aren’t free?!”

Well, believe it or not, there is a cure for these experiences. Their names are Stephanie, Sara and Cassio, and apparently, they are more than happy to pay all kinds of extra charges for what they are being told is a “white-glove move”.

Courtesy of the New York Times, here are some examples of what this white glove mover service in New York City is willing to help you out with.

  • $150 extra per move for a special “low-noise” box tape: For people who “don’t like the screeching sound of regular packing tape.” (Bonus guarantee: If the low-noise tape runs out, someone will hold their white-gloved hands over your poor delicate ears for you.)
  • $180 per hour (!) to figure out your move: That means they’ll do “…everything from taking an inventory of your home, to creating a budget and interviewing moving companies.” (Just don’t expect them to lift anything heavier than a pair of white gloves.)
  • $200 for a ride to your new home: Because, my god, have you ever seen how dirty a cabbies hands can get?
  • $500 per day to call the cable and gas companies to inform them of your new address: Yup, someone out there will pay you 500 clams to be put on hold for you.

To prove that people are willing to toss their money around like this, the Times also offers a few quotes, including a couple beauties from private citizen Stephanie:

“As with many of us,” says Stephanie, “my moves have often been hideous experiences.” (My god! They’re not even wearing white gloves!)

This type of service is “extremely helpful,” she continues. “Not like having boxes in a dark basement that are stuffed with 50 dining room dishes and a lampshade.” 

Pamela Muller, co-owner of NouvelleView, the company in question that specializes in suckering customers into thinking they can’t handle an address change, says her firm will “oversee every aspect, from the initial strategic plan to seeing that every box is unpacked.” (Especially the ones in that dark, scary basement.)

“I always say to clients that we are the most expensive in the business,” says Michael Jaque, a director at the shipping company Gander & White. At least they know what’s coming.

The funniest part about all this? NouvelleView says many of their clientele, with their delicate ears and their taxi cab allergies, still hire a traditional moving company to handle the bulk of the items!

And this is where you come in. Charge Stephanie, Sara and Cassio whatever you want for that shrink wrap, those boxes and the furniture pads you’re getting back anyway.

Just make sure you pick up some white gloves at Wal-Mart on your way over.


Cover photo from The New York Times.

Bubble Wrap 101: Protips, What It Doesn’t Work With, and Solid Alternatives

Author:

Publish Date:

Last Modified Date:

Category: How To Pack

Tags: Tags: , , , , , , , , , , , , , , , , , , , , , , , , ,

For keeping your most valuable, most expensive stuff protected when you move, it may seem like there’s nothing better than bubble wrap. But we’ll let you in on a little secret. 

Movers very rarely – if ever – use the stuff.

Not because it doesn’t work. It does. But the pros know, all those little bubbles add up to some bulky and relatively expensive bit of cushioning. Packing paper, used correctly, will serve most any packing purpose and save you both space and money.

Still, you may be more comfortable enveloping your flat screen TV, your electronics, your stemware and your china in bubble wrap. That’s totally understandable. So if you decide to go this route, here are a few things to keep in mind.

Using Bubble Wrap: 5 Quick Tips

  1. Put a layer of packing paper between your TV and that bubble wrap. Plastic can leave marks on your screen, particularly in extreme temperatures. This goes for anything you wrap in bubbles. For items with sharp edges or corners, some extra paper can help keep those sharp areas from poking right through the plastic.
  2. Wrap your items with the bubbles facing inward for better protection against exterior pressure and accidental impact. The flat side is easier to write on (in case you want to be able to identify each item quickly) and will hold the tape in place much more effectively.
  3. Don’t bank on one layer of bubble wrap. Two layers of small bubble sheeting might be enough for a piece of stemware, though this would be in addition to packing them with plenty of packing paper and, for extra peace of mind, individual cells inside your cardboard box. If you are using the stuff with the bigger bubbles for heavier items like a large framed mirror or your CPU, one layer may suffice – but again, only in addition to some crumpled packing paper for extra cushioning on all sides.
  4. Keep that bubble wrap firmly in place by taping not just along the edges, but all the way around the item. You splurged on that bubble wrap, don’t start skimping on the tape!
  5. Have a pair of scissors on hand when you are unpacking. It would be a real bummer to break something – or drop and break something – while trying to tear that bubble wrap off using only your hands. 

You might love our:

Moving Cost Calculator

If the quote from your movers felt expensive …
Make sure it lines up with the costs reported by other Americans.

What to Pack in Bubble Wrap

bubble wrap

Valuable items. Fragile items. Heavy and hard-to-replace items. If you’re staring at something and you can’t decide whether to bubble wrap it, err on the side of caution and wrap it.

Specifically, you’ll want to consider bubble wrap for:

  • Large picture frames and mirrors
  • Flat screen TVs
  • Glass tabletops and shelving
  • Electronics and computers
  • Stemware and fine china
  • Fragile decorative items

Remember, bubble wrap alone will not do the trick. Even surrounded by two or three layers of air pockets, the things on this list will still need to be packed firmly in cardboard cartons with enough crumpled packing paper on all sides to keep them from shifting and bouncing in transit while keeping them safe from exterior impact.

After the bubble wrapping is done, use the right kind of box.

There’s no point in being safe if you use the wrong box for your stuff. Finish the job right by packing each bubble-wrapped item properly, surrounded by plenty of crumpled packing paper. Moving boxes come in specific shapes and sizes for your items, use accordingly.

bubble wrap

Mirror Cartons

Picture frames, mirrors, glass shelves and flat-screen TVs go in mirror cartons – sets of two, if not four pieces that you can use to form a custom-sized box.

Double-Walled Dish Pack Cartons

bubble wrap
containerstore.com

Electronics and computer components are best protected when packed in double-walled dish pack cartons, the same boxes we use for dishes, plates and glasses. And yes! This includes your china and stemware. Fragile decorative items like statuettes and ceramics can still be packed in medium (3 cubic foot) boxes, provided they are cushioned well and the boxes are clearly marked to minimize the chances of someone putting a box of books on top.

Cardboard Cells

A note about stemware: Nothing gets broken more often than this stuff. Wrapping each piece well is crucial, but so is packing it all correctly into your dish pack as the items on the bottom will have to support the weight of everything else in there.

bubble wrap
cactuscontainers.com

The best thing to do is get your hands on some of those cardboard cells, which not only keep your wine glasses from knocking against each other but offer an appreciable amount of vertical support, keeping all the weight of those glasses off the ones at the bottom of the box.

If you can’t find any cardboard cells, don’t despair! A thick layer of crumpled packing paper on the bottom of your dish pack and another layer of crumpled paper on top of each successive tier of firmly-packed stemware is what the pros use to keep everything safe. If you aren’t comfortable with that, line your entire dish pack with bubble wrap and put a couple of sheets in between your tiers of glasses. This isn’t the most cost-efficient way to pack your stemware, but it beats a box full of expensive shards of glass.

Alternatives

If not bubble wrap, then what? As stated earlier, packing paper is the standard. However, towels, crumpled newspaper, or virtually anything form-fitting, sturdy and that’s plenty soft can often do the trick for cheaper. Sound too simple? It really is. As long as you pad your items in a balanced way, it doesn’t need to be as expensive as bubble wrap. Just as long as “this one, extra towel” isn’t the only thing keeping your priceless vase safe. Check the moving supplies section at your local hardware store for bubble wrap alternatives.

A Note on Packing Peanuts

bubble wrap
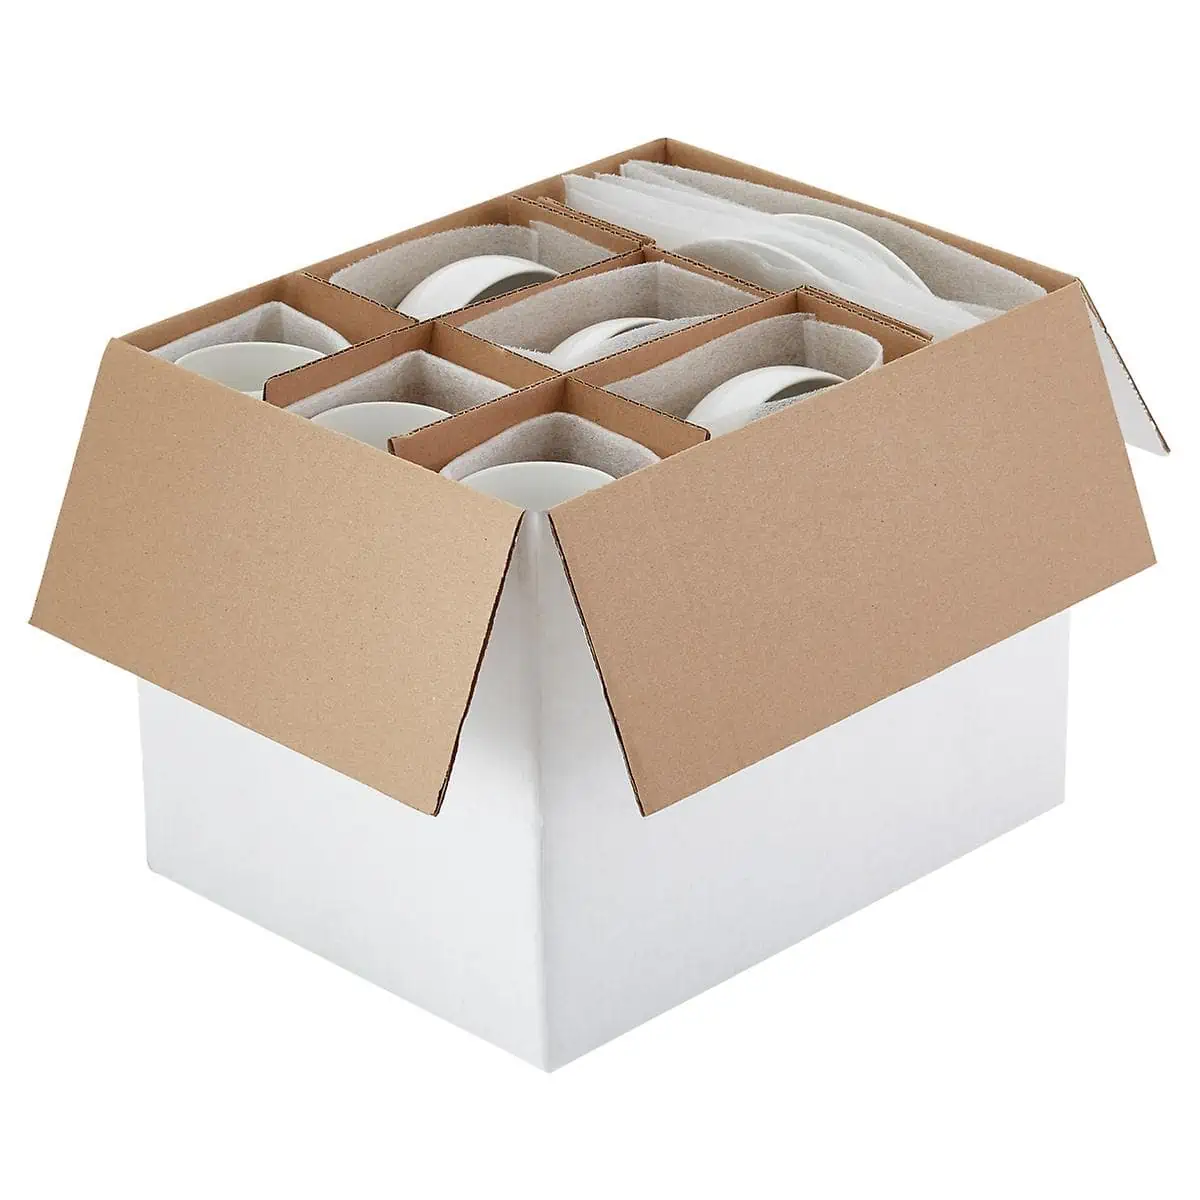
You may like the idea of those Styrofoam nuggets, but in general, they are bulky, costly, and non-biodegradable. The eco-friendly alternative cornstarch peanuts are even more expensive and don’t make for a very satisfying snack, no matter how hungry you are at the end of your move. Plus, they end up getting scattered all over the floor and clinging to your clothes. In short, use (and eat) them if you like, but I don’t recommend them.


Admit it. It’s hard to resist popping those plastic bubbles once you’re done with that bubble wrap. But think for a moment how easy it is to pop them – and how much all the boxes you are packing must weigh.

Keep this in mind when you are packing up all those valuable, expensive, fragile items. On its own, a sheet of bubble wrap can’t adequately protect your stuff. You’re going to need plenty of packing paper (or towels or clothes) in a pinch. Pack those items firmly in the center of your box, protected on all sides.

And really, save yourself a headache (and maybe the stomachache) and stay away from those peanuts!

×

I'm Moving

Moving? Thinking about moving? Whether your move is off in the distance or you already have one foot out the door, you'll learn about everything you should expect through our useful how-to's, cool articles and much more. It's all specially curated for you in our "I'm Moving" section.
Explore
×

I'm a Mover

For rookies or veterans alike, our "I'm a Mover" section is filled with extensive industry news, crucial protips and in-depth guides written by industry professionals. Sharing our decade of moving knowledge is just one way we help keep our professional movers at the top of their game.
Explore